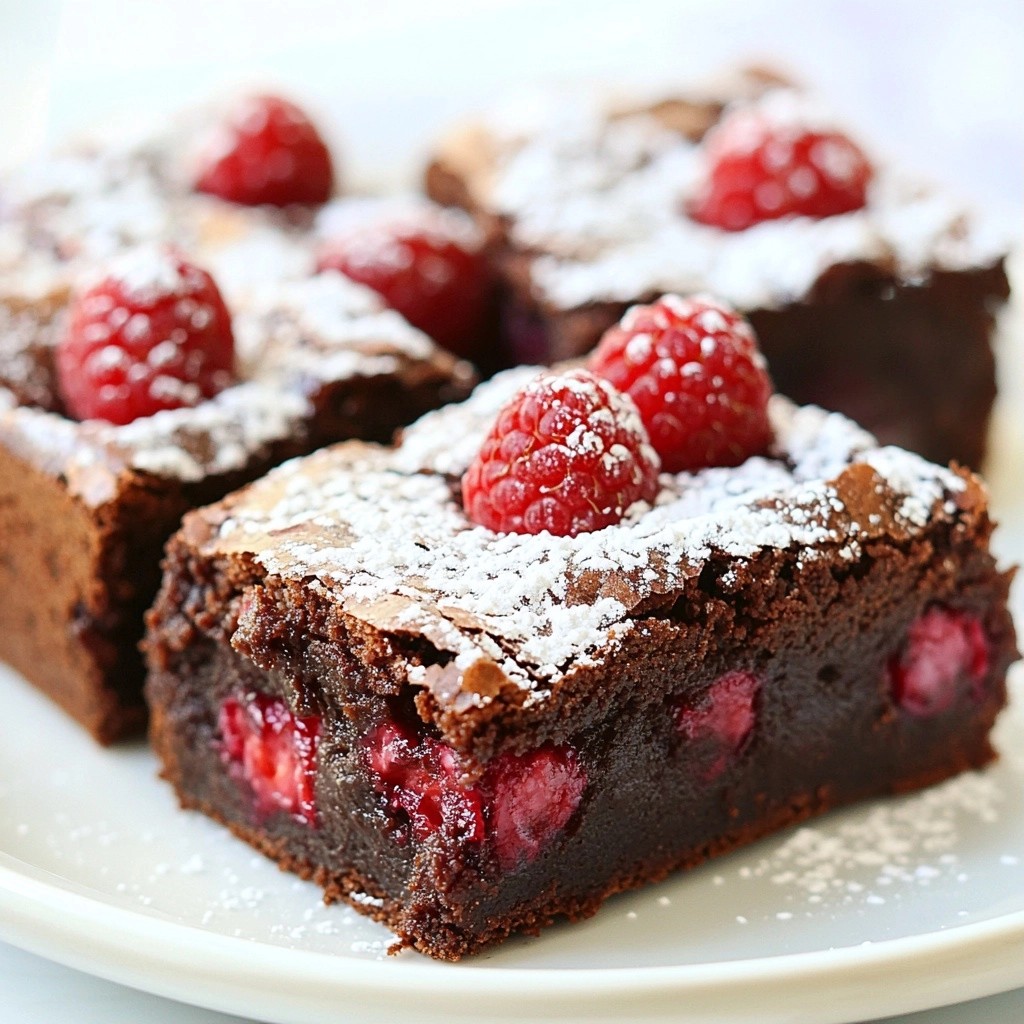
Craving a rich dessert that satisfies your sweet tooth? These dark chocolate raspberry brownies are the answer! Bursting with bold flavors, they offer a perfect balance of fudge and fruitiness. I’ll guide you through the easy steps to create these decadent treats, plus tips for storage and variations. Let’s dive into this delicious adventure, where every bite promises pure indulgence!
Why I Love This Recipe
- Decadent Flavor: The rich dark chocolate combined with the tartness of fresh raspberries creates a heavenly taste experience.
- Simple Preparation: This recipe is quick and easy, making it perfect for both novice and experienced bakers.
- Perfectly Fudgy: The brownies have a moist, fudgy texture that melts in your mouth, ensuring a delightful dessert.
- Versatile Serving: These brownies can be served on their own or dressed up with some powdered sugar or a scoop of ice cream.
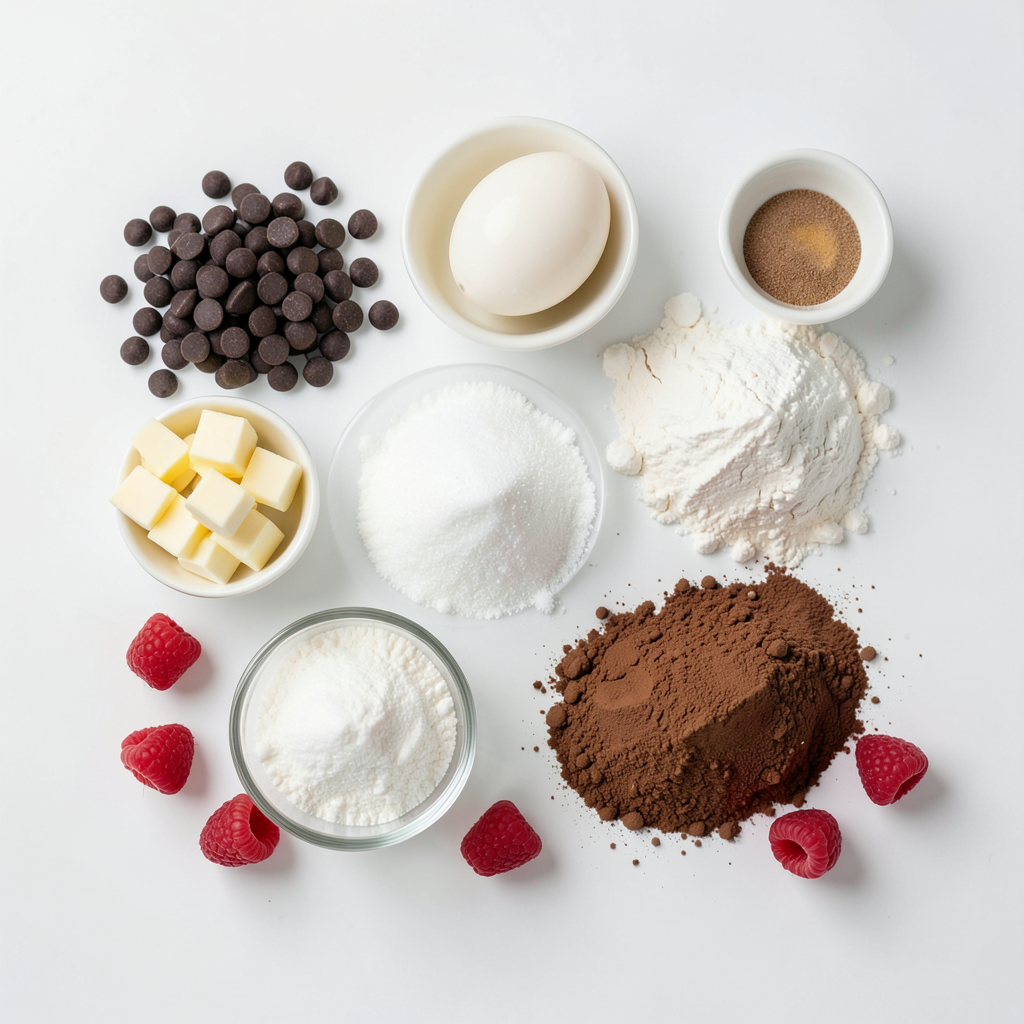
Ingredients
List of Ingredients with Measurements
- 1 cup dark chocolate chips (70% cocoa or higher)
- 1/2 cup unsalted butter, cubed
- 1 cup granulated sugar
- 2 large eggs
- 1 teaspoon pure vanilla extract
- 1/2 cup all-purpose flour
- 1/4 cup unsweetened cocoa powder
- 1/4 teaspoon baking powder
- 1/4 teaspoon salt
- 1 cup fresh raspberries
Optional Ingredients for Added Flavor
You can make these brownies even better. Here are some ideas:
- A pinch of sea salt on top for contrast
- Chopped nuts like walnuts or pecans for crunch
- A splash of coffee to boost the chocolate flavor
- A sprinkle of cinnamon for warmth
Suggested Tools and Equipment
To make the process smooth, gather these tools:
- A microwave-safe bowl for melting chocolate
- A whisk for mixing
- An 8x8-inch baking dish, greased and lined
- Parchment paper for easy removal
- A wire rack for cooling
These ingredients and tools will help you create rich dessert dark chocolate raspberry brownies that are both delicious and easy to make. Happy baking!
Step-by-Step Instructions
Preparation Steps for Baking
Start by preheating your oven to 350°F (175°C). This step ensures even cooking. Next, take an 8x8-inch baking dish and grease it. Line the bottom with parchment paper. Leave some paper hanging over the edges. This helps you lift the brownies out later.
Detailed Mixing and Baking Guide
In a microwave-safe bowl, combine 1 cup of dark chocolate chips and 1/2 cup of cubed unsalted butter. Microwave them in 20-second intervals. Stir after each interval until the mixture is smooth. In a separate large bowl, whisk together 1 cup of granulated sugar, 2 large eggs, and 1 teaspoon of pure vanilla extract. Mix until the mixture is light and fluffy.
Now, slowly pour the melted chocolate and butter into the egg mixture. Stir continuously to blend them well. In another bowl, sift together 1/2 cup of all-purpose flour, 1/4 cup of unsweetened cocoa powder, 1/4 teaspoon of baking powder, and 1/4 teaspoon of salt. Gradually fold this dry mix into the wet ingredients. Be gentle; do not over-mix. Finally, fold in 1 cup of fresh raspberries. Make sure they stay whole for the best bites.
Pour the batter into your prepared baking dish. Spread it evenly with a spatula. Bake in your preheated oven for 25-30 minutes. Check doneness by inserting a toothpick into the center. It should come out with a few moist crumbs, not wet batter.
Cooling and Serving Instructions
Once baked, remove the dish from the oven. Let the brownies cool in the pan for about 10 minutes. Use the hanging parchment paper to lift them out. Place them on a wire rack to cool completely. After cooling, cut them into squares. For an extra treat, dust with powdered sugar before serving. Enjoy these delightful brownies!
Tips & Tricks
How to Achieve the Perfect Fudgy Texture
To get that perfect fudgy texture in your brownies, focus on the chocolate and butter mix. Melt them together gently in the microwave. Stir well to ensure they blend fully. This step helps your brownies stay moist and rich. When mixing the dry ingredients, don’t over-mix. Just fold until combined. This keeps the air in, making them light yet fudgy.
Storage Tips for Leftover Brownies
If you have leftover brownies, store them in an airtight container. Place parchment paper between layers to keep them from sticking. You can store them at room temperature for about 3 days. For longer storage, put them in the fridge. They can last up to a week. If you want to save them longer, freeze them. Wrap each brownie in plastic wrap and then in foil. They can last for up to 3 months in the freezer.
Recommended Serving Suggestions
Serve your brownies warm for a melty treat. A scoop of vanilla ice cream on top works wonders. You can also dust them with powdered sugar for a nice finish. Pair them with fresh raspberries for a bright burst of flavor. These tips let you enjoy your brownies in fun new ways.
Pro Tips
- Use Quality Chocolate: The flavor of your brownies heavily depends on the chocolate you use. Opt for high-quality dark chocolate with at least 70% cocoa for a richer taste.
- Don’t Overmix: When combining the dry ingredients with the wet, mix just until combined. Overmixing can lead to dense, less fudgy brownies.
- Customize Your Add-ins: Feel free to swap out raspberries for other fruits or nuts. Chopped walnuts or pecans can add a delightful crunch!
- Storing Brownies: To keep your brownies fresh, store them in an airtight container at room temperature for up to a week. You can also freeze them for longer storage.
Variations
Nutty Dark Chocolate Raspberry Brownies
You can add nuts to your brownies for a nice crunch. I love using walnuts or pecans. Just chop them up and fold them into the batter with the raspberries. Use about 1/2 cup of nuts. This gives your brownies added texture and flavor. The mix of dark chocolate, raspberries, and nuts makes each bite special.
Gluten-Free Version of Brownies
If you need gluten-free brownies, switch the flour. Use almond flour or a gluten-free flour blend. The rest of the recipe stays the same. You might want to add a little extra cocoa to keep the taste rich. These swaps keep your brownies tasty while meeting gluten-free needs.
Other Flavor Combinations to Try
You can play with flavors to make your brownies unique. Some ideas include:
- Mint: Add a few drops of peppermint extract for a fresh twist.
- Orange: Use orange zest for a bright, citrusy flavor.
- Peanut Butter: Swirl in some creamy peanut butter for richness.
Feel free to get creative! Each flavor change gives the brownies a fun new taste.
Storage Info
Best Storage Practices for Freshness
To keep your dark chocolate raspberry brownies fresh, store them in an airtight container. This helps to lock in moisture. Place parchment paper between layers to prevent sticking. Keep them at room temperature for up to three days. If you want to keep them longer, refrigeration is an option.
Freezing Instructions for Long-Term Storage
To freeze brownies, first cut them into squares. Wrap each square tightly in plastic wrap. Then, place them in a freezer bag or container. They can stay in the freezer for up to three months. When you’re ready to enjoy them, simply thaw at room temperature for about an hour.
How to Reheat Brownies for Optimal Taste
Reheating brownies brings back their soft, fudgy texture. Preheat your oven to 350°F (175°C). Place the brownies on a baking sheet. Heat them for about 5-10 minutes, until warmed through. You can also microwave them for about 10-15 seconds. This makes them warm and gooey, just like fresh out of the oven.
FAQs
How can I make these brownies more chocolatey?
To boost the chocolate flavor, use more dark chocolate chips. You can add an extra 1/2 cup of chips to the batter. Another great tip is to sprinkle some chocolate chips on top before baking. This adds a rich layer of melted chocolate on the surface. You can also swap half of the flour with cocoa powder. This gives the brownies a deeper chocolate taste.
Can I use other fruits instead of raspberries?
Yes! You can use many fruits in place of raspberries. Cherries, blueberries, or sliced strawberries work well. Just remember to cut them into small pieces. This way, they blend nicely into the batter. Each fruit gives a unique flavor. Experiment with your favorites to find what you love best.
How do I know when the brownies are done?
The best way to check is to use a toothpick. Insert it in the center of the brownies after 25 minutes. If it comes out with a few moist crumbs, they are done. If the toothpick has wet batter, bake for a few more minutes. Keep checking until you get the right doneness. The edges should look set while the center may look a bit soft. This ensures a fudgy texture.
This guide covered all you need to make amazing brownies. We explored the ingredients, tools, and step-by-step instructions. I shared tips for texture, storage, and fun variations. Remember, these brownies can fit any taste. Whether you want fudgy, gluten-free, or fruity, the options are endless. Keep this guide handy for delicious results every time. Enjoy your baking journey!