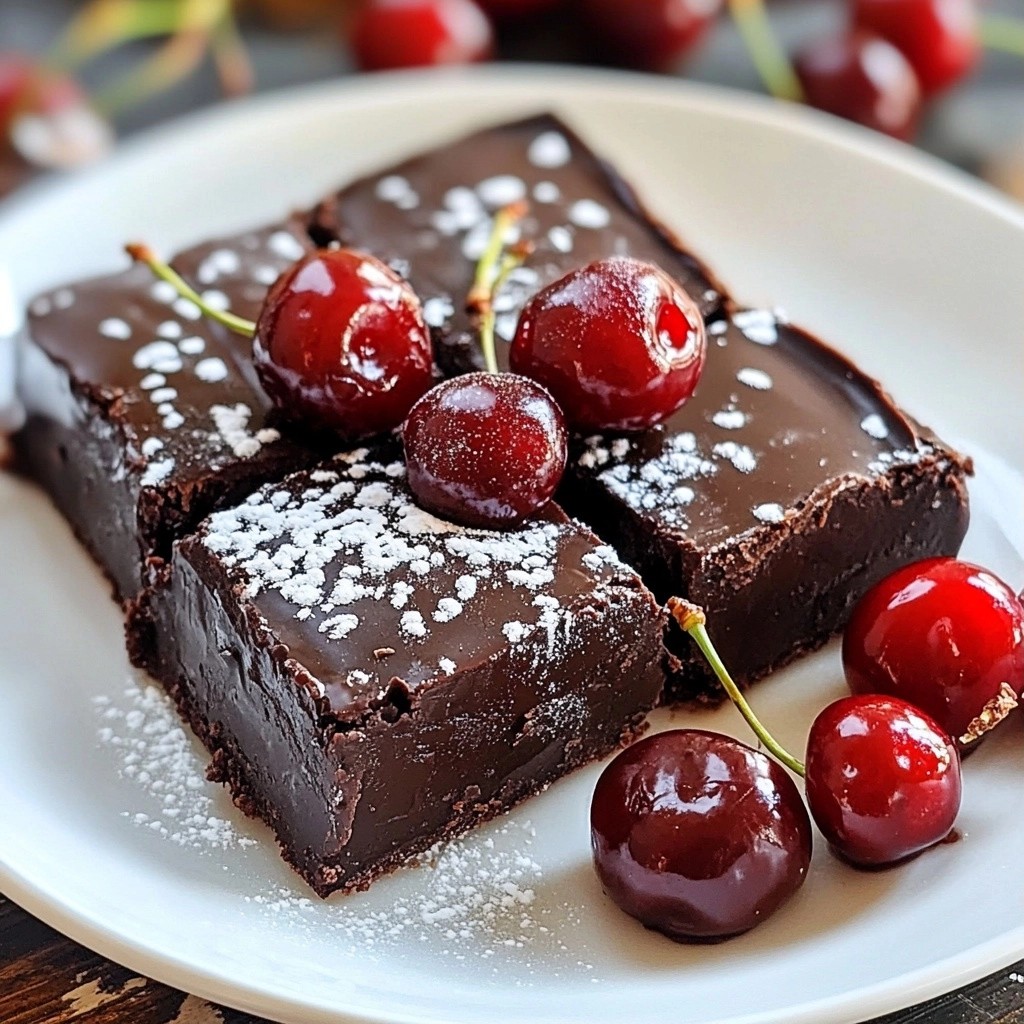
Are you ready for a sweet treat that combines rich dark chocolate and juicy cherries? In this article, I’ll show you how to make Gooey Dessert Dark Chocolate Cherry Bars. This recipe is easy, delicious, and perfect for any occasion. Whether you're baking for friends, family, or just for yourself, these bars will delight your taste buds. Let’s dive into the ingredients and get baking!
Why I Love This Recipe
- Decadent Flavor: The rich dark chocolate combined with the tartness of fresh cherries creates a harmonious blend of flavors that is simply irresistible.
- Easy to Make: This recipe requires minimal effort and common ingredients, making it perfect for both novice and experienced bakers.
- Perfect for Sharing: These bars are easily cut into portions, making them ideal for potlucks, parties, or just a sweet treat to share with friends and family.
- Customizable: Add your favorite nuts or try different fruits to make this recipe your own - the possibilities are endless!
Ingredients
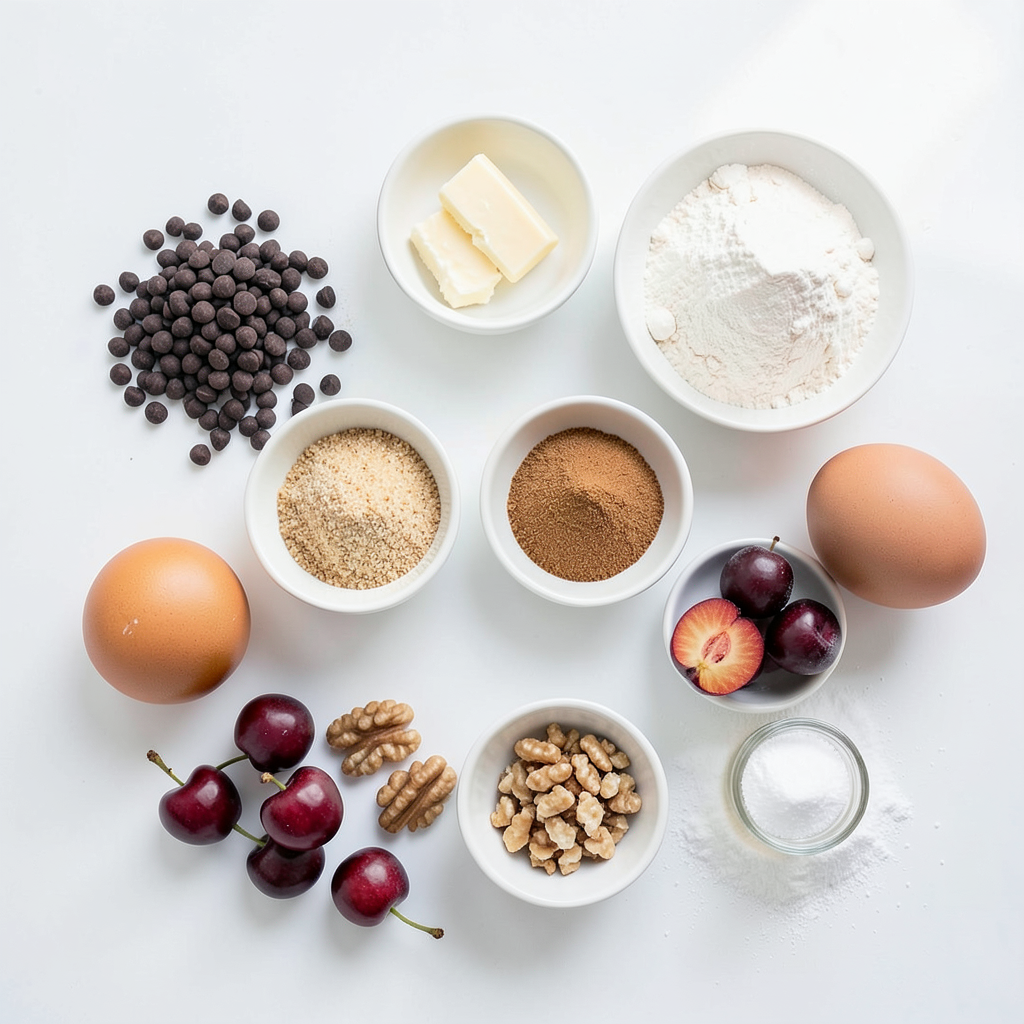
To make Gooey Dessert Dark Chocolate Cherry Bars, you need the following ingredients:
- 1 cup dark chocolate chips
- 1/2 cup unsalted butter
- 1 cup granulated sugar
- 1/4 cup packed brown sugar
- 3 large eggs
- 1 teaspoon vanilla extract
- 1 cup all-purpose flour
- 1/4 teaspoon salt
- 1 cup fresh cherries, pitted and halved
- 1/2 cup optional chopped walnuts
- Optional powdered sugar for dusting
These ingredients create a rich and gooey treat. Dark chocolate brings deep flavor. Cherries add a burst of tartness. The buttery base gives a soft and chewy texture. You can choose to add walnuts for a nice crunch. If you want a sweet finish, sprinkle powdered sugar on top. Each ingredient plays an important role in making these bars delicious.
Step-by-Step Instructions
Prepping the Oven and Pan
- Preheat oven to 350°F (175°C).
- Grease a 9x9-inch baking pan or use parchment paper.
Melting Chocolate and Butter
- Combine 1 cup of dark chocolate chips and 1/2 cup of butter in a saucepan.
- Stir over low heat until smooth.
- Allow the mixture to cool slightly.
Mixing the Batter
- In a large bowl, blend together 1 cup of granulated sugar, 1/4 cup of brown sugar, and 3 large eggs.
- Stir in the melted chocolate mixture until fully mixed.
- Add 1 teaspoon of vanilla extract and mix well.
- Gradually sift in 1 cup of flour and 1/4 teaspoon of salt, folding gently.
- Incorporate 1 cup of halved cherries and 1/2 cup of optional chopped walnuts.
Baking the Bars
- Pour the batter into the prepared baking pan, smoothing the top.
- Bake for 25-30 minutes.
- Check doneness with a toothpick; it should come out with a few moist crumbs.
Cooling and Serving
- Cool the bars in the pan for 10 minutes.
- Transfer them to a wire rack to cool completely.
- Cut into bars and dust with powdered sugar if desired for a lovely finish.
Tips & Tricks
Baking Tips
- Ensure even baking by not overmixing the batter. Mixing too much can make the bars tough.
- Use a toothpick to check for doneness accurately. Insert it in the center and look for moist crumbs.
Presentation Ideas
- Serve on a decorative plate with fresh cherries. This adds color and freshness to your dish.
- Pair with vanilla ice cream for a delicious contrast. The cold ice cream balances the warm chocolate.
Pro Tips
- Use Quality Chocolate: Opt for high-quality dark chocolate for a richer flavor in your bars. The better the chocolate, the more indulgent the dessert will be!
- Chill the Cherries: For a firmer texture, chill the halved cherries in the refrigerator before adding them to the batter. This helps them maintain their shape during baking.
- Check for Doneness: Keep a close eye on the bars while baking; they can quickly go from perfectly gooey to overcooked. The toothpick should come out with moist crumbs, not wet batter.
- Store Properly: To keep the bars fresh, store them in an airtight container at room temperature for up to a week. You can also freeze them for longer storage!
Variations
Flavor Tweaks
You can change the flavor of these bars in fun ways. Try using different kinds of chocolate. Milk chocolate gives a sweeter touch. White chocolate adds a creamy taste. You can also swap cherries for other fruits. Raspberries bring a tart flavor. Blueberries add sweetness and burst.
Nut Alternatives
If you want a nutty crunch, use pecans or almonds. They bring a different taste and texture. If you need a nut-free option, just leave the nuts out. The bars will still be tasty and gooey without them.
Storage Info
Storing Bars
To keep your gooey dark chocolate cherry bars fresh, place them in an airtight container. You can store them at room temperature for a few days. If you want them to last longer, refrigerate them. Just remember to let them come to room temperature before you enjoy them again. This will help bring back their soft, gooey texture.
Freezing Instructions
If you have extra bars, freezing is a great option. First, wrap each bar individually in plastic wrap. After that, place them in a freezer bag or container. You can freeze these bars for up to three months. When you’re ready to eat one, simply thaw it at room temperature. If you want it warm, pop it in the microwave for a few seconds. This way, you can enjoy that rich chocolate flavor anytime!
FAQs
Can I use frozen cherries?
Yes, but make sure to thaw and drain excess liquid. Frozen cherries can work well in these bars. They add a nice tartness that pairs well with dark chocolate. Just remember to squeeze out extra water to avoid sogginess in your bars.
How can I make these bars gluten-free?
Substitute all-purpose flour with a gluten-free flour blend. Many brands offer good blends that work well in baking. This swap helps keep the texture light and fluffy, just like the original recipe.
What’s the best way to serve these bars?
Serve warm with ice cream or let them cool completely for a firm texture. Warm bars create a gooey center that melts the ice cream perfectly. If you prefer, let them cool for a firmer bite that holds its shape well. Enjoy them however you like!
You now have a delicious recipe for cherry chocolate bars. We covered the ingredients, step-by-step instructions, tips, variations, and storage. With easy steps, you can create a lovely treat perfect for any occasion. Don’t forget to try new flavors or fruits to make it your own. Store extras to enjoy later, and share with friends or family. Baking can be fun and rewarding, so enjoy every bite!