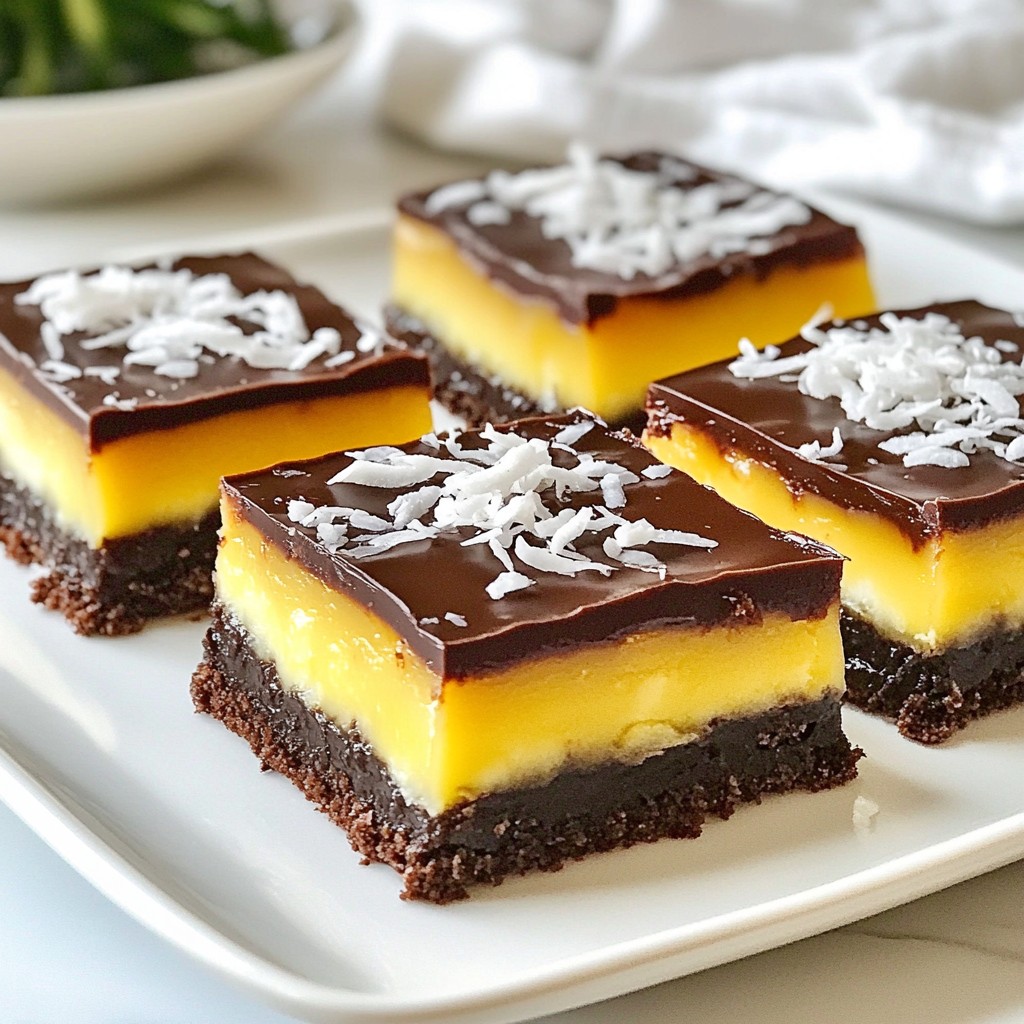
Get ready to indulge your sweet tooth with my Fudgy Sweet Coconut Caramel Bars! This delightful treat combines rich chocolate and creamy coconut for a flavor sensation. Perfect for snack time or a party, these bars are easy to make and taste heavenly. In this article, I’ll share my favorite ingredients, step-by-step instructions, and handy tips to help you create the perfect batch. Let’s get cooking!
Why I Love This Recipe
- Indulgent Flavor: These bars combine rich cocoa and sweet coconut for a decadent treat that satisfies any craving.
- Nutritious Ingredients: With wholesome ingredients like dates and almond flour, they offer a healthier dessert option without sacrificing taste.
- Simple Preparation: Easy to make with minimal steps, these bars are perfect for a quick and satisfying dessert.
- Perfect for Sharing: Cut into bite-sized pieces, these bars are great for parties or gatherings, making them a crowd-pleaser.
Ingredients
Detailed Ingredients List
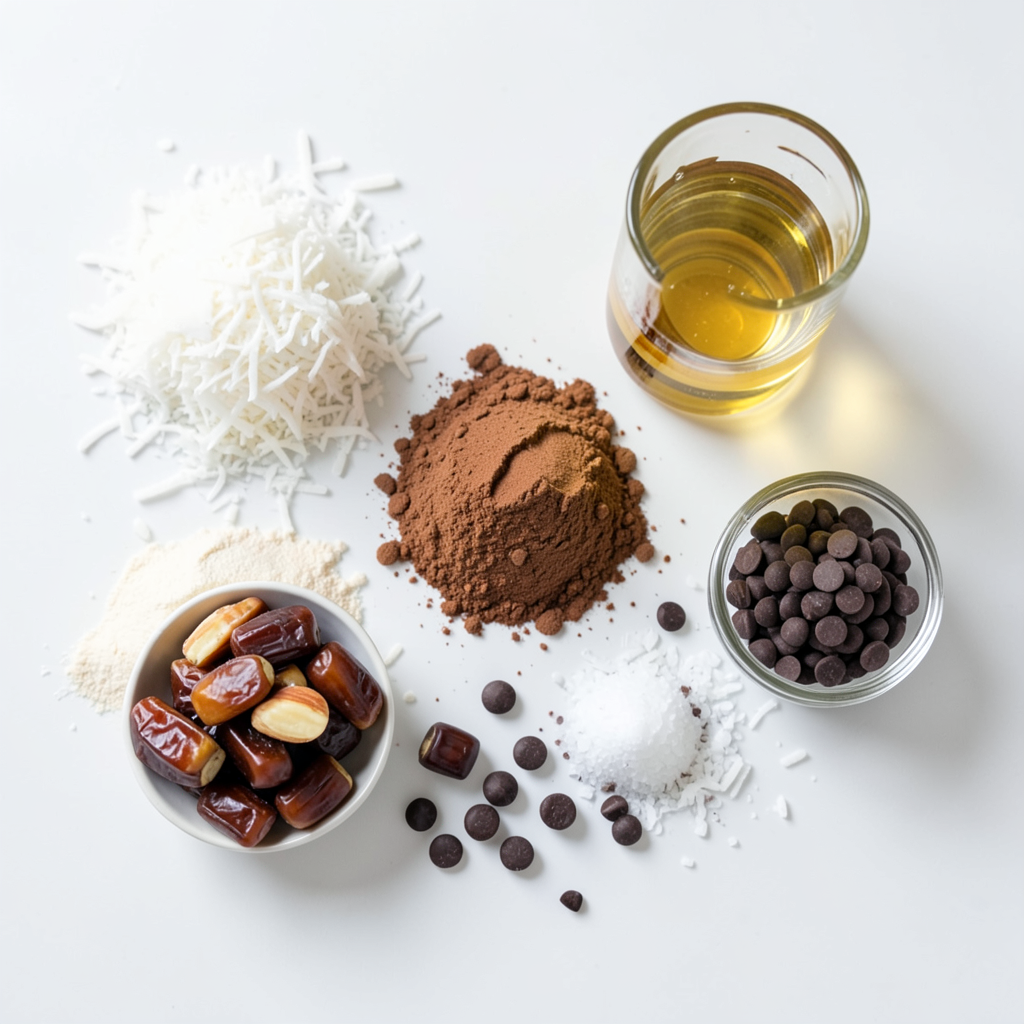
To make Fudgy Sweet Coconut Caramel Bars, you need the following:
- 1 cup unsweetened shredded coconut
- 1 cup pitted dates, packed tightly
- 1/2 cup almond flour
- 1/2 cup cocoa powder
- 1/4 cup coconut oil, melted
- 1/4 cup maple syrup
- 1 teaspoon vanilla extract
- Pinch of sea salt
- 1/2 cup dark chocolate chips (dairy-free if needed)
- Extra shredded coconut for topping
These ingredients come together to create a rich and chewy treat. Each one plays a key role in the flavor and texture.
Alternative Ingredients for Variations
You can swap some ingredients based on your needs or what you have at home:
- Almond Flour: Use oat flour or coconut flour for a gluten-free option.
- Cocoa Powder: Try carob powder for a different flavor.
- Maple Syrup: Honey or agave syrup works well too.
- Dark Chocolate Chips: You can use milk chocolate or white chocolate if you prefer.
These swaps keep your bars tasty while catering to different diets.
Importance of Ingredient Quality
Using high-quality ingredients makes a big difference. Fresh dates add sweetness and moisture. Good cocoa powder brings deep chocolate flavor.
Coconut oil should be pure and cold-pressed for the best flavor. Quality chocolate chips melt smoothly and taste amazing. When you choose great ingredients, you get richer flavors and better texture in your bars.
So, don't rush this step! Select the best ingredients to create the perfect treat.
Step-by-Step Instructions
Preparing the Base Mixture
To make the base, gather these ingredients:
- 1 cup unsweetened shredded coconut
- 1 cup pitted dates, packed tightly
- 1/2 cup almond flour
- 1/2 cup cocoa powder
- 1/4 cup coconut oil, melted
- 1/4 cup maple syrup
- 1 teaspoon vanilla extract
- Pinch of sea salt
Start by placing your pitted dates, almond flour, cocoa powder, melted coconut oil, maple syrup, vanilla extract, and sea salt in a food processor. Blend until you have a smooth dough. This mixture should feel slightly sticky but hold together well.
Next, add the shredded coconut. Mix until the coconut is evenly spread throughout the dough. This gives your bars a sweet and chewy texture.
Chilling and Setting the Base
Line an 8x8 inch baking pan with parchment paper. This will make it easy to lift the bars out later. Transfer your base mixture into the pan. Press it down firmly to create an even layer. Use a spatula or your hands for this step. It’s important to pack it tightly for the best results.
Once pressed, place the pan in the refrigerator for about 30 minutes. This chill time helps the base set properly. You want it firm enough so it won’t crumble when you cut the bars later.
Melting and Spreading the Chocolate
While the base is chilling, melt your dark chocolate chips. Use a microwave-safe bowl. Heat in 15-second intervals, stirring in between. This step is key to avoid burning the chocolate. You want it smooth and shiny.
Once your base is set, take it out of the fridge. Pour the melted chocolate over the top. Use a spatula to spread it evenly across the bars. The chocolate adds a rich layer that makes these bars even more special.
For a finishing touch, sprinkle some extra shredded coconut on top. This adds texture and looks nice too. After this, return the pan to the fridge for another 30 minutes. This helps the chocolate harden, making it easier to cut the bars later.
Tips & Tricks
Ensuring the Perfect Texture
To get the best texture for your bars, pack the base tightly. This helps create a firm layer. After mixing the ingredients, press the mixture into the pan with your hands or a spatula. Make sure there are no air pockets. Chilling the base for 30 minutes sets it well. The bars will hold together better when you cut them.
Making Clean Cuts for Serving
When cutting the bars, use a sharp knife. Dip the knife in warm water for clean cuts. Wipe the knife after each cut to keep edges neat. This will make your bars look nice and professional. Aim for squares or rectangles that are similar in size. This helps with serving and sharing.
Serving Suggestions for Presentation
For a lovely presentation, place the bars on a nice platter. Add a few coconut flakes on top for a pop of color. You can also serve them with fresh fruit or a scoop of ice cream. This adds extra fun to your treat. Chill the bars before serving to keep them firm and refreshing.
Pro Tips
- Use Fresh Dates: For the best flavor and texture, use fresh, soft pitted dates. If they are too dry, soak them in warm water for about 10 minutes before blending.
- Press Firmly: When pressing the mixture into the pan, ensure it is tightly packed. This will help the bars hold their shape when cut.
- Custom Chocolate Topping: Feel free to customize your chocolate topping by adding nuts, seeds, or a sprinkle of sea salt for an extra flavor kick.
- Store Properly: Store the bars in an airtight container in the refrigerator for up to a week. They also freeze well for longer storage.
Variations
Different Flavors to Explore
You can create many fun flavors with these bars. Try adding peanut butter instead of almond flour. This swap gives a rich taste that many love. You can also mix in a few drops of peppermint extract for a fresh twist. For a fruity touch, add some dried cherries or cranberries. They pair well with the sweet coconut and chocolate.
Dietary Modifications (e.g., gluten-free, vegan)
These bars are easy to adapt for different diets. They are gluten-free since they use almond flour. For a vegan option, ensure your chocolate chips are dairy-free. You can replace the maple syrup with agave syrup. This keeps the bars sweet without using animal products.
Seasonal Additions (fruits and spices)
You can change the bars with seasonal flavors. For fall, add a pinch of cinnamon or nutmeg. These spices warm up the taste and smell great. If it's summer, toss in some fresh blueberries or raspberries. They add a bright burst of color and flavor.
Storage Info
Best Practices for Storing Bars
To keep your fudgy sweet coconut caramel bars fresh, store them in an airtight container. Place parchment paper between layers to avoid sticking. This helps maintain their soft texture. Keep them in a cool, dry area away from sunlight. If it’s warm, the fridge is a better option.
How to Freeze for Later Enjoyment
Freezing these bars is simple and smart. Cut them into squares first. Wrap each piece in plastic wrap or foil. Then, place them in a freezer-safe bag. Label the bag with the date. They can last up to three months in the freezer. When you want one, let it thaw in the fridge overnight.
Shelf Life of Fudgy Coconut Caramel Bars
When stored properly, these bars can last up to a week at room temperature. In the fridge, they stay fresh for up to two weeks. Freezing extends their life, making them a great treat for later. Enjoy them whenever you crave a sweet delight!
FAQs
Can I substitute the almond flour?
Yes, you can! If you need a substitute for almond flour, try oat flour or sunflower seed flour. Both options work well. Oat flour gives a nice texture. Sunflower seed flour is great for nut-free bars. Just use the same amount as almond flour in the recipe.
How do I make these bars nut-free?
To make these bars nut-free, simply swap almond flour for sunflower seed flour. This change keeps the bars tasty and safe for nut allergies. Make sure to check all your ingredients for possible nut traces. Use dairy-free chocolate chips if needed too.
What can I use instead of maple syrup?
If you don’t have maple syrup, try agave syrup or honey. Both sweeteners add a nice flavor. You can use the same amount as the recipe calls for. Just remember, honey is not vegan, so agave syrup is a better choice for vegan diets.
To sum up, we explored key ingredients and their quality. We discussed step-by-step instructions for mixing, chilling, and melting chocolate. You learned tips for achieving the best texture and clean cuts. We also covered variations to fit different diets and seasons. Lastly, we went over storage techniques and answered common questions.
With these insights, you can make delicious fudgy coconut caramel bars with confidence. Enjoy the process, share your results, and have fun experimenting!