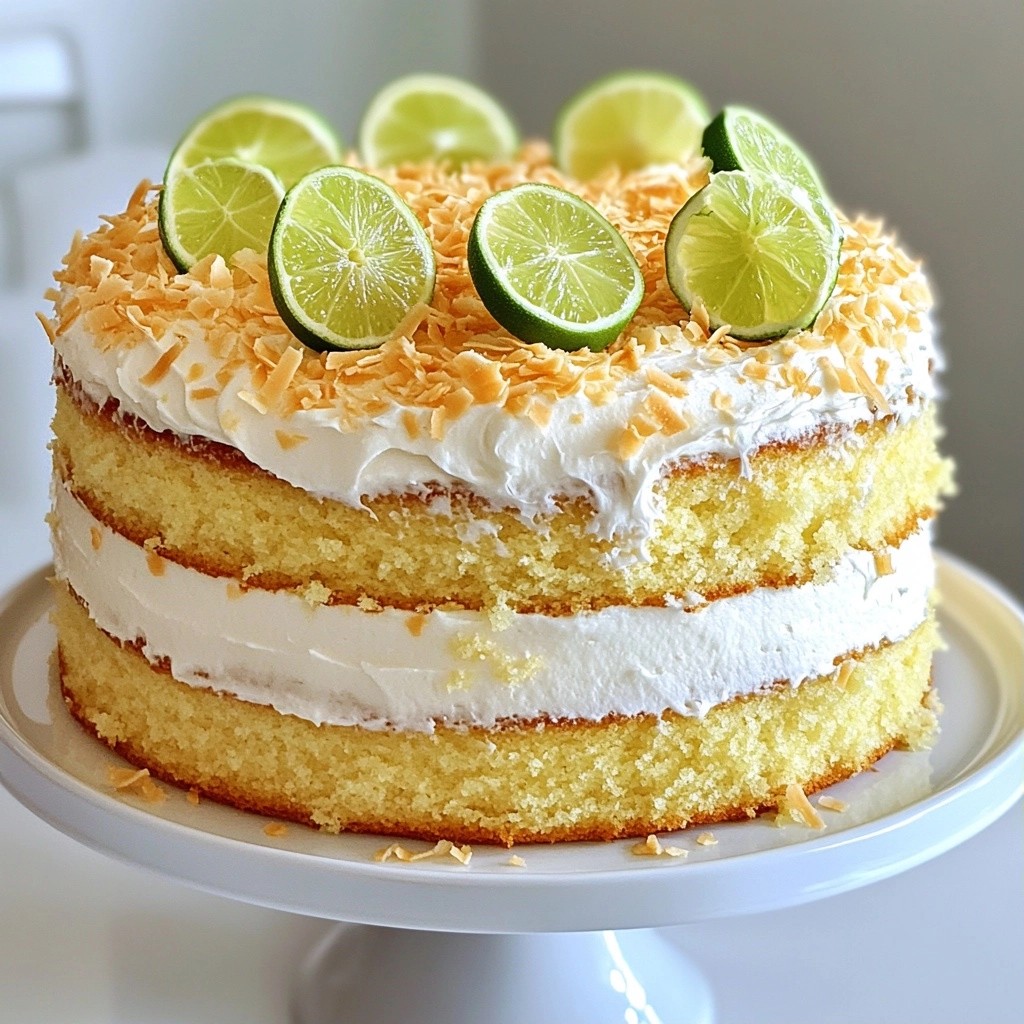
Are you ready to impress your friends with a stunning dessert? This Fluffy Desserts Coconut Lime Layer Cake is both easy and delicious. With fresh lime and coconut flavors, it’s a perfect treat for any occasion. In this recipe, I’ll guide you step by step to achieve a light and fluffy cake that everyone will love. Let’s dive right into the ingredients and get started!
Why I Love This Recipe
- Light and Fluffy Texture: This cake is incredibly light, making each bite a delightful experience that melts in your mouth.
- Refreshing Lime Flavor: The combination of fresh lime juice and zest adds a bright, zesty flavor that perfectly complements the creamy coconut.
- Beautiful Presentation: With its layered design and toasted coconut flakes, this cake is not only delicious but also visually stunning, perfect for any occasion.
- Versatile for Celebrations: This cake is great for birthdays, holidays, or just a special treat, bringing a tropical vibe to your dessert table.
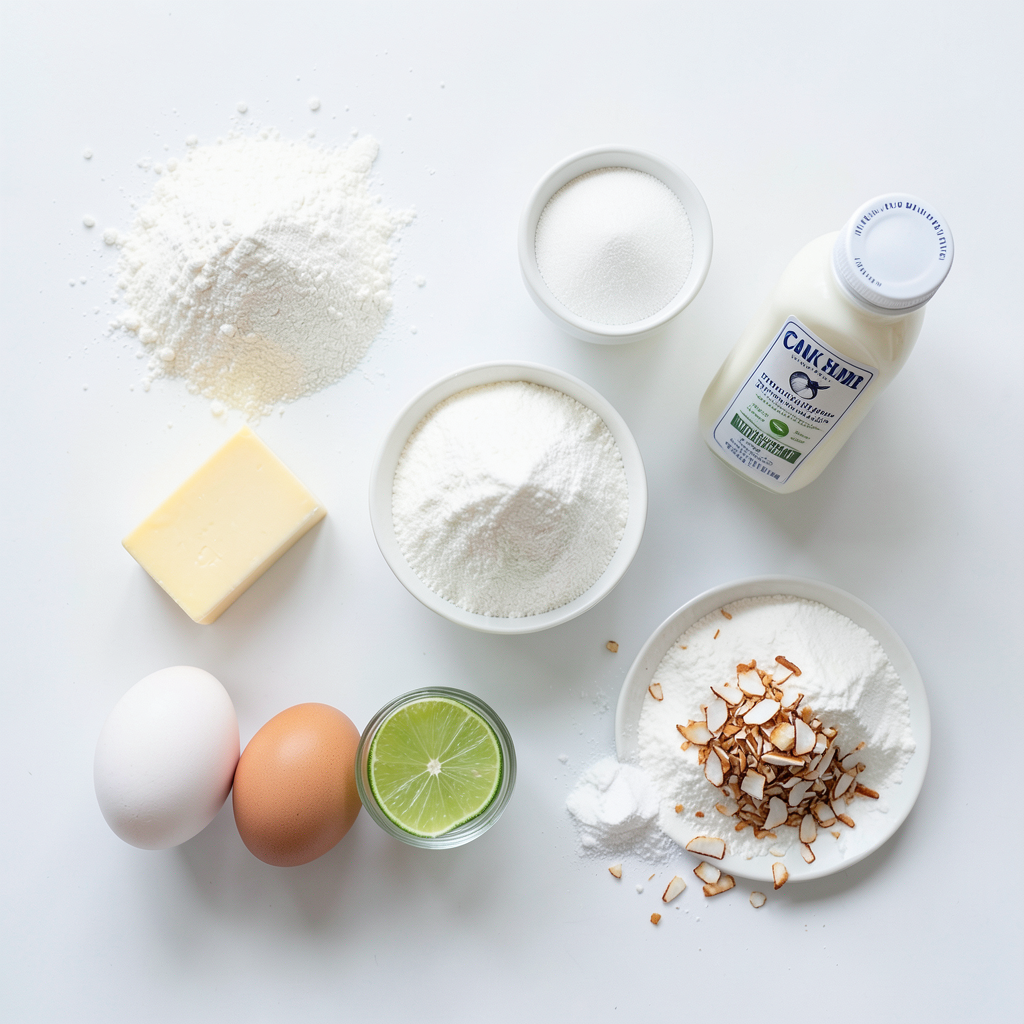
Ingredients
List of Ingredients for Cake
- 2 ½ cups all-purpose flour
- 2 teaspoons baking powder
- ½ teaspoon baking soda
- ¼ teaspoon salt
- 1 cup unsalted butter, softened
- 2 cups granulated sugar
- 4 large eggs
- 1 teaspoon vanilla extract
- 1 cup coconut milk
- Zest of 2 limes
- ½ cup fresh lime juice
List of Ingredients for Coconut Lime Frosting
- 1 cup unsalted butter, softened
- 4 cups powdered sugar
- 1 can (14 oz) coconut cream, chilled and solid part only
- 2 tablespoons lime juice
- 1 teaspoon lime zest
- Toasted coconut flakes for topping
Tips for Selecting Fresh Lime and Coconut Products
When choosing limes, look for ones that feel heavy for their size. They should have smooth skin and vibrant color. If you can, smell the lime. Fresh limes have a strong, zesty scent.
For coconut, always check the can label for "coconut cream." It gives the best flavor and texture for frosting. If you prefer fresh coconut, buy one that feels heavy and sounds full. This means it has good water inside.
Using fresh ingredients makes your cake taste better. It adds a bright flavor and a lovely texture to your Coconut Lime Layer Cake.
Step-by-Step Instructions
Preparing Cake Batter
Start by preheating your oven to 350°F (175°C). Grease and flour three 9-inch round cake pans. In a mixing bowl, whisk together 2 ½ cups all-purpose flour, 2 teaspoons baking powder, ½ teaspoon baking soda, and ¼ teaspoon salt. Set this aside for later.
In a large bowl, cream 1 cup of softened unsalted butter and 2 cups of granulated sugar using a mixer. Mix until it’s light and fluffy, about 5 minutes. Then, add 4 large eggs, one at a time, mixing well after each. Blend in 1 teaspoon of vanilla extract, the zest of 2 limes, and ½ cup of fresh lime juice.
Now, gradually add your dry mixture to the wet mixture. Alternate with 1 cup of coconut milk, starting and ending with the flour mixture. Mix just until combined, so your batter stays fluffy.
Baking the Cake Layers
Divide the batter evenly among your prepared pans. Spread it out smoothly. Bake in your preheated oven for 25-30 minutes. To check if the cakes are done, insert a toothpick into the center. If it comes out clean, your cakes are ready!
Once baked, remove them from the oven and let them cool in the pans for 10 minutes. After that, transfer them to wire racks to cool completely.
Making Coconut Lime Frosting
While your cakes cool, let’s prepare the frosting. In a mixing bowl, beat 1 cup of softened unsalted butter until creamy. Gradually add 4 cups of powdered sugar while mixing. Next, add the solid part of 1 can (14 oz) of chilled coconut cream. Mix in 2 tablespoons of lime juice and 1 teaspoon of lime zest. Beat until fluffy and well combined.
Assembling the Layer Cake
When your cakes are completely cool, it’s time to assemble. Place one layer on a serving plate. Spread a layer of coconut lime frosting on top. Add the second layer and repeat with more frosting. Top with the third layer and cover the top and sides with frosting.
For the finishing touch, cover the sides with toasted coconut flakes. Add lime slices or more lime zest on top for a burst of color. Enjoy your fluffy coconut lime layer cake!
Tips & Tricks
Achieving Fluffy Texture in Cakes
To make your cake fluffy, follow these steps:
- Cream Butter and Sugar Well: Beat them until light and airy. This step adds air.
- Room Temperature Ingredients: Use eggs and butter at room temp. They mix better.
- Do Not Overmix: Once you combine wet and dry ingredients, mix until just blended. Overmixing makes the cake dense.
- Use Fresh Baking Powder: Check the date on your baking powder. Old powder won’t rise well.
Common Mistakes to Avoid
Here are some common mistakes that can ruin your cake:
- Skipping the Baking Powder: This is key for fluffiness. Don’t leave it out.
- Using Cold Ingredients: Cold butter or eggs can lead to a heavy cake.
- Not Preheating the Oven: Always preheat your oven before baking. A cold oven affects rising.
- Opening the Oven Door Early: This can cause your cake to sink. Wait until it's almost done.
Tools and Equipment Recommendations
Having the right tools makes baking easier:
- Mixing Bowls: Use large, sturdy bowls for mixing.
- Hand Mixer or Stand Mixer: A good mixer saves time and energy.
- Measuring Cups and Spoons: Accurate measurements lead to better results.
- Cake Pans: Use three 9-inch round pans for even baking.
- Wire Rack: A wire rack helps cool cakes evenly.
These tips and tools will help you create a light, fluffy Coconut Lime Layer Cake that impresses everyone!
Pro Tips
- Ensure Room Temperature Ingredients: Using room temperature butter and eggs will help create a smoother batter and a fluffier cake.
- Measure Flour Correctly: Spoon the flour into the measuring cup and level it off with a knife to avoid packing it, which can lead to a dense cake.
- Cool Cakes Completely: Make sure the cakes are completely cooled before frosting to prevent the frosting from melting and sliding off.
- Toast Coconut Flakes: Toasting the coconut flakes enhances their flavor and adds a beautiful color and crunch to your finished cake.
Variations
Substitutions for Gluten-Free Options
If you want a gluten-free Coconut Lime Layer Cake, use gluten-free flour. You can find blends that work well in cakes. Look for options that contain rice flour or almond flour. These can give you a light texture. Check for a brand that has a good reputation. This way, you ensure your cake stays fluffy and moist.
Flavor Additions
To enhance the taste, you can add coconut extract. This gives the cake a stronger coconut flavor. Lime extract is another great option. Just a teaspoon can brighten up the cake. You might also consider adding lime zest to the frosting for a zesty kick. Feel free to experiment with flavors. Mixing in pineapple juice can add a fun twist too.
Dietary Modifications
If you need a vegan version, replace eggs with flax eggs. Mix one tablespoon of ground flaxseed with three tablespoons of water for each egg. Use vegan butter instead of regular butter for the frosting. For milk, choose almond milk or coconut milk. This keeps the flavor while making it plant-based. You still get that rich and fluffy texture everyone loves.
Storage Info
Best Practices for Storing Layer Cake
To keep your Coconut Lime Layer Cake fresh, store it properly. First, let the cake cool completely. Once cooled, use plastic wrap to cover the cake tightly. This helps keep moisture in and prevents it from drying out. If you have leftover slices, place them in an airtight container. You can keep the cake at room temperature for up to two days. However, for longer storage, the fridge is a better choice. Just remember, frostings with cream can spoil quicker.
How to Freeze the Cake
Freezing your cake is easy and great for longer storage. Start by wrapping each layer in plastic wrap. Make sure it is tight to avoid freezer burn. You can also use aluminum foil for extra protection. Label the packages with the date. The cake can stay frozen for about three months. When you're ready to eat, let the cake thaw in the fridge overnight. This keeps it from becoming soggy.
Shelf Life of Leftovers
Once you cut into the cake, it is best enjoyed fresh. However, if you have leftovers, store them in the fridge. The Coconut Lime Layer Cake will stay good for about four to five days. After that, the freshness may fade. Always check for any signs of spoilage before eating. Remember, cakes with coconut cream frosting should be consumed sooner.
FAQs
How to make the cake even fluffier?
To make your cake fluffier, try a few tips. First, ensure your butter is softened, but not melted. This helps create air pockets when you mix it with sugar. Next, whip the eggs well before adding them to the batter. This will add more air. Also, don’t overmix the batter. Mix until just combined for the best texture. Finally, using cake flour instead of all-purpose flour can also help create a lighter cake.
Can I use canned coconut milk instead of fresh?
Yes, you can use canned coconut milk. It has a rich flavor that works well in this recipe. Look for full-fat coconut milk for the best results. This will give your cake a nice creamy texture. Just remember to stir it well before measuring, as it can separate in the can.
What can I do if my cake layers sink?
If your cake layers sink, it often means they were underbaked. Always check with a toothpick to see if it comes out clean. If your oven is too hot, it can cause the cake to rise too fast and sink later. Make sure your oven is calibrated correctly. Also, ensure you don’t open the oven door too soon, as this can let out heat and cause sinking.
How to tell when the cake is fully baked?
To know if your cake is fully baked, use a toothpick. Insert it into the center of the cake. If it comes out clean or with a few crumbs, your cake is ready. You can also gently press the top. If it springs back, it’s done. Keep an eye on the clock, but use these tests for the best results.
This blog post covered how to make a delicious coconut lime layer cake. You learned about the key ingredients, from cake batter to frosting. I shared step-by-step instructions to guide you through the process. Tips helped avoid common mistakes and offered helpful tools. Variations showed options for gluten-free and vegan diets. Finally, I explained the best ways to store your cake. With these insights, you are ready to create your tasty treat and enjoy the process. Happy baking!