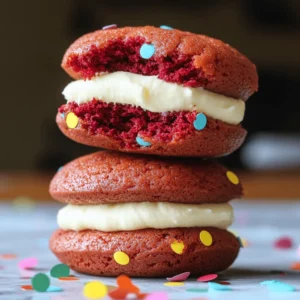
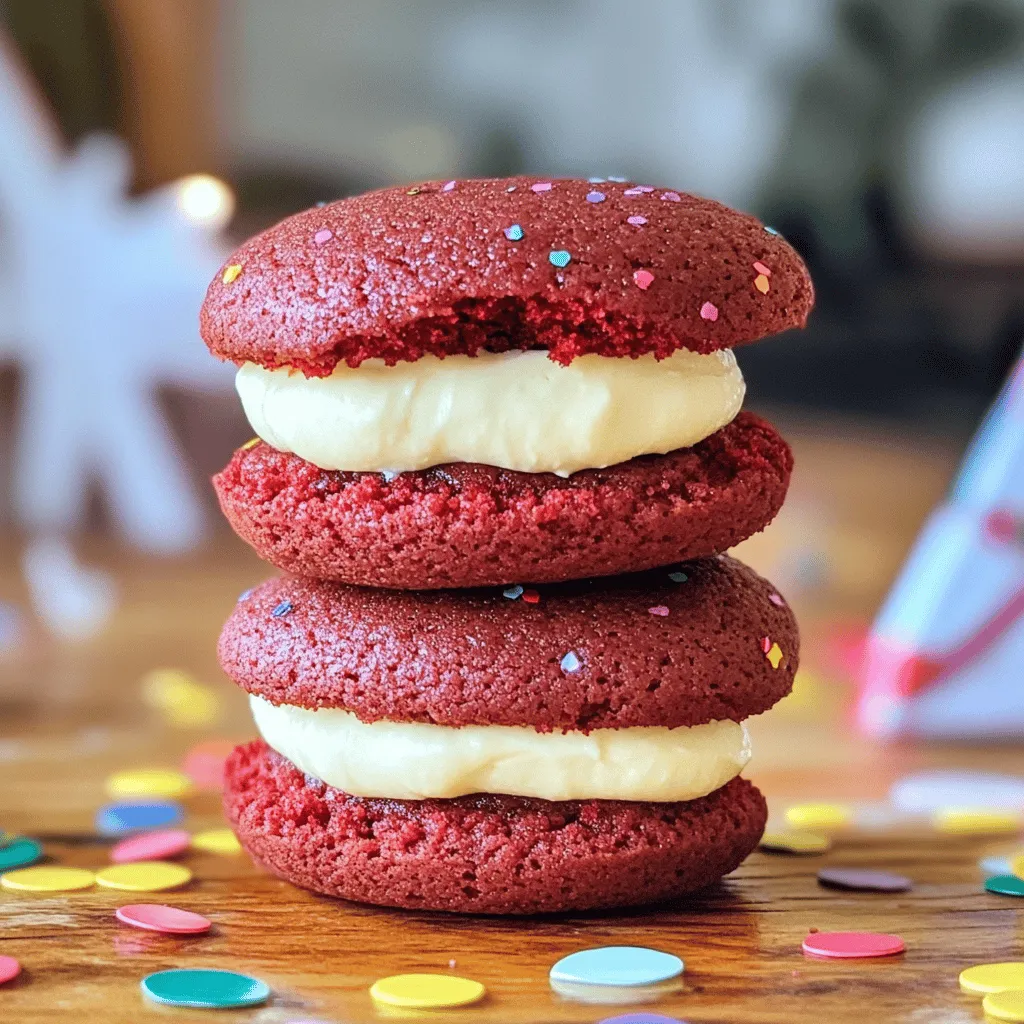
Are you ready to indulge in a sweet treat? These Red Velvet Cupcake Cookies combine the best of both worlds—soft cookies and rich cream cheese filling. They’re easy to make, perfect for any occasion, and a delight for the taste buds. Follow me as I guide you step-by-step through making these colorful cookies. You’ll impress friends and family with this delightful dessert! Let’s dive into the fun!

Ingredients
Dry Ingredients
– 1 ½ cups all-purpose flour
– 1 cup granulated sugar
– ½ cup unsweetened cocoa powder
– 1 teaspoon baking powder
– ½ teaspoon baking soda
– ½ teaspoon salt
Wet Ingredients
– ½ cup unsalted butter, softened
– 1 large egg
– 1 teaspoon vanilla extract
– 2 tablespoons red food coloring
Cream Cheese Filling
– ½ cup cream cheese, softened
– ½ cup powdered sugar
– 1 teaspoon vanilla extract
– Additional sprinkles for garnish (optional)
To make these Red Velvet Cupcake Cookies, we need a mix of dry and wet ingredients. The dry ingredients include flour, sugar, cocoa powder, baking powder, baking soda, and salt. Each plays a role in texture and flavor.
Next, we have the wet ingredients. Softened butter, an egg, vanilla, and red food coloring bring the cookies to life. The red food coloring gives them that classic red velvet look.
Finally, we create a delightful cream cheese filling. This filling combines softened cream cheese, powdered sugar, and vanilla. It adds a rich taste and creamy texture to the cookies. You can even add sprinkles for some fun color!
With these ingredients, you will create a treat that is soft, flavorful, and visually stunning.
Step-by-Step Instructions
Preheat and Prepare
– Preheat the oven to 350°F (175°C).
– Line a baking sheet with parchment paper.
Mix Dry Ingredients
– In a large bowl, whisk together:
– 1 ½ cups all-purpose flour
– 1 cup granulated sugar
– ½ cup unsweetened cocoa powder
– 1 teaspoon baking powder
– ½ teaspoon baking soda
– ½ teaspoon salt
This mix gives the cookies their rich color and flavor.
Combine Wet Ingredients
– In another bowl, beat ½ cup softened butter until creamy.
– Add 1 large egg, 1 teaspoon vanilla extract, and 2 tablespoons red food coloring.
– Mix until everything is well combined.
The red food coloring makes these cookies pop!
Form the Dough
– Gradually mix the dry ingredients into the wet ingredients.
– Keep mixing until a soft, cohesive dough forms.
It should not be too sticky or dry.
Shape and Bake Cookies
– Use a cookie scoop or tablespoon to drop rounded balls onto the baking sheet.
– Leave space between each ball for spreading.
– Bake cookies for 10-12 minutes.
The edges should be set, but the centers can be soft.
Prepare Filling and Assemble
– Make the cream cheese filling by mixing:
– ½ cup softened cream cheese
– ½ cup powdered sugar
– 1 teaspoon vanilla extract
Beat until smooth.
– Once cookies cool, spread a dollop of filling on one cookie.
– Sandwich with another cookie, bottom side down.
If you like, add some sprinkles for fun!
Tips & Tricks
Achieving the Perfect Texture
To get the right dough, mix the flour, sugar, cocoa powder, baking powder, baking soda, and salt well. Make sure the butter is soft before mixing it with the egg, vanilla, and food coloring. This helps the dough be creamy and smooth.
Aim for a soft dough that is not sticky. If it’s too dry, add a bit of milk. If it’s too wet, add a little flour.
Bake the cookies at 350°F (175°C) for 10-12 minutes. The edges should be set while the center stays soft. Keep an eye on them to avoid overbaking.
Decorating Ideas
For fun decorations, you can use colorful sprinkles on the sides of the cream cheese filling. You can also try different frostings, like chocolate or vanilla. These small touches make your cookies look great.
Think about using seasonal sprinkles for holidays. They add a festive flair to your treats.
Common Mistakes to Avoid
One common mistake is over-mixing the dough. This can lead to tough cookies. Mix until just combined for the best result.
Another issue is baking too long. If cookies feel hard, they may be overdone. Watch for soft centers when you pull them from the oven.
Finally, do not skip the cooling time. Letting them cool on the sheet for a bit helps keep them soft and chewy.
Variations
Flavor Infusions
You can add spices to your red velvet cupcake cookies. Try mixing in cinnamon or nutmeg. These spices bring warmth and depth to the flavor. Just a pinch can change the taste. It makes your cookies special and unique.
Alternative Fillings
The cream cheese filling can be swapped for different flavors. You might use strawberry or lemon cream cheese. Chocolate ganache is another tasty option. Each filling adds a new twist to the cookie. It’s fun to experiment with flavors and find your favorite.
Dietary Adjustments
You can make these cookies gluten-free easily. Just use a gluten-free flour blend instead of all-purpose flour. For a vegan version, swap the egg with a flax egg or applesauce. Use vegan butter and cream cheese. These changes keep the flavor while meeting dietary needs.
Storage Info
How to Store Cookies
To keep your cookies fresh, place them in an airtight container. I recommend layering parchment paper between the cookies. This helps prevent them from sticking together. Store the container in a cool, dry place. Avoid the fridge; it can dry out the cookies.
Freezing Instructions
You can freeze these cookies for later. To freeze baked cookies, let them cool completely. Then, place them in a single layer on a baking sheet. Freeze until solid, about 1 hour. Next, transfer the cookies to a freezer bag. Squeeze out the air and seal it tight. For dough, scoop cookie balls onto a baking sheet. Freeze until firm, then place them in a bag. You can bake them straight from frozen.
Shelf Life and Enjoyability
These cookies taste best within 3 days. If stored properly, they can last up to a week. However, the cream cheese filling may get soft over time. For the best flavor, eat them fresh. If you freeze them, they stay good for about 2-3 months. To enjoy them, let them thaw at room temperature.
FAQs
What is the difference between red velvet cupcakes and red velvet cookies?
Red velvet cupcakes are soft, moist, and fluffy. They often have a cream cheese frosting. Red velvet cookies, on the other hand, are chewy and a bit denser. They have a cream cheese filling that gives them a nice surprise. Both share the same rich flavor but in different forms.
Can I make these cookies ahead of time?
Yes, you can make these cookies ahead of time. You can prepare the dough and freeze it. Just scoop the dough into balls and place them on a baking sheet. Freeze them until firm, then transfer to a bag. When you want fresh cookies, bake them straight from the freezer. Just add a minute to the baking time.
How do I fix dry or crumbly cookie dough?
If your dough is dry or crumbly, try adding a little more butter or egg. You can also add a teaspoon of milk to help it come together. Mix until the dough is soft but not sticky. This should fix the texture for better cookies.
Is it okay to use gel food coloring instead of liquid?
Yes, you can use gel food coloring. It provides a more vibrant color and needs less than liquid color. Just start with a small amount and mix until you reach the desired shade. This way, your cookies will stand out with a rich red hue.
How can I make these cookies more chocolatey?
To boost the chocolate flavor, add an extra tablespoon of cocoa powder. You can also mix in chocolate chips for a delightful surprise. Use dark or semi-sweet chips for a richer taste. This will make your red velvet cookie experience even more delicious.
You now have all the steps to make delicious red velvet cookies. We covered the key ingredients, mixing tips, and baking advice. Remember, small changes in the recipe can lead to big flavors. Experiment with extra spices or alternative fillings to find your favorite. Store them well to keep them fresh and tasty. Whether for a celebration or just a treat, these cookies are sure to please. Enjoy your baking journey and share these tasty delights with friends and family!