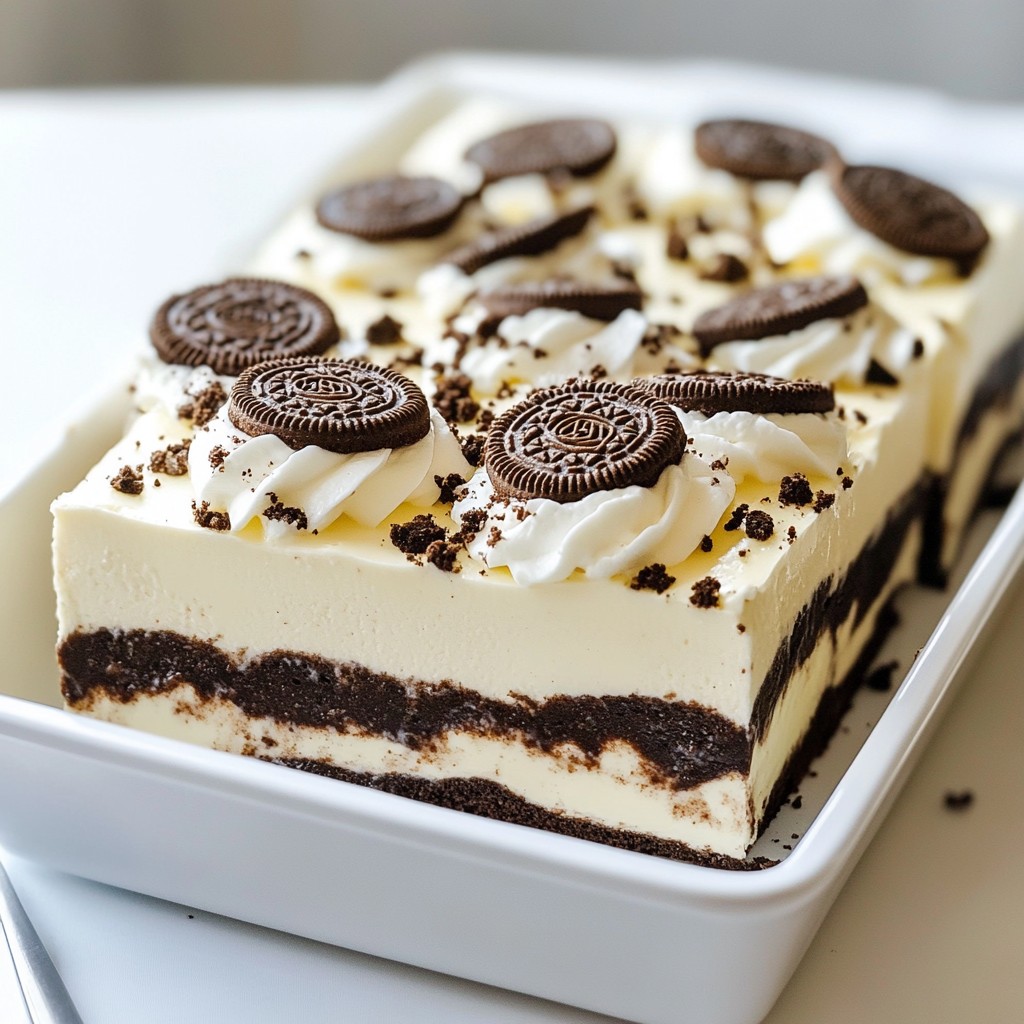
Are you ready to impress with a dessert that’s both simple and delicious? Oreo No-Bake Lasagna is a fun twist on traditional lasagna. This dessert layers creamy goodness with crunchy cookies, and everyone will love it. I’ll guide you through easy steps, ingredient swaps, and tips to make it your own. Let’s dive in and make a sweet treat that will wow your family and friends!
Why I Love This Recipe
- Decadent Layers: This dessert features multiple indulgent layers that combine the rich flavors of Oreos, cream cheese, and chocolate pudding, making every bite a delightful experience.
- No-Bake Convenience: With no baking required, this recipe is perfect for warm days or when you want a quick and easy dessert that doesn't heat up the kitchen.
- Perfect for Gatherings: This Oreo No-Bake Lasagna serves a crowd, making it an ideal choice for parties, potlucks, or family gatherings where everyone can enjoy a slice.
- Customizable Delight: You can easily modify this recipe by adding different flavors or toppings to suit your preferences, ensuring that it can be a new treat every time!
Ingredients
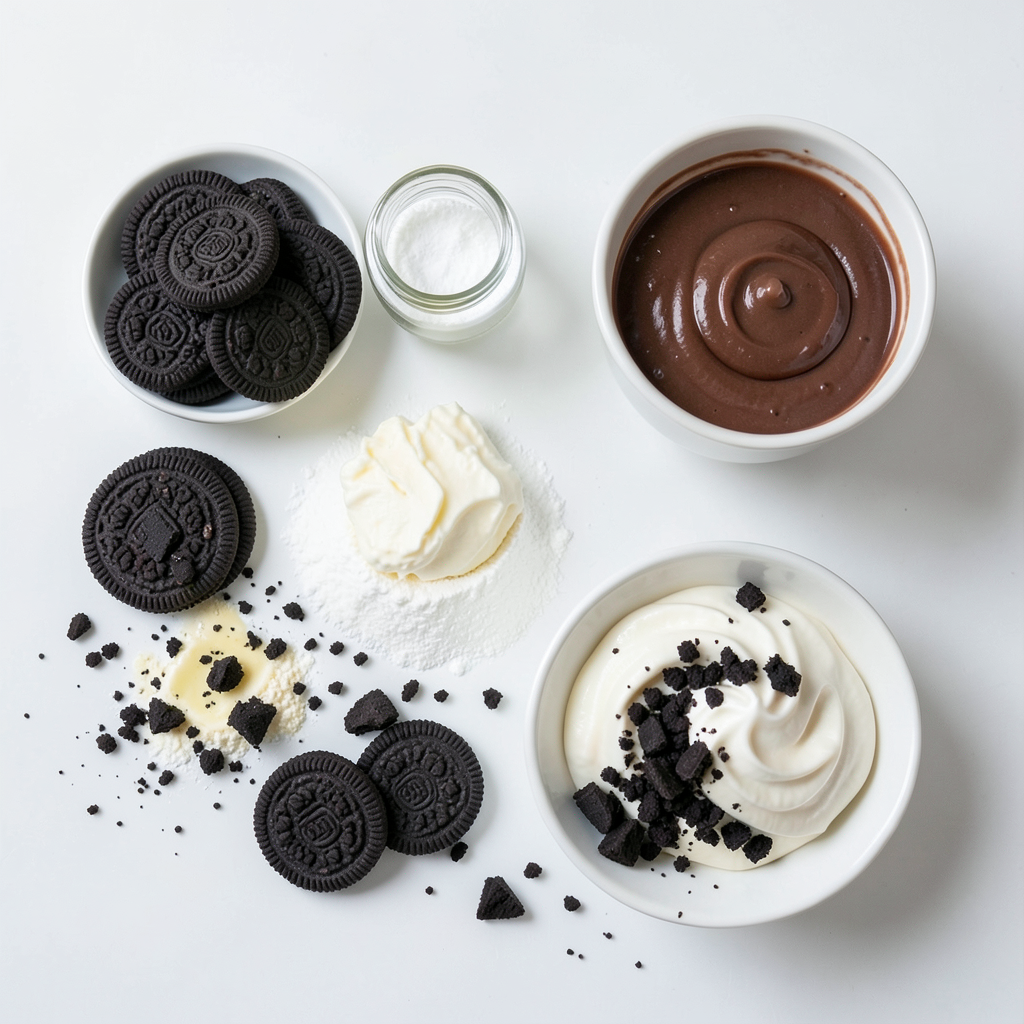
List of Ingredients
- 1 package (14.3 ounces) Oreo cookies, crushed
- 1/2 cup unsalted butter, melted
- 2 packages (8 ounces each) cream cheese, softened
- 1 cup powdered sugar
- 1 teaspoon vanilla extract
- 2 cups whipped topping (like Cool Whip)
- 1 cup chocolate pudding (instant or homemade)
- 1 cup milk
- Extra crushed Oreos for topping
Recommended Brands for Ingredients
For the best taste, I recommend using Nabisco Oreos. They have the classic flavor we love. For cream cheese, Philadelphia is my go-to choice. It’s creamy and mixes well. As for whipped topping, Cool Whip is reliable and easy to find. For pudding, you can use Jell-O for instant options or make it from scratch for a richer flavor.
Notes on Ingredient Substitutes
If you need a dairy-free option, you can use vegan cream cheese and whipped topping. For the cookies, try gluten-free Oreos if you need a gluten-free option. If you want a different flavor, use vanilla pudding instead of chocolate. You can also replace the butter with coconut oil for a dairy-free treat.
Step-by-Step Instructions
Preparing the Oreo Crust
To start, you need to make the Oreo crust. In a medium bowl, mix together the crushed Oreos and melted butter. Make sure every crumb gets coated in butter. This helps the crust hold its shape. Once mixed, press half of this mixture firmly into the bottom of a 9x13 inch baking dish. This will form a nice, even layer. Set this aside to get ready for the next step.
Making the Cream Cheese Layer
Now, let’s make the cream cheese layer. In a large mixing bowl, beat together two packages of softened cream cheese with the powdered sugar and vanilla extract. You want it to be smooth and creamy. This step is key for flavor! After it’s well mixed, gently fold in one cup of whipped topping. Be careful not to deflate the whipped topping. This adds lightness to your filling.
Assembling the Lasagna Layers
Next, it’s time to layer everything up. Spread half of the cream cheese mixture over the crust. Make sure it covers the whole base. Now, prepare the pudding layer. In another bowl, whisk one cup of chocolate pudding mix with one cup of milk. Do this until it thickens, which should take about two minutes. Pour this pudding over the cream cheese layer and spread it evenly. Then, add the rest of the cream cheese mixture on top of the pudding. Finally, spread the remaining whipped topping over the cream cheese layer. For that finishing touch, sprinkle extra crushed Oreos on top.
Chilling the Dessert
Once you have everything layered, cover the dish with plastic wrap. This keeps the dessert fresh and helps it set. Place it in the fridge for at least four hours, or even overnight if you can wait. Chilling is crucial. It helps all the layers meld together nicely. When you’re ready to serve, cut into squares and enjoy this tasty Oreo No-Bake Lasagna!
Tips & Tricks
How to Achieve the Perfect Creamy Texture
To make your Oreo No-Bake Lasagna creamy, start with softened cream cheese. You can leave it out for an hour to soften. Beat it well with powdered sugar and vanilla extract. This helps create a smooth base. Gently fold in the whipped topping last. This keeps it light and fluffy. Avoid over-mixing, as it can make the texture too dense.
Common Mistakes to Avoid
One common mistake is not crushing the Oreos finely. Large chunks can make the crust uneven and hard to cut. Another mistake is skipping the chill time. Letting it sit in the fridge for at least four hours is key. This helps the layers set and flavors blend. Lastly, don’t rush the mixing process. Each layer should be mixed well but gently, to maintain that nice creamy texture.
Presentation Tips for Serving
For a beautiful presentation, cut the dessert into neat squares. Use a sharp knife for clean edges. Serve each piece on a small dessert plate. Add a dollop of whipped topping on top. Sprinkle extra crushed Oreos for a fun touch. You can also add a drizzle of chocolate sauce for extra flair. These small details make your dessert stand out at any gathering.
Pro Tips
- Chill for Best Results: Allow the Oreo lasagna to chill overnight for the best texture and flavor. This gives the layers time to set and meld together.
- Use Room Temperature Ingredients: Ensure your cream cheese is at room temperature for easy blending. This will help achieve a smooth, lump-free mixture.
- Customize the Layers: Feel free to switch up the layers by adding different flavors of pudding or incorporating other mix-ins like peanut butter or mint.
- Presentation is Key: For a more elegant look, serve in individual cups or jars. This makes for a perfect party dessert and easier serving!
Variations
Alternative Cookie Options
You can change the cookies in this dessert. Use chocolate sandwich cookies instead of Oreos. You can also try vanilla cookies for a lighter taste. If you want a fun twist, use peanut butter cookies. They add a rich flavor that pairs well with the creamy layers.
Flavor Additions for Customization
Want to make it your own? Add different flavors to the cream cheese layer. Try mixing in some peanut butter or a splash of coffee. You can even add crushed mint candies for a refreshing taste. For a fruity touch, mix in some fresh berries or a fruit puree.
Gluten-Free Adaptations
Making this dessert gluten-free is easy. Look for gluten-free chocolate sandwich cookies. These are widely available and taste great in this recipe. Just make sure your pudding mix is also gluten-free. With these swaps, everyone can enjoy this tasty treat!
Storage Info
Best Practices for Refrigeration
To keep your Oreo No-Bake Lasagna fresh, store it in the fridge. Use plastic wrap or a lid to cover the dish. This prevents it from absorbing other smells. Make sure it’s sealed tight to keep it creamy and tasty.
How Long the Dessert Lasts
When stored properly, this dessert lasts about 3 to 5 days in the fridge. After that, it may lose some quality. Check for any changes in texture or smell before serving. If it looks or smells odd, it’s best to toss it.
Freezing Tips for Leftovers
You can freeze your leftover Oreo No-Bake Lasagna. Cut it into squares for easy serving. Wrap each piece in plastic wrap, then put them in an airtight container. It can last up to 2 months in the freezer. When you want to eat it, let it thaw in the fridge overnight. This keeps the taste and texture nice.
FAQs
Can I use homemade whipped cream?
Yes, you can use homemade whipped cream. It adds a fresh taste and a lovely texture. Just whip heavy cream until it forms soft peaks. Then, fold it into the cream cheese mixture gently. This will keep it light and fluffy.
How do I know when it’s properly set?
You will know it’s set when the top feels firm and holds its shape. After chilling for at least four hours, check if it feels solid. If it jiggles too much, give it more time in the fridge. Overnight chilling is best for great results.
What can I serve with Oreo No-Bake Lasagna?
You can serve it with fresh fruit like strawberries or bananas. Ice cream also pairs well, adding a creamy touch. For a fun twist, try drizzling chocolate sauce on top. This adds extra flavor and looks great on the plate.
Making Oreo No-Bake Lasagna is fun and easy. First, you learned about the key ingredients and the best brands to use. Then, I guided you through each step, from the crust to the final chill. You also discovered tips for a creamy texture, common mistakes to avoid, and creative ways to present your dessert.
To wrap it up, remember that variations exist for different tastes. Store your dessert properly so it stays fresh. Enjoy sharing this treat with friends and family for a delightful experience.