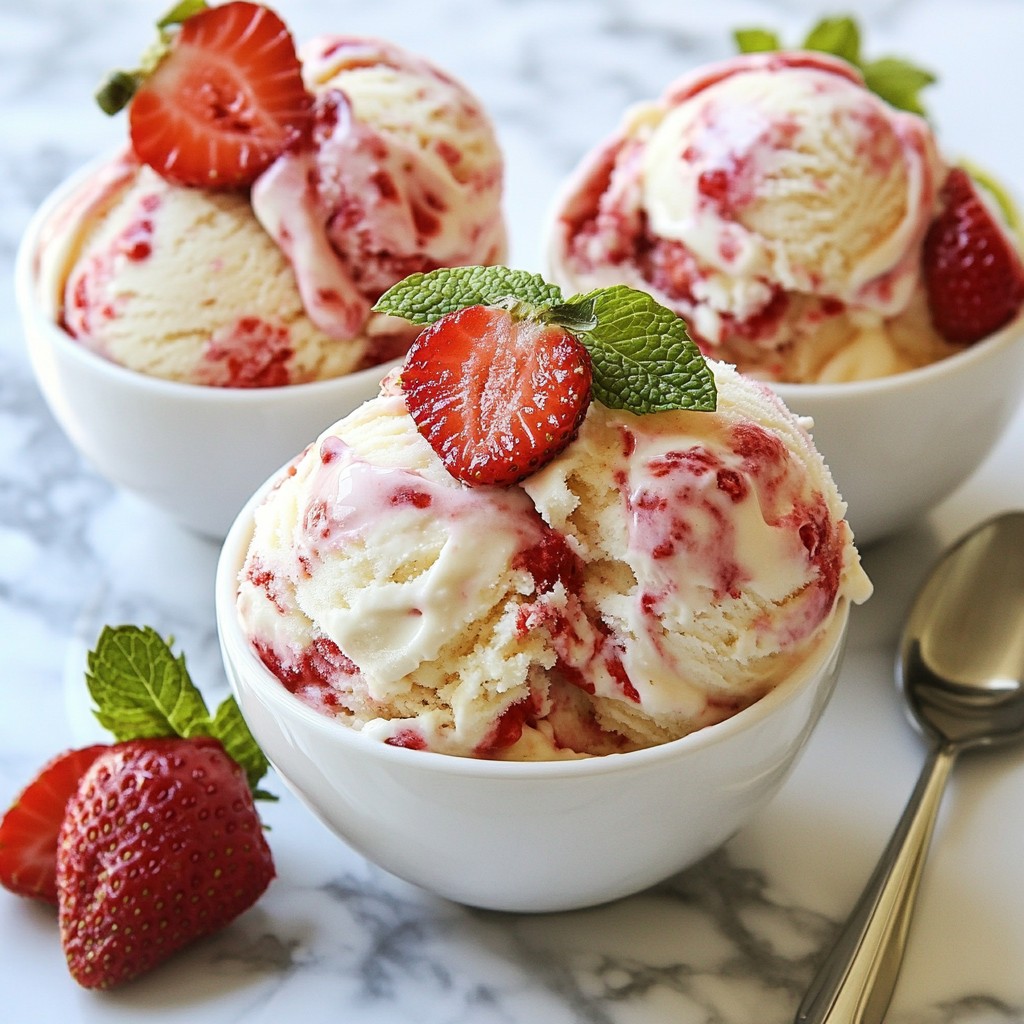
Craving a sweet treat without the hassle? My No Churn Strawberry Ice Cream Delight in Every Bite is your answer! This simple recipe lets you enjoy creamy, rich ice cream made from fresh strawberries, all without an ice cream maker. With just a few easy steps, you’ll have a delicious dessert ready to impress. Let’s dive in and create a frozen delight you’ll love!
Why I Love This Recipe
- Fresh and Fruity Flavor: This ice cream captures the essence of summer with its vibrant strawberry flavor, making every scoop a refreshing delight.
- Simple Ingredients: With just a handful of easy-to-find ingredients, this recipe is perfect for anyone looking to whip up a sweet treat without fuss.
- Versatile Texture: The combination of creamy ice cream with chunks of strawberries adds a delightful texture, making each bite interesting and enjoyable.
- Perfect for Everyone: This recipe is kid-friendly and a hit at gatherings, ensuring that everyone will love indulging in this homemade ice cream.
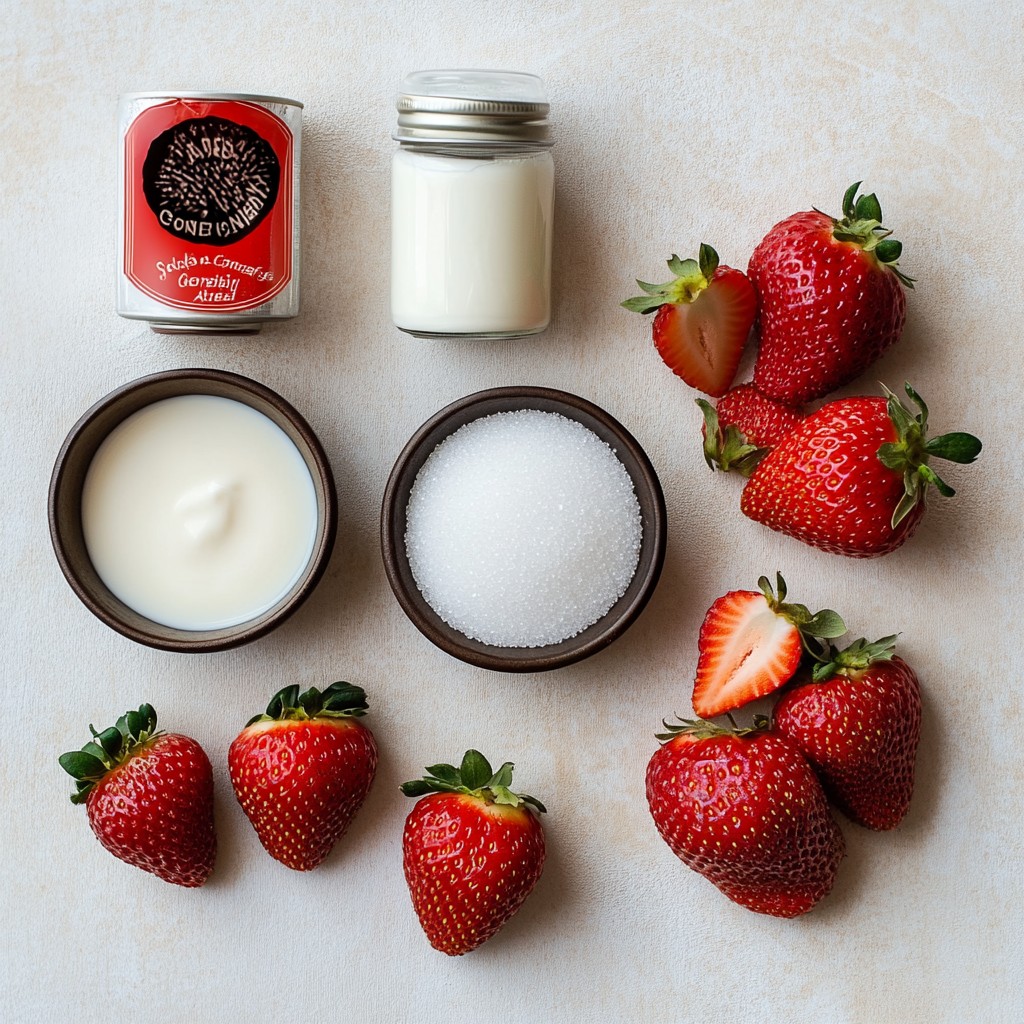
Ingredients
Main Ingredients
- 2 cups fresh strawberries, hulled and sliced
- 1/2 cup granulated sugar
- 2 cups heavy cream
- 1 cup sweetened condensed milk
- 1 teaspoon vanilla extract
- A pinch of salt
To make this no churn strawberry ice cream, you need fresh strawberries. You can find them in local markets. Slice them and mix with sugar. This step helps release the sweet juice.
Next, gather heavy cream and sweetened condensed milk. These ingredients make the ice cream creamy and rich. Add vanilla extract for extra flavor and a pinch of salt to balance the sweetness. This mix creates a base that holds the strawberry flavor well.
Optional Garnishes
- Fresh strawberry slices
- Mint leaves
- Waffle cones or dessert bowls
For serving, you can add fresh strawberry slices on top. Mint leaves give a pop of color and flavor. Use waffle cones or dessert bowls to hold the ice cream. This makes it fun and pretty to enjoy!
Step-by-Step Instructions
Preparing the Strawberries
- Macerate the strawberries
Start by slicing 2 cups of fresh strawberries. Place them in a small bowl and mix with 1/4 cup of sugar. Let them sit for about 15 minutes. This process draws out their sweet juices.
- Puree the strawberries
After macerating, blend the strawberries until smooth. You can leave a few chunks for texture. Set this puree aside for later.
Mixing the Ice Cream Base
- Combine heavy cream and condensed milk
In a large bowl, whisk 2 cups of heavy cream with 1 cup of sweetened condensed milk. This mix should feel light and fluffy.
- Add sugar, vanilla extract, and salt
Next, add the remaining 1/4 cup of sugar, 1 teaspoon of vanilla extract, and a pinch of salt. Whisk again until everything is well combined.
Folding in the Strawberry Puree
- Gently mix together
Carefully fold the strawberry puree into the cream mixture. Use a spatula or large spoon to avoid overmixing. You want to keep those lovely strawberry swirls visible.
- Avoid overmixing
Mixing too much will lose the nice texture. Just blend until you see a beautiful mix of cream and strawberry.
Freezing the Ice Cream
- Pour into a container
Take the mixture and pour it into a lidded container. Smooth the top with a spatula for an even finish.
- Freeze duration and tips
Cover the container and place it in the freezer. Let it freeze for at least 6 hours or overnight. This will help it set nicely. For best results, try to keep it in the coldest part of your freezer.
Tips & Tricks
Achieving the Best Texture
To get the best texture, start with the cream mixture. Use cold heavy cream for a light and fluffy ice cream. Whisk it well until it’s airy. This helps make your ice cream creamy and smooth.
When you fold in the strawberry puree, do it gently. You want to keep some strawberry swirls. If you mix too much, you lose those pretty ribbons. The swirls add both flavor and fun to each scoop.
Serving Suggestions
Serve your ice cream at the right temperature. Let it sit out for about five minutes before scooping. This makes it easier to scoop and enhances the creaminess.
For a fun twist, serve the ice cream in waffle cones. You can also use chilled dessert bowls. Add fresh strawberry slices or a mint leaf on top for a pop of color. This makes your dish look fancy and inviting.
Popular Add-ins
Consider adding other fruits for a new twist. Blueberries, raspberries, or peaches work well. They bring extra flavor and color to your ice cream.
Chocolate chips or nuts can also be tasty. They add crunch and richness. Just fold them in gently to keep the texture smooth. Enjoy experimenting with different flavors!
Pro Tips
- Choose the Right Strawberries: Look for ripe, fragrant strawberries for the best flavor. Local, in-season strawberries will yield the most delicious ice cream.
- Texture Matters: For a creamier texture, make sure to blend the strawberry mixture until smooth, but don’t hesitate to leave a few chunks for a delightful bite.
- Chill Your Ingredients: Ensure that your heavy cream and condensed milk are cold before mixing. This helps the ice cream to freeze faster and improves texture.
- Mixing Technique: When folding the strawberry puree into the cream, use a gentle hand to create beautiful swirls without fully incorporating the puree.
Variations
Flavor Alternatives
You can switch up flavors with ease. Try using different fruits like peaches, blueberries, or mango. These fruits can add their unique taste to your ice cream. You can also blend a mix of fruits for a fun twist. If you love richness, add chocolate or caramel. Swirl in melted chocolate or caramel sauce before freezing. This creates a delightful contrast with the fruity flavor.
Dairy-Free Options
If you want a dairy-free treat, use coconut cream instead of heavy cream. Coconut cream gives a creamy texture and a hint of coconut flavor. For sweetness, choose plant-based sweeteners like maple syrup or agave. These options make the ice cream tasty without the dairy.
Customizable Sweetness
Not everyone likes the same level of sweetness. You can adjust sugar levels to match your taste. If you prefer less sugar, reduce the amount you add. For a natural option, use honey or agave syrup as a sweetener. Both options mix well and can enhance the flavor profile of your ice cream.
Storage Info
Best Practices for Freezing
To keep your no churn strawberry ice cream fresh, use a tight-sealing container. This helps prevent air from getting in. Air can create ice crystals, which ruin the texture. If you notice ice crystals, your ice cream might not be as creamy. Ensure that the container is freezer-safe and not too large. A smaller container limits the air space.
Shelf Life
Your strawberry ice cream can last up to two weeks in the freezer. After this time, the quality may drop. Be on the lookout for signs of freezer burn. If you see white patches or ice crystals, it’s time to toss it out. This happens when the ice cream loses moisture and can affect taste.
Thawing Instructions
To enjoy your ice cream at its best, thaw it in the fridge for about 20 minutes. This method warms it gently. Avoid using a microwave, as it can melt spots unevenly. Aim for a serving temperature around 10°F to 20°F for the best texture. This way, you’ll get that creamy delight in every bite.
FAQs
How long does it take to make no churn strawberry ice cream?
It takes about 15 minutes to prep. After that, you need to freeze the ice cream for at least six hours. If you have time, let it freeze overnight. The longer it sits, the better the flavor develops.
Can I use frozen strawberries?
Yes, you can use frozen strawberries. Just thaw them first. Drain any extra juice before you start. This keeps your ice cream from being too watery. If you want a strong flavor, blend the thawed strawberries into a puree.
What can I do if my ice cream is too hard?
If your ice cream is too hard, let it sit at room temperature for about 10 to 15 minutes. This makes it easier to scoop. You can also run your ice cream scoop under warm water for a few seconds. This helps to soften the ice cream quickly. Enjoy your creamy treat!
You’ve learned how to make delicious no-churn strawberry ice cream. We covered the key ingredients, from fresh strawberries to sweetened condensed milk. You now have a simple step-by-step method to create the perfect texture and flavor.
Remember, you can customize your ice cream with other fruits or adjust the sweetness. Enjoy every scoop and impress your friends with your new skills. This treat is not just tasty; it’s also easy to make and fun to share!