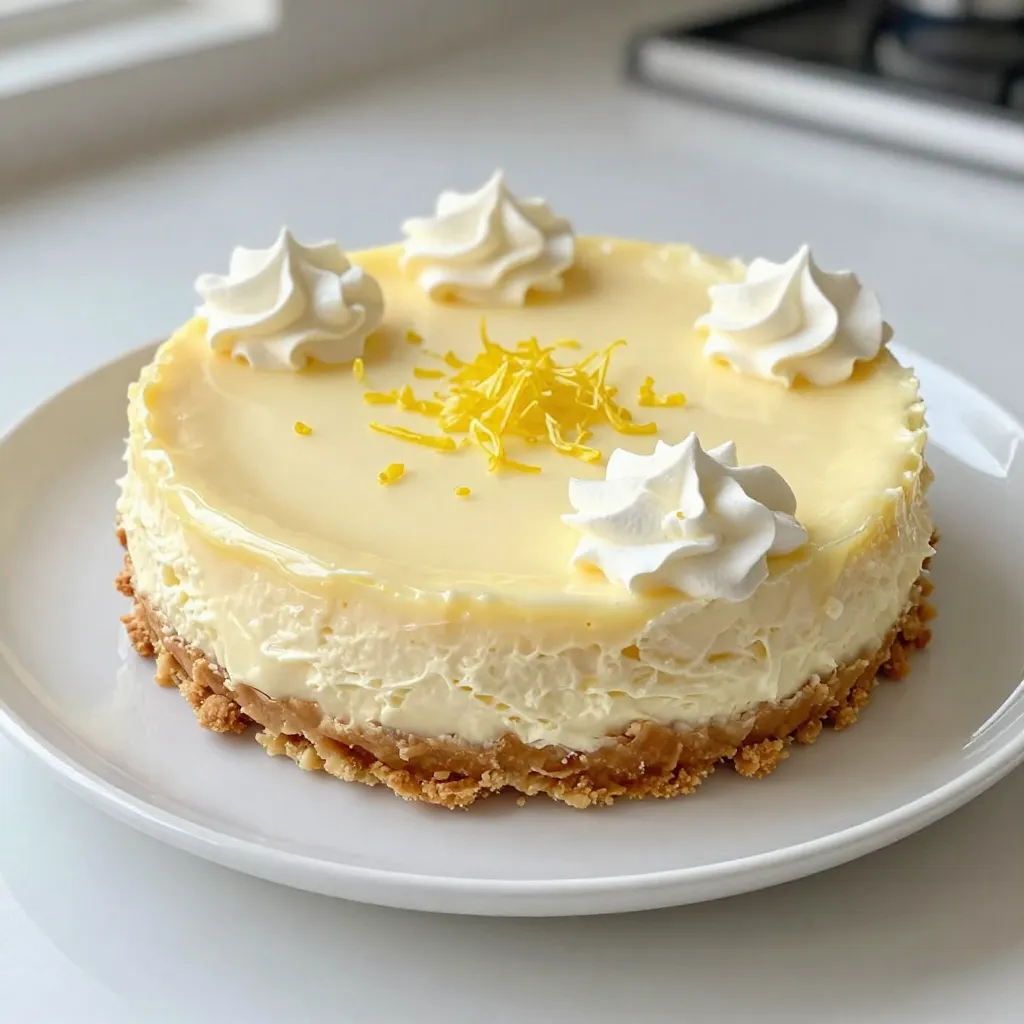
Are you ready to whip up a dessert that’s both simple and zesty? My No-Bake Lemon Cheesecake is a refreshing treat perfect for any occasion. With a creamy texture and a burst of lemon flavor, this cheesecake is a winner. Plus, you won’t need an oven! Follow my easy steps, and you’ll impress friends and family with this delightful dessert. Let’s dive into the ingredients and get started!
Why I Love This Recipe
- Refreshing Flavor: This cheesecake delivers a burst of citrusy goodness that brightens up any occasion.
- No-Bake Convenience: With no baking required, this recipe is perfect for warm days when you want dessert without the heat.
- Simple Ingredients: The recipe uses common pantry staples, making it accessible and easy to whip up anytime.
- Impressive Presentation: Serve it chilled for a show-stopping dessert that will impress your family and friends.
Ingredients
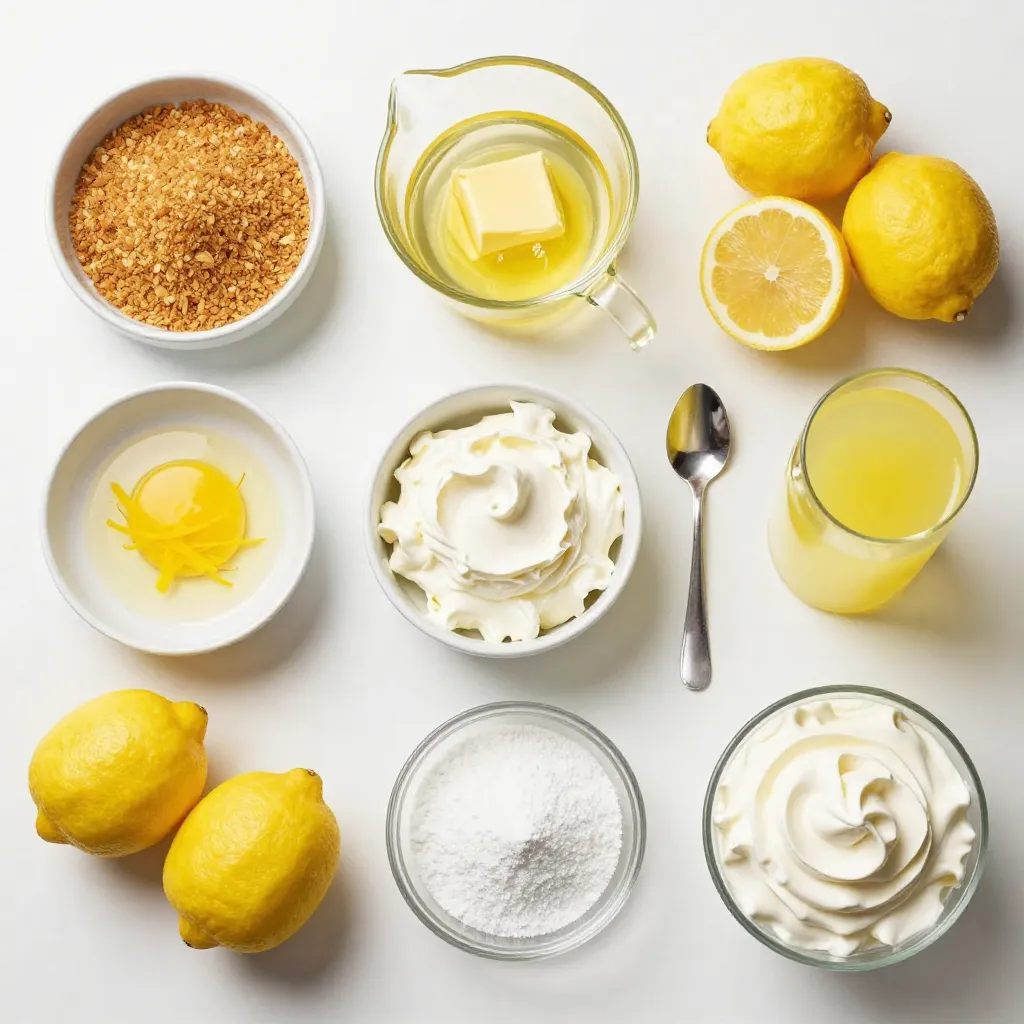
Main Ingredients for No-Bake Lemon Cheesecake
To make a no-bake lemon cheesecake, you will need:
– 1 ½ cups graham cracker crumbs
– ½ cup unsalted butter, melted
– 2 cups cream cheese, softened
– 1 cup powdered sugar
– 1 teaspoon vanilla extract
– Zest of 2 lemons
– ½ cup fresh lemon juice (about 2-3 lemons)
– 1 tablespoon gelatin powder (optional for setting)
– ⅔ cup heavy cream
These ingredients create a creamy, zesty dessert. The graham cracker crumbs give a nice crunch, while the cream cheese adds richness.
Optional Ingredients
You can enhance your cheesecake with these optional ingredients:
– 1 tablespoon lemon extract for more lemon flavor
– ½ cup sour cream for extra creaminess
– A pinch of salt to balance sweetness
These options allow you to tailor the cheesecake to your taste. They can add depth and complexity to your dish.
Suggested Garnishes
Garnishing makes your cheesecake look even better. Here are some great ideas:
– Fresh berries like strawberries or blueberries
– Extra lemon zest for a pop of color
– Whipped cream dollops for added fluffiness
These garnishes are not just pretty; they add flavor and texture. They elevate your no-bake lemon cheesecake into a stunning dessert.
Step-by-Step Instructions
Preparing the Crust
To start, grab a medium bowl and mix 1 ½ cups of graham cracker crumbs with ½ cup of melted unsalted butter. Use a spatula to blend them well. The mixture should look sandy and stick together. Now, take a 9-inch springform pan and press the graham cracker mix firmly into the bottom. Make sure it is even all around. This crust will hold your cheesecake together. Place the pan in the refrigerator while you prepare the filling.
Making the Cheese Mixture
Now, it’s time to make the cheese mixture. In a large mixing bowl, add 2 cups of softened cream cheese. Use an electric mixer to beat it until it’s creamy. Gradually add in 1 cup of powdered sugar. Keep mixing until it’s smooth. Next, add 1 teaspoon of vanilla extract, the zest of 2 lemons, and ½ cup of fresh lemon juice. If you want the cheesecake to set better, dissolve 1 tablespoon of gelatin powder in 2 tablespoons of warm water and mix it in.
Whipping the Cream and Combining
In a separate bowl, pour in ⅔ cup of heavy cream. Use a mixer to whip it until stiff peaks form. This means it should hold its shape well. Now, gently fold the whipped cream into the creamy lemon mixture. Be careful not to deflate the whipped cream. This will keep your cheesecake light and fluffy. Once mixed, pour the lemon filling over the chilled crust. Use a spatula to smooth out the top. Now, cover the cheesecake and place it in the fridge for at least 4 hours, or overnight is even better.
Tips & Tricks
Achieving the Perfect Creamy Texture
To get a creamy texture, start with softened cream cheese. Cold cream cheese makes it hard to mix. Use an electric mixer to blend until smooth and fluffy. This step is key for that rich, dreamy taste. Folding in whipped cream adds air, making the cheesecake light. Do this gently to keep the texture airy.
How to Avoid Common Mistakes
A few common mistakes can ruin your cheesecake. First, don’t skip chilling the crust. It needs time to firm up. Second, avoid over-mixing the cream cheese. This can lead to cracks later. If you choose to use gelatin, make sure it dissolves fully. If not, it may not set right. Lastly, don’t rush the chilling time. Let it rest for at least four hours.
Recommendations for Serving
Serve your cheesecake chilled for the best taste. Slice it carefully to keep the shape. You can top it with extra lemon zest or fresh berries for color. If you want a bit more sweetness, add a drizzle of honey or a dusting of powdered sugar. This makes a beautiful presentation for any gathering.
Pro Tips
- Use Fresh Lemons: For the best flavor, always use fresh lemons rather than bottled lemon juice. The zest and juice from fresh lemons will give your cheesecake a vibrant taste.
- Chill the Cream Cheese: Ensure your cream cheese is softened to room temperature before mixing. This helps create a smooth filling without lumps.
- Whip Cream to Stiff Peaks: When whipping the heavy cream, beat until stiff peaks form. This will add lightness and airiness to your cheesecake filling.
- Garnish for Presentation: Consider garnishing your cheesecake with fresh berries or a sprig of mint for added color and a touch of elegance when serving.
Variations
Alternative Flavors and Add-Ins
You can change the lemon flavor to suit your taste. Try using lime or orange juice instead of lemon juice. This gives a new twist to the cheesecake. You can also add fresh fruit to the mix. Strawberries or blueberries blend well. These add color and a burst of flavor. Another fun idea is to mix in crushed cookies. Oreos or gingersnaps can make a tasty crust or filling.
Gluten-Free Version
If you need a gluten-free option, use gluten-free graham crackers. They work just as well for the crust. Check the labels to ensure they are safe for your diet. The cream cheese and other ingredients are usually gluten-free. This means you can enjoy the cheesecake without worry.
Mini Cheesecake Bites
Mini cheesecake bites are perfect for parties or snacks. Simply use a muffin tin instead of a springform pan. Line each cup with mini cupcake liners. Fill each cup with the lemon mixture. Chill as you would the full cheesecake. These bites are fun, easy to serve, and great for sharing. You can also top each bite with a small piece of fruit or a dollop of whipped cream.
Storage Info
How to Store Leftover Cheesecake
To store leftover cheesecake, wrap it tightly in plastic wrap. You can also place it in an airtight container. This helps keep it fresh for later. Make sure to refrigerate the cheesecake right away. It will last for about 3 to 5 days in the fridge.
Freezing Options
If you want to save some cheesecake for later, freezing is a great option. First, let it cool completely in the fridge. Then, slice it into pieces. Wrap each slice in plastic wrap. After that, place the slices in a freezer bag or container. This way, you can enjoy it for up to 2 months.
Best Practices for Keeping Fresh
To keep your cheesecake fresh, try these tips:
– Store it in the coldest part of the fridge.
– Avoid placing other strong-smelling foods nearby.
– Always cover the cheesecake to prevent drying out.
Following these tips helps maintain its zesty flavor and creamy texture. Enjoy your cheesecake at its best!
FAQs
Can I use low-fat cream cheese?
Yes, you can use low-fat cream cheese. It will make the cheesecake lighter. However, the texture may differ slightly. The flavor remains bright and zesty. If you want a rich taste, regular cream cheese works best.
How long does the no-bake cheesecake last in the fridge?
The no-bake cheesecake lasts about 4 to 5 days in the fridge. Make sure to cover it well. Use plastic wrap or a lid to keep it fresh. After that, it may lose its texture and flavor.
Can I substitute lemon juice with another citrus?
Yes, you can use lime juice or orange juice. Each will give a unique taste. Lime juice offers a tangy twist, while orange juice adds sweetness. Feel free to experiment and find your favorite flavor!
In this blog post, I shared the key steps to make a no-bake lemon cheesecake. We covered the main and optional ingredients, plus tasty garnishes. You learned how to prepare the crust and mix the cheese. I gave tips for a creamy texture and how to avoid mistakes. We also explored fun variations, like gluten-free options and mini bites. Finally, I shared how to store your cheesecake. Use this guide to spark joy with your dessert, and share it with friends for delicious moments together. Enjoy every bite of your tasty creatio