No-Bake Caramel Cheesecake Jars Delightful Treats

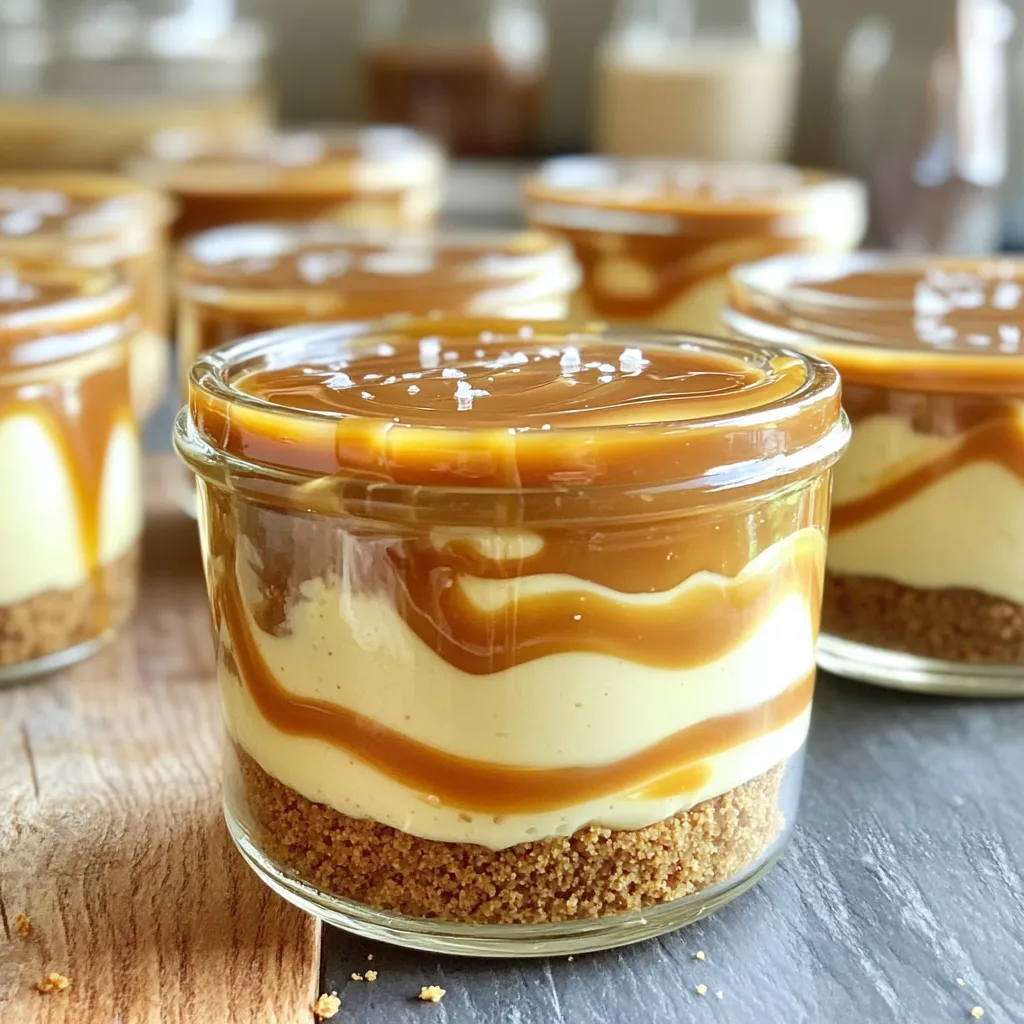
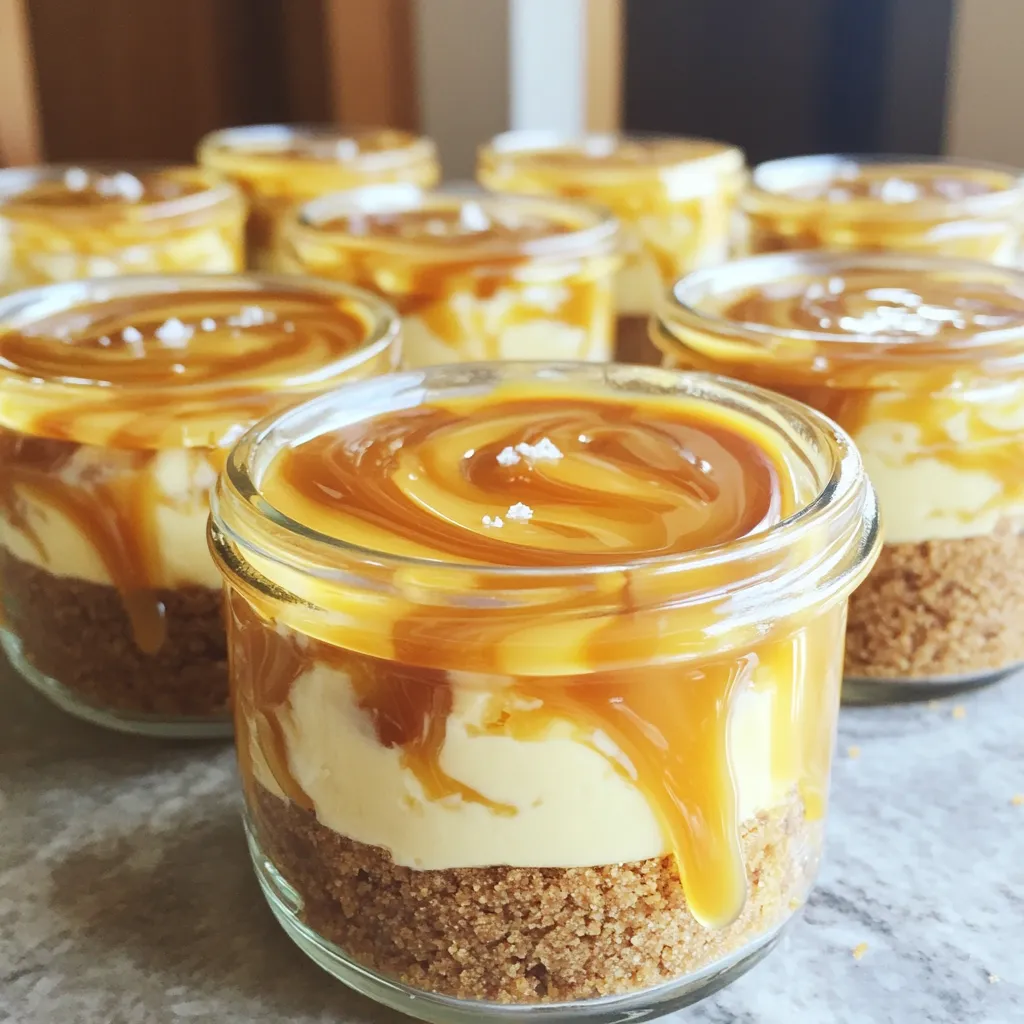
Craving a sweet treat that’s easy to make? Let me introduce you to No-Bake Caramel Cheesecake Jars! These delightful desserts come together quickly and need no oven. With layers of creamy cheesecake and rich caramel, they’ll satisfy your sweet tooth. Perfect for parties or a simple night in, these jars are sure to impress friends and family. Let’s dive into the delicious details and make something unforgettable!

- 1 cup crushed graham crackers - 1/2 cup powdered sugar - 4 tablespoons unsalted butter, melted - 16 oz cream cheese, softened - 1 cup heavy whipping cream - 1 teaspoon vanilla extract - 1/2 cup caramel sauce (plus extra for drizzling) - Sea salt for garnish - Additional caramel for drizzling For this no-bake caramel cheesecake, we focus on simple ingredients. The dry ingredients include crushed graham crackers and powdered sugar. The graham crackers form a sweet crust, while the powdered sugar adds extra sweetness to the cheesecake filling. The wet ingredients are where the magic happens. Unsalted butter binds the graham cracker crust. Cream cheese gives the cheesecake its rich texture. Heavy whipping cream is vital for a light, fluffy filling. Vanilla extract adds warmth and depth. Finally, caramel sauce brings a sweet, gooey touch that makes every bite delightful. You can add sea salt on top for a fun flavor twist. A drizzle of extra caramel enhances the look and taste. These ingredients work together to create layers of flavor and texture. Each jar becomes a little piece of dessert heaven. Start by mixing together the crushed graham crackers and melted butter in a medium bowl. You want this mix to feel like wet sand. Once it's ready, scoop about 2 tablespoons into each jar. Press down gently to form an even layer. This crust gives your cheesecake a great base. Next, grab a large bowl and beat the softened cream cheese with an electric mixer until it's smooth. This step is key for a creamy texture. Slowly add the powdered sugar and vanilla extract. Keep mixing until everything combines well and is creamy. In a separate bowl, whip the heavy cream until stiff peaks form. This means the cream should hold its shape when you lift the beaters. Now, gently fold the whipped cream into the cream cheese mixture. Be careful here; you don't want to deflate the whipped cream. It's time to layer your jars! Start by adding the cheesecake mixture on top of the graham cracker crust. Fill each jar about halfway. Then, drizzle some caramel sauce over this layer. Add another layer of the remaining graham cracker mix next. Finally, top each jar with the rest of the cheesecake mixture and smooth it out. Cover each jar with a lid or plastic wrap and place them in the fridge. Let them chill for at least 4 hours, or overnight if you can wait. This time helps the flavors meld together. When you’re ready to serve, drizzle a bit more caramel sauce on top. Optionally, sprinkle some sea salt for a touch of flavor contrast. Enjoy your delightful no-bake caramel cheesecake jars! - Use room temperature cream cheese: This helps mix the cream cheese smoothly. Cold cream cheese can cause lumps. - Ensure whipped cream is folded gently: This keeps the mixture light and fluffy. A heavy hand can deflate the cream. - Overmixing the cream cheese: This can make your cheesecake too dense. Mix just until smooth. - Skipping the chilling process: Chilling allows the flavors to meld. Don't rush this step, as it makes a big difference in taste. - Pair with fresh fruit: Berries or sliced bananas add a fresh burst. Their sweetness complements the cheesecake nicely. - Serve with a side of whipped cream: A dollop of whipped cream makes it extra special. It adds creaminess and looks great on the plate. {{image_2}} You can switch up the flavor of your no-bake caramel cheesecake jars. Here are two fun ideas: - Chocolate caramel cheesecake: Just add cocoa powder to the cream cheese mix. This gives the cheesecake a rich chocolate taste. You can also use chocolate graham crackers for the crust. - Pumpkin spice version: Mix in pumpkin puree and pumpkin spice. This adds a fall flavor that many love. It’s perfect for a seasonal treat. You can make this dessert work for your needs by swapping some ingredients: - Gluten-free graham crackers: Look for gluten-free options at your store. They work just as well for the crust. - Dairy-free cream cheese alternatives: Use cashew or almond cream cheese. These options keep the same creamy texture without dairy. How you present your cheesecake jars can make them even more special: - Use mason jars for a rustic look: They add charm and are easy to find. Plus, they are perfect for layering. - Layer with fresh berries on top: Berries not only add color but also give a fresh taste. You can use strawberries, blueberries, or raspberries for a pop of flavor. You can store your no-bake caramel cheesecake jars in the fridge for up to five days. Make sure to cover them tightly with lids or plastic wrap. This keeps them fresh and tasty. Yes, you can freeze no-bake cheesecake jars! However, it's best to freeze them before adding the caramel sauce on top. This will help maintain their texture. Wrap each jar in plastic wrap, then place them in an airtight container. They can last for up to three months in the freezer. To prevent sogginess in layers, keep the graham cracker crust separate until you are ready to serve. You can also add a thin layer of chocolate or white chocolate on top of the crust before adding the cheesecake. This layer acts as a barrier and helps keep the crust crisp. I love serving these jars in a fun way. Here are some ideas: - Use clear jars to show off the layers. - Add a drizzle of caramel on top. - Sprinkle a pinch of sea salt for a nice contrast. - Serve with a small spoon for easy eating. - Pair them with fresh fruit for extra flavor. These simple touches make your jars look stunning and taste even better! Yes! If you want a change, consider these options: - Use crushed Oreos for a chocolatey twist. - Try crushed almonds or walnuts for a nutty flavor. - Consider using a cookie like shortbread for a rich taste. - Gluten-free options, like almond flour, work great too. Feel free to mix and match until you find your favorite! The cheesecake needs time to chill. Here’s what you need to know: - Chill the jars for at least 4 hours. - Overnight works best for full flavor and texture. - Warmer kitchens may need longer chilling times. This wait allows the layers to meld and the cheesecake to firm up. Enjoy the patience; it's worth it! This blog post guides you on making no-bake caramel cheesecake jars. You learned about key ingredients and how to blend them. The step-by-step instructions help you create a tasty crust and filling. I shared tips to avoid common mistakes, suggested fun variations, and explained storage. No-bake desserts are easy, fun, and rewarding. You can impress friends with your delicious treat. Enjoy making these jars and get creative with your flavors!

Ingredients

Dry Ingredients

– 1 cup crushed graham crackers

– 1/2 cup powdered sugar

Wet Ingredients

– 4 tablespoons unsalted butter, melted

– 16 oz cream cheese, softened

– 1 cup heavy whipping cream

– 1 teaspoon vanilla extract

– 1/2 cup caramel sauce (plus extra for drizzling)

Optional Ingredients

– Sea salt for garnish

– Additional caramel for drizzling

For this no-bake caramel cheesecake, we focus on simple ingredients. The dry ingredients include crushed graham crackers and powdered sugar. The graham crackers form a sweet crust, while the powdered sugar adds extra sweetness to the cheesecake filling.

The wet ingredients are where the magic happens. Unsalted butter binds the graham cracker crust. Cream cheese gives the cheesecake its rich texture. Heavy whipping cream is vital for a light, fluffy filling. Vanilla extract adds warmth and depth. Finally, caramel sauce brings a sweet, gooey touch that makes every bite delightful.

You can add sea salt on top for a fun flavor twist. A drizzle of extra caramel enhances the look and taste. These ingredients work together to create layers of flavor and texture. Each jar becomes a little piece of dessert heaven.

Step-by-Step Instructions

Preparing the Crust

Start by mixing together the crushed graham crackers and melted butter in a medium bowl. You want this mix to feel like wet sand. Once it’s ready, scoop about 2 tablespoons into each jar. Press down gently to form an even layer. This crust gives your cheesecake a great base.

Making the Cheesecake Filling

Next, grab a large bowl and beat the softened cream cheese with an electric mixer until it’s smooth. This step is key for a creamy texture. Slowly add the powdered sugar and vanilla extract. Keep mixing until everything combines well and is creamy.

Whipping the Cream

In a separate bowl, whip the heavy cream until stiff peaks form. This means the cream should hold its shape when you lift the beaters. Now, gently fold the whipped cream into the cream cheese mixture. Be careful here; you don’t want to deflate the whipped cream.

Assembling the Jars

It’s time to layer your jars! Start by adding the cheesecake mixture on top of the graham cracker crust. Fill each jar about halfway. Then, drizzle some caramel sauce over this layer. Add another layer of the remaining graham cracker mix next. Finally, top each jar with the rest of the cheesecake mixture and smooth it out.

Chilling and Serving

Cover each jar with a lid or plastic wrap and place them in the fridge. Let them chill for at least 4 hours, or overnight if you can wait. This time helps the flavors meld together. When you’re ready to serve, drizzle a bit more caramel sauce on top. Optionally, sprinkle some sea salt for a touch of flavor contrast. Enjoy your delightful no-bake caramel cheesecake jars!

Tips & Tricks

Tips for Perfecting the Cheesecake

Use room temperature cream cheese: This helps mix the cream cheese smoothly. Cold cream cheese can cause lumps.

Ensure whipped cream is folded gently: This keeps the mixture light and fluffy. A heavy hand can deflate the cream.

Common Mistakes to Avoid

Overmixing the cream cheese: This can make your cheesecake too dense. Mix just until smooth.

Skipping the chilling process: Chilling allows the flavors to meld. Don’t rush this step, as it makes a big difference in taste.

Serving Suggestions

Pair with fresh fruit: Berries or sliced bananas add a fresh burst. Their sweetness complements the cheesecake nicely.

Serve with a side of whipped cream: A dollop of whipped cream makes it extra special. It adds creaminess and looks great on the plate.

Variations

Flavor Variations

You can switch up the flavor of your no-bake caramel cheesecake jars. Here are two fun ideas:

Chocolate caramel cheesecake: Just add cocoa powder to the cream cheese mix. This gives the cheesecake a rich chocolate taste. You can also use chocolate graham crackers for the crust.

Pumpkin spice version: Mix in pumpkin puree and pumpkin spice. This adds a fall flavor that many love. It’s perfect for a seasonal treat.

Ingredient Substitutions

You can make this dessert work for your needs by swapping some ingredients:

Gluten-free graham crackers: Look for gluten-free options at your store. They work just as well for the crust.

Dairy-free cream cheese alternatives: Use cashew or almond cream cheese. These options keep the same creamy texture without dairy.

Presentation Ideas

How you present your cheesecake jars can make them even more special:

Use mason jars for a rustic look: They add charm and are easy to find. Plus, they are perfect for layering.

Layer with fresh berries on top: Berries not only add color but also give a fresh taste. You can use strawberries, blueberries, or raspberries for a pop of flavor.

Storage Info

Refrigeration

You can store your no-bake caramel cheesecake jars in the fridge for up to five days. Make sure to cover them tightly with lids or plastic wrap. This keeps them fresh and tasty.

Freezing Instructions

Yes, you can freeze no-bake cheesecake jars! However, it’s best to freeze them before adding the caramel sauce on top. This will help maintain their texture. Wrap each jar in plastic wrap, then place them in an airtight container. They can last for up to three months in the freezer.

Maintaining Freshness

To prevent sogginess in layers, keep the graham cracker crust separate until you are ready to serve. You can also add a thin layer of chocolate or white chocolate on top of the crust before adding the cheesecake. This layer acts as a barrier and helps keep the crust crisp.

FAQs

What is the best way to serve no-bake caramel cheesecake jars?

I love serving these jars in a fun way. Here are some ideas:

– Use clear jars to show off the layers.

– Add a drizzle of caramel on top.

– Sprinkle a pinch of sea salt for a nice contrast.

– Serve with a small spoon for easy eating.

– Pair them with fresh fruit for extra flavor.

These simple touches make your jars look stunning and taste even better!

Can I use a different type of crust?

Yes! If you want a change, consider these options:

– Use crushed Oreos for a chocolatey twist.

– Try crushed almonds or walnuts for a nutty flavor.

– Consider using a cookie like shortbread for a rich taste.

– Gluten-free options, like almond flour, work great too.

Feel free to mix and match until you find your favorite!

How long does it take for the cheesecake to set?

The cheesecake needs time to chill. Here’s what you need to know:

– Chill the jars for at least 4 hours.

– Overnight works best for full flavor and texture.

– Warmer kitchens may need longer chilling times.

This wait allows the layers to meld and the cheesecake to firm up. Enjoy the patience; it’s worth it!

This blog post guides you on making no-bake caramel cheesecake jars. You learned about key ingredients and how to blend them. The step-by-step instructions help you create a tasty crust and filling. I shared tips to avoid common mistakes, suggested fun variations, and explained storage.

No-bake desserts are easy, fun, and rewarding. You can impress friends with your delicious treat. Enjoy making these jars and get creative with your flavors!

- 1 cup crushed graham crackers - 1/2 cup powdered sugar - 4 tablespoons unsalted butter, melted - 16 oz cream cheese, softened - 1 cup heavy whipping cream - 1 teaspoon vanilla extract - 1/2 cup caramel sauce (plus extra for drizzling) - Sea salt for garnish - Additional caramel for drizzling For this no-bake caramel cheesecake, we focus on simple ingredients. The dry ingredients include crushed graham crackers and powdered sugar. The graham crackers form a sweet crust, while the powdered sugar adds extra sweetness to the cheesecake filling. The wet ingredients are where the magic happens. Unsalted butter binds the graham cracker crust. Cream cheese gives the cheesecake its rich texture. Heavy whipping cream is vital for a light, fluffy filling. Vanilla extract adds warmth and depth. Finally, caramel sauce brings a sweet, gooey touch that makes every bite delightful. You can add sea salt on top for a fun flavor twist. A drizzle of extra caramel enhances the look and taste. These ingredients work together to create layers of flavor and texture. Each jar becomes a little piece of dessert heaven. Start by mixing together the crushed graham crackers and melted butter in a medium bowl. You want this mix to feel like wet sand. Once it's ready, scoop about 2 tablespoons into each jar. Press down gently to form an even layer. This crust gives your cheesecake a great base. Next, grab a large bowl and beat the softened cream cheese with an electric mixer until it's smooth. This step is key for a creamy texture. Slowly add the powdered sugar and vanilla extract. Keep mixing until everything combines well and is creamy. In a separate bowl, whip the heavy cream until stiff peaks form. This means the cream should hold its shape when you lift the beaters. Now, gently fold the whipped cream into the cream cheese mixture. Be careful here; you don't want to deflate the whipped cream. It's time to layer your jars! Start by adding the cheesecake mixture on top of the graham cracker crust. Fill each jar about halfway. Then, drizzle some caramel sauce over this layer. Add another layer of the remaining graham cracker mix next. Finally, top each jar with the rest of the cheesecake mixture and smooth it out. Cover each jar with a lid or plastic wrap and place them in the fridge. Let them chill for at least 4 hours, or overnight if you can wait. This time helps the flavors meld together. When you’re ready to serve, drizzle a bit more caramel sauce on top. Optionally, sprinkle some sea salt for a touch of flavor contrast. Enjoy your delightful no-bake caramel cheesecake jars! - Use room temperature cream cheese: This helps mix the cream cheese smoothly. Cold cream cheese can cause lumps. - Ensure whipped cream is folded gently: This keeps the mixture light and fluffy. A heavy hand can deflate the cream. - Overmixing the cream cheese: This can make your cheesecake too dense. Mix just until smooth. - Skipping the chilling process: Chilling allows the flavors to meld. Don't rush this step, as it makes a big difference in taste. - Pair with fresh fruit: Berries or sliced bananas add a fresh burst. Their sweetness complements the cheesecake nicely. - Serve with a side of whipped cream: A dollop of whipped cream makes it extra special. It adds creaminess and looks great on the plate. {{image_2}} You can switch up the flavor of your no-bake caramel cheesecake jars. Here are two fun ideas: - Chocolate caramel cheesecake: Just add cocoa powder to the cream cheese mix. This gives the cheesecake a rich chocolate taste. You can also use chocolate graham crackers for the crust. - Pumpkin spice version: Mix in pumpkin puree and pumpkin spice. This adds a fall flavor that many love. It’s perfect for a seasonal treat. You can make this dessert work for your needs by swapping some ingredients: - Gluten-free graham crackers: Look for gluten-free options at your store. They work just as well for the crust. - Dairy-free cream cheese alternatives: Use cashew or almond cream cheese. These options keep the same creamy texture without dairy. How you present your cheesecake jars can make them even more special: - Use mason jars for a rustic look: They add charm and are easy to find. Plus, they are perfect for layering. - Layer with fresh berries on top: Berries not only add color but also give a fresh taste. You can use strawberries, blueberries, or raspberries for a pop of flavor. You can store your no-bake caramel cheesecake jars in the fridge for up to five days. Make sure to cover them tightly with lids or plastic wrap. This keeps them fresh and tasty. Yes, you can freeze no-bake cheesecake jars! However, it's best to freeze them before adding the caramel sauce on top. This will help maintain their texture. Wrap each jar in plastic wrap, then place them in an airtight container. They can last for up to three months in the freezer. To prevent sogginess in layers, keep the graham cracker crust separate until you are ready to serve. You can also add a thin layer of chocolate or white chocolate on top of the crust before adding the cheesecake. This layer acts as a barrier and helps keep the crust crisp. I love serving these jars in a fun way. Here are some ideas: - Use clear jars to show off the layers. - Add a drizzle of caramel on top. - Sprinkle a pinch of sea salt for a nice contrast. - Serve with a small spoon for easy eating. - Pair them with fresh fruit for extra flavor. These simple touches make your jars look stunning and taste even better! Yes! If you want a change, consider these options: - Use crushed Oreos for a chocolatey twist. - Try crushed almonds or walnuts for a nutty flavor. - Consider using a cookie like shortbread for a rich taste. - Gluten-free options, like almond flour, work great too. Feel free to mix and match until you find your favorite! The cheesecake needs time to chill. Here’s what you need to know: - Chill the jars for at least 4 hours. - Overnight works best for full flavor and texture. - Warmer kitchens may need longer chilling times. This wait allows the layers to meld and the cheesecake to firm up. Enjoy the patience; it's worth it! This blog post guides you on making no-bake caramel cheesecake jars. You learned about key ingredients and how to blend them. The step-by-step instructions help you create a tasty crust and filling. I shared tips to avoid common mistakes, suggested fun variations, and explained storage. No-bake desserts are easy, fun, and rewarding. You can impress friends with your delicious treat. Enjoy making these jars and get creative with your flavors!

No-Bake Caramel Cheesecake Jars

Indulge in the sweetest treat with these irresistible No-Bake Caramel Cheesecake Jars! This easy recipe combines a buttery graham cracker crust with a creamy caramel cheesecake filling, all topped with a drizzle of rich caramel and a hint of sea salt. Perfect for any occasion, this dessert is sure to impress. Click through to discover the step-by-step instructions and enjoy a delicious dessert that requires no baking!

Ingredients
  

1 cup crushed graham crackers

4 tablespoons unsalted butter, melted

16 oz cream cheese, softened

1/2 cup powdered sugar

1 teaspoon vanilla extract

1 cup heavy whipping cream

1/2 cup caramel sauce (plus extra for drizzling)

Sea salt for garnish (optional)

Instructions
 

Begin by preparing the crust. In a medium bowl, combine the crushed graham crackers and melted butter until the mixture resembles wet sand.

    Spoon about 2 tablespoons of the graham cracker mixture into the bottom of each jar, pressing down gently to form an even layer. Set aside.

      In a separate large bowl, beat the softened cream cheese until smooth using an electric mixer.

        Gradually add in the powdered sugar and vanilla extract, continuing to blend until fully combined and creamy.

          In another bowl, whip the heavy cream until stiff peaks form.

            Gently fold the whipped cream into the cream cheese mixture, being careful not to deflate the whipped cream.

              Add in the caramel sauce and fold until just combined, creating a marbled effect.

                Layer the cheesecake mixture into the jars on top of the graham cracker crust, filling each jar about halfway.

                  Drizzle a small amount of caramel sauce over the cheesecake layer, then add another layer of the remaining graham cracker mixture.

                    Top off each jar with the remaining cheesecake mixture and smooth the tops with a spatula.

                      Cover the jars with lids or plastic wrap and refrigerate for at least 4 hours or overnight to allow flavors to meld.

                        Before serving, drizzle additional caramel sauce on top and sprinkle with a pinch of sea salt for a touch of savory contrast.

                          Prep Time: 20 minutes | Total Time: 4 hours | Servings: 6 jars