Are you ready to savor something truly special? These Mushroom Thyme Hand Pies promise a burst of flavor in every bite! With a flaky crust and a rich, savory filling, they are perfect for lunch, dinner, or a tasty snack. Join me as we dive into a step-by-step guide to creating these delightful treats. You won’t want to miss out on this delicious adventure!
Ingredients
List of Main Ingredients
– 2 cups all-purpose flour
– 1/2 teaspoon salt
– 1/2 cup unsalted butter, cold and cubed
– 6-8 tablespoons ice water
Filling Ingredients
– 2 cups finely chopped mushrooms (shiitake and cremini mix)
– 1 small onion, finely diced
– 2 cloves garlic, minced
– 1 teaspoon fresh thyme leaves (or 1/2 teaspoon dried thyme)
– 1 tablespoon olive oil
– 1/2 cup cream cheese, softened
– Salt and pepper to taste
Egg Wash
– 1 egg, beaten
Having the right ingredients is key to great hand pies. I love using a mix of shiitake and cremini mushrooms for the filling. This combo gives a rich, deep flavor. Fresh thyme is my go-to herb for that earthy touch. Don’t skip the cream cheese; it makes the filling creamy and smooth.
Make sure your butter is cold. Cold butter helps create a flaky crust. Use ice water to keep the dough cool and workable. The egg wash gives the hand pies a lovely golden color when baked. This mix of flavors and textures makes each bite delicious.
Step-by-Step Instructions
Preparing the Dough
To start, I combine 2 cups of all-purpose flour with 1/2 teaspoon of salt in a large bowl. Next, I add 1/2 cup of cold, cubed unsalted butter. Using my fingers or a pastry cutter, I blend the butter until it looks like coarse crumbs. Then, I gradually add 6-8 tablespoons of ice water, one tablespoon at a time. I mix until the dough comes together. After that, I divide the dough into two discs, wrap them in plastic wrap, and place them in the fridge for at least 30 minutes.
Cooking the Filling
For the filling, I heat 1 tablespoon of olive oil in a skillet over medium heat. I add a finely diced small onion and sauté it until it’s translucent, which takes about 4-5 minutes. I then add 2 minced cloves of garlic and cook for another minute until I smell that wonderful aroma. After that, I toss in 2 cups of finely chopped mushrooms and 1 teaspoon of fresh thyme. I cook this mixture until the mushrooms release their moisture and it evaporates, which takes about 8-10 minutes. I season it with salt and pepper, then remove it from the heat. Once slightly cooled, I mix in 1/2 cup of softened cream cheese until it’s smooth.
Assembling the Hand Pies
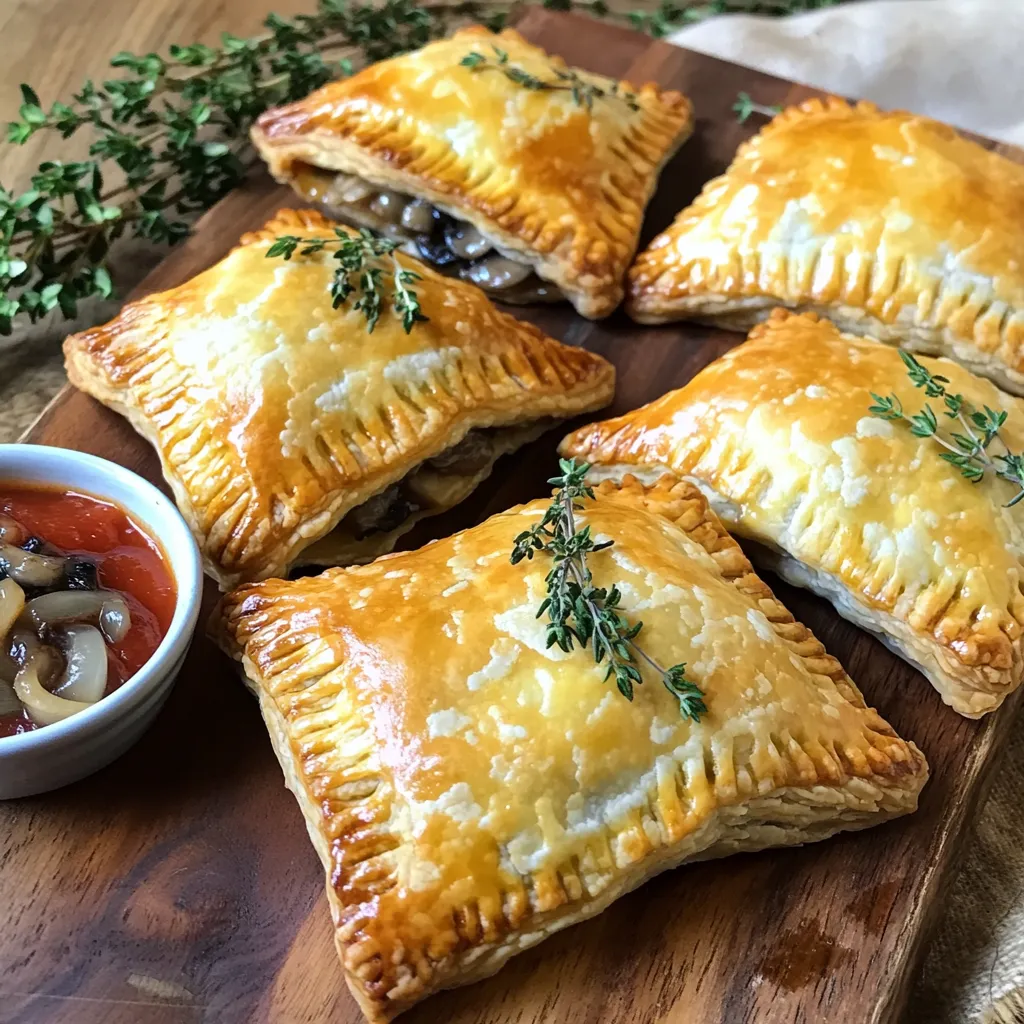
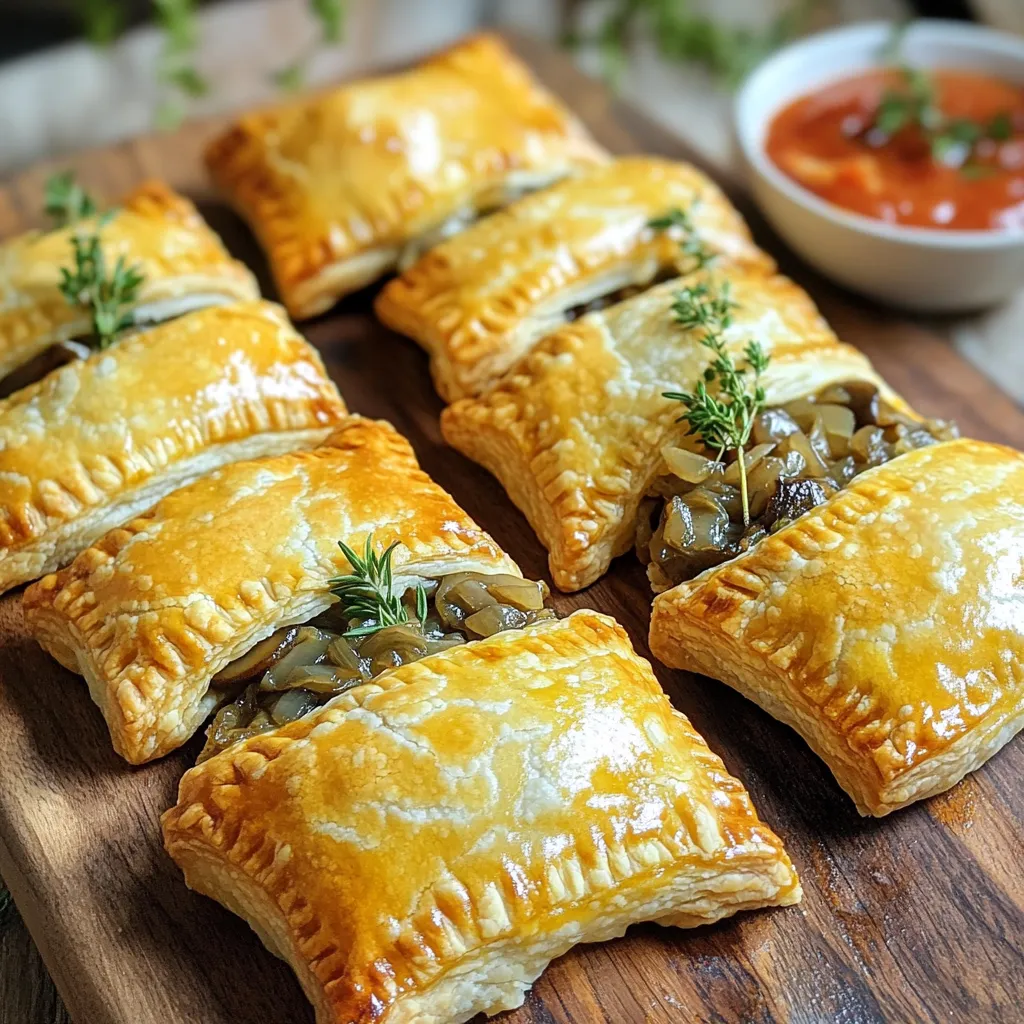
I preheat the oven to 375°F (190°C). On a floured surface, I roll out one disc of the dough to about 1/8 inch thick. Using a biscuit cutter or small bowl, I cut out circles that are about 4-5 inches in diameter. For each circle, I spoon about 1 tablespoon of the mushroom filling into the center. I then fold the dough over to make a half-moon shape and crimp the edges with a fork to seal them. I repeat this process with the rest of the dough and filling.
Baking Procedure
Next, I place the hand pies on a lined baking sheet. I brush the tops with a beaten egg for a nice golden finish. To let steam escape, I make a small slit on top of each pie. I then bake them in the preheated oven for 25-30 minutes, or until they turn golden brown.
Tips & Tricks
Dough Preparation Tips
Using cold ingredients is key. Cold butter helps the pie crust stay flaky. It keeps the fat from melting before baking. This results in a light, crispy crust. Always chill your butter before use.
When kneading, be gentle. Overworking the dough can make it tough. Mix until just combined. Roll it out evenly on a floured surface. Aim for 1/8 inch thick. This thickness ensures even cooking.
Filling Improvement Suggestions
Cheese can make your filling richer. Try adding sharp cheddar or creamy goat cheese. These cheeses enhance the taste and create a creamy texture.
You can also experiment with spices and herbs. Add a pinch of nutmeg for warmth. A dash of smoked paprika introduces depth. Fresh herbs like parsley or chives can brighten each bite.
Crimping and Sealing Techniques
Crimping is important. It keeps the filling from leaking out while baking. Use a fork to press the edges together. This creates a nice pattern and seals the pie.
For extra security, you could use egg wash on the edges. This helps them stick better. Always make slits on top for steam to escape. This prevents sogginess.
Variations
Vegetarian Options
You can make these hand pies without mushrooms. Try using other veggies like spinach or zucchini. Just chop them finely. You can also create a cheese-only filling. Use cream cheese with herbs for a tasty twist.
Meat Additions
For a hearty option, add cooked sausage or chicken to the filling. This will give your hand pies a new flavor profile. Try adding spices like paprika or herbs like rosemary for depth. Cook the meat first to ensure it is safe to eat.
Gluten-Free Alternatives
If you need a gluten-free option, swap all-purpose flour with gluten-free flour. It works well, but you may need to add more ice water. This will help the dough hold together better.
Storage Info
Refrigeration Guidelines
To store leftovers properly, let your hand pies cool. Place them in an airtight container. This keeps them fresh. Use a container that seals tightly to avoid air. You can keep them in the fridge for up to three days.
Freezing Instructions
For freezing uncooked hand pies, prepare them as usual but do not bake. Place the filled hand pies on a baking sheet. Freeze them in a single layer for about two hours. Once frozen, transfer them to a freezer bag. Label the bag with the date. Uncooked hand pies can last up to three months in the freezer.
To thaw and reheat frozen hand pies, remove them from the freezer. Let them thaw in the refrigerator overnight. You can bake them directly from the freezer, but add 5-10 minutes to the baking time.
Reheating Recommendations
For the best texture, use an oven to reheat hand pies. Preheat the oven to 350°F (175°C). Place the pies on a baking sheet and heat for about 10-15 minutes. This keeps the crust crispy.
If you use a microwave, the crust may become soggy. If you must, heat them in short bursts. Use a paper towel to soak up excess moisture. This will help maintain some crispiness.
FAQs
How do I make the dough less sticky?
To make dough less sticky, adjust the flour amount. Start with two cups of flour. If the dough feels wet, add more flour, one tablespoon at a time. Mix well after each addition. Cold butter is key. It helps keep the dough firm. Use chilled tools for mixing, too. If your hands get sticky, lightly flour them. This keeps the dough manageable while you work.
Can I use dried thyme instead of fresh?
Yes, you can use dried thyme. However, fresh thyme has a brighter flavor. You need less dried thyme. Use half the amount of dried thyme. So, use 1/2 teaspoon instead of 1 teaspoon. Dried herbs are often more potent. If you prefer fresh flavors, stick with fresh thyme. Both options will still taste good, but the fresh thyme shines in this dish.
How can I make these hand pies ahead of time?
You can make hand pies ahead easily. Prepare the dough and filling first. Chill the dough in the fridge for up to two days. Store the filling in a sealed container. Assemble the pies when you are ready to bake. You can also freeze the unbaked pies. Wrap them well in plastic wrap. Bake them straight from the freezer, adding a few extra minutes.
What dipping sauces pair well with mushroom thyme hand pies?
Mushroom thyme hand pies taste great with many sauces. Marinara sauce adds a nice tomato flavor. Garlic aioli gives a creamy and rich touch. You could also try a balsamic reduction for a sweet and tangy kick. For a spicy twist, serve with sriracha or a spicy mayo. Each sauce will enhance the mushroom flavor in a unique way.
You now have all the tools to make delicious handheld pies. We covered the main ingredients, step-by-step instructions, and helpful tips. Don’t forget the fun variations you can try! Whether you want to mix in meat or keep it vegetarian, these pies can fit your taste. Store leftovers for later or freeze them for convenience. Enjoy experimenting and sharing your tasty creations. With practice, you’ll master these hand pies and impress everyone. Happy cooking!