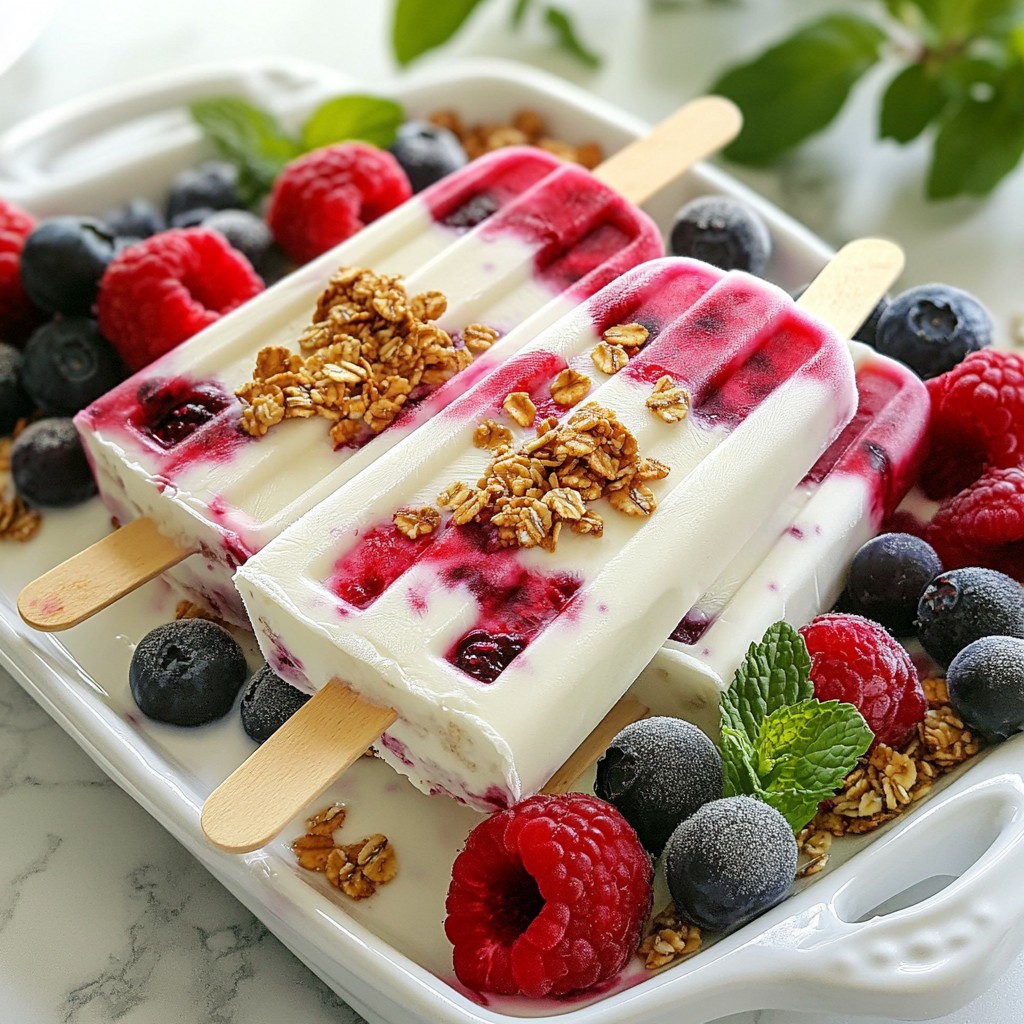
Looking for a cool and healthy summer treat? Greek Yogurt Parfait Popsicles are the answer! They are easy to make and taste fantastic. With creamy yogurt, sweet berries, and fun add-ins like granola, these popsicles will delight your taste buds. In this guide, I'll share all the steps and tips to create this refreshing snack. Let’s dive into the delicious world of Greek Yogurt Parfait Popsicles!
Why I Love This Recipe
- Healthy Treat: This recipe is a guilt-free dessert option, packed with protein from Greek yogurt and antioxidants from berries.
- Customizable Flavors: You can easily switch up the berries or add your favorite fruits to create a unique parfait every time.
- Fun for Kids: Making popsicles is a fun activity for kids, and they will love the colorful layers and crunch from the granola.
- Perfect for Summer: These popsicles are a refreshing treat on hot days, making them an ideal summer snack.
Ingredients
Main Ingredients Overview
- Greek Yogurt: Use 2 cups of plain or vanilla Greek yogurt. This thick yogurt gives a creamy texture and rich taste.
- Mixed Berries: Use 1 cup of mixed berries. You can choose strawberries, blueberries, or raspberries. They add sweetness and vibrant color.
- Sweetener Options: You need ½ cup of honey or maple syrup. Adjust the amount to fit your taste preference.
Optional Add-ins
- Vanilla Extract: Add 1 teaspoon for extra flavor. It enhances the taste of the yogurt.
- Granola: Use ½ cup of granola. It adds a nice crunch to your popsicles.
Garnish Suggestions
- Fresh Mint Leaves: Use fresh mint for garnish. It adds a lovely touch and fresh aroma when you serve the popsicles.

Step-by-Step Instructions
Preparing the Berry Layer
- Blending Mixed Berries
Start by adding your mixed berries into a blender. You can use strawberries, blueberries, and raspberries. Blend until smooth. If you like some berry chunks, blend less. This adds texture to your popsicles.
- Adjusting Sweetness
Taste the berry blend. If it needs sweetness, add honey or maple syrup. Blend again briefly to mix. Remember, you can always add more, but you can't take it out.
Making the Yogurt Mixture
- Combining Ingredients
In a bowl, combine Greek yogurt, honey or maple syrup, and vanilla extract. Stir until everything is well mixed. This makes your yogurt creamy and delicious.
- Achieving Desired Creaminess
Make sure there are no lumps in the yogurt mixture. It should be smooth and thick. If it feels too thick, you can add a little milk to loosen it up.
Layering Popsicles
- Layering Yogurt Mixture
Start with your popsicle molds. Fill the bottom with the yogurt mixture. Aim for about one-third of the mold. This creates a nice base.
- Adding Berry Mixture
Next, spoon the berry mixture on top of the yogurt layer. Fill another third of the mold. This bright layer adds flavor and color.
- Incorporating Granola
Sprinkle granola on top of the berry layer. This adds a fun crunch. It's a great surprise in every bite.
Freezing Process
- Inserting Popsicle Sticks
After layering, place popsicle sticks into the center of each mold. Make sure they go deep enough to hold the popsicle together.
- Freezing Time Recommendations
Freeze your popsicles for at least 4 to 6 hours. This ensures they are completely solid. Overnight is even better if you can wait!
- Unmolding Techniques
To remove the popsicles, run warm water over the outside of the mold. Hold it for a few seconds. Gently pull the popsicles out once they are loose. Enjoy your refreshing treat!
Tips & Tricks
Customization Options
- Using Different Fruits
You can mix it up with fruits. Try bananas, mangoes, or peaches. Each fruit brings a unique taste. You can blend them as you did with berries.
- Alternative Sweeteners
If you want less sugar, use agave syrup or stevia. Adjust the amount based on your taste. Honey or maple syrup works well too.
Serving Suggestions
- Garnishing with Mint and Berries
Serve your popsicles on a tray. Add fresh mint leaves and extra berries for color. It makes your dessert look stunning.
- Creative Serving Ideas
Try serving popsicles in fun cups. You can also cut them into smaller pieces. This works well for parties or kids.
Troubleshooting Common Issues
- Difficulty in Unmolding
If your popsicles stick, run warm water over the mold. This helps loosen them. Be gentle when pulling them out to avoid breaking.
- Adjusting Flavor Balance
If your popsicles are too tart, add more sweetener. Taste your mixtures before freezing. This way, you can adjust to your liking.
Pro Tips
- Choose Your Yogurt Wisely: Opt for a thick Greek yogurt for creaminess, or go with flavored varieties for an extra hint of sweetness.
- Perfect the Berry Layer: Blend the berries until smooth for a creamy texture, or leave some chunks for added bite and visual appeal.
- Granola Alternatives: Experiment with different types of granola or other crunchy toppings like nuts or seeds for variety in texture.
- Easy Unmolding: If you struggle to remove the popsicles, run warm water over the outside of the mold to loosen them up.
Variations
Flavor Combinations
You can mix flavors for fun popsicles.
- Tropical Fruit Popsicles: Use mango, pineapple, and coconut yogurt. Blend these fruits together. This gives a sunny, beachy taste.
- Chocolate Yogurt Variation: Mix cocoa powder into the yogurt. This creates a rich and sweet treat. It’s a hit for chocolate lovers.
Dietary Adaptations
You can make these popsicles fit your diet.
- Dairy-Free Options: Use coconut yogurt instead of Greek yogurt. It’s creamy and tasty. You can add almond milk for a lighter texture.
- Sugar-Free Alternatives: Use ripe bananas or unsweetened applesauce as sweeteners. They keep popsicles sweet without added sugar.
Seasonal Variations
Seasonal fruits make great popsicles.
- Summer Berry Popsicles: Use fresh strawberries, blueberries, and raspberries. They burst with flavor and are perfect for hot days.
- Autumn Spiced Fruit Popsicles: Add cinnamon and nutmeg to pear or apple puree. This brings cozy fall vibes to your popsicles.
Feel free to explore these ideas. Each variation adds a unique twist to your Greek yogurt parfait popsicles. Enjoy the refreshing flavors!
Storage Info
Freezing Storage Tips
For the best popsicle storage, follow these tips:
- Use Airtight Containers: Keep your popsicles in airtight containers. This helps avoid freezer burn.
- Label and Date: Always label your containers. Write the date so you remember when you made them.
- Keep Them Flat: Freeze the popsicles on a flat surface. This ensures they freeze evenly.
Shelf Life
How long do they last?
Greek yogurt parfait popsicles can last up to two months in the freezer. If stored well, they will taste fresh.
What are signs of spoilage?
Check for ice crystals or an odd smell. If you see these signs, it’s best to throw them away.
Reusing Popsicle Molds
How do I clean and maintain molds?
After use, wash your molds with warm, soapy water. Rinse well and air dry. This keeps them clean for next time.
What are alternative uses for molds?
You can use popsicle molds for frozen smoothies or yogurt bites. Get creative!
FAQs
Can I use store-bought yogurt instead of Greek yogurt?
Yes, but Greek yogurt gives a thicker texture. Regular yogurt is more liquid. You might need to adjust the sweetener since regular yogurt can taste more tart. Greek yogurt adds creaminess and protein, making the popsicles more filling.
How can I make these popsicles vegan?
To make these popsicles vegan, use plant-based yogurt. Almond, coconut, or soy yogurt works well. Replace honey with maple syrup for sweetness. This keeps the flavor great and the popsicles dairy-free.
What can I use instead of granola?
You can use crushed nuts or seeds instead of granola. Chia seeds also add a nice crunch. For a sweeter option, try crushed cookies or cereal. These add texture and flavor to your popsicles.
How can I make the popsicles more colorful?
Use a variety of colorful fruits. Try mango, kiwi, or peaches for bright layers. You can blend fruits separately for distinct colors. Layering different fruit mixtures will make your popsicles look fun and vibrant.
Are these popsicles suitable for kids?
Absolutely! These popsicles are healthy and fun. The yogurt provides protein, and the fruit adds vitamins. Kids will love the sweet taste and colorful layers. Plus, they can help make them, making it a fun activity!
You now have a complete guide to making tasty yogurt berry popsicles. We covered key ingredients, simple steps, and fun tips for custom flavors. Remember, you can mix fruits, adjust sweetness, and even add granola for crunch. Enjoy experimenting with different yogurt types and sweeteners. These popsicles are not just good; they’re a healthy treat for everyone. Give these recipes a try, and watch your popsicles become a favorite. Enjoy your homemade treats all season long!