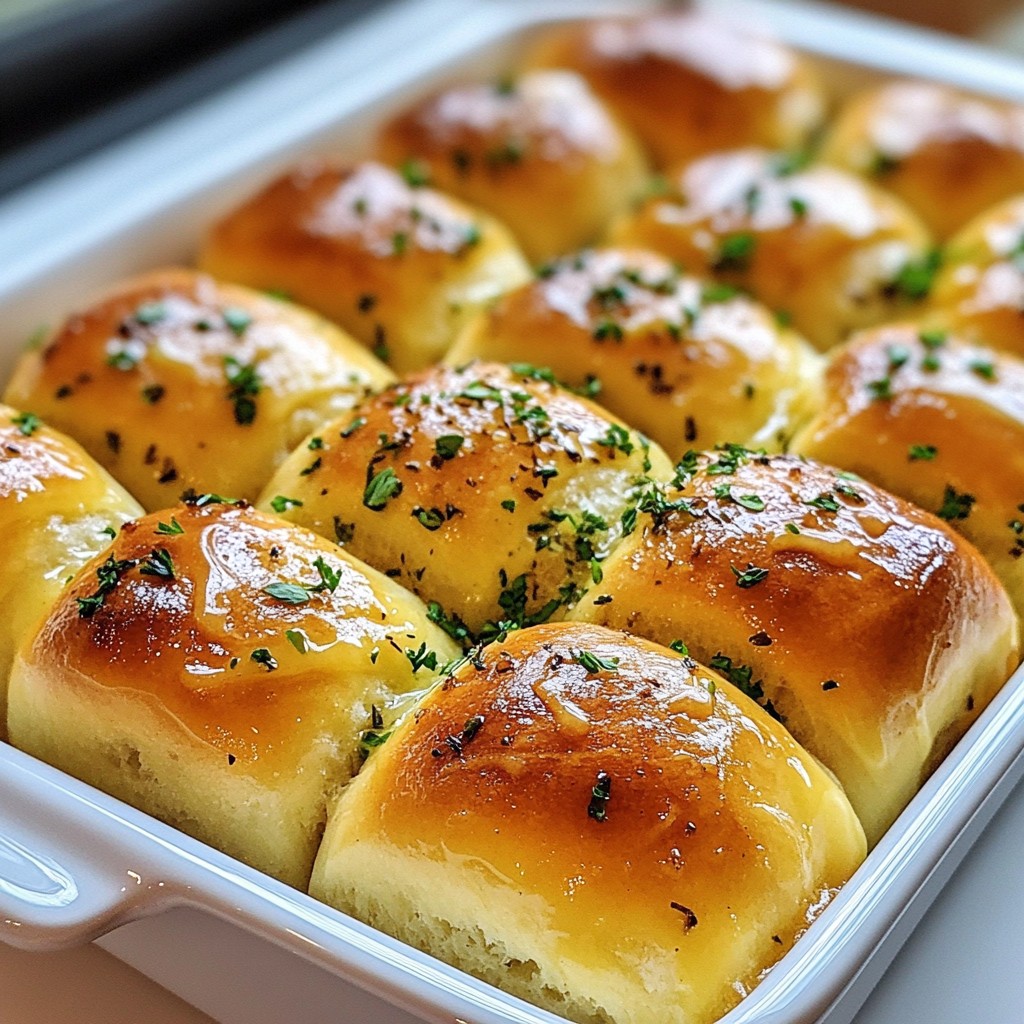
Are you ready to make the fluffiest, most delicious Garlic Herb Dinner Rolls? These rolls are packed with flavor and perfect for any meal. I’ll guide you through each step, from choosing the right herbs to tips on dough rising. Trust me, once you make these rolls, they will become a dinner staple. Let’s dive in and get those tasty rolls baking!
Why I Love This Recipe
- Delicious Flavor: The combination of garlic and fresh herbs creates a mouthwatering aroma and taste that elevates these rolls to a whole new level.
- Easy to Make: This recipe involves simple ingredients and straightforward steps, making it accessible for both novice and experienced bakers.
- Perfect for Any Meal: These dinner rolls complement a variety of dishes, from hearty casseroles to light salads, making them a versatile addition to any table.
- Warm and Comforting: There’s nothing quite like pulling a batch of warm, homemade rolls out of the oven—perfect for family gatherings or cozy dinners.
Ingredients
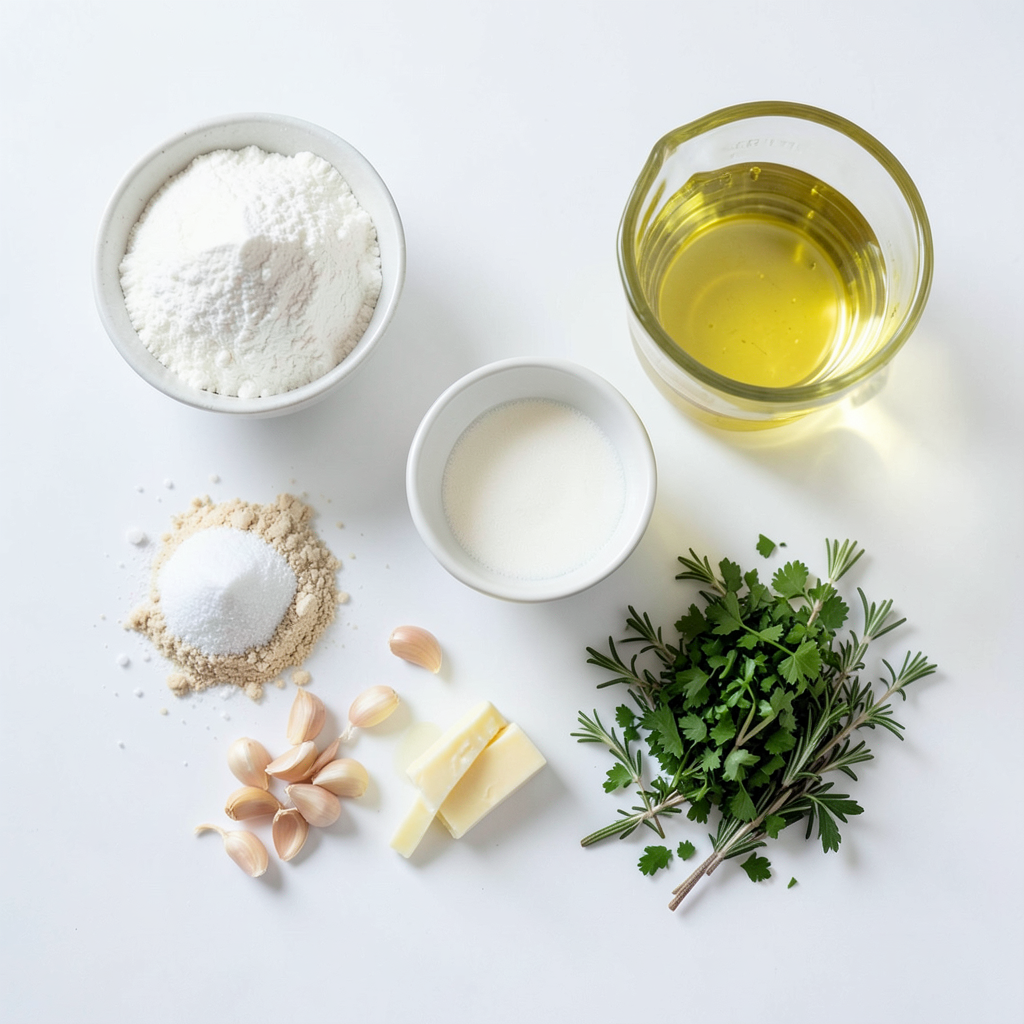
List of Ingredients
- 3 cups all-purpose flour
- 1 packet (2 1/4 teaspoons) instant yeast
- 1 teaspoon sugar
- 1 teaspoon salt
- 1 cup warm water (110°F)
- 3 tablespoons olive oil
- 3 cloves garlic, minced
- 1 tablespoon fresh parsley, chopped
- 1 teaspoon fresh rosemary, chopped
- 1 teaspoon fresh thyme, chopped
- 2 tablespoons unsalted butter, melted (for brushing)
Ingredient Descriptions and Substitutions
All-purpose flour gives the rolls their light and fluffy texture. You can swap it with bread flour for a chewier roll. Instant yeast makes the dough rise quickly. If you have active dry yeast, use one packet but mix it with warm water first. The sugar feeds the yeast, making it happy and bubbly. Opt for coconut sugar or honey if you want a different flavor. Salt enhances the taste and controls yeast growth.
Warm water activates the yeast, so check the temperature with a thermometer. Olive oil adds richness and flavor. You can replace it with melted butter or another oil, like avocado oil. Fresh garlic makes these rolls fragrant and tasty. Feel free to use garlic powder if fresh is not available. Fresh herbs bring bright flavors; if you don't have them, dried herbs will work too.
Fresh Herbs vs. Dried Herbs
Fresh herbs offer a vibrant taste and lovely aroma. They can brighten the rolls and make them special. If you use fresh herbs, you will need more. A general rule is to use three times the amount of dried herbs as fresh. For example, if a recipe calls for 1 tablespoon of fresh herbs, use 1 teaspoon of dried.
Dried herbs are handy since they last longer and are easy to measure. However, the flavor can be less intense. Whenever possible, choose fresh for the best taste. Use dried herbs when fresh is hard to find or out of season. Both options can lead to delicious garlic herb dinner rolls!
Step-by-Step Instructions
Preparation of the Dough
Start by mixing warm water, sugar, and instant yeast in a large bowl. Let this sit for five minutes until it gets frothy. This step wakes up the yeast and helps the rolls rise. Next, add olive oil and salt to the mixture. Then, stir in half of the flour. Mix until it combines well. Gradually add the rest of the flour while mixing. Your goal is a smooth and elastic dough. This should take about five to seven minutes.
Techniques for Kneading the Dough
Kneading is key for soft rolls. You can knead by hand or use a stand mixer with a dough hook. If you knead by hand, push the dough down and fold it over. Repeat this for five to seven minutes. The dough should feel smooth and springy. Do not rush this step; it builds the structure of the rolls. Add minced garlic and your fresh herbs to the dough. Knead again until all flavors mix in well.
Tips for the Rising Process
After kneading, place the dough in a lightly greased bowl. Cover it with a clean towel. Let it rise in a warm spot for about one hour. The dough should double in size. If your kitchen is cool, it may take longer. Once it rises, punch it down gently. Divide the dough into twelve equal pieces. Shape each piece into a ball and place them in a greased baking dish. Leave space between each roll. Let them rise again for about thirty minutes before baking. This second rise helps the rolls become fluffy.
Tips & Tricks
Perfecting the Texture of the Rolls
To make your rolls fluffy, start with warm water. The right warmth helps the yeast grow. Use a kitchen thermometer to check the water. Aim for 110°F. Mix your dough until it feels soft and elastic. Kneading is key. Do this for about 5 to 7 minutes. You can use your hands or a mixer. The dough should spring back when poked.
Achieving the Best Garlic Flavor
For that strong garlic taste, use fresh garlic. Mince three cloves finely. Mix them into the dough with the herbs. This way, the garlic spreads its flavor throughout the rolls. If you want a milder taste, roast the garlic first. Roasting makes the garlic sweet and soft. Either way, do not skip the garlic!
Adjusting Baking Time for Different Ovens
Every oven is different. Some run hot, while others cool down. Start checking your rolls at 20 minutes. Look for a golden-brown color on top. If they are not ready, give them a few more minutes. Keep an eye on them so they do not burn. Use the toothpick test to check. Insert a toothpick in the center. If it comes out clean, your rolls are done!
Pro Tips
- Use Fresh Herbs: Fresh herbs provide a vibrant flavor that dried herbs can't match. If possible, opt for fresh garlic, parsley, rosemary, and thyme for the best results.
- Check Dough Temperature: Ensure your water is at the right temperature (around 110°F) to activate the yeast without killing it. A thermometer can help you get it just right.
- Knead Properly: Kneading the dough for 5-7 minutes ensures gluten development, which is essential for fluffy rolls. The dough should be smooth and elastic when ready.
- Brush with Butter: Brushing the rolls with melted butter before baking gives them a rich flavor and a beautifully golden crust. Don’t skip this step!
Variations
Adding Cheese or Other Herbs
You can add cheese to these rolls for extra flavor. Try mozzarella or cheddar for a gooey texture. Just mix in 1 cup of shredded cheese after adding the herbs. You can also use other herbs. Basil or dill can change the taste nicely. Experiment to find your favorite mix.
Different Flavor Profiles (e.g., Italian, Mediterranean)
To create Italian rolls, add dried oregano and a pinch of crushed red pepper. For a Mediterranean twist, mix in some olives or sun-dried tomatoes. These changes bring new flavors to the rolls. You can also swap olive oil for garlic-infused oil for added depth. Each variation can take your rolls on a delicious journey.
Gluten-Free Garlic Herb Dinner Rolls
You can make these rolls gluten-free. Use a gluten-free all-purpose flour blend. Make sure it contains xanthan gum for better texture. Follow the same steps in the recipe. The rolls may need a bit more water, so check the dough. They will still rise and taste great!
Storage Info
How to Store Leftover Rolls
To keep your garlic herb dinner rolls fresh, place them in an airtight container. This will help retain their softness. You can also wrap them in plastic wrap or foil. Store them at room temperature for up to three days. If you want to keep them longer, freezing is a great option.
Reheating Instructions
When you're ready to enjoy your leftover rolls, you can reheat them easily. Preheat your oven to 350°F (175°C). Place the rolls on a baking sheet. Cover them with aluminum foil to keep them moist. Heat for about 10 to 15 minutes. You can also use a microwave. Wrap a roll in a damp paper towel and heat for 15 to 20 seconds.
Freezing Garlic Herb Dinner Rolls
Freezing is an excellent way to save these rolls for later. Once the rolls cool completely, place them in a freezer-safe bag. Remove as much air as you can. They will stay good for about three months. To thaw, move them to the fridge overnight or let them sit at room temperature for a few hours. Enjoy them warm again, and they will taste almost fresh-baked!
FAQs
Can I use regular yeast instead of instant yeast?
Yes, you can use regular yeast. Just remember to activate it first. Mix it with warm water and sugar. Let it sit for about 5 to 10 minutes until it bubbles. After that, you can add it to your dough like instant yeast. This step takes extra time. Instant yeast works faster, so rolls will rise quicker.
What can I serve with garlic herb dinner rolls?
Garlic herb dinner rolls pair well with many dishes. Here are some ideas:
- Soups: Try them with creamy tomato or minestrone.
- Stews: They complement beef or vegetable stew nicely.
- Salads: Serve alongside a fresh green salad.
- Dips: Great with olive oil, balsamic vinegar, or hummus.
You can also use them to soak up sauce from your plate. They add flavor to any meal.
How can I tell when the rolls are done baking?
You can tell rolls are done by looking for a golden brown color. They should be firm to the touch but spring back when pressed. Another tip is to tap the bottom of a roll. If it sounds hollow, it’s ready. Baking usually takes 20-25 minutes at 375°F. Keep an eye on them, as ovens can vary. Enjoy those fluffy rolls fresh from the oven!
In this article, we covered key points about garlic herb dinner rolls. You learned about the essential ingredients, methods for mixing and kneading, and tips for baking. We explored fun variations and how to store leftover rolls for later. Remember, the right mix of fresh and dried herbs really boosts flavor. Finally, taste and texture come down to practice. Enjoy making these rolls with your preferred twists while impressing your friends and family!