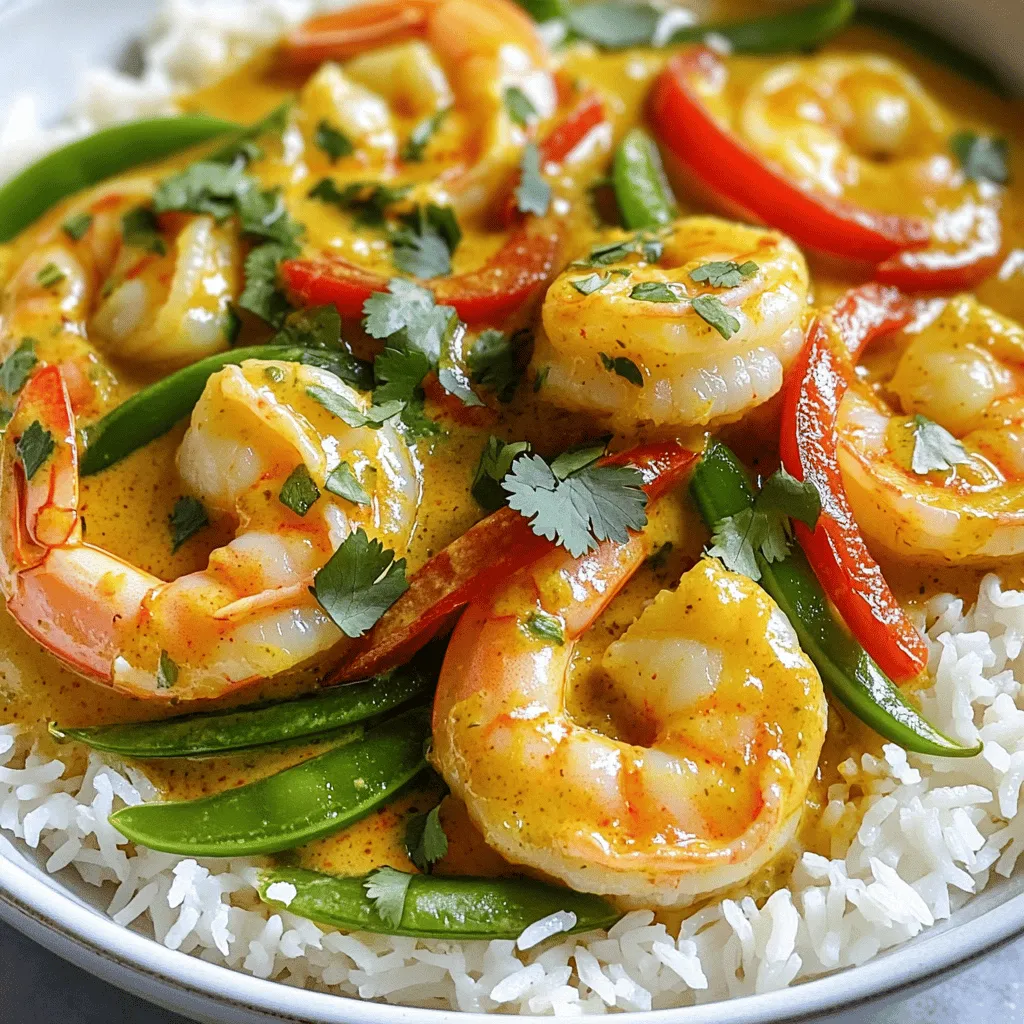
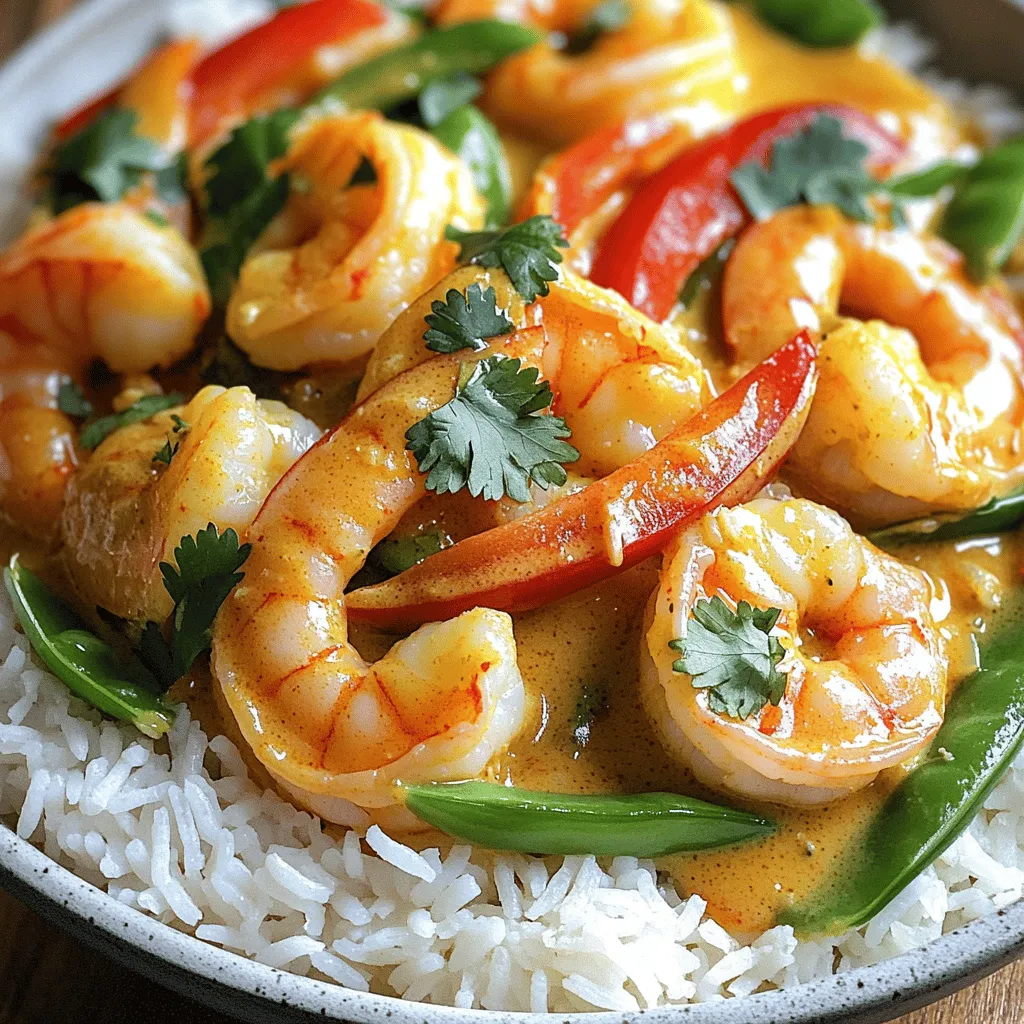
Are you ready to spice up your dinner routine with Creamy Thai Coconut Curry Shrimp? This dish is a rich blend of flavors that’ll impress your family and friends. With succulent shrimp, fresh veggies, and creamy coconut milk, it’s both easy to make and utterly delicious. Join me as I guide you through each step to create this flavorful delight that will have everyone coming back for more!
Ingredients
List of Ingredients
– 1 lb (450g) large shrimp, peeled and deveined
– 1 tablespoon coconut oil
– 1 small onion, finely chopped
– 3 cloves garlic, minced
– 1 tablespoon ginger, minced
– 2 tablespoons red curry paste
– 1 can (14 oz) coconut milk
– 1 cup vegetable broth
– 1 tablespoon fish sauce (or soy sauce for a vegetarian option)
– 1 tablespoon brown sugar
– 1 red bell pepper, thinly sliced
– 1 cup snap peas, trimmed
– 1 lime, juiced
– Fresh cilantro, chopped, for garnish
– Salt and pepper to taste
To make Creamy Thai Coconut Curry Shrimp, gather these simple yet vibrant ingredients. Each one plays a key role in creating a rich and flavorful dish.
You start with shrimp, which brings a sweet and tender bite. Coconut oil adds a hint of tropical flavor. The onion, garlic, and ginger provide a fragrant base. Red curry paste gives you that signature heat and depth.
The coconut milk gives the curry its creamy goodness. Vegetable broth helps to balance the flavors. Fish sauce or soy sauce brings umami, while brown sugar adds a touch of sweetness.
The red bell pepper and snap peas offer color and crunch. Lime juice brightens the dish, making it fresh and lively. Finally, cilantro adds a pop of color and flavor as a garnish.
With this list in hand, you are ready to create a delightful meal that will impress anyone at your table.
Step-by-Step Instructions
Preparing the Aromatics
– Sautéing onion in coconut oil: Start by heating 1 tablespoon of coconut oil in a large skillet. Use medium heat. Once the oil is hot, add 1 small finely chopped onion. Cook it for about 3-4 minutes. You want the onion to turn soft and clear.
– Adding garlic and ginger: Next, stir in 3 minced garlic cloves and 1 tablespoon of minced ginger. Cook for 1 more minute. You will smell a lovely aroma that fills your kitchen. This is the base of your curry.
Developing the Curry Base
– Combining red curry paste with aromatics: Now, add 2 tablespoons of red curry paste. Mix it well with the onion, garlic, and ginger. Let it cook for 1-2 minutes. This step builds the deep flavor of the curry.
– Mixing coconut milk and vegetable broth: Pour in 1 can of coconut milk and 1 cup of vegetable broth. Stir until the curry paste is fully dissolved. Bring the mixture to a gentle simmer. This creamy base is what makes the curry rich and delicious.
Cooking the Vegetables and Shrimp
– Adding bell pepper and snap peas: Add 1 thinly sliced red bell pepper and 1 cup of trimmed snap peas to the skillet. Cook for about 5 minutes. You want the veggies tender but still bright and crisp.
– Incorporating the shrimp into the curry: Gently add 1 pound of peeled and deveined shrimp. Cook them until they turn pink and opaque, which takes about 3-4 minutes. This is when the shrimp soak up all the flavors.
Enjoy the vibrant colors and the wonderful scents as you create this dish!
Tips & Tricks
Enhancing Flavor
Using fresh ingredients is key to great taste. Fresh shrimp, veggies, and herbs make a big difference. For the best flavor, pick shrimp that is firm and smells like the sea. Fresh ginger and garlic also boost taste.
Adjust spice levels to fit your taste. If you like it spicy, add more red curry paste. If you prefer less heat, start with a small amount. You can always add more later, but you can’t take it out!
Perfect Cooking Techniques
When sautéing, use medium heat. This helps the onion cook evenly without burning. Stir often to prevent sticking.
Timing is critical for cooking shrimp. They cook fast! Add them last. Cook until they turn pink and opaque, which takes about 3-4 minutes. Overcooked shrimp become rubbery, so watch them closely.
Serving Suggestions
Serve your curry with steamed rice or quinoa for a filling meal. Jasmine rice pairs well with the curry’s flavors, while quinoa adds extra protein.
Garnish with fresh cilantro and a squeeze of lime juice. This adds freshness and brightness. A well-garnished dish looks inviting and tastes even better!
Variations
Vegetarian/Vegan Options
You can easily make a vegetarian or vegan version of this dish. Start by substituting shrimp with tofu. Tofu soaks up flavors well. Use firm tofu for the best texture.
You can also add other veggies. Good choices include zucchini, carrots, or broccoli. These will add more color and nutrients.
Different Flavor Profiles
To change the flavor, add other spices or herbs. Fresh basil or lemongrass can bring a fresh taste. These herbs work well with coconut milk.
You can also try different curry pastes. Green or yellow curry paste gives unique flavors. Each type brings its own twist to the dish.
Customizing for Dietary Needs
If you need gluten-free options, use soy sauce labeled gluten-free. This simple swap does not change the taste much.
For low-carb variations, skip rice and serve with steamed veggies. You can also use cauliflower rice for a healthy base.
Storage Info
Storing Leftovers
To keep your creamy Thai coconut curry shrimp fresh, follow these steps:
– Refrigeration: Place the curry in an airtight container. This keeps it moist and tasty.
– Shelf Life: The curry lasts up to three days in the fridge. Make sure to check for any off smells before eating.
Freezing Tips
Freezing your curry is a great way to save it for later. Here’s how:
– Proper Freezing: Let the curry cool to room temperature. Then, transfer it to a freezer-safe container. Leave some space at the top, as it will expand.
– Thawing and Reheating: When you’re ready to enjoy it, thaw in the fridge overnight. Reheat gently on the stove, stirring until hot. You can add a splash of coconut milk if it seems thick.
Meal Prep Ideas
Meal prep can make cooking easier. Here are some ideas:
– Preparing Ingredients: Chop your veggies and shrimp in advance. Store them in separate containers. This saves time on busy days.
– Portioning for Quick Meals: Divide the curry into individual servings. This makes it easy to grab and go. You’ll have a delicious meal ready in no time!
FAQs
How long does it take to make Creamy Thai Coconut Curry Shrimp?
It takes about 15 minutes to prep and 15 minutes to cook. You’ll have a tasty meal ready in just 30 minutes. That’s quick for such a rich dish!
Can I use frozen shrimp for this recipe?
Yes, you can use frozen shrimp! Just make sure to thaw them first. This helps cook them evenly. Frozen shrimp are a good option if fresh ones are not available.
What can I substitute for coconut milk?
You can use almond milk or cashew cream as substitutes. They will change the flavor but can still work well. If you want a thicker sauce, use heavy cream. Keep in mind that this will alter the dish’s taste.
Is this dish spicy?
The spice level depends on how much red curry paste you use. For a milder dish, add less paste. You can always add more later if you like it spicier. Adjusting spice levels makes it perfect for your taste!
This blog post explored making a delicious Creamy Thai Coconut Curry Shrimp. We covered key ingredients, step-by-step instructions, and tips to elevate your dish. You learned variations for dietary needs and how to store leftovers.
Cooking can be fun and rewarding. With this recipe, you can impress friends and family. Enjoy exploring flavors while customizing it to your taste. Dive into this culinary adventure today!