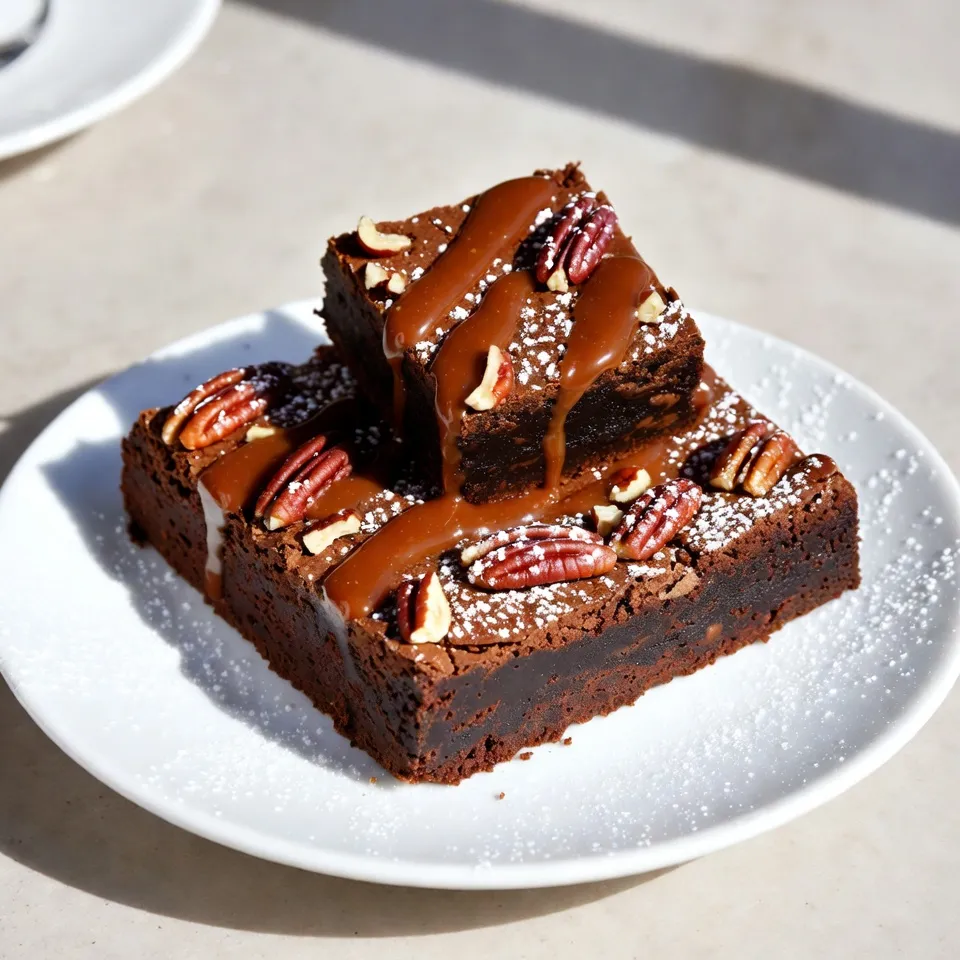
If you’re craving a rich, gooey treat, Chocolate Turtle Brownies are the answer! This easy recipe combines chocolate, caramel, and crunchy pecans for a dessert that’s hard to resist. I’ll guide you through simple steps and ingredient swaps, ensuring success every time. You’ll impress your family and friends without spending hours in the kitchen. Let’s dive into making these delightful brownies that are sure to satisfy your sweet tooth!
Why I Love This Recipe
- Decadent Flavor: These brownies combine rich chocolate and gooey caramel, creating a delightful treat for any chocolate lover.
- Easy to Make: With simple ingredients and straightforward steps, these brownies are perfect for bakers of all skill levels.
- Perfect for Sharing: Cut into squares, they are ideal for parties, gatherings, or just sharing with family and friends.
- Versatile Toppings: Customize them with extra toppings like sea salt or whipped cream for an even more indulgent dessert experience.
Ingredients
Essential Ingredients for Chocolate Turtle Brownies
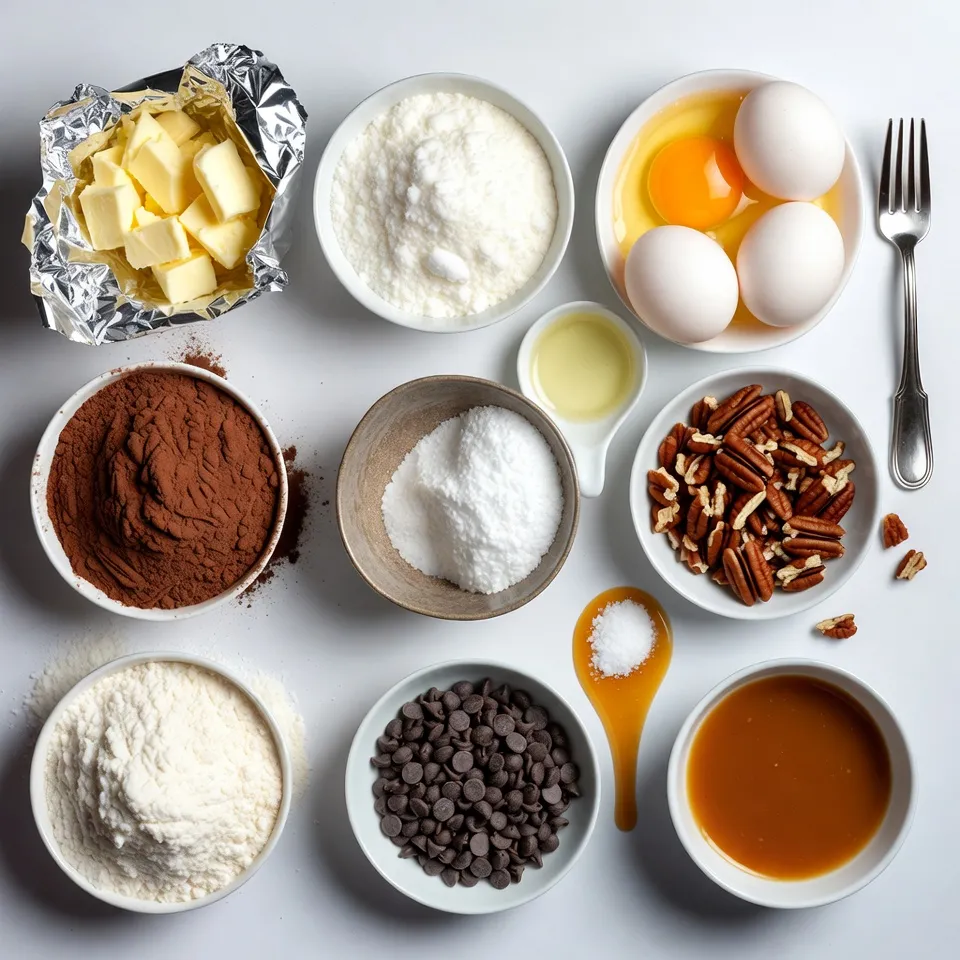
To make Chocolate Turtle Brownies, gather these must-have ingredients:
– 1 cup unsalted butter
– 2 cups granulated sugar
– 4 large eggs
– 1 teaspoon vanilla extract
– 1 cup all-purpose flour
– 1 cup cocoa powder
– 1/2 teaspoon baking powder
– 1/2 teaspoon salt
– 1 cup semi-sweet chocolate chips
– 1 cup pecans, chopped
– 1 cup caramel sauce
Each ingredient plays a key role in creating rich flavors and a perfect texture. The unsalted butter gives richness, while sugar adds sweetness. Eggs help bind everything together, giving the brownies a soft and chewy bite. Cocoa powder packs in that chocolatey goodness.
Optional Garnishes and Enhancements
You can elevate your brownies with these tasty garnishes:
– Powdered sugar for dusting
– Extra caramel sauce for drizzling
– Sea salt for a flavor boost
These extras bring a nice touch. The powdered sugar adds a sweet look, while sea salt enhances the chocolate and caramel flavors. Drizzling extra caramel on top makes it even more decadent.
Common Ingredient Substitutions
If you need to swap some ingredients, here are some easy options:
– Use coconut oil instead of butter for a dairy-free option.
– Replace granulated sugar with brown sugar for a richer taste.
– Choose almond flour instead of all-purpose flour for gluten-free brownies.
These changes keep the brownies delicious while meeting different dietary needs. Always test the texture and taste when making swaps. You might find a new favorite!
Step-by-Step Instructions
Preparing Your Baking Pan
Start by preheating your oven to 350°F (175°C). Next, grab a 9×13-inch baking pan. Grease the pan with butter or cooking spray. Line the bottom with parchment paper. Leave some paper hanging over the edges. This helps you lift out the brownies later.
Mixing Wet Ingredients
In a medium saucepan, melt 1 cup of unsalted butter over low heat. Once it’s melted, take it off the heat. Stir in 2 cups of granulated sugar until mixed well. Next, add 4 large eggs, one at a time. Mix well after each egg. Finally, stir in 1 teaspoon of vanilla extract for flavor.
Combining Dry Ingredients and Assembly
In a separate bowl, mix 1 cup of all-purpose flour, 1 cup of cocoa powder, 1/2 teaspoon of baking powder, and 1/2 teaspoon of salt. Whisk these dry ingredients together until they are well blended. Slowly add this mix to your wet ingredients. Stir until just combined; do not overmix. Now fold in 1 cup of semi-sweet chocolate chips and 1 cup of chopped pecans.
Baking Time and Testing for Doneness
Pour half of the brownie batter into the prepared pan. Spread it evenly. Drizzle half of the caramel sauce (1 cup) over the layer. Carefully add the remaining batter on top. Spread it evenly, then drizzle the rest of the caramel sauce over the top. Use a knife to swirl the caramel into the batter. Bake for 30-35 minutes. To check for doneness, insert a toothpick in the center. It should come out with a few moist crumbs. Once done, cool the brownies for 15 minutes in the pan. Lift them out with the parchment paper and transfer to a wire rack. Let them cool completely before cutting.
Tips & Tricks
Achieving the Perfect Brownie Texture
To get that soft and chewy brownie texture, don’t overmix the batter. Mix just until the dry ingredients blend in. This keeps the brownies tender. Also, bake them until a toothpick comes out with a few moist crumbs. Avoid waiting for a clean toothpick. That means they might be dry.
Swirling Caramel for Best Results
Swirling the caramel is fun and easy! Pour half of your batter into the pan first. Then drizzle half the caramel sauce on top. Use a knife or skewer to gently swirl. This creates a lovely marbled look. Repeat with the rest of the batter and caramel. Don’t overdo the swirling, or you’ll mix it too much.
Serving Suggestions for Chocolate Turtle Brownies
Cut the brownies into squares for nice portions. Dust them with powdered sugar for a pretty touch. Drizzle extra caramel sauce on top for added sweetness. A sprinkle of sea salt brings out the chocolate flavor. Serve these with a scoop of vanilla ice cream for a treat. Enjoy every bite!
Pro Tips
- Use Room Temperature Ingredients: Allow your eggs and butter to come to room temperature before mixing. This helps create a smoother batter and ensures even baking.
- Don’t Overmix: When combining the dry ingredients with the wet ingredients, mix until just combined. Overmixing can lead to dense brownies.
- Marble the Caramel: For a beautiful presentation, use a knife or skewer to create swirls with the caramel sauce. This not only looks great but adds caramel flavor in every bite.
- Let Them Cool: Allow the brownies to cool completely in the pan before cutting. This helps them set up and makes for cleaner cuts.
Variations
Gluten-Free Chocolate Turtle Brownies
You can make these brownies gluten-free easily. Just swap the all-purpose flour for a gluten-free blend. Look for a brand that works well in baking. This way, everyone can enjoy them! The taste remains rich and chocolatey, just like the classic recipe.
Vegan Chocolate Turtle Brownies
To make vegan chocolate turtle brownies, replace the eggs with flax eggs. Mix one tablespoon of ground flaxseed with three tablespoons of water for each egg. Let it sit for five minutes until it thickens. Use a plant-based butter instead of regular butter. You can also choose dairy-free chocolate chips and caramel sauce. These brownies will still be delicious and gooey!
Adding Flavor Variations
You can add fun flavors to your brownies. A sprinkle of sea salt on top adds a nice contrast to the sweet caramel. If you want a coffee kick, mix in a teaspoon of espresso powder. For a nutty twist, try adding chopped walnuts or almonds. Each variation makes your brownies unique and tasty!
Storage Info
Best Ways to Store Leftover Brownies
To keep your brownies fresh, store them in an airtight container. This helps keep them moist. You can place a piece of parchment paper between layers to avoid sticking. Store them at room temperature for up to four days. If you want to keep them longer, the fridge works too. Just remember, chilling may change the texture a bit.
How to Freeze Chocolate Turtle Brownies
Freezing brownies is easy and a great way to save some for later. First, let them cool completely. Then, cut them into squares. Wrap each square in plastic wrap. After that, place them in a freezer bag or container. Make sure to remove as much air as possible. These can last up to three months in the freezer. When you’re ready to enjoy them, just thaw at room temperature or in the fridge.
Reheating Tips for Maximum Freshness
To reheat frozen brownies, take them out and let them thaw first. You can warm them in the oven at 350°F (175°C) for about 10 minutes. This will help restore some of that gooey goodness. If you’re in a hurry, use the microwave for about 15-20 seconds. Just watch closely to avoid overheating. Adding a drizzle of warm caramel sauce on top makes them even better!
FAQs
What is the origin of Chocolate Turtle Brownies?
Chocolate Turtle Brownies blend two classic treats: brownies and turtle candies. Turtle candies come from the United States. They mix chocolate, caramel, and nuts. The exact start of turtle candies is unclear, but they gained fame in the 1920s. The rich flavors of turtles inspired many desserts, including these brownies. They offer a delicious twist on the original treat, making them loved by many.
Can I make these brownies ahead of time?
Yes, you can make these brownies ahead of time! They stay fresh for several days. Just cool them completely before covering them. Store them in an airtight container. For longer storage, freeze them. Wrap each brownie well in plastic wrap. Then, place them in a freezer bag. They can last up to three months in the freezer. This makes it easy for you to enjoy them later!
What are the best ways to serve Chocolate Turtle Brownies?
Serving Chocolate Turtle Brownies can be fun and creative. Here are my top tips:
– Cut them into squares for easy serving.
– Dust with powdered sugar for a nice touch.
– Drizzle extra caramel sauce on top.
– Sprinkle sea salt for added flavor.
– Serve them warm with a scoop of ice cream.
These serving ideas will take your brownies to the next level!
Can I use other nuts instead of pecans?
Absolutely! You can swap pecans for other nuts. Walnuts or almonds work well too. Just chop them into small pieces. The nuts add a nice crunch to the brownies. If you want a different flavor, try hazelnuts. Each nut will change the taste slightly, so choose your favorite. Enjoy making these brownies your own!
You now have all the details to make perfect Chocolate Turtle Brownies. From ingredients to steps, you can bake with confidence. Remember to choose your ingredients wisely and follow the simple steps for great results. Enjoy some fun variations, and don’t forget to store your leftovers correctly. Perfecting these brownies may take practice, but they’re worth it. Bake, share, and enjoy every bit