Craving a dessert that’s both simple and indulgent? Let me introduce you to my Chocolate Hazelnut Crepe Cake! This cake is a delightful mix of smooth hazelnut spread and light, airy crepes. With just a few easy steps, you can create a stunning treat that impresses and satisfies. Join me as I share all the tips and tricks you need for perfect layers and rich flavors. Your sweet tooth will thank you!
Why I Love This Recipe
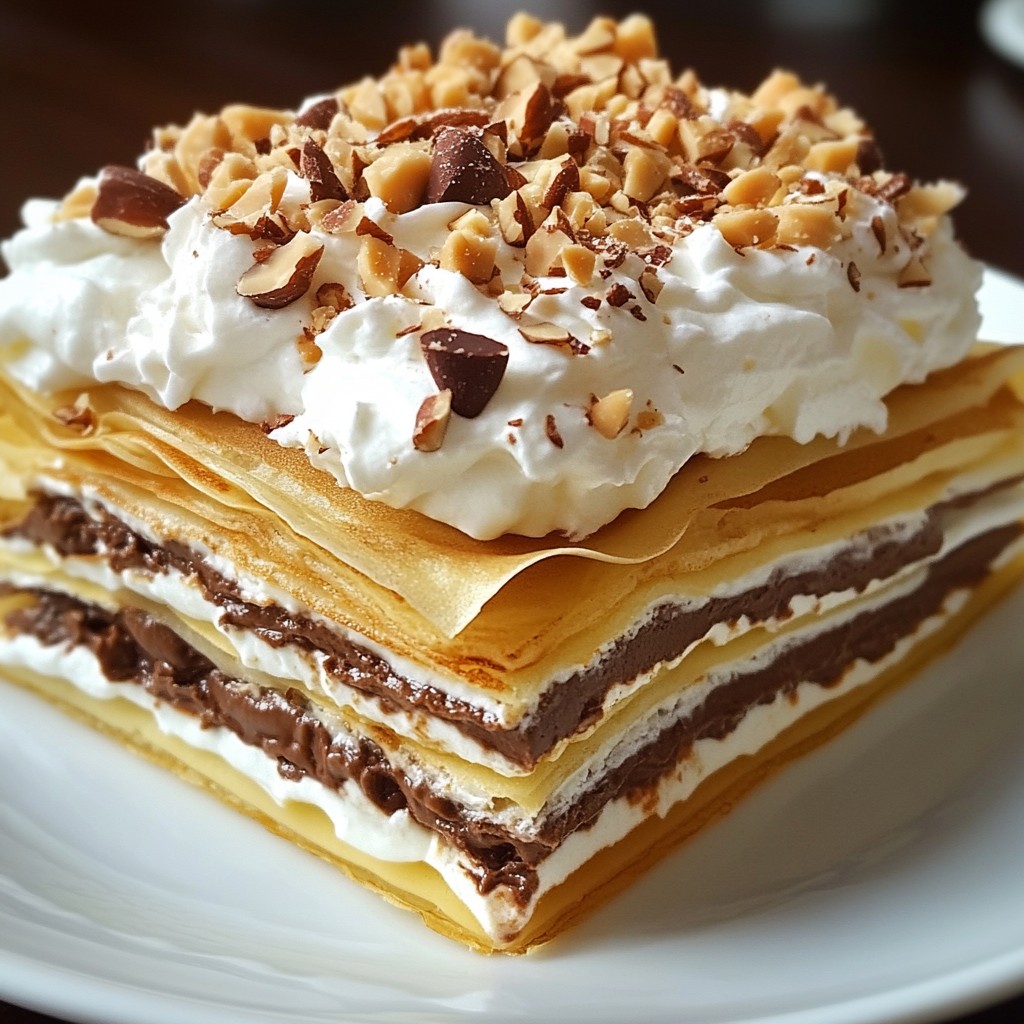
- Delicious Layers: This crepe cake features indulgent layers of chocolate hazelnut spread and whipped cream, creating a delightful taste experience.
- Beautiful Presentation: The stacked crepes look elegant and impressive, making it a perfect dessert for special occasions.
- Versatile Ingredients: You can easily customize the filling with different spreads or toppings, catering to different tastes.
- Make Ahead: This cake can be made in advance, allowing the flavors to meld, making it ideal for busy hosts.
Ingredients
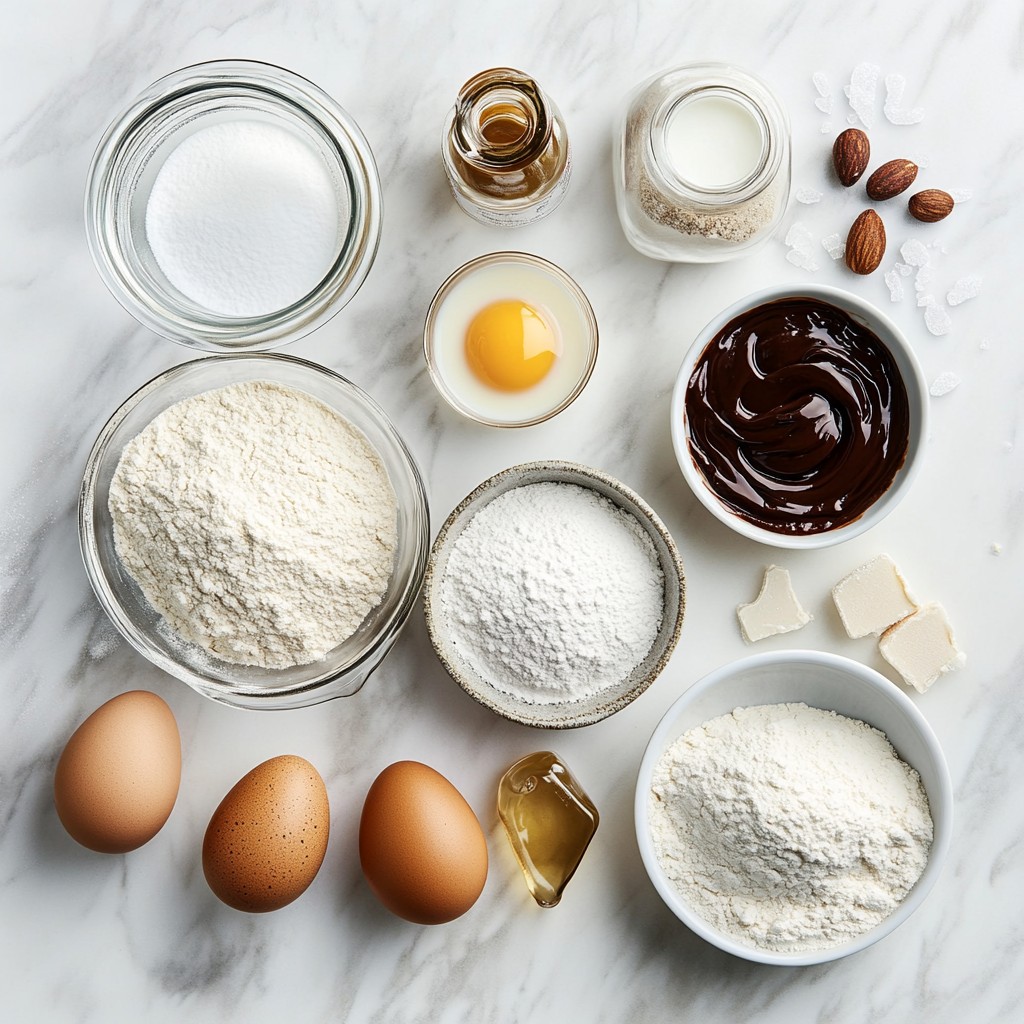
List of Ingredients
- 1 cup all-purpose flour
- 2 large eggs
- 2 1/2 cups milk
- 2 tablespoons melted butter
- 1 tablespoon sugar
- 1 teaspoon vanilla extract
- 1 cup chocolate hazelnut spread (like Nutella)
- 1/2 cup heavy cream
- 1/4 cup powdered sugar
- 1/4 cup crushed hazelnuts (for topping)
- A pinch of salt
Key Ingredients for Flavor
The main flavors come from the chocolate hazelnut spread. This spread gives the cake a rich, sweet taste. The crepes add a soft texture. They soak up the spread and cream well. Eggs and milk make the crepes light and fluffy. Vanilla adds a nice touch of warmth.
Optional Ingredients for Variations
You can add different flavors if you want. Consider adding a splash of coffee to the batter for a mocha taste. Fresh fruits like strawberries or bananas can add freshness. You can also use almond extract instead of vanilla for a nutty flavor.
Step-by-Step Instructions
How to Make the Crepe Batter
To start, gather your ingredients. In a large bowl, mix 1 cup of flour, 2 eggs, and 2 1/2 cups of milk. Add 2 tablespoons of melted butter, 1 tablespoon of sugar, and 1 teaspoon of vanilla extract. Don’t forget a pinch of salt! Whisk all ingredients until you have a smooth batter. This mix needs to rest for 30 minutes. Resting helps the crepes cook better.
Cooking the Crepes Perfectly
Now, let’s cook the crepes! Heat a non-stick skillet on medium heat. Lightly grease it with butter to prevent sticking. Pour about 1/4 cup of batter into the skillet. Quickly swirl it to cover the bottom evenly. Cook for about 1-2 minutes until the crepe turns golden brown. Flip the crepe and cook for another minute. Stack these crepes on a plate as you go. Repeat this until all the batter is used.
Preparing the Whipped Cream
Next, we’ll whip the cream. In a medium bowl, pour in 1/2 cup of heavy cream. Use an electric mixer to whip it until soft peaks form. Gradually add 1/4 cup of powdered sugar. Keep mixing until you see stiff peaks. This whipped cream will add a light and creamy layer to your cake. Now, you are ready to assemble your Chocolate Hazelnut Crepe Cake!
Assembling the Chocolate Hazelnut Crepe Cake
Layering Crepes and Fillings
Start with a crepe on your serving plate. Use a spatula to spread a thin layer of chocolate hazelnut spread on top. Make sure to cover the crepe well but leave a small edge. Next, add a thin layer of whipped cream on top of the spread. Repeat this step, stacking crepes and adding layers of chocolate hazelnut spread and whipped cream. Aim for about eight layers. This creates a tall, beautiful cake.
Tips for Even Layers
To keep your layers even, use a measuring cup to pour the crepe batter. Pour about 1/4 cup for each crepe. Use a spatula to spread the chocolate hazelnut spread and whipped cream evenly. This will help your cake look neat and tidy. If one layer is thicker, it can make the cake lean.
Final Touches Before Chilling
Once you finish layering, sprinkle crushed hazelnuts on the top of the cake. This adds a nice crunch and makes it look pretty. Cover the cake with plastic wrap to keep it fresh. Chill it in the fridge for at least two hours. This allows the flavors to blend and the cream to set. Your cake will be much tastier after chilling!
Pro Tips
- Rest Your Batter: Allowing the crepe batter to rest for 30 minutes helps the gluten relax, resulting in tender and delicate crepes.
- Keep the Crepes Warm: Stack the cooked crepes on a plate and cover them with a clean kitchen towel to keep them warm and moist until you’re ready to assemble.
- Whip Cream to Soft Peaks: For the best texture, whip the heavy cream until soft peaks form before adding the powdered sugar, ensuring a light and airy whipped cream.
- Chill Before Serving: Refrigerating the assembled cake for at least 2 hours allows the flavors to meld and the cream to set, enhancing the overall taste and texture.
Tips & Tricks
How to Achieve Perfect Crepes
To make perfect crepes, you need a good batter. Mix flour, eggs, milk, melted butter, sugar, vanilla, and salt. Whisk until smooth, then let it rest. Resting helps the flour absorb liquid. Use a non-stick skillet for easy cooking. Heat it over medium and add a little butter. Pour a bit of batter, then swirl to cover the bottom. Cook until golden brown, then flip. Each crepe should be thin and delicate.
Common Mistakes to Avoid
One mistake is using too much batter. Remember to pour just enough for a thin layer. Also, don’t skip resting the batter. If you do, crepes can become rubbery. Make sure your skillet is at the right temperature. If it’s too hot, your crepes will burn. If it’s not hot enough, they will stick. Lastly, be careful not to overfill your crepes when assembling. Too much filling can make them hard to slice.
Serving Suggestions for Best Presentation
For a stunning presentation, stack your crepes neatly. Use a large plate or cake stand. Start with a crepe, spread chocolate hazelnut, then add whipped cream. Repeat until high. Top with crushed hazelnuts for crunch. Drizzle extra chocolate hazelnut spread on top for style. Serve chilled or at room temperature. This cake looks beautiful and tastes amazing.
Variations
Chocolate Hazelnut Crepe Cake with Fruits
You can add fruit for a fresh twist. Berries like strawberries, raspberries, or blueberries pair well. Slice the fruits and layer them between the crepes. This adds color and a bright flavor. I love using bananas too; they blend perfectly with chocolate. You can even top the finished cake with extra fruit for a lovely look.
Nut-Free Version Options
If you need a nut-free option, use a different spread. Sunflower seed butter works great for this cake. It has a smooth texture and mild taste. You can also try using a chocolate spread made from soy or coconut. Just check the labels to ensure no nuts are in the product.
Gluten-Free Crepe Adaptations
To make gluten-free crepes, switch the flour. Use a gluten-free blend instead. Many brands offer good mixes for baking. You can also use almond flour for a nutty flavor. Just remember that gluten-free flour may give a different texture. Keep an eye on the batter and adjust as needed.
Storage Info & FAQs
How to Store Leftover Crepe Cake
To store leftover crepe cake, cover it with plastic wrap. This keeps the cake fresh. Place it in the fridge. It will stay good for about 3 days. If you have slices, store each one in an airtight container. This helps keep the layers nice and moist.
Can You Freeze Crepe Cake?
Yes, you can freeze crepe cake. Wrap it tightly in plastic wrap and then in foil. This helps prevent freezer burn. It can last for about 1 month in the freezer. When you're ready to eat it, thaw it in the fridge overnight. Let it sit at room temperature for about 30 minutes before serving.
FAQs: Common Questions About Chocolate Hazelnut Crepe Cake
How many servings does this recipe make? This recipe makes 8 servings.
Can I use another spread instead of chocolate hazelnut? Yes, you can use other spreads like almond or peanut butter.
Is this cake suitable for special diets? The cake contains gluten and dairy. For gluten-free, use a gluten-free flour. For dairy-free, use coconut cream and a dairy-free spread.
How long does it take to make? It takes about 3 hours total, including prep and chill time.
Can I make the crepes in advance? Absolutely! You can make crepes a day ahead. Store them layered with parchment paper to prevent sticking.
We covered how to make a delicious chocolate hazelnut crepe cake. You learned about the key ingredients and several optional ones for variety. I shared step-by-step instructions for the batter, cooking, and preparation of whipped cream. Next, we discussed layering and assembling the cake perfectly. Tips helped you avoid common mistakes and improve your presentation. Finally, variations let you change things up based on your needs. Now, you have all you need to impress friends and family with this tasty treat. Enjoy creating your own masterpiece!