Indulging in a Chocolate Dipped Cannoli Cone is an experience you don’t want to miss. Imagine a crispy cone filled with creamy ricotta and mascarpone, all wrapped in rich chocolate. This delightful treat combines classic Italian flavors with a sweet twist. Whether you're hosting a party or treating yourself, I’ll guide you through the simple steps to create these scrumptious desserts at home. Let’s dive in and satisfy that sweet tooth!
Why I Love This Recipe
- Decadent Flavor: The combination of ricotta and mascarpone creates a rich and creamy filling that pairs perfectly with the chocolate.
- Customizable Toppings: You can easily switch up the toppings with various nuts or sprinkles, making each cone unique.
- Quick and Easy: This recipe comes together in less than an hour, making it perfect for a last-minute dessert.
- Fun Presentation: Serving the cones upright adds a playful touch to your dessert table, impressing guests with their visual appeal.
Ingredients
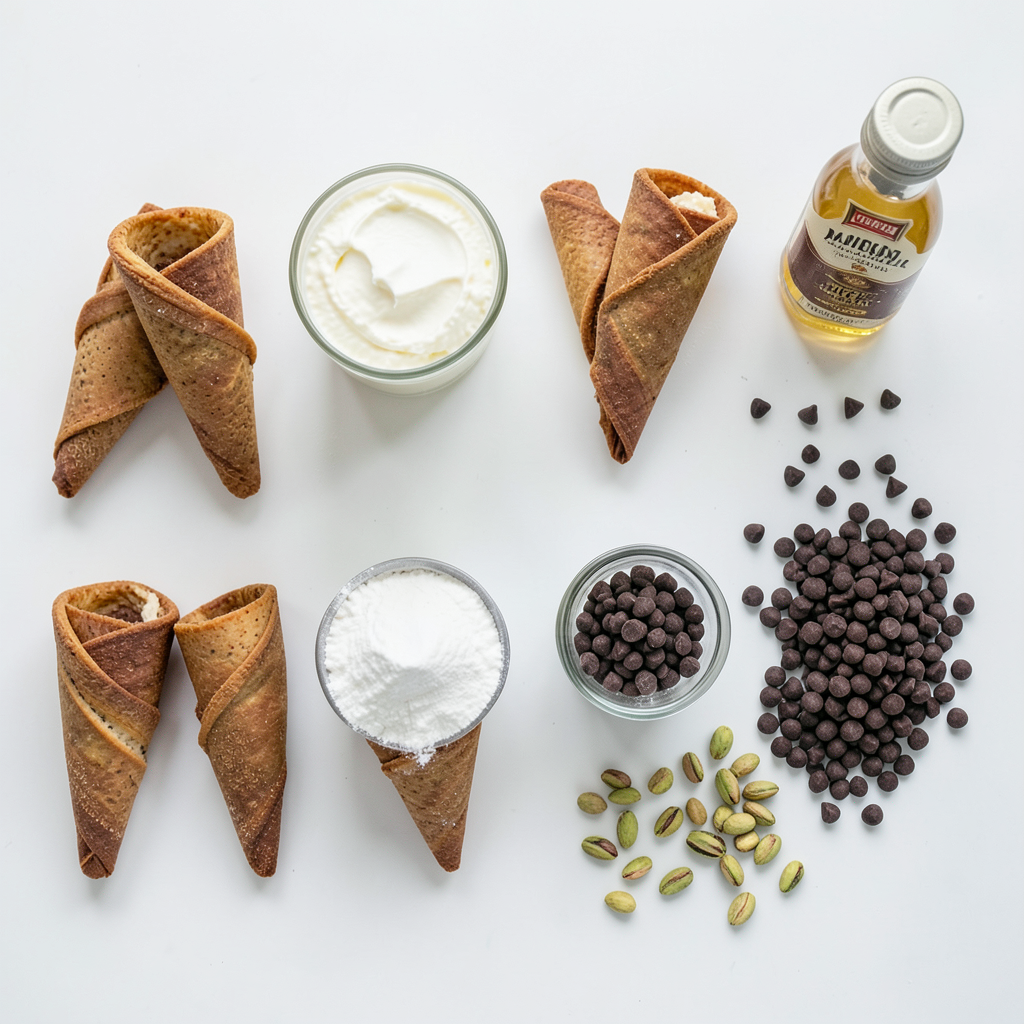
Required Ingredients for Chocolate Dipped Cannoli Cones
- 8 cannoli cones (store-bought or homemade)
- 1 cup ricotta cheese
- 1 cup mascarpone cheese
- 1/2 cup powdered sugar
- 1 teaspoon vanilla extract
- 1/2 cup mini chocolate chips
- 1 cup semi-sweet chocolate chips
- 1 tablespoon coconut oil (or vegetable shortening)
- Chopped pistachios or sprinkles for garnish (optional)
The key to making these chocolate dipped cannoli cones is using quality ingredients. Start with 8 cannoli cones. You can buy them or make your own. Next, use 1 cup each of ricotta and mascarpone cheese for a rich filling. Combine this with 1/2 cup of powdered sugar. This sweetens the mix just right. Add 1 teaspoon of vanilla extract for flavor.
To make it even better, fold in 1/2 cup of mini chocolate chips. These little bites add a fun texture.
For the dipping, use 1 cup of semi-sweet chocolate chips. Combine these with 1 tablespoon of coconut oil. The oil helps the chocolate melt smoothly. Lastly, let your creativity shine with garnishes. Use chopped pistachios or colorful sprinkles for that extra flair.
Step-by-Step Instructions
Preparation of Cannoli Filling
To start, grab a large mixing bowl. Add 1 cup of ricotta cheese, 1 cup of mascarpone cheese, 1/2 cup of powdered sugar, and 1 teaspoon of vanilla extract to the bowl. Mix everything together until it is smooth and creamy. You can use a hand mixer or a spatula for this. It’s fun to see the colors blend!
Next, gently fold in 1/2 cup of mini chocolate chips. This adds a delightful crunch and sweetness to the filling. Be careful not to over-mix; you want those chocolate chips to stay whole.
Filling the Cannoli Cones
Now it’s time to fill your cannoli cones. You can use a piping bag for this, which makes it easy. If you don’t have one, a small spoon works fine too. Make sure to fill each cone generously with the ricotta mixture. Press down slightly to pack the filling, but don’t overfill. This will keep them from spilling out.
Chocolate Dipping Process
For the chocolate dip, take a microwave-safe bowl and add 1 cup of semi-sweet chocolate chips and 1 tablespoon of coconut oil. Microwave this mixture in 30-second intervals. Stir in between until it is smooth and fully melted. This step is crucial for a nice, shiny finish on your cones.
Next, dip the top of each filled cannoli cone into the melted chocolate. Let the excess chocolate drip back into the bowl. It is important to do this quickly. After dipping, sprinkle chopped pistachios or colorful sprinkles on top of the chocolate before it hardens. This adds extra flavor and makes your cones look great.
To cool the cones, place them upright in a glass or a standing position. Let them sit for about 20 to 30 minutes. This will allow the chocolate to harden. When ready, serve them chilled for the best taste! Enjoy the fun of making these delightful treats.
Tips & Tricks
Achieving the Perfect Cannoli Texture
To get the best cannoli, chill your filling. This step keeps the filling thick and creamy. A cold filling also helps prevent the cones from getting soggy. Keep your cones crispy by filling them just before serving. If you fill them too early, they may lose that crunch.
Enhancing Flavor and Presentation
You can add fun toppings to your cones. Try chopped nuts, sprinkles, or even drizzles of caramel. Each adds a different flavor and look. For a beautiful display, serve the cones on a nice platter. You can drizzle extra melted chocolate over them. A light dusting of powdered sugar adds elegance too. These small touches make your treats more appealing.
Pro Tips
- Use Fresh Ingredients: Ensure your ricotta and mascarpone are fresh for the best flavor and texture in your filling.
- Chill Before Filling: Chill the cannoli cones for about 30 minutes prior to filling them to help keep them crisp.
- Don’t Overfill: Leave a little space at the top of the cone to prevent the filling from spilling out when dipped in chocolate.
- Experiment with Toppings: Try different toppings like crushed nuts or coconut flakes for added texture and flavor variety.
Variations
Flavor Variations for Filling
You can easily change the flavor of your filling for these cannoli cones. Adding citrus zest gives a bright taste. Try lemon or orange zest for a fresh kick. You can also use flavored extracts. Almond or hazelnut extracts work well. Each will change the taste and make it special.
Using different types of chocolate can also create a new twist. Dark chocolate chips add a rich flavor. White chocolate chips bring a sweet touch. You can mix and match to find your favorite combo.
Unique Garnish Options
For garnishing, pistachios are great, but you can swap them for other nuts. Chopped almonds or hazelnuts can add a different crunch. You can even use crushed cookies for a fun texture.
Holiday-themed sprinkles also make these cones pop. Red and green sprinkles are perfect for Christmas. Heart-shaped sprinkles are great for Valentine’s Day. Get creative with the toppings to match any occasion!
Storage Info
How to Store Leftover Cannoli Cones
To keep your cannoli cones fresh, store them in the fridge. Wrap each cone tightly in plastic wrap. This prevents them from getting soggy. Place them in an airtight container for extra protection. Your leftover cones can stay fresh for up to 2 days. After that, the filling may lose its creamy texture.
Preparing Ahead of Time
You can make the filling a day before serving. Mix the ricotta, mascarpone, powdered sugar, and vanilla extract. Store it in the fridge in a sealed container. This saves time when you’re ready to serve.
Assemble the cones just before serving. Fill them with the ricotta mixture right before you enjoy them. This keeps the cones crispy and the filling fresh.
FAQs
Can I make cannoli cones from scratch?
Yes, you can make cannoli cones from scratch. You will need flour, sugar, and eggs for the dough. Roll out the dough and cut it into triangles. Wrap the triangles around a cone-shaped mold and fry them until golden. Cool them before filling. This adds a personal touch to your dessert.
How do I prevent the filling from getting watery?
To keep your filling from getting watery, use a good quality ricotta. Drain it well before mixing. You can place the ricotta in a cheesecloth for 30 minutes to remove extra moisture. Mixing in mascarpone helps to create a thicker filling. Avoid adding too much liquid flavoring as well.
What can I use instead of ricotta cheese?
If you don’t have ricotta, you can use cream cheese. It gives a rich flavor and creamy texture. You can also try cottage cheese, but blend it well to make it smooth. For a dairy-free option, use tofu blended with a bit of vanilla and sugar.
You can make delicious chocolate-dipped cannoli cones by following simple steps. We covered the ingredients you need, like cannoli cones, cheese, chocolate, and garnishes. The filling process is easy with ricotta and mascarpone. You also learned how to dip the cones and keep them crispy. Remember to store leftovers correctly and try different flavors to make it unique. With practice, you can impress everyone with your sweet treat. Enjoy your cannoli cones!