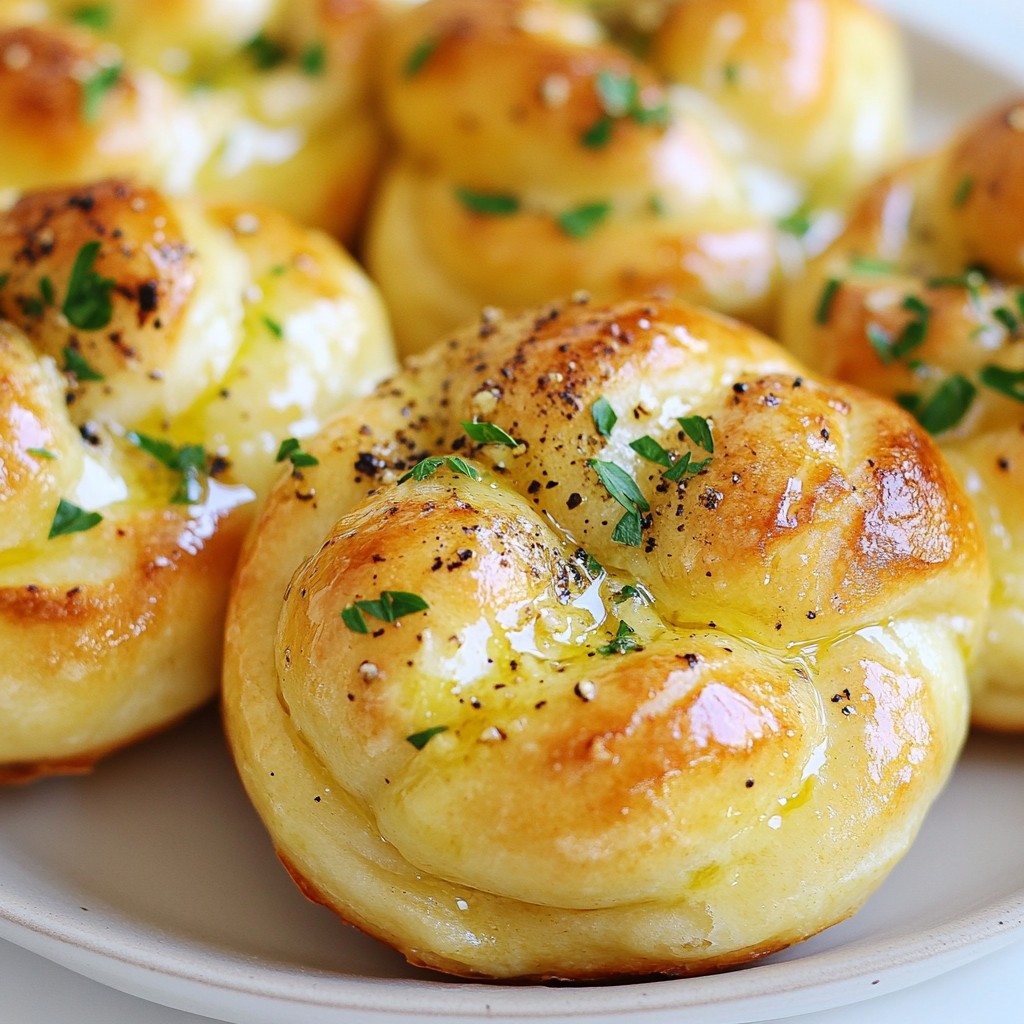
Looking for a delicious snack idea? These Buttery Garlic Knots are easy to make and full of flavor. With simple ingredients and step-by-step instructions, you’ll have a tasty treat in no time. Plus, I’ll share tips for perfecting the dough and ways to spice them up. Whether for a party or a movie night, these knots are sure to impress. Let’s get started!
Why I Love This Recipe
- Comforting Flavor: The buttery garlic flavor is incredibly comforting and perfect for any occasion.
- Easy to Make: With simple ingredients and straightforward steps, anyone can whip these up!
- Perfect for Sharing: These knots are great for gatherings, parties, or just enjoying with family.
- Customizable: You can easily add your favorite herbs or cheeses to make them even more delicious.
Ingredients
Essential Ingredients
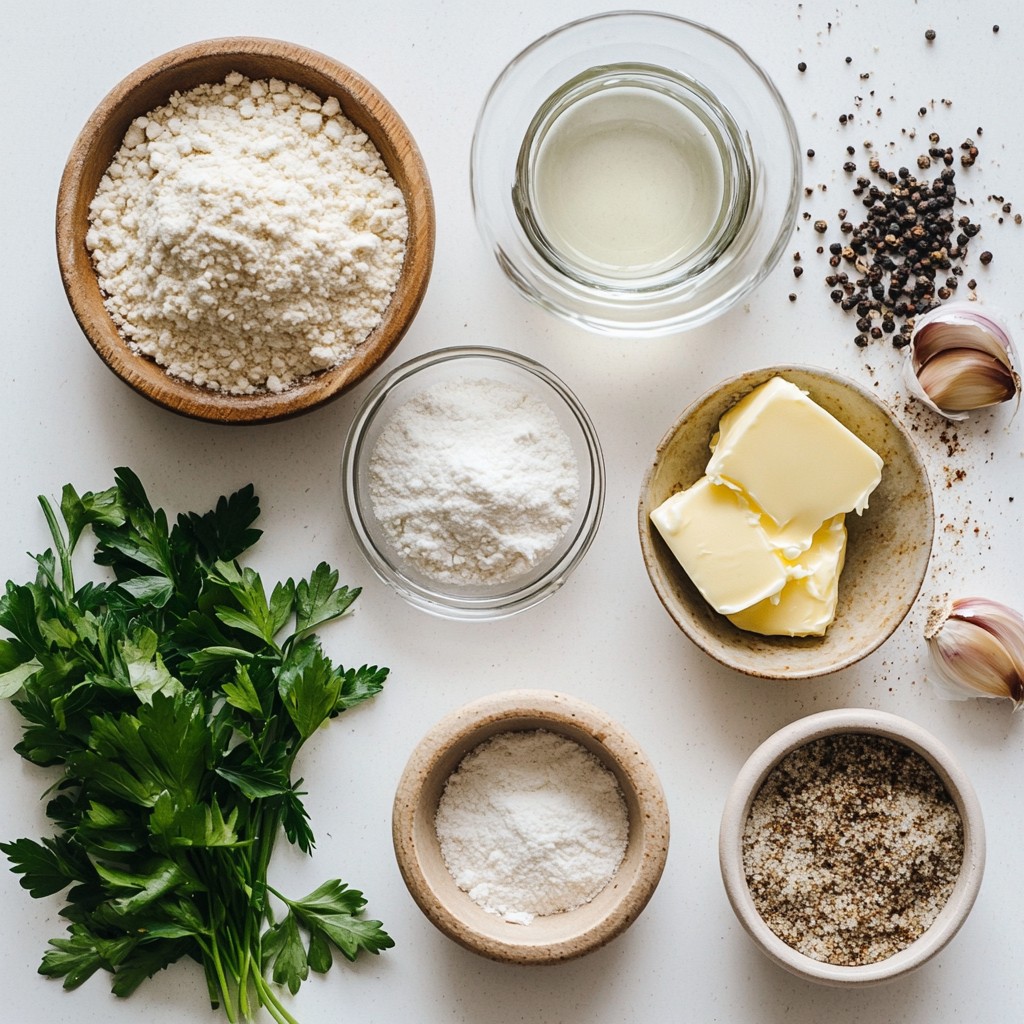
To make buttery garlic knots, you need a few key items:
- 1 packet (2 1/4 teaspoons) active dry yeast
- 1 teaspoon sugar
- 3/4 cup warm water (110°F/43°C)
- 2 1/2 cups all-purpose flour
- 1 teaspoon salt
- 1/4 cup unsalted butter, melted (plus more for brushing)
- 3 cloves garlic, minced
- 1 tablespoon fresh parsley, chopped
- 1/4 teaspoon black pepper
- 1/4 teaspoon garlic powder
These ingredients work together to create soft, flavorful knots that everyone loves.
Optional Ingredients for Extra Flavor
You can add more depth to your knots with these extras:
- Grated Parmesan cheese
- Italian seasoning
- Red pepper flakes
These ingredients can give your knots a unique twist. Try mixing them in with your garlic butter for a new taste.
Suggested Substitutions for Dietary Preferences
If you have dietary needs, consider these swaps:
- Use whole wheat flour for a healthier option.
- Substitute vegan butter for a dairy-free version.
- Swap out garlic for roasted garlic for a milder taste.
These substitutions help you enjoy buttery garlic knots while catering to your diet.
Step-by-Step Instructions
Preparing the Yeast Mixture
Start by getting a small bowl. In this bowl, mix warm water, sugar, and yeast. The water should be warm, about 110°F (43°C). Let this sit for about 5 minutes. You will see bubbles on top. This means the yeast is ready to use. It will help the dough rise.
Making the Dough
Next, grab a large bowl. In it, combine the flour and salt. Make a small well in the center. Pour the yeast mixture and melted butter into this well. Stir everything together until a dough forms. Now, take the dough out and knead it on a floured surface. Do this for about 5-7 minutes. You want it to feel smooth and elastic. After kneading, place the dough in a greased bowl. Cover it with a clean cloth and let it rise in a warm spot for about 1 hour. The dough should double in size.
Shaping the Garlic Knots
After the dough has risen, punch it down gently. Now, divide it into 12 equal pieces. Roll each piece into a long rope, about 6 inches long. Tie each rope into a knot. Place the knots on a greased baking sheet. Make sure there’s space between each knot.
Baking Instructions
Preheat your oven to 400°F (200°C). While it heats, mix melted butter, minced garlic, parsley, black pepper, and garlic powder in a small bowl. Brush this mixture generously over each garlic knot. Bake the knots in the preheated oven for 15-20 minutes. They should turn golden brown. Once they are out of the oven, brush them with more melted butter for extra flavor. Enjoy your warm, buttery garlic knots!
Tips & Tricks
How to Achieve Perfectly Fluffy Knots
To make fluffy knots, use warm water for the yeast. The water should feel like a warm bath. This helps the yeast activate well. Let it froth for about 5 minutes. If it doesn't foam, your yeast may be dead. Use fresh yeast for best results.
Best Practices for Kneading and Rising
Kneading is key for good texture. Knead the dough for 5-7 minutes. Your dough should feel smooth and elastic. If it's sticky, add a little flour. After kneading, let the dough rise in a warm spot. Cover it to keep it warm. Aim for about an hour of rising time. The dough should double in size.
Enhancing Flavor with Herbs and Seasoning
Herbs add great taste to your knots. Try fresh parsley, which I love! You can also mix in dried herbs like oregano or basil. For extra zing, add some red pepper flakes. Brush melted butter mixed with garlic on top. This gives each knot a rich, savory flavor.
Pro Tips
- Use Fresh Yeast: For best results, ensure your yeast is fresh and active. Check the expiration date on the packet to avoid flat knots.
- Kneading Technique: Knead the dough until it is smooth and elastic, which helps develop the gluten for a better texture in the final product.
- Perfectly Golden Brown: Keep an eye on the knots while baking. If they are browning too quickly, cover them with aluminum foil to prevent burning.
- Flavored Butter: Experiment with different herbs and spices in the butter mixture for added flavor. Try adding Italian seasoning or red pepper flakes for a kick!
Variations
Cheesy Garlic Knots Recipe
To make cheesy garlic knots, add some cheese inside each knot. Use mozzarella or cheddar for a nice melt. After tying the knots, tuck a small piece of cheese inside. Bake as usual for a gooey surprise in every bite. This adds a rich flavor and a fun twist to your buttery garlic knots.
Herb-Infused Garlic Knots
Herb-infused garlic knots bring fresh flavors to the table. Mix in chopped herbs like thyme or rosemary with the garlic butter. You can also sprinkle dried Italian herbs into the dough when mixing. This will give your knots a delightful aroma and taste that pairs well with many meals.
Gluten-Free Option
For a gluten-free version, swap the all-purpose flour with a gluten-free blend. Make sure it has xanthan gum for better texture. Follow the same steps as the original recipe. You may need to adjust the water amount for the right dough consistency. Enjoy delicious buttery garlic knots without the gluten!
Storage Info
Best Ways to Store Leftover Garlic Knots
Store your leftover garlic knots in an airtight container. This keeps them fresh. If you have a lot, wrap them in plastic wrap before placing them in the container. They can last up to three days at room temperature. If you want them to last longer, put them in the fridge. Just remember to seal them tight to avoid drying out.
Reheating Tips for Freshness
To keep your garlic knots soft and tasty, reheat them in the oven. Preheat your oven to 350°F (175°C). Place the knots on a baking sheet. Cover them with foil to trap moisture. Heat for about 10 minutes. If you want a crispy top, remove the foil for the last 2 minutes. You can also microwave them for about 15-20 seconds, but they may become chewy.
Freezing Instructions
To freeze garlic knots, first let them cool completely. Then, wrap each knot in plastic wrap. Place them in a freezer-safe bag. They can stay frozen for up to three months. When you are ready to eat, thaw them overnight in the fridge. Reheat in the oven as mentioned above for the best taste.
FAQs
Can I make buttery garlic knots ahead of time?
Yes, you can make buttery garlic knots ahead of time. After you shape the knots, you can cover them and place them in the fridge. They will stay fresh for up to 24 hours. When ready to bake, let them sit at room temperature for about 30 minutes. Then, brush with garlic butter and bake as normal.
What can I serve with garlic knots?
Garlic knots pair well with many dishes. Here are some tasty options:
- Marinara sauce for dipping
- Caesar salad for a fresh crunch
- Spaghetti or pasta for a hearty meal
- Soup, like tomato or minestrone, for a warm side
These pairings will enhance your meal and make it more enjoyable.
How do I know when my garlic knots are done baking?
Your garlic knots are done when they turn golden brown. This usually takes about 15 to 20 minutes in the oven. You can also check by tapping the bottom. If it sounds hollow, they are ready. Don’t forget to brush them with more melted butter when they come out for extra flavor.
Is it possible to use instant yeast instead of active dry yeast?
Yes, you can use instant yeast instead of active dry yeast. Instant yeast does not need to be mixed with warm water first. Just mix it directly with your flour and salt. This can save you a step and still give you delicious, fluffy garlic knots.
In this post, we covered all you need to make tasty garlic knots. You learned about key and optional ingredients, plus great swaps for special diets. I detailed clear steps for mixing, shaping, and baking the dough. With my tips, you can master perfect knots every time. Explore fun variations and smart storage methods to keep them fresh. Garlic knots are simple to make and great for sharing or enjoying alone. Dive into creating these yummy treats today. You won’t be disappointed!