Bakery-Style Maple Walnut Scones Quick and Easy Recipe

WANT TO SAVE THIS RECIPE?

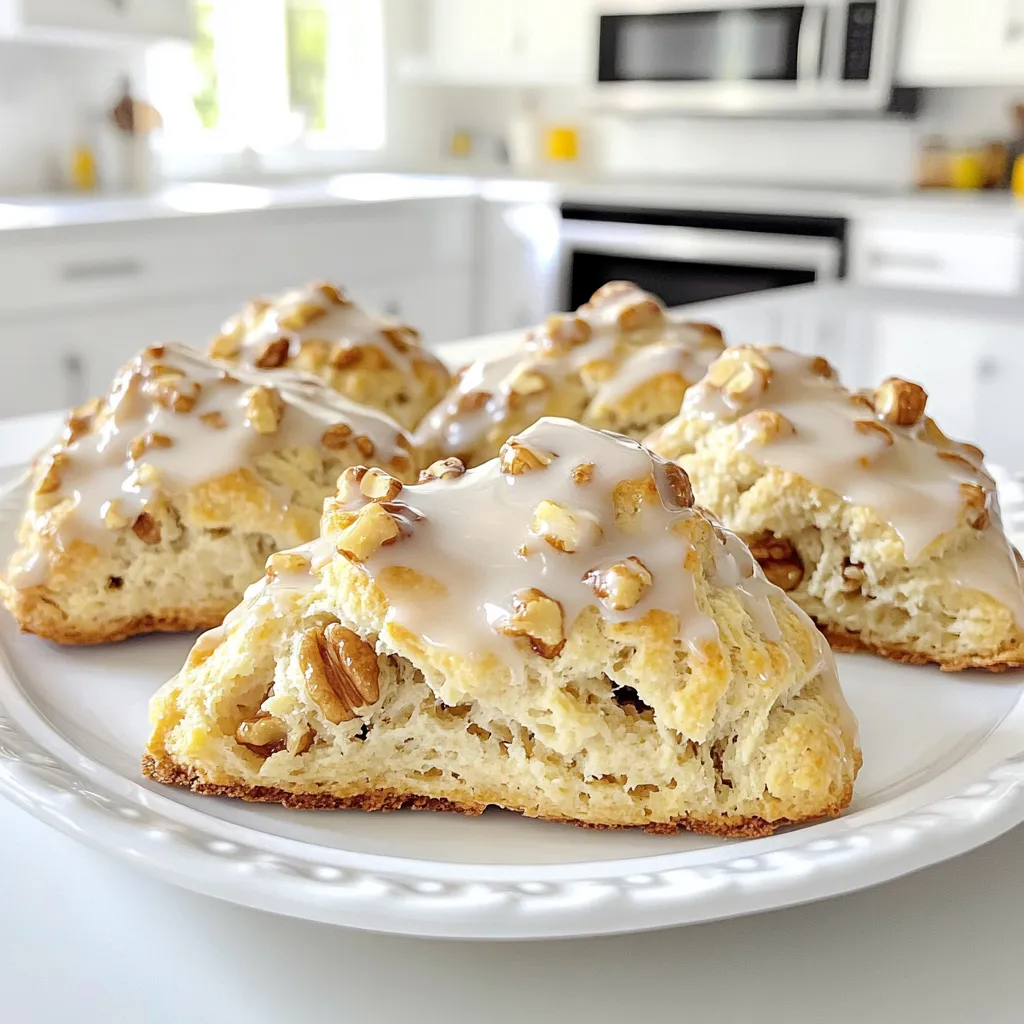
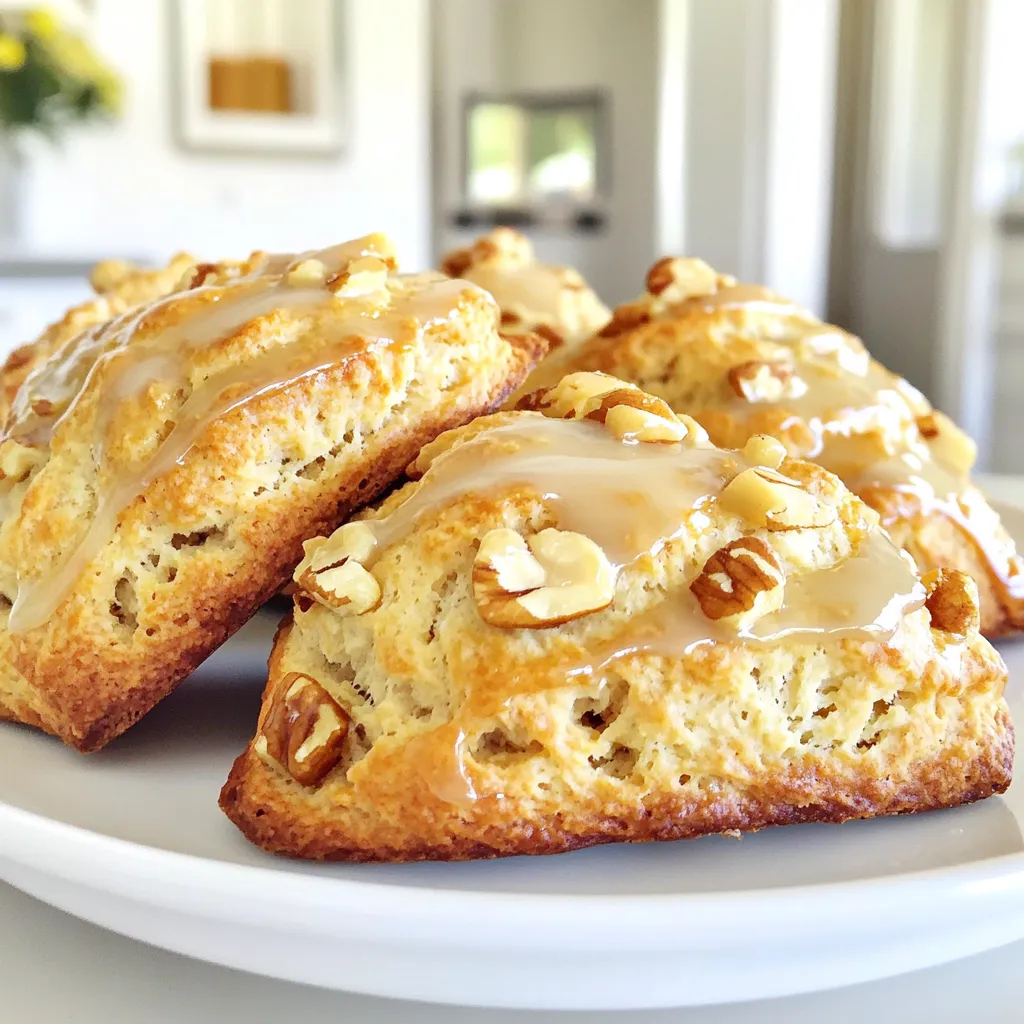
Are you ready to bake delicious bakery-style maple walnut scones at home? This quick and easy recipe brings warm, sweet goodness right to your kitchen. With simple ingredients and step-by-step instructions, you’ll impress everyone with your baking skills. Plus, I’ll share tips to avoid common mistakes and ideas for tasty variations. Let’s dive in and make scones that rival your favorite bakery treats!

- 2 cups all-purpose flour - 1/4 cup granulated sugar - 1 tablespoon baking powder - 1/2 teaspoon salt - 1/2 cup cold unsalted butter, cubed - 1/4 cup chopped walnuts, toasted - 1/2 cup heavy cream (plus extra for brushing) - 1/4 cup pure maple syrup - 1 teaspoon vanilla extract - 1/2 teaspoon maple extract (optional) - 1/4 cup powdered sugar (for glaze) - 1 tablespoon milk (for glaze) Using high-quality ingredients makes a big difference in your scones. Fresh flour gives texture and taste. Choose real maple syrup for a rich flavor. Good butter adds a lovely, flaky quality. Toasted walnuts bring a nutty crunch. Overall, quality ingredients lead to scones that taste bakery-fresh. You can swap ingredients based on your needs. If you’re out of walnuts, try pecans or almonds. For a dairy-free option, use coconut cream and vegan butter. If you want a less sweet scone, cut the sugar by a tablespoon. Feel free to play with flavors! Add dried fruit or spices to make your scones unique. Start by preheating your oven to 400°F (200°C). Line a baking sheet with parchment paper. In a large bowl, whisk together 2 cups of all-purpose flour, 1/4 cup of granulated sugar, 1 tablespoon of baking powder, and 1/2 teaspoon of salt. This mix gives your scones the right rise and sweetness. Next, add 1/2 cup of cold, cubed unsalted butter. Use your fingers or a pastry cutter to mix until the mix looks like coarse crumbs. This step is key for flakiness. Then, stir in 1/4 cup of chopped, toasted walnuts. They add crunch and flavor. In another bowl, combine 1/2 cup of heavy cream, 1/4 cup of pure maple syrup, 1 teaspoon of vanilla extract, and 1/2 teaspoon of maple extract if you want a stronger flavor. Pour this mix into your dry ingredients. Fold gently, just until the dough comes together. It should be a bit sticky but not wet. Now, sprinkle some flour on your counter. Place the dough on it and shape it into a circle, about 1-inch thick. You can cut the dough into 8 wedges, like a pizza, or use a round cutter for a classic scone shape. If using wedges, space them out on your baking sheet. Brush the tops with a bit of extra heavy cream for a nice golden finish. Bake the scones in your preheated oven for 15-20 minutes. They should turn golden brown on top. While they bake, make the glaze. In a small bowl, whisk 1/4 cup of powdered sugar with 1 tablespoon of milk until smooth. Adjust the milk to get your desired thickness. Once the scones cool for a few minutes, drizzle the glaze over the tops. Enjoy them warm, or let them cool for a tasty treat later! To get the best texture in your scones, keep the butter very cold. This helps the scones rise well. When you mix the butter with flour, aim for a crumbly look. If the dough feels too dry, add a touch more cream. Remember, the dough should be sticky but not too wet. You can boost the flavor of your scones easily. Adding a bit of maple extract makes the maple taste stronger. You can also mix in dried fruits like cranberries or blueberries for more flavor. If you want a nutty taste, try using pecans instead of walnuts. For a sweet twist, sprinkle cinnamon into the dry mix. One common mistake is overmixing the dough. This makes the scones tough. Mix just until combined, and then stop. Another mistake is not using enough flour when shaping. If you skip this, the dough may stick and be hard to handle. Lastly, don’t forget to brush with cream before baking. This gives your scones a nice golden color. {{image_2}} You can make these scones even better by adding fruit and nuts. Try dried cranberries or blueberries for a sweet twist. Chopped apples also work well. For nuts, pecans or almonds can substitute walnuts. Just mix them in with the dry ingredients. This gives your scones a fun pop of flavor. Want a different taste? You can change the flavor easily. Add a dash of cinnamon or nutmeg to the dry mix for warmth. You can also use flavored extracts. Almond extract gives a nice twist, while orange zest brightens the scones. Feel free to experiment until you find your favorite mix. If you need gluten-free scones, use a gluten-free flour blend. Make sure it has a good binding agent. For a vegan option, swap heavy cream with coconut cream and butter with vegan butter. Maple syrup is already vegan, so you’re good there! These changes keep the scones tasty and suitable for different diets. To keep your scones fresh, store them in an airtight container. This helps maintain their soft texture. You can keep them at room temperature for up to two days. If you want to enjoy them longer, consider refrigerating them. This will extend their freshness for about four days. To reheat scones, preheat your oven to 350°F (175°C). Place the scones on a baking sheet. Heat them for about 5 to 10 minutes. This warms them up and brings back their nice, soft texture. You can also use a microwave for quick reheating. Just warm them for 15 to 20 seconds. Be careful not to overheat, or they may become tough. Freezing scones is an excellent way to save some for later. Let the scones cool completely after baking. Wrap each scone tightly in plastic wrap. Then place them in a freezer-safe bag. You can freeze them for up to three months. When you’re ready to enjoy them, thaw overnight in the fridge and reheat as described above. Yes, you can use other nuts. Pecans, almonds, or hazelnuts work well. Just chop them roughly. Each nut adds a unique taste and texture. Pecans give a buttery flavor. Almonds add a nice crunch. Hazelnuts bring a sweet, earthy note. Feel free to experiment with what you love! You can prep the dough in advance. After mixing, shape the dough into a circle. Cut it into wedges but do not bake. Wrap the dough in plastic wrap. Store it in the fridge for up to 2 days. When ready, bake straight from the fridge. You might need to add a few extra minutes to the baking time. A warm cup of coffee or tea pairs perfectly. The rich flavors of coffee balance the sweetness of the scones. Matcha or chai tea also works well for a unique twist. For a cold drink, try iced maple latte. Each drink enhances the maple flavor in the scones. Enjoy your scones with whatever drink you love! This blog post covered all you need to make perfect maple walnut scones. We explored key ingredients, their quality, and tasty substitutions. The step-by-step instructions make baking easy. Tips helped you avoid common mistakes and achieve the right texture. Variations showed how to fit different diets and tastes. Remember, storing and reheating properly keeps your scones fresh. Use this guide to create your scones with confidence! Enjoy the process and share with others. Happy baking!

Ingredients

List of Ingredients

– 2 cups all-purpose flour

– 1/4 cup granulated sugar

– 1 tablespoon baking powder

– 1/2 teaspoon salt

– 1/2 cup cold unsalted butter, cubed

– 1/4 cup chopped walnuts, toasted

– 1/2 cup heavy cream (plus extra for brushing)

– 1/4 cup pure maple syrup

– 1 teaspoon vanilla extract

– 1/2 teaspoon maple extract (optional)

– 1/4 cup powdered sugar (for glaze)

– 1 tablespoon milk (for glaze)

Importance of Ingredient Quality

Using high-quality ingredients makes a big difference in your scones. Fresh flour gives texture and taste. Choose real maple syrup for a rich flavor. Good butter adds a lovely, flaky quality. Toasted walnuts bring a nutty crunch. Overall, quality ingredients lead to scones that taste bakery-fresh.

Substitutions and Adjustments

You can swap ingredients based on your needs. If you’re out of walnuts, try pecans or almonds. For a dairy-free option, use coconut cream and vegan butter. If you want a less sweet scone, cut the sugar by a tablespoon. Feel free to play with flavors! Add dried fruit or spices to make your scones unique.

Step-by-Step Instructions

Preparing the Dough

Start by preheating your oven to 400°F (200°C). Line a baking sheet with parchment paper. In a large bowl, whisk together 2 cups of all-purpose flour, 1/4 cup of granulated sugar, 1 tablespoon of baking powder, and 1/2 teaspoon of salt. This mix gives your scones the right rise and sweetness. Next, add 1/2 cup of cold, cubed unsalted butter. Use your fingers or a pastry cutter to mix until the mix looks like coarse crumbs. This step is key for flakiness. Then, stir in 1/4 cup of chopped, toasted walnuts. They add crunch and flavor.

In another bowl, combine 1/2 cup of heavy cream, 1/4 cup of pure maple syrup, 1 teaspoon of vanilla extract, and 1/2 teaspoon of maple extract if you want a stronger flavor. Pour this mix into your dry ingredients. Fold gently, just until the dough comes together. It should be a bit sticky but not wet.

Shaping and Cutting the Scones

Now, sprinkle some flour on your counter. Place the dough on it and shape it into a circle, about 1-inch thick. You can cut the dough into 8 wedges, like a pizza, or use a round cutter for a classic scone shape. If using wedges, space them out on your baking sheet. Brush the tops with a bit of extra heavy cream for a nice golden finish.

Baking and Glazing

Bake the scones in your preheated oven for 15-20 minutes. They should turn golden brown on top. While they bake, make the glaze. In a small bowl, whisk 1/4 cup of powdered sugar with 1 tablespoon of milk until smooth. Adjust the milk to get your desired thickness. Once the scones cool for a few minutes, drizzle the glaze over the tops. Enjoy them warm, or let them cool for a tasty treat later!

Tips & Tricks

Achieving the Perfect Texture

To get the best texture in your scones, keep the butter very cold. This helps the scones rise well. When you mix the butter with flour, aim for a crumbly look. If the dough feels too dry, add a touch more cream. Remember, the dough should be sticky but not too wet.

Flavor Enhancements

You can boost the flavor of your scones easily. Adding a bit of maple extract makes the maple taste stronger. You can also mix in dried fruits like cranberries or blueberries for more flavor. If you want a nutty taste, try using pecans instead of walnuts. For a sweet twist, sprinkle cinnamon into the dry mix.

Common Mistakes to Avoid

One common mistake is overmixing the dough. This makes the scones tough. Mix just until combined, and then stop. Another mistake is not using enough flour when shaping. If you skip this, the dough may stick and be hard to handle. Lastly, don’t forget to brush with cream before baking. This gives your scones a nice golden color.

Variations

Fruit and Nut Additions

You can make these scones even better by adding fruit and nuts. Try dried cranberries or blueberries for a sweet twist. Chopped apples also work well. For nuts, pecans or almonds can substitute walnuts. Just mix them in with the dry ingredients. This gives your scones a fun pop of flavor.

Flavor Profile Adjustments

Want a different taste? You can change the flavor easily. Add a dash of cinnamon or nutmeg to the dry mix for warmth. You can also use flavored extracts. Almond extract gives a nice twist, while orange zest brightens the scones. Feel free to experiment until you find your favorite mix.

Dietary Modifications (gluten-free, vegan)

If you need gluten-free scones, use a gluten-free flour blend. Make sure it has a good binding agent. For a vegan option, swap heavy cream with coconut cream and butter with vegan butter. Maple syrup is already vegan, so you’re good there! These changes keep the scones tasty and suitable for different diets.

Storage Info

Best Way to Store Scones

To keep your scones fresh, store them in an airtight container. This helps maintain their soft texture. You can keep them at room temperature for up to two days. If you want to enjoy them longer, consider refrigerating them. This will extend their freshness for about four days.

Reheating Instructions

To reheat scones, preheat your oven to 350°F (175°C). Place the scones on a baking sheet. Heat them for about 5 to 10 minutes. This warms them up and brings back their nice, soft texture. You can also use a microwave for quick reheating. Just warm them for 15 to 20 seconds. Be careful not to overheat, or they may become tough.

Freezing for Later Use

Freezing scones is an excellent way to save some for later. Let the scones cool completely after baking. Wrap each scone tightly in plastic wrap. Then place them in a freezer-safe bag. You can freeze them for up to three months. When you’re ready to enjoy them, thaw overnight in the fridge and reheat as described above.

FAQs

Can I use other nuts instead of walnuts?

Yes, you can use other nuts. Pecans, almonds, or hazelnuts work well. Just chop them roughly. Each nut adds a unique taste and texture. Pecans give a buttery flavor. Almonds add a nice crunch. Hazelnuts bring a sweet, earthy note. Feel free to experiment with what you love!

How can I make these scones ahead of time?

You can prep the dough in advance. After mixing, shape the dough into a circle. Cut it into wedges but do not bake. Wrap the dough in plastic wrap. Store it in the fridge for up to 2 days. When ready, bake straight from the fridge. You might need to add a few extra minutes to the baking time.

What drink pairs well with maple walnut scones?

A warm cup of coffee or tea pairs perfectly. The rich flavors of coffee balance the sweetness of the scones. Matcha or chai tea also works well for a unique twist. For a cold drink, try iced maple latte. Each drink enhances the maple flavor in the scones. Enjoy your scones with whatever drink you love!

This blog post covered all you need to make perfect maple walnut scones. We explored key ingredients, their quality, and tasty substitutions. The step-by-step instructions make baking easy. Tips helped you avoid common mistakes and achieve the right texture. Variations showed how to fit different diets and tastes.

Remember, storing and reheating properly keeps your scones fresh. Use this guide to create your scones with confidence! Enjoy the process and share with others. Happy baking!

- 2 cups all-purpose flour - 1/4 cup granulated sugar - 1 tablespoon baking powder - 1/2 teaspoon salt - 1/2 cup cold unsalted butter, cubed - 1/4 cup chopped walnuts, toasted - 1/2 cup heavy cream (plus extra for brushing) - 1/4 cup pure maple syrup - 1 teaspoon vanilla extract - 1/2 teaspoon maple extract (optional) - 1/4 cup powdered sugar (for glaze) - 1 tablespoon milk (for glaze) Using high-quality ingredients makes a big difference in your scones. Fresh flour gives texture and taste. Choose real maple syrup for a rich flavor. Good butter adds a lovely, flaky quality. Toasted walnuts bring a nutty crunch. Overall, quality ingredients lead to scones that taste bakery-fresh. You can swap ingredients based on your needs. If you’re out of walnuts, try pecans or almonds. For a dairy-free option, use coconut cream and vegan butter. If you want a less sweet scone, cut the sugar by a tablespoon. Feel free to play with flavors! Add dried fruit or spices to make your scones unique. Start by preheating your oven to 400°F (200°C). Line a baking sheet with parchment paper. In a large bowl, whisk together 2 cups of all-purpose flour, 1/4 cup of granulated sugar, 1 tablespoon of baking powder, and 1/2 teaspoon of salt. This mix gives your scones the right rise and sweetness. Next, add 1/2 cup of cold, cubed unsalted butter. Use your fingers or a pastry cutter to mix until the mix looks like coarse crumbs. This step is key for flakiness. Then, stir in 1/4 cup of chopped, toasted walnuts. They add crunch and flavor. In another bowl, combine 1/2 cup of heavy cream, 1/4 cup of pure maple syrup, 1 teaspoon of vanilla extract, and 1/2 teaspoon of maple extract if you want a stronger flavor. Pour this mix into your dry ingredients. Fold gently, just until the dough comes together. It should be a bit sticky but not wet. Now, sprinkle some flour on your counter. Place the dough on it and shape it into a circle, about 1-inch thick. You can cut the dough into 8 wedges, like a pizza, or use a round cutter for a classic scone shape. If using wedges, space them out on your baking sheet. Brush the tops with a bit of extra heavy cream for a nice golden finish. Bake the scones in your preheated oven for 15-20 minutes. They should turn golden brown on top. While they bake, make the glaze. In a small bowl, whisk 1/4 cup of powdered sugar with 1 tablespoon of milk until smooth. Adjust the milk to get your desired thickness. Once the scones cool for a few minutes, drizzle the glaze over the tops. Enjoy them warm, or let them cool for a tasty treat later! To get the best texture in your scones, keep the butter very cold. This helps the scones rise well. When you mix the butter with flour, aim for a crumbly look. If the dough feels too dry, add a touch more cream. Remember, the dough should be sticky but not too wet. You can boost the flavor of your scones easily. Adding a bit of maple extract makes the maple taste stronger. You can also mix in dried fruits like cranberries or blueberries for more flavor. If you want a nutty taste, try using pecans instead of walnuts. For a sweet twist, sprinkle cinnamon into the dry mix. One common mistake is overmixing the dough. This makes the scones tough. Mix just until combined, and then stop. Another mistake is not using enough flour when shaping. If you skip this, the dough may stick and be hard to handle. Lastly, don’t forget to brush with cream before baking. This gives your scones a nice golden color. {{image_2}} You can make these scones even better by adding fruit and nuts. Try dried cranberries or blueberries for a sweet twist. Chopped apples also work well. For nuts, pecans or almonds can substitute walnuts. Just mix them in with the dry ingredients. This gives your scones a fun pop of flavor. Want a different taste? You can change the flavor easily. Add a dash of cinnamon or nutmeg to the dry mix for warmth. You can also use flavored extracts. Almond extract gives a nice twist, while orange zest brightens the scones. Feel free to experiment until you find your favorite mix. If you need gluten-free scones, use a gluten-free flour blend. Make sure it has a good binding agent. For a vegan option, swap heavy cream with coconut cream and butter with vegan butter. Maple syrup is already vegan, so you’re good there! These changes keep the scones tasty and suitable for different diets. To keep your scones fresh, store them in an airtight container. This helps maintain their soft texture. You can keep them at room temperature for up to two days. If you want to enjoy them longer, consider refrigerating them. This will extend their freshness for about four days. To reheat scones, preheat your oven to 350°F (175°C). Place the scones on a baking sheet. Heat them for about 5 to 10 minutes. This warms them up and brings back their nice, soft texture. You can also use a microwave for quick reheating. Just warm them for 15 to 20 seconds. Be careful not to overheat, or they may become tough. Freezing scones is an excellent way to save some for later. Let the scones cool completely after baking. Wrap each scone tightly in plastic wrap. Then place them in a freezer-safe bag. You can freeze them for up to three months. When you’re ready to enjoy them, thaw overnight in the fridge and reheat as described above. Yes, you can use other nuts. Pecans, almonds, or hazelnuts work well. Just chop them roughly. Each nut adds a unique taste and texture. Pecans give a buttery flavor. Almonds add a nice crunch. Hazelnuts bring a sweet, earthy note. Feel free to experiment with what you love! You can prep the dough in advance. After mixing, shape the dough into a circle. Cut it into wedges but do not bake. Wrap the dough in plastic wrap. Store it in the fridge for up to 2 days. When ready, bake straight from the fridge. You might need to add a few extra minutes to the baking time. A warm cup of coffee or tea pairs perfectly. The rich flavors of coffee balance the sweetness of the scones. Matcha or chai tea also works well for a unique twist. For a cold drink, try iced maple latte. Each drink enhances the maple flavor in the scones. Enjoy your scones with whatever drink you love! This blog post covered all you need to make perfect maple walnut scones. We explored key ingredients, their quality, and tasty substitutions. The step-by-step instructions make baking easy. Tips helped you avoid common mistakes and achieve the right texture. Variations showed how to fit different diets and tastes. Remember, storing and reheating properly keeps your scones fresh. Use this guide to create your scones with confidence! Enjoy the process and share with others. Happy baking!

Bakery-Style Maple Walnut Scones

Indulge in the deliciousness of bakery-style maple walnut scones! This simple recipe combines buttery goodness with the rich flavors of maple and toasted walnuts, perfect for any occasion. Bake your way to a warm, golden treat in just 35 minutes! Click to discover the full recipe and enjoy a delightful treat that will impress your family and friends. Don’t miss out on these scrumptious scones! #Scones #BakingRecipes #MapleScones #WalnutBakery

Ingredients
  

2 cups all-purpose flour

1/4 cup granulated sugar

1 tablespoon baking powder

1/2 teaspoon salt

1/2 cup cold unsalted butter, cubed

1/4 cup chopped walnuts, toasted

1/2 cup heavy cream (plus extra for brushing)

1/4 cup pure maple syrup

1 teaspoon vanilla extract

1/2 teaspoon maple extract (optional)

1/4 cup powdered sugar (for glaze)

1 tablespoon milk (for glaze)

Instructions
 

Preheat your oven to 400°F (200°C) and line a baking sheet with parchment paper.

    In a large mixing bowl, whisk together the flour, granulated sugar, baking powder, and salt until well combined.

      Add the cold, cubed butter to the flour mixture. Using a pastry cutter or your fingers, blend the butter into the flour until it resembles coarse crumbs.

        Stir in the chopped walnuts until evenly distributed throughout the mixture.

          In a separate bowl, mix together the heavy cream, maple syrup, vanilla extract, and maple extract (if using).

            Pour the wet ingredients into the dry ingredients and gently fold until just combined. Do not overmix; the dough should be slightly sticky but hold together.

              Transfer the dough onto a lightly floured surface and shape it into a circle about 1-inch thick. Cut the dough into 8 wedges (like a pizza) or use a round cutter for a more traditional scone shape.

                Place the scones on the prepared baking sheet, spacing them apart. Brush the tops with a little extra heavy cream for a golden finish.

                  Bake in the preheated oven for 15-20 minutes, or until the scones are golden brown on top.

                    While the scones are baking, prepare the glaze by whisking together the powdered sugar and milk until smooth. Adjust the milk for desired consistency.

                      Once the scones are done baking, let them cool for a few minutes, then drizzle the maple glaze over the tops.

                        Serve warm or at room temperature, and enjoy!

                          Prep Time: 20 minutes | Total Time: 35 minutes | Servings: 8 scones

                            WANT TO SAVE THIS RECIPE?