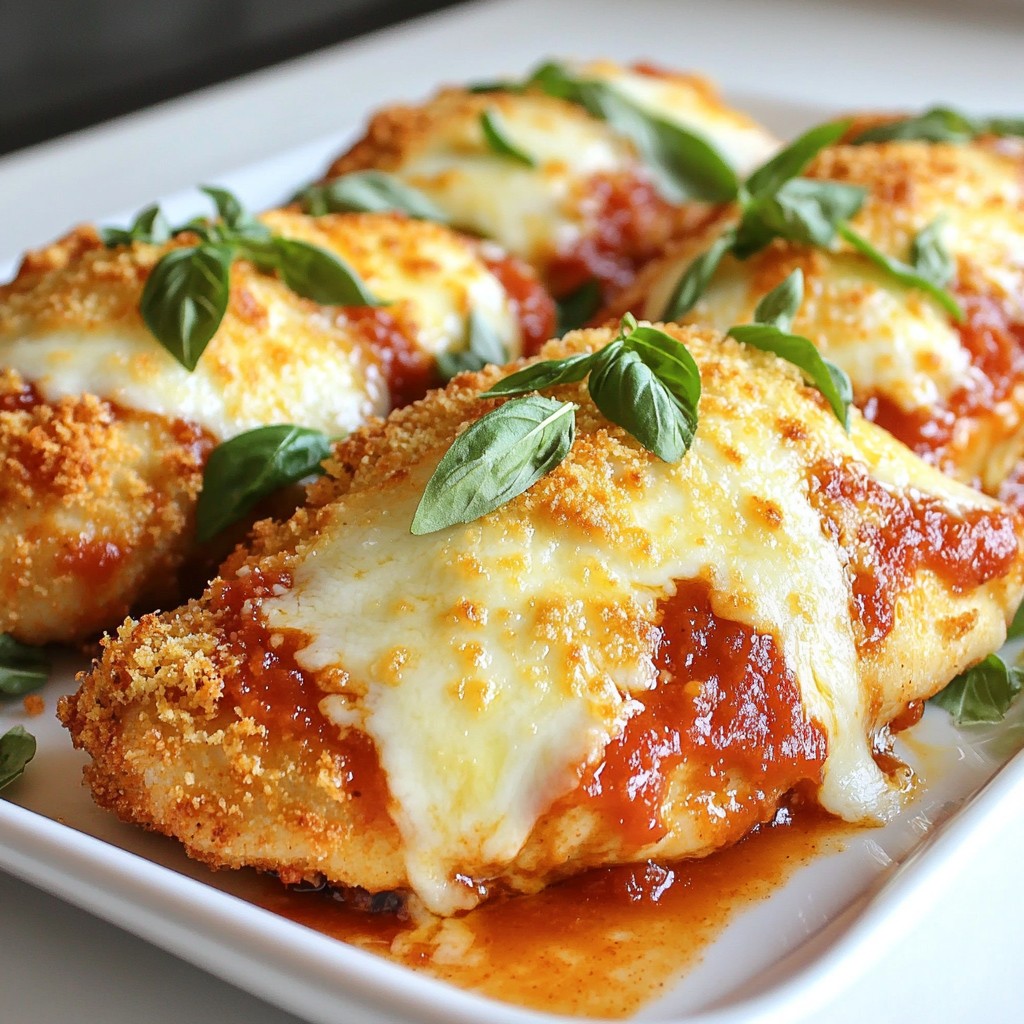
If you love a hearty and simple meal, Baked Chicken Parmesan is a must-try! In this easy recipe, you’ll learn how to transform chicken breasts into a cheesy, savory dish that is both tasty and satisfying. With bright marinara sauce and a golden breadcrumb coating, I’ll guide you through each step to create a meal everyone will enjoy. Let’s dive in and bring some Italian flavor to your dinner table!
Why I Love This Recipe
- Delicious Flavor Combination: This recipe brings together the savory taste of chicken, the rich flavor of marinara, and the creamy texture of melted mozzarella, creating a mouthwatering dish that everyone will love.
- Healthy Twist: By baking instead of frying, this chicken parmesan delight offers a healthier option without sacrificing taste, making it a guilt-free indulgence.
- Easy Preparation: With just a few simple steps, you can prepare this dish in no time, making it perfect for busy weeknights or casual gatherings.
- Customizable Ingredients: This recipe allows for versatility; feel free to add your favorite herbs or spices, or even toss in some vegetables for added nutrition.
Ingredients
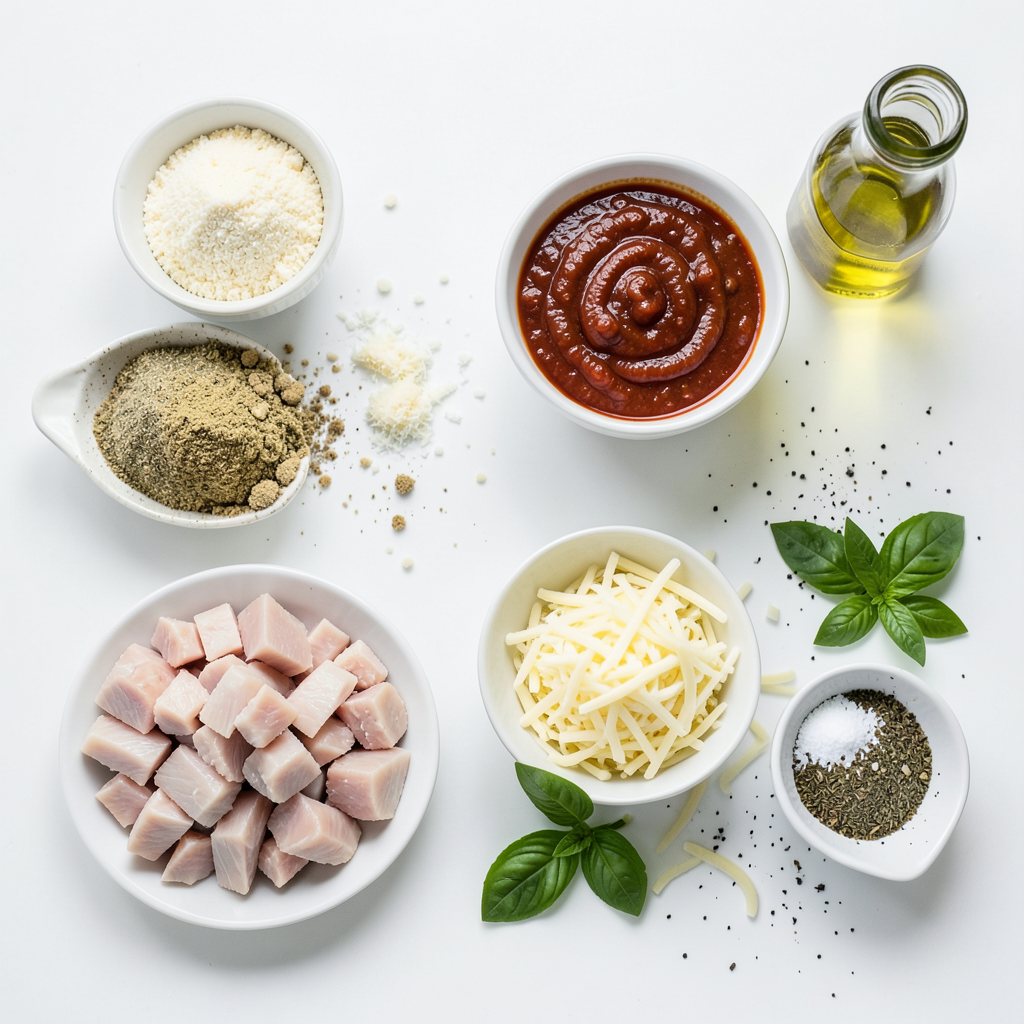
Cooking Baked Chicken Parmesan is simple when you gather the right ingredients. Here’s what you need:
- 4 boneless, skinless chicken breasts
- 1 cup breadcrumbs (preferably Panko for extra crunch)
- 1/2 cup grated Parmesan cheese
- 1 teaspoon garlic powder
- 1 teaspoon dried oregano
- 1 teaspoon dried basil
- 2 cups marinara sauce (store-bought or homemade)
- 2 cups shredded mozzarella cheese
- 2 tablespoons olive oil
- Salt and pepper to taste
- Fresh basil leaves for garnish (optional)
Each ingredient plays a vital role. The chicken provides protein and serves as the base. Breadcrumbs and cheese add a crunchy and cheesy layer. The seasonings like garlic powder, oregano, and basil bring flavor. Marinara sauce adds moisture and richness. Olive oil helps the coating stick and adds a touch of healthy fat. Finally, fresh basil leaves can brighten up the dish when served.
Feel free to explore alternatives or add your favorite herbs. Cooking should be fun and personal!
Step-by-Step Instructions
Prepping the Oven and Ingredients
First, you need to preheat the oven to 375°F (190°C). This ensures even cooking. While the oven heats, prepare your breadcrumb mixture. In a shallow bowl, mix 1 cup of breadcrumbs with 1/2 cup of grated Parmesan cheese. Add 1 teaspoon of garlic powder, 1 teaspoon of dried oregano, 1 teaspoon of dried basil, and a pinch of salt and pepper. Mix it all until combined.
Coating the Chicken
Next, take 4 boneless, skinless chicken breasts. Lightly brush each piece with 2 tablespoons of olive oil on both sides. This helps the breadcrumbs stick. Now, dredge each oiled chicken breast in the breadcrumb mixture. Make sure to press gently so the crumbs stick well.
Baking Process
Arrange your coated chicken breasts on a baking sheet lined with parchment paper or greased foil. Bake the chicken in the preheated oven for about 20 minutes. You want the chicken to be cooked through and the coating to turn golden brown. After 20 minutes, take the chicken out and spoon 2 cups of marinara sauce over each piece. Next, sprinkle 2 cups of shredded mozzarella cheese on top. Return the baking sheet to the oven and bake for another 10 to 15 minutes. You’ll know it’s done when the cheese is melted and bubbly. Let the chicken cool for a few moments before serving.
Tips & Tricks
Perfecting the Coating
- Alternatives for breadcrumbs: You can use crushed cornflakes or ground oats. These give a nice crunch. If you want a gluten-free option, try almond flour or ground nuts.
- Enhancing flavor with spices: Add red pepper flakes for heat. Try smoked paprika for a smoky taste. A pinch of thyme can also boost the flavor.
Cooking Techniques
- Checking for doneness: Use a meat thermometer to check the chicken. It should reach 165°F (74°C). If you don't have a thermometer, cut into the thick part. The juices should run clear.
- Bake time adjustments for thicker chicken: If your chicken breasts are thick, add 5-10 minutes to the bake time. Keep an eye on them to avoid overcooking.
Serving Suggestions
- Pairing sides with Baked Chicken Parmesan: Serve it with pasta or a fresh salad. Garlic bread goes well too. Steamed vegetables can add color and nutrients to your plate.
- Best accompaniments and sauces: A drizzle of balsamic glaze can enhance flavors. You might also enjoy a side of creamy alfredo sauce for dipping.
Pro Tips
- Choose the Right Breadcrumbs: Using Panko breadcrumbs will give you a lighter, crispier coating compared to regular breadcrumbs.
- Keep Chicken Juicy: Brining the chicken breasts in a saltwater solution for a couple of hours before cooking can help keep them moist and flavorful.
- Experiment with Cheese: Feel free to mix in different cheeses like provolone or fontina for a unique flavor twist.
- Serve with Sides: This dish pairs beautifully with a fresh salad or pasta for a complete meal.
Variations
Chicken Parmesan with Different Cheeses
You can swap out mozzarella for provolone or gouda. These cheeses add unique flavors. Provolone gives a sharp taste, while gouda offers a creamy texture. If you want to cut calories, try low-fat cheese options. They melt well and keep the dish tasty.
Gluten-Free Option
For a gluten-free version, use almond flour or crushed nuts as substitutes for breadcrumbs. These options bring a lovely crunch. When you make this change, check other ingredients for hidden gluten. Always read labels to ensure they fit a gluten-free diet.
Adding Extra Flavor
Boost the dish by adding vegetables. Sautéed spinach, mushrooms, or bell peppers work great. They add color and nutrients. Want some heat? Toss in red pepper flakes for a spicy kick. This variation can turn a comforting dish into a bold meal.
Storage Info
Storing Leftovers
To keep your baked chicken parmesan fresh, store it in the fridge. Use an airtight container. This helps to keep moisture in and germs out. Leftovers can stay good for up to three days. If you want to keep it longer, consider freezing it.
Reheating Methods
When reheating, the oven works best. Preheat the oven to 350°F (175°C). Place the chicken on a baking sheet. Cover it with foil to retain moisture. Heat for about 15-20 minutes. You can use the microwave too. However, it may make the chicken a bit soggy. If you choose the microwave, heat for one minute at a time.
Freezing Tips
To freeze cooked chicken parmesan, let it cool first. Wrap each piece in plastic wrap, then put it in a freezer bag. You can freeze it for up to three months. When you are ready to eat, thaw it in the fridge overnight. Then, reheat it in the oven or microwave, as mentioned above.
FAQs
Can I bake Baked Chicken Parmesan ahead of time?
Yes, you can bake Baked Chicken Parmesan ahead of time. To do this, prepare the dish fully, but do not add the marinara and cheese. Cover it and store it in the fridge for up to one day. When ready to eat, add the sauce and cheese and bake as usual. This keeps the chicken crispy. If you want to reheat, use the oven. Preheat to 375°F (190°C) and heat for about 15-20 minutes. This method keeps the chicken tasty and warm.
Is Baked Chicken Parmesan healthier than fried?
Baked Chicken Parmesan is generally healthier than fried. Baking uses less oil than frying. This means fewer calories and less fat. For example, a fried chicken breast may have around 400 calories, while baked can have about 300 calories. The choice of Panko breadcrumbs adds crunch without extra oil. Plus, you get protein from chicken and calcium from cheese. This makes it a better option for a balanced meal.
How do I know when the chicken is fully cooked?
To check if the chicken is fully cooked, use a meat thermometer. Insert it into the thickest part of the chicken. The safe internal temperature is 165°F (75°C). If you don’t have a thermometer, cut into the chicken. It should be white and no pink should show. Juices should run clear. Follow these tips to ensure your chicken is safe and delicious.
Baked Chicken Parmesan is a delicious and easy dish to make. We covered each step, from choosing ingredients to mastering the cooking process. I shared tips for perfecting your coating and suggested fun variations. Plus, you learned how to store and reheat leftovers to keep them fresh.
In conclusion, this meal is both tasty and flexible, making it perfect for any occasion. Enjoy creating your own version and impressing others with your cooking skills!