FREE DINNER EBOOK! Get your copy!
  • Cookie Policy
  • GDPR Policy
  • Disclaimer
  • Terms Of Use
  • Visit my other site: Fun Cookie Recipes
meal twig
  • Home
  • Dinner
  • Desserts
  • Drinks
  • Appetizers
  • Contact
  • About
  • Privacy Policy
  • Home
  • Dinner
  • Desserts
  • Drinks
  • Appetizers
  • Contact
  • About
  • Privacy Policy
  • Cookie Policy
  • GDPR Policy
  • Disclaimer
  • Terms Of Use
Visit my other site: Fun Cookie Recipes

HOME / CATEGORIES /

Latest

- 1 cup sushi rice - ½ pound sushi-grade tuna, diced - 2 tablespoons mayonnaise - 1 tablespoon Sriracha sauce - 1 tablespoon soy sauce - 1 teaspoon sesame oil - 1 green onion, finely chopped - 1 sheet nori, cut into small squares - Sesame seeds for garnish - Avocado slices for serving (optional) - Medium saucepan - Mixing bowls - Measuring cups and spoons - Rolling surface Gather these ingredients and tools for your spicy tuna sushi balls. Each item plays a key role in making this dish simple and tasty. Sushi rice is the base. It gives a nice texture. Sushi-grade tuna is a must. It ensures safety and flavor. Mayonnaise adds creaminess. Sriracha gives the kick. Soy sauce brings saltiness. Sesame oil adds depth. Green onion gives a fresh bite. Nori adds a fun wrap. Sesame seeds are great for garnish, and avocado slices add a cool touch. With these ingredients ready, you will be set to make a delicious meal. - Rinse the sushi rice under cold water until it runs clear. This step is key. It removes extra starch and gives you great texture. - In a medium saucepan, mix the rinsed rice with 1 ¼ cups of water. Bring it to a boil over medium-high heat. Once it boils, turn the heat down low. Cover it and simmer for 15 minutes. The water should be gone at this point. Remove it from heat and leave it covered for 10 more minutes. - While the rice rests, let’s make the spicy tuna mixture. In a bowl, add ½ pound of diced sushi-grade tuna. Then, stir in 2 tablespoons of mayonnaise, 1 tablespoon of Sriracha sauce, 1 tablespoon of soy sauce, and 1 teaspoon of sesame oil. - Don’t forget the green onion! Add 1 finely chopped green onion. Mix it all well. You can adjust the Sriracha for more or less heat based on your taste. - Once the rice is cool enough to touch, wet your hands. This stops the rice from sticking. Take about 2 tablespoons of rice and flatten it in your palm. - Place a small spoonful of the spicy tuna mixture in the center. Carefully fold the rice around the filling. Roll it into a ball shape, ensuring the filling is fully encased. - Keep repeating this until you form all the sushi balls. - For the final touch, sprinkle sesame seeds on each sushi ball. Place a small square of nori on the side for a nice presentation. - You can serve these sushi balls on a plate. Adding avocado slices on the side is a great option. Rinsing the sushi rice is key. It removes excess starch. This step helps the rice become fluffy and not sticky. After rinsing, cover the rice and let it rest. This helps the rice absorb steam and become tender. You can adjust the Sriracha to your taste. If you want more heat, add more Sriracha. If you prefer less spice, use less. You can also try other spicy ingredients like chili oil or wasabi. These will give your sushi balls a unique kick. Wetting your hands while shaping the sushi balls is helpful. It stops the rice from sticking to your hands. Use a non-stick surface when rolling the balls. This makes it easier to shape them without mess. {{image_2}} You can switch the tuna for different fish. Salmon or crab works great. Both add unique flavors and textures. If you want a vegetarian option, use creamy avocado or crunchy cucumber. These choices keep the sushi balls fresh and tasty. Mix sesame seeds into the sushi rice for extra crunch. This simple change adds a nutty flavor. You can also try using other sauces. Teriyaki sauce gives a sweet and savory kick. Feel free to experiment with flavors to find your favorite. Dipping sauces are a must for sushi balls. Try soy sauce or spicy mayo for a flavor boost. These sauces complement the sushi perfectly. For side dishes, serve with seaweed salad or pickled ginger. These sides add freshness and balance to your meal. To keep your leftover sushi balls fresh, place them in the fridge. Use an airtight container to protect them from drying out. They are best enjoyed within one to two days. If you plan to keep them longer, consider freezing. You can freeze sushi balls for longer storage. Wrap each ball in plastic wrap and place them in a freezer-safe bag. This will help avoid freezer burn. When ready to eat, thaw them in the fridge overnight. For best results, eat them within one month. To reheat sushi balls, avoid using a microwave. Instead, place them in a warm oven for a few minutes. This helps maintain their texture and flavor. You can also warm them gently on a skillet. Enjoy them fresh for the best taste! Yes, you can use regular tuna, but it’s not the best choice. Sushi-grade tuna is safe to eat raw. It comes from healthy fish and is handled with care. Regular tuna may not be safe for raw use. It might taste different too. If you choose regular tuna, cook it first to avoid any health risks. If you need a substitute for Sriracha, try these options: - Chili garlic sauce offers heat and flavor. - Hot sauce can work too, but adjust the amount. - You can blend red pepper flakes with mayo for a quick fix. These alternatives can add spice without changing the dish too much. These sushi balls can last about 1 to 2 days in the fridge. Store them in an airtight container. Keep them away from strong smells to maintain fresh taste. The rice may get a little hard, so eat them soon for the best flavor. Yes, you can make these sushi balls ahead of time! Prepare the sushi balls and store them in the fridge. Just wait to add garnishes until you serve. It helps keep them fresh and tasty. This makes meal prep easy and fun. In this article, we explored how to make delicious spicy tuna sushi balls. You learned about the key ingredients, important kitchen tools, and followed step-by-step instructions. We also covered tips for perfect sushi rice and various filling options. In conclusion, making sushi balls at home is fun and easy. Customize them to your taste and enjoy. Don’t forget to share your creations and try different variations!

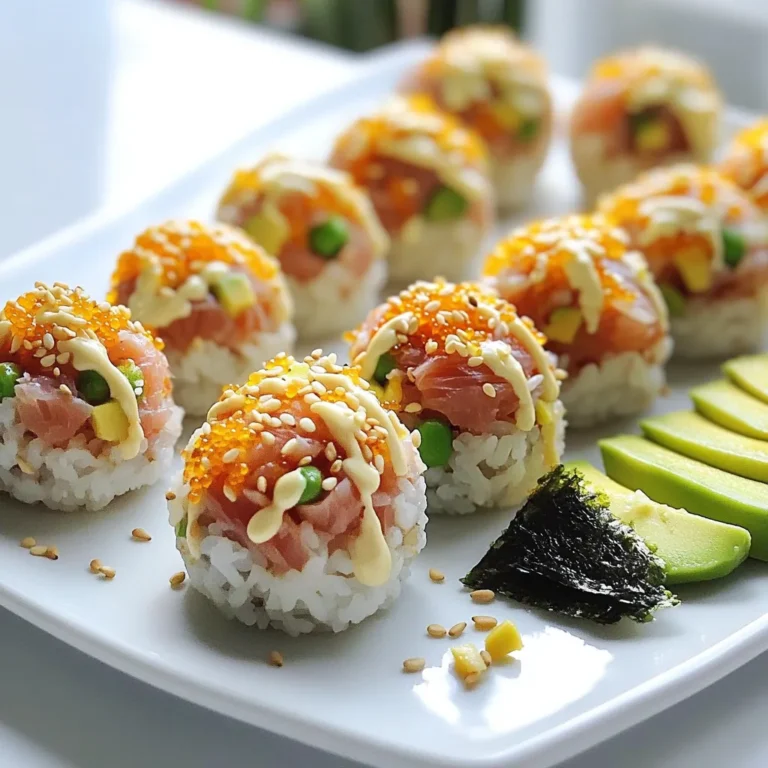
Spicy Tuna Sushi Balls Flavorful and Easy Recipe

- 2 large chicken breasts - 1 cup pretzel crumbs - 1/2 cup all-purpose flour - 1 large egg - 1 tablespoon Dijon mustard - 2 tablespoons honey - 1 teaspoon garlic powder - 1 teaspoon onion powder - Salt and pepper to taste - Olive oil spray These ingredients create a crispy and tasty dish. The chicken is the star here. You want to use large, fresh chicken breasts for the best texture. The pretzel crumbs give a nice crunch. You can crush regular pretzels if you can't find crumbs. The all-purpose flour helps the coating stick well. Next, the egg mixture brings a sweet and tangy flavor. Mix Dijon mustard and honey for a perfect blend. Garlic powder and onion powder add depth to the taste. Salt and pepper enhance all the flavors. Finally, the olive oil spray helps the coating brown nicely in the oven. Gather these items before you start cooking. This dish is fun to make and even more fun to eat! {{ingredient_image_1}} 1. Preheat the oven: Start by heating your oven to 400°F (200°C). This high heat helps the chicken get crispy. Line a baking sheet with parchment paper. This will make cleanup easy. 2. Coat the chicken in flour: Take the two large chicken breasts and coat them in a mix of flour, salt, and pepper. This helps the egg mixture stick later. 3. Create honey mustard egg mixture: In a bowl, beat one large egg. Add one tablespoon of Dijon mustard and two tablespoons of honey. Mix these well until smooth. This mix gives the chicken great flavor. 1. Dipping process in egg mixture: First, take your floured chicken and dip it into the honey mustard egg mixture. Let any extra egg mixture drip off. This is key for a good coating. 2. Coating with pretzel crumbs: Next, roll the chicken in the pretzel crumbs mixture. Press down a bit to help the crumbs stick. This crunchy layer makes the chicken tasty and fun to eat. 1. Oven baking time and temperature: Place the coated chicken breasts on the baking sheet. Bake them in the preheated oven for 25 to 30 minutes. This time allows the chicken to cook through and get golden. 2. Checking internal chicken temperature: Use a meat thermometer to check the chicken. The inside should reach 165°F (75°C). This ensures it’s safe to eat. If it’s not there yet, bake a few more minutes. Enjoy your crunchy and flavorful Honey Mustard Pretzel Chicken! To ensure a crispy coating, follow these steps: - Use thin chicken breasts. They cook faster and stay juicy. - Coat each chicken piece fully. Make sure the pretzel crumbs stick well. - Lightly spray the chicken with olive oil before baking. This helps the coating brown nicely. Using olive oil spray effectively makes a big difference. Here’s how: - Hold the spray can about six inches from the chicken. This creates an even layer. - Avoid soaking the chicken. A light mist is best for that crunch. - If you don’t have spray, brush olive oil gently on the coating. For the best dips, honey mustard pairs well. It enhances the sweet and tangy flavors. You can also try ranch dressing or barbecue sauce for variety. For side dishes, consider these options: - A fresh garden salad with colorful veggies adds crunch. - Sweet potato fries offer a nice sweet contrast. - Roasted asparagus or green beans provide a healthy touch. These sides will make your meal more colorful and complete. Enjoy the flavors together for a delightful dining experience! Pro Tips Use Fresh Ingredients: For the best flavor, use fresh chicken breasts and high-quality Dijon mustard and honey. Customize the Seasoning: Feel free to add your favorite spices or herbs to the pretzel crumb mixture for a personal touch. Ensure Even Cooking: Try to pound the chicken breasts to an even thickness before breading to ensure they cook evenly. Let Rest After Baking: Allowing the chicken to rest for a few minutes after baking helps retain its juices for a more tender bite. {{image_2}} You can make this dish even better with some easy swaps. - Gluten-free options: Use gluten-free flour and crushed gluten-free pretzels. They work just as well. Your chicken will still have that nice crunch. - Alternative coatings: If you don’t have pretzels, try crushed corn flakes. They add a lovely texture and flavor. Get creative with flavors to make your Honey Mustard Pretzel Chicken unique. - Adding spices for extra flavor: Sprinkle in some paprika or cayenne pepper for heat. This gives your dish a nice kick. You can also add Italian seasoning for a different taste. - Sweet and spicy variations: Mix honey with a touch of sriracha sauce. This sweet and spicy combo will excite your taste buds. Try adding some brown sugar for a deeper sweetness, too. To keep your Honey Mustard Pretzel Chicken fresh, follow these simple steps. First, let the chicken cool down to room temperature. This keeps it from steaming and getting soggy. Once cool, wrap it tightly in plastic wrap or aluminum foil. You can also place it in an airtight container. It's best to store your chicken in the fridge. Use it within three days for the best taste. If you want to keep it longer, freeze it! Make sure to use a freezer-safe container. You can store it in the freezer for up to three months. When reheating, aim for a crispy finish. Preheat your oven to 350°F (175°C). Place the chicken on a baking sheet. Cover it loosely with foil to keep it from drying out. Heat for about 15-20 minutes, or until hot. Check the internal temperature; it should reach 165°F (75°C). Avoid using the microwave if you want to keep the crunch. Microwaving can make your chicken soggy. If you must use it, heat in short bursts and check often. Enjoy your tasty chicken just like when it was fresh! Yes, you can use frozen chicken breasts. However, you must thaw them first. Thawing helps ensure even cooking. You can do this in the fridge overnight. If you're short on time, use the microwave. Just make sure the chicken is fully thawed before cooking. Check the internal temperature of the chicken. It should reach 165°F (75°C). You can use a meat thermometer for the best accuracy. Another way is to cut into the chicken. The juices should run clear, not pink. Yes, you can prep the chicken ahead of time. Coat the chicken and store it in the fridge. Just make sure to bake it within 24 hours for the best taste. You can also bake it ahead and reheat it later. Just keep it in an airtight container. This post lays out a simple way to make crispy pretzel-coated chicken. We covered the key ingredients, step-by-step cooking directions, and tips for the best results. You learned about ingredient swaps and how to store leftovers, too. I hope you feel ready to try this recipe. It combines fun flavors and textures that everyone will enjoy. Dive in, experiment, and make this dish your own!

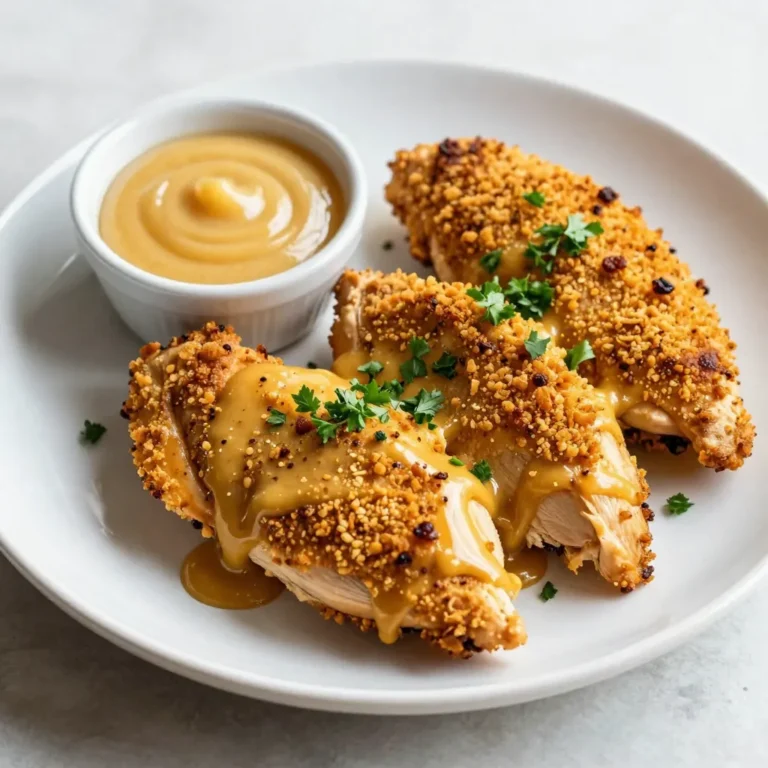
Honey Mustard Pretzel Chicken Crunchy and Flavorful Dish

To make Strawberry Crunch Cheesecake Tacos, you need these simple ingredients: - 1 cup graham cracker crumbs - 1/2 cup unsalted butter, melted - 1 tablespoon sugar - 1 (8 oz) package cream cheese, softened - 1/2 cup powdered sugar - 1 teaspoon vanilla extract - 1 cup heavy whipping cream - 1 cup fresh strawberries, diced - 1/4 cup strawberry jam - Mini flour tortillas (6-inch size) If you want to switch up the flavors, here are some fun swaps: - Use almond or coconut flour for a gluten-free base. - Try flavored cream cheese like strawberry or vanilla for extra taste. - Swap fresh strawberries with blueberries or raspberries for variety. - Use whipped topping instead of heavy cream for a lighter texture. Gather these tools to make the process easier: - Mixing bowls for combining ingredients - Baking sheet for toasting the graham cracker crumbs - Hand mixer for blending the cream cheese mixture - Whisk for whipping the cream - Spoon for filling the tortillas - Platter for serving the finished tacos With these ingredients and tools, you're all set to create a tasty treat that everyone will love! {{ingredient_image_1}} To start, gather your graham cracker crumbs, melted butter, and sugar. In a mixing bowl, combine these three. Mix them well until it looks like wet sand. This means your crunch is ready! Preheat your oven to 350°F (175°C). Spread the mixture on a baking sheet. Bake for 8 to 10 minutes or until golden brown. Once done, let it cool completely. Next, we make the filling. Grab a bowl and add softened cream cheese, powdered sugar, and vanilla extract. Use a hand mixer to blend these until smooth and creamy. In a different bowl, whip the heavy cream. Beat it until you see stiff peaks. Gently fold this whipped cream into the cream cheese mixture. This will make the filling light and fluffy. Now it's time to assemble! Take your mini flour tortillas and lay them out. Spoon about 2 tablespoons of your cheesecake mixture onto each tortilla. Next, add diced strawberries on top. Drizzle some strawberry jam over the strawberries. Fold the tortillas like a taco to enclose the filling. Finally, roll them in the cooled graham cracker crunch. This will give them a nice coating. You can serve them right away or chill them in the fridge for about 30 minutes. Enjoy your tasty creation! Whipping cream can be tricky. Start with cold heavy cream for the best results. Use a chilled bowl and beaters to help it whip faster. Whip the cream until it forms stiff peaks. This means the cream holds its shape well. Be careful not to over-whip. Over-whipped cream can turn into butter. If that happens, you can still use it, but it won’t be smooth. To shape your tacos right, use mini flour tortillas. When filling them, use about two tablespoons of the cheesecake mix. Spoon it onto the center of the tortilla. Then, fold one side over the filling. Gently press down to seal. Fold the other side over and pinch the edges together. This keeps the filling inside. Roll the taco in the graham cracker crunch for a fun touch. To make your tacos look great, use a colorful platter. Place the tacos in a line or a circle. Drizzle extra strawberry jam on top for a pop of color. Add whole strawberries around the tacos for a nice touch. You can also sprinkle some graham cracker crumbs on the platter. This adds a fun look and makes each bite even better. Enjoy your treat with friends or family! Pro Tips Use Fresh Strawberries: Opt for ripe, fresh strawberries to enhance the flavor and texture of your tacos. They will provide a juicy and sweet contrast to the creamy filling. Chill Before Serving: Allow the assembled tacos to chill in the refrigerator for about 30 minutes before serving. This helps the flavors meld together and makes them easier to handle. Experiment with Toppings: Don’t hesitate to get creative with your toppings! Consider adding crushed nuts, chocolate drizzle, or even a sprinkle of coconut for added texture and flavor. Make Ahead: You can prepare the cheesecake filling in advance and store it in the refrigerator. Just assemble the tacos right before serving for the best texture. {{image_2}} You can change the fruit to make new flavors. Try blueberries, raspberries, or peaches. Each fruit brings a unique taste. For blueberries, mash them up and mix with some jam. For peaches, slice them thin and layer them on top. You can even mix fruits for a fun twist. Just keep the same cream cheese filling to hold it all together. To make this dish gluten-free, use gluten-free mini tortillas. Check the label on the tortillas to ensure they are truly gluten-free. For a vegan version, replace the cream cheese with a plant-based cream cheese. Use coconut cream instead of heavy whipping cream. This way, you can enjoy the same great taste without dairy. Don’t forget to use maple syrup instead of powdered sugar. You can play with toppings to add more fun. Try crushed nuts or shredded coconut for extra crunch. Drizzle honey or chocolate sauce for a sweet finish. You can also add a layer of whipped cream on top for more creaminess. Feel free to mix in some extra toppings inside the tacos, like chocolate chips or sprinkles. The possibilities are endless, so have fun with it! To keep your leftover tacos fresh, place them in an airtight container. Make sure to store them in the refrigerator. If you want to keep them crisp, store the graham cracker crunch topping separately. This way, you can add it just before serving. In the fridge, your tacos will stay fresh for about 1 to 2 days. The longer they sit, the softer the tortillas may become. I suggest eating them within the first day for the best texture and taste. If you want to freeze the taco filling, it works well. Place the cheesecake mixture in a freezer-safe container, leaving some space for expansion. It can last about 1 month in the freezer. When you’re ready to use it, thaw it in the fridge overnight. Then, assemble your tacos fresh for a delightful treat. Yes, you can make these tacos ahead of time. Prepare the filling and graham cracker crunch first. Store them in separate containers in the fridge. You can fill the tortillas right before serving. This keeps them fresh and crunchy. If you lack heavy whipping cream, you can use a few options. Try coconut cream for a dairy-free choice. You can also use half-and-half, but the texture may differ. Whipping cream provides the best results, so use substitutes carefully. You can serve these tacos with extra strawberry jam for a sweet touch. A drizzle of chocolate sauce also pairs well. A dollop of whipped cream makes a nice addition too. These add flavor and make the dish even more fun! This blog post covers everything you need to make delicious Strawberry Crunch Cheesecake Tacos. We explored the key ingredients, tools, and step-by-step instructions. I shared tips for perfect texture and shape, plus ways to customize your tacos. You learned how to store leftovers for later enjoyment and answered common questions. Try this fun recipe! It’s perfect for a special treat or gathering. You can impress friends and family with a sweet and crunchy delight. Enjoy making it your own!

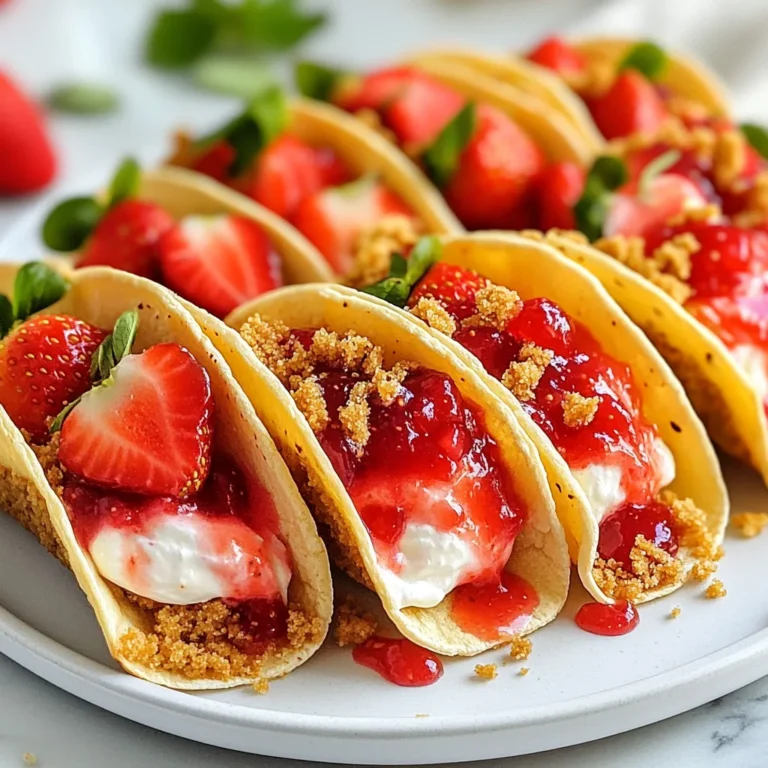
Strawberry Crunch Cheesecake Tacos Delightful Treat

To make these baked lemon blueberry donuts, gather these key items: - 1 cup all-purpose flour - 1/2 cup granulated sugar - 1 teaspoon baking powder - 1/2 teaspoon baking soda - 1/4 teaspoon salt - 1/2 teaspoon ground cinnamon - 1/2 cup Greek yogurt - 1/4 cup milk - 1/4 cup unsalted butter, melted - 1 large egg - Zest of 1 lemon - 1 tablespoon lemon juice - 1 cup fresh blueberries These ingredients come together to create a moist and flavorful donut. The lemon zest and juice add a bright taste. The fresh blueberries bring sweetness and a juicy burst in every bite. For a finishing touch, consider using: - Powdered sugar for dusting Dusting with powdered sugar makes your donuts look even more appealing. It adds a sweet, soft finish that pairs well with the tart lemon. These donuts are a tasty treat, but how do they stack up nutritionally? Here’s a quick overview: - Calories per donut: Approximately 150 - Fat: 5 grams - Carbohydrates: 23 grams - Protein: 3 grams These donuts can fit into a balanced diet. Enjoy one as a delightful breakfast or snack, knowing they are made with wholesome ingredients. {{ingredient_image_1}} Start by preheating your oven to 350°F (175°C). This step is key for even baking. Lightly grease your donut pan with cooking spray or melted butter. This helps the donuts release easily after baking. In a large mixing bowl, add 1 cup of all-purpose flour, 1/2 cup of granulated sugar, and 1 teaspoon of baking powder. Next, add 1/2 teaspoon of baking soda, 1/4 teaspoon of salt, and 1/2 teaspoon of ground cinnamon. Whisk everything together until it is well blended. This mix creates a tasty base for your donuts. In another bowl, mix 1/2 cup of Greek yogurt, 1/4 cup of milk, and 1/4 cup of melted butter. Add 1 large egg, the zest of 1 lemon, and 1 tablespoon of lemon juice. Stir until the mixture is smooth. This mix adds moisture and flavor to your donuts. Gently fold the wet ingredients into the dry ingredients. Be careful not to overmix. The batter should remain slightly lumpy. This helps keep the donuts light and fluffy. Now, fold in 1 cup of fresh blueberries. Ensure they are evenly distributed without breaking them. Using a piping bag or a spoon, fill each donut cavity about 3/4 full with the batter. Place the pan in the preheated oven. Bake for 12-15 minutes. The donuts should turn golden, and a toothpick should come out clean when inserted in the center. Once baked, remove the pan from the oven. Let the donuts cool in the pan for about 5 minutes. Then, transfer them to a wire rack to cool completely. If you like, dust them with powdered sugar for a sweet finish before serving. Enjoy your warm, zesty treats! To make great baked lemon blueberry donuts, focus on your batter. Start with fresh ingredients. Use high-quality flour and fresh blueberries. Measure your flour carefully. Too much flour can make them dense. A kitchen scale helps ensure accuracy. Mix the dry ingredients well, so they blend evenly. The zest of the lemon adds a bright flavor. Overmixing can hurt your donuts. It makes them tough and chewy. When you combine the wet and dry ingredients, mix gently. Use a spatula to fold the wet mixture into the dry. Stop mixing when you see some lumps in the batter. This is okay! Those lumps will help keep your donuts soft. Decorating your donuts makes them more fun! After cooling, you can dust them with powdered sugar. This adds sweetness and looks nice. For a pop of color, add fresh blueberries and lemon slices around the donuts on a plate. You can also drizzle a simple lemon glaze on top for extra zing. Pro Tips Use Fresh Blueberries: Fresh blueberries provide the best flavor and texture. If using frozen, ensure they are thawed and drained to avoid excess moisture in the batter. Don't Overmix the Batter: Overmixing can lead to dense donuts. Mix just until combined for a light, airy texture. Check for Doneness: Use a toothpick to check if the donuts are fully baked. If it comes out clean, they’re ready! Experiment with Glazes: For added sweetness, consider drizzling a lemon glaze over the donuts after cooling. Simply mix powdered sugar with lemon juice to taste. {{image_2}} You can switch up the berries in this recipe. Try using raspberries, strawberries, or blackberries. Each berry brings a unique flavor. Raspberries add a tart taste, while strawberries offer sweetness. Just keep the amount the same, and fold them in like blueberries. This small change can create a whole new treat! A glaze can take your donuts to the next level. Mix powdered sugar with lemon juice for a sweet finish. Start with one cup of powdered sugar and two tablespoons of lemon juice. Stir until smooth. Drizzle this glaze over the cooled donuts for a zesty kick. It adds a nice shine and extra flavor! You can make these donuts gluten-free easily. Substitute all-purpose flour with a gluten-free blend. Look for a blend that works well in baking. This swap keeps the texture light and fluffy. You won’t lose any flavor! Enjoy delicious donuts that everyone can eat. To keep your baked lemon blueberry donuts fresh, place them in an airtight container. This keeps them moist and tasty. You can store them at room temperature for about two days. If you want to keep them longer, the fridge is a good choice. Just be sure to seal them well to avoid drying out. If you want to save some donuts for later, freezing is a great option. First, let the donuts cool completely. Then, wrap each one in plastic wrap. Place them in a freezer-safe bag or container. They can stay in the freezer for up to three months. When you’re ready to enjoy them, just take them out and let them thaw at room temperature. Reheating donuts is easy. You can use a microwave or an oven. If using a microwave, heat for about 10-15 seconds. This warms them up without making them dry. For the oven, preheat it to 350°F (175°C) and warm the donuts for about 5-7 minutes. This will make them taste fresh-baked all over again! Yes, you can use frozen blueberries. Just do not thaw them first. Frozen berries can help keep your donuts moist. They may burst a little in the batter, creating a lovely swirl of color. To make the donuts sweeter, add more sugar. Start with an extra tablespoon of granulated sugar. You can also top them with a sweet glaze or powdered sugar after baking. If you need a substitute for Greek yogurt, try sour cream or regular plain yogurt. You can also use applesauce for a dairy-free option. Just keep the texture in mind when making your choice. The donuts stay fresh for about 2-3 days at room temperature. Store them in an airtight container to keep them soft. For longer storage, you can freeze them for up to a month. Baking blueberry donuts is easy and fun. We covered key ingredients, step-by-step instructions, and helpful tips. You can also try variations, like a lemon glaze or gluten-free options. Don’t forget to store your donuts properly to keep them fresh. With these recipes and tricks, you’ll make delightful treats that everyone will enjoy. Now, grab your ingredients and start baking today!

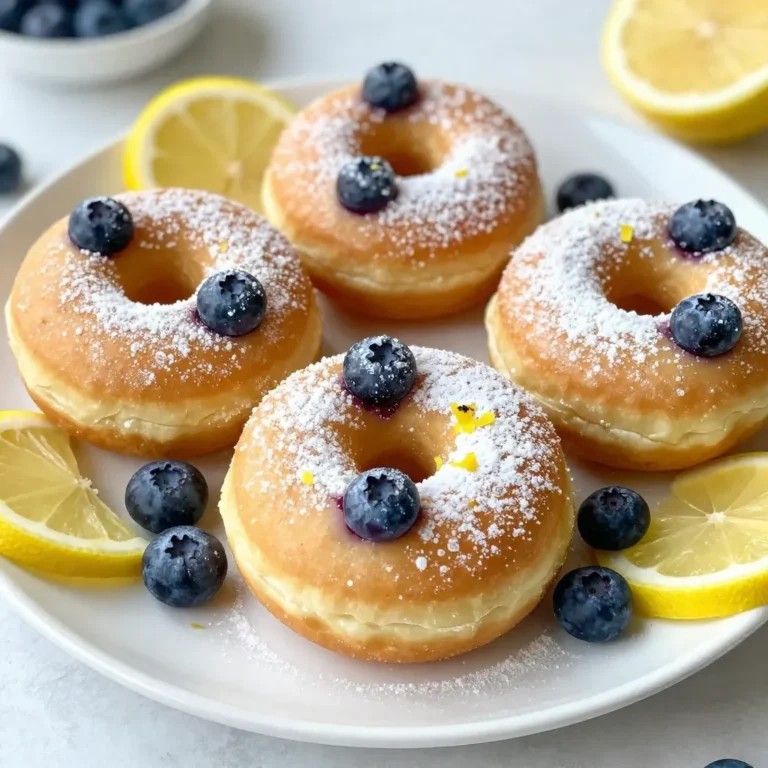
Baked Lemon Blueberry Donuts Irresistible Treat

For these tasty Pumpkin Spice Rice Krispie Treats, you will need: - 4 cups Rice Krispies cereal - 5 tablespoons unsalted butter - 1 package (10 ounces) miniature marshmallows - 1 teaspoon pumpkin pie spice - 1/2 cup canned pumpkin puree - 1 teaspoon vanilla extract - 1/2 cup white chocolate chips (optional) - 1/4 cup pumpkin seeds (optional, for topping) These ingredients come together to create a fun and festive treat that is easy to make. The pumpkin puree adds a rich flavor, while the pumpkin pie spice gives it that warm, autumn taste. When buying these ingredients, I recommend using high-quality brands for the best flavor: - Rice Krispies: Kellogg's is the classic choice. - Miniature Marshmallows: Look for Jet-Puffed for consistent results. - Unsalted Butter: Choose brands like Land O'Lakes for creamy goodness. - Canned Pumpkin: Libby's offers a great flavor and smooth texture. Using these brands can help you achieve the best taste and texture for your treats. To make your treats even more special, consider these add-ins: - White chocolate chips add a sweet, creamy layer. - Pumpkin seeds on top add a nice crunch and extra flavor. - You can also fold in some chopped nuts or dried fruit for extra texture. These options allow you to customize your treats and make them your own. Enjoy experimenting with different flavors! Start by gathering your tools. You need a large saucepan, a spatula, and a 9x13 inch baking dish. Grease the baking dish with cooking spray or butter. This step helps the treats come out easily later. Make sure your workspace is tidy. A clean area makes cooking more fun. Place the saucepan on low heat. Add the unsalted butter first. Let it melt slowly. Once melted, add the miniature marshmallows. Stir them constantly until they turn smooth. After that, take the saucepan off the heat. Mix in pumpkin pie spice, pumpkin puree, and vanilla extract. Stir well until everything blends nicely. Now, it’s time to add the Rice Krispies. Fold them into the melted mixture gently. Make sure each piece gets coated well. If you want, stir in white chocolate chips. Next, pour everything into the greased baking dish. Use lightly greased hands or a spatula to press it down. Be gentle; don’t pack it too tight. Let the treats cool at room temperature. Once cooled, you can sprinkle pumpkin seeds on top for a nice crunch. Cut them into squares or rectangles when ready to serve. To get the best texture, be gentle when mixing. Fold the Rice Krispies into the marshmallow mix slowly. Over-mixing can make them tough. When pressing into the pan, use greased hands to avoid sticking. Press just enough to hold them together but not too hard. This keeps them soft and chewy. One common mistake is using too much heat. Always melt butter and marshmallows on low heat. If you cook them too fast, they can burn. Another mistake is not greasing the pan well. If the treats stick, they can break apart when you cut them. Finally, don’t skip the cooling time. If you cut them too soon, they may crumble. Serve your treats on a pretty plate. You can sprinkle extra pumpkin pie spice on top for flair. For a crunch, add pumpkin seeds as a topping. You can even wrap them in clear bags with ribbons for gifts. They look great and taste even better! {{image_2}} You can add a fun twist to your treats with chocolate. Just mix in 1/2 cup of chocolate chips with the marshmallows. This adds a rich layer of flavor. The chocolate pairs well with the pumpkin spice. It makes each bite a bit sweeter. To make these treats gluten-free, swap Rice Krispies for a gluten-free rice cereal. Many brands offer great options. Check the labels to ensure they are gluten-free. The rest of the recipe stays the same. You still get the yummy pumpkin flavor without any gluten. For a vegan version, you'll need to replace the butter and marshmallows. Use a plant-based butter and vegan marshmallows. Both are easy to find at most stores. Stick with the pumpkin puree and spices. You still get that warm, cozy taste of fall. To keep your Pumpkin Spice Rice Krispie Treats fresh, store them in an airtight container. Line the container with parchment paper for easy removal. Avoid stacking the treats directly on top of each other to prevent sticking. If you want to keep them extra fresh, add a piece of bread to the container. The bread helps absorb moisture and keeps the treats soft. When stored properly, these treats can last about a week at room temperature. If you place them in the fridge, they might last up to two weeks. However, note that refrigeration can change their texture, making them a bit firmer. You can always let them sit at room temperature before serving. If your treats get too hard, you can soften them. Place a damp paper towel over the treats and microwave them for about 10 seconds. This adds moisture and makes them chewy again. Just be careful not to overheat them; they can get too sticky. Enjoy your treats warm for a cozy snack! Yes, you can use fresh pumpkin. Cook the pumpkin until soft. Then, mash it well. This will give you a fresh taste. Just remember to drain any excess water. Canned pumpkin is thicker and smoother, making it easier to mix. To make these treats less sweet, reduce the marshmallows. You can use 8 ounces instead of 10 ounces. You can also skip the white chocolate chips. Adding more pumpkin can balance the sweetness, too. The pumpkin adds flavor without much sugar. You can use other cereals if you want. Try crispy rice cereal or corn flakes. Both will give a nice crunch. For a healthier option, use puffed brown rice. This will change the flavor a bit, but still taste great. Yes, you can freeze these treats. Wrap them tightly in plastic wrap or foil. Then, place them in a freezer bag. They can last up to three months in the freezer. When ready to eat, let them thaw at room temperature. This blog post covered everything you need to make delicious Pumpkin Spice Rice Krispie Treats. We explored key ingredients, helpful brands, and optional add-ins. I shared step-by-step instructions for preparation, melting, and cooling. You learned tips for the best texture and common mistakes. We even discussed fun variations and proper storage methods. As you try this treat, keep it fun and simple. Enjoy making it your own!

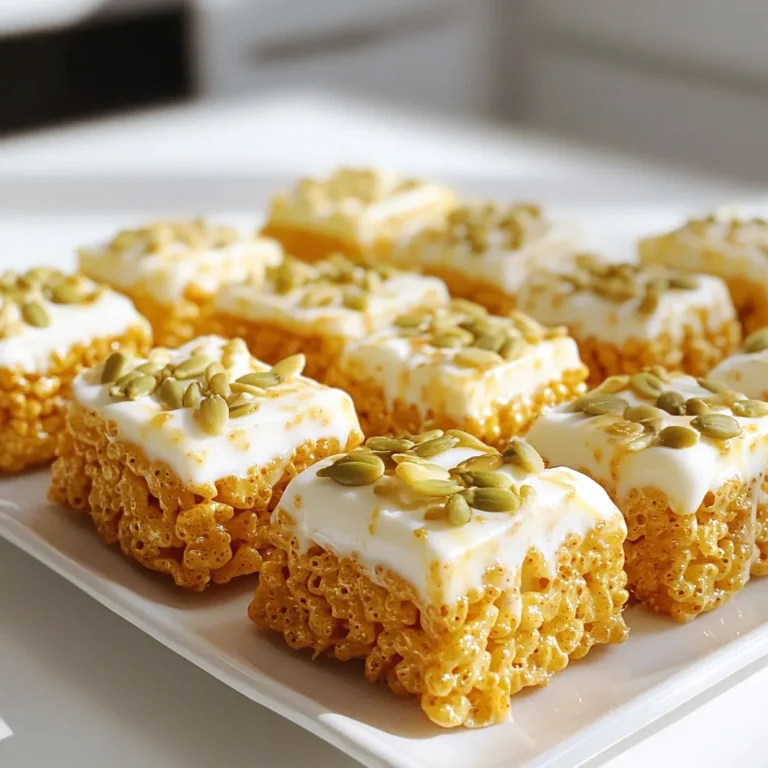
Pumpkin Spice Rice Krispie Treats Simple and Sweet Snack

For this tasty slow cooker chicken enchilada soup, you will need: - 1 pound boneless, skinless chicken breasts - 1 can (15 oz) black beans, drained and rinsed - 1 can (15 oz) corn, drained - 1 can (10 oz) red enchilada sauce - 1 can (14.5 oz) diced tomatoes with green chilies - 1 medium onion, chopped - 3 cloves garlic, minced - 1 teaspoon ground cumin - 1 teaspoon chili powder - 1/2 teaspoon smoked paprika - 4 cups chicken broth - Salt and pepper to taste These ingredients work together to create a rich flavor. The chicken serves as a hearty base. The beans and corn add a nice texture. The tomatoes bring a little sweetness, while the spices add warmth. For the best experience, I suggest adding some optional toppings: - Shredded cheese - Avocado and cilantro - Sour cream and lime wedges These toppings add creaminess and freshness to the soup. You can mix and match them based on your taste. Enjoying this soup with toppings makes each bowl feel special. How to prep chicken for the slow cooker Start by taking 1 pound of boneless, skinless chicken breasts. Place them at the bottom of your slow cooker. This base layer helps the chicken cook well and soak up all the flavors. Steps to rinse and drain canned ingredients Next, grab your canned ingredients. You’ll need 1 can of black beans and 1 can of corn. Open both cans. Use a strainer to rinse the black beans under cold water. This helps remove extra salt. Drain the corn as well. It’s a quick and easy step that makes the soup taste fresher. Layering ingredients in the slow cooker Now, add the rinsed black beans and corn on top of the chicken. Then, open a can of red enchilada sauce and pour it in. Add 1 can of diced tomatoes with green chilies, 1 chopped onion, and 3 minced garlic cloves. Each ingredient adds flavor and texture. Setting the cooking time and temperature Sprinkle 1 teaspoon of ground cumin, 1 teaspoon of chili powder, and 1/2 teaspoon of smoked paprika over the top. Add salt and pepper to taste. Finally, pour in 4 cups of chicken broth. Cover the slow cooker and set it on low for 6-8 hours or high for 4-6 hours. The chicken should be tender when done. Shredding chicken and re-integrating it into the soup About 30 minutes before serving, take the chicken out. Use two forks to shred it into bite-sized pieces. This makes it easier to eat. Return the shredded chicken back into the soup. Stir well to mix everything together. Serving options with toppings Ladle the soup into bowls. You can add tasty toppings like shredded cheese, avocado slices, fresh cilantro, and a dollop of sour cream. A squeeze of lime juice over the top adds a nice zing. Enjoy your delicious slow cooker chicken enchilada soup! To make your soup even better, adjust the seasoning. If you like spice, add more chili powder or cumin. For a milder taste, reduce these spices. Taste the soup before serving. This way, you can add salt or pepper as needed. For the right consistency, pay attention to the broth. If your soup is too thick, add more chicken broth. If it's too thin, let it cook longer with the lid off. This helps it thicken naturally. Use a slow cooker with a low and high setting. I recommend cooking on low for 6-8 hours. This makes the chicken super tender. If you are short on time, use the high setting for 4-6 hours. For easy prep, have these kitchen tools ready: - A sharp knife for chopping - A cutting board for safe slicing - Two forks for shredding chicken - Measuring cups and spoons for accurate amounts These tools make your cooking process smooth and quick. {{image_2}} You can switch the chicken for other proteins. Ground turkey works well. You can also try tofu for a plant-based option. Both choices add unique flavors. If you want a meat-free version, use extra beans. Chickpeas or lentils are great alternatives. They add protein and texture. Use vegetable broth instead of chicken broth for a full vegetarian dish. To amp up the flavor, add more spices. A pinch of cayenne pepper adds heat. You can also try chipotle powder for a smoky kick. Different broths can change the soup's taste. Use vegetable broth for a lighter flavor. You might even try a spicy broth for extra zing. Each change can make your soup unique and exciting. To store your slow cooker chicken enchilada soup, let it cool. Then, place it in airtight containers. This keeps the soup fresh and tasty. You can store it in the fridge for up to four days. If you want to keep it longer, freezing is a great option. Pour the soup into freezer-safe bags or containers. Leave some space at the top for expansion. When you want to eat it, thaw it overnight in the fridge. You can also reheat it straight from the freezer in a pot on low heat. Just stir often to avoid burning. Refrigerated soup lasts about four days. If you freeze it, it can last for about three months. Always check for signs of spoilage. If the soup smells off or has a strange color, it’s best to toss it. Also, watch for any mold or unusual texture. When in doubt, throw it out. Enjoy your soup safely! Can I use frozen chicken? Yes, you can use frozen chicken. Just add a little extra cooking time. Cook it for about 6-8 hours on low or 5-7 hours on high. This way, the chicken cooks well and stays juicy. How does this soup compare to traditional chicken enchiladas? This soup is simpler than traditional chicken enchiladas. Instead of rolling tortillas, you combine all the flavors in one pot. It has the same great taste but is easier to make. Each spoonful gives you the same spicy, savory flavors. What sides pair best with this dish? Some great sides are tortilla chips or a fresh salad. You can also serve it with rice or cornbread. These sides add crunch and balance the soup's warmth. They make your meal even more fun! In this blog post, we explored how to make slow cooker chicken enchilada soup. We covered main ingredients like chicken, black beans, and spices. I shared step-by-step cooking instructions and tips for perfecting your soup. We also discussed tasty variations and storage tips. This soup is not only easy to make but also delicious and versatile. You can adjust the flavors to fit your taste. Dive in, cook up a batch, and enjoy the warm, cozy flavors. You’ll love how simple and satisfying this dish can be.

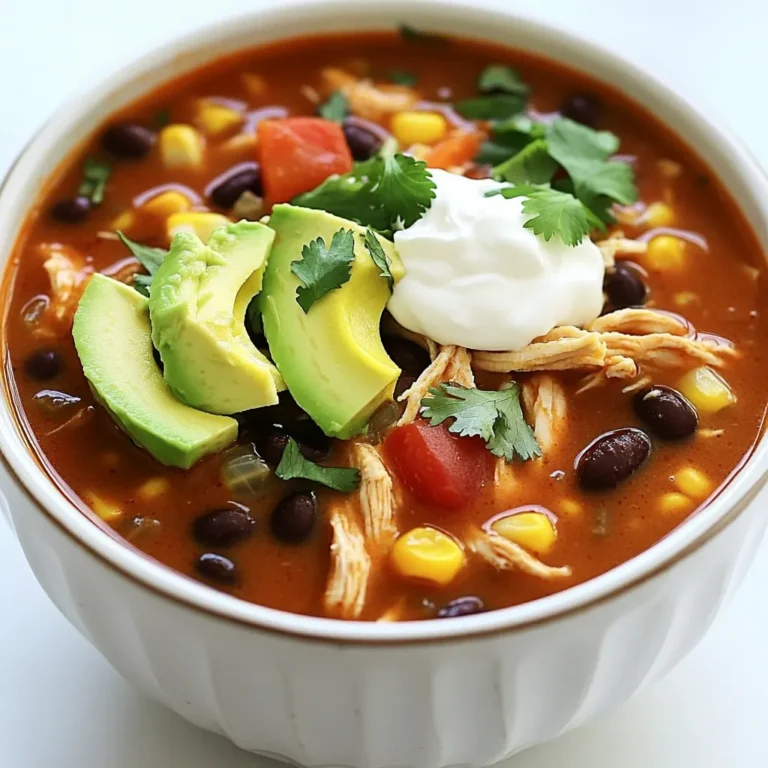
Slow Cooker Chicken Enchilada Soup Easy and Tasty Meal

- 1 pound ground turkey - 1 tablespoon olive oil - 4 cloves garlic, minced - 1 medium onion, diced The main ingredients set the stage for this dish. Ground turkey serves as the hearty base. It is lean, healthy, and absorbs flavors well. Olive oil adds richness and helps cooking. Garlic and onion bring aroma and depth, making every bite special. - 1 teaspoon dried thyme - 1 teaspoon dried oregano - 1 teaspoon paprika - Salt and pepper to taste Herbs and seasonings elevate the taste. Dried thyme provides a warm, earthy flavor. Oregano adds a hint of sweetness. Paprika gives a mild heat and color. Salt and pepper enhance all the flavors, making everything pop. - 1 cup heavy cream - 2 cups fresh spinach - 1 cup cherry tomatoes, halved - 1/2 cup grated Parmesan cheese Dairy and veggies make this dish creamy and fresh. Heavy cream creates a rich sauce that coats the turkey. Fresh spinach adds color and nutrients. Cherry tomatoes bring a burst of sweetness. Parmesan cheese adds a salty, nutty finish. Together, they create a delightful balance. First, heat 1 tablespoon of olive oil in a large skillet over medium heat. Add 1 medium diced onion and sauté it for 3 to 4 minutes. You want the onion to turn translucent. Next, add 4 cloves of minced garlic. Cook this for another 1 to 2 minutes until it smells nice. Now, push the onion and garlic to one side of the skillet. Add 1 pound of ground turkey. Use a spatula to break it apart. Cook the turkey for about 6 to 8 minutes, until it’s browned and no longer pink. While the turkey cooks, season it well. Add salt, pepper, 1 teaspoon of paprika, 1 teaspoon of dried thyme, and 1 teaspoon of dried oregano. Mix everything together. This will help the turkey absorb all those tasty flavors. Make sure to brown the meat evenly. This step adds depth to the flavor. Stir often to prevent sticking. Once the turkey is cooked, pour in 1 cup of chicken broth and 1 cup of heavy cream. Stir well to combine the ingredients. Bring this mixture to a gentle simmer. Let it cook for about 5 minutes. This allows the flavors to mix nicely. Next, add 2 cups of fresh spinach and 1 cup of halved cherry tomatoes. Cook for another 2 to 3 minutes until the spinach wilts. The colorful tomatoes brighten the dish. Finally, take the skillet off the heat. Stir in 1/2 cup of grated Parmesan cheese. This will create a creamy, rich sauce that ties everything together. Taste it and adjust any seasoning if needed. To make this dish shine, start with the seasoning. You can adjust salt and pepper based on your taste. If you want more flavor, add extra thyme or oregano. A pinch of lemon juice can brighten the dish too. Balancing creaminess is key. If you find the sauce too rich, add more chicken broth. This will lighten it without losing flavor. You can also stir in a bit of lemon zest for a fresh twist. Browning the turkey evenly makes a big difference. Make sure to break it apart with a spatula as it cooks. This helps it brown nicely and cook through. Don't rush this step; it adds depth to the dish. Next, focus on the sauce consistency. After adding the chicken broth and cream, stir well and let it simmer. You want the sauce to thicken but not too much. It should coat the turkey and veggies without being too heavy. Garnishing with fresh parsley adds color and freshness. Just sprinkle it on right before serving. It makes the dish look inviting and bright. For serving, you can keep it in the skillet. This adds a rustic touch. Pair it with crusty bread to soak up the sauce or serve it over pasta or rice. Both options make the meal complete and satisfying. {{image_2}} You can easily change the protein in this dish. Try chicken or beef instead of turkey. Both options give a tasty twist. For veggies, swap in broccoli or bell peppers. They add crunch and color to your meal. If you need a gluten-free option, use gluten-free broth and check labels on your cream. This dish can fit into a low-carb diet. Use cauliflower rice instead of pasta or rice for a light dish. To boost the flavor, add fresh lemon juice or zest. It brightens the creamy sauce. You can also mix in different herbs. Basil, rosemary, or dill work well and add unique tastes. To keep your One Pan Creamy Garlic Herb Turkey fresh, store it in the fridge right away. Use an airtight container to avoid drying out. This dish stays good for about 3 to 4 days. If you notice any strange smells or colors, it's best to toss it out. When it's time to enjoy leftovers, use the stovetop or microwave. For the stovetop, heat it gently over low heat. Stir often to keep it smooth. If you use the microwave, heat in short bursts. Check it every minute to stir. This method helps avoid sauce separation. If you want to freeze this meal, portion it into smaller containers first. Leave some space at the top for expansion. It freezes well for up to 3 months. When you’re ready to eat, thaw it overnight in the fridge. Then, reheat it gently as mentioned above. This way, your meal stays delicious. To make this dish dairy-free, you can use coconut cream instead of heavy cream. It gives a nice, creamy texture. You can also use cashew cream for a rich flavor. For cheese, try nutritional yeast for a cheesy taste without dairy. Yes, you can use ground turkey breast. It is leaner than regular ground turkey. Cooking time might be shorter because it has less fat. The dish may taste less rich, so adjust seasonings to boost the flavor. This dish pairs well with many sides. Try serving it over rice or pasta for a hearty meal. Crusty bread also complements the creamy sauce nicely. A fresh salad adds a crisp touch to balance the meal. This article shows how to make One Pan Creamy Garlic Herb Turkey. We covered key ingredients like ground turkey, olive oil, and fresh veggies. I gave tips on cooking techniques and suggested variations to suit your taste. Storing leftovers is easy with proper practices, and reheating is straightforward. Experimenting can enhance flavor, too. Remember, cooking is about creativity and enjoying the process. With these steps, you can make a delicious meal that you and your family will love. Happy cooking!

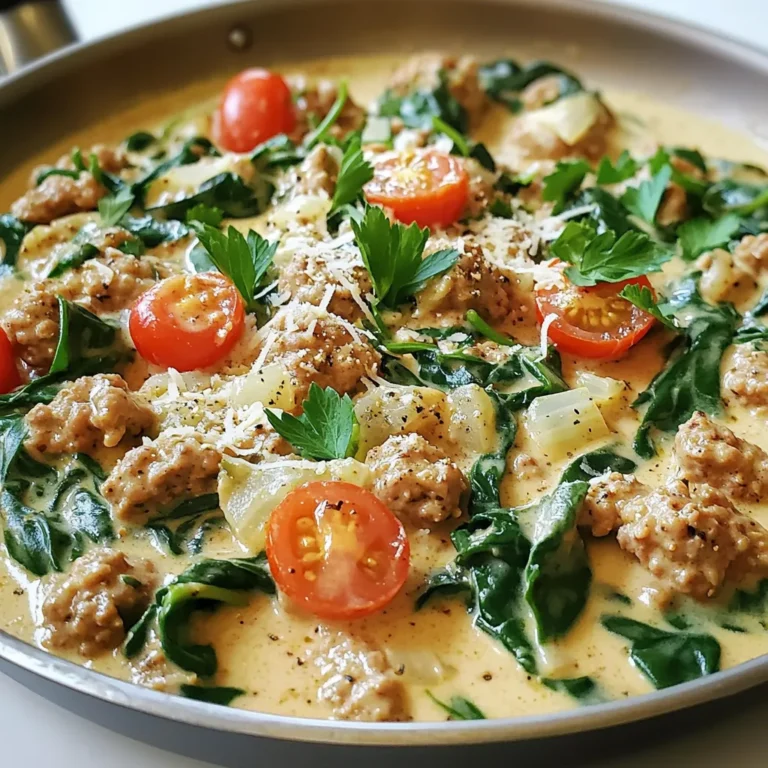
One Pan Creamy Garlic Herb Turkey Flavorful Dinner

To make these No Bake Pumpkin Peanut Butter Bites, you'll need simple ingredients. Here’s what you should gather: - 1 cup pumpkin puree - 1/2 cup natural peanut butter - 1/4 cup rolled oats - 1/4 cup honey or maple syrup - 1 teaspoon cinnamon - 1/2 teaspoon nutmeg - 1/2 teaspoon vanilla extract - 1/4 cup chocolate chips (dark or milk) - A pinch of salt These ingredients work together to create a tasty treat. The pumpkin puree brings in moisture and flavor. Natural peanut butter adds creaminess and protein. Rolled oats give these bites a nice texture. You can choose honey or maple syrup for sweetness. Cinnamon and nutmeg add warmth and a hint of spice. Vanilla extract enhances the overall taste. Finally, chocolate chips provide a sweet touch that everyone loves. When you combine these ingredients, you create a healthy snack that is easy to make. You can adjust the sweetener to your taste. If you prefer a sweeter bite, add more honey or syrup. If you want less sweetness, reduce the amount. The spices can also be adjusted. If you love cinnamon, add a bit more! Gather these ingredients, and you’re on your way to making a delicious treat. Each one plays a vital role in the final flavor and texture. Enjoy experimenting with your own twists on this recipe! - Mixing the Base Ingredients Start by taking a large bowl. Add 1 cup of pumpkin puree and 1/2 cup of natural peanut butter. Stir them well until they blend together smoothly. This mix is the heart of your bites. - Incorporating Oats and Sweetener Next, add 1/4 cup of rolled oats and 1/4 cup of honey or maple syrup. These ingredients add texture and sweetness. Stir until everything is fully combined. - Adding Spices and Flavorings Now, sprinkle in 1 teaspoon of cinnamon, 1/2 teaspoon of nutmeg, and 1/2 teaspoon of vanilla extract. These spices give your bites a warm, cozy flavor. Don’t forget a pinch of salt to balance the sweetness. Mix again to blend these flavors well. - Folding in Chocolate Chips Finally, gently fold in 1/4 cup of chocolate chips. This adds a sweet surprise to each bite. Be careful not to crush the chips as you mix. - Forming the Balls After mixing, it’s time to shape the mixture. Use your hands to scoop out small amounts, about 1 inch in diameter. Roll them into balls. This is a fun and hands-on part of the process. - Arranging on Baking Sheet Place each ball on a parchment-lined baking sheet. Make sure to leave some space between them. This helps them chill evenly later. - Refrigeration Process Once all the bites are shaped, put the baking sheet in the fridge. This helps them firm up, making them easier to eat. - Timing for Firming Up Let the bites chill for about 30 minutes. This time allows them to set properly. After chilling, they are ready to enjoy. Store any leftovers in an airtight container in the fridge for freshness. Adjusting Sweetness You can change the sweetness by using more or less honey or maple syrup. Start with 1/4 cup, then taste. If you like it sweeter, add a little more. Remember, pumpkin has its own natural sweetness. Ensuring Proper Mixing Mix the pumpkin puree and peanut butter well. This helps the flavors blend. Use a sturdy spoon or spatula. Make sure no lumps remain. When you add oats and spices, mix until everything is even. This will give you a great texture. Pairing with Dips or Toppings These bites are tasty on their own, but you can add dips. Try yogurt or a chocolate sauce for extra flavor. You can also sprinkle some crushed nuts on top for crunch. Ideas for Serving at Events These bites are fun to serve at parties. Place them on a colorful platter. You can also use small cups or skewers for easy eating. They make a great treat for kids and adults alike. Nutritional Value of Pumpkin Pumpkin is low in calories and high in vitamins. It has a lot of vitamin A, which is good for your eyes. Pumpkin also has fiber, which helps with digestion. Benefits of Peanut Butter Peanut butter is packed with protein. It keeps you full and gives you energy. It also contains healthy fats that are good for your heart. Choose natural peanut butter for the best health benefits. {{image_2}} You can make your No Bake Pumpkin Peanut Butter Bites even more fun! Try adding different nuts or seeds. Chopped almonds or walnuts give a nice crunch. Sunflower seeds add a nutty flavor and boost nutrients. Both choices keep your bites tasty and healthy. You can also spice things up by incorporating other spices. Besides cinnamon and nutmeg, try ginger or allspice. These spices add warmth and depth. You can mix and match based on your taste buds. You can easily adapt this recipe to fit your diet. For vegan options, use maple syrup instead of honey. Also, choose a vegan chocolate brand. This way, everyone can enjoy these bites without worry. If you need gluten-free alternatives, use certified gluten-free oats. They are just as delicious and safe for those with gluten sensitivities. This recipe remains tasty and friendly for all diets. Add some fun to your bites with dried fruit. Raisins, cranberries, or chopped dates blend well with pumpkin and peanut butter. They add sweetness and chewiness to your bites. You can also use different types of chocolate. Dark chocolate chips bring a rich taste. Milk chocolate chips offer sweetness, while white chocolate can add a creamy twist. The choices are endless, so get creative! To keep your No Bake Pumpkin Peanut Butter Bites fresh, store them in an airtight container. This helps prevent them from drying out and keeps flavors locked in. You can store them in the fridge for up to a week. If you want to enjoy them later, freezing is a great option. To freeze these bites, first place them on a baking sheet in a single layer. Freeze them for about an hour. Once they are firm, transfer them to a freezer-safe bag or container. This method helps keep their shape. When you’re ready to eat, just take out the desired amount and thaw them in the fridge for a few hours. Watch for signs of spoilage, like an off smell or discoloration. If they look or smell strange, it’s best to toss them. To keep your bites fresh, store them away from heat and direct sunlight. Enjoy them while they’re at their best! Yes, you can use other nut butters. Almond butter works well and has a nice flavor. Cashew butter is also a great choice if you want something mild. Sunflower seed butter is a good option for nut-free diets. Just keep in mind that each nut butter has a unique taste. If you need a pumpkin substitute, try using sweet potato puree. It gives a similar sweetness and texture. You can also use butternut squash puree as a good alternative. Both options keep the bites delicious and help you stick to the recipe's spirit. These bites can stay fresh in the fridge for about one week. Make sure to store them in an airtight container. This keeps them from drying out and helps keep the flavors intact. For longer storage, you can freeze them, which I’ll explain later. Absolutely! You can skip the chocolate chips if you want. Try adding chopped nuts or dried fruit instead for a tasty twist. You can also mix in some seeds for a crunch. This way, you keep the bites fun and add your own flair! We covered how to make delicious pumpkin peanut butter bites using simple ingredients. From mixing the base to shaping the bites, each step is easy to follow. I shared tips for perfect texture, serving ideas, and health benefits. You can even customize these bites to fit your dietary needs. Try these recipes, and you’ll enjoy tasty snacks that are good for you. With proper storage, they can last a while too. Remember, your imagination is the only limit to these bites! Enjoy your healthy treats.

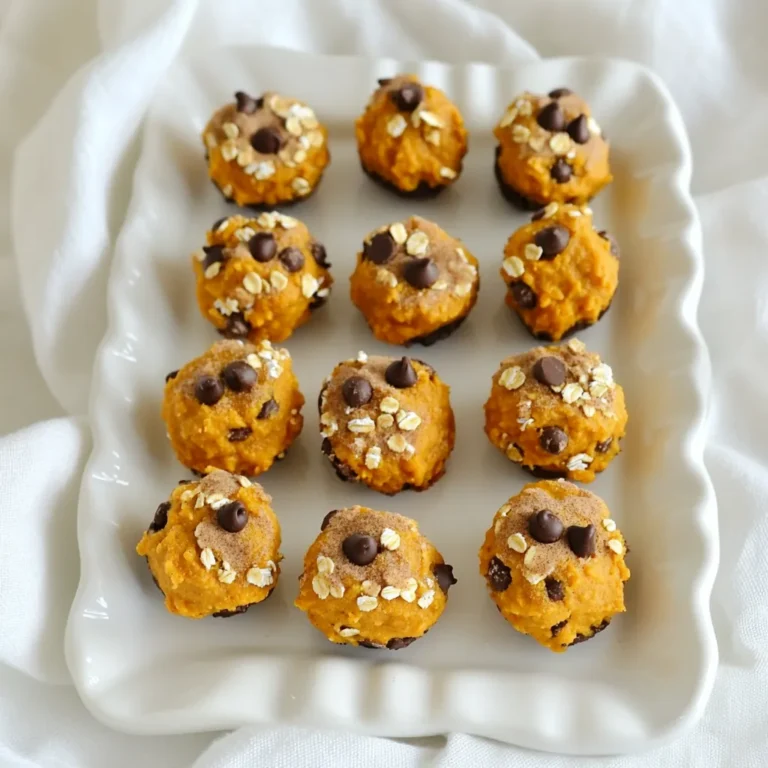
No Bake Pumpkin Peanut Butter Bites Easy Treat

- 2 cups apple cider - 1 cup sparkling water or club soda - 1 tablespoon fresh lemon juice - 1 tablespoon maple syrup (optional) - 1/2 teaspoon ground cinnamon - 1/4 teaspoon ground nutmeg - Garnishes: apple slices and cinnamon sticks This Cozy Apple Cider Spritzer uses simple, fresh ingredients. The main star is the apple cider. It gives the drink its sweet and fruity taste. The sparkling water or club soda adds fizz. It makes every sip light and refreshing. Adding fresh lemon juice brightens the flavors. The maple syrup can sweeten the drink if you like. Ground cinnamon and nutmeg bring warmth. These spices remind you of fall and holidays. For garnishes, apple slices and cinnamon sticks look great. They add a fun touch and extra flavor. You can find all these ingredients at your local store. With just a few simple items, you can create a cozy drink that warms your heart. 1. Combine apple cider, sparkling water, and lemon juice in a pitcher. This brings a bright taste. The mixture will bubble as the lemon juice meets the soda. 2. Stir in maple syrup and mix until dissolved. If you want a sweeter drink, this step is key. The maple syrup adds a nice touch that complements the apple cider. 3. Add cinnamon and nutmeg, then blend well. These spices make the drink warm and cozy. They add a fall flavor that makes you feel right at home. 1. Fill glasses with ice and pour the mixture. Ice keeps the drink cool and refreshing. Pour gently to avoid splashing. 2. Garnish each glass with apple slices and cinnamon sticks. This step makes your drink look pretty. The apple slices add a nice crunch and the cinnamon sticks give an extra dash of flavor. Enjoy your cozy apple cider spritzer! To make your cozy apple cider spritzer sweeter, add maple syrup. Start with one tablespoon. Stir it in until it blends well. You can also try other sweeteners, like honey or agave syrup, for a different taste. For spices, ground cinnamon and nutmeg give great warmth. But if you want a twist, use allspice or ginger. Each spice adds a unique flavor. Taste as you mix to find your perfect blend. How you serve this drink makes a big impact. Clear glasses show off the pretty colors. You can add ice cubes and let them shine. For a fun touch, use glasses with fall designs or colors. Garnish is key to a great look. Add apple slices on the rim. A cinnamon stick can sit tall in each glass. These small details make your spritzer stand out at any gathering. For special events, choose themed drinkware. Use mugs for a cozy feel or cocktail glasses for a fancy vibe. The right glass can make your spritzer even more inviting. {{image_2}} You can make your cozy apple cider spritzer even better with some seasonal twists. Adding cranberries gives a pop of color and tartness. You can also try other fruits like pomegranate or pear. These fruits match perfectly with the apple cider. For a spiced version, think about adding extra seasonings. You might add ginger or cloves for more warmth. A pinch of allspice can also deepen the flavor. Each option brings a unique taste while keeping that cozy vibe. This spritzer works for everyone, whether you want it boozy or not. For an adult drink, consider adding whiskey or spiced rum. These spirits mix well with the flavors and warm you up. If you want a kid-friendly version, skip the alcohol. Stick with the apple cider and sparkling water. You can add a splash of fruit juice, like cranberry or orange, for extra fun. This way, everyone can enjoy a festive drink together! To store leftover cozy apple cider spritzer, pour it into a clean glass jar. Seal it tightly with a lid. This helps keep the drink fresh. Store it in the fridge for up to three days. The flavors will remain good, but the fizz may fade a bit. If you want to keep the sparkle, store the sparkling water and cider separately. For the ingredients, apple cider can last about a week in the fridge. Fresh lemon juice stays good for about three days. Ground spices like cinnamon and nutmeg last for months when kept in a cool, dark place. To refresh leftover apple cider spritzer, add more sparkling water before serving. This brings back some fizz. You can also add fresh apple slices and a cinnamon stick to enhance the look and flavor. If you store the ingredients separately, combine them right before serving. This keeps the drink fresh and bubbly. For a quick mix, use a shaker or a jar to blend the cider and water. Can I prepare this drink in advance? Yes, you can. I like to mix the apple cider, sparkling water, and lemon juice a few hours ahead. Just don’t add the ice until you serve it. This keeps it fizzy and fresh. What are the best occasions to serve this spritzer? This spritzer shines at fall gatherings. It’s perfect for cozy nights, Thanksgiving, or Halloween parties. The warm spices make it feel like a hug in a glass. How can I make a larger batch for a party? Making a larger batch is easy! Just multiply the ingredients. For every four servings, use 2 cups of cider and 1 cup of sparkling water. A big pitcher will keep everyone happy. Just remember to add ice and garnishes close to serving time. This blog post shared how to make a cozy apple cider spritzer. You learned about the key ingredients, from apple cider to spices. I provided step-by-step instructions that are easy to follow. You also found tips for flavor variations and storage. Whether you serve it at a party or a family gathering, this drink suits all occasions. Enjoying a tasty spritzer can bring warmth and fun to any day. Get creative with your ingredients and enjoy this refreshing drink!

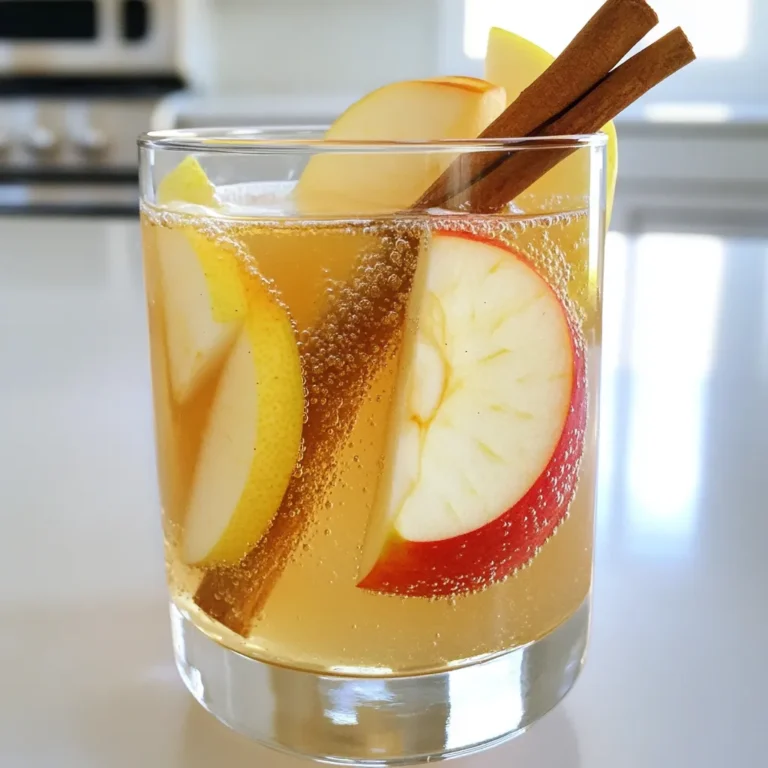
Cozy Apple Cider Spritzer Refreshing Fall Beverage

- 12 fresh jalapeños, halved and seeded - 1 cup cream cheese, softened - 1/2 cup shredded sharp cheddar cheese - 1/4 cup crumbled feta cheese - 1 tablespoon garlic powder - 1 teaspoon onion powder - 1/2 teaspoon smoked paprika - 1/4 teaspoon black pepper - 1/2 cup panko breadcrumbs - 2 tablespoons olive oil - Fresh parsley or cilantro for garnish (optional) If you need options for cream cheese, you can try Greek yogurt or vegan cream cheese. For cheese, mozzarella or pepper jack works great, adding a nice twist. When it comes to breadcrumbs, you can use regular bread crumbs or crushed cornflakes. These swaps can give you new flavors while keeping the dish fun and tasty! 1. Preheat the air fryer: Start by setting your air fryer to 375°F (190°C). This ensures even cooking and crispy bites. 2. Prepare the filling for jalapeños: In a mixing bowl, combine 1 cup of softened cream cheese, 1/2 cup of shredded sharp cheddar cheese, and 1/4 cup of crumbled feta cheese. Add 1 tablespoon of garlic powder, 1 teaspoon of onion powder, 1/2 teaspoon of smoked paprika, and 1/4 teaspoon of black pepper. Mix until everything blends well. This filling is creamy and flavorful. - How to properly fill jalapeño halves: Take your halved jalapeños and fill each half generously with the cheese mixture. Make sure to pack it in well to avoid gaps. - Tips for avoiding spillage: Use a small spoon or spatula to help push the filling into each half. If you fill them too much, the filling may overflow. - Cooking times and temperatures: Place the filled jalapeños in the air fryer basket in a single layer. Cook for about 10-12 minutes. You want them golden and bubbly. - How to check for doneness: Look for the cheese to be melted and the breadcrumbs to be golden brown. If they're not ready, keep them cooking for another minute or two. Enjoy the aroma! To get even cooking in your air fryer, arrange the jalapeño popper bites in a single layer. This helps the hot air flow freely around each piece. If you overcrowd the basket, they may not crisp up well. For heat management, preheat your air fryer to 375°F (190°C) before cooking. The right temperature ensures your bites cook through while keeping the breadcrumbs golden. Adjust the cooking time if you prefer them extra crispy. For a fun twist, serve your jalapeño popper bites on a colorful platter. You can add a dollop of sour cream or ranch dressing in the center for dipping. Fresh herbs like parsley or cilantro can make your dish look fancy. Try pairing the bites with spicy salsas or creamy avocado dip for an added kick. These options enhance the flavor and make the snack more exciting. If you're hosting a party, you can easily double the recipe. Just make sure your air fryer can handle the extra servings. Cook in batches if needed, and keep the first batch warm in the oven. Meal prepping jalapeño popper bites is also a great idea. You can fill and coat them ahead of time. Just store them in the fridge until you’re ready to cook. This makes it simple to serve delicious snacks when guests arrive. {{image_2}} You can boost the flavor of jalapeño popper bites with spices. Try adding cayenne pepper for extra heat. A pinch of chili powder can give a nice kick. You can also mix in cooked bacon or sausage. These ingredients add a savory depth that pairs well with the cheese. If you want a vegan version, you can swap cream cheese. Use cashew cream or a store-bought vegan cream cheese. For the cheeses, try nutritional yeast for a cheesy flavor. Use crushed nuts or seeds for the breading. This gives a nice crunch without dairy. You don’t have to use an air fryer. Baking is a great option too. Preheat your oven to 375°F (190°C). Place the jalapeño bites on a baking sheet. Bake for 15-20 minutes until golden and bubbly. Grilling is also fun! Cook them over medium heat for about 10 minutes. Flip them halfway for even cooking. Each method brings out unique flavors. Explore them all! After enjoying your jalapeño popper bites, store any extras in the fridge. Place them in an airtight container. They will stay fresh for about three days. If you want to save them longer, you can freeze them. Wrap each piece in plastic wrap and then place them in a freezer bag. They will last up to three months in the freezer. To keep your jalapeño popper bites crispy, reheat them in the air fryer. Set the air fryer to 350°F (175°C) and heat for about five minutes. This method helps restore their crunch. Avoid using the microwave, as this can make them soggy. If you must use the microwave, heat them in short bursts, checking often to prevent moisture build-up. In the fridge, jalapeño poppers are good for three days. After that, they may spoil. Look for changes in smell, texture, or discoloration as signs of spoilage. If they smell off or have a mushy texture, it’s best to toss them. Enjoying them fresh is always the best choice! Can I make them ahead of time? Yes, you can prepare the jalapeño popper bites ahead. Just fill the jalapeños and coat them with breadcrumbs. Place them in the fridge until you're ready to cook. This saves time when you want to serve them. Are these jalapeño poppers spicy? The spice level depends on the jalapeños you use. Some are mild, while others pack a punch. If you prefer less heat, choose milder peppers or remove all the seeds and membranes. What to do if the filling leaks out while cooking? If the filling leaks, it’s often due to overfilling. Make sure you fill each half just enough. If it still leaks, try using a toothpick to secure the halves together. How to prevent burnt breadcrumbs? To avoid burnt breadcrumbs, coat them lightly with olive oil. This helps them crisp up without burning. Keep an eye on them as they cook. If they brown too quickly, lower the temperature slightly. How many servings per recipe? This recipe makes about four servings. Each serving has three to four popper bites, depending on how hungry you are. What to serve with jalapeño popper bites? Serve these bites with sour cream or ranch dressing for dipping. Fresh veggies or a light salad also pair nicely. Enjoy them as a fun appetizer at your next gathering! In this blog post, we've explored making tasty jalapeño popper bites. You learned the key ingredients, like cream cheese and sharp cheddar, and how to prep them. We covered tips for cooking in the air fryer and even ideas for variations. You can make these bites for a crowd or try different flavors. Remember to store any leftovers properly to keep them fresh. With these steps, you can create delicious treats that will impress everyone. Enjoy cooking and sharing your jalapeño poppers!

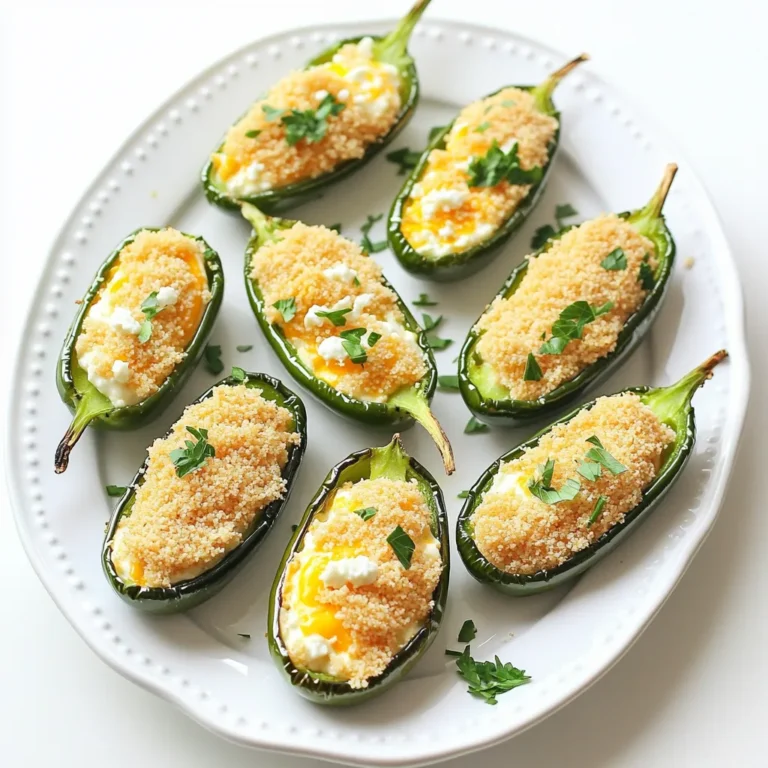
Air Fryer Jalapeño Popper Bites Tasty and Easy Snack

PREV 1 … 5 6 7 … 86 NEXT
meal twig

explore

DessertsDinnerAppetizersDrinks

Our Policies

  • Cookie Policy
  • Copyright Policy
  • Disclaimer
  • GDPR Policy
  • Terms Of Use
Back to Top
  • About
  • Contact Us
  • Privacy Policy
© 2026 meal twig