FREE DINNER EBOOK! Get your copy!
  • Cookie Policy
  • GDPR Policy
  • Disclaimer
  • Terms Of Use
  • Visit my other site: Fun Cookie Recipes
meal twig
  • Home
  • Dinner
  • Desserts
  • Drinks
  • Appetizers
  • Contact
  • About
  • Privacy Policy
  • Home
  • Dinner
  • Desserts
  • Drinks
  • Appetizers
  • Contact
  • About
  • Privacy Policy
  • Cookie Policy
  • GDPR Policy
  • Disclaimer
  • Terms Of Use
Visit my other site: Fun Cookie Recipes

HOME / CATEGORIES /

Latest

- 12 oz spaghetti or fettuccine - 1 tablespoon olive oil - 1 medium onion, chopped - 2 cloves garlic, minced - 1 bell pepper (red or yellow), sliced - 1 zucchini, sliced - 1 cup cherry tomatoes, halved - 1 cup broccoli florets - 4 cups vegetable broth - 1 teaspoon dried Italian herbs (oregano, basil, thyme) - Salt and pepper to taste - ½ cup grated Parmesan cheese (or nutritional yeast for a vegan option) - Fresh basil leaves for garnish Gather these fresh and vibrant ingredients to create a tasty dish. I love using spaghetti or fettuccine for this recipe. Both types of pasta work well and soak up the flavors nicely. Olive oil adds richness and helps the veggies cook. Onion and garlic bring a sweet and savory base. I prefer using a medium onion for the right amount of flavor. The minced garlic adds a nice punch. Next, I always choose a mix of colorful vegetables. Bell peppers, zucchini, cherry tomatoes, and broccoli are my favorites. They add different textures and flavors to the dish. Vegetable broth is key for extra depth. It helps cook the pasta while adding savory notes. Dried Italian herbs like oregano, basil, and thyme enhance the taste too. Lastly, I finish the dish with grated Parmesan cheese or nutritional yeast for a vegan twist. Fresh basil leaves bring a fresh touch on top. These ingredients come together to create a bright and flavorful One Pot Pasta Primavera! {{ingredient_image_1}} 1. Heat one tablespoon of olive oil in a large pot over medium heat. 2. Add one chopped onion and two minced garlic cloves. Sauté for about three to four minutes. 3. When the onion looks clear and smells good, it is time for the veggies. 4. Add one sliced bell pepper, one sliced zucchini, one cup of halved cherry tomatoes, and one cup of broccoli florets. 5. Cook this mix for five minutes. Stir often to help the veggies soften. 1. Pour in four cups of vegetable broth. 2. Add 12 ounces of spaghetti or fettuccine to the pot. 3. Sprinkle in one teaspoon of dried Italian herbs, salt, and pepper. 4. Turn the heat to high and bring the mix to a boil. 5. Once it boils, lower the heat to medium-low. Cover and let it simmer for about ten to twelve minutes. 6. Stir occasionally until the pasta is soft and the broth is mostly gone. 1. Remove the pot from heat. 2. Stir in half a cup of grated Parmesan cheese or nutritional yeast. This will add creaminess. 3. Taste your dish. Adjust the salt and pepper as needed for better flavor. 4. Serve your pasta primavera warm. Add fresh basil leaves on top for a nice touch. To get your pasta just right, aim for al dente. This means the pasta should be firm but not hard. Cook the spaghetti or fettuccine for about 10 to 12 minutes. Stir occasionally to keep it from sticking. If you notice the pasta clumping, add a splash of broth or water. This helps keep each piece separate. Choosing seasonal vegetables makes this dish fresh and tasty. Look for bright, colorful veggies at your local market. Bell peppers, zucchini, and cherry tomatoes are great choices. If you want to swap the cheese, use nutritional yeast for a vegan option. It adds a nice flavor without dairy. Pasta primavera pairs well with a crisp salad or warm bread. A light vinaigrette adds a nice touch. If you have leftovers, store them in an airtight container. They taste great reheated the next day. You can also mix in some extra vegetables or protein for variety. Pro Tips Use Seasonal Vegetables: Opt for vegetables that are in season for the best flavor and freshness. You can substitute or add any seasonal produce you prefer! Adjust Cooking Time: Depending on the type of pasta you use, the cooking time may vary. Check the pasta package instructions for al dente results. Enhance Flavor: Consider adding a splash of lemon juice or a sprinkle of red pepper flakes just before serving to brighten up the flavors. Make It Creamy: For a creamier texture, you can stir in a splash of heavy cream or plant-based cream alternatives along with the cheese. {{image_2}} To make this dish vegan, you can swap out the cheese. Use nutritional yeast instead of Parmesan. Nutritional yeast gives a cheesy taste without dairy. It also adds B vitamins. Just sprinkle about half a cup into the pot with your veggies. Stir it in until it melts nicely. This keeps the dish creamy and rich. If you need a gluten-free dish, you can switch the pasta. Use gluten-free spaghetti or fettuccine. There are many good options available now. Look for ones made from rice, quinoa, or lentils. These alternatives cook well in the same way. Just follow the package instructions for cooking times. Want to add protein? You can toss in cooked chicken or tofu. Chicken goes well with the veggies and herbs. Tofu is a great plant-based choice. Cut it into cubes and add it with the vegetables. You can also play with spices. Try adding red pepper flakes for heat or lemon zest for brightness. Each tweak makes the dish more exciting! Store your One Pot Pasta Primavera in an airtight container. Glass or plastic containers work well. Make sure the pasta is cool before sealing it. This helps keep the texture nice. You can keep it in the fridge for about three days. To reheat, use a microwave or a stovetop. If using a microwave, heat in short bursts. Stir after each burst to warm evenly. On the stovetop, add a splash of broth or water. Heat it over low heat, stirring often. This keeps the pasta from drying out. You can freeze this dish for later enjoyment. Let it cool completely before freezing. Use freezer-safe containers or bags. Store in portions for easy meals. To defrost, move it to the fridge overnight. Reheat on the stove or in the microwave as needed. This way, you can enjoy your tasty pasta primavera anytime! One Pot Pasta Primavera is a simple, colorful dish. It blends pasta with fresh veggies. You cook everything in one pot, which saves time and clean-up. The dish features spaghetti or fettuccine, tossed with bell peppers, zucchini, cherry tomatoes, and broccoli. The veggies add bright flavors and nutrients. You finish the dish with cheese and fresh basil for taste and aroma. It is perfect for a quick weeknight meal. Yes, you can make One Pot Pasta Primavera ahead of time. To prep, cook the pasta and veggies as per the recipe. Once cooked, let it cool before storing. Keep it in an airtight container in the fridge. This dish tastes great the next day. If you want to save time, chop the vegetables the night before too. One Pot Pasta Primavera lasts about 3 to 4 days in the fridge. Make sure to store it in a sealed container. Check for any signs of spoilage before eating. If it looks or smells off, it’s best to toss it out. To keep it fresh, eat it within a few days for the best taste and texture. This blog post explored how to make a delicious One Pot Pasta Primavera. You learned about the key ingredients and step-by-step instructions, from sautéing vegetables to cooking pasta. We shared tips for perfecting your dish and how to store leftovers effectively. One Pot Pasta Primavera is simple and flexible. You can make it vegan or gluten-free. Enjoy experimenting with flavors and seasonal veggies. Cooking this dish is a great way to enjoy fresh ingredients while saving time in the kitchen. Now, you’re ready to create your own masterpiece!

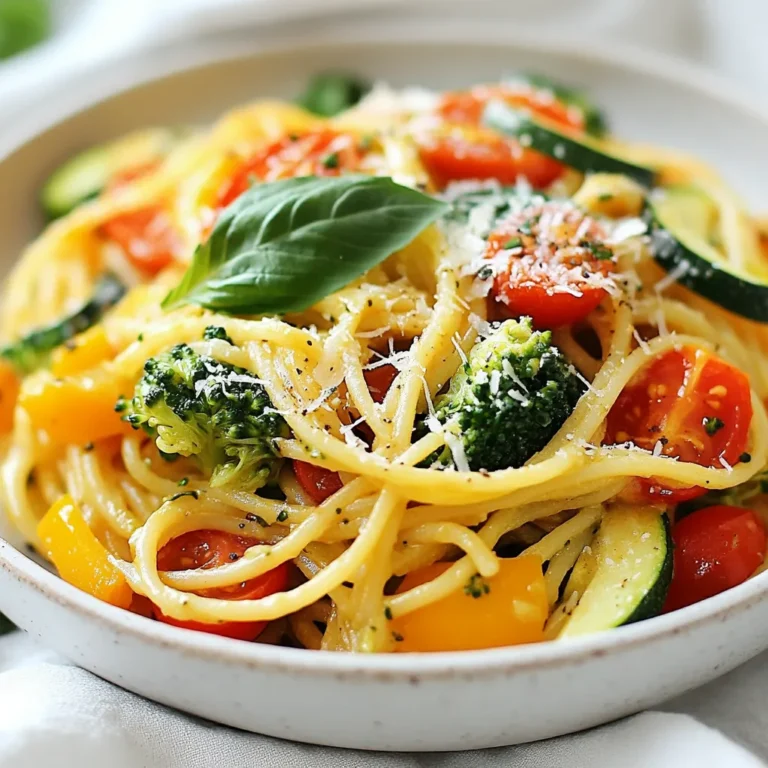
One Pot Pasta Primavera Flavorful and Easy Recipe

- 1 lb bavette steak (flank or skirt steak) - Salt and pepper to taste - 2 tablespoons olive oil - 4 cloves garlic, minced - 1 cup beef stock - 1 tablespoon Dijon mustard - 2 tablespoons unsalted butter - Fresh parsley, chopped (for garnish) Bavette steak is a flavorful cut of meat. This recipe uses a pound of it. You can use flank or skirt steak too. Salt and pepper help enhance the meat's natural taste. Next, you need olive oil. It brings richness to the dish. Garlic adds a lovely aroma and taste. I use four cloves here, minced finely. Beef stock is crucial for the pan sauce. It gives depth and richness. Dijon mustard adds a tangy kick to the sauce. Finally, unsalted butter helps make the sauce creamy and smooth. Don’t forget fresh parsley! It brightens the dish and adds color. Each ingredient plays a role in creating a savory bavette steak with garlic pan sauce. {{ingredient_image_1}} Start by taking your bavette steak out of the fridge. Let it sit at room temperature for about 30 minutes. This helps it cook evenly. Next, season both sides of the steak generously with salt and pepper. This simple step boosts the flavor. Heat 2 tablespoons of olive oil in a large skillet over medium-high heat. Once the oil is hot, gently place the seasoned steak in the skillet. Sear each side for about 4 to 5 minutes. This timing gives you a nice medium-rare steak. If you prefer it more done, leave it in for a bit longer. After searing, transfer the steak to a cutting board. Let it rest while you prepare the sauce. In the same skillet, reduce the heat to medium. Add 4 cloves of minced garlic to the pan. Sauté for about 1 minute. You want it fragrant but not brown. Then, carefully pour in 1 cup of beef stock. Use a wooden spoon to scrape any brown bits from the bottom. These bits add great flavor! Bring the mixture to a simmer, cooking for about 3 to 4 minutes until it thickens a bit. Next, stir in 1 tablespoon of Dijon mustard. Mix it well to combine. Remove the skillet from heat and add 2 tablespoons of unsalted butter. Swirl it into the sauce until it melts and blends. The sauce is now ready to drizzle over your steak. For bavette steak, the right doneness matters. Here are the recommended internal temperatures: - Rare: 120°F - Medium-rare: 130°F - Medium: 140°F - Medium-well: 150°F - Well done: 160°F To check doneness, I use an instant-read thermometer. Insert it into the thickest part of the steak. This gives you an accurate reading without cutting into it. To boost the flavor of your bavette steak, consider these spices and herbs: - Paprika adds a mild warmth. - Cumin gives a smoky touch. - Rosemary and thyme provide fresh notes. For sauces, try these alternatives: - Chimichurri for a fresh twist. - Béarnaise sauce for richness. - Red wine reduction for depth. Pair your bavette steak with tasty side dishes like: - Garlic mashed potatoes for comfort. - Grilled asparagus for a fresh crunch. - Mixed greens salad for lightness. For plating, arrange the steak slices on a platter. Drizzle with the garlic pan sauce and sprinkle fresh parsley on top. This adds color and makes the dish pop! Pro Tips Let it Rest: Always allow the bavette steak to rest after cooking. This helps the juices redistribute, ensuring a tender and flavorful steak. Slice Against the Grain: For maximum tenderness, slice the steak against the grain. This shortens the muscle fibers, making each bite easier to chew. Use a Hot Skillet: Preheat your skillet before adding the steak. A hot pan ensures a good sear, which locks in flavors and creates a delicious crust. Customize the Sauce: Feel free to add herbs or spices to the pan sauce, such as thyme or rosemary, for an extra layer of flavor that complements the steak. {{image_2}} Marinating your bavette steak can boost its flavor. Here are some popular marinades: - Soy Sauce and Ginger: Mix soy sauce, minced ginger, and a splash of rice vinegar. - Citrus Blend: Combine orange juice, lime juice, and garlic for a zesty kick. - Red Wine Marinade: Use red wine, garlic, and rosemary for depth. For best results, marinate your steak for 2 to 4 hours. If you have more time, you can go for overnight marinating. It helps the flavors soak in deeply. You can customize the garlic pan sauce easily. Here are some ideas: - Add Herbs: Fresh thyme or rosemary can enhance the sauce. Chop them finely and add while cooking. - More Spice: For heat, try adding red pepper flakes or a dash of hot sauce. - Stock Alternatives: If you don't have beef stock, try chicken stock or vegetable stock for a lighter flavor. These tweaks can make the sauce fit your taste perfectly. You have different ways to cook your bavette steak, each bringing its own charm: - Grilling: This method gives a smoky taste. Preheat the grill and cook the steak for about 3-5 minutes on each side. - Stovetop Cooking: This is great for a quick meal. Follow the stovetop steps in the recipe for a nice sear. - Slow Cooking or Sous-Vide: Use a slow cooker for tender meat. Set it on low for 6-8 hours. If using sous-vide, cook the steak at 130°F for 2-3 hours for perfect doneness. Choose the method that fits your time and mood. Each will deliver a delicious bavette steak! To keep your leftover bavette steak fresh, use airtight containers. Glass or plastic containers work well. Wrap the steak tightly in foil or plastic wrap if you don’t have containers. Store it in the fridge for up to three days. Make sure it cools before sealing to avoid moisture buildup. To reheat your bavette steak, use low heat. The best way is to warm it in a skillet on the stove. Place a little olive oil or butter in the pan. Heat it on low and add the steak. This method keeps the meat juicy. Avoid using the microwave, as it can dry out the steak. Check the temperature often to avoid overcooking. To freeze bavette steak, first let it cool completely. Then, wrap it tightly in plastic wrap. Use freezer bags to prevent freezer burn. Squeeze out as much air as possible before sealing the bags. You can freeze steak for up to three months. When ready to cook, thaw it in the fridge overnight. Cook it as you normally would, ensuring it reaches the right doneness. Bavette steak comes from the flank area of the cow. This cut is long and thin, with a rich flavor. It has a loose grain and is very tender when cooked right. The best way to cook bavette is by searing it quickly. This helps to keep it juicy and flavorful. It’s great for grilling or pan-searing. Yes, you can use other cuts. Skirt steak is a great substitute. It has a similar texture and flavor. Flank steak is another good option. Both cuts will work well for this recipe. Just remember to adjust cooking times based on the thickness of the steak. Let the steak rest for at least 5 to 10 minutes. This time helps the juices settle. If you cut it too soon, the juices will run out. Resting makes the steak more juicy and flavorful. This is a key step for the best results. Bavette steak is a tasty choice for any meal. We covered its ingredients, from seasoning to cooking methods. You learned to make a flavorful garlic pan sauce and how to store leftovers. Remember, resting your steak is key for juiciness. Feel free to experiment with marinades and sauces to enhance flavors. With these tips, you can impress your friends and family at dinner. Enjoy your cooking journey with this versatile cut of meat!

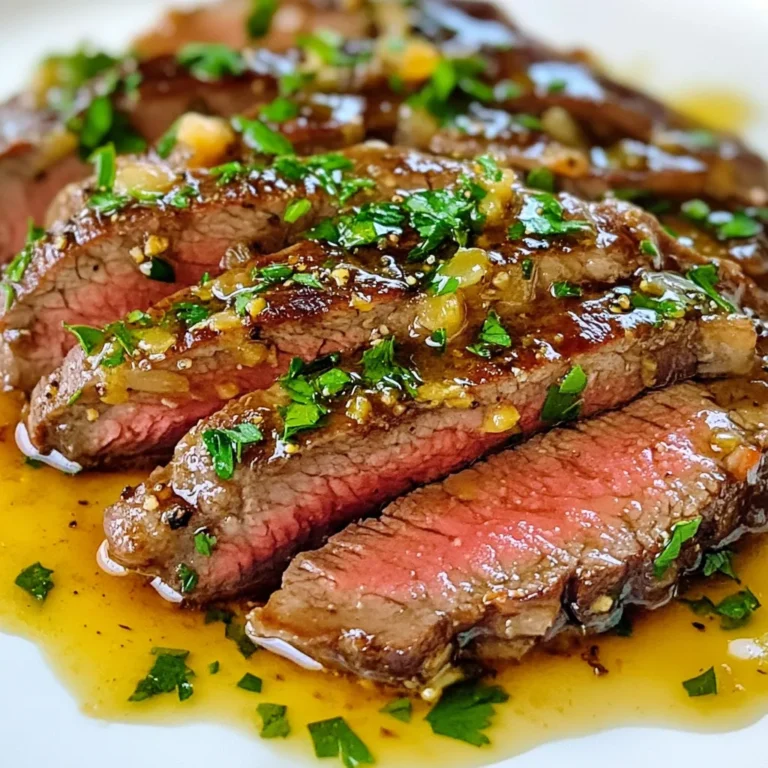
Savory Bavette Steak with Garlic Pan Sauce Recipe

To make Cranberry Brie Thyme Phyllo Cups, you need a few simple ingredients. Each one adds a special touch to this delightful snack. - 12 sheets of phyllo dough - 1 cup brie cheese, cut into small cubes - 1 cup cranberry sauce (homemade or store-bought) - 1 tablespoon fresh thyme leaves, chopped - 1/4 cup honey - 1/4 teaspoon salt - 1/4 teaspoon black pepper - Cooking spray or melted butter for brushing Each ingredient plays a key role. The phyllo dough gives a crispy base. The brie melts perfectly, adding creamy richness. The cranberry sauce brings sweet and tart flavors. Fresh thyme adds a hint of earthiness. Honey balances the flavors with sweetness. Salt and pepper enhance the taste. Finally, cooking spray or butter helps the dough crisp up nicely. These ingredients work together to create a wonderful treat. You can enjoy these cups as an appetizer or snack. They are perfect for parties or family gatherings. {{ingredient_image_1}} First, set your oven to 375°F (190°C). This step warms the oven, which helps the phyllo cups bake evenly. Make sure to do this before you start preparing the phyllo dough. Take one sheet of phyllo dough and lay it on a clean surface. Use a brush to coat it with melted butter or spray it with cooking spray. Then, lay another sheet on top. Repeat this until you have four sheets stacked together. This will make the base strong and crispy. Next, cut the stacked phyllo dough into a grid of 3x4 squares. This gives you 12 equal pieces. Gently press each piece into a muffin tin to form cups. Make sure the edges are fluted. This adds a nice texture to your cups. Now, place the muffin tin in the preheated oven. Bake the phyllo cups for about 8-10 minutes. You want them to turn golden brown and crispy. Once they are done, take them out and let them cool slightly before filling. In a mixing bowl, combine the brie cheese cubes, cranberry sauce, chopped thyme, honey, salt, and black pepper. Mix these ingredients until well combined. This filling is where the magic happens. The flavors blend nicely and create a rich taste. Spoon the cranberry-brie filling into each baked phyllo cup. Fill them generously for the best flavor. After that, return the filled cups to the oven. Bake for an additional 5-7 minutes. You want the brie to melt and bubble. Once done, let the cups cool for a few minutes. Carefully remove them from the muffin tin. Enjoy your tasty snack! To keep phyllo cups crispy, start with dry dough. Use fresh sheets and handle them gently. Brush each layer with melted butter or cooking spray. This adds flavor and keeps them from getting soggy. Bake them until golden brown. Watch closely to avoid burning. Select a soft, creamy brie for the best taste. Look for cheese with a white rind. Avoid brie that feels too hard. It should yield slightly when you press it. This cheese melts beautifully and gives a rich flavor. The creaminess pairs well with the tart cranberry sauce. Store leftover phyllo cups in an airtight container. Keep them in the fridge for up to three days. To reheat, place them in the oven at 350°F (175°C) for about 10 minutes. This helps restore their crispiness. Avoid the microwave, as it makes them soggy. Enjoy your delicious snacks even after the main event! Pro Tips Keep Phyllo Dough Covered: Always keep your phyllo dough covered with a damp cloth while working to prevent it from drying out and becoming brittle. Choose Quality Brie: Opt for a high-quality brie cheese for the best flavor and creaminess in your filling. Experiment with Flavors: Feel free to add other herbs like rosemary or sage, or mix in some chopped nuts for added texture and flavor. Serving Suggestions: Serve these phyllo cups warm with a drizzle of extra honey or a sprinkle of fresh thyme for an elegant touch. {{image_2}} You can swap brie for other cheeses. Creamy goat cheese works well. It adds a tangy taste. Another great option is camembert. This cheese melts nicely, too. Try sharp cheddar for a bolder flavor. Each cheese brings its own twist to the cups. Cranberry sauce is delicious, but other sauces shine, too. Use a sweet fig jam for a unique flavor. This jam adds a sweet and savory touch. You might enjoy a tart apple chutney. It gives a fresh kick to the cups. Experiment with your favorite sauces for fun flavors. Thyme adds nice flavor, but feel free to explore other herbs. Rosemary brings a strong, earthy taste. It pairs well with cheese and fruit. Fresh basil gives a sweet, aromatic touch. You can also try parsley for a mild flavor. Changing the herbs can completely change the dish! To store leftover Cranberry Brie Thyme Phyllo Cups, place them in an airtight container. Keep the container in the fridge. They will stay fresh for up to three days. Make sure they cool completely before sealing the container. This prevents moisture build-up, which can make the cups soggy. When you want to enjoy the cups again, preheat your oven to 350°F (175°C). Place the cups on a baking sheet. Heat them for about 10-15 minutes. This method keeps the phyllo crispy. You can also use a microwave, but the texture won't be as nice. If you choose the microwave, heat in short bursts of 15-20 seconds. You can freeze these cups for later use. First, let them cool completely. Then, place them in a single layer on a baking sheet. Freeze them for about an hour. Once frozen, transfer them to a freezer-safe bag. They can stay in the freezer for up to two months. When ready to eat, bake from frozen at 375°F (190°C) for about 15-20 minutes. Yes, you can prepare these cups in advance. Make the phyllo cups and filling separately. Store the cups in an airtight container. Keep the filling in the fridge. When ready to serve, fill the cups and bake. This keeps them fresh and crisp. If you can't find phyllo dough, try using puff pastry. Puff pastry gives a different texture but works well. You can also use wonton wrappers for a fun twist. Just remember to adjust the baking time accordingly. You will know the brie is melted when it bubbles slightly. Look for a soft, gooey texture. The cheese should not be too runny. It should hold its shape but be warm and creamy. Absolutely! You can use raspberry, cherry, or even apple sauce. Each sauce will give a unique twist to the flavor. Just ensure the sauce is thick enough to hold in the phyllo cups. In this blog post, I shared a clear guide to making Cranberry Brie Thyme Phyllo Cups. We covered the necessary ingredients, step-by-step instructions, and some handy tips. You learned how to ensure your cups stay crispy and how to store leftovers. Don't shy away from experimenting with different cheeses or sauces to add your unique touch. Enjoy creating this delicious snack. It’s sure to impress your friends and family at any gathering.

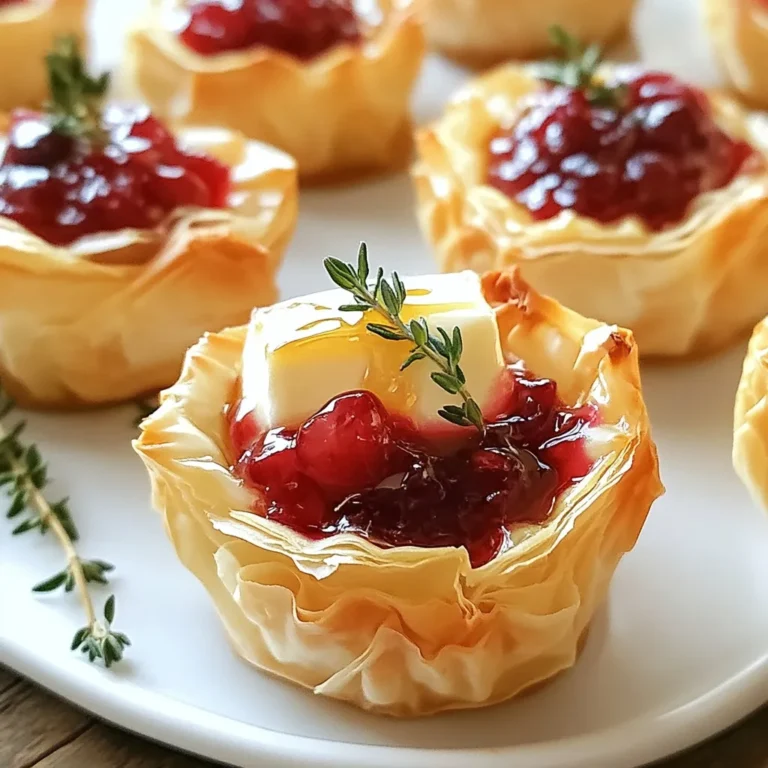
Cranberry Brie Thyme Phyllo Cups Delightful Snack

Cinnamon Roll Cookies are simple yet delightful. You will need the following ingredients to make them: - 2 cups all-purpose flour - 1 teaspoon baking powder - 1/2 teaspoon baking soda - 1/2 teaspoon salt - 1 teaspoon ground cinnamon - 3/4 cup unsalted butter, softened - 1 cup brown sugar, packed - 1 large egg - 1 teaspoon vanilla extract - 1/4 cup granulated sugar (for rolling) - 1/2 cup powdered sugar (for glaze) - 1-2 tablespoons milk (for glaze) These ingredients blend to create a sweet treat that captures the essence of cinnamon rolls in a cookie format. The butter gives a rich flavor, while the brown sugar adds sweetness and moisture. Ground cinnamon fills each bite with warmth and comfort. As you gather your ingredients, remember to use fresh spices and quality butter. This will enhance the taste of your cookies. You can also prepare your workspace by measuring everything out beforehand. This will make your baking process smoother and more enjoyable. {{ingredient_image_1}} Set your oven to 350°F (175°C). This step is key to getting the cookies just right. In a medium bowl, whisk together: - 2 cups all-purpose flour - 1 teaspoon baking powder - 1/2 teaspoon baking soda - 1/2 teaspoon salt - 1 teaspoon ground cinnamon This mix gives your cookies flavor and helps them rise. In a large bowl, beat together: - 3/4 cup unsalted butter, softened - 1 cup brown sugar, packed Mix for about 2-3 minutes until it is fluffy. This adds air, making your cookies light. Add one large egg and: - 1 teaspoon vanilla extract Mix these in until they are well combined. This adds moisture and flavor. Gradually add the dry mixture to the wet mixture. Mix until a dough forms. This helps blend all the flavors together. On a clean surface, roll the dough into a log about 1.5 inches in diameter. Wrap it in plastic wrap and chill for at least 30 minutes. Chilling makes the dough easier to slice. After chilling, remove the dough from the wrap. Slice it into 1/2-inch thick rounds. Roll each slice in: - 1/4 cup granulated sugar This adds sweetness and a nice crunch. Place the cookie slices on a baking sheet, leaving space between each. Bake for 10-12 minutes until the edges are lightly golden. You will love the smell as they bake! While the cookies cool, mix: - 1/2 cup powdered sugar - 1-2 tablespoons milk Stir until smooth. Adjust with more milk for a thinner glaze. Drizzle the glaze over the cooled cookies using a spoon or whisk. This adds a sweet finish to your tasty treats. To make your cinnamon roll cookies a hit, focus on mixing. Start by whisking the dry ingredients well. This helps the baking powder and soda blend evenly. It ensures each cookie rises just right. Chilling the dough is key. After you shape the dough into a log, wrap it up and place it in the fridge. Chilling for 30 minutes firms the dough. This makes slicing easier and helps the cookies keep their shape while baking. When serving, think about how to present your cookies. Arrange them on a pretty platter. A sprinkle of cinnamon or a fresh mint leaf adds a nice touch. This makes your cookies look even more tempting! You can also get creative with toppings. Consider adding nuts, chocolate chips, or a drizzle of extra glaze on top. These small changes can make your cookies stand out even more. Pro Tips Use Cold Butter: For a flakier texture, consider chilling your butter before creaming. This helps maintain the structure of the cookies. Chill the Dough: Don’t skip the chilling step! It helps the cookies maintain their shape while baking and enhances the flavors. Adjust Glaze Consistency: If your glaze is too thick, add milk a teaspoon at a time until you reach the desired drizzling consistency. Experiment with Spices: Feel free to add other spices like nutmeg or ginger for a unique twist on the classic cinnamon flavor. {{image_2}} To make gluten-free cinnamon roll cookies, you can use flour alternatives. Here are some great options: - Almond flour - Coconut flour - Gluten-free all-purpose flour Each of these flours has different textures and flavors. Almond flour gives a nutty taste. Coconut flour is sweet and absorbs moisture, so use less. Gluten-free all-purpose flour works well in most recipes. Just check that it has xanthan gum for the best results. If you want to make vegan cinnamon roll cookies, you need to substitute the egg and butter. Here are my favorite swaps: - Use flaxseed meal: Mix one tablespoon of flaxseed meal with three tablespoons of water. Let it sit for five minutes until thick. - For butter, use coconut oil or vegan butter. Both options provide the same rich texture. These swaps keep your cookies soft and tasty while making them plant-based. You can add fun flavors to your cinnamon roll cookies. Here are a few ideas: - Nuts: Chopped pecans or walnuts add crunch and flavor. - Chocolate chips: Mixing in chocolate chips makes the cookies extra sweet and rich. Feel free to experiment with your favorite flavors. Each addition can change the taste and make your cookies unique. To keep your cinnamon roll cookies fresh, store them in an airtight container. Place parchment paper between layers to avoid sticking. This method will help maintain their soft and chewy texture. Keep the container at room temperature. If you live in a hot area, consider placing the container in the fridge. You can freeze these cookies before or after baking. To freeze unbaked dough, roll it into a log and wrap it tightly in plastic wrap. Place the wrapped dough in a freezer bag. To freeze baked cookies, let them cool completely. Then, layer them in an airtight container with parchment paper between layers. When stored properly, cinnamon roll cookies last about 5 to 7 days at room temperature. If you freeze the cookies, they can last for up to 3 months. Just remember to thaw them at room temperature before enjoying them. Cinnamon roll cookies are a sweet treat that taste like cinnamon rolls. They have a soft, chewy texture and a warm, spicy flavor from ground cinnamon. The cookies come together with a buttery base, brightened by a hint of vanilla. When baked, they get a lovely golden edge and a soft center. The glaze on top adds sweetness and richness, making each bite truly delightful. Yes, you can use brown sugar instead of granulated sugar. Brown sugar adds more moisture and a deeper flavor. It enhances the cookie's taste, giving it that classic cinnamon roll sweetness. If you want a lighter cookie, stick with granulated sugar. But for a richer flavor, brown sugar is great! You can tell when the cookies are done by looking at the edges. They should be lightly golden brown. Also, gently touch the top of a cookie; it should feel set and not gooey. If they look puffy and soft, they need a bit more time. Keep an eye on them; they bake quickly! These cinnamon roll cookies combine warm spices and sweet flavors. You’ve learned to mix simple ingredients and follow easy steps. Remember to chill the dough for the best results and get creative with flavors or toppings. Store your cookies well, and enjoy them fresh. Baking can be fun and rewarding, especially when you share your treats. Trust these tips and enjoy every bite of your delicious cookies!

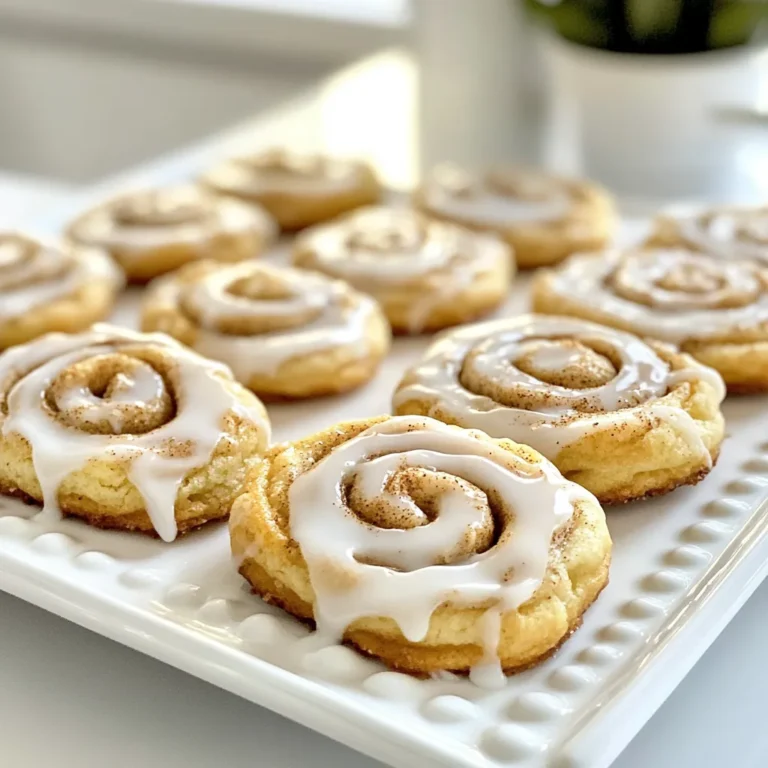
Cinnamon Roll Cookies Irresistible Dessert Recipe

For this tasty Street Corn Chicken Bowl, you will need: - 2 cups cooked quinoa - 1 cup grilled chicken breast, diced - 1 cup corn kernels (frozen or fresh) - 1 red bell pepper, diced - 1 avocado, sliced - 1/2 cup crumbled feta cheese - 1/4 cup fresh cilantro, chopped - 2 tablespoons lime juice - 1 tablespoon olive oil - 1 teaspoon chili powder - Salt and pepper to taste These ingredients come together to create a mix of flavors and textures. The quinoa adds a hearty base, while the chicken gives protein. The corn adds sweetness, and the bell pepper brings a nice crunch. You can customize your Street Corn Chicken Bowl with these additions: - Hot sauce for drizzling - Black beans for more protein - Cherry tomatoes for extra freshness - Jalapeños for heat Adding these options can change the flavor and make it your own. Feel free to play with different toppings! If you need to swap ingredients, here are some good choices: - Use brown rice or farro instead of quinoa - Try shrimp or tofu in place of chicken - Use goat cheese if you don’t have feta - Substitute lime juice with lemon juice These substitutions can still keep your bowl delicious while meeting your needs. Keep exploring different combinations! {{ingredient_image_1}} First, grab a medium bowl. Add the corn and diced red bell pepper. Pour in the olive oil and lime juice. Sprinkle in chili powder, salt, and pepper. Mix it all up well. Let this sit for 10 minutes. This waiting time helps the flavors blend nicely. You will love how fresh it tastes! Next, take a large serving bowl. Spoon in the cooked quinoa as your base. Spread it out evenly. The quinoa adds a nice texture. It also packs in protein, making your meal filling. Now, add the grilled chicken on top of the quinoa. Make sure to spread it evenly. Then, spoon the corn and bell pepper mixture over the chicken. This step brings all the flavors together. Now, slice the avocado and arrange it around the bowl. This adds color and creaminess. Finally, sprinkle crumbled feta cheese and chopped cilantro on top. If you like heat, drizzle some hot sauce for extra spice. Enjoy your bowl right away or chill it for later! To cook quinoa, rinse it first. Rinsing removes bitterness. Use two cups of water for every cup of quinoa. Bring the water to a boil. Then, add the quinoa. Lower the heat to a simmer. Cover it and cook for about 15 minutes. The quinoa should be fluffy when done. Let it rest for five minutes before you fluff it with a fork. This makes it light and tasty. Start with chicken breast that is even in thickness. This helps it cook evenly. Season it with salt, pepper, and your favorite spices. Preheat the grill to medium-high heat. Cook the chicken for about six to eight minutes on each side. Use a meat thermometer to check for doneness; it should reach 165°F. Let the chicken rest for a few minutes before you dice it. This keeps it juicy and full of flavor. For added flavor, try marinating the chicken. A mix of lime juice, olive oil, and chili powder works great. You can also add smoked paprika for a deeper taste. For the corn mixture, add diced jalapeños for some heat. Fresh herbs like cilantro and parsley brighten up the dish. Lastly, a drizzle of hot sauce adds a fun kick. Don’t be afraid to play around with spices. Each tweak can make the bowl your own! Pro Tips Fresh Corn is Best: If using fresh corn, grill the ears for a smoky flavor before cutting the kernels off and adding them to the bowl. Customize Your Protein: Swap out grilled chicken for shrimp or black beans for a vegetarian option to suit your dietary preferences. Make it Spicy: If you enjoy heat, add diced jalapeños or a sprinkle of cayenne pepper to the corn mixture for an extra kick. Meal Prep Friendly: This dish stores well in the fridge for up to 2 days, making it a great option for meal prep or quick lunches. {{image_2}} You can easily make a vegetarian version of the street corn bowl. Simply swap the grilled chicken for black beans or chickpeas. Both options add protein and flavor. You still get all the tasty corn, bell pepper, and avocado. The feta cheese adds a creamy touch. This dish stays just as colorful and satisfying. If you love heat, add some spice to your dish. You can mix in diced jalapeños with the corn and bell pepper. This will give your bowl a nice kick. Drizzling hot sauce on top boosts the spice even more. Use a spicy cheese, like pepper jack, for an extra layer of flavor. Your taste buds will thank you! For a low-carb option, use cauliflower rice instead of quinoa. You can make cauliflower rice by pulsing fresh cauliflower in a food processor. It gives a light, fluffy base for your bowl. The flavors from the corn, bell pepper, and lime juice shine through. This way, you enjoy a hearty meal while keeping carbs low. Store your Street Corn Chicken Bowl in an airtight container. This helps keep it fresh. Make sure to cool it down before sealing. You can keep it in the fridge for up to two days. If you want to save it longer, consider freezing it. When you're ready to eat leftovers, reheating is key. I recommend using a microwave. Heat it in short bursts of 30 seconds. Stir between each burst for even warming. If you prefer the oven, preheat to 350°F and heat for about 15 minutes. Just make sure it’s hot all the way through. You can keep your leftovers in the fridge for two days. If you freeze it, enjoy within three months. Make sure to label your containers with the date. This way, you know when to eat it by. Always check for changes in smell or color before eating any leftovers. You can add many tasty items to your Street Corn Chicken Bowl. Here are some ideas: - Black beans for extra protein and fiber. - Cherry tomatoes for a sweet burst of flavor. - Jalapeños for some heat. - Sliced radishes for crunch and color. - A squeeze of extra lime for brightness. Feel free to get creative with your toppings. The goal is to find what you love! Yes, you can make this recipe ahead of time. You can prepare the corn mixture and cook the quinoa in advance. Store them in the fridge for up to two days. Assemble the bowl right before serving. This keeps everything fresh and tasty. If you want a chilled dish, let it sit in the fridge for up to two hours before serving. Many Mexican and Tex-Mex restaurants serve Street Corn Chicken Bowls. Look for places that focus on fresh ingredients. You may also find it on food trucks that offer street food. Some chains might have their version of the dish. Always check the menu for options featuring corn, chicken, and fresh toppings. Enjoying this bowl at a restaurant can inspire your homemade version! In this post, I shared how to build a tasty Street Corn Chicken Bowl. You learned about the key ingredients, step-by-step instructions, and useful tips for cooking. I also offered fun variations and storage advice for leftovers. Street corn bowls are simple yet delightful. You can mix and match to fit your taste. Try adding your favorite ingredients or spices. Enjoy your delicious creation whenever you want!

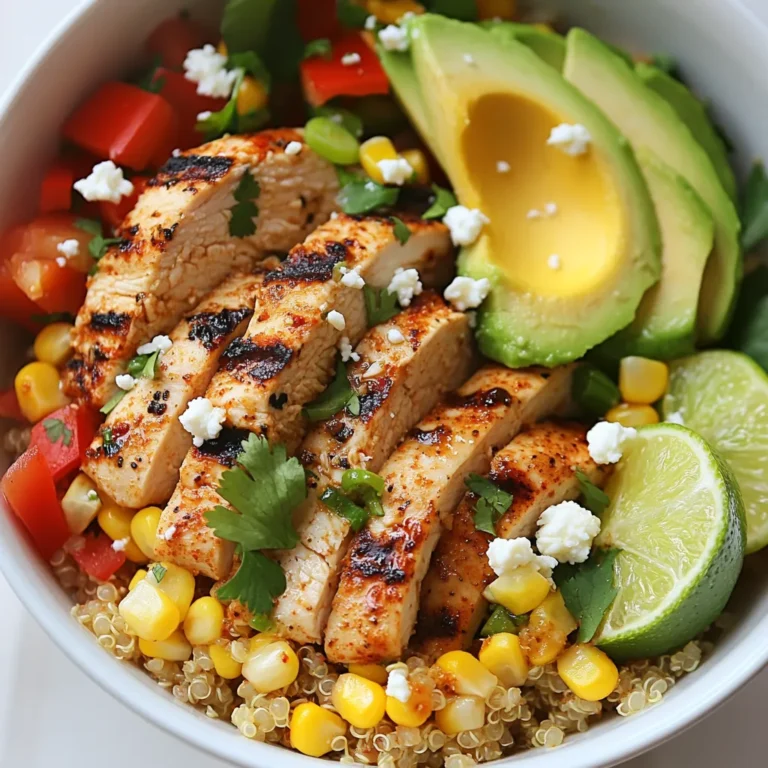
Savory Street Corn Chicken Bowl Quick and Easy Recipe

To make a vibrant Italian pasta salad, you will need: - 2 cups elbow macaroni or rotini pasta - 1 cup cherry tomatoes, halved - 1 cup cucumber, diced - 1/2 cup black olives, sliced - 1/2 cup red bell pepper, diced - 1/4 cup red onion, finely chopped - 1/2 cup mozzarella balls, halved - 1/4 cup fresh basil leaves, roughly chopped - 1/4 cup olive oil - 2 tablespoons red wine vinegar (or apple cider vinegar) - 1 teaspoon dried oregano - Salt and pepper to taste You can easily swap some ingredients for others based on what you like. Here are a few ideas: - Use penne or farfalle pasta if you want a different shape. - Try grape tomatoes or diced regular tomatoes instead of cherry tomatoes. - Replace cucumber with zucchini for a fresh twist. - If you don’t like olives, leave them out or use artichoke hearts. - Use feta cheese instead of mozzarella for a salty kick. - Opt for fresh herbs like parsley or dill instead of basil. Picking fresh ingredients makes your pasta salad taste better. Here’s how to choose the best: - Pasta: Choose pasta with no cracks or broken pieces. Look for brands that are whole grain for extra fiber. - Vegetables: Pick firm, colorful veggies. Tomatoes should feel heavy for their size. Cucumbers should be crisp with no soft spots. - Herbs: Look for bright green basil leaves with no browning. Fresh herbs should smell fragrant. - Cheese: When choosing mozzarella, pick balls that feel moist and fresh. Avoid dry or crumbly cheese. This careful selection enhances the taste and nutrition of your dish. Enjoy your cooking! {{ingredient_image_1}} Start by boiling water in a pot. Add a pinch of salt for taste. Once boiling, add 2 cups of elbow macaroni or rotini pasta. Cook according to the package instructions until the pasta is al dente. This usually takes about 7-10 minutes. Once done, drain the pasta in a colander. Rinse it under cold water to stop the cooking process. This helps keep the pasta firm. Set the pasta aside to cool. In a large mixing bowl, combine the cooled pasta with other fresh ingredients. Add 1 cup of halved cherry tomatoes, 1 cup of diced cucumber, and 1/2 cup of sliced black olives. Don’t forget 1/2 cup of diced red bell pepper, 1/4 cup of finely chopped red onion, and 1/2 cup of halved mozzarella balls. Mix everything together gently. This helps all the flavors blend well. In a small bowl, whisk together the dressing. Combine 1/4 cup of olive oil and 2 tablespoons of red wine vinegar. You can also use apple cider vinegar if you prefer. Add 1 teaspoon of dried oregano, salt, and pepper to taste. Make sure to mix it until well combined. Pour this dressing over the pasta salad. Toss everything gently to coat all the ingredients. Finally, add 1/4 cup of roughly chopped fresh basil leaves and give it one last gentle toss. Cover the bowl and let it chill in the fridge for at least 30 minutes. This helps the flavors meld together nicely. Start with a large pot. Fill it with water and bring it to a boil. Use plenty of water so the pasta can move freely. Add salt to the boiling water. This step adds flavor to the pasta. Cook the pasta until it is al dente. This means it should be firm but not hard. After cooking, drain the pasta and rinse it with cold water. This stops the cooking process and cools the pasta quickly. To make your pasta salad pop, use fresh ingredients. Fresh basil and ripe tomatoes bring bright flavors. Don’t forget to season well with salt and pepper. A good dressing is key. Mix olive oil and vinegar in a bowl. Whisk them until they blend. Add dried oregano for a nice herbal note. Pour the dressing over the salad and toss gently. This helps each bite burst with flavor. Serve the pasta salad in a colorful bowl. You can add extra toppings for fun. Try crumbled feta cheese, diced avocado, or toasted nuts. These add new textures and tastes. For a picnic, pack the salad in individual containers. This makes it easy to enjoy on the go. You can also serve it alongside grilled chicken or fish for a complete meal. Pro Tips Cook Pasta Al Dente: Be sure to cook the pasta until it's al dente for the best texture. This ensures it holds up well in the salad and doesn't become mushy when mixed with the dressing. Chill Before Serving: Refrigerating the pasta salad for at least 30 minutes allows the flavors to meld beautifully, enhancing the overall taste of the dish. Fresh Ingredients Matter: Use the freshest vegetables and herbs you can find. This will not only improve the flavor but also add vibrant colors to your salad. Customize Your Add-Ins: Feel free to add other ingredients like grilled chicken, feta cheese, or your favorite vegetables to make this salad your own! {{image_2}} You can add proteins to your pasta salad for extra flavor and nutrition. Cooked chicken, diced and seasoned, pairs well with the fresh ingredients. Canned tuna adds a nice touch, too. Simply drain it and mix it in. For a fun twist, consider using shrimp. Just cook them until pink, then chop and add. For a vegetarian option, skip the meats and add extra veggies. Roasted bell peppers or artichokes bring great taste. If you want a vegan salad, swap mozzarella for vegan cheese. Nutritional yeast can also add a cheesy flavor without dairy. Try adding chickpeas or black beans for a protein boost. Using seasonal ingredients keeps your salad fresh and exciting. In summer, add fresh corn or zucchini. In fall, roasted butternut squash or Brussels sprouts work well. You can use spinach or arugula instead of basil for a peppery flavor. Always consider what is fresh at your local market. This keeps your salad vibrant and full of life. To keep your pasta salad fresh, store it in the fridge. First, let it cool to room temperature. Then, place the salad in an airtight container. This helps keep moisture in and air out. If you have extra dressing, store it separately to avoid soggy pasta. I recommend using glass or plastic containers with tight lids. Glass containers are great for seeing your food. They also don’t hold odors. Plastic containers are lighter and easier to handle. Make sure the container is big enough to hold all the salad without squishing it. Leftover pasta salad lasts about 3 to 5 days in the fridge. The flavors get better as it sits. However, check for any signs of spoilage like off smells or changes in color. If it looks or smells strange, don’t eat it. Always trust your senses! If you need a pasta swap, try these options: - Zucchini noodles: They are fresh and light. - Quinoa: This grain adds protein. - Chickpea pasta: It has a nice texture. - Rice: Use cooked rice for a different bite. These swaps keep the dish fun while still tasty. Yes, you can make pasta salad ahead. It tastes even better after sitting. The flavors mix well when chilled. I suggest making it the night before. This way, you save time for your meal. Just remember to stir it before serving. Pasta salad can be healthy! It depends on the ingredients you choose. Using whole grain pasta adds fiber. Fresh veggies like cucumbers and tomatoes are full of vitamins. You can control the dressing, too. Use olive oil for healthy fats. Watch the salt to keep it balanced. Enjoy your tasty, colorful meal! This article covered the key elements for making a great pasta salad. We discussed the ingredients, cooking steps, and storage tips. You learned about fresh ingredient choices, substitutions, and the best ways to store leftovers. My final thoughts are simple: experiment with flavors and find what you love. Pasta salad can adapt to your taste, diet, and season. Have fun with it. Cooking should bring joy and flavor to your meals.

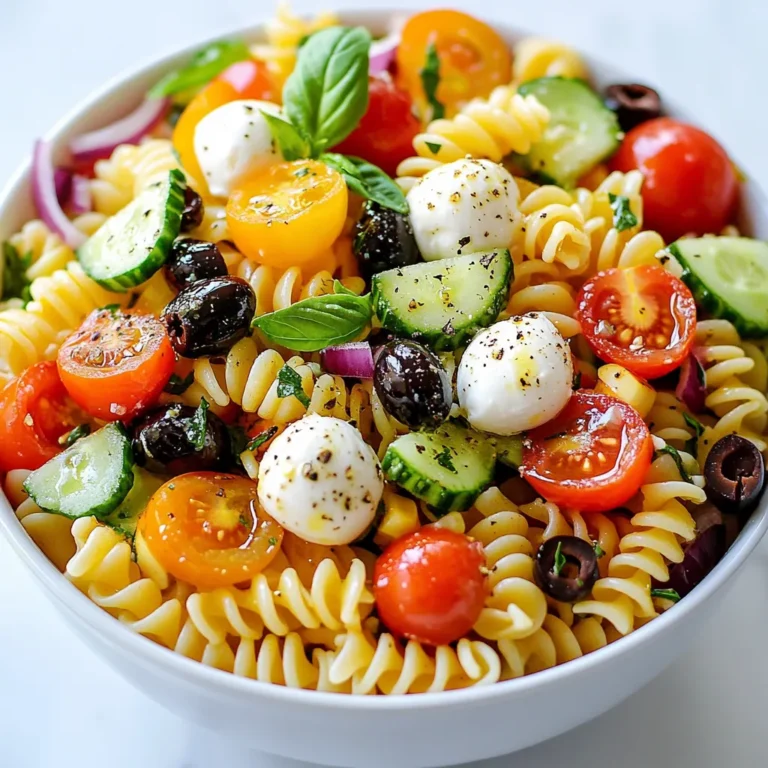
Easy Pasta Salad Flavorful and Quick Recipe Guide

To make a tasty breakfast quesadilla, you need just a few key items. Gather these ingredients: - 2 large flour tortillas - 4 large eggs - 1/2 cup shredded cheese (cheddar or pepper jack) - 1/4 cup diced bell pepper (any color) - 1/4 cup diced onion - 1/4 cup cooked black beans (optional) - Salt and pepper to taste - 1 tablespoon olive oil or butter These ingredients form the base of your quesadilla. The eggs provide protein, while the cheese adds creaminess. The bell pepper and onion give great flavor and texture. You can change up your quesadilla by adding more ingredients. Here are some ideas: - Chopped spinach or kale for greens - Diced tomatoes for freshness - Cooked sausage or bacon for meat lovers - Avocado slices for creaminess - Fresh herbs like cilantro or parsley for brightness Feel free to mix and match these options. They make the quesadilla even more delicious and fun. Choosing the right cheese can make a big difference. Here are some great options: - Cheddar: A classic choice with a sharp taste. - Pepper jack: Adds a bit of spice and flavor. - Monterey Jack: Smooth and creamy, melts well. - Mozzarella: Mild flavor, great for pulling cheese. Experiment with different cheeses to find what you like best. Each one adds its own twist to your breakfast quesadilla. {{ingredient_image_1}} To start, crack the four large eggs into a medium bowl. Add salt and pepper to taste. Whisk them together until mixed well. This simple egg mixture is the heart of your quesadilla. The eggs add protein and flavor. Make sure there are no big lumps. You want a smooth and creamy texture. Next, heat one tablespoon of olive oil or butter in a large skillet over medium heat. Toss in the diced onion and bell pepper. Sauté them for about 3-4 minutes. You want them soft and slightly caramelized. This step brings out their natural sweetness. Stir often to make sure they cook evenly. If you like, add cooked black beans for more texture and flavor. Now, pour the egg mixture into the skillet with the veggies. Gently stir as the eggs scramble. Cook for about 3-5 minutes until they are fully set. If your skillet is big enough, place one tortilla in it. Sprinkle half of the shredded cheese on one side. Add half of the egg mixture on top, then fold the tortilla over. If the skillet is small, cook each quesadilla one by one. Cook each side for 2-3 minutes until golden brown and the cheese melts. Once done, let them cool a bit, then cut into wedges. Enjoy your tasty breakfast quesadilla! To make the best eggs for your quesadilla, start with fresh eggs. Whisk them well with salt and pepper in a bowl. Heat your skillet over medium heat, but don’t rush it. Add the olive oil or butter and let it melt. Then, add the onions and bell peppers. Sauté them until soft and slightly golden. This step adds flavor. Pour in your beaten eggs and stir gently. Cook until the eggs are just set. Remove them from heat to avoid overcooking. For a great cheese melt, choose the right cheese. Cheddar or pepper jack works well. Add the cheese to the quesadilla while it is still hot. The heat helps melt the cheese nicely. When cooking the quesadilla, press down slightly with a spatula. This helps the cheese stick to the eggs and tortilla. Cook until the outside is golden brown. This gives a nice crunch while keeping the cheese gooey inside. When serving, cut your quesadilla into wedges for easy eating. Place them on a cutting board or a plate. Add a small bowl of salsa and sour cream on the side for dipping. For extra flair, garnish with fresh cilantro or avocado slices. This not only makes it pretty but adds flavor too. You can also serve it with a side of fruit for a complete breakfast. Enjoy! Pro Tips Use Fresh Ingredients: Always opt for fresh vegetables and eggs to enhance the overall flavor of your quesadilla. Experiment with Cheese: Try different types of cheese such as Monterey Jack or feta for a unique twist. Make it Spicy: Add jalapeños or a dash of hot sauce to the egg mixture for an extra kick. Keep it Warm: If making multiple quesadillas, keep them warm in a low oven (around 200°F) until ready to serve. {{image_2}} You can easily make a tasty vegetarian quesadilla. Just swap the eggs for tofu. Crumble firm tofu and sauté it with your veggies. Add spinach, mushrooms, or zucchini for extra flavor. You can also try using different cheeses like feta or goat cheese. These add a creamy taste and pair well with veggies. Want to boost your protein? Add cooked chicken or turkey. Shredded meats mix well with eggs and cheese. You can also add more black beans for a hearty touch. Another great choice is to mix in cooked sausage or bacon. This gives your quesadilla a savory kick. If you love spice, try adding jalapeños or hot sauce. You can mix diced jalapeños into the egg mix. For an extra kick, sprinkle some red pepper flakes on top. Another fun idea is to use spicy cheese, like pepper jack. This will give your quesadilla a fun and zesty taste. To store leftover quesadillas, let them cool first. Place them in an airtight container. Keep the container in the fridge. They will stay fresh for up to three days. You can also wrap them in foil or plastic wrap for extra protection. To reheat your quesadillas, use a skillet. Heat the skillet over medium heat. Place the quesadilla in the pan. Cook for about 2 to 3 minutes on each side. This warms them and makes them crispy. You can also use a microwave. Heat on high for 30 to 60 seconds. This method is quick but may soften the quesadilla. To freeze quesadillas, let them cool completely. Wrap each quesadilla in plastic wrap. Place them in a freezer bag or container. They can last up to two months in the freezer. When ready to eat, thaw them in the fridge overnight. Then reheat as mentioned above. Enjoy your tasty breakfast anytime! It takes about 20 minutes to make a breakfast quesadilla. You spend 10 minutes prepping and 10 minutes cooking. This quick meal is perfect when you are short on time. Yes, you can make breakfast quesadillas ahead of time. Cook them, let them cool, and store them in the fridge. They will last for about three days. Just reheat them for a fast breakfast. You can mix many ingredients into your breakfast quesadilla. Here are some ideas: - Spinach - Mushrooms - Tomatoes - Cooked bacon or sausage - Avocado - Jalapeños for heat Feel free to get creative! You learned how to make a tasty breakfast quesadilla. We covered the main ingredients, cooking steps, and fun tips. Don't forget to try different flavors and ingredients. You can add veggies or spices to make it your own. Ideal for a quick meal, breakfast quesadillas are delicious and easy to store. Enjoy them fresh or save some for later. With all this knowledge, you can surprise anyone with your cooking skills. Now, get cooking and have fun in the kitchen!

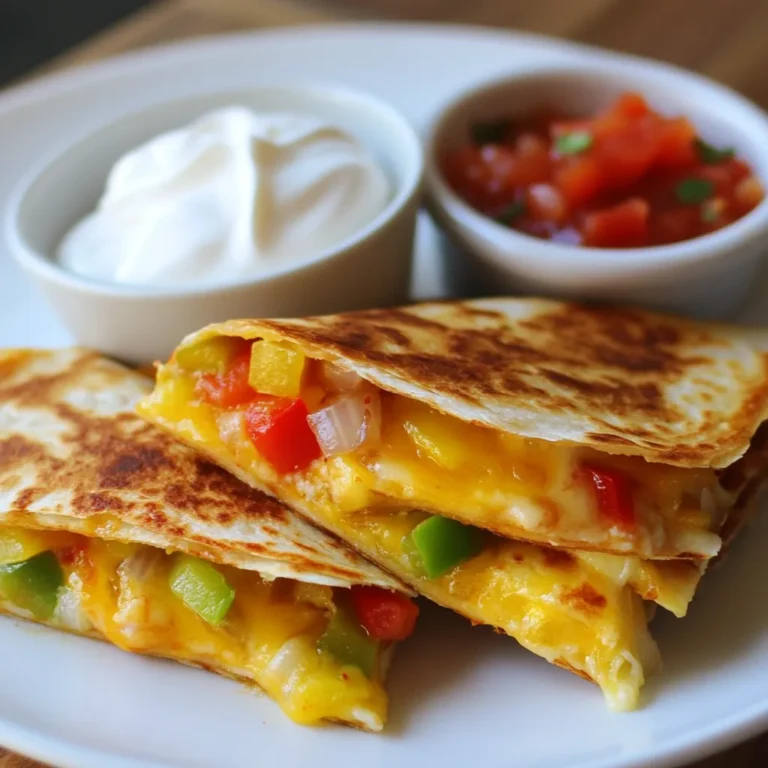
Simple Breakfast Quesadilla Quick and Tasty Recipe

- 4 boneless, skinless chicken thighs - 1 tablespoon olive oil - 3 cloves garlic, minced - 1 onion, finely chopped - 1 teaspoon dried thyme - 1 teaspoon dried oregano - 1 teaspoon smoked paprika - Salt and pepper to taste - Fresh parsley, chopped - Fresh cilantro, chopped - Lemon wedges for garnish The chicken thighs are key to this dish. They stay juicy and tender. I love using olive oil for marinating. Garlic and onion add depth to the flavor. Thyme and oregano bring warmth, while smoked paprika gives a nice kick. Fresh herbs and lemon at the end brighten the dish. - 2 cups basmati rice - 4 cups chicken broth Basmati rice is perfect for this dish. It cooks up fluffy and aromatic. Using chicken broth instead of water adds extra flavor. Make sure to rinse the rice before cooking to remove excess starch. - Additional vegetables or side dishes - Suggested sauces to complement the chicken You can add veggies like peas or carrots for color and nutrition. A light sauce, like a yogurt sauce or tangy vinaigrette, pairs well. These extras can make your meal even more exciting. {{ingredient_image_1}} To marinate the chicken, mix olive oil, minced garlic, dried thyme, oregano, smoked paprika, salt, and pepper in a bowl. Add the chicken thighs and coat them well. Marinate for at least 30 minutes. For even better flavor, marinate for up to 2 hours in the fridge. This allows the chicken to soak in all those tasty herbs. Heat a large skillet over medium heat. Place the marinated chicken thighs in the skillet. Cook them for about 7-8 minutes on each side. Look for a golden brown color and ensure the chicken is cooked through. This gives the chicken a nice crust and keeps it juicy. Once done, remove the chicken from the skillet and set it aside. In the same skillet, add chopped onion and sauté for about 3-4 minutes until soft and translucent. This adds flavor to your rice. Next, stir in the basmati rice and let it toast for about 2 minutes. This step enhances the rice's taste. Pour in 4 cups of chicken broth and bring it to a boil. Reduce the heat, cover the skillet, and let it simmer for about 15 minutes. Your rice will be fluffy and absorb all the broth. After 15 minutes, fluff the rice with a fork. This makes it light and airy, ready to serve with the chicken. Marinate the chicken for at least 30 minutes. This helps the chicken soak up all the flavors. For even better taste, you can marinate it for up to 2 hours in the fridge. This extra time allows the spices to work their magic. To enhance your marinade, consider these tips: - Use fresh herbs instead of dried ones for a brighter taste. - Add a splash of lemon juice for a zesty kick. - Try a bit of honey for sweetness if you like. To avoid mushy rice, start with rinsing the basmati rice. Rinsing removes excess starch, keeping your rice fluffy. Control the cooking time and temperature: - Bring the broth to a boil before adding rice for the best texture. - After adding the rice, lower the heat and cover it tightly. This step keeps the steam in and cooks the rice evenly. - Let the rice sit covered after cooking for 5 minutes. This helps it fluff up nicely. To make your dish look great, try these plating techniques: - Start with a bed of fluffy rice and gently place the chicken on top. - Use a fork to fluff the rice before serving. This adds height and makes it look inviting. For garnishing, consider: - Adding fresh herbs like parsley or cilantro on top for color. - Placing lemon wedges on the side. They add brightness and flavor when squeezed on the dish. Pro Tips Marinate for Flavor: For the best flavor, marinate the chicken for at least 2 hours in the refrigerator; this allows the spices to penetrate the meat better. Use Fresh Herbs: Whenever possible, use fresh herbs instead of dried ones for a more vibrant flavor in your dish. Perfect Rice Texture: To achieve fluffy basmati rice, avoid stirring it too much while it cooks; this helps prevent it from becoming mushy. Enhance with Acidity: Don't skip the lemon wedges; the acidity cuts through the richness of the chicken and complements the herbs beautifully. {{image_2}} You can change the flavor of the chicken by using different herbs. Try rosemary, basil, or tarragon for a new taste. You can also add spices like cumin or coriander for warmth. To add heat, mix in some crushed red pepper or cayenne. For sweetness, a touch of honey or brown sugar can work well. Each choice allows you to create a chicken dish that fits your mood. If you want to switch up the rice, try jasmine or long-grain rice. These options have a different texture and flavor. You can also add veggies like peas or carrots to the rice during cooking. Consider adding proteins too, like shrimp or beans. This adds more nutrition and makes the dish even heartier. You get a one-pot meal that is full of flavors and colors. For sauces, a simple lemon butter sauce pairs nicely. You can also use a garlic sauce for added flavor. A tomato-based sauce can bring a fresh twist if you prefer. As for side dishes, a green salad with a light vinaigrette complements this meal well. You can also serve steamed broccoli or roasted vegetables for more variety on your plate. Each option enhances the meal and makes it more exciting. To keep your leftovers fresh, allow the dish to cool first. Place chicken and rice in airtight containers. Use glass or BPA-free plastic containers for the best results. Always label containers with the date you made the dish. This helps you track freshness. Reheat the chicken and rice in the microwave or on the stove. For the microwave, place food in a safe dish and cover it with a lid or a damp paper towel. Heat in short bursts to avoid dryness. On the stove, add a splash of broth or water to the pan. Heat over low until warmed through. Stir often to keep the rice fluffy. Yes, you can freeze this dish! It stays good for about 2-3 months in the freezer. To freeze, cool the dish completely, then place it in airtight freezer bags. Press out as much air as possible to prevent freezer burn. When ready to eat, thaw it overnight in the fridge. Reheat thoroughly before serving. You should marinate the chicken for at least 30 minutes. This time allows the flavors to soak in. For even better taste, try marinating for up to 2 hours. This longer time helps the herbs and spices blend well with the chicken. Always keep the chicken in the fridge while marinating. This keeps it safe and fresh. Yes, you can use brown rice instead of basmati. However, you need to adjust the cooking time. Brown rice takes longer to cook. You should use about 5 cups of water for every 2 cups of brown rice. Cook it for about 40-45 minutes. Check the rice often to make sure it does not burn. There are many sides you can serve with this dish. Here are some great options: - Steamed vegetables: Broccoli, carrots, or green beans work well. - Salads: A fresh green salad adds crunch. - Roasted potatoes: Crispy potatoes make a hearty side. - Cucumber salad: A cool salad balances the warm chicken. These sides enhance the meal and add more flavors! You’ve learned how to make tasty herb chicken and fluffy basmati rice. We covered key ingredients, marinating tips, and cooking methods. You can try variations to suit your taste. Remember that proper storage keeps leftovers fresh, and reheating is easy with simple techniques. With these details, you can whip up a delicious meal any time. Enjoy cooking, trying new flavors, and impressing your loved ones with your skills!

Herb Chicken with Basmati Rice Flavorful Dinner Dish

For this tasty honey garlic chicken, gather these items: - 4 boneless, skinless chicken breasts - 1/2 cup honey - 1/4 cup low sodium soy sauce - 4 cloves garlic, minced - 1 tablespoon fresh ginger, grated - 2 tablespoons olive oil - Salt and pepper to taste - 2 green onions, sliced (for garnish) - Sesame seeds (for garnish) You can swap some ingredients if needed. Here are a few ideas: - Use maple syrup instead of honey for a different sweet taste. - Tamari works well if you need a gluten-free option for soy sauce. - Garlic powder can replace fresh garlic in a pinch. Use 1/2 teaspoon. - Chicken thighs can be used instead of breasts for a juicier dish. This recipe serves four people. Here’s a quick look at the nutrition per serving: - Calories: Approximately 350 - Protein: About 30 grams - Total Fat: 9 grams - Saturated Fat: 1.5 grams - Carbohydrates: 40 grams - Sugars: 35 grams - Fiber: 0.5 grams This meal is not just tasty; it also packs a good amount of protein. Enjoy knowing you are making a healthy choice! {{ingredient_image_1}} To start, mix your marinade. In a bowl, whisk together honey, soy sauce, minced garlic, and fresh ginger. This blend brings sweet and savory notes to the chicken. Next, place the chicken breasts in a resealable bag or shallow dish. Pour the marinade over the chicken. Seal the bag or cover the dish. Let it sit in the fridge for at least 30 minutes. For more flavor, let it marinate for up to 4 hours. Once your chicken is ready, heat olive oil in a large skillet over medium heat. Remove the chicken from the marinade, letting excess marinade drip off. Add the chicken breasts to the hot skillet. Cook each side for about 5-7 minutes. You want them golden brown and cooked all the way through. Check the internal temperature; it should reach 165°F (75°C) for safe eating. After cooking, take the chicken out of the pan. Pour the leftover marinade into the same skillet. Bring it to a simmer and cook for 2-3 minutes. This reduces the sauce and thickens it nicely. Next, drizzle this reduced sauce over the cooked chicken breasts. Allow the chicken to rest for a couple of minutes. This helps the flavors soak in. When you’re ready to serve, slice the chicken and sprinkle it with sliced green onions and sesame seeds. Enjoy your delicious honey garlic chicken! To bring out the best taste, marinate the chicken for at least 30 minutes. If you have time, let it soak for up to 4 hours. This longer marination helps the flavors soak deep into the meat. Use fresh garlic and ginger for a stronger taste. They add a bright, zesty kick that makes the dish pop. For juicy chicken, cook on medium heat. If the heat is too high, the outside burns while the inside stays raw. Aim for a golden brown crust on both sides. Check the chicken's temperature with a meat thermometer. It should reach 165°F (75°C) for safe eating. Let the chicken rest for a few minutes after cooking. This step helps keep the juices inside. Serve the chicken on a large platter for a stunning display. Drizzle the thickened sauce over the chicken pieces. This adds a shiny finish that looks appealing. Garnish with sliced green onions and sesame seeds for color and crunch. These simple touches make the dish look gourmet and fancy. Pro Tips Marination Time: For the best flavor, allow the chicken to marinate for at least 2 hours, or even overnight if you can plan ahead. Cooking Temperature: Make sure your skillet is hot before adding the chicken to achieve a nice golden crust. Check Doneness: Use a meat thermometer to check that the internal temperature of the chicken reaches 165°F (75°C) for safety and juiciness. Thickening Sauce: If you want a thicker glaze, let the sauce simmer a bit longer until it reaches your desired consistency. {{image_2}} You can make this dish even better by adding vegetables. Bell peppers, broccoli, and snap peas work great. Cut the veggies into bite-sized pieces. After marinating your chicken, sear the chicken first. Then, add the veggies to the pan. Cook until the chicken is golden and the veggies are tender. This adds color and nutrients to your meal. If you like heat, try a spicy version. Add red pepper flakes or sriracha to the marinade. Start with half a teaspoon and adjust to your taste. This gives your chicken a nice kick. The sweet honey will still balance the spice. Your taste buds will love the combo of sweet and spicy! You can also bake the chicken for less mess. Preheat your oven to 400°F. Marinate the chicken as usual. Place the chicken on a baking sheet lined with parchment paper. Bake for 20-25 minutes or until the chicken is fully cooked. This method keeps the chicken juicy and allows for easy cleanup. Plus, you can roast some veggies on the same sheet for a complete meal! You can store leftover honey garlic chicken in the fridge. Place it in an airtight container. It stays good for up to 3 days. Make sure to cool it down before sealing it. This helps keep the chicken juicy and fresh. You can also store the sauce separately to keep it from making the chicken soggy. If you want to keep it longer, freeze the chicken. Wrap it well in plastic wrap and then in foil. This prevents freezer burn. You can also store it in a freezer bag. Honey garlic chicken lasts about 2 to 3 months in the freezer. When you are ready to eat, thaw it in the fridge overnight. To reheat, avoid using the microwave for best results. Instead, use a skillet on low heat. Add a splash of water or broth to keep it moist. Heat until warmed through. If you use the oven, cover it with foil to keep it from drying out. Reheating takes about 10 to 15 minutes. Enjoy it warm and flavorful! Yes, you can use chicken thighs. They have more fat, so they stay moist. Thighs also have a rich flavor that complements the honey garlic sauce. Just make sure to cook them through, reaching 165°F. I suggest marinating the chicken for at least 30 minutes. If you want a stronger taste, go for up to 4 hours. This time allows the flavors to soak into the chicken, making it juicy and tasty. You can serve this chicken with many sides. Rice is a great choice, as it soaks up the sauce well. Steamed vegetables add color and nutrients. A fresh salad also balances the meal nicely. Yes, you can prepare this dish in advance. Marinate the chicken and store it in the fridge. You can also cook the chicken ahead of time. Just reheat it gently before serving to keep it juicy. The best way to check doneness is to use a meat thermometer. Insert it into the thickest part of the chicken. It should read 165°F. If you don't have one, cut into the chicken and make sure the juices run clear. This blog post covered key ingredients, cooking steps, and helpful tips for honey garlic chicken. You learned about ingredient swaps, nutritional facts, and how to make the dish shine. The variations offered new spins, like adding veggies or a spicy kick. Remember, you can store leftovers safely and reheat them for later. Enjoy making this tasty dish. With these steps, you’ll create a flavorful meal every time!

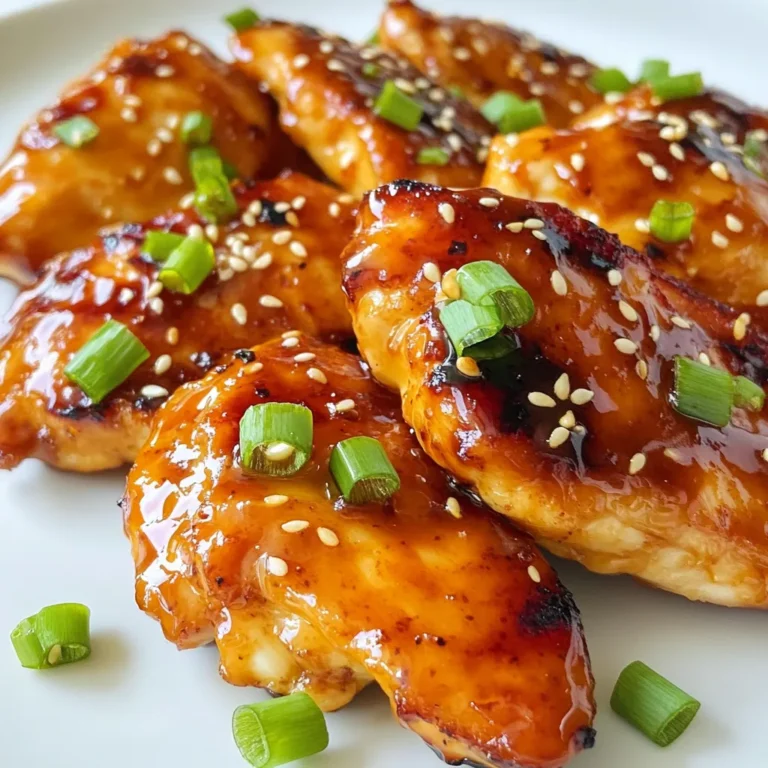
Honey Garlic Chicken Breasts Juicy and Flavorful Dish

- 300g spaghetti or penne pasta - 300g broccoli florets - 4 cloves garlic, minced - 1/4 teaspoon red pepper flakes (adjust to taste) I love using spaghetti or penne pasta in this dish. Both types hold sauce well. The broccoli florets add crunch and color. Garlic gives an amazing flavor, and red pepper flakes add a kick. You can change the spice level by adding more or less red pepper. - 1/4 cup olive oil - 1 lemon (zested and juiced) - 50g grated Parmesan cheese (plus extra for serving) - Salt and pepper to taste - Fresh basil leaves for garnish Olive oil is key for making the garlic oil. It enriches the dish with flavor. The lemon zest and juice brighten everything up. Parmesan cheese adds a nice creaminess. Finally, fresh basil leaves give a fresh finish. Use salt and pepper to make it taste just right. {{ingredient_image_1}} First, bring a large pot of salted water to a boil. Use enough water to let the pasta move freely. Add 300g of spaghetti or penne pasta and cook it according to the package instructions. This usually takes about 8 to 10 minutes. Make sure the pasta is al dente; it should still have a slight bite. During the last 3 minutes of cooking, add 300g of broccoli florets to the pot. This way, the broccoli cooks perfectly without getting mushy. After the time is up, reserve 1 cup of pasta water, then drain the pasta and broccoli. Set them aside while you prepare the garlic oil. Next, use the same pot to heat 1/4 cup of olive oil over medium heat. Once the oil is hot, add 4 minced cloves of garlic and 1/4 teaspoon of red pepper flakes. Stir them together and cook for about 1 to 2 minutes. The goal is to make the garlic fragrant and lightly golden. Watch closely to avoid burning the garlic, as it can turn bitter. Now, return the drained pasta and broccoli to the pot with the garlic oil. Pour in the juice and zest from 1 lemon. Toss everything together so that the pasta and broccoli are well coated. If the mixture seems dry, gradually add some of the reserved pasta water until you reach the desired consistency. Finally, stir in 50g of grated Parmesan cheese. Season with salt and pepper to taste. Toss again until the cheese melts and coats the pasta. Serve your Italian broccoli pasta hot, garnished with fresh basil leaves and extra Parmesan on top. Enjoy a meal that is both simple and full of flavor! To keep broccoli bright and crisp, cook it right. Avoid overcooking broccoli by adding it to the pasta pot only during the last three minutes of cooking. This way, the broccoli stays green and crunchy. For pasta, aim for al dente. This means it should be firm yet cooked through. Follow the cooking time on the package. Always taste the pasta a minute before the time is up. If it’s slightly hard, it’s just right! Flavor is key to this dish. Start with the basics: salt and pepper. Taste as you go. If you want more kick, add red pepper flakes. They add a nice heat that complements the broccoli. If you don’t have Parmesan cheese, don’t worry! You can use Pecorino Romano for a tangy twist. Nutritional yeast is a great dairy-free option too. It gives a cheesy flavor without the cheese! Pro Tips Use Fresh Broccoli: Fresh broccoli not only tastes better but also retains more nutrients. Look for vibrant green florets with no yellowing for the best results. Adjust Spice Levels: The red pepper flakes can be adjusted according to your heat preference. Start with a small amount and add more if you like it spicier! Reserve Pasta Water: Always reserve some pasta water before draining. It’s a great way to adjust the sauce consistency and add extra starch for creaminess. Garnish for Flavor: Fresh basil adds a wonderful aroma and flavor to the dish. Don’t skip the garnish; it elevates the overall presentation and taste! {{image_2}} You can switch up the pasta for this dish. If you want a gluten-free meal, use gluten-free pasta. Many brands make great options that taste good. You won't lose any flavor or fun! Whole wheat pasta is another great choice. It adds more fiber and nutrients. Plus, it has a nutty taste that goes well with broccoli. Both options keep the dish healthy and tasty. Want to make it heartier? You can add protein! Chicken is a great option. Cook it in the garlic oil before mixing in the pasta. Shrimp is another quick choice. It cooks fast and pairs well with the lemon flavor. If you prefer a plant-based option, try tofu. Just cube it and sauté it until golden. This dish is also great for vegetarians and vegans. You can skip the cheese or use a plant-based alternative. For extra flavor, toss in some cherry tomatoes. They add sweetness and color. You can also use olives for a briny kick. They add a nice contrast to the dish. Don’t forget herbs! Fresh basil works well. You can also try parsley or oregano. Each herb brings its own unique flavor, so don’t be afraid to experiment. To keep your Italian broccoli pasta fresh, store it in the fridge. Use airtight containers for best results. Glass or plastic containers work great. Make sure to cool the pasta before sealing it. This helps prevent moisture buildup. The pasta stays good in the fridge for about three days. When reheating pasta, use low heat to keep it tasty. You can use a pan or the microwave. If using a pan, add a splash of water to help it steam. Stir gently as it heats. For the microwave, cover the bowl with a lid or a damp paper towel to keep moisture in. To keep the texture nice, avoid cooking it too long. Always check if it’s heated through before serving. If it seems dry, add a bit of olive oil or pasta water. This will help bring back the flavor and moisture. Yes, you can use frozen broccoli. It is a great option when fresh isn't available. Just add it to the pot with the pasta during the last three minutes of cooking. This keeps the broccoli bright and tender. Frozen broccoli may be softer than fresh, but it still tastes good. If you want a firmer texture, try to use fresh broccoli. If you're looking for a lactose-free option, try nutritional yeast. It gives a cheesy flavor without dairy. You could also use a plant-based cheese substitute. Grated pecorino romano cheese is a good alternative, though it is still dairy. Just remember to adjust the salt since pecorino is saltier than Parmesan. You can prepare the pasta and broccoli in advance. Cook them, then cool them down. Store them in an airtight container in the fridge. When you are ready to eat, heat the garlic oil and add the cooked pasta and broccoli. Add lemon juice and cheese when you reheat. This makes it easy and quick for a busy weeknight meal. This blog post covered a simple, tasty pasta recipe centered around broccoli. You learned the key ingredients and steps to cook it right. We also shared tips for better flavor and texture and offered variations to suit your taste. In the end, you can make this dish your own with easy changes. Enjoy experimenting and personalizing this recipe. Using fresh or frozen ingredients, you’ll create a delicious meal in no time. Happy cooking!

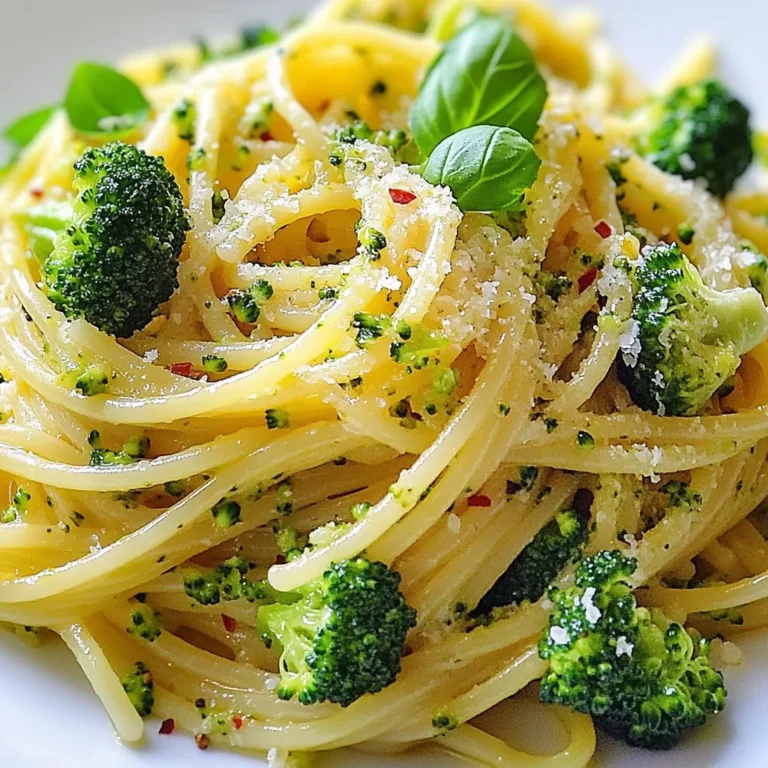
Italian Broccoli Pasta Flavorful and Easy Weeknight Meal

PREV 1 … 53 54 55 … 57 NEXT
meal twig

explore

DessertsDinnerAppetizersDrinks

Our Policies

  • Cookie Policy
  • Copyright Policy
  • Disclaimer
  • GDPR Policy
  • Terms Of Use
Back to Top
  • About
  • Contact Us
  • Privacy Policy
© 2025 meal twig