FREE DINNER EBOOK! Get your copy!
  • Cookie Policy
  • GDPR Policy
  • Disclaimer
  • Terms Of Use
  • Visit my other site: Fun Cookie Recipes
meal twig
  • Home
  • Dinner
  • Desserts
  • Drinks
  • Appetizers
  • Contact
  • About
  • Privacy Policy
  • Home
  • Dinner
  • Desserts
  • Drinks
  • Appetizers
  • Contact
  • About
  • Privacy Policy
  • Cookie Policy
  • GDPR Policy
  • Disclaimer
  • Terms Of Use
Visit my other site: Fun Cookie Recipes

HOME / CATEGORIES /

Latest

- 4 salmon fillets - 1/4 cup honey - 2 tablespoons soy sauce - 1 tablespoon Dijon mustard - 2 tablespoons olive oil - 2 cloves garlic - 1 teaspoon fresh ginger - Salt and pepper - Green onions for garnish - Sesame seeds for garnish The main ingredients for honey glazed salmon are simple yet flavorful. You start with fresh salmon fillets, which are rich in omega-3 fatty acids. Honey adds a sweet touch, while soy sauce provides a savory kick. Dijon mustard gives the dish depth, and olive oil keeps everything moist. Garlic and ginger bring warmth and spice to the mix. This dish is not just tasty; it's also good for you. Each serving has about 300 calories. You'll find protein, healthy fats, and various vitamins. Salmon offers vitamin D and B12. Honey gives you quick energy, while ginger may help digestion. This meal keeps you satisfied without weighing you down. - Baking sheet - Mixing bowl - Whisk - Resealable plastic bag To make this recipe easy, gather a few tools. A mixing bowl is great for whisking the marinade. Use a whisk to blend the honey, soy sauce, and other ingredients well. A resealable plastic bag helps coat the salmon evenly. Finally, a baking sheet will hold your salmon in the oven. These tools make cooking smooth and fun! {{ingredient_image_1}} To start, grab a bowl. In it, whisk together these ingredients: - 1/4 cup honey - 2 tablespoons soy sauce - 1 tablespoon Dijon mustard - 2 tablespoons olive oil - 2 cloves garlic, minced - 1 teaspoon fresh ginger, grated Mix until everything is smooth. This blend gives the salmon its sweet and savory taste. Make sure to coat every piece well when you add the salmon. Next, you will need to marinate the salmon. You can use a shallow dish or a resealable plastic bag. Place the salmon fillets inside. Pour the marinade over them. It should cover each fillet completely. For the best flavor, let them marinate for at least 30 minutes. If you have time, go for 2 hours in the fridge. This wait gives the salmon a deeper flavor. Before cooking, preheat your oven to 400°F (200°C). This step is key for getting the right texture. After the oven is ready, remove the salmon from the marinade. Place the fillets skin-side down on a lined baking sheet. Save the marinade for later; you will use it to baste the salmon. Bake for about 12-15 minutes. Check the salmon by seeing if it flakes easily with a fork. In the last 5 minutes, brush the salmon with the reserved marinade for a nice glaze. To get the best glaze, timing is key. Brush the marinade on the salmon during the last five minutes of baking. This step helps create a nice, shiny finish. The sugars in the honey will caramelize, giving the salmon a sweet and sticky layer. You want to watch it closely so it doesn’t burn. Cook the salmon at 400°F (200°C). This heat keeps the salmon tender and moist. If you use a convection oven, you may lower the temperature by about 25°F. Always check the salmon's internal temperature. It should reach 145°F for safe eating. Pair your salmon with sides like steamed vegetables or fluffy rice. Bright green veggies add color to your plate. For a nice touch, garnish the salmon with sliced green onions and a sprinkle of sesame seeds. This adds flavor and makes it look fancy. Use a white plate for a clean look that highlights the dish’s colors. Pro Tips Use Fresh Ingredients: Fresh salmon, garlic, and ginger will enhance the flavor of your dish significantly. Always opt for fresh over frozen when possible. Don't Overcook the Salmon: Salmon is best when it’s cooked to medium. Remove it from the oven when it flakes easily with a fork to ensure it remains moist and tender. Experiment with Marinade Time: While 30 minutes is enough, marinating the salmon for up to 2 hours can deepen the flavor profile. Just be careful not to exceed this time as the fish can become mushy. Add a Citrus Twist: For a bright flavor, consider adding a splash of lemon or lime juice to the marinade before applying it to the salmon. {{image_2}} You can change the honey glaze to make it even better! Here are two fun ideas: - Citrus-infused honey glaze: Add fresh orange or lemon juice. This brings a bright, zesty taste. - Spicy honey glaze with chili flakes: Mix in chili flakes for heat. It gives your salmon a nice kick. You have a few ways to cook your salmon. Each method brings out different flavors: - Grilling vs. baking: Grilling gives a smoky taste. Baking is easy and keeps the salmon moist. - Pan-searing and broiling options: Pan-searing creates a crispy skin. Broiling cooks the top quickly for a nice finish. What goes well with honey glazed salmon? You can pair it with several tasty sides: - Suggested vegetable combinations: Try steamed broccoli, asparagus, or green beans. These veggies add color and crunch. - Rice and grain alternatives: Serve with jasmine rice, quinoa, or farro. These grains soak up the sauce nicely and make your meal complete. To keep your honey glazed salmon fresh, follow these steps: - Refrigeration guidelines: Place leftovers in an airtight container. They stay good for about 3 days in the fridge. - Freezing salmon for future use: If you want to keep it longer, wrap the salmon tightly in plastic wrap, then place it in a freezer bag. Frozen salmon lasts for up to 3 months. When you’re ready to enjoy the rest of your meal, here’s how to do it right: - Best practices for maintaining flavor and texture: Reheat salmon in the oven at 350°F (175°C). This method keeps the fish moist. - Avoiding overcooking during reheating: Check the salmon at 10 minutes. You want it warm but not dry. Knowing how long your salmon lasts is key: - Expected duration for refrigerated and frozen salmon: In the fridge, eat it within 3 days. In the freezer, use it within 3 months for the best taste. You can use coconut aminos for a gluten-free option. It has a slightly sweet taste. Another option is tamari, which is also gluten-free. If you want a lower sodium choice, look for low-sodium soy sauce. Some people like using liquid aminos too. These substitutes work well in marinades and sauces. Check the salmon color. It should change from bright pink to a lighter shade. The fish will also flake easily when you use a fork. You can check the internal temperature, too. It should be around 145°F (63°C). If it’s firm to the touch, it’s done. Let it rest for a few minutes before serving. Yes, you can use frozen salmon. Just make sure to thaw it first. You can thaw it in the fridge overnight or under cold water. Cooking time may vary for frozen salmon. It might take a few extra minutes to cook through. Always check for doneness before serving. This blog post covered a delicious salmon recipe. We discussed essential ingredients and provided nutritional details. You learned how to prepare and marinate the salmon for great flavor. I shared tips for achieving a perfect glaze, cooking temperature, and serving ideas. Plus, we explored variations and storage guidelines. Cooking salmon can be simple and fun. With these methods, you can easily create a meal that impresses. Enjoy trying these ideas and make your next dinner special!

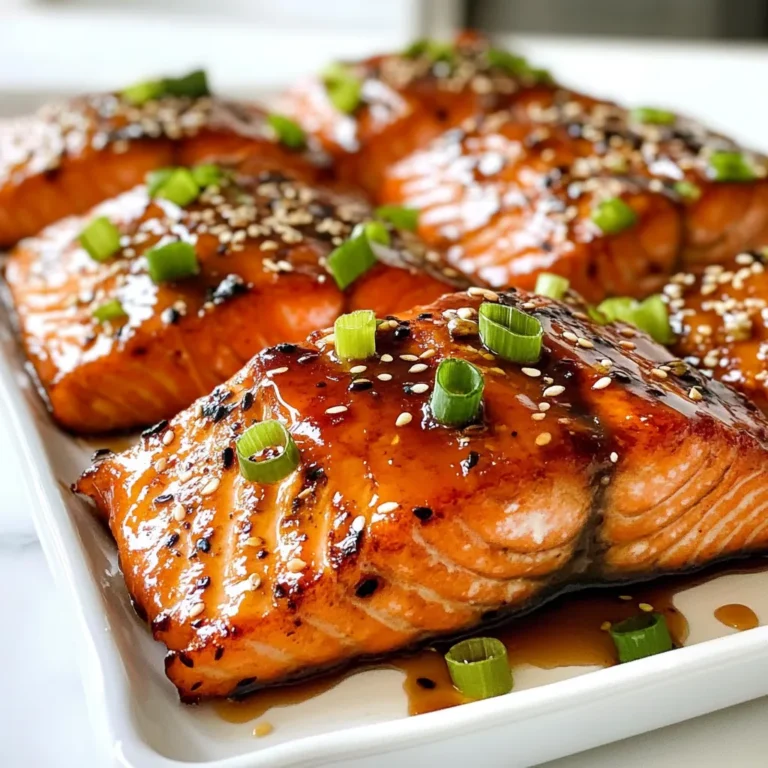
Honey Glazed Salmon Flavorful Dish for Dinner

- 1 lb boneless, skinless chicken thighs - 3 cloves garlic, minced - 2 tablespoons ground cumin - 2 tablespoons ground coriander - 1 tablespoon ground paprika - 1 tablespoon ground turmeric - 1 teaspoon cinnamon - 1 teaspoon cayenne pepper (adjust to taste) - 4 tablespoons olive oil - Salt and pepper to taste - Juice of 1 lemon - ½ cup mayonnaise - 2 tablespoons plain yogurt - 2 cloves garlic, minced - 1 tablespoon lemon juice - Salt to taste - 4 pita breads or flatbreads - 1 cup fresh vegetables (cucumbers, tomatoes, lettuce) for garnish - ½ cup pickles (optional) I love using chicken thighs for this recipe. They stay juicy and full of flavor. You can mix the spices to make the marinade. The garlic gives it a nice kick! For the garlic sauce, just mix mayo, yogurt, minced garlic, and lemon juice. It adds creaminess and tang. Feel free to add fresh veggies like cucumbers and tomatoes. They make the dish colorful and fresh. Pickles are a great touch too! Gather all these ingredients, and you're ready to create a tasty Chicken Shawarma. {{ingredient_image_1}} Start by making a tasty marinade. In a big bowl, mix the garlic, cumin, coriander, paprika, turmeric, cinnamon, cayenne pepper, olive oil, lemon juice, salt, and pepper. This mix gives the chicken a lot of flavor. Add the chicken thighs to the bowl. Make sure they get coated well. Cover the bowl and put it in the fridge. Let it marinate for at least one hour. For the best taste, let it sit overnight. Now it’s time to cook. Preheat your grill or skillet over medium-high heat. Take the marinated chicken out of the fridge. Place the chicken on the grill. Cook each side for 6 to 7 minutes. The chicken should be fully cooked and a little charred. Use a meat thermometer to check if it’s at 165°F (75°C). When done, take the chicken off the heat and let it rest for a few minutes. Once rested, slice the chicken thinly. While the chicken cooks, let’s make the garlic sauce. In a bowl, mix the mayonnaise, yogurt, minced garlic, lemon juice, and salt. Stir until it’s smooth. This sauce adds a creamy, tangy kick to your shawarma. Taste it and adjust the salt if needed. Next, warm your pita or flatbreads. You can heat them on the grill or in a dry skillet for about one minute on each side. Now, it’s time to assemble your shawarma. Take a warm pita and place sliced chicken in the center. Top it with fresh vegetables like cucumbers, tomatoes, and lettuce. If you like pickles, add those too. Drizzle a good amount of garlic sauce over the top. Wrap the pita around the fillings. You can cut it in half if you want. Serve your delicious shawarma right away! To make the best marinade, mix the spices well. I use garlic, cumin, coriander, and paprika. These flavors blend nicely. The turmeric adds color, while cinnamon gives warmth. Adjust the cayenne to your taste for heat. Use fresh lemon juice for a bright kick. Coat the chicken in this mixture and let it sit. Marinate for at least one hour, but overnight is best. This lets the flavors soak in deeply. You can grill or pan-cook the chicken. Preheat your grill or skillet over medium-high heat. Grill each side for 6 to 7 minutes. Look for a nice char. Use a meat thermometer to check the inside. It should reach 165°F (75°C). If you prefer, you can also bake the chicken. Set your oven to 400°F (200°C) and bake for 25-30 minutes. The key is to not overcook, as it will dry out. Once cooked, slice the chicken thinly for serving. Warm your pita or flatbreads before filling. Add fresh veggies like cucumbers, tomatoes, and lettuce. For extra flavor, include pickles if you like. Drizzle a good amount of garlic sauce on top. Serve the shawarmas on a wooden board for a nice look. A bowl of extra garlic sauce and a fresh salad on the side make it perfect. Enjoy your meal with family or friends! Pro Tips Marinate Overnight: For the best flavor, marinate the chicken thighs overnight. This allows the spices to penetrate the meat deeply, resulting in a more aromatic and flavorful shawarma. Use a Meat Thermometer: Ensure your chicken is perfectly cooked by using a meat thermometer. The internal temperature should reach 165°F (75°C) to guarantee it's safe to eat and remains juicy. Customize the Heat: Adjust the cayenne pepper to your preference. If you enjoy a milder flavor, you can reduce the amount or omit it altogether. Conversely, add extra for more heat! Fresh Ingredients Matter: Use fresh vegetables for garnishing your shawarma. Crisp cucumbers, juicy tomatoes, and crunchy lettuce not only enhance the flavor but also add a delightful texture. {{image_2}} If you want a vegetarian twist, try using marinated mushrooms or eggplant. These veggies soak up flavors well and grill nicely. You can also use chickpeas or lentils for a protein boost. Just season them with the same spices to keep that shawarma taste. Besides garlic sauce, you can try tahini or yogurt sauce for a creamy touch. Hummus adds a nice flavor, too. For toppings, think about adding roasted red peppers, olives, or a spicy salsa. Each sauce or topping can change the whole dish! You can adjust the spice mix to fit your taste. If you like heat, add more cayenne pepper or chili flakes. For a milder flavor, reduce the cayenne or skip it altogether. Feel free to add herbs like parsley or mint for a fresh taste. To keep your leftover chicken shawarma fresh, store it in an airtight container. Make sure the chicken cools down before sealing. It will last in the fridge for up to three days. For best taste, eat it within two days. When you want to enjoy your leftovers, heat them wisely. You can use a skillet on medium heat for about five minutes. Stir the chicken often to warm it evenly. You can also use a microwave. Heat it in short bursts, about 30 seconds, checking each time until hot. If you have extra chicken shawarma, freezing is a great option. Wrap the chicken tightly in plastic wrap or foil. Place it in a freezer-safe bag. Label the bag with the date. This way, it can stay fresh for up to three months. When you're ready to eat, thaw it in the fridge overnight before reheating. Chicken Shawarma is a popular Middle Eastern dish. It consists of marinated chicken cooked on a grill. The chicken is usually served in pita bread with fresh veggies and sauce. The spices give it a warm, rich flavor. Many people love it for its savory taste and easy-to-eat style. To make garlic sauce, mix these ingredients in a bowl: - ½ cup mayonnaise - 2 tablespoons plain yogurt - 2 cloves garlic, minced - 1 tablespoon lemon juice - Salt to taste Stir until smooth. Taste and adjust salt if needed. This sauce adds creaminess and a tasty garlic kick to your shawarma. Yes, you can use chicken breast instead of thighs. Chicken breast will be leaner and slightly less juicy. Make sure to watch the cooking time. Overcooking can dry it out. Thighs stay moist and tender, but breasts are a fine choice too. You can add many fresh vegetables to your shawarma, such as: - Cucumbers - Tomatoes - Lettuce - Onions - Bell peppers These veggies add crunch and freshness. You can also add pickles for extra tang. To make a gluten-free version, skip the pita bread. Instead, use lettuce wraps or gluten-free flatbreads. Make sure to check all labels on sauces and seasonings. Many sauces can contain gluten, so choose carefully. Enjoy your shawarma with fresh veggies for a tasty meal! This blog post walked you through making Chicken Shawarma. We covered each step, from marinating the chicken to cooking it. I shared tips on preparing garlic sauce and garnishes. You learned about storage and reheating options to keep leftovers fresh. In summary, making Chicken Shawarma is fun and easy. You can adapt it to suit your taste. Enjoy your cooking and savor every bite of this flavorful dish!

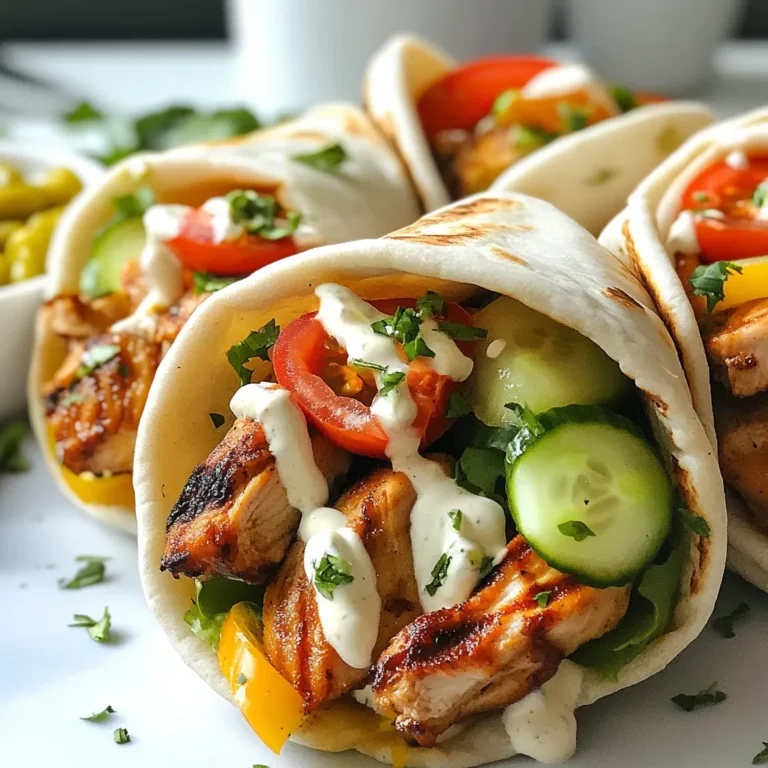
Chicken Shawarma with Garlic Sauce Delicious Recipe

- 1.5 lbs boneless, skinless chicken thighs - 1/4 cup olive oil - 4 cloves garlic - 1/2 cup grated Parmesan cheese The main ingredients for your Keto Chicken Skewers with Garlic Parmesan are simple yet flavorful. I love using boneless, skinless chicken thighs. They stay juicy and tender when cooked. Olive oil adds richness and helps the spices stick. Fresh garlic gives a nice punch of flavor. Grated Parmesan cheese melts beautifully, adding a delightful crust. - 1 teaspoon dried Italian herbs - 1/2 teaspoon paprika - Salt and pepper to taste For seasoning, I recommend dried Italian herbs. They blend well with the chicken. Paprika brings a slight smokiness. Don’t forget salt and pepper; they enhance all flavors. Adjust them according to your taste. - 1 tablespoon fresh parsley - Wooden or metal skewers Fresh parsley is a great touch. It makes your dish look pretty and adds freshness. You can use either wooden or metal skewers. If you choose wooden, soak them in water for 15 minutes. This step prevents them from burning on the grill. {{ingredient_image_1}} In a medium bowl, start by whisking together the following ingredients: - 1/4 cup olive oil - 4 cloves garlic (minced) - 1 teaspoon dried Italian herbs (oregano, thyme, or basil) - 1/2 teaspoon paprika - Salt and pepper to taste This mix creates a rich and flavorful marinade. It adds depth to the chicken skewers. Make sure to whisk until everything blends well. The olive oil helps keep the chicken juicy. The garlic and herbs infuse great taste. Next, add 1.5 lbs of boneless, skinless chicken thighs cut into bite-sized pieces. Make sure each piece gets a good coat of the marinade. You want every bite to be packed with flavor. Cover the bowl and place it in the fridge. Let it marinate for at least 30 minutes. If you have time, let it sit for up to 2 hours for even more flavor. Now, it’s time to grill. First, preheat your grill or grill pan over medium-high heat. If you are using wooden skewers, soak them in water for about 15 minutes. This step prevents them from burning. Thread the marinated chicken pieces onto the skewers. Leave a little space between each piece. This helps them cook evenly. Once your grill is hot, place the skewers on it. Cook for about 10 to 12 minutes. Turn them occasionally. You want the chicken to reach an internal temperature of 165°F (75°C). In the last few minutes of grilling, sprinkle 1/2 cup of grated Parmesan cheese over the skewers. The cheese will melt and stick to the chicken, adding a creamy finish. After cooking, let the skewers rest for a few minutes. This helps the juices settle. Finally, garnish with chopped fresh parsley before serving. Enjoy your delicious keto chicken skewers! For the best taste, marinate your chicken for at least 30 minutes. If you have time, aim for 2 hours. This longer time helps the flavors soak in well. You can even prepare the marinade the night before. Place the chicken in the fridge for the best results. Grilling adds a nice char and smoky flavor. If you don't have a grill, baking is a good option. Preheat your oven to 400°F (200°C) for baking. Use a baking tray lined with parchment paper. Cook skewers for 20-25 minutes. Make sure to turn them halfway through for even cooking. To check if your chicken is done, use a meat thermometer. It should read 165°F (75°C) inside. If you don’t have a thermometer, cut a piece open. The meat should be white, with no pink showing. Avoid overcooking, as it can make your chicken dry. Let your skewers rest for a few minutes after cooking. This helps keep them juicy and tender. Pro Tips Marinate for More Flavor: Allowing the chicken to marinate for at least 2 hours can significantly enhance the flavors, making each bite more delicious. Use Fresh Herbs: Fresh herbs can elevate the dish; consider using fresh basil or oregano instead of dried for a brighter flavor profile. Check Internal Temperature: Always use a meat thermometer to ensure the chicken reaches an internal temperature of 165°F (75°C) for safe consumption. Experiment with Seasonings: Feel free to mix up the spices and herbs to suit your taste; adding cayenne pepper can introduce a nice kick! {{image_2}} You can switch the chicken for shrimp or tofu. Shrimp cooks quickly and adds a sweet touch. Use large shrimp for easy skewering. Tofu is a great plant-based choice. Choose firm tofu, and press it to remove excess water. Cut it into cubes and marinate just like the chicken. Both options will soak up the garlic and Parmesan flavors well. Spice things up with your favorite seasonings! Try adding cayenne pepper for heat or lemon zest for brightness. You can also use a different marinade, like teriyaki or honey mustard. Experiment with fresh herbs like rosemary or cilantro. Each change can create a new taste profile. Have fun and find what you love! Pair these skewers with keto-friendly sides. A fresh salad with leafy greens and avocado works great. You can also serve them with grilled veggies like zucchini or bell peppers. For a heartier option, try cauliflower rice or a creamy garlic dip. Each side will complement the chicken skewers perfectly. Enjoy your meal! Leftover Keto Chicken Skewers last for about three days in the fridge. Make sure to store them in an airtight container. This keeps them fresh and safe to eat later. Before eating, always check for any strange odors or colors. Freezing cooked skewers is easy and effective. To freeze, place the cooled skewers in a single layer on a baking sheet. This prevents them from sticking together. After they freeze for a couple of hours, transfer them to a freezer bag. Remove as much air as you can to avoid freezer burn. They can last up to three months in the freezer. To reheat the skewers, use the oven for the best taste. Preheat your oven to 350°F (175°C). Place the skewers on a baking sheet. Cover them with foil to keep them moist. Heat for about 10 to 15 minutes or until warmed through. You can also use a microwave, but this may make them a bit soggy. Enjoy your delicious skewers again! Yes, you can use chicken breast. Chicken breast is leaner than thighs, but it works. Just remember that breast meat cooks faster, so check for doneness sooner. It’s best to slice the breast into similar-sized pieces to ensure even cooking. Both cuts will take on the marinade flavors well. Absolutely! These skewers are perfect for meal prep. You can make them ahead of time and store them in the fridge. Simply marinate the chicken and thread them onto skewers. Cook them when ready to eat. They keep well for up to four days in the fridge. You can easily reheat them on the grill or in a pan. You have many great options to serve with these skewers. Here are a few ideas: - Zucchini noodles: They are light and pair well with the flavors. - Cauliflower rice: A tasty, low-carb side. - Grilled vegetables: Bell peppers, onions, and mushrooms add color and taste. - Salad: A fresh garden salad can balance the meal nicely. Choose what you enjoy most! This blog post shows you how to make great keto chicken skewers. You learned about the main ingredients, like boneless chicken thighs and Parmesan cheese. I shared how to prepare the marinade and grill the skewers. You also got tips on cooking techniques and variations for different proteins. Remember, proper storage keeps leftovers fresh. These tips will help you create tasty meals that fit your diet. Now, go ahead and enjoy every bite you make!

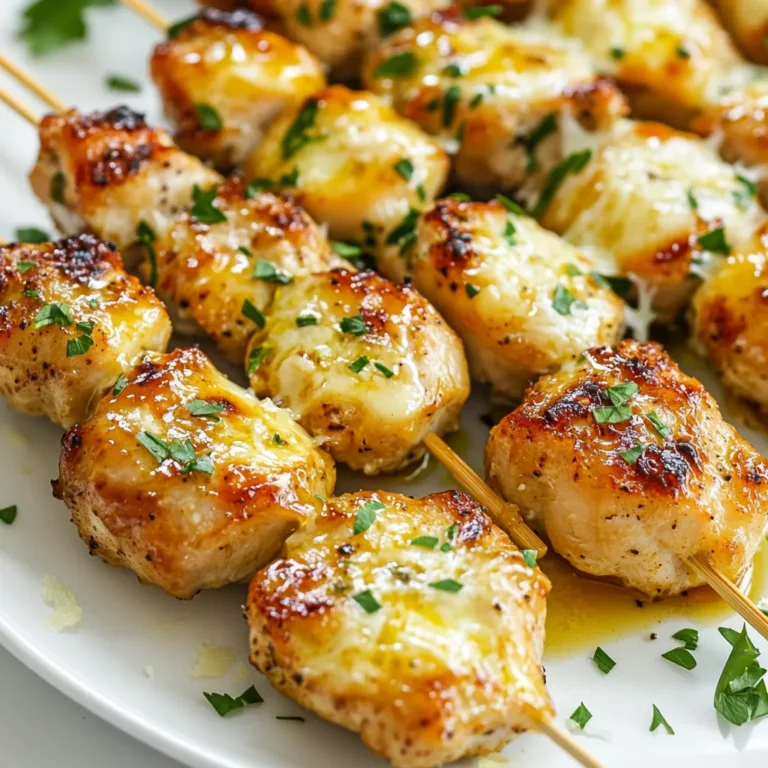
Keto Chicken Skewers with Garlic Parmesan Delight

To make Ricotta Zucchini Lasagna Roll-Ups, gather these fresh ingredients: - 3 medium zucchinis, sliced thinly lengthwise - 2 cups ricotta cheese - 1 cup grated mozzarella cheese - 1 cup grated Parmesan cheese - 1 egg - 2 cups marinara sauce (homemade or store-bought) - 2 cloves garlic, minced - 1 teaspoon dried Italian herbs (oregano, basil, thyme) - Salt and pepper to taste - Fresh basil leaves for garnish Each serving of Ricotta Zucchini Lasagna Roll-Ups has about: - Calories: 350 - Protein: 22g - Fat: 18g - Carbohydrates: 28g - Fiber: 3g This dish is a great way to enjoy veggies while getting enough protein and flavor. To elevate your dish, consider adding: - Fresh spinach leaves for extra greens - Sliced mushrooms for umami flavor - Chopped bell peppers for sweetness - Fresh herbs like parsley or thyme for brightness These fresh ingredients can make your roll-ups even more delicious and colorful. {{ingredient_image_1}} Start by preheating your oven to 375°F (190°C). Take three medium zucchinis and slice them thinly lengthwise. Aim for about 1/8 inch thick. A mandoline slicer works best for this. After slicing, sprinkle salt on the zucchini strips. Let them rest for 10 to 15 minutes. This step helps draw out excess moisture. Pat the slices dry with a paper towel to remove any liquid. In a mixing bowl, combine 2 cups of ricotta cheese with half a cup of grated mozzarella and half a cup of grated Parmesan. Add one egg, two minced garlic cloves, one teaspoon of dried Italian herbs, salt, and pepper. Mix everything until it’s well combined. Taste the mixture; it should be creamy and flavorful. This filling is the heart of your roll-ups. Spread a thin layer of marinara sauce on the bottom of a 9x13 inch baking dish. This keeps the rolls from sticking. Take one zucchini slice, place a generous tablespoon of the ricotta mixture at one end, and roll it tightly. Place the roll seam-side down in the dish. Repeat this for all zucchini slices. Arrange the rolls snugly next to each other. Once done, pour the remaining marinara sauce over the rolls. Sprinkle the rest of the mozzarella and Parmesan on top. Cover the dish with foil to avoid burning the cheese. Bake for 25 minutes. After that, remove the foil and bake for another 15 minutes until the cheese is melted and bubbly. Let the roll-ups sit for 5 minutes before garnishing with fresh basil leaves. Enjoy! To cut zucchini right, use a sharp knife or a mandoline slicer. Slice the zucchini lengthwise into thin strips about 1/8 inch thick. This size helps them roll easily. If you cut them too thick, they won't bend. After slicing, lightly salt the zucchini. Let it sit for 10-15 minutes to remove extra moisture. This step keeps your roll-ups from getting soggy. To get the best cheese melt, use fresh cheeses. Grate your mozzarella and Parmesan just before mixing. This gives better flavor and texture. Cover the dish with foil for the first part of baking. This keeps the cheese from burning. Remove the foil later to let the cheese bubble and brown nicely. Watch it closely so it doesn’t burn. For a great look, serve the roll-ups on a big plate. Pour some marinara sauce on the bottom before placing the roll-ups. This adds color and flavor. Garnish with fresh basil leaves for a pop of green. You can also sprinkle extra cheese on top for flair. Serve it warm, and enjoy the smiles! Pro Tips Use a Mandoline Slicer: For perfectly uniform zucchini slices, a mandoline slicer will save time and ensure even cooking. Salt Your Zucchini: Salting the zucchini before rolling helps draw out moisture, preventing a soggy lasagna. Pat dry to remove excess salt. Experiment with Cheeses: Feel free to mix in other cheeses like feta or goat cheese for a unique flavor twist in your filling. Let it Rest: Allow the roll-ups to sit for a few minutes after baking; this helps the cheese set and makes serving easier. {{image_2}} You can change the cheese mix for different flavors. Try goat cheese for a tangy twist. Cream cheese will add creaminess, while feta gives a salty bite. You can also mix in some cheddar for a sharper taste. Each cheese brings a unique flavor to the roll-ups. Feel free to use what you love or have at home. Want to make your roll-ups heartier? Add protein! Cooked, shredded chicken works well. Just mix that into the ricotta filling. Ground beef is another great option. Brown it in a pan before mixing it in. This will add more flavor and make the dish more filling. You can even use turkey for a leaner choice. You can make these roll-ups gluten-free easily. Just use gluten-free marinara or avoid any wheat products. For a vegan version, swap ricotta with a cashew cream or tofu blend. Nutritional yeast can give a cheesy flavor. Use vegan cheese for topping. These swaps keep the roll-ups delicious while meeting dietary needs. Enjoy experimenting with what works for you! After you enjoy your Ricotta Zucchini Lasagna Roll-Ups, store any leftovers in an airtight container. This keeps them fresh. Place the container in your fridge. Leftovers stay good for about 3 to 5 days. When you’re ready to eat again, check for any signs of spoilage. If you want to save some for later, freezing works well. First, let the roll-ups cool completely. Then, place them in a freezer-safe container or wrap them in plastic wrap. Use a layer of foil for extra protection. They last up to 3 months in the freezer. When ready to use, thaw them overnight in the fridge before reheating. To reheat your Ricotta Zucchini Lasagna Roll-Ups, preheat your oven to 350°F (175°C). Place the roll-ups in a baking dish. Cover them with foil to keep moisture in. Heat for about 20 minutes. You can also microwave them if you're in a hurry. Just warm them for 2 to 3 minutes on high, checking frequently. Enjoy your meal just like it was fresh! Yes, you can prepare these roll-ups in advance. Just follow all the steps until you bake them. Once you have assembled the roll-ups, cover the dish with foil and store it in the fridge. You can keep them for up to 24 hours before baking. When you are ready to enjoy them, bake as directed. You may need to add a few extra minutes to the baking time if they are cold. If you don’t have zucchini, there are great alternatives. Thin slices of eggplant work well for a similar texture. You can also use bell peppers or thin sheets of butternut squash. These options add unique flavors and colors to your dish. Just make sure to slice them thinly for easy rolling. Leftover Ricotta Zucchini Lasagna Roll-Ups can stay fresh in the fridge for about 3 to 4 days. Store them in an airtight container to keep them from drying out. When reheating, use the oven for best results. This way, the cheese will melt nicely again, and the roll-ups will taste just as good. This blog post explored how to make delicious Ricotta Zucchini Lasagna Roll-Ups. We covered the full list of ingredients, step-by-step instructions, and helpful tips for the best results. You learned how to mix flavors, layer ingredients, and present your dish beautifully. I shared variations to suit different diets and preferences, plus storage tips to keep your leftovers fresh. With all this info, you can confidently prepare and enjoy this tasty meal. Now, go ahead and make these roll-ups your own!

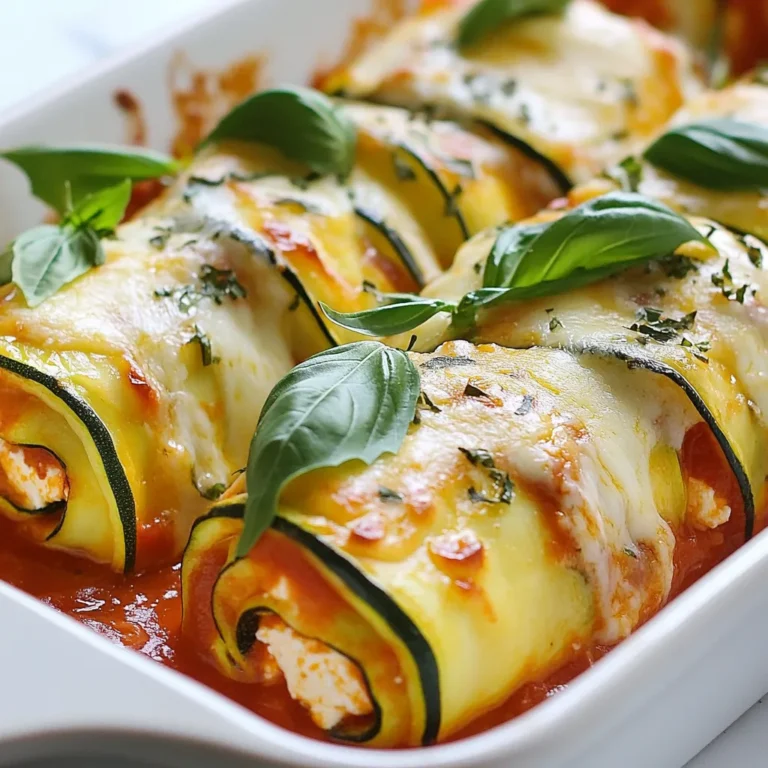
Ricotta Zucchini Lasagna Roll-Ups Simple and Savory

- 12 oz spaghetti or linguine - 1 lb large shrimp, peeled and deveined - 5 cloves garlic, minced - 1 small onion, finely chopped - 1 cup cherry tomatoes, halved - 4 cups chicken or vegetable broth - 1 teaspoon red pepper flakes (adjust for spice level) - 1 teaspoon dried oregano - 2 tablespoons olive oil - 1 tablespoon lemon juice - Salt and black pepper to taste - Fresh parsley, chopped - Grated parmesan cheese {{ingredient_image_1}} First, heat two tablespoons of olive oil in a large pot over medium heat. Add one small onion, finely chopped, and cook it for about two to three minutes. You want the onion to turn soft and clear. Next, add five cloves of minced garlic and one teaspoon of red pepper flakes. Stir these for one to two minutes until they smell great. This step builds a strong flavor base. Now, pour in four cups of chicken or vegetable broth. Bring this to a simmer. The broth adds depth and richness to the dish. Once the broth is simmering, it’s time to add the pasta. Use 12 ounces of spaghetti or linguine. Make sure the pasta is fully submerged in the broth. Cook it according to the package instructions, which is usually about eight to ten minutes. Stir it often to ensure it cooks evenly. This helps prevent sticking and gives you a better texture. When the pasta is almost done, it’s time to add the shrimp. Place one pound of peeled and deveined shrimp into the pot along with one cup of halved cherry tomatoes. Cook everything for another three to five minutes. The shrimp should turn pink and opaque when done. Now, stir in one teaspoon of dried oregano, one tablespoon of lemon juice, salt, and black pepper to taste. Mix well so all flavors combine. Let it sit for a couple of minutes to thicken slightly. Garnish your dish with freshly chopped parsley before serving. You can also add grated parmesan cheese if you like. This simple touch makes the dish more special. To cook shrimp just right, watch for their color change. They should turn pink and opaque. This means they are cooked through. Overcooking makes them tough, so keep an eye on them. Adjust spice levels by adding more or less red pepper flakes. Start with one teaspoon for a mild kick. You can always add more later if you like heat. Stir the pasta well as it cooks. This helps it not stick together and creates a nice texture. Use high-quality broth for rich flavor. Chicken or vegetable broth adds depth to the dish. The better the broth, the tastier your pasta will be. Garnish with fresh parsley for a bright look. It adds color and freshness to the dish. For a finishing touch, sprinkle grated parmesan cheese on top. This adds a creamy taste and makes it look gourmet. You can serve it right in the pot or on individual plates for a nice touch. Pro Tips Perfectly Cooked Pasta: To achieve the best texture, cook the pasta just shy of al dente. It will continue to cook when you add the shrimp and sauce. Fresh Shrimp: For maximum flavor, use fresh shrimp instead of frozen. If using frozen, make sure to thaw them completely before cooking. Flavor Boost: Enhance the dish by adding a splash of white wine to the broth after sautéing the onions and garlic. This will deepen the flavors. Garnish Wisely: Fresh herbs like basil or chives can be used alongside parsley for a more complex flavor profile. Experiment with different herbs for variety. {{image_2}} You can switch shrimp for other proteins. Scallops work well, adding a sweet flavor. Chicken is another great choice. Just cook it until golden before adding other ingredients. For a vegetarian twist, use mushrooms and spinach instead. They add great texture and flavor, making the dish hearty and satisfying. If you want to change the pasta, try whole wheat or gluten-free options. Both can give you a healthy boost. You can also use different pasta shapes like penne or fettuccine. These shapes hold sauce well and make each bite enjoyable. You can enhance the flavor by adding white wine. It adds depth and richness to the dish. Try incorporating extra veggies like bell peppers. They add color and crunch, making your meal even better. Each of these variations keeps the dish fun and fresh! Store your one-pot garlic shrimp pasta in an airtight container. This keeps it fresh. You can place it in the fridge right after it cools. It lasts about 3 to 4 days. Always check for any signs of spoilage before eating. To freeze your pasta, let it cool completely first. Then, portion it into freezer-safe bags or containers. Remove as much air as possible to prevent freezer burn. It can stay good for up to 3 months. When you want to eat it, thaw it overnight in the fridge. For quick reheating, use a microwave. Place it in a bowl and cover it. Heat for 2-3 minutes, stirring halfway. For stovetop reheating, add a splash of broth or water. Heat it over low flame, stirring until hot. This keeps the pasta moist and tasty. To make One-Pot Garlic Shrimp Pasta, it takes about 30 minutes. This includes 10 minutes for prep and 20 minutes for cooking. I love how quick this meal is, especially on busy nights. You can sauté the onions and garlic while the pasta cooks. This saves time and adds great flavor. Yes, you can make One-Pot Garlic Shrimp Pasta ahead of time! I recommend cooking the pasta until it’s just underdone. This way, it won’t get mushy when you reheat it. Store the dish in an airtight container in the fridge. You can reheat it on the stovetop or in the microwave. Just add a splash of broth to keep it moist. One-Pot Garlic Shrimp Pasta pairs well with many sides. A fresh green salad with a light vinaigrette works great. Garlic bread is another tasty option; it’s perfect for soaking up extra sauce. For drinks, a crisp white wine like Sauvignon Blanc complements this dish well. If you prefer non-alcoholic options, sparkling water with lemon is refreshing too. To sum up, you learned how to make One-Pot Garlic Shrimp Pasta. We covered the key ingredients, like shrimp, garlic, and broth. You also learned step-by-step instructions for preparing, cooking, and finishing the dish. Tips helped you perfect your flavors and presentation. Remember, you can swap proteins and pasta types for variety. This dish is easy to store and reheat, making it great for meals ahead. Now, enjoy making this tasty dish and impress your family and friends!

One-Pot Garlic Shrimp Pasta Quick and Tasty Dinner

To make tasty Ground Chicken Sloppy Joes, you need a few key items. Here are the main ingredients: - 1 lb ground chicken - 1 medium onion, finely chopped - 2 cloves garlic, minced - 1 bell pepper (any color), diced - 1 cup tomato sauce - 4 hamburger buns These ingredients create a savory base for your sloppy joes. The ground chicken gives it a light texture, while the onion and bell pepper add a sweet crunch. Now, let’s talk about the flavors! These seasonings and sauces are crucial: - 2 tablespoons ketchup - 1 tablespoon Worcestershire sauce - 1 tablespoon brown sugar - 1 teaspoon smoked paprika - ½ teaspoon chili powder - Salt and pepper to taste These items bring a mix of sweet, smoky, and tangy flavors to your dish. The brown sugar balances the acidity of the tomato sauce. Smoked paprika adds depth, and chili powder gives a bit of heat. Finally, let’s not forget the finishing touches! Here’s what you can use: - Fresh parsley, chopped (for garnish) Chopped parsley adds a fresh bite to each serving. You can also try adding sliced pickles or cheese for extra flavor. These toppings make your sloppy joes not just tasty but also visually appealing! {{ingredient_image_1}} Start by heating a large skillet over medium heat. Add 1 pound of ground chicken. Cook it for about 5 to 7 minutes. Break it apart with a spatula while it cooks. Make sure it turns white and is no longer pink. Once cooked, take it out of the skillet and set it aside. In the same skillet, add a finely chopped onion, 2 minced cloves of garlic, and 1 diced bell pepper. Sauté them until they are tender, which takes around 3 to 4 minutes. Stir often to avoid burning. The aroma will fill your kitchen, and it will smell great! Now, add the cooked ground chicken back into the skillet with the vegetables. Pour in 1 cup of tomato sauce, 2 tablespoons of ketchup, and 1 tablespoon of Worcestershire sauce. Add 1 tablespoon of brown sugar, 1 teaspoon of smoked paprika, and ½ teaspoon of chili powder. Season with salt and pepper to taste. Stir everything well to mix. Reduce the heat to low and let it simmer for about 10 minutes. Stir occasionally. This thickens the mixture and blends the flavors. While it simmers, you can toast 4 hamburger buns until golden brown. Once ready, serve the sloppy joe mix on the toasted buns and sprinkle with chopped fresh parsley for a nice touch! To keep your Sloppy Joes juicy, use fresh ground chicken. Choose a brand with some fat. This fat adds moisture, making each bite tender. Don’t cook the chicken until it’s too dry. Stir often for even cooking. When mixing in sauces, let them coat the chicken well. This helps lock in flavor and moisture. Toasting buns adds a nice crunch. Use a skillet for better control. Heat it over medium heat and add a little butter. Place the buns cut-side down in the skillet. Watch them closely. They can burn quickly. Toast until they are golden brown. This step makes them sturdy for the filling. Want to amp up the flavor? Try adding diced jalapeños for heat. A splash of hot sauce gives a nice kick too. For an extra layer of taste, mix in some barbecue sauce. It pairs well with the sweetness of the brown sugar. Fresh herbs like basil or cilantro can brighten the dish. Don’t hesitate to experiment! Pro Tips Use Lean Ground Chicken: Opt for lean ground chicken to reduce fat content, keeping your sloppy joes healthier without sacrificing flavor. Customize the Vegetables: Feel free to add more veggies like carrots or zucchini for extra nutrients and texture. Make it Spicy: Add a dash of hot sauce or diced jalapeños for those who enjoy a bit of heat in their sloppy joes. Serve with Sides: Pair your sloppy joes with coleslaw or sweet potato fries for a complete and satisfying meal. {{image_2}} You can switch ground chicken for other meats. Ground turkey works well and has a similar taste. If you like beef, use lean ground beef for a classic flavor. Ground pork adds a nice richness. For a fun twist, try shredded rotisserie chicken. Each option will give you a different taste and texture. If you want a meatless meal, use lentils or beans. Cooked lentils blend well with the sauce. Black beans or kidney beans are great, too. You can also use crumbled tofu or tempeh. These options give you protein without meat. They soak up flavors nicely and keep the dish hearty. You can change the taste of your sloppy joes with spices. Add cayenne pepper or hot sauce for heat. A teaspoon of sriracha can bring a spicy kick. For a sweet twist, add more brown sugar or a splash of maple syrup. You can even mix in barbecue sauce for a smoky flavor. Experiment with different herbs like thyme or oregano to find your favorite mix. Store any leftover sloppy joes in an airtight container. Keep them in the fridge for up to three days. Make sure to let the mixture cool before sealing it. This helps to keep the flavors fresh and tasty. You can freeze sloppy joes for later meals. After cooking, let the mixture cool completely. Then, place it in a freezer-safe bag or container. Label it with the date. Sloppy joes can be frozen for up to three months. When you want to eat them, just thaw in the fridge overnight. To reheat, use a skillet over medium heat. Stir often to avoid sticking. You can also use the microwave. Heat in short bursts, stirring in between. Add a splash of water or broth if it seems dry. This keeps your sloppy joes moist and tasty. I love to serve Ground Chicken Sloppy Joes with crispy fries or a fresh salad. The fries add crunch, while the salad gives a light touch. You can also add pickles or coleslaw for extra flavor and texture. Yes, you can make sloppy joes in advance. Just cook the mixture and store it in the fridge. It will stay fresh for up to three days. When you are ready to eat, just heat it up on the stove or in the microwave. To spice up your sloppy joes, add more chili powder or some hot sauce. You can also mix in diced jalapeños or crushed red pepper flakes. Start with a little, then taste it to see how spicy you want it. Yes, there are many gluten-free bun options. Look for buns made from rice or almond flour. You can also use lettuce leaves for a low-carb option. This way, everyone can enjoy these tasty sloppy joes! Ground chicken sloppy joes are easy to make and fun to eat. We covered the best ingredients, seasonings, and toppings. I shared step-by-step cooking tips and ways to avoid dry meat. You can also try different proteins or make tasty vegan versions. Storing leftovers is simple and reheating keeps them tasty. These tips help you enjoy sloppy joes any day. Now, go create your own delicious version!

Ground Chicken Sloppy Joes Flavorful Family Meal

- 2 boneless, skinless chicken breasts, diced - 1 cup jasmine rice - 1 ½ cups chicken broth - 1 cup fresh pineapple, diced - 1 red bell pepper, diced - 1 small red onion, finely chopped - 3 cloves garlic, minced - 2 tablespoons soy sauce - 1 tablespoon honey - 1 teaspoon fresh ginger, grated - 2 tablespoons olive oil - Salt and pepper to taste - Fresh cilantro for garnish When choosing chicken, look for fresh, high-quality breasts. They should feel firm and moist. For the rice, jasmine rice offers the best aroma and texture. Fresh pineapple gives a sweet and tangy flavor. Make sure it is ripe and fragrant. For the vegetables, always pick vibrant bell peppers and crisp onions. Using fresh garlic and ginger enhances the dish's overall taste. If you can’t find jasmine rice, use basmati rice or even brown rice for a healthier option. For chicken broth, vegetable broth works well for a lighter flavor. You can swap fresh pineapple for canned pineapple, but drain it well to avoid excess liquid. If you prefer a different protein, try shrimp or tofu. For a gluten-free option, replace soy sauce with tamari. {{ingredient_image_1}} Start by rinsing the jasmine rice in cold water. This removes excess starch and helps keep the rice fluffy. In a medium saucepan, combine the rinsed rice with 1 ½ cups of chicken broth. Bring this mixture to a boil. Once boiling, reduce the heat to a simmer. Cover the pot and cook for about 15 minutes. This will let the rice absorb the broth. When the rice is tender, fluff it gently with a fork and set it aside. Next, grab a large skillet and heat 2 tablespoons of olive oil over medium-high heat. Add the diced chicken to the hot skillet. Season it with salt and pepper to taste. Cook the chicken for 5 to 7 minutes. You want it to turn golden brown and be fully cooked. Once done, remove the chicken from the skillet and keep it warm while you cook the vegetables. In the same skillet, add the finely chopped red onion and diced red bell pepper. Sauté these for about 3 to 4 minutes. You want them soft and fragrant. Then, add the minced garlic and grated ginger. Cook these for another minute. This will release their wonderful aromas, adding depth to your dish. Now, return the cooked chicken to the skillet. Pour in the soy sauce and honey, stirring well to coat the chicken and vegetables. Next, add in the diced pineapple. Gently mix everything together. Let the dish cook for an additional 2 to 3 minutes. This will heat through all the ingredients and blend the flavors perfectly. When ready to serve, place a generous scoop of fluffy jasmine rice on each plate. Top it off with the sweet and savory pineapple chicken mixture. For a final touch, sprinkle fresh cilantro on top. Enjoy your delicious dinner delight! To get fluffy jasmine rice, rinse it under cold water. This removes extra starch. Use a medium saucepan, and mix one cup of rice with one and a half cups of chicken broth. Bring it to a boil, then lower the heat. Cover the pot and let it simmer for about 15 minutes. This time allows the rice to absorb the broth. After cooking, fluff the rice with a fork for the best texture. Enhancing flavor makes this dish shine. Use fresh ingredients like garlic and ginger for a bright taste. Sauté the onion and bell pepper until soft. This step adds depth to the meal. When you add soy sauce and honey, mix well. This combination brings a sweet and salty balance. Finally, toss in the fresh pineapple. It adds a tropical twist and brightens every bite. Using the right tools can make cooking easier. A medium saucepan works best for the rice. A large skillet is ideal for cooking the chicken and veggies. Choose a sharp knife for easy chopping. A cutting board helps keep your workspace tidy. Lastly, having a fork to fluff the rice is essential. These tools will help you create a tasty Pineapple Chicken and Rice dish with ease. Pro Tips Marinate the Chicken: For extra flavor, marinate the diced chicken in soy sauce, honey, and ginger for at least 30 minutes before cooking. Use Fresh Pineapple: Fresh pineapple adds a vibrant sweetness to the dish; canned pineapple can work in a pinch but may alter the texture. Adjust Spice Levels: If you prefer a spicier kick, add red pepper flakes or sliced jalapeños when sautéing the vegetables. Serve with Lime: A squeeze of fresh lime juice over the dish before serving enhances the tropical flavors beautifully. {{image_2}} You can make Pineapple Chicken and Rice even more fun. Try adding mango or papaya. These fruits add a sweet touch. You can also use coconut milk instead of chicken broth. This gives a creamy flavor. Consider adding cashews for a crunchy bite. The extra textures make each bite special. You can cook this dish in different ways. A slow cooker works great for busy days. Just add all the ingredients and let it cook. You can also grill the chicken for a smoky taste. Another option is to bake it in the oven. Bake at 375°F for about 25 minutes. This keeps the chicken juicy and tender. If you need gluten-free options, use tamari instead of soy sauce. This keeps the flavors while being safe for diets. For a vegetarian version, swap chicken for tofu or chickpeas. Cook these the same way to soak up flavors. You can also use vegetable broth instead of chicken broth. This way, everyone can enjoy this tasty meal. After enjoying Pineapple Chicken and Rice, you might have some leftovers. To keep them fresh, place the food in an airtight container. Let it cool down before sealing the lid. Store the container in the fridge. It will stay good for about three to four days. If you want to save Pineapple Chicken and Rice for later, freezing is a great option. First, cool the dish completely. Then, transfer it to a freezer-safe container or bag. Press out as much air as you can. Label it with the date. This meal can last up to three months in the freezer. When ready to eat your frozen Pineapple Chicken and Rice, take it out of the freezer. Let it thaw in the fridge overnight. You can reheat it in the microwave or on the stove. If using the stove, add a splash of chicken broth to keep it moist. Heat it until it is hot all the way through. Enjoy every bite! Yes, you can use canned pineapple! Canned pineapple saves time and effort. It also adds a sweet touch to your dish. Just make sure to drain the juice before adding it. This helps keep the dish from getting too watery. Fresh pineapple gives a crunch and bright flavor, but canned works well, too. You can enjoy Pineapple Chicken and Rice with many sides. Here are some tasty options: - Steamed broccoli adds a nice crunch and color. - A simple green salad offers freshness and balance. - Roasted sweet potatoes bring out the dish's sweetness. - Garlic bread is great for mopping up the sauce. Choose any of these sides to make your meal even better! To serve more people, just increase the ingredients. For every two extra servings, add: - 1 extra chicken breast - 1 cup of jasmine rice - 1 cup of chicken broth - ½ cup of diced pineapple - ½ red bell pepper - 1 small red onion - 1 clove of garlic - 1 tablespoon of soy sauce - ½ tablespoon of honey These changes keep the flavors balanced. Adjust seasoning as needed, too. Enjoy sharing this delightful dish! This blog post covered key elements for making Pineapple Chicken and Rice. We explored ingredients, cooking steps, and expert tips. Quality matters when choosing ingredients. You can customize flavors and methods to fit your needs. Storing leftovers properly keeps your dish fresh. Remember, you can always adjust the recipe to suit your taste. Cooking should be fun and flexible. Now you have the tools to create a delicious meal anytime!

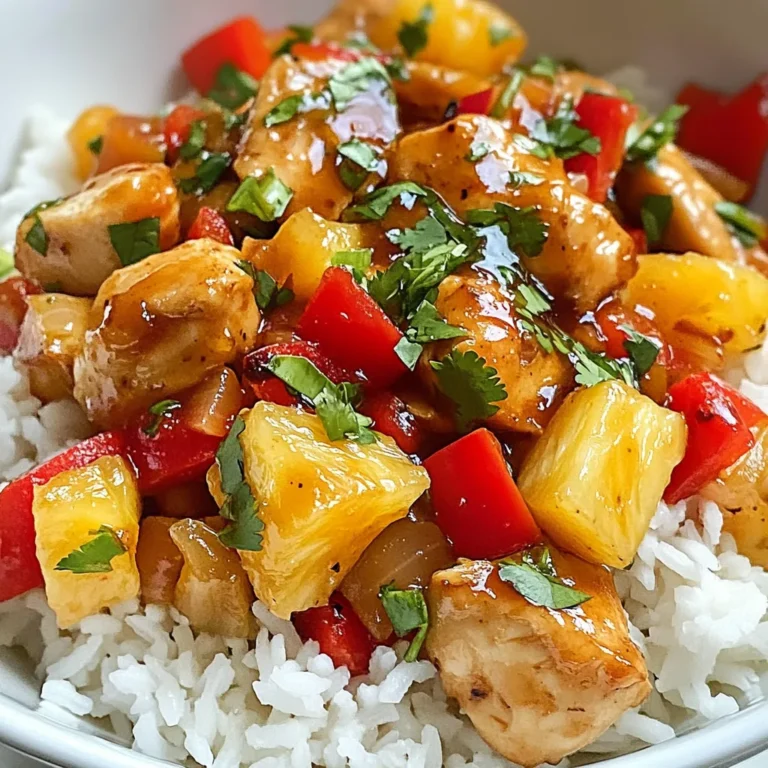
Pineapple Chicken and Rice Tasty Dinner Delight

To make these cookies, you need simple yet tasty ingredients: - 1 cup all-purpose flour - 1/2 teaspoon baking powder - 1/4 teaspoon baking soda - 1/4 teaspoon salt - 1/2 cup unsalted butter, softened - 1/2 cup sugar - 1/4 cup brown sugar, packed - 1 large egg - 1 teaspoon vanilla extract - 1/2 cup cream cheese, softened - 1/2 cup powdered sugar - 1/2 cup fresh blueberries (plus extra for garnish) - Zest of 1 lemon These ingredients work together to create a rich and creamy flavor. You can easily swap some ingredients if needed. Here are a few ideas: - Use whole wheat flour for a healthier option. - Replace butter with coconut oil for a dairy-free version. - For a lower sugar option, you can use a sugar substitute. - If you don’t have fresh blueberries, frozen ones can work too. Just thaw and drain them first. These swaps still keep the cookies delicious and fun. When picking blueberries, look for these signs: - Choose firm berries with a deep blue color. - Avoid any that are soft or have green spots. - Fresh blueberries should have a natural bloom, which looks like a white powder. - If possible, smell the berries. Fresh ones have a sweet aroma. Good blueberries make a big difference in taste. They add a burst of flavor to your cookies. Happy baking! {{ingredient_image_1}} First, preheat your oven to 350°F (175°C). While it warms up, line a baking sheet with parchment paper. This step is key to prevent sticking and make cleanup easier. Next, grab a small bowl. In it, whisk together 1 cup of all-purpose flour, 1/2 teaspoon of baking powder, 1/4 teaspoon of baking soda, and 1/4 teaspoon of salt. Set this mix aside. In a large bowl, beat together 1/2 cup of softened unsalted butter, 1/2 cup of sugar, and 1/4 cup of brown sugar. Mix until light and fluffy, which takes about 2-3 minutes. Now, add 1 large egg and 1 teaspoon of vanilla extract. Stir until everything is well combined. In another bowl, beat 1/2 cup of softened cream cheese with 1/2 cup of powdered sugar. Mix until smooth. Then, gently fold in 1/2 cup of fresh blueberries and the zest of 1 lemon. This filling adds a rich and tangy taste to your cookies. Now, take a tablespoon of cookie dough and flatten it on your palm. Add about 1 teaspoon of the cream cheese filling on top. Fold the edges of the dough around the filling, sealing it inside. Place these cookies on the prepared baking sheet, leaving space between each one. Bake in the oven for 10-12 minutes. The edges should turn lightly golden, while the centers can look a bit soft. Once baked, remove the cookies from the oven. Let them cool on the baking sheet for 5 minutes. Then, transfer them to a wire rack to cool completely. If you like, garnish with extra blueberries for a pretty touch. Enjoy your delightful treats! To get the best swirl in your cookies, use a light touch. After you scoop the dough, add the cream cheese mixture on top. Fold the dough around the filling gently. This will keep the filling intact while still letting it peek out. Be careful not to mix too much; you want to see those beautiful swirls when they bake! Sweetness is key in these cookies. If you prefer less sweet, cut back on sugar a little. Use the zest of one lemon to brighten the flavor. Fresh blueberries add a tart note that balances the sweetness. You can also add a dash of cinnamon for warmth or a hint of nutmeg for an extra flavor twist. One common mistake is overmixing the dough. Mix just until combined for soft cookies. Make sure your butter is softened, not melted. Cold butter will not cream well and affects texture. Also, don’t forget to space the cookies on the sheet. They spread out a lot, so leave room for them to grow! Pro Tips Use Fresh Blueberries: For the best flavor and texture, opt for fresh blueberries instead of frozen. They will provide a juicier burst in every bite. Don’t Overmix: When combining the dry and wet ingredients, mix just until incorporated. Overmixing can lead to tough cookies. Chill the Dough: If the dough is too soft to handle, chilling it in the refrigerator for 15-30 minutes can make it easier to shape the cookies. Garnish for Presentation: Adding extra blueberries on top after baking not only enhances the visual appeal but also adds a fresh touch to each cookie. {{image_2}} You can swap blueberries for other fruits. Raspberries, strawberries, or cherries work well. Each fruit gives a new taste. Try using fresh or frozen fruit. Just remember to adjust the sugar. If the fruit is sweet, use less sugar. To make these cookies gluten-free, use a gluten-free flour blend. Look for a blend that includes xanthan gum. This helps mimic the texture of regular flour. You can also use almond flour, but it may change the cookie's texture. Add a bit more liquid if needed. To make these cookies vegan, replace butter with coconut oil or vegan butter. Use a flax egg instead of a large egg. Mix one tablespoon of ground flaxseed with three tablespoons of water. Let it sit for five minutes to thicken. Replace cream cheese with a vegan cream cheese made from nuts or tofu. To keep your blueberry cheesecake swirl cookies fresh, store them in an airtight container. This helps maintain their soft texture and rich flavor. You can use a cookie jar or a plastic container with a tight lid. Place parchment paper between layers if you stack them. This prevents sticking. Always store the cookies at room temperature. Avoid putting them in the fridge, as this can dry them out. If you want to save some cookies for later, freezing is a great option. First, let the cookies cool completely. Then, place them in a single layer on a baking sheet. Freeze them for about an hour. Once they are solid, transfer them to a freezer-safe bag or container. Make sure to remove as much air as possible. You can freeze them for up to three months. To enjoy, just thaw them at room temperature. When stored properly, these cookies can last about one week at room temperature. If you freeze them, they can stay good for up to three months. Over time, though, they may lose some flavor. To enjoy the best taste, try to eat them within a few weeks. Always check for any signs of spoilage before eating. Yes, you can make these cookies ahead of time. Prepare the dough and fill it with cream cheese. Then, wrap the dough in plastic wrap. Store it in the fridge for up to three days. When you are ready to bake, just scoop and bake. This saves time and makes warm cookies easy! If you don't have fresh blueberries, you can use frozen ones. Thaw and drain them before adding them to the cream cheese mix. You may also try other fruits, like raspberries or chopped strawberries. Each fruit brings a unique flavor to the cookies. To make these cookies dairy-free, use dairy-free butter and cream cheese. There are many good dairy-free brands available today. Check the labels to make sure they fit your needs. You can also use a plant-based milk in place of the egg for a vegan version. The cookies are done when the edges turn a light golden brown. The center may look a bit soft, and that's okay. They will firm up as they cool. Keep a close eye on them after about 10 minutes of baking. Yes, you can add more cream cheese filling if you like. Just be sure to adjust the cookie dough around it. This might make the cookies a bit larger. Enjoy the rich, creamy flavor that extra filling will bring! You now have all the tools to make delicious blueberry cheesecake swirl cookies. We covered key ingredients, helpful tips, and even variations for special diets. Remember to choose fresh blueberries for the best flavor. Avoid common mistakes for great results. Whether you store them or freeze them, these cookies will stay tasty. Enjoy making these cookies your own. Happy baking!

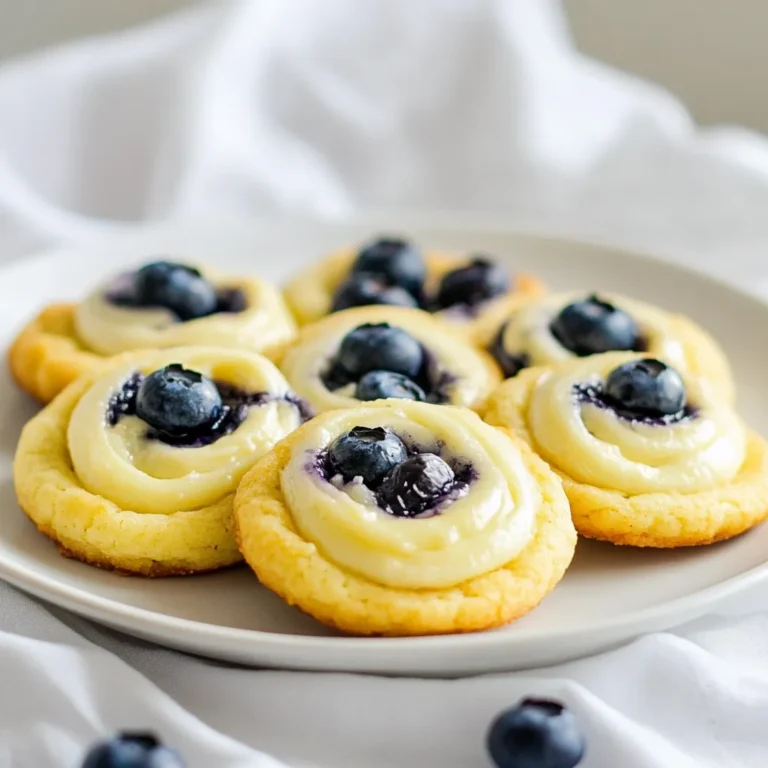
Blueberry Cheesecake Swirl Cookies Delightfully Simple

To make One-Pan Butter Parmesan Pasta, you need some great ingredients. Here’s what you will use: - 12 oz fettuccine or spaghetti - 4 tablespoons unsalted butter - 4 cloves garlic, minced - 4 cups vegetable broth - 1 cup heavy cream - 1 cup grated Parmesan cheese - Salt and black pepper to taste - 1 teaspoon Italian seasoning - Fresh parsley, chopped (for garnish) - Extra Parmesan cheese (for serving) Each ingredient plays a key role in this dish. The pasta serves as the base, soaking up all the flavors. The unsalted butter adds richness, while the garlic gives a nice aroma. Vegetable broth helps cook the pasta and adds depth. Heavy cream makes the sauce creamy and smooth. Grated Parmesan cheese is what makes it a true treat. Salt, pepper, and Italian seasoning bring everything together. Fresh parsley adds a pop of color and a hint of freshness. If you love cheese, feel free to add extra Parmesan when serving. This simple combination creates a delightful meal in just one pan. Enjoy the ease and taste of this dish! {{ingredient_image_1}} Melting the Butter Start by taking a large skillet or deep pan. Place it on medium heat. Add 4 tablespoons of unsalted butter. Watch it melt slowly. This butter adds rich flavor to the dish. Sautéing the Garlic Once the butter is melted, add 4 minced garlic cloves. Stir and sauté for 1-2 minutes. You want the garlic to smell good but not burn. This step gives the dish a nice aroma. Adding Vegetable Broth Next, pour in 4 cups of vegetable broth. Bring this mixture to a gentle boil. The broth will help cook the pasta and add flavor. Cooking to Al Dente Now, add 12 ounces of fettuccine or spaghetti. Reduce the heat and let it simmer. Cook the pasta for about 8-10 minutes. Stir it occasionally, so it cooks evenly. It should be al dente, meaning it still has a slight bite. Incorporating Cream and Cheese Once the pasta is cooked, stir in 1 cup of heavy cream and 1 cup of grated Parmesan cheese. Add 1 teaspoon of Italian seasoning, salt, and black pepper to taste. Mix everything well until it becomes creamy. Adjusting Seasoning Let the pasta cook for another 2-3 minutes. This helps the sauce thicken and coat the pasta. Taste the dish and adjust the seasoning if needed. Once satisfied, remove it from the heat and let it sit for a minute before serving. Stirring Techniques To get a creamy sauce, stir the pasta often while it cooks. This helps the starches release. The starches make the sauce thick and smooth. Use a wooden spoon or a spatula to avoid scratching your pan. Stir gently but firmly to coat the pasta well. Adjusting Liquid Levels If your pasta seems dry, add more vegetable broth or cream. Start with a small amount, like a quarter cup. Let it cook for a minute, then check the sauce. You want it to cling to the pasta but not drown it. If it's too saucy, let it cook a bit longer to thicken. Adding More Seasoning Feel free to add more salt and pepper to taste. You can also try other herbs, like basil or oregano. For a kick, add a pinch of red pepper flakes. Just sprinkle them in while mixing. Taste as you go to find what you like best. Custom Garnishes Garnishing adds a nice touch. Fresh parsley gives a pop of color and flavor. You can also sprinkle more grated Parmesan on top. For a crunch, try toasted pine nuts or breadcrumbs. These little details make your dish look and taste special. Pro Tips Perfect Pasta Texture: To achieve the ideal al dente texture, cook the pasta just until it's firm to the bite, which usually takes about 8-10 minutes. Remember, it will continue to cook slightly in the sauce. Cheese Quality Matters: Use freshly grated Parmesan cheese instead of pre-grated for a creamier texture and richer flavor. Freshly grated cheese melts better and enhances the dish significantly. Enhance with Extras: Feel free to add in vegetables like spinach, mushrooms, or cherry tomatoes for added nutrition and flavor. You can also toss in cooked chicken or shrimp for a heartier meal. Leftover Storage: Store any leftovers in an airtight container in the refrigerator for up to 3 days. Reheat gently on the stove with a splash of broth or cream to restore creaminess. {{image_2}} You can add many veggies to make this dish even better. Spinach or kale works great. Just toss them in with the pasta during the last few minutes of cooking. They get soft and blend well with the sauce. Mushrooms or peppers are also great choices. Slice them and sauté them with the garlic. They add nice texture and flavor to the dish. Adding protein can make this meal more filling. Chicken or shrimp are perfect choices. Cook them in the pan first, before adding the garlic. Once cooked, add the broth and pasta. For a vegetarian option, try chickpeas or tofu. Both will soak up the rich flavors and make your pasta hearty. - Storing Leftovers: Let the pasta cool to room temperature. Then, place it in an airtight container. Store it in the fridge for up to three days. - Reheating Tips: To reheat, add a splash of milk or broth to a pan. Warm over low heat, stirring until heated through. This keeps the pasta creamy and prevents it from drying out. - How to Freeze Pasta: After cooling, divide the pasta into portions. Use freezer-safe bags or containers. Squeeze out air before sealing. Label with the date and freeze for up to two months. - Best Practices for Thawing: To thaw, move the pasta to the fridge overnight. You can also use the microwave. Heat on low power, stirring often until warm. Enjoy your tasty pasta even after freezing! You can use fettuccine or spaghetti for this dish. Both types cook well in one pan. I prefer fettuccine for its wide shape, which holds sauce nicely. You can also use other pasta types, like penne or rotini. Just check the cooking time on the package. Yes, you can easily make this recipe gluten-free. Simply swap regular pasta for gluten-free pasta. Brands like brown rice or quinoa pasta work well. Keep an eye on the cooking time, as gluten-free pasta may cook faster. To serve more people, just scale up the ingredients. For six servings, use 18 ounces of pasta and 6 tablespoons of butter. Increase the broth and cream in the same ratio. Make sure your pan is large enough to hold it all while cooking. This blog post covered how to make a simple, delicious butter parmesan pasta. We explored key ingredients like fettuccine, garlic, and creamy cheese. You learned to prepare it step-by-step, ensuring the perfect texture. We shared helpful tips for consistency and flavor, plus tasty variations to suit your taste. Finally, we discussed how to store and reheat leftovers. Enjoy your cooking journey and make this dish your own!

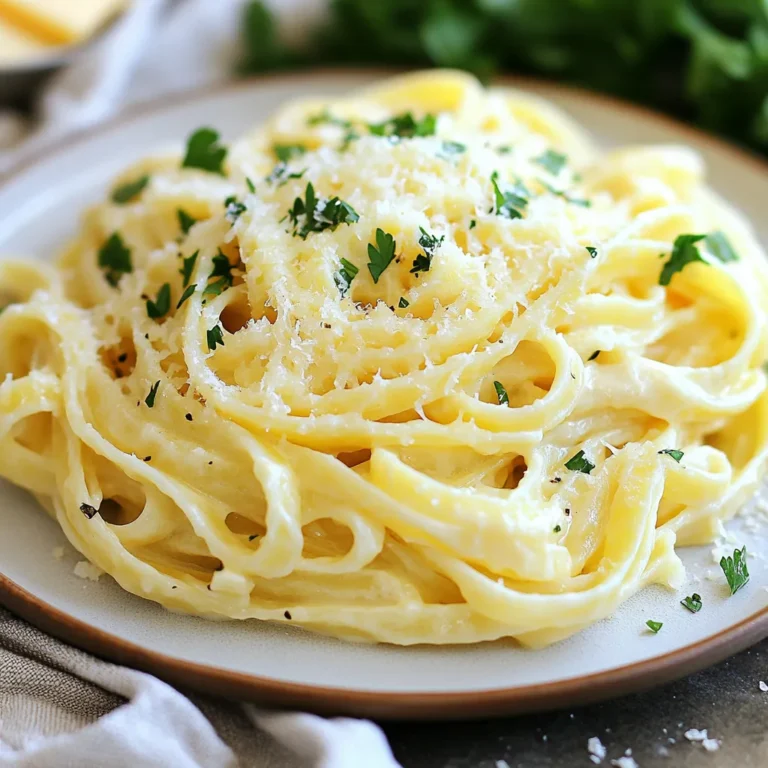
One-Pan Butter Parmesan Pasta Simple and Tasty Meal

- 1 large zucchini, spiralized - 1 bell pepper (any color), diced - 1 cup cherry tomatoes, halved - 1 cup cooked ground turkey or chicken - 1 teaspoon Italian seasoning - 1/2 teaspoon garlic powder - 1/4 teaspoon crushed red pepper flakes (optional for spice) - 1/2 cup Whole30-compliant tomato sauce - 1/2 cup nutritional yeast (optional for a cheesy flavor) - Fresh basil leaves for garnish - Salt and pepper to taste For my Whole30 pizza bowls, I love using fresh and simple ingredients. Start with a large zucchini, spiralized to create fun noodles. The zucchini adds a great texture. Next, grab any color bell pepper. I usually pick red or yellow for sweetness. Cherry tomatoes burst with flavor when baked. Halve them for even cooking. Ground turkey or chicken gives the bowls protein. Make sure it's cooked before adding. For flavor, I use Italian seasoning, garlic powder, and a pinch of red pepper flakes. These spices add warmth and depth. The Whole30-compliant tomato sauce ties everything together. This sauce gives a classic pizza taste without dairy or grains. If you want a cheesy flavor, sprinkle some nutritional yeast on top. Finally, fresh basil leaves brighten the dish. Don’t forget to season with salt and pepper. Gather all these ingredients, and you're ready to make something delicious! {{ingredient_image_1}} 1. First, preheat your oven to 375°F (190°C). This step warms up your oven for even cooking. 2. In a large mixing bowl, combine the spiralized zucchini, diced bell pepper, halved cherry tomatoes, and cooked ground turkey or chicken. Mix them well. 3. Now, sprinkle the Italian seasoning, garlic powder, crushed red pepper flakes, salt, and pepper over the mixture. Toss everything together until it’s well coated. 1. Next, spread the mixture evenly into a baking dish. Make sure it is flat and even. 2. Pour the Whole30-compliant tomato sauce over the top. Make sure every part is covered. 3. If you want a cheesy flavor, sprinkle the nutritional yeast over the sauce. This step is optional but tasty. 1. Bake the dish in the preheated oven for 20-25 minutes. The zucchini should be tender and the veggies warm. 2. Once cooked, remove the dish from the oven and let it cool for a few minutes. This makes it easier to serve. 3. Finally, garnish with fresh basil leaves before serving. This adds a lovely touch and freshness. Choosing the right zucchini is key. Look for a large zucchini that is firm and free of blemishes. A fresh zucchini gives your pizza bowls the best texture. Spiralizing it makes for fun noodles that hold the sauce well. To avoid soggy pizza bowls, make sure to drain excess moisture. After spiralizing, let the zucchini sit in a colander for a few minutes. You can also pat it dry with a paper towel. This helps keep your dish nice and crisp. Spicing things up can make a big difference. Besides Italian seasoning, try adding onion powder or smoked paprika for depth. If you love heat, increase the red pepper flakes. You can also add fresh herbs like oregano or thyme. Feel free to swap out the meat or veggies. Ground beef or sausage works great, too. If you want a vegetarian option, use plant-based meat crumbles. You can also add extra veggies, like spinach or mushrooms, to boost nutrition. For a complete meal, pair your pizza bowls with a side salad. A simple green salad with a lemon vinaigrette complements the dish well. You can also serve roasted sweet potatoes for a hearty side. Presentation matters, too. Serve the pizza bowls in bright, colorful dishes. Garnish with fresh basil leaves for a pop of color. This makes your meal look as good as it tastes, and it’s sure to impress! Pro Tips Use Fresh Vegetables: Fresh vegetables will enhance the flavor and texture of your pizza bowls. Choose the ripest tomatoes and freshest bell peppers for the best results. Adjust Seasoning to Taste: Feel free to modify the seasoning according to your preferences. Add more Italian seasoning or herbs for a bolder flavor. Experiment with Proteins: While this recipe calls for ground turkey or chicken, you can substitute with lean beef, sausage, or even plant-based proteins for a different twist. Let It Rest: Allowing the pizza bowls to cool for a few minutes before serving helps the flavors meld together and makes it easier to serve. {{image_2}} You can make vegetarian Whole30 pizza bowls by using plant-based meat. This option gives you the same great taste without animal products. Just swap the ground turkey or chicken for a tasty plant-based meat. It still fits into the Whole30 plan! For a Paleo-friendly twist, you can skip the nutritional yeast. This keeps the bowls compliant while still being delicious. Stick to seasonal veggies or your favorite meats for a hearty meal. These changes make the recipe flexible for many diets. To create different flavor profiles, try using various sauces or toppings. You can swap the Whole30-compliant tomato sauce for pesto or a spicy marinara. This adds a unique taste to your bowls. Another fun idea is to incorporate seasonal vegetables. In the summer, add zucchini or eggplant. In the fall, roasted butternut squash or kale can bring a new twist. These fresh ingredients will keep your pizza bowls exciting and flavorful. You can personalize your Whole30 pizza bowls for meal prep. Make a big batch and store them in individual containers. This way, you have quick meals ready for the week. Serving them in individual bowls makes for a fun dinner option. They look great on the table and make it easy for guests to enjoy. You can also serve them as a main dish with a side salad for a complete meal. This brings a delightful balance to your dining experience. To store leftovers, let the pizza bowls cool completely. Then, place them in an airtight container. Make sure to separate layers with parchment paper to avoid sticking. You can keep them in the fridge for up to four days. For reheating, use the oven for best results. Preheat it to 350°F (175°C). Place the pizza bowl in an oven-safe dish and cover it with foil. Heat for about 15-20 minutes, or until warm. You can also use a microwave, but the oven keeps the texture better. To freeze prepared pizza bowls, let them cool first. Then, scoop them into freezer-safe containers. Make sure to label the date. You can freeze them for up to three months. When you’re ready to eat, thaw the bowls in the fridge overnight. For reheating, follow the same steps as before. If frozen, bake at 350°F (175°C) for about 25-30 minutes. Always check to ensure they are heated through before serving. Can I make this recipe vegan? Yes, you can! To make it vegan, swap out the ground turkey or chicken for a plant-based meat alternative. You can also add more veggies like mushrooms or spinach for extra flavor and texture. How do I substitute for ground meat? Try using lentils, chickpeas, or crumbled tofu. These options provide protein and fit the Whole30 plan. You can season them with Italian herbs to match the flavor profile of the dish. What are other Whole30-compliant toppings to consider? You can use olives, artichokes, or jalapeños for a kick. Fresh spinach and arugula add great color and nutrition. Feel free to experiment with toppings that excite your taste buds! How do I know when the pizza bowls are done? Check if the zucchini is tender. A fork should easily pierce through. The tomatoes should be soft, and the whole dish will look bubbly and hot. Can I prep this recipe in advance? Yes, you can! Prep the veggies and meat a day before. Store them in the fridge. When ready, mix them with the sauce and bake. This saves time on busy days. What to pair with Whole30 Pizza Bowls for a complete meal? A fresh salad works well. Try a simple mixed green salad with a lemon vinaigrette. You can also serve it with a side of roasted vegetables for added nutrition. You’ve learned how to create delicious Whole30 pizza bowls using fresh ingredients and simple steps. We covered essential tips for perfecting the recipe and offered variant options for every diet. Remember, the right ingredients and seasoning can elevate your dish. Enjoy customizing your meal, and don’t forget to try new flavors! With these bowls, healthy eating can be fun and tasty. Now, you’re ready to impress your family and friends with your cooking skills!

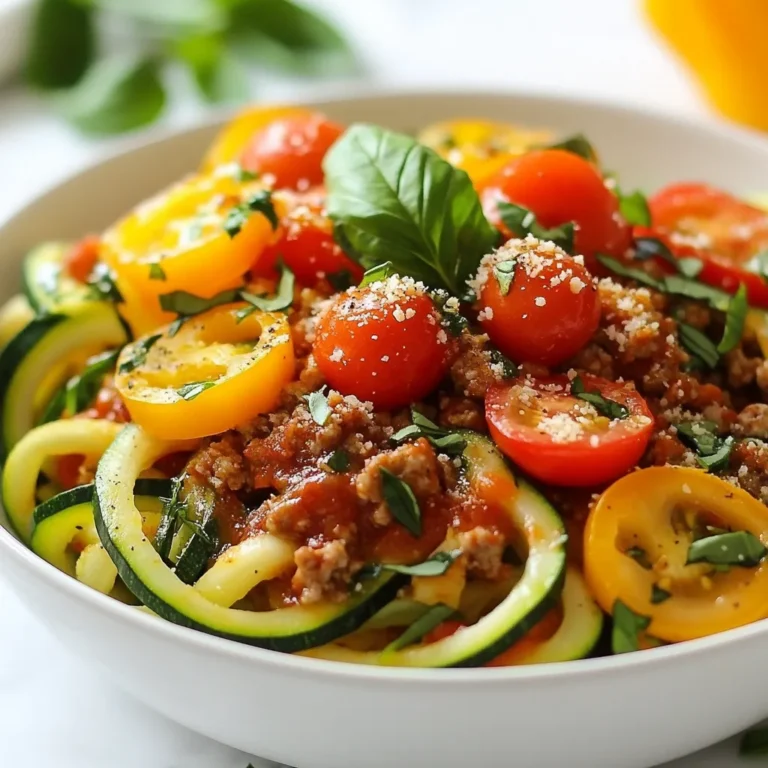
Whole30 Pizza Bowls Flavorful and Easy Recipe

PREV 1 … 52 53 54 … 57 NEXT
meal twig

explore

DessertsDinnerAppetizersDrinks

Our Policies

  • Cookie Policy
  • Copyright Policy
  • Disclaimer
  • GDPR Policy
  • Terms Of Use
Back to Top
  • About
  • Contact Us
  • Privacy Policy
© 2025 meal twig