FREE DINNER EBOOK! Get your copy!
  • Cookie Policy
  • GDPR Policy
  • Disclaimer
  • Terms Of Use
  • Visit my other site: Fun Cookie Recipes
meal twig
  • Home
  • Dinner
  • Desserts
  • Drinks
  • Appetizers
  • Contact
  • About
  • Privacy Policy
  • Home
  • Dinner
  • Desserts
  • Drinks
  • Appetizers
  • Contact
  • About
  • Privacy Policy
  • Cookie Policy
  • GDPR Policy
  • Disclaimer
  • Terms Of Use
Visit my other site: Fun Cookie Recipes

HOME / CATEGORIES /

Latest

- 10 cups popped popcorn (about 1/2 cup unpopped kernels) - 1 cup granulated sugar - 1/2 cup unsalted butter - 1/4 cup light corn syrup - 1 teaspoon vanilla extract - 1/2 teaspoon baking soda - 1/4 teaspoon salt - Optional: 1 cup mini chocolate chips or chopped nuts for added texture Using unsalted butter gives you better control over the salt level. Margarine can be used, but it may change the flavor. For popcorn, use kernels that pop well. You could use air-popped or stovetop popcorn. Avoid microwave popcorn for this recipe, as it often has added flavors and chemicals. Add-ins make your popcorn balls even more fun. Try mixing in mini chocolate chips or chopped nuts. You can also use dried fruit or colorful sprinkles for a festive touch. Just remember, add them when the caramel is hot, so they stick well to the popcorn. {{ingredient_image_1}} First, you need to pop the popcorn. You can use an air popper, stove, or microwave. If using a stove, heat a pot with a little oil and add kernels. Keep the lid on, and shake the pot until popping stops. You want 10 cups of popped popcorn. Be sure to check for unpopped kernels and remove them. Place the popcorn in a large bowl. Next, we’ll make the caramel sauce. In a medium saucepan, mix together sugar, unsalted butter, corn syrup, and salt. Heat the mixture over medium heat. Stir it constantly until it starts to boil. Once it boils, stop stirring. Let it boil for 4-5 minutes. Watch for a deep golden color. When it’s ready, take it off the heat. Carefully stir in vanilla extract and baking soda. The mixture will bubble, so be careful not to burn yourself. Now, we’ll coat the popcorn. Pour the hot caramel over the popped popcorn. Use a spatula to fold it in gently. Make sure all the popcorn gets coated. If you want, this is the time to add mini chocolate chips or chopped nuts. Allow the mixture to cool for about 5 minutes. Use buttered hands to shape the popcorn into balls, about the size of a golf ball. Place the popcorn balls on a baking sheet lined with parchment paper. Bake them at 200°F for 30 minutes, stirring halfway. This helps set the caramel. Let them cool completely before serving. Enjoy your tasty treat! To keep your popcorn balls from sticking, use buttered hands. This simple trick helps the caramel slide off your hands. Also, make sure your popcorn is fresh and dry. If the popcorn is damp, it will clump together. Mixing in some mini chocolate chips or nuts can add texture and help break up clumps. Lastly, let the mixture cool enough before shaping. If it's too hot, it will be sticky. When melting caramel, use a medium saucepan over medium heat. Stir the mix of sugar, butter, corn syrup, and salt constantly until it boils. Once it starts to boil, stop stirring. Let it bubble for 4-5 minutes. This helps the caramel reach a deep golden color. Be careful during this step; the hot caramel can bubble up fast. After removing it from heat, add the vanilla extract and baking soda. This step adds flavor and lightens the caramel. Timing is key for great popcorn balls. After pouring the caramel over the popcorn, mix gently but quickly. You want to coat all the popcorn before it cools too much. Shape the popcorn into balls while it’s still warm, but not too hot. Bake the balls for 30 minutes to set the caramel. Stir them halfway to ensure even cooking. This step gives the popcorn balls a nice crunch. Let them cool completely before enjoying or storing. Pro Tips Tip for Perfect Popcorn: Use high-quality popcorn kernels to ensure even popping. Store them in a cool, dry place to maintain freshness and optimal popping results. Be Cautious with Caramel: When boiling the sugar mixture, watch it closely to prevent burning. Use a candy thermometer to ensure the caramel reaches the right temperature for the perfect consistency. Butter Your Hands: Lightly buttering your hands before shaping the popcorn balls will prevent the caramel from sticking to your fingers, making the process easier and cleaner. Storage Tips: Store the popcorn balls in an airtight container at room temperature to maintain their crispness. Avoid refrigerating, as it can make them chewy. {{image_2}} You can add a fun twist to your caramel popcorn balls by making them chocolate-covered. After you shape the popcorn into balls, melt some chocolate chips in a bowl. Dip each popcorn ball into the melted chocolate, letting the excess drip off. Place the chocolate-covered balls on parchment paper to set. This adds a rich flavor and a nice crunch. It’s a great way to make these treats even more special for parties or movie nights! If you love nuts, try making nutty caramel popcorn balls. You can mix in chopped nuts like peanuts, almonds, or walnuts into the popcorn before adding the caramel. This adds a crunchy texture and a nutty flavor that pairs well with caramel. Just be sure to chop the nuts into smaller pieces. This way, they mix well and help form the balls without falling apart. You can also switch up the flavors to match the season. For fall, add a teaspoon of pumpkin spice to the caramel mixture. This gives a warm, cozy taste that’s perfect for autumn. In winter, a dash of cinnamon can give your popcorn balls a festive touch. You can even try adding a pinch of peppermint extract for a refreshing winter flavor. With these seasonal flavors, your caramel popcorn balls can be a hit all year round! To keep your caramel popcorn balls fresh, wait until they cool completely. Place the balls in a single layer on a plate for a few hours. After they cool, you can stack them. Just make sure to place parchment paper between the layers. This prevents sticking. Caramel popcorn balls last about a week at room temperature. Store them in a cool, dry place. If you want to keep them longer, freeze them. Wrap each ball in plastic wrap, then place them in a freezer bag. They can stay in the freezer for up to three months. When ready to eat, let them thaw at room temperature. For best results, use airtight containers. Glass jars or plastic bins work well. Make sure the lid seals tightly. This keeps the popcorn balls fresh and prevents them from getting stale. Avoid containers that let air in, as this can ruin the texture. Yes, you can use microwave popcorn. Just make sure to pick a plain flavor. Avoid buttered popcorn. The extra fat can make the caramel slide off the popcorn. Popcorn should be fresh and free of unpopped kernels. This way, it will hold the caramel better. You can use honey or maple syrup as a corn syrup substitute. Both options work well. They add a unique flavor twist. Just keep in mind that honey will make the caramel a bit darker. Adjust the amount slightly if using these substitutes, as they are sweeter. To make caramel popcorn balls healthier, consider reducing the sugar. You can use less sugar or a sugar substitute. Also, use air-popped popcorn instead of oil-popped. Adding nuts or seeds can boost nutrition too. They add healthy fats and protein. Yes, caramel popcorn balls are gluten-free. Popcorn itself is a gluten-free grain. Ensure your caramel sauce contains no gluten ingredients. This way, everyone can enjoy this tasty treat without worry. Always check labels if you are unsure. You learned how to make tasty caramel popcorn balls with this guide. We covered ingredients, easy steps, and handy tips. Experiment with flavors like chocolate or nuts for fun twists. Store them right to keep them fresh. With these tips, you can enjoy yummy snacks at home. Making popcorn balls can be a fun treat for everyone. Dive in and enjoy your sweet creations!

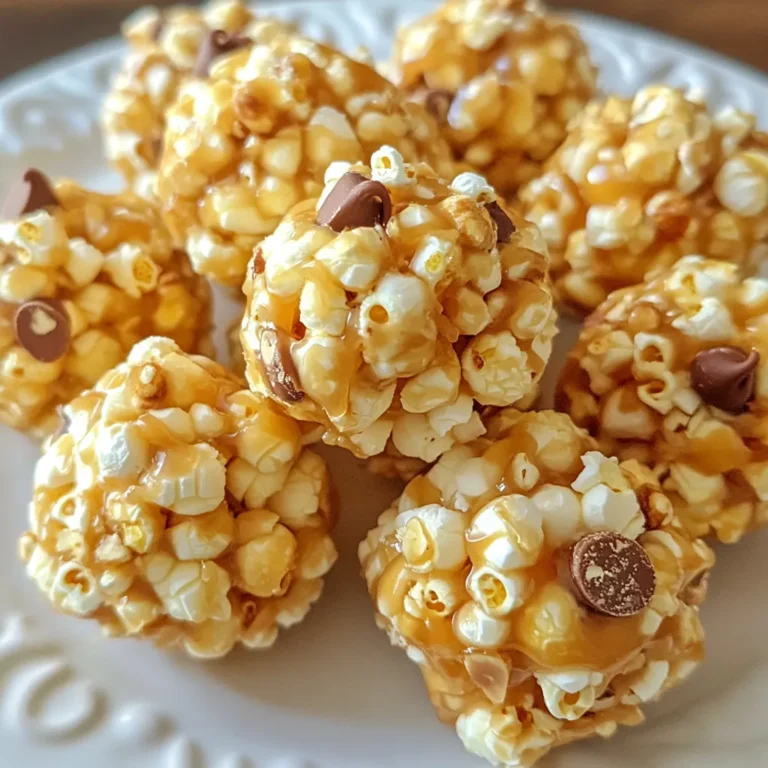
Caramel Popcorn Balls Tasty and Simple Treat Recipe

To make creamy Cajun chicken pasta, you will need: - 2 boneless, skinless chicken breasts - 8 oz fettuccine pasta - 2 tablespoons Cajun seasoning - 2 tablespoons olive oil - 1 small onion, diced - 3 cloves garlic, minced - 1 cup heavy cream - 1 cup chicken broth - 1 cup bell peppers (red, yellow, green), sliced - 1 cup cherry tomatoes, halved - ½ cup grated Parmesan cheese - Salt and pepper to taste - Fresh parsley, chopped (for garnish) These ingredients create a bold flavor. The Cajun seasoning gives the dish a spicy kick. The cream adds richness, making it delightful. To elevate your pasta, consider these enhancements: - Smoked paprika for a deeper flavor - Red pepper flakes for extra heat - Fresh herbs like thyme or basil for freshness These options let you customize the dish. You can adjust the spice level to your taste. A little extra seasoning can make a big difference. Garnishing adds a nice touch to your dish. Try these ideas: - Chopped green onions for a fresh bite - Additional grated Parmesan for creaminess - A drizzle of olive oil for richness These garnishes enhance the look and flavor. They make your creamy Cajun chicken pasta even more inviting. Enjoy the bright colors and flavors on your plate! {{ingredient_image_1}} To start, fill a large pot with water. Add a good amount of salt. Bring the water to a boil. Once it boils, add the fettuccine. Cook it according to the package instructions until it is al dente. This usually takes about 8-10 minutes. When done, drain the pasta and set it aside. While your pasta cooks, it’s time to prepare the chicken. Take the two chicken breasts and season both sides with Cajun seasoning, salt, and pepper. This adds great flavor. In a large skillet, heat olive oil over medium-high heat. Once hot, add the seasoned chicken. Cook for about 5-7 minutes on each side, until it is golden brown and fully cooked. After that, remove the chicken from the skillet and let it rest. In the same skillet, add the diced onion. Sauté it for about 2-3 minutes until it turns translucent. Next, toss in the minced garlic and sliced bell peppers. Cook this mix for an additional 3-4 minutes until the peppers soften. Pour in the chicken broth and heavy cream, stirring to combine. Bring the sauce to a gentle simmer. Let it thicken for about 3-5 minutes. Now, slice the grilled chicken into strips. Return it to the skillet along with the cooked fettuccine and halved cherry tomatoes. Toss everything until it’s all coated in the creamy sauce. Finally, stir in the grated Parmesan cheese until it melts. Adjust the seasoning with salt and pepper, if needed. Serve this dish hot, garnished with freshly chopped parsley for a nice touch. To get juicy chicken, start with boneless, skinless breasts. Season both sides well with Cajun seasoning, salt, and pepper. Sear the chicken in olive oil over medium-high heat. Cook for 5-7 minutes on each side. You want a golden brown color. Let the chicken rest after cooking. This keeps it moist inside. Slice it just before adding to the pasta. For a rich and creamy sauce, use heavy cream and chicken broth. After sautéing the vegetables, pour in the broth first. Then add the cream. Stir well to mix. Let it simmer gently for 3-5 minutes. This helps the sauce thicken. If it’s too thick, add a little extra broth. If too thin, let it cook longer. The right consistency should coat the pasta well. To boost flavor, think about adding extra spices. A dash of smoked paprika or cayenne can add more heat. You can also mix in some fresh herbs like thyme or oregano. If you want some tang, squeeze a bit of lemon juice into the sauce. Taste your dish before serving. Adjust the salt and pepper to your liking. Add more Parmesan for a cheesy kick. These tweaks can make your creamy Cajun chicken pasta even better! Pro Tips Use Quality Chicken: Opt for organic or free-range chicken breasts for a more flavorful and tender result. Customize the Spice Level: Adjust the amount of Cajun seasoning to suit your taste; you can add more for extra heat or less for a milder dish. Add More Veggies: Feel free to incorporate other vegetables like zucchini or spinach for added nutrition and color. Let the Sauce Simmer: Allow the sauce to simmer longer for a thicker consistency, which helps it cling better to the pasta. {{image_2}} You can easily make a vegetarian version of this dish. Just swap the chicken for hearty vegetables. Good choices are mushrooms, zucchini, or eggplant. These will soak up the Cajun flavors well. You can also use plant-based cream for a rich texture. Try a mix of bell peppers and spinach to brighten the dish. For seasoning, keep the Cajun spice to maintain that signature kick. If you want to change the protein, you have many tasty options. Shrimp works great in this recipe. Cook the shrimp until pink and tender. You can also try smoked sausage for a different flavor. Slice it and cook it with the veggies. This adds a nice smoky taste. Each protein brings its own twist to the creamy sauce. You can play with the sauce too. Instead of heavy cream, use Greek yogurt for a lighter twist. It adds creaminess with fewer calories. You could also try a tomato-based sauce if you like a tangy kick. Just sauté the garlic and onion first, then add crushed tomatoes. This gives the dish a fresh and vibrant flavor. Don't forget to adjust the seasoning with salt and pepper. To store your creamy Cajun chicken pasta, let it cool first. Then, place it in an airtight container. Make sure to seal it well to keep the flavors fresh. You can store it in the fridge for up to three days. If you think you won’t eat it that fast, freezing is a great option. When reheating, add a splash of chicken broth or cream. This helps keep the pasta creamy. Heat it gently in a skillet over low heat. Stir often to avoid sticking. You can also use a microwave. Just cover it loosely to prevent splatters. Heat in short bursts, stirring each time. To freeze the pasta, divide it into portions. Use freezer-safe bags or containers. Remove as much air as you can before sealing. Label each bag with the date. You can freeze the pasta for up to three months. When ready to eat, thaw it in the fridge overnight. Then, reheat it as mentioned above. Enjoy your delicious meal later! Cajun seasoning is a mix of spices. It usually includes paprika, garlic powder, onion powder, and black pepper. You might also find cayenne pepper for heat. This mix gives food a warm, spicy flavor. It adds a kick to dishes like our creamy Cajun chicken pasta. You can buy it or make your own blend at home. Yes, you can make this recipe ahead of time. Cook the pasta and chicken, then store them separately. Keep the sauce in a container, too. When ready to eat, just reheat everything. This way, you can enjoy a tasty meal anytime. It’s great for busy weeknights or meal prep. If you want a lighter option, use half-and-half or whole milk. Coconut milk works well too for a dairy-free choice. You can also blend silken tofu with a splash of broth for a creamy texture. Each option changes the flavor slightly but keeps the dish rich and delicious. In this article, I covered how to make creamy Cajun chicken pasta. We discussed key ingredients, step-by-step cooking tips, and creative variations. You learned the secret to a perfect sauce and texture for the chicken. Storing leftovers and reheating options were also shared. I hope you feel confident to try this dish. Enjoy the cooking process and make it your own!

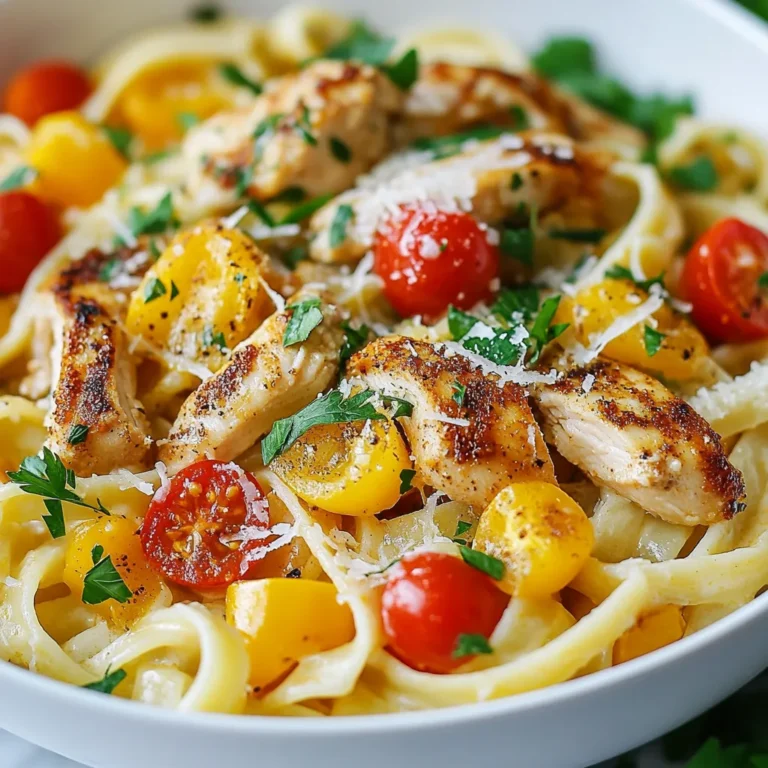
Creamy Cajun Chicken Pasta Delightfully Flavorful Meal

To make One-Pan Butter Parmesan Pasta, you'll need: - 12 oz fettuccine or spaghetti - 4 cups vegetable broth - 1 cup heavy cream - 1/2 cup unsalted butter - 1 cup freshly grated Parmesan cheese - 3 cloves garlic, minced - 1 teaspoon Italian seasoning - Salt and pepper to taste - Fresh parsley, chopped (for garnish) For this dish, you will need: - A large skillet or frying pan - A measuring cup for liquids - A cutting board and knife for garlic - A spoon for stirring - A serving bowl for the pasta To make your pasta even better, consider these toppings: - Extra Parmesan cheese - A drizzle of olive oil - Crushed red pepper flakes for heat - Fresh basil or chives for color {{ingredient_image_1}} Start by taking a large skillet or pan. Pour in 4 cups of vegetable broth. Add 1 cup of heavy cream and 1/2 cup of unsalted butter. Heat this mixture over medium heat. Watch for it to simmer gently. This step sets the base for our dish. Next, you’ll want to add 3 cloves of minced garlic. Also, sprinkle in 1 teaspoon of Italian seasoning. Stir this mixture well. Cook for about 1-2 minutes. You’ll notice the garlic smell filling the air. This adds great flavor to your pasta. Now, it’s time to add the pasta. Use 12 oz of fettuccine or spaghetti. Make sure the pasta is submerged in the broth. Cook according to the package instructions. Usually, this takes about 10-12 minutes. Stir occasionally to prevent sticking. The pasta will soak up that yummy broth. Once the pasta is cooked, lower the heat. Gradually stir in 1 cup of freshly grated Parmesan cheese. This cheese melts into the sauce, making it creamy. Keep stirring until it’s all melted. This step is key for that rich flavor. Now, season with salt and pepper to taste. Stir it all together. Let the dish sit for a few minutes to thicken. When you're ready to serve, scoop it into shallow bowls. For a nice touch, sprinkle some fresh parsley on top. Enjoy your delicious meal! To get the best flavor, start with fresh ingredients. Use high-quality Parmesan cheese. Grate it yourself for a rich taste. You can add a touch of lemon juice for brightness. A pinch of red pepper flakes adds a nice kick. Fresh herbs, like parsley, also enhance the flavor. If your sauce is too thick, add a splash of vegetable broth. This will keep it creamy. If it's too thin, let it cook longer. The sauce will thicken as it cools. Stir in more Parmesan for a richer texture. Always check the sauce before serving. To save time, chop your garlic and herbs ahead of time. Use pre-grated Parmesan cheese if you’re in a rush. You can also cook the pasta while the sauce simmers. Keep your pan size large to avoid crowding. This helps everything cook evenly and fast. Pro Tips Perfect Pasta Texture: Make sure to stir the pasta occasionally while it cooks to prevent it from sticking together and to ensure even cooking. Quality Ingredients Matter: Use high-quality Parmesan cheese for a richer flavor; freshly grated cheese melts better and enhances the creaminess of the sauce. Customize Your Seasoning: Feel free to add your favorite herbs or spices, such as crushed red pepper flakes for a bit of heat or fresh basil for added flavor. Leftover Storage: Store any leftovers in an airtight container in the fridge for up to 3 days. Reheat on low heat, adding a splash of cream or broth to loosen the sauce. {{image_2}} You can add protein to your One-Pan Butter Parmesan Pasta for extra flavor. Cooked chicken or shrimp works well. For chicken, use cooked, shredded pieces. Toss them in during the last few minutes of cooking. For shrimp, add peeled and deveined shrimp to the pan. Cook until they turn pink and curl up. This addition makes the meal heartier and more filling. To make this dish vegetarian, skip any meat. You can add veggies like spinach, mushrooms, or bell peppers. Sauté them with the garlic for extra taste. This gives you a colorful, healthy plate. It keeps the dish satisfying while sticking to vegetarian choices. You can also use vegetable broth instead of chicken broth for a richer flavor. You can switch ingredients based on what you have at home. If you don’t have fettuccine, use any pasta you like. Bowtie or penne works great too. If you lack heavy cream, try using milk or a non-dairy option like coconut cream. You can replace Parmesan with nutritional yeast for a cheesy taste without dairy. These swaps keep the dish flexible and fun. To store your One-Pan Butter Parmesan Pasta, let it cool down first. Place the pasta in an airtight container. This helps keep it fresh. You can store it in the fridge for up to three days. If you want to keep it longer, consider freezing it. When you're ready to eat it again, take the pasta out of the fridge. Heat it gently in a pan over low heat. Add a splash of vegetable broth or cream to help loosen it up. Stir it well until it's hot. You can also use the microwave. Place it in a microwave-safe bowl, cover it, and heat for one to two minutes. To freeze the pasta, use a freezer-safe container. Make sure to leave some space for the pasta to expand. It can last in the freezer for up to three months. When you’re ready to eat it, thaw it overnight in the fridge. Reheat it as noted above for the best taste. Yes, you can use other pasta types. Short pasta like penne or fusilli works well. Just remember to adjust the cooking time based on the pasta shape. Always check the package for exact cooking times. To make this dish dairy-free, swap heavy cream with coconut cream or a dairy-free alternative. Use nutritional yeast instead of Parmesan cheese for a cheesy flavor. You can also use dairy-free butter or olive oil for richness. You can pair this pasta with fresh salad or garlic bread. A side of steamed vegetables like broccoli or green beans adds color and nutrition. Grilled chicken or shrimp can make it a heartier meal. Pasta is al dente when it feels firm but not hard. You can taste a piece to check. It should have a slight bite to it. Cooking times vary, so start checking a minute or two before the package says. This blog post covered making One-Pan Butter Parmesan Pasta step-by-step. You learned about essential ingredients, cooking tools, and tasty optional garnishes. We explored tips for great flavor and easy meal prep. You also found out how to adjust the dish for dietary needs and store leftovers. Cooking can be simple and fun. With this guide, you can create a delicious meal that suits your taste. Enjoy your time in the kitchen and happy cooking!

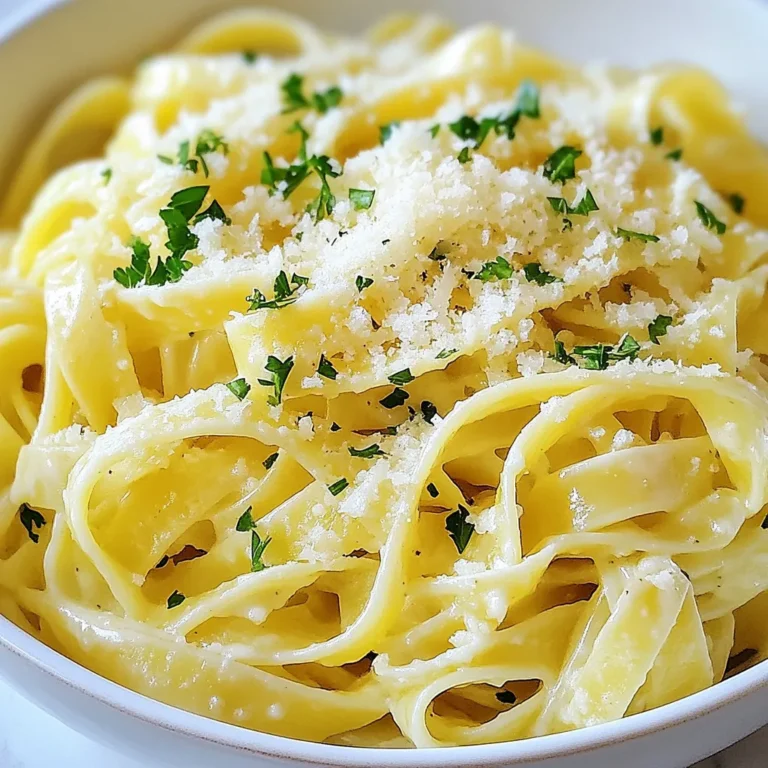
One-Pan Butter Parmesan Pasta Simple and Tasty Meal

To make Zuppa Toscana, you need fresh, simple ingredients. Here’s what you’ll need: - 1 lb Italian sausage (mild or spicy, your choice) - 1 medium onion, diced - 3 cloves garlic, minced - 4 large russet potatoes, thinly sliced - 6 cups chicken broth - 1 cup kale, chopped - 1 cup heavy cream - 1 teaspoon red pepper flakes (for spice) - Salt and pepper to taste - Olive oil for sautéing - Grated Parmesan cheese for serving These items come together to create a rich and hearty soup. You can switch up some ingredients to fit your taste. For a twist, try: - Using sweet Italian sausage for a milder flavor. - Adding spinach instead of kale for a different green. - Mixing in carrots or celery for extra veggies. - Swapping heavy cream with coconut milk for a dairy-free option. Feel free to get creative! If you have dietary needs, there are easy swaps. Here are some ideas: - For gluten-free, check your broth's label. - Use turkey or chicken sausage for a leaner option. - Replace heavy cream with cashew cream for vegan soup. - Skip the cheese or use a vegan alternative for a dairy-free dish. These substitutions keep the soup tasty while meeting your needs. {{ingredient_image_1}} First, gather your ingredients. You will need: - 1 lb Italian sausage - 1 medium onion, diced - 3 cloves garlic, minced - 4 large russet potatoes, thinly sliced - 6 cups chicken broth - 1 cup kale, chopped - 1 cup heavy cream - 1 teaspoon red pepper flakes - Salt and pepper to taste - Olive oil for sautéing - Grated Parmesan cheese for serving Next, prep your veggies. Dice the onion and mince the garlic. Thinly slice the potatoes and chop the kale. This will help speed up cooking. In a large pot, heat olive oil over medium heat. Add the diced onion and sauté for about 5 minutes. When the onion turns translucent, add the garlic and red pepper flakes. Cook for another minute until you smell the garlic. Now, take the Italian sausage out of its casing. Add it to the pot and break it up with a wooden spoon. Cook until it turns brown, about 7-10 minutes. Once the sausage is cooked, stir in the sliced potatoes. Pour in the chicken broth and bring everything to a boil. Lower the heat and let it simmer for 15-20 minutes. You want the potatoes to be tender. After the potatoes are soft, add the chopped kale and heavy cream. Stir it all together and cook for an extra 5-7 minutes. The kale should wilt and the soup will heat through. Finally, season your soup with salt and pepper to taste. Serve it hot, topped with grated Parmesan cheese. For the best flavor, use fresh garlic and quality sausage. Adjust the red pepper flakes to match your spice preference. If you want a thicker soup, mash some of the potatoes before adding the kale. This will add creaminess without extra calories. Always taste your soup before serving. Adjust the seasoning if needed. Enjoy your delicious Zuppa Toscana! When making Zuppa Toscana, avoid using too much oil. A drizzle is enough. Use fresh ingredients for the best taste. Don't skip the garlic; it adds flavor. Overcooking the kale makes it mushy. Add it near the end of cooking for a nice texture. Lastly, taste your soup before serving. Adjust the salt and pepper to fit your taste. To boost the flavor, try adding fresh herbs. Thyme or oregano works well. You can also use homemade broth for deeper taste. If you love spice, add more red pepper flakes. A squeeze of lemon juice brightens the soup. This little trick can make a big difference. For a creamier texture, blend a part of the soup and mix it back in. Serve Zuppa Toscana hot, topped with grated Parmesan cheese. A slice of crusty bread pairs perfectly. Consider a light salad on the side for a fresh touch. If you like, drizzle olive oil over the soup for extra flavor. This dish works great for gatherings and cozy nights in. Enjoy it with friends and family for a warm meal. Pro Tips Use Fresh Ingredients: Always opt for fresh kale and high-quality sausage to enhance the flavor of your soup. Adjust Spice Level: If you're sensitive to heat, start with a smaller amount of red pepper flakes and adjust to taste. Make it Creamy: For an extra creamy texture, blend a portion of the soup and then stir it back in before serving. Leftover Storage: Store any leftovers in an airtight container in the fridge for up to 3 days, but note that the potatoes may absorb some liquid. {{image_2}} You can make Zuppa Toscana without meat. For a vegetarian version, use plant-based sausage. Replace chicken broth with vegetable broth. You can still enjoy creamy goodness by using coconut milk or a cashew cream. For a vegan option, ensure your sausage is completely plant-based and skip the cream or use a vegan substitute. Adjust the heat to fit your taste. For mild soup, use sweet Italian sausage. Skip the red pepper flakes for a gentler flavor. If you love heat, use spicy sausage and add more red pepper flakes. You can also add jalapeños for an extra kick. Zuppa Toscana has many regional twists. In some areas, people add beans for extra protein. Others like to include carrots or corn for sweetness. In Tuscany, adding rosemary can give a nice herbal touch. Each region adds its flair, making this soup personal and unique. Store your Zuppa Toscana in an airtight container. This keeps it fresh and tasty. Let the soup cool down before you seal it. Place it in the fridge within two hours. It lasts about three to four days in the fridge. Always check for any signs of spoilage before serving. You can freeze Zuppa Toscana if you want to save some for later. Use a freezer-safe container or bag. Make sure to leave some space for expansion. The soup will stay good for about three months in the freezer. To thaw, place it in the fridge overnight before reheating. Reheat your Zuppa Toscana slowly on the stove over low heat. Stir it often to avoid burning. You can add a splash of chicken broth or cream to restore its creamy texture. If using the microwave, heat in short bursts. Check and stir to make sure it warms evenly. Enjoy your comforting soup! Zuppa Toscana is a hearty Italian soup. It features Italian sausage, potatoes, and kale. The dish hails from Tuscany, Italy. It's creamy and savory, perfect for chilly days. Many people love its comforting flavors. You can adjust the spice level with red pepper flakes. This soup is great for sharing with family and friends. Yes, you can make Zuppa Toscana in a slow cooker. Start by browning the sausage in a pan. Then, add the sausage, onion, garlic, and potatoes to the slow cooker. Pour in the chicken broth and let it cook on low for 6-8 hours. Add the kale and cream near the end. This method makes it easy and tasty. Zuppa Toscana pairs well with crusty bread. A fresh salad also complements the soup nicely. You can add a sprinkle of Parmesan cheese on top. This adds extra flavor and creaminess. Enjoy your meal with a glass of wine for a treat. Zuppa Toscana lasts about 3-4 days in the fridge. Store it in an airtight container. This helps keep it fresh and tasty. Reheat it on the stove or in the microwave. Just be careful not to overheat, as it can change the texture. Zuppa Toscana can be gluten-free. Use gluten-free sausage and broth. Always check the labels for hidden gluten. Potatoes and kale are naturally gluten-free. This makes it a great option for gluten-sensitive folks. Enjoy without worry while savoring its rich flavors. Zuppa Toscana is a warm and tasty soup, perfect for any table. We explored its key ingredients, preparation steps, and variations, offering tips to enhance your dish. Remember to avoid common mistakes and consider different dietary needs. With the right storage, your leftovers will stay delicious for days. This soup is simple to make and full of flavor. You can enjoy it in many ways, making it a versatile choice for everyone. Enjoy making Zuppa Toscana your own!

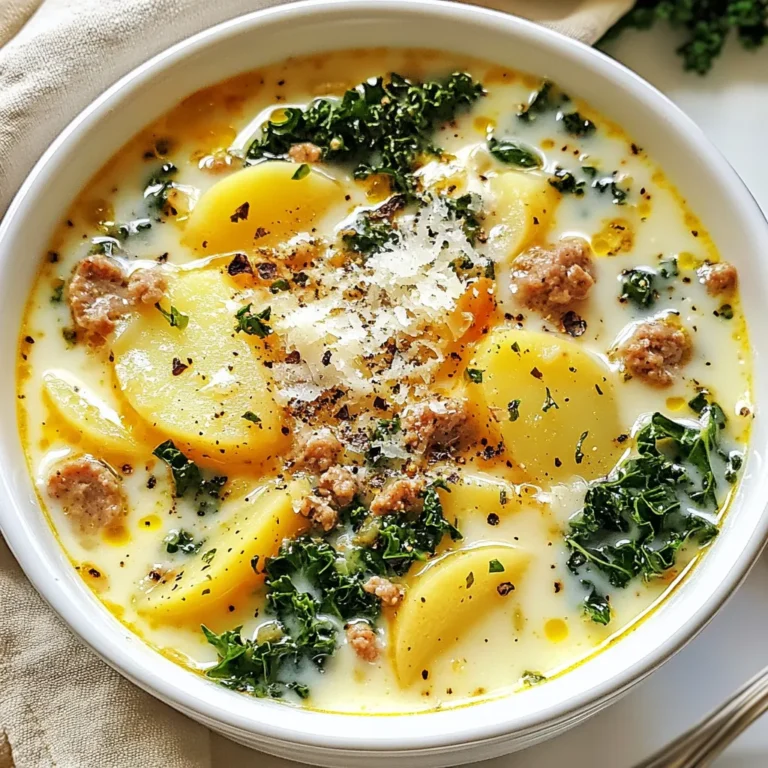
Zuppa Toscana Delightful Comfort Food Recipe

- 2 boneless, skinless chicken breasts - 1 tablespoon olive oil - 4 cups chicken broth - 1 cup diced carrots - 1 cup diced celery - 1 medium onion, chopped - 3 cloves garlic, minced - 1 teaspoon dried thyme - 1 teaspoon dried oregano - Salt and pepper to taste - 1 cup uncooked pasta (penne or macaroni works well) - 1 cup baby spinach - ½ cup heavy cream - Fresh parsley, chopped, for garnish You can swap chicken breasts for thighs if you like dark meat. If you want a lighter soup, use low-fat cream or skip it altogether. You can replace pasta with quinoa or rice for a gluten-free option. If you don't have fresh herbs, use dried ones instead. Fresh spinach can be swapped with kale or any leafy green. This soup serves about 4-6 people. Each bowl gives you a hearty dose of protein and vitamins. Here's a quick look at what’s inside: - Calories: Around 350 per serving - Protein: About 25g - Fat: Roughly 15g - Carbohydrates: Approximately 30g - Fiber: 3g This soup is not just tasty but also filling. The chicken provides protein, while the veggies add fiber and nutrients. Enjoying a bowl of Marry Me Chicken Soup means you’re treating yourself to a comforting meal that warms your heart and body. {{ingredient_image_1}} Start by gathering your ingredients. You need two boneless chicken breasts, olive oil, chicken broth, diced carrots, diced celery, chopped onion, minced garlic, dried thyme, dried oregano, salt, pepper, uncooked pasta, baby spinach, heavy cream, and parsley. 1. Heat the olive oil in a large pot over medium heat. 2. Add the chicken breasts and sear them for 5 to 6 minutes on each side. Look for a nice brown color. 3. Remove the chicken from the pot and set it aside. Next, it’s time for the veggies! 1. In the same pot, add the chopped onion, diced carrots, and diced celery. 2. Sauté for 5 to 7 minutes until the veggies soften. 3. Stir in the minced garlic, thyme, and oregano. Cook for one more minute to release those lovely scents. Now we move to the heart of the soup! 1. Pour in the chicken broth and bring it to a boil. 2. Add the seared chicken back to the pot. 3. Reduce the heat to low and let it simmer for 20 minutes. The chicken should be cooked through by now. After that, it’s shredding time! 1. Remove the chicken again and shred it using two forks. 2. Return the shredded chicken to the pot. Next, we add the pasta. 1. Stir in the uncooked pasta and let it cook for about 10 minutes. Check for al dente texture. 2. Add the baby spinach and heavy cream. Stir until the spinach wilts and the soup heats through. Shredding chicken can be easy. Here are some tips: - Use two forks to pull apart the chicken. - Shred while it’s warm. This makes it easier to pull apart. - If you prefer, you can chop the chicken into bite-sized pieces instead of shredding. Remember to season with salt and pepper to taste before serving. Enjoy your comforting bowl of Marry Me Chicken Soup! To get the best soup texture, you want a balance. Start by searing your chicken well. This adds flavor and keeps the meat juicy. When adding vegetables, make sure they cook until soft but not mushy. This helps keep their shape. Adding pasta should be done near the end to avoid overcooking. Aim for al dente pasta, which gives a nice bite. Lastly, stir in the cream gently to keep the soup smooth. You can boost flavor with simple tweaks. Try adding a squeeze of lemon juice for brightness. Fresh herbs like basil or thyme can add depth. For heat, toss in some crushed red pepper flakes. Consider using homemade chicken broth for richer taste. You can also add a dash of Worcestershire sauce for a savory kick. Don’t forget that salt and pepper are key for balancing flavors. Avoid overcooking your chicken. This can make it dry and tough. When cooking vegetables, don’t rush. They need time to soften and develop flavor. Be careful with the pasta; adding it too early can lead to mushy soup. If you want creamy soup, add cream at the end. This keeps it fresh and prevents curdling. Lastly, always taste and adjust seasoning before serving. Pro Tips Use Homemade Broth: For a richer flavor, use homemade chicken broth instead of store-bought. It enhances the taste of the soup significantly. Perfectly Cooked Pasta: To prevent the pasta from becoming mushy, add it to the pot just before serving and cook until al dente. Customize Your Vegetables: Feel free to add other vegetables like zucchini, peas, or bell peppers for extra nutrition and flavor. Garnish for Freshness: A sprinkle of fresh herbs like basil or thyme adds a burst of freshness and brightens up the soup's flavor. {{image_2}} You can make Marry Me Chicken Soup even healthier. Here are some great swaps: - Use skinless chicken thighs instead of breasts for more flavor. - Swap heavy cream for Greek yogurt or a light cream for fewer calories. - Add more veggies like zucchini or kale for extra nutrients. - Use low-sodium chicken broth to cut back on salt. These changes keep the soup tasty while making it better for you. You can also enjoy a vegetarian or vegan version. Here’s how: - Replace chicken with chickpeas or lentils for protein. - Use vegetable broth instead of chicken broth for the base. - Add tofu for a hearty texture. - Skip the heavy cream and use coconut milk for a rich flavor. This way, you can savor the warmth and comfort without meat. Pasta adds heartiness, but you have options. Try these ideas: - Use whole wheat or gluten-free pasta for a different texture. - Quinoa or rice can be a great substitute for pasta. - For a lighter soup, skip the pasta entirely. Just add more veggies or beans. These variations keep your soup fresh and exciting every time you make it. To keep your Marry Me Chicken Soup fresh, let it cool first. Then, pour the soup into an airtight container. Make sure the lid seals tightly. Store the container in the fridge. It lasts about three days. If you want it to last longer, you can freeze it. When you are ready to enjoy your soup, take it out of the fridge or freezer. If frozen, let it thaw overnight in the fridge. To reheat, pour it into a pot over medium heat. Stir often to avoid burning. Heat until it bubbles. If the soup is too thick, add a little broth or water. Freezing is a great option for leftovers. Use freezer-safe containers or bags. Leave some space at the top for expansion. Label the bags with the date. This helps you track how long it has been in the freezer. When you want to eat it later, follow the reheating instructions above. This way, your Marry Me Chicken Soup stays tasty for a long time! Marry Me Chicken Soup is a warm and tasty dish. It features tender chicken, fresh veggies, and creamy broth. This soup gets its name from its rich flavors. Many say it’s so good, it could win hearts! You can find carrots, celery, and pasta in this soup. Adding spinach brings a nice pop of green. It’s perfect for chilly days or when you need comfort food. Yes, you can make Marry Me Chicken Soup ahead of time. It tastes even better the next day! Just follow the recipe and cool it down before storing. Place it in a container and keep it in the fridge for up to three days. When you want to eat it, just reheat on the stove. Add a splash of broth if it seems thick. Marry Me Chicken Soup goes well with several dishes. Crusty bread is a great choice for dipping. A side salad adds a fresh touch. You could also serve it with grilled cheese for a fun twist. Pairing it with rice or a light pasta dish works too. Enjoy the soup with your favorite sides for a full meal! In this blog post, we explored Marry Me Chicken Soup. You learned about the key ingredients, helpful substitutions, and nutrition facts. I shared step-by-step cooking instructions and tips for perfect texture. Variations included healthier versions and vegetarian options. Finally, we discussed storage and reheating. Making this soup brings joy to your table. With these tips, you can create a dish that warms hearts. Enjoy trying different flavors and styles. Happy cooking!

Marry Me Chicken Soup Comforting Delicious Recipe

- 200g egg noodles - 2 chicken breasts, sliced thinly - 4 cloves garlic, minced - 3 tablespoons soy sauce - 2 tablespoons honey - 1 tablespoon sesame oil - 1 tablespoon ginger, grated - 1 tablespoon rice vinegar - 1 red bell pepper, thinly sliced - 1 cup bok choy, chopped - Sesame seeds for garnish - Fresh cilantro for garnish - Salt and pepper to taste - Egg Noodles: These noodles give a nice texture. You can use rice noodles if you need a gluten-free option. - Chicken Breasts: Thin slices cook well. You can swap chicken for tofu or shrimp for a different flavor. - Garlic: Fresh is best for taste. Garlic powder can work in a pinch, but fresh adds more zing. - Soy Sauce: This adds salt and umami. Use tamari for a gluten-free version. - Honey: It adds sweetness. Maple syrup works as a vegan substitute. - Sesame Oil: This gives a nutty flavor. You can use olive oil, but the taste will change. - Ginger: Fresh ginger gives a great kick. Ground ginger can be used, but fresh is better. - Rice Vinegar: It adds acidity. You can use apple cider vinegar if needed. - Vegetables: Red bell pepper and bok choy add color and crunch. Feel free to mix in your favorite veggies. - Calories: 420 - Protein: 30g - Carbohydrates: 50g - Fat: 15g - Fiber: 3g - Sugar: 8g This dish is tasty and balanced. It has protein from the chicken and fiber from the veggies. Enjoy a flavorful meal that feels good too! {{ingredient_image_1}} Start by boiling a large pot of salted water. Once it boils, add 200g of egg noodles. Cook them until they are al dente, about 4-5 minutes. Drain the noodles and set them aside in a bowl. In a small bowl, combine the sauce ingredients. Whisk together 3 tablespoons of soy sauce, 2 tablespoons of honey, 1 tablespoon of sesame oil, 1 tablespoon of grated ginger, and 1 tablespoon of rice vinegar. Mix well until everything blends. Set this sauce aside for later. Next, heat a large skillet or wok on medium-high heat. Add a drizzle of oil to the hot skillet. Season your sliced chicken breasts with salt and pepper, then add them to the skillet. Cook the chicken for about 5-7 minutes until it turns golden and is fully cooked. Once the chicken is cooked, add 4 minced garlic cloves and 1 sliced red bell pepper to the skillet. Stir-fry these for around 2 minutes until they smell great and the pepper softens. Lastly, add 1 cup of chopped bok choy and cook for another 2-3 minutes until it wilts. Now, it’s time to bring it all together. Add the cooked noodles to the skillet with the chicken and veggies. Pour the sauce over the top. Gently toss everything to coat the noodles and ingredients evenly. Cook for another 2-3 minutes until heated through. Finally, remove the skillet from the heat. Serve the sticky garlic chicken noodles in deep bowls. Garnish with sesame seeds and fresh cilantro for a nice touch. Enjoy your meal! To make your sticky garlic chicken noodles shine, follow a few key tips. First, cook your egg noodles just until al dente. This keeps them firm and not mushy. After cooking, make sure to drain and rinse them under cold water. This stops the cooking and prevents them from sticking together. Next, use a hot skillet for sautéing. A hot pan helps brown the chicken evenly and gives it a nice texture. Balance is key for this dish. The sweetness from honey needs to match the saltiness of soy sauce. Adjust these to your taste. If you want a bit of heat, add a pinch of red pepper flakes. Also, don’t skip the fresh garlic and ginger; they add great depth. Finally, finish with a sprinkle of sesame seeds and fresh cilantro. These bright flavors elevate the dish. Watch out for a few common mistakes. First, don't overcook the chicken. It should be juicy and tender, not dry. Also, be careful with the garlic. Burnt garlic tastes bitter, so add it to the pan after the chicken has cooked for a minute. Lastly, don’t rush the mixing step. Toss everything gently to coat the noodles fully in the sauce. This ensures each bite is packed with flavor. Pro Tips Use Fresh Ingredients: Fresh garlic and ginger will enhance the flavor of your dish significantly compared to dried alternatives. Adjust Sauce to Taste: Feel free to modify the amount of soy sauce and honey to suit your taste preferences; you can make it saltier or sweeter as you like. Vegetable Variations: You can substitute bok choy with other leafy greens like spinach or kale, or add more veggies like carrots or snap peas for extra crunch. Meal Prep Friendly: This dish is great for meal prep; store leftovers in the fridge and reheat for a quick meal throughout the week. {{image_2}} You can switch the chicken for other meats. Try sliced beef or shrimp. Both options work well with the sauce. For a lighter dish, use turkey breast. Each protein has its own taste. Adjust cook times as needed. Beef needs more time to brown, while shrimp cooks quickly. For a vegetarian dish, use tofu instead of chicken. Firm tofu holds up well in stir-fries. Marinate the tofu in the sauce for extra flavor. If you want a vegan option, replace honey with maple syrup or agave nectar. Add more veggies like carrots or snap peas for added texture and taste. To make this dish gluten-free, use rice noodles or zucchini noodles. Both options are tasty and healthy. Check labels on soy sauce – some contain gluten. You can use tamari or coconut aminos as good gluten-free swaps. These changes let you enjoy sticky garlic chicken noodles without worries. After you enjoy your sticky garlic chicken noodles, let them cool. Place the leftovers in an airtight container. You can keep them in the fridge for up to three days. Make sure to seal it tight to keep the flavors fresh. If you want to save them longer, consider freezing instead. When you are ready to eat the leftovers, reheating is key. Use a skillet over medium heat for the best results. Add a splash of water or chicken broth to keep the noodles moist. Stir often until everything is heated through and hot. This method helps maintain the texture of the noodles and chicken. To freeze sticky garlic chicken noodles, place them in a freezer-safe container. Make sure to leave some space at the top, as they may expand. They can last in the freezer for up to three months. When you want to eat them, thaw in the fridge overnight before reheating. This way, the noodles keep their taste and texture. You can serve sticky garlic chicken noodles with many tasty sides. Here are some ideas: - Steamed broccoli adds a nice crunch. - Crispy spring rolls make a great starter. - Egg drop soup is light and flavorful. - A simple green salad brings freshness to the meal. These sides enhance the dish. They add color and variety to your plate. To spice up your sticky garlic chicken noodles, try these tips: - Add red pepper flakes when cooking the chicken. - Use spicy soy sauce or chili garlic sauce in the recipe. - Mix in sliced jalapeños with the garlic and veggies. These options give your dish heat without changing its core flavor. Yes! You can swap egg noodles for other types. Here are some choices: - Rice noodles offer a lighter texture. - Udon noodles give a chewy bite. - Whole wheat noodles add a healthy twist. Each type brings its own taste. Choose what you like best. You can prep sticky garlic chicken noodles ahead of time. Here’s how: - Cook the noodles and store them in the fridge for up to 3 days. - Prepare the sauce in advance and keep it in a sealed jar. - Slice the chicken and chop veggies ahead. Store them in containers. When ready, just combine everything in a skillet. Heat it up, and you’ll have a quick meal! In this post, we covered all you need for sticky garlic chicken noodles. We discussed ingredients, from key components to great substitutes. You learned step-by-step cooking instructions for perfect results. Plus, I shared tips to avoid common mistakes and enhance flavors. We explored tasty variations for different diets and how to store and reheat leftovers. Enjoy making this dish your own and share it with loved ones. Happy cooking!

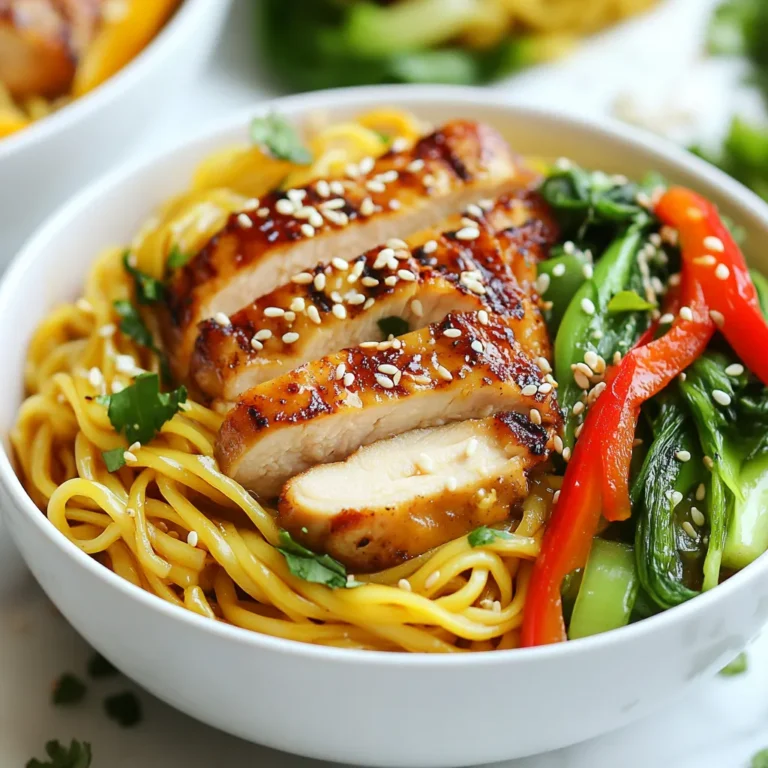
Sticky Garlic Chicken Noodles Quick and Tasty Meal

- 8 oz rice noodles - 4 tablespoons sweet chili sauce - 2 tablespoons soy sauce - 1 cup snap peas, trimmed - 1 red bell pepper, sliced thin - 2 green onions, chopped - 2 tablespoons sesame oil - 3 cloves garlic, minced - 1 teaspoon fresh ginger, grated - Sesame seeds for garnish - Lime wedges for serving You need rice noodles for the base. They give the dish a nice texture. Sweet chili sauce adds a sweet and spicy kick. Soy sauce brings in a savory taste. Next, add fresh veggies. Snap peas add crunch. Red bell pepper gives color and sweetness. Green onions add a fresh bite. For flavor, sesame oil, minced garlic, and grated ginger work wonders. They create a fragrant base. Finally, sesame seeds and lime wedges are great for garnish. They add a nice touch when serving. {{ingredient_image_1}} To cook rice noodles, start by boiling water in a pot. When it bubbles, add the noodles. Let them cook as per the package guide, usually about 4 to 6 minutes. You want them soft but not mushy. After cooking, drain the noodles. Rinse them under cold water to stop the cooking. Rinsing helps the noodles stay separate and not stick together. Next, heat 2 tablespoons of sesame oil in a large skillet or wok over medium heat. Once hot, add 3 cloves of minced garlic and 1 teaspoon of grated ginger. Stir for about 30 seconds. You want them fragrant but not brown. This step brings out their flavors. Then, toss in 1 cup of trimmed snap peas and 1 thinly sliced red bell pepper. Cook for 2 to 3 minutes until the veggies are bright and a bit tender. Now, it's time to bring it all together. Add the cooked rice noodles to the skillet. Pour in 4 tablespoons of sweet chili sauce and 2 tablespoons of soy sauce. Toss everything well to coat the noodles in the sauce. Cook for another 2 to 3 minutes to heat through. Make sure the noodles are warm and the sauce is evenly mixed. Finally, stir in 2 chopped green onions right before serving. Enjoy the vibrant colors and flavors! To make these noodles even better, you can add chili flakes. This gives your dish a nice kick. If you want more sweetness, just add more sweet chili sauce. This helps balance the flavors. Taste as you go to find your ideal mix. Use a non-stick skillet or a wok for best results. These help cook the noodles evenly without sticking. To save time, prep your ingredients ahead. Chop your veggies and measure sauces before you start cooking. This makes the process quick and easy. Pair your sweet chili garlic noodles with proteins like chicken or shrimp. This adds heartiness to your meal. For a fun touch, serve the noodles in bowls. You can layer them with fresh veggies and top with sesame seeds for a pretty presentation. Don’t forget lime wedges on the side for extra flavor! Pro Tips Use Fresh Ingredients: Fresh garlic and ginger will enhance the flavor of your noodles, making them more aromatic and delicious. Customize the Heat: Adjust the amount of sweet chili sauce according to your spice preference; add more for extra heat or less for a milder taste. Add Protein: For a heartier meal, consider adding cooked shrimp, chicken, or tofu to the noodles for added protein and texture. Garnish Creatively: Experiment with different garnishes like chopped cilantro or crushed peanuts for added flavor and crunch. {{image_2}} If you want to change up the rice noodles, you have options. You can use egg noodles or whole wheat noodles instead. Both work well and still taste great. For a gluten-free choice, try using rice vermicelli or quinoa noodles. They give a nice flavor and texture. Adding fresh herbs can change the whole dish. I love using cilantro or basil for a bright taste. You can also try other sauces. For example, add hoisin sauce for a sweet twist or sriracha for some heat. Mixing flavors keeps it fun! Using seasonal vegetables makes this dish even better. In spring, add asparagus or peas. In summer, try zucchini or cherry tomatoes. You can also adapt the dish for special occasions. For a holiday, mix in roasted veggies or serve it with grilled proteins. Each change brings a new life to the noodles! To keep your sweet chili garlic noodles fresh, place them in an airtight container. This helps prevent drying out. Use glass or plastic containers with tight lids. When you store them, make sure they cool completely first. This keeps the noodles from getting soggy. When you want to eat leftovers, you can use the microwave or the stove. For the microwave, place the noodles in a bowl. Add a splash of water to keep them moist. Heat for one to two minutes, stirring halfway through. On the stove, use a non-stick pan. Add a tiny bit of sesame oil, and heat over low. Stir the noodles gently until warm. This helps keep their texture nice. If you want to save noodles for later, you can freeze them. First, let them cool down completely. Next, place them in freezer-safe bags. Remove as much air as you can before sealing. To defrost, place the bag in the fridge overnight. Once they are thawed, reheat them using the stove method for the best texture. What is sweet chili sauce made of? Sweet chili sauce is a mix of sugar, vinegar, and chili peppers. It often has garlic and salt for extra flavor. You can find it in most grocery stores. Can I make sweet chili garlic noodles vegan? Yes, you can make these noodles vegan. Use a plant-based sweet chili sauce and replace soy sauce with a vegan version. This way, you keep all the flavors while making it plant-friendly. What to do if noodles are sticky? If your noodles are sticky, try rinsing them under cold water right after cooking. This helps separate them. You can also add a bit of sesame oil to keep them loose. How to adjust flavor if it’s too salty? If the dish is too salty, add more sweet chili sauce or a squeeze of lime. Both add sweetness and acidity that balance the saltiness. What goes well with sweet chili garlic noodles? These noodles pair well with grilled chicken, shrimp, or tofu. Add a side of fresh veggies for a crunchy contrast, too. Can I serve this dish cold? Yes, you can serve sweet chili garlic noodles cold. They make a great cold salad option. Just chill the noodles after cooking and toss with the sauce. This blog post covered the key ingredients, step-by-step cooking, and tips for making sweet chili garlic noodles. Remember to rinse your rice noodles well for the best texture. Experiment with veggies and proteins to make the dish your own. You can store leftovers easily and even freeze them for later. Enjoy trying new flavors and techniques. Cooking should be fun and tasty, so don't hesitate to get creative!

Sweet Chili Garlic Noodles Quick and Flavorful Dish

- 1 lb ground chicken - 1 tablespoon olive oil - 1 small onion, finely chopped - 2 cloves garlic, minced - 1 teaspoon cumin - 1 teaspoon chili powder - 1 teaspoon paprika - Salt and pepper to taste - 8 small taco-sized tortillas These main ingredients create a tasty base for the tacos. Ground chicken is lean and cooks quickly. Olive oil helps to sauté the onion and garlic, adding flavor. The spices like cumin and chili powder give the chicken a nice kick. - 1 cup shredded lettuce - 1 cup diced tomatoes - 1 cup shredded cheese (cheddar or a Mexican blend) - 1/2 cup sour cream - 1/2 cup salsa - Fresh cilantro leaves for garnish (optional) These toppings make the tacos colorful and fun. Shredded lettuce adds crunch, while diced tomatoes bring freshness. Cheese melts beautifully and adds richness. Sour cream and salsa offer creaminess and tang. Cilantro gives a nice herb touch. For ground chicken, I like using brands like Perdue or Purdue. You can also use turkey if you want a healthier option. For tortillas, look for brands like Mission or La Banderita. They are soft and perfect for folding. If you prefer, corn tortillas are a great gluten-free choice. {{ingredient_image_1}} First, heat one tablespoon of olive oil in a large skillet over medium heat. Add one small, finely chopped onion and sauté for three to four minutes. You want the onion to be soft and clear. Next, add two minced garlic cloves and cook for one more minute. This will make your kitchen smell great! Now, add one pound of ground chicken to the skillet. Use a spatula to break the chicken apart as it cooks. Cook for five to seven minutes, stirring often, until it's fully cooked and no longer pink. Season the chicken with one teaspoon of cumin, one teaspoon of chili powder, and one teaspoon of paprika. Add salt and pepper to taste. Stir well and let it cook for another two minutes so the flavors mix nicely. While the chicken cooks, it’s time to warm up the tortillas. You can wrap eight small taco-sized tortillas in foil and put them in the oven at 350°F (175°C) for about ten minutes. This will make them soft and warm. If you're in a hurry, just microwave them for about 30 seconds. Either way, warm tortillas make the tacos taste even better! Now, let’s put everything together! Take one warm tortilla and add a generous scoop of the ground chicken mixture in the center. Top it with one cup of shredded lettuce, one cup of diced tomatoes, and one cup of shredded cheese. For a tasty finish, add a dollop of sour cream and a spoonful of salsa on top. If you like, sprinkle some fresh cilantro leaves for a pop of color and flavor. Enjoy your kid-friendly ground chicken tacos! To make tacos more fun, let kids help. They love to build their own tacos! Offer toppings in small bowls. Use bright colors for veggies like lettuce and tomatoes. You can also use fun shapes for the tortillas. Cut them into triangles or stars for excitement. If your child likes crunch, add tortilla chips on the side. Ground chicken cooks quickly, so stay close. Start by heating olive oil in a skillet. Then, add onions and garlic. Saute them until soft. This builds flavor. Add the ground chicken and break it apart. Cook until it's no longer pink. Season with cumin, chili powder, and paprika for taste. Stir the spices in well to mix all the flavors. One common mistake is overcooking the chicken. This can make it dry. Keep an eye on it and cook just until fully done. Another mistake is not warming the tortillas. Warm tortillas are soft and tasty. If you skip this, they may break easily. Lastly, don’t forget to taste the mixture. Adjust salt and spices as needed for the best flavor. Pro Tips Use Fresh Ingredients: Fresh vegetables and herbs will enhance the flavor of your tacos and make them more nutritious. Customize Your Spice Level: Adjust the amount of chili powder according to your family's spice tolerance for a milder or spicier taco filling. Meal Prep for Convenience: Cook the ground chicken mixture in advance and store it in the fridge for quick taco assembly on busy nights. Experiment with Toppings: Try different toppings like avocado, jalapeños, or corn to add variety and excitement to your tacos! {{image_2}} You can switch ground chicken for other proteins. Ground turkey is a great choice. It has a mild flavor, just like chicken. If you want a plant-based option, try lentils or black beans. Both are hearty and tasty. Use the same spices to keep the flavor strong. This way, you can please every palate. Tortillas come in many styles. You can use corn or flour tortillas based on what your kids like. For a fun twist, try mini tortillas. They are perfect for little hands. You can also use lettuce leaves for a low-carb option. This adds crunch and freshness to each bite. You can make these tacos healthier with simple swaps. Use Greek yogurt instead of sour cream. It adds creaminess and protein. Choose whole-wheat tortillas for extra fiber. You can also add more veggies like bell peppers or corn for color and nutrients. Each swap keeps the tacos tasty and fun. After your taco night, you may have some tasty leftovers. To store them, let the tacos cool down. Then, take the filling out of the tortillas. Place the ground chicken mixture in an airtight container. You can keep the tortillas in a separate bag or container. This helps them stay fresh. Store both in the fridge for up to three days. Keeping them separate prevents soggy tacos. When you want to enjoy your leftover tacos, it’s easy! Start by reheating the ground chicken. Use a skillet over medium heat. Stir it often until it’s hot. This usually takes about 5 minutes. If you want, you can also use the microwave. Just place the chicken in a bowl and cover it. Heat for about one minute, then check to see if it's hot all the way through. Warm the tortillas in the microwave for about 30 seconds, too. Freezing is a great way to save extra tacos for later. To freeze, first cool the ground chicken completely. Then, place it in a freezer-safe container. You can also use freezer bags, but remove as much air as you can. Label the bags with the date. The chicken can stay in the freezer for up to three months. When you’re ready to eat, thaw it overnight in the fridge. Then, reheat as mentioned above for a quick meal! Yes, you can. Ground turkey, beef, or pork work well. Each adds its own taste. Turkey is leaner, while beef has more flavor. Choose what your family likes best. You can also mix meats for extra flavor. Just make sure to adjust the cooking time as needed. To add heat, use spicy seasonings. You can add cayenne pepper to the meat mix. Also, try using hot salsa instead of mild. Fresh jalapeños on top can also kick things up. If you want more spice, serve with sliced chili peppers. Always taste as you go to find the right heat. Many sides go great with these tacos. Here are some ideas: - Mexican rice - Refried beans - Corn on the cob - Guacamole - Chips and salsa - A simple salad These sides are easy and fun. They add color and taste to your meal. In this post, we explored ground chicken tacos. We covered key ingredients, fun toppings, and useful brands. You learned easy steps to prepare, warm, and assemble your tacos. We shared tips to make tacos fun for kids and avoid common mistakes. You discovered tasty variations and how to store leftovers. In the end, these tacos are an enjoyable meal for everyone. Try them out and make them your own!

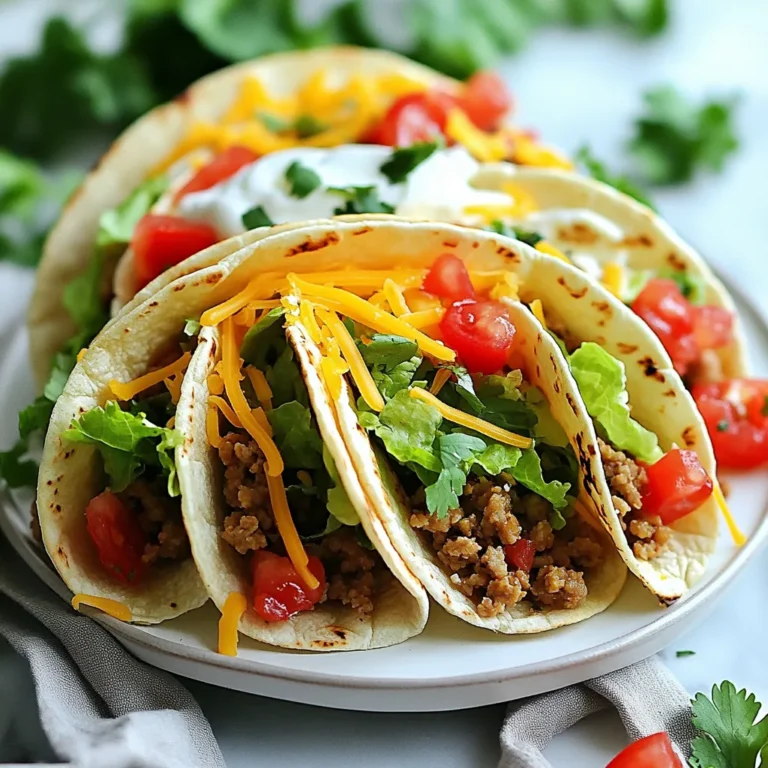
Kid Friendly Ground Chicken Tacos Simple and Tasty

You need 4 cups of fresh broccoli florets. Choose bright green ones for the best flavor. Cut them into small pieces. This helps them cook faster and blend easily. Fresh broccoli gives the soup a vibrant color and taste. Next, gather your dairy products. You will need 1 cup of heavy cream and 2 cups of shredded sharp cheddar cheese. The heavy cream adds a rich, smooth texture. The sharp cheddar cheese brings a bold flavor that makes this soup special. Make sure to shred your cheese. Pre-shredded cheese has anti-caking agents that can affect melting. For aromatics, you will need 1 medium onion and 2 cloves of garlic. Chop the onion and mince the garlic. These will add depth to your soup. You will also need 3 tablespoons of unsalted butter to sauté them. Seasonings include 1 teaspoon of Dijon mustard, salt, pepper, and 1 teaspoon of paprika. The mustard adds tang, while paprika gives a hint of smokiness. Adjust these seasonings to your taste for the best results. {{ingredient_image_1}} Start by washing your broccoli. Cut it into small florets. You want about four cups. Next, chop one medium onion and mince two cloves of garlic. These will add great flavor to your soup. Set your veggies aside while you prepare to cook. In a large pot, melt three tablespoons of unsalted butter over medium heat. Once the butter is melted, add the chopped onion. Sauté it for about five minutes until it looks soft and clear. Then, add the minced garlic and cook it for one more minute. Now, toss in the broccoli florets and sauté them for another three to four minutes. Next, pour in three cups of vegetable broth. Bring it to a boil, then lower the heat. Let the mix simmer for ten to fifteen minutes until the broccoli is tender. After the broccoli is tender, you will want to make the soup smooth. Use an immersion blender to puree it right in the pot. If you don’t have one, carefully transfer the soup to a regular blender in batches. Once it’s smooth, pour it back into the pot. Stir in one cup of heavy cream and one teaspoon of Dijon mustard. Heat this gently over low heat. Now, add in two cups of shredded sharp cheddar cheese. Stir until the cheese melts. Finally, season your soup with salt, pepper, and a teaspoon of paprika for flavor. Serve it hot with croutons on top if you like. For a creamy soup, blend it well. I use an immersion blender for ease. If you don’t have one, a regular blender works too. Just be careful with hot soup. Blend until smooth, but leave some little bits for texture. This adds a nice contrast to each spoonful. Sharp cheddar cheese is my go-to for this soup. It gives a strong flavor that shines. You can also mix in some Gruyère for a unique twist. Always shred your cheese fresh. Pre-shredded cheese has fillers that can make it clump. Seasonings can make or break your soup. I love adding a teaspoon of Dijon mustard. It brings a nice tang. A sprinkle of paprika gives a hint of smokiness. Don’t forget to taste as you go. Adjust salt and pepper to suit your liking. This way, your soup will be just right! Pro Tips Blanch the Broccoli: For a brighter green color and enhanced flavor, blanch the broccoli florets in boiling water for 2-3 minutes before adding them to the soup. Cheese Choice: Opt for a sharp cheddar cheese for a more robust flavor. Mixing in a bit of Gruyère can also add a unique twist. Texture Tips: If you prefer a chunkier soup, reserve some broccoli florets before blending and add them back in after pureeing. Storage Secrets: This soup can be stored in the fridge for up to 3 days. Reheat gently on the stove to avoid curdling the cream. {{image_2}} You can make this soup heartier by adding proteins. Cooked chicken, turkey, or even ground beef work well. I like to shred rotisserie chicken and stir it in at the end. This adds flavor and makes the soup more filling. You can also use beans or lentils for a vegetarian protein boost. Just remember to adjust the seasoning to match the added protein. To make this soup vegan, swap out the dairy products. Use cashew cream or coconut cream instead of heavy cream. For the cheese, look for vegan cheddar shreds. They melt nicely and keep the cheesy taste. Use vegetable broth to keep it plant-based. You still get a creamy and tasty soup without animal products. If you love heat, try adding chili flakes. Just a pinch can elevate the flavor. Stir in a teaspoon when you add the seasonings. For more heat, try fresh jalapeños or diced chili peppers. This adds a nice kick and balances the creaminess of the soup. Adjust the amount to your taste, but start small! After making your creamy broccoli cheddar soup, let it cool first. Once cool, pour it into an airtight container. Store it in the fridge for up to three days. This soup tastes just as good the next day. The flavors meld together beautifully overnight. If you want to save some for later, freezing works well. Allow the soup to cool completely. Use freezer-safe containers or zip-top bags. Leave some space at the top, as soup expands when frozen. Your soup can last in the freezer for up to three months. When you're ready to eat, thaw it in the fridge overnight. To reheat, pour the soup into a pot. Heat it over low to medium heat. Stir often to prevent sticking. You can also use a microwave. Place the soup in a microwave-safe bowl. Heat it in short bursts, stirring in between. If the soup seems thick, add a splash of broth or cream to get it creamy again. Enjoy every warm, cheesy bite! Yes, you can use frozen broccoli for this soup. Frozen broccoli is easy to find and saves time. It also cooks quickly, so you can still enjoy a creamy soup. Just make sure to thaw it first. Cut it into smaller pieces if needed. Then, follow the same steps in the recipe. The taste will still be great! The best cheese for this soup is sharp cheddar. It gives a strong flavor that pairs well with broccoli. You can also mix in some mild cheddar or even Gruyère for a twist. Just remember to shred the cheese before adding it. This helps it melt better and blend smoothly into the soup. To thicken your soup, you have a few options. You can blend in more broccoli or even add a potato. Another way is to stir in a bit of cornstarch mixed with water. This helps create a thicker texture without changing the flavor. Just make sure to let it cook for a few minutes to thicken up nicely. This blog post detailed the key ingredients and steps to make a great broccoli cheddar soup. We discussed using fresh broccoli, dairy, and the right seasonings to create a tasty base. I provided tips for texture, cheese choice, and flavor boosts. You can also customize the soup by adding proteins, making it vegan, or adding chili flakes for heat. Finally, I shared storage tips so you can enjoy your soup later. Cook with joy and enjoy your delicious creation!

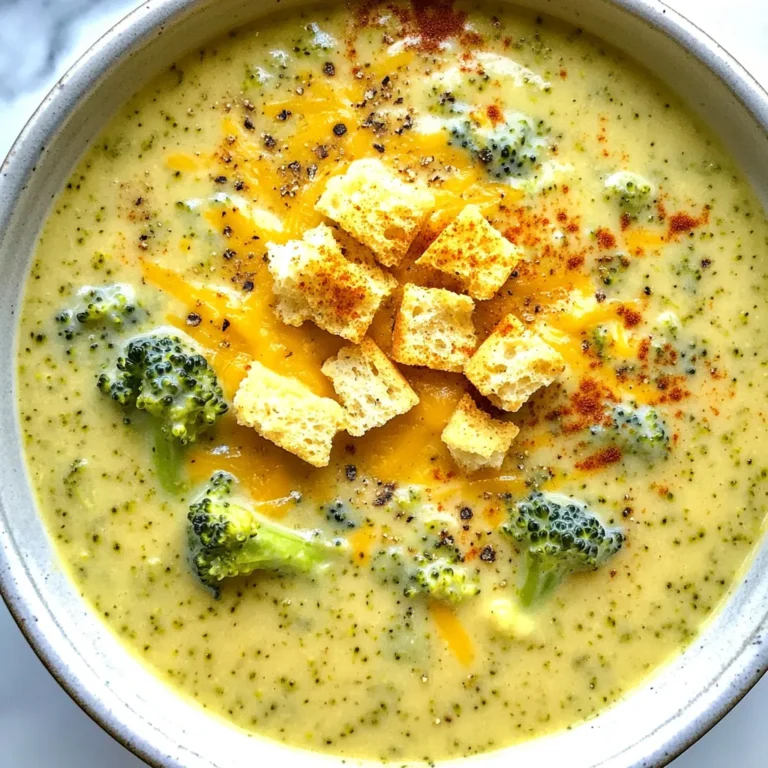
Creamy Broccoli Cheddar Soup Easy and Flavorful Recipe

- 4 boneless, skinless chicken thighs - 1 cup long-grain rice - 1 onion, diced - 2 garlic cloves, minced - 1 bell pepper (any color), diced - 1 cup low-sodium chicken broth - 1 can (14 oz) diced tomatoes, with juices - 1 cup heavy cream For the main ingredients, chicken thighs add flavor and juiciness. Long-grain rice gives the dish a nice texture. The onion, garlic, and bell pepper create a savory base. The broth and diced tomatoes add moisture and depth. - 1 teaspoon smoked paprika - 1 teaspoon dried thyme - Salt and pepper to taste - 1 tablespoon olive oil The smoked paprika and thyme bring warmth and earthiness. Salt and pepper enhance all the flavors. Olive oil is key for cooking the chicken and veggies. - Fresh parsley, chopped Fresh parsley adds a pop of color. It also brings a fresh flavor that brightens the dish. You can sprinkle it on just before serving for a beautiful touch. {{ingredient_image_1}} - Searing the Chicken Thighs First, heat olive oil in a large skillet over medium heat. Season the chicken thighs with salt, pepper, and smoked paprika. This adds a nice flavor. Sear the chicken for about 5 minutes on each side. Look for a golden brown color. Once done, remove the chicken and set it aside. - Seasoning Tips Use fresh spices to boost flavor. Smoked paprika gives a nice smoky taste. Salt and pepper are key for enhancing all other flavors. Don’t be shy; season well! - Sautéing the Mixture In the same skillet, add the diced onion, minced garlic, and diced bell pepper. Sauté these for 3-4 minutes. You want the vegetables to soften and get fragrant. This step builds the base of your dish. - Toasting the Rice Now, add the long-grain rice to the skillet. Stir it into the vegetables for 1-2 minutes. Toasting the rice adds a nutty flavor. It helps the rice absorb all the delicious juices later on. - Adding Liquids Pour in the low-sodium chicken broth and the can of diced tomatoes (with juices). Stir well to combine. This creates a rich, flavorful sauce. Bring the mixture to a simmer. - Cooking On Low Heat Return the seared chicken to the skillet. Nestle it into the rice mixture. Cover the skillet with a lid. Now, reduce the heat to low and cook for 20-25 minutes. This allows the chicken to cook through and the rice to become tender. If you smell something amazing, you’re doing it right! Avoiding Overcooking To avoid overcooking, you need to watch the timing closely. When you sear the chicken, cook it for about 5 minutes on each side. This gives it a nice golden color. After that, the chicken will finish cooking in the rice mixture. Make sure to cover the skillet to keep the moisture in. This will keep the chicken juicy and tender. Ensuring Creamy Texture The heavy cream is key for a creamy texture. After the rice absorbs most of the liquid, drizzle the cream over the dish. Stir it gently to mix it in. Let it heat through for about 5 minutes. This will make the dish rich and smooth. Prepping Ingredients Ahead You can save time by prepping the ingredients ahead of time. Dice the onion, bell pepper, and garlic the day before. Store them in the fridge. Measure out the rice and broth as well. This makes cooking quicker and less stressful. Meal Prep Tips This dish is perfect for meal prep. You can make a big batch and store it in containers. It keeps well in the fridge for a few days. When you're ready to eat, just reheat it on the stove or in the microwave. Add a splash of water or broth to keep it moist. Presentation Tips for a Beautiful Dish Serve this dish in shallow bowls. Place a piece of chicken on a bed of creamy rice. This looks nice and makes it easy to eat. Garnish with fresh parsley for a pop of color. This adds freshness and makes the dish look inviting. Pairing Suggestions This meal pairs well with a simple green salad. A side of steamed vegetables also works great. These sides add crunch and balance the creamy rice. Enjoy your meal with a light drink, like iced tea or lemonade. Pro Tips Rest the Chicken: Allow the chicken to rest for a few minutes after cooking. This helps retain its juices and ensures a moist texture when served. Customize the Vegetables: Feel free to add or substitute other vegetables like zucchini or carrots based on your preference. This adds variety and nutrition to the dish. Use Fresh Herbs: For an extra burst of flavor, add fresh herbs such as thyme or basil just before serving. This enhances the dish's aroma and taste. Check Rice Doneness: Before serving, check the rice for doneness. If it’s still firm, add a splash of additional broth and simmer until fully cooked. {{image_2}} Different Cuts of Chicken You can use various cuts of chicken for this recipe. If you prefer chicken breasts, they work well too. Just remember, breasts may cook faster than thighs. Adjust the cooking time to ensure they don’t dry out. If you want more flavor, try using bone-in, skin-on chicken. The skin adds richness. Alternative Grains While long-grain rice is a classic choice, you can swap it for other grains. Quinoa is a great option that adds protein. Brown rice gives a nutty flavor and is heartier. Just note that cooking times will vary. Always check the water needed for different grains. Adding Spices Want to spice things up? You can add cayenne pepper for heat or cumin for warmth. These spices blend well with the smoky flavor of paprika. Experiment and find the balance that suits your taste. A little extra garlic can also add depth if you love that flavor. Incorporating Vegetables Feel free to mix in more vegetables. Carrots, peas, or even spinach can add color and nutrition. Just chop them small and add them when you sauté the onion and bell pepper. This way, they cook evenly and blend into the dish nicely. Gluten-Free Options If you need a gluten-free meal, use gluten-free grains like quinoa or rice. Always check your broth to ensure it’s gluten-free, as some brands may contain gluten. This way, you can enjoy a tasty dish without worry. Dairy-Free Modifications To make this dish dairy-free, switch out the heavy cream for coconut milk. This adds a nice flavor and keeps the dish creamy. You might also try using a dairy-free cream alternative. Just be sure to check the labels for any added sugars or flavors. To store leftovers safely, let the chicken and rice cool down first. Place them in an airtight container. This keeps the meal fresh. Make sure to put it in the fridge within two hours. You can enjoy the leftovers within three to four days. To reheat, simply take the meal out of the fridge. Place it in a microwave-safe dish. Cover it with a lid or wrap it to keep moisture in. Heat in the microwave for about 2-3 minutes, stirring halfway. You can also reheat it on the stove. Add a splash of broth or water to keep it moist. How do you freeze smothered chicken and rice? Start by letting it cool completely. Then, use a freezer-safe container. You can also use heavy-duty freezer bags. Remove as much air as you can before sealing. This helps prevent freezer burn. It can stay fresh in the freezer for up to three months. For thawing, place the container in the fridge overnight. This keeps the chicken safe to eat. If you need it fast, you can use the microwave. Use the defrost setting and check it often. How long will it keep in the fridge or freezer? In the fridge, it lasts about three to four days. In the freezer, it can last for three months. Always check for any signs of spoilage before eating. Trust your senses; if it smells or looks off, it’s best to discard it. You can easily scale the recipe up. Just follow these simple steps: - Chicken Thighs: Add more thighs based on servings. For 8 servings, use 8 thighs. - Rice: Increase rice to 2 cups for every 4 servings. - Broth: Use 2 cups of chicken broth for 8 servings. - Cream: Add 2 cups of heavy cream for extra creaminess. - Vegetables: Increase onion, garlic, and bell pepper proportionally. Adjust all spices and seasonings too. Taste as you go for the best results. Yes, you can make this dish in a slow cooker. Here’s how: 1. Sear the Chicken: Brown the thighs in a skillet first. This adds flavor. 2. Layer Ingredients: Place the sautéed vegetables, rice, and liquids in the slow cooker. 3. Add Chicken: Nestle the chicken on top. 4. Cook: Set the slow cooker on low for 4-6 hours or high for 2-3 hours. 5. Add Cream: Stir in the heavy cream 30 minutes before serving. This method makes it easy and hands-free. You can serve many tasty sides with this dish. Here are a few ideas: - Steamed Vegetables: Broccoli or green beans add color and nutrients. - Salad: A crisp green salad balances the creamy dish. - Cornbread: This pairs well with the flavors of the chicken. - Garlic Bread: Perfect for soaking up the creamy sauce. Feel free to mix and match sides based on your taste. Smothered chicken and rice is a simple and tasty dish. We explored key ingredients like chicken thighs and rice, along with essential seasonings. You learned step-by-step instructions for preparing and cooking, ensuring a creamy texture. I shared tips for perfecting your dish, along with variations and storage info. This meal is versatile and adapts to your needs. Enjoy your culinary journey with this comforting dish!

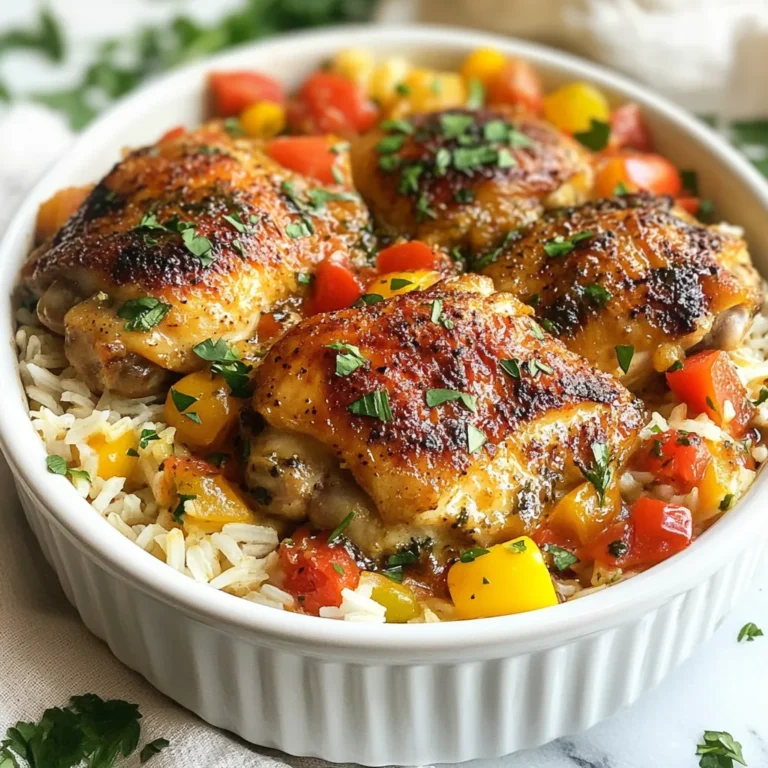
Smothered Chicken and Rice Flavorful Dinner Recipe

PREV 1 … 50 51 52 … 57 NEXT
meal twig

explore

DessertsDinnerAppetizersDrinks

Our Policies

  • Cookie Policy
  • Copyright Policy
  • Disclaimer
  • GDPR Policy
  • Terms Of Use
Back to Top
  • About
  • Contact Us
  • Privacy Policy
© 2025 meal twig