FREE DINNER EBOOK! Get your copy!
  • Cookie Policy
  • GDPR Policy
  • Disclaimer
  • Terms Of Use
  • Visit my other site: Fun Cookie Recipes
meal twig
  • Home
  • Dinner
  • Desserts
  • Drinks
  • Appetizers
  • Contact
  • About
  • Privacy Policy
  • Home
  • Dinner
  • Desserts
  • Drinks
  • Appetizers
  • Contact
  • About
  • Privacy Policy
  • Cookie Policy
  • GDPR Policy
  • Disclaimer
  • Terms Of Use
Visit my other site: Fun Cookie Recipes

HOME / CATEGORIES /

Latest

To make this tasty soup, you need some key ingredients. Here is what you will need: - 1 large head of cauliflower, chopped into florets - 4 cups vegetable broth - 1 cup heavy cream - 1 cup shredded sharp cheddar cheese - 4 oz cream cheese, softened - 1/2 cup cooked crispy bacon bits (optional) - 1 cup green onions, sliced (reserve some for garnish) - 2 cloves garlic, minced - 1 teaspoon onion powder - 1 teaspoon garlic powder - Salt and pepper to taste - 1 tablespoon olive oil - Fresh parsley, chopped (for garnish) These ingredients work together to create a rich and creamy flavor. The cauliflower serves as the base, giving a nice texture. The cheese adds a wonderful taste and creaminess. You can change this soup to suit your taste. Here are some optional ingredients: - Cooked sausage or ham for added protein - Different types of cheese, like gouda or mozzarella - Additional herbs, like thyme or rosemary - Spices, like paprika or cayenne for heat Feel free to mix and match these options. Each addition can give a new twist. If you have dietary needs, you can still enjoy this soup. Here are some easy swaps: - Use almond milk or coconut cream instead of heavy cream for dairy-free - Replace cream cheese with cashew cream for a vegan option - Use vegetable broth made from scratch for a low-sodium choice - Skip the bacon or use tempeh bacon for a vegetarian option These substitutes help keep the soup delicious while fitting your diet. Adjusting ingredients makes it easy for anyone to enjoy this meal. {{ingredient_image_1}} First, gather all your ingredients. You need a large head of cauliflower, vegetable broth, heavy cream, and shredded cheddar cheese. Don’t forget the cream cheese, bacon bits, green onions, garlic, and spices. Chop the cauliflower into florets. Slice the green onions, keeping some for garnish. Mince the garlic. This prep makes cooking easier and faster. In a large pot, heat the olive oil on medium heat. Add the minced garlic and stir for one minute. The smell will be amazing! Next, add the cauliflower florets and stir for 2-3 minutes. Pour in the vegetable broth and bring it to a gentle boil. Cover and let it simmer for 15-20 minutes. The cauliflower should be tender when done. Once the cauliflower is soft, use an immersion blender to purée the soup until smooth. If you don’t have one, carefully transfer the soup to a regular blender in batches. Return the smooth soup to the pot. Stir in the heavy cream, cream cheese, onion powder, garlic powder, salt, and pepper. Heat it on low, stirring often. Add the shredded cheddar cheese and let it melt. Finally, mix in the bacon bits and sliced green onions. Taste it, and adjust the seasoning if needed. Serve hot, garnished with extra green onions, parsley, and cheese if you want. Enjoy! To get a super creamy soup, start with the right cauliflower. Use fresh florets for the best taste. Steam the cauliflower until it is soft. This helps it blend well. Use an immersion blender for a smooth mix. If you don’t have one, a regular blender works, too. Just make sure to let it cool a bit before blending. Always add heavy cream and cream cheese slowly. This helps them mix in better. Adding herbs can boost the soup's taste. Fresh parsley adds brightness. Green onions give a nice crunch. For more depth, sauté the garlic until golden. Onion powder and garlic powder are must-haves for flavor. If you want a smoky touch, add crispy bacon bits. They pair great with the creamy base. Don’t forget to taste as you cook. Adjust salt and pepper to make it perfect. One common mistake is overcooking the cauliflower. It should be tender but not mushy. If you blend it too long, the soup can become too thin. Avoid adding all the cheese at once. It can clump together and not melt well. Always taste before serving. You might need more seasoning. Lastly, don’t skip garnishing. A sprinkle of green onions or parsley makes a big difference. Pro Tips Use Fresh Cauliflower: Fresh cauliflower gives the best flavor and texture. Look for firm, white heads without blemishes. Adjust Thickness: If you prefer a thicker soup, add less vegetable broth or blend for a longer time to achieve your desired consistency. Flavor Boost: For an added depth of flavor, consider roasting the cauliflower florets before adding them to the soup. Customize Toppings: Feel free to get creative with toppings! Try adding avocado, jalapeños, or a drizzle of olive oil for extra flavor. {{image_2}} To make a vegetarian version, simply leave out the bacon bits. This soup tastes great without them. You can still enjoy the creamy texture and rich flavors. Add more green onions for a nice crunch. You can also toss in some mushrooms for added depth. They pair well with the cauliflower and add umami flavor. If you need a dairy-free soup, swap the heavy cream and cream cheese for coconut cream. Use a plant-based cheese that melts well. Check labels to ensure they fit your diet. You can also use almond milk instead of heavy cream. This keeps the soup creamy without dairy. Adjust the spices to balance the coconut flavor. You can add various ingredients to enhance the flavor. Consider adding roasted red peppers for sweetness. They add a nice color and taste to the soup. A dash of smoked paprika gives a warm, smoky flavor. For some heat, toss in red pepper flakes. You can also mix in spinach or kale for added nutrients. These greens blend well and boost the overall healthiness of the meal. To keep your Keto Loaded Cauliflower Soup fresh, store it in airtight containers. Make sure to let the soup cool down to room temperature first. This step helps prevent condensation inside the container. You can keep it in the fridge for about 3 to 4 days. If you want to store it for longer, freezing is a great option. When you are ready to enjoy your leftover soup, reheat it on the stove over low heat. Stir it often to keep it smooth and creamy. You can also microwave it in a bowl. Just cover it loosely, so steam can escape. Heat it in short bursts, stirring between each. This method helps keep the flavors bright and fresh. For freezing, pour the cooled soup into freezer-safe bags or containers. Leave some space at the top, as soup expands when frozen. Label the bags with the date and type of soup. You can freeze it for up to 3 months. When you're ready to eat it, thaw it overnight in the fridge. After that, reheat it on the stove or in the microwave. To add heat to your Keto Loaded Cauliflower Soup, try these options: - Add red pepper flakes for a kick. - Stir in some hot sauce to suit your taste. - Use diced jalapeños for a fresh, spicy flavor. You can also sauté the minced garlic with diced chili peppers. This will infuse the soup with heat right from the start. Just be careful not to overdo it. You can always add more spice later. This soup packs a nutritious punch while keeping it low in carbs. Here’s a quick breakdown per serving: - Calories: Approximately 350 - Total Fat: 30g - Saturated Fat: 18g - Carbohydrates: 9g - Fiber: 3g - Protein: 12g These numbers may vary based on exact ingredients and portions. The soup is rich in healthy fats, making it perfect for a keto diet. It's both filling and satisfying. Yes, you can make this soup ahead of time! The flavors deepen as it sits. To prepare in advance: - Cook the soup and let it cool. - Store it in an airtight container in the fridge for up to three days. When ready to serve, reheat gently on the stove. Stir well to bring the soup back to life. If you find it too thick, add a splash of broth or cream to adjust the consistency. Keto Loaded Cauliflower Soup offers rich flavor and easy prep. We covered the key ingredients, preparation steps, and tips for a creamy texture. Don't forget the variations to cater to different diets. Store leftovers properly to keep them tasty for later. Overall, this soup is versatile and satisfying. You can enjoy it hot or cold, making it great for any meal. Now, it’s time to get cooking and enjoy every spoonful!

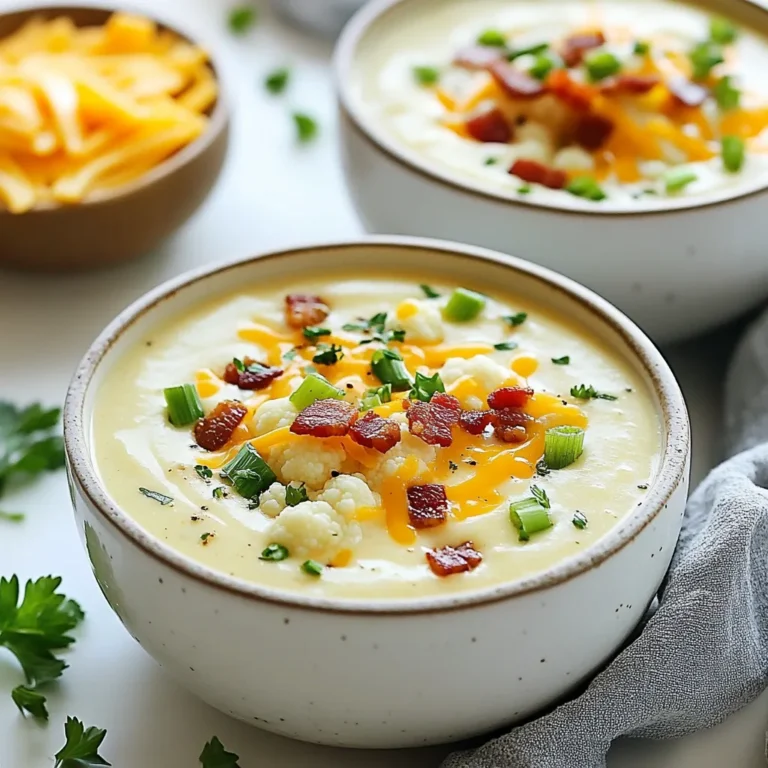
Keto Loaded Cauliflower Soup Healthy and Satisfying Meal

- 2 cups cooked chicken, shredded - 1 cup uncooked white rice - 1 cup broccoli florets, steamed - 1 can (10.5 oz) cream of mushroom soup - 1 cup sour cream - 1 cup shredded sharp cheddar cheese - 1 cup milk I love using these main ingredients because they work together so well. The cooked chicken gives a hearty base. The rice soaks up all the flavors and adds texture. Broccoli brings color and nutrients. Cream of mushroom soup makes everything creamy and rich. Sour cream adds tang. Cheddar cheese gives a sharp, savory taste that pulls it all together. Milk helps create a smooth texture, making every bite comforting. - 1 teaspoon garlic powder - 1 teaspoon onion powder - 1/2 teaspoon black pepper - 1/2 teaspoon salt - 1/4 cup green onions, sliced (for garnish) Seasoning is key for flavor. Garlic powder and onion powder add depth. Black pepper gives a slight kick. Salt enhances all the tastes, while sliced green onions bring a fresh crunch when you serve the dish. - 1/2 cup crushed buttery crackers - 2 tablespoons butter, melted The topping makes this casserole special. Crushed buttery crackers add a crunch that contrasts with the creamy filling. Melted butter helps the topping brown nicely in the oven, making it even more delicious. This combination of ingredients creates a dish that's not just tasty but also fun to eat. {{ingredient_image_1}} - Preheat oven to 350°F (175°C). - Grease your casserole dish for easy serving. - In a large bowl, mix cooked chicken, uncooked rice, and steamed broccoli. - Add cream of mushroom soup, sour cream, cheddar cheese, and milk. - Stir in garlic powder, onion powder, black pepper, and salt. - Mix until all ingredients are well combined and creamy. - Pour the mixture into the prepared casserole dish. - In a separate bowl, mix crushed crackers with melted butter. - Sprinkle the cracker mix evenly over the top of the casserole. - Cover the dish with aluminum foil and bake for 30 minutes. - After 30 minutes, remove the foil and bake for an additional 15 minutes. - Look for a golden brown top and bubbly filling. - Let it cool for 5-10 minutes, then garnish with sliced green onions. Using cooked chicken is key for this dish. It keeps the casserole moist and flavorful. Shredded chicken also mixes well with the other ingredients. You can use leftovers or rotisserie chicken for ease. To steam broccoli perfectly, first, cut it into small florets. Then, boil a small pot of water and place a steamer basket on top. Add the broccoli and cover. Steam for about 3-5 minutes. The broccoli should be bright green and tender but still crisp. To enhance visuals, consider garnishing with sliced green onions. You can also add a sprinkle of extra cheese on top. This adds color and makes the dish look more inviting. Serve the casserole in individual bowls. This makes it easy for guests to enjoy. Plus, you can top each bowl with more cheese or green onions for a personal touch. Oven types can affect cooking time. If you use a convection oven, check for doneness a few minutes early. The fan cooks food faster. To check if the casserole is done, insert a knife into the center. If it comes out hot, it’s ready! The top should be golden brown and bubbly for the best texture. Pro Tips Use Leftover Chicken: This casserole is a great way to utilize leftover rotisserie or grilled chicken, saving you time and enhancing flavor. Rice Variations: Feel free to substitute white rice with brown rice or quinoa for a healthier twist; just adjust the cooking time accordingly. Cheese Choices: Experiment with different types of cheese, such as mozzarella or pepper jack, to customize the flavor profile of your casserole. Add More Veggies: Incorporate additional vegetables like carrots, bell peppers, or spinach to boost nutrition and add color to your dish. {{image_2}} You can swap out the chicken for turkey. Turkey works well and keeps it tasty. If you want a meatless option, try using tofu. Tofu soaks up flavors and gives you protein. Need dairy-free? Use a dairy-free sour cream and milk. Cashew or almond milk can work great here. For gluten-free, choose gluten-free crackers and rice. This way, everyone can enjoy the dish! Add bell peppers for a colorful twist. They bring a nice crunch and flavor. Carrots also work well; they add sweetness and nutrition. You can even mix in some spinach for extra greens. When it comes to cheese, feel free to switch it up. Monterey Jack adds a nice creamy texture. You can also try pepper jack for a spicy kick. Each cheese brings a unique taste! If you want to cook it slow, use a slow cooker. Just mix all the ingredients and let it simmer for 6-8 hours. It will be warm and comforting. For a quick option, try the Instant Pot. Cook on high pressure for 10 minutes. This method saves time and still keeps the flavors rich. You’ll have a delicious meal in no time! To keep your Million Dollar Chicken Casserole fresh, I suggest using airtight containers. Glass or plastic containers work well. Make sure to let the casserole cool before sealing it. This helps avoid moisture build-up inside. Store the containers in the fridge for up to three days. If you plan to eat it later, consider freezing it instead. To reheat, you can use the oven or microwave. For the oven, preheat it to 350°F (175°C). Place the casserole in a dish, cover it with foil, and heat for about 20-25 minutes. This method keeps the texture nice. If you use the microwave, heat it in short bursts. Stir often to warm it evenly. This way, the flavors stay rich and delicious. If you want to freeze the casserole, let it cool completely first. Then, wrap it tightly in plastic wrap and foil. This helps prevent freezer burn. You can store it frozen for up to three months. When you're ready to eat, move it to the fridge to thaw overnight. Reheat as mentioned before to enjoy! Yes, you can make Million Dollar Chicken Casserole ahead of time. Prepare the casserole as directed. Before baking, cover it and place it in the fridge. You can keep it there for up to 24 hours. When you're ready to bake, add about 10 to 15 minutes to the cooking time. This makes it easy for busy days. This casserole pairs well with many sides. Here are some tasty options: - Garlic bread - A fresh green salad - Steamed vegetables - Mashed potatoes These sides will balance the flavors and add some color to your meal. Million Dollar Chicken Casserole lasts about 3 to 4 days in the fridge. Store it in an airtight container to keep it fresh. Make sure it cools completely before putting it away. This way, you can enjoy leftovers later in the week. Yes, you can substitute the cream of mushroom soup. Here are some options: - Cream of chicken soup - Cream of celery soup - A homemade white sauce These substitutions will still give you a creamy texture without losing flavor. This blog post covered a delicious Million Dollar Chicken Casserole. You learned about the key ingredients, step-by-step instructions, and helpful tips. Remember to use cooked chicken and perfectly steamed broccoli for the best results. Consider variations for different tastes and dietary needs. Lastly, proper storage and reheating keep your casserole fresh! This meal is a crowd-pleaser, great for sharing. Enjoy making and sharing this tasty dish with family and friends!

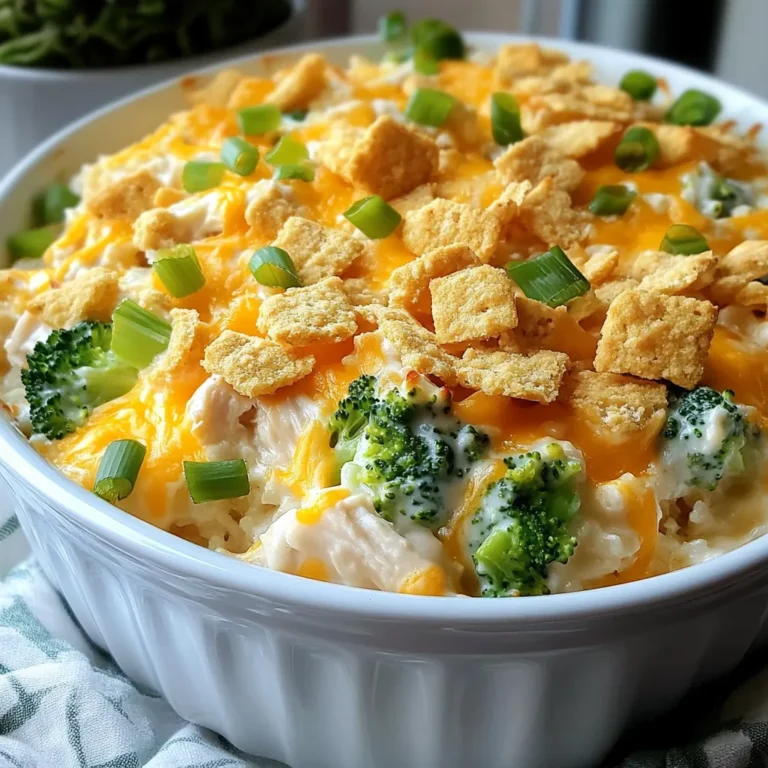
Million Dollar Chicken Casserole Quick and Easy Recipe

To make the best Double Chocolate Banana Bread, gather these simple ingredients: - 3 ripe bananas, mashed - 1/3 cup melted coconut oil - 1/2 cup brown sugar - 1 large egg, beaten - 1 teaspoon vanilla extract - 1 teaspoon baking soda - Pinch of salt - 1 cup all-purpose flour - 1/2 cup cocoa powder - 1/2 cup chocolate chips (semi-sweet or dark) - 1/4 cup chopped walnuts or pecans (optional) Each ingredient plays a key role. The ripe bananas add natural sweetness and moisture. Coconut oil gives a rich flavor and a soft texture. Brown sugar enhances the bread's sweetness with a touch of caramel flavor. The egg binds everything together, while vanilla adds warmth. Baking soda helps the bread rise, and a pinch of salt balances the sweetness. Flour and cocoa powder create the base for a rich, chocolatey taste. Chocolate chips provide bursts of chocolate in every bite. If you want some crunch, add walnuts or pecans. Make sure to use ripe bananas. They should be speckled and soft. This is the secret to a moist loaf. Enjoy the process of gathering these ingredients. Your kitchen will soon be filled with delightful aromas! {{ingredient_image_1}} - Preheat oven to 350°F (175°C). - Grease or line a loaf pan with parchment paper. This helps with easy removal later. - In a large bowl, combine 3 mashed bananas and 1/3 cup melted coconut oil. - Add 1/2 cup brown sugar, 1 beaten egg, and 1 teaspoon vanilla extract. Mix until smooth. - Sprinkle in 1 teaspoon baking soda and a pinch of salt. Stir gently to combine. - Gradually fold in 1 cup all-purpose flour and 1/2 cup cocoa powder. Do not overmix. - Mix in 1/2 cup chocolate chips and 1/4 cup chopped nuts, if you like extra crunch. - Pour the batter into your prepared loaf pan. Smooth the top with a spatula. - Bake for 60 to 70 minutes. Check for doneness with a toothpick around the 55-minute mark. - If the toothpick comes out clean, your bread is ready! Let it cool in the pan for about 10 minutes. Then transfer it to a wire rack to cool completely. Using ripe bananas makes a big difference in flavor. Ripe bananas are sweeter and add moisture. Look for bananas with brown spots. They are perfect for baking. Avoiding overmixing is key. When you mix the batter, do it gently. Overmixing can make the bread dense and tough. Just fold the dry ingredients in until you see no flour. Presentation can make your banana bread shine. Slice the bread and serve it warm. A light dusting of powdered sugar adds a nice touch. You can also spread butter or nut butter on top. This adds flavor and richness. Pair your banana bread with drinks or snacks. A cup of coffee or tea works well. It also goes great with fresh fruit on the side. If your bread is dense, it may be due to overmixing. Try mixing just until combined. Another reason could be too much flour. Measure carefully to avoid this. For underbaking, always check for doneness with a toothpick. If it comes out wet, bake a little longer. If your bread is overbaked, it will be dry. Keep an eye on the time. Start checking around 55 minutes. Pro Tips Use Overripe Bananas: The riper the bananas, the sweeter and more flavorful your banana bread will be. Look for bananas with plenty of brown spots for the best results. Don't Overmix: When combining the dry ingredients with the wet, mix just until everything is incorporated. Overmixing can lead to a dense and tough bread. Experiment with Mix-Ins: Feel free to get creative! Add in your favorite nuts, dried fruits, or even a swirl of peanut butter for extra flavor and texture. Check for Doneness Early: Since oven temperatures can vary, start checking your bread for doneness around the 55-minute mark to prevent overbaking. {{image_2}} If you want to make this banana bread gluten-free, you can swap all-purpose flour for gluten-free flour blends. Many brands offer great mixes that work well in baking. Just make sure to check the package for the best results. For egg substitutes, you have a few tasty options. You can use 1/4 cup of applesauce or mashed banana per egg. Another choice is using flaxseed meal. Mix one tablespoon of flaxseed meal with three tablespoons of water, then let it sit for a few minutes. This mix works great! To boost flavor, consider adding spices like cinnamon or nutmeg. A teaspoon of cinnamon can warm up the bread nicely. Nutmeg adds a lovely hint of sweetness. Feel free to adjust the amount based on your taste. You can also add different nuts or dried fruits. Chopped walnuts or pecans add a crunchy texture. Dried cranberries or chopped dates can make the bread sweeter and more interesting. Mix and match to find your favorite combo! When it's time to serve, think about delicious spreads. A bit of butter or nut butter adds creaminess. You can also try cream cheese for a rich flavor. If you're feeling fancy, consider frosting your banana bread. A simple chocolate frosting can enhance the chocolate flavor. A light glaze made from powdered sugar and milk adds a sweet touch. Get creative with your toppings! To keep your double chocolate banana bread fresh, store it at room temperature. Wrap it in plastic wrap or place it in an airtight container. This helps keep the bread moist and soft. It will stay good for about three days. If you want to refrigerate it, make sure it is fully cooled first. Wrap it tightly in plastic wrap or foil. In the fridge, the bread lasts about a week. Just remember, chilling can change its texture a bit. For long-term storage, freezing works best. Slice the banana bread into pieces. Wrap each slice in plastic wrap and place them in a freezer-safe bag. Remove as much air as possible to prevent freezer burn. This bread can freeze well for up to three months. When you are ready to enjoy a slice, remove it from the freezer. Let it sit at room temperature for about 30 minutes. For a warm treat, you can also pop it in the microwave for a few seconds. Enjoy the rich chocolate flavor again! You can tell when the bread is done by using a toothpick. Insert it into the center of the loaf. If it comes out clean or with a few crumbs, your bread is ready. Check around 55 minutes to avoid overbaking. The bread should also feel firm to the touch and have a nice, dark color on top. Yes, you can make this recipe vegan. Simply replace the egg with a flax egg. To make a flax egg, mix one tablespoon of ground flaxseed with three tablespoons of water. Let it sit for five minutes until it thickens. You can also use plant-based yogurt or unsweetened applesauce as another option. Substituting ingredients is easy. If you don’t have coconut oil, you can use melted butter or any neutral oil. If you lack brown sugar, white sugar works too; just add a teaspoon of molasses for that rich flavor. You can swap all-purpose flour with gluten-free flour, but check the packaging for ratios. If your banana bread is too dense, you might have overmixed the batter. Mix just until the dry ingredients are combined. Also, make sure your bananas are ripe. Ripe bananas add sweetness and moisture. If your bread still seems dense, consider adding a bit more baking soda to help it rise. Absolutely! You can use dark, semi-sweet, or even milk chocolate chips. You can also try white chocolate chips for a different flavor. If you want, mix in some peanut butter chips or butterscotch chips for a fun twist. The choice is yours! You can create delicious banana chocolate bread with simple ingredients and steps. We covered what you need, from ripe bananas to chocolate chips. I shared tips for perfecting your loaf and ideas for tasty twists. Storing it correctly ensures your bread stays fresh longer. Remember, baking is all about having fun and experimenting. Try different flavors and ingredients to find your favorite version. Enjoy your time in the kitchen and share your yummy results!

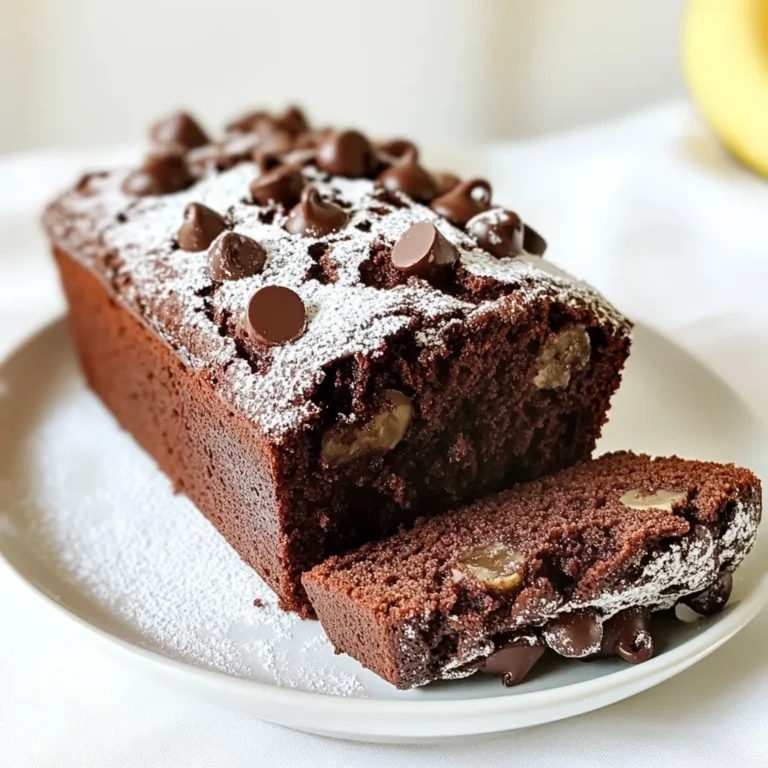
Double Chocolate Banana Bread Delightful Homebaking

- 4 boneless, skinless chicken thighs - Salt and pepper to taste - 4 medium-sized Yukon gold potatoes, quartered - Olive oil for coating - 3 tablespoons olive oil - 1 lemon (zest and juice) - 3 cloves garlic, minced - 1 teaspoon dried oregano - 1 teaspoon dried thyme - 1 teaspoon smoked paprika - Fresh parsley for garnish When I make One-Pan Chicken and Potatoes, I start with fresh chicken thighs. They are juicy and full of flavor. I season them with salt and pepper. This simple step makes a big difference. Next, I choose Yukon gold potatoes. They are creamy and sweet. I cut them into quarters, which helps them cook evenly. A light coat of olive oil keeps them from sticking. The marinade is where the magic happens. I blend olive oil, lemon zest, and juice in a bowl. The lemon adds brightness. I then mix in minced garlic, oregano, thyme, and smoked paprika. This mix gives the chicken a zesty kick. I always let the chicken marinate for about 15 minutes. This allows the flavors to soak in. While the chicken rests, I prepare the potatoes. I toss them with olive oil, salt, and pepper. They will roast nicely alongside the chicken. Finally, I garnish with fresh parsley before serving. This adds a pop of color and flavor. Each bite is a delicious mix of juicy chicken and tender potatoes. It's simple yet satisfying. {{ingredient_image_1}} - Preheat oven to 425°F (220°C). - In a large bowl, mix olive oil, lemon zest, lemon juice, garlic, oregano, thyme, smoked paprika, salt, and pepper. - Add the chicken thighs to the bowl. - Coat them well with the marinade. - Let the chicken marinate for about 15 minutes. - In another bowl, toss the quartered potatoes. - Use olive oil, salt, and pepper to coat them well. - Spread the marinated chicken on one side of a baking sheet. - Place the seasoned potatoes next to the chicken. - Make sure there is space between them for even cooking. - Bake in the oven for about 30 minutes. - Check that the chicken reaches an internal temperature of 165°F (74°C). - The potatoes should be golden and tender. - Best practices for marinating: Marinate your chicken for at least 15 minutes. This helps the meat soak up the flavors. Use a bowl that allows the chicken to sit in the marinade. Flip it halfway to ensure even coating. - Tips for checking doneness: The best way to check if the chicken is done is by using a meat thermometer. Aim for 165°F (74°C). If you don’t have one, cut into the thickest part. The meat should look white and juices should run clear. - Methods to achieve crispy edges: Start with dry potatoes. Pat them with a towel to remove moisture. Toss them in olive oil and seasonings. Bake at a high heat for the best crunch. - Importance of spacing on the baking sheet: Give the potatoes space on the baking sheet. Crowding them leads to steaming, not crisping. Make sure they are in a single layer for even cooking. - Adding herbs or spices for additional flavor: You can try adding fresh herbs like rosemary or thyme. A pinch of chili powder can also add a nice kick. Mix these into the marinade for extra taste. - Suggestions for a zesty kick: Squeeze some extra lemon juice over the chicken and potatoes before serving. You can also add a dash of hot sauce for a spicy twist. Pro Tips Marinate Longer for More Flavor: If time allows, marinate the chicken thighs for up to an hour or even overnight in the refrigerator. This will enhance the flavor and juiciness of the chicken. Use a Meat Thermometer: To ensure the chicken is perfectly cooked, use a meat thermometer to check for an internal temperature of 165°F (74°C). This minimizes the risk of overcooking. Customize Your Herbs: Feel free to experiment with fresh herbs or different dried herbs according to your taste preferences. Fresh rosemary or basil can add a delightful twist. One-Pan Cleanup: Line your baking sheet with parchment paper or aluminum foil for easy cleanup. This will save you time washing dishes after enjoying your delicious meal. {{image_2}} You can use different chicken cuts for this recipe. Chicken breasts or drumsticks work well. If you choose chicken breasts, slice them in half for even cooking. Drumsticks will take a bit longer to cook. Adjust your baking time to about 35-40 minutes for drumsticks. Always check the internal temperature. It should reach 165°F (74°C) for safety. Feel free to switch up the vegetables. Seasonal veggies add great flavor and nutrition. Try carrots, bell peppers, or zucchini. These veggies pair nicely with chicken. Toss them in olive oil, salt, and pepper before adding them to the pan. This way, they cook just right alongside the chicken and potatoes. Add a twist by using global spices. Try cumin for a warm flavor or curry powder for a kick. You can mix up the marinade too. Use soy sauce for an Asian vibe or chimichurri for a Latin touch. Experimenting with different marinades keeps the dish fresh and exciting. To store leftovers, let them cool first. Place the chicken and potatoes in an airtight container. This keeps them fresh. Store the container in the fridge. You can enjoy leftovers for up to three days. Always check for any signs of spoilage before eating. If you want to freeze the dish, let it cool. Portion it into freezer-safe bags or containers. Remove as much air as possible before sealing. You can freeze it for up to three months. When you're ready to eat, thaw it in the fridge overnight. To reheat, bake it at 350°F (175°C) until hot, or microwave it until warmed through. For easy meal prep, chop the potatoes and marinate the chicken ahead of time. You can store the marinated chicken in the fridge for up to 24 hours. Keep the potatoes in a separate container to avoid sogginess. On a busy day, just assemble and bake. This saves time and makes cooking simple. Yes, you can use frozen chicken thighs. Just remember to thaw them first. Place the frozen chicken in the fridge overnight. If you're in a hurry, you can use the microwave. Make sure to marinate them for a little longer. This will help keep them juicy and flavorful. If you can't find Yukon gold potatoes, don't worry. You can use other types of potatoes. Red potatoes work well because they hold their shape. Russet potatoes are good too but can become fluffy. Sweet potatoes add a nice twist. Just adjust the cooking time based on the size. To check if the chicken is done, use a meat thermometer. The chicken should reach an internal temperature of 165°F (74°C). If you don't have a thermometer, look for clear juices. The meat should no longer be pink. This ensures that it's safe to eat. Yes, you can adapt this recipe for a slow cooker. First, sear the chicken in a pan for extra flavor. Then, place the chicken and potatoes in the slow cooker. Add the marinade, then cook on low for 6-8 hours or high for 3-4 hours. This will keep the chicken tender and moist. In this blog post, we explored a delicious chicken and potato dish. We covered key ingredients, step-by-step instructions, and helpful tips for success. You learned how to marinate chicken, prepare crispy potatoes, and even try variations on the recipe. Storing and reheating tips help keep leftovers fresh. This dish is simple yet packed with flavor. You can enjoy it any night of the week. So grab your ingredients and start cooking. You’ll love the results!

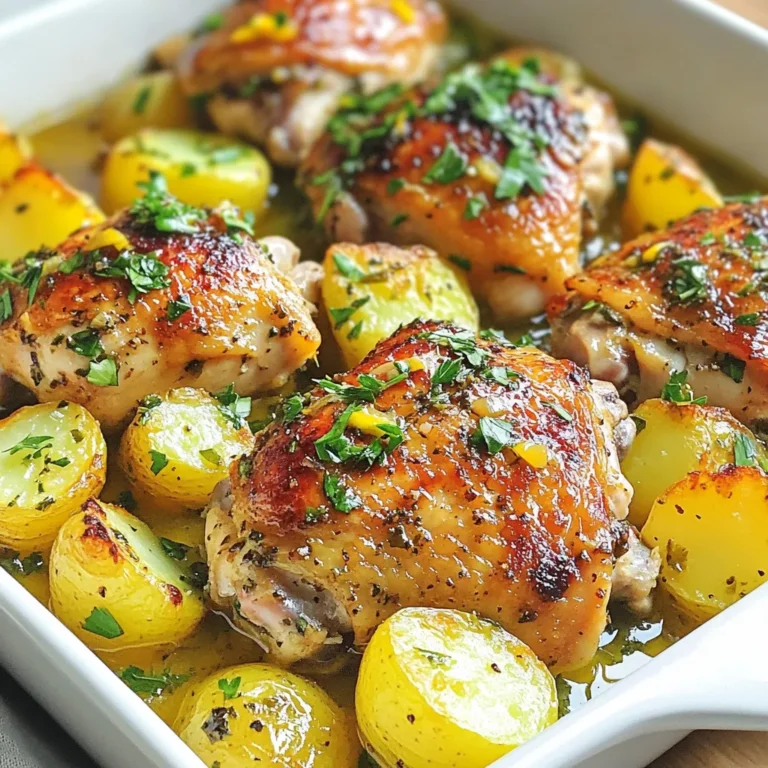
One-Pan Chicken and Potatoes Simple Home Recipe

For this dish, you need simple, fresh items. Here’s what to gather: - 8 oz (225g) pasta (penne or fusilli work well) - 2 cups broccoli florets - 1 cup heavy cream (or coconut cream for a dairy-free option) - 1 cup grated Parmesan cheese (or nutritional yeast for vegan option) Pasta forms the base of your meal. Penne or fusilli works best. They hold the creamy sauce well. Fresh broccoli adds color and nutrition. It also gives a nice crunch to the dish. Heavy cream adds richness, while coconut cream is a great dairy-free choice. Parmesan cheese brings a salty flavor. If you want a vegan option, nutritional yeast is perfect. Adding flavor is key to this dish. Here’s what you’ll need: - 1 tablespoon olive oil - 3 cloves garlic, minced - 1 cup vegetable broth - 1 teaspoon lemon zest - Salt and black pepper to taste - Crushed red pepper flakes (optional, for heat) - Fresh basil leaves for garnish Olive oil and garlic create a fragrant base. The broth makes the pasta moist and adds depth. Lemon zest brightens the dish with a fresh taste. Salt and pepper enhance all the flavors. If you like heat, crushed red pepper flakes are a fun touch. Fresh basil leaves make a lovely garnish that adds color and flavor. {{ingredient_image_1}} 1. Start by heating 1 tablespoon of olive oil in a large pot over medium heat. 2. Add 3 minced garlic cloves and sauté for 1-2 minutes until fragrant. Watch closely so it does not burn. 3. Next, add 8 ounces of pasta to the pot. Pour in 1 cup of vegetable broth. 4. Bring the mixture to a simmer. Stir occasionally to keep the pasta from sticking. 1. After 5 minutes of cooking the pasta, it’s time to add 2 cups of broccoli florets. 2. Continue cooking for about 5-7 more minutes. The pasta should be al dente, and the broccoli should be tender. 1. Once the pasta is cooked, reduce the heat to low. 2. Stir in 1 cup of heavy cream and 1 cup of grated Parmesan cheese. Mix until the sauce is creamy and smooth. 3. Add 1 teaspoon of lemon zest. Season with salt, black pepper, and crushed red pepper flakes for some heat. 4. Stir everything to combine well. Let it sit for a couple of minutes to thicken slightly. Now your delicious one-pot creamy broccoli pasta is ready to enjoy! To change the creaminess, you can use heavy cream or coconut cream. If you want a lighter dish, try half cream and half broth. Coconut cream adds a nice flavor, too. Spices can really boost the taste. Consider adding garlic powder, onion powder, or even a pinch of nutmeg. If you like heat, crushed red pepper flakes give a nice kick. Just a little goes a long way! To stop the pasta from sticking, stir it often when it cooks. You can also add a bit of olive oil to the water before cooking. This helps keep the pasta separate. To cook the broccoli perfectly, add it halfway through the pasta cooking time. This way, it gets tender but stays bright green. You want it soft but not mushy. Check for doneness by tasting a floret. Pro Tips Choose the Right Pasta: Opt for pasta shapes that hold sauce well, like penne or fusilli, to maximize flavor in every bite. Don't Overcook the Broccoli: Add the broccoli halfway through pasta cooking to ensure it remains vibrant and slightly crisp. Adjust Creaminess: For a lighter version, substitute half of the heavy cream with additional vegetable broth without sacrificing flavor. Flavor Boosters: Enhance the dish with additional herbs like thyme or oregano for a more complex flavor profile. {{image_2}} For a vegan twist, you can swap heavy cream for coconut cream. This makes the dish rich and creamy without dairy. Use nutritional yeast instead of Parmesan cheese. It adds a cheesy flavor and boosts the nutrition. You can also try other veggies for added health benefits. Spinach, kale, or peas work well in this dish. They bring different textures and flavors. Plus, they pack in extra vitamins and minerals. You can mix and match to find your favorite combo! To change the flavor, add herbs and spices. Fresh basil is great for a bright taste. Oregano and thyme can add depth too. If you like heat, sprinkle in crushed red pepper flakes. For added protein, consider chicken or shrimp. Cook them in the pot before adding the pasta. This way, they soak up all the delicious flavors. Tofu is another good protein option for a plant-based meal. You can customize this dish in many ways! To keep your One-Pot Creamy Broccoli Pasta fresh, store it in the fridge. Use an airtight container. This helps to keep out moisture and smells. Make sure the pasta has cooled down before sealing it. You can keep it for about 3 to 4 days. If you notice any strange smells or colors, it's best to toss it. When reheating, you want the pasta to stay creamy. The best way to do this is on the stovetop. Add a splash of water or broth to the pan. Heat it over low to medium heat, stirring often. This helps prevent it from sticking and makes it creamy again. If you prefer the microwave, place the pasta in a microwave-safe bowl. Add a bit of water to it. Cover the bowl with a microwave-safe lid or wrap. Heat in short bursts, stirring in between to avoid hot spots. This way, your pasta stays tasty and smooth. Can I use frozen broccoli instead of fresh? Yes, you can use frozen broccoli. Just add it to the pot with the pasta. It will cook well. The flavor stays nice, and it saves time. How can I make this recipe gluten-free? To make it gluten-free, use gluten-free pasta. There are many options like rice or chickpea pasta. Ensure your vegetable broth is also gluten-free. Can I make this in a slow cooker? Yes, you can. Cook the pasta and broccoli in the slow cooker with the broth. Add cream and cheese toward the end of cooking. This method takes longer but is very easy. What are the best pasta alternatives? Penne and fusilli work best. You can also use spaghetti or rotini. Each type will give a nice texture to the dish. Caloric content of the dish One serving has about 500 calories. This can vary based on the cream and cheese you use. Check your brands for exact numbers. How to adjust for dietary preferences For a lighter dish, use less cream. You can also add more vegetables. For vegan options, replace cream with coconut cream and cheese with nutritional yeast. This blog post covered how to make a delicious pasta dish. We looked at the key ingredients, like pasta, fresh broccoli, and creamy alternatives. I shared step-by-step instructions for cooking and creating the sauce. You learned tips for enhancing flavor and making vegan changes. Don’t forget about storage tips and answering common questions. This recipe is easy, tasty, and flexible for your needs. Enjoy your cooking!

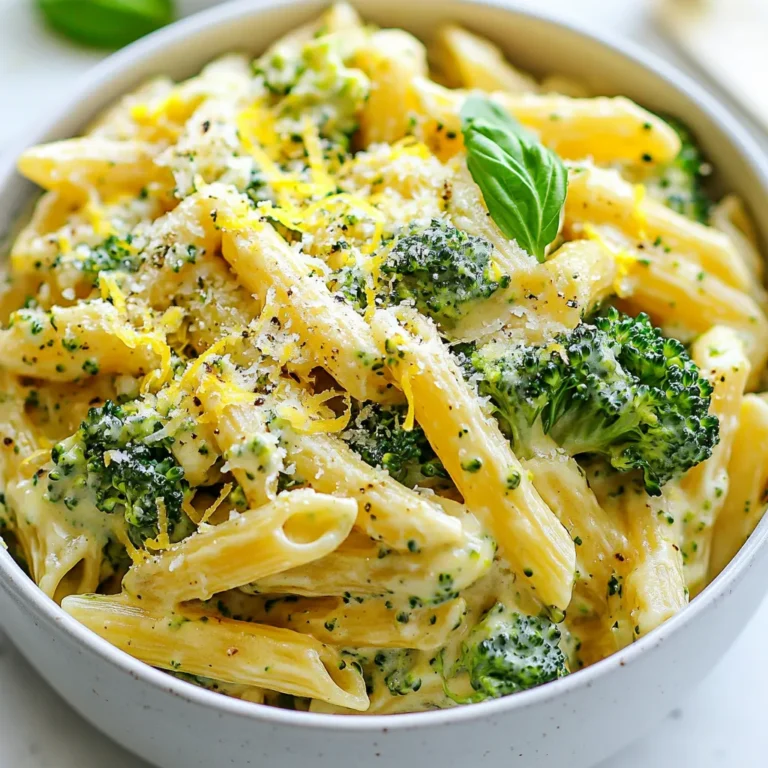
One-Pot Creamy Broccoli Pasta Delightful Meal Idea

- 2 boneless, skinless chicken breasts, cubed - 2 cups broccoli florets - 1 cup quinoa The main ingredients of the Chicken & Broccoli Bowls pack a punch of nutrition and flavor. I use chicken breasts because they are lean and cook quickly. Broccoli adds a nice crunch and is full of vitamins. Quinoa is my go-to grain for its protein and fiber. This trio creates a balanced meal that fills you up. - 2 tablespoons olive oil - 3 cloves garlic, minced - 1 tablespoon fresh ginger, grated - 3 tablespoons soy sauce (low sodium) - 1 tablespoon honey - 1 teaspoon sesame oil The sauce is where the magic happens. I start with olive oil to sauté the garlic and ginger. The soy sauce adds a savory touch, while honey gives it sweetness. Sesame oil adds depth and richness. Together, they create a tasty glaze that brings the chicken and broccoli to life. - 1 teaspoon sesame seeds (for garnish) - 2 green onions, sliced (for garnish) - Salt and pepper to taste Garnishes elevate your dish. I sprinkle sesame seeds on top for a nutty crunch. Green onions add freshness and a pop of color. Don't forget to season with salt and pepper. These small touches make a big difference in presentation and taste. {{ingredient_image_1}} First, rinse the quinoa in cold water. Use a fine-mesh sieve for best results. Then, place the rinsed quinoa in a medium saucepan. Add 2 cups of water. Bring it to a boil over high heat. After that, reduce the heat and cover the pot. Let it simmer for 15 minutes. The water should be absorbed when done. Remove the pot from heat and keep it covered for 5 minutes. Finally, fluff the quinoa with a fork. This will make it light and airy. While the quinoa cooks, grab a large skillet. Heat 1 tablespoon of olive oil over medium heat. Add the cubed chicken to the skillet. Season it with salt and pepper. Cook the chicken for about 5-7 minutes. Stir occasionally to ensure even cooking. You want the chicken to be golden brown and fully cooked. This step is key for flavor. Next, push the chicken to one side of the skillet. Add the other tablespoon of olive oil. Then, toss in the minced garlic, grated ginger, and broccoli florets. Sauté this mix for 4-5 minutes. You want the broccoli to be tender but still bright green. This keeps the nutrients and adds a nice crunch. In a small bowl, whisk together the soy sauce, honey, and sesame oil. This will create a sweet and savory sauce. Pour the sauce over the chicken and broccoli mixture. Stir well to combine all the flavors. Cook for an additional 2 minutes. This allows the sauce to coat the chicken and broccoli nicely. Now it's time to put it all together. Divide the cooked quinoa into serving bowls. Top each bowl with the chicken and broccoli mixture. Aim for equal portions to make it fair. A nice presentation makes the meal more inviting. Finish your bowls with a sprinkle of sesame seeds. Add sliced green onions for a fresh touch. These final touches add flavor and color. When serving, remind everyone to mix their bowls well. This way, they get all the flavors in every bite. Enjoy your delicious Chicken & Broccoli Bowls! - Use a hot skillet to cook the chicken. This helps it brown nicely. - Cook the chicken for 5-7 minutes. Stir it often for even cooking. - To check if it's done, cut a piece. It should be white inside, not pink. - To keep broccoli bright green, add it to the pan last. Cook it for just 4-5 minutes. - You can also steam broccoli instead of sautéing. This keeps it crunchy and vibrant. - Try blanching it! Boil briefly, then plunge into ice water. This stops cooking and locks in color. - Rinse quinoa before cooking. This removes bitter saponins and enhances the flavor. - For faster cooking, use a rice cooker. It can save time and effort. - Add flavor to the cooking water. Use broth instead of plain water for a tasty twist. Pro Tips Marinate the Chicken: For extra flavor, marinate the cubed chicken in the soy sauce, honey, and sesame oil mixture for at least 30 minutes before cooking. Use Fresh Ingredients: Fresh garlic and ginger will give the dish a more vibrant flavor compared to dried versions. Customize Your Veggies: Feel free to add other vegetables like bell peppers or snap peas for added color and nutrition. Meal Prep Friendly: This recipe is great for meal prep! Store the components separately in airtight containers for easy reheating throughout the week. {{image_2}} You can switch the chicken for other proteins. Try shrimp or tofu for a tasty twist. Both options work well with the same flavors. For a vegetarian option, use chickpeas or tempeh. They add great texture while keeping your meal balanced and filling. Quinoa is a great base for these bowls, but brown rice is another choice. Brown rice offers more fiber and a nutty taste. You can also mix grains. Try adding farro or barley for extra chew and nutrition. These grains give your meal variety and texture. If you like heat, add some chili sauce to the mix. Sriracha or red pepper flakes can spice things up. For a vegan option, swap honey with maple syrup or agave. This keeps the sweetness while making it plant-based. Feel free to experiment with flavors to make it your own! To store your Chicken & Broccoli Bowls, use airtight containers. This keeps the food fresh and tasty. You can store them in the fridge for up to three days. If you want to save them longer, freezing is a great option. When reheating, keep the chicken and broccoli moist. You can use a microwave or stovetop. In a microwave, cover the bowl with a damp paper towel. Heat in short bursts to keep it juicy. On the stovetop, add a splash of water and cook over low heat. Stir often to avoid burning. To freeze, let the bowls cool completely. Then, pack them in airtight bags or containers. Label them with a date. When ready to eat, thaw them overnight in the fridge. Freezing may change the texture slightly, but the flavor stays great. Just reheat gently to enjoy! To make Chicken & Broccoli Bowls healthier, consider these tips: - Use skinless chicken thighs instead of breasts for more flavor. - Swap quinoa for brown rice for extra fiber. - Replace honey with a sugar-free sweetener. - Add more veggies like bell peppers or snap peas for nutrients. These swaps boost health without losing taste. You can make small changes to fit your needs. Yes, you can use frozen broccoli. Here are some pros and cons: - Pros: Frozen broccoli is quick and easy. It lasts longer and is often cheaper. - Cons: It may have a softer texture after cooking. Fresh broccoli gives a crunchier bite. If using frozen broccoli, cut cooking time by a minute or two. Add it to the skillet when the chicken is nearly done. Chicken & Broccoli Bowls can last in the fridge for about 3 to 4 days. Here are signs of spoilage: - A sour smell. - Changes in color or texture. - Mold on the food. When in doubt, trust your senses. If it seems off, it’s best to throw it away. You can serve a variety of sides with Chicken & Broccoli Bowls: - Steamed rice or cauliflower rice for a low-carb option. - A fresh salad adds crunch and freshness. - Egg rolls or spring rolls can be fun additions. These sides make for a complete meal. Mix and match to find your favorite combinations! We covered everything you need to know about Chicken & Broccoli Bowls. I shared main ingredients like chicken, broccoli, and quinoa. You learned how to cook, assemble, and garnish the dish. I also provided tips for perfecting the chicken and variations to suit your taste. Remember, this meal is versatile and easy. You can adapt it to fit your diet. Enjoy creating your bowls, knowing you have all the tools to make it great!

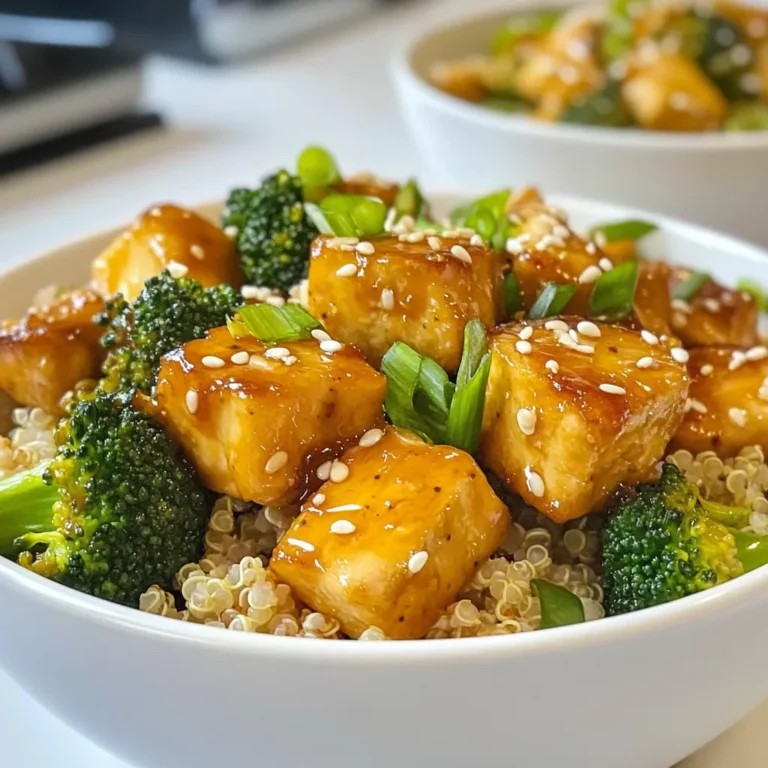
Chicken & Broccoli Bowls Flavorful and Nutritious Meal

One Pot Shawarma Chicken and Rice is full of flavor. Here are the ingredients you need: - 1.5 lbs boneless, skinless chicken thighs - 1.5 cups basmati rice - 1 onion, finely chopped - 3 garlic cloves, minced - 2 teaspoons ground cumin - 2 teaspoons ground coriander - 1 teaspoon paprika - 1/2 teaspoon turmeric - 1/2 teaspoon cinnamon - 1/2 teaspoon cayenne pepper (adjust for spice preference) - 4 cups chicken broth - 2 tablespoons olive oil - Salt and pepper to taste - Fresh parsley, chopped (for garnish) - Lemon wedges (for serving) These ingredients come together to create a dish that is both tasty and simple to make. The chicken thighs offer rich flavor and stay juicy, while the basmati rice absorbs all the spices. The spices, like cumin and coriander, add warmth and depth. When you chop the onion and garlic, make sure they are small. This helps them cook evenly and blend into the dish. The broth adds moisture and enhances the flavors. Use fresh parsley for a pop of color and taste. Lemon wedges serve as a bright finish to each bite. Make sure to measure everything before you start. This way, you’ll have a smooth cooking experience. Enjoy the process and let these ingredients shine! {{ingredient_image_1}} 1. Heat 2 tablespoons of olive oil in a large pot over medium heat. 2. Add 1 finely chopped onion and 3 minced garlic cloves. Sauté until soft, about 3-4 minutes. 3. Take 1.5 lbs of boneless, skinless chicken thighs. Season them with salt, pepper, and spices: - 2 teaspoons ground cumin - 2 teaspoons ground coriander - 1 teaspoon paprika - 1/2 teaspoon turmeric - 1/2 teaspoon cinnamon - 1/2 teaspoon cayenne pepper (adjust for spice) 4. Add the seasoned chicken to the pot. Sear for about 5 minutes on each side until browned. 5. Stir in 1.5 cups of basmati rice, mixing it well with the chicken and onions. 6. Pour in 4 cups of chicken broth. 1. Bring the mixture to a boil. Then, reduce the heat to low and cover the pot. 2. Let it simmer for 18-20 minutes, or until the rice is tender and has absorbed the liquid. 3. Remove the pot from heat. Let it sit covered for 5 minutes. 4. Fluff the rice with a fork. Taste and adjust seasoning if needed. Garnish with fresh chopped parsley. Serve with lemon wedges. Ensuring perfect chicken doneness To ensure your chicken is cooked just right, use a meat thermometer. The chicken should reach 165°F. Cut into a thigh to check if it’s no longer pink. This way, you’ll always have juicy, tender chicken. How to achieve fluffy rice Fluffy rice is all about the right water ratio. For basmati rice, use 1 part rice to 2 parts broth. After cooking, let the pot sit covered for 5 minutes. This step helps the rice absorb steam, making it light and fluffy. Spice adjustments for heat and flavor If you like heat, add more cayenne pepper. For a milder dish, skip it or reduce the amount. You can also experiment with spices like smoked paprika or sumac for a twist. Taste as you go to find your perfect blend. Suggested garnishes Fresh parsley adds a bright flavor. Lemon wedges bring zest and freshness. You can also add sliced cucumbers or tomatoes for a refreshing side. These garnishes not only enhance the dish but also make it look appealing. Pro Tips Marinate for Flavor: For even more flavorful chicken, consider marinating the chicken thighs in the spices and olive oil for at least 30 minutes, or overnight in the refrigerator. Rice Texture: Rinse the basmati rice under cold water until the water runs clear to remove excess starch. This will result in fluffier rice. Adjusting Spice Levels: If you prefer milder flavors, reduce the cayenne pepper or omit it altogether. You can always add hot sauce when serving for an extra kick! Garnish for Freshness: Adding a squeeze of fresh lemon juice just before serving brightens up the dish and enhances the spices beautifully. {{image_2}} You can easily change the protein in this dish. If you prefer chicken breast, use it instead of thighs. Chicken breast is leaner but still works well. You can also swap in tofu for a vegetarian option. Tofu absorbs flavors well. It makes a hearty meal, too. For rice, basmati is great, but there are other choices. Jasmine rice adds a nice aroma and flavor. Brown rice is another option. It has a nutty taste and is more filling. Just remember that cooking times may change. Adjust the liquid as needed for the type of rice you use. You can make this meal even more exciting with extra flavors. Try adding Mediterranean ingredients. Olives, sun-dried tomatoes, or artichoke hearts can enhance the dish. Fresh herbs like dill or mint also add a fresh twist. For a vegetarian take, use the same spices but skip the chicken. Add chickpeas for protein. They provide a wonderful texture and flavor. You can add more vegetables like bell peppers or zucchini. These add color and nutrition to your meal. After enjoying your One Pot Shawarma Chicken and Rice, store any leftovers to keep them fresh. First, let the dish cool to room temperature. Place the food in airtight containers. For best results, use glass containers with tight lids. These keep the flavors locked in and help avoid spills. You can refrigerate your leftovers for up to four days. If you want to keep them longer, freezing is a great option. Transfer the food to freezer-safe bags or containers. Remove as much air as possible to prevent freezer burn. You can freeze it for up to three months. To enjoy your Shawarma Chicken and Rice again, reheating it well is key. The best method is using the stove. Place the leftovers in a pot with a splash of chicken broth or water. Heat over low to medium heat, stirring occasionally. This keeps the rice moist and flavorful. If you prefer using a microwave, add a little broth or water, then cover the bowl. Heat in short bursts, stirring in between. This helps prevent the rice from drying out. Remember to adjust the heating time based on the amount you're reheating. Enjoy your delicious meal! Can I use frozen chicken? Yes, you can use frozen chicken thighs. Just ensure to cook them longer. Thawing overnight in the fridge is best. If you’re short on time, you can cook them straight from frozen. Just add a bit more broth and extend the cooking time. What sides pair well with this dish? This One Pot Shawarma Chicken and Rice goes well with many sides. You could serve it with a fresh salad. A simple cucumber and tomato salad adds a nice crunch. Flatbreads or pita are also great for scooping. You might even enjoy it with yogurt or tzatziki sauce. How do I adjust spices for different tastes? To adjust spices, taste as you go. If you love heat, add more cayenne pepper. For a milder flavor, reduce the spices. You can also try adding herbs like oregano or thyme for a different taste. Experiment with what you like best. Can this recipe be made in advance? Yes, this dish can be made in advance. Prepare it and store it in the fridge. It keeps well for about three days. You can also freeze it for up to three months. Just reheat it on the stove or in the microwave when you’re ready to eat. This post showed how to make a tasty chicken and rice dish. You learned about the key ingredients, step-by-step cooking, and helpful tips. I shared how to swap ingredients and enhance flavors. Storing leftovers is easy with proper techniques. My final advice: experiment with spices to find what you love. Enjoy cooking and feel free to adapt this dish to your taste!

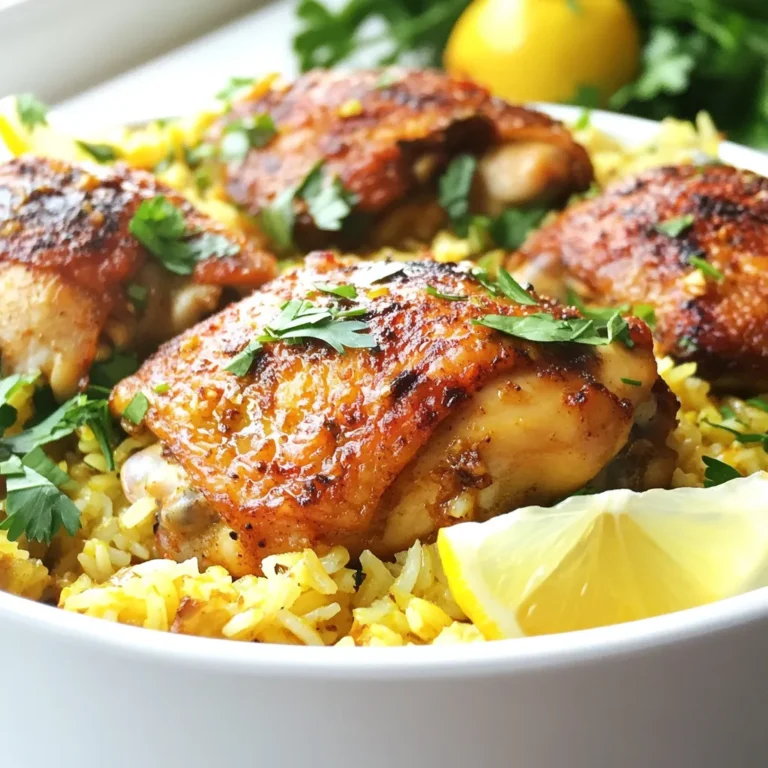
One Pot Shawarma Chicken and Rice Flavorful Meal

- Chuck roast (3 to 4 pounds) - Carrots, cut into chunks (4 large) - Potatoes, cubed (4 medium) - Onion, quartered (1 large) - Garlic, minced (4 cloves) - Beef broth (2 cups) - Worcestershire sauce (2 tablespoons) - Soy sauce (1 tablespoon) - Dried thyme (2 teaspoons) - Dried rosemary (1 teaspoon) - Salt and pepper to taste - Cornstarch (2 tablespoons) - Water (2 tablespoons) Gather these ingredients for a great pot roast. The chuck roast gives a rich flavor. Use fresh veggies for great taste. The broth adds depth, while Worcestershire and soy sauce enhance it. Thyme and rosemary bring a lovely aroma. If you want thicker gravy, keep cornstarch and water handy. This mix will help create a smooth sauce. Remember, using quality ingredients makes all the difference. Enjoy the process of cooking and the delicious meal that follows! {{ingredient_image_1}} - First, season the chuck roast with salt and pepper on all sides. This step adds flavor. - Next, heat a large skillet over medium-high heat. Sear the roast for about 3-4 minutes on each side. This browning gives it a nice crust. - Once browned, transfer the roast into the slow cooker. - In the same skillet, add the chopped onions and minced garlic. Cook these for about 2 minutes until they smell great. - Now, pour in the beef broth, Worcestershire sauce, and soy sauce. Scrape the bottom of the skillet to deglaze it. This step lifts the tasty bits from the pan. - Pour the aromatic mixture over the roast in the slow cooker. - Add the chopped carrots and cubed potatoes. Sprinkle in the dried thyme and rosemary. - Cover the slow cooker and set it to low for 8 hours or high for 4 hours. The meat should be fork-tender when it's done. - If you want a thicker gravy, mix cornstarch and water in a small bowl to create a slurry. - About 30 minutes before serving, add the slurry to the slow cooker and stir gently. This will help the gravy thicken nicely. - Once cooked, carefully remove the roast and vegetables from the slow cooker. Let them rest for about 10 minutes. - Slice the roast against the grain. Arrange it on a large serving platter with the carrots and potatoes. - Drizzle some of the gravy over the top and enjoy! For a pretty touch, sprinkle fresh parsley on the dish. To make a great pot roast, use a low and slow cooking method. This means cooking the meat at a low heat for a long time. It helps break down the tough fibers, making the roast tender. I recommend using a chuck roast. It has lots of flavor and is perfect for slow cooking. Adding extra herbs and spices can boost the taste. Try using bay leaves or a pinch of paprika for warmth. If you like it spicy, add some crushed red pepper. Adjust the salt and pepper to suit your taste. Always taste the gravy before serving to get it just right. When choosing a slow cooker, look for one with a large capacity. A 6-quart model works well for a pot roast. I also like to have a good knife for slicing the meat. A sturdy cutting board helps when prepping the veggies. These tools make the cooking process smooth and enjoyable. Pro Tips Choose the Right Cut: For the best flavor and tenderness, use a well-marbled cut like chuck roast. The fat will render during cooking, keeping the meat moist. Don't Skip the Sear: Searing the roast before adding it to the slow cooker enhances the flavor significantly by creating a rich brown crust. Add Vegetables Wisely: Layer the vegetables underneath the roast to ensure they absorb all the delicious juices and flavors from the meat. Rest Before Serving: Allow the roast to rest for at least 10 minutes after cooking. This helps the juices redistribute, resulting in a juicier, more flavorful roast. {{image_2}} You can change the root vegetables in this recipe. Instead of carrots, try parsnips or turnips. They add a nice twist to the flavor. You might also want to add seasonal veggies. In summer, zucchini and bell peppers work well. In fall, consider adding butternut squash or sweet potatoes. Each option can bring new tastes and textures to your pot roast. To boost the flavor, try making a red wine reduction sauce. This adds a rich taste that pairs well with the roast. You can also switch up the broth. Using chicken broth or a vegetable broth can change the flavor completely. Each broth brings its unique notes to the dish. If you need a gluten-free meal, use gluten-free sauces. There are great options for Worcestershire sauce and soy sauce. Check the labels to be sure. For those watching sodium, low-sodium broth works well. You can also skip the soy sauce or use a lower-sodium alternative. These simple swaps let everyone enjoy the dish without worry. To keep your pot roast fresh, cool it first. Then, place it in airtight containers. Store the roast and vegetables separately for best results. Use glass or plastic containers with tight lids. Label them with the date to track freshness. To freeze pot roast, slice it first. This helps it freeze more evenly. Place the slices in freezer bags. Remove as much air as you can. For gravy, use a separate container. Thaw the roast overnight in the fridge before reheating. To keep the roast moist, reheat it slowly. You can use the oven at 300°F. Add a splash of broth to the dish. Cover it with foil to trap moisture. For microwave reheating, use a microwave-safe dish. Place a damp paper towel over it to keep it juicy. Always check the temperature before serving. Cooking times vary based on the heat setting. On low, the pot roast takes about 8 hours. If you choose high, it cooks in about 4 hours. Both methods yield tender meat, just with different times. Yes, you can use frozen meat. However, it’s best to thaw it first for even cooking. If you cook from frozen, add an extra hour to your cooking time. Always check the meat's internal temperature for safety. Pot roast pairs well with many sides. Here are some great options: - Mashed potatoes - Steamed green beans - Roasted Brussels sprouts - Fresh salad These sides add color and balance to your meal. Check for tenderness. The meat should easily pull apart with a fork. Use a meat thermometer; it should read at least 145°F (63°C). If it’s not tender yet, give it more time to cook. In this article, we explored the key ingredients for a delicious slow cooker pot roast, from the meat to the veggies and seasonings. I shared step-by-step instructions to guide you through cooking. Tips and tricks help you achieve perfect tenderness and flavor. Plus, I discussed variations to suit your tastes and dietary needs. Finally, I covered storage info to keep your leftovers fresh. Enjoy creating your pot roast masterpiece! You’ll love the comforting taste it brings to your table.

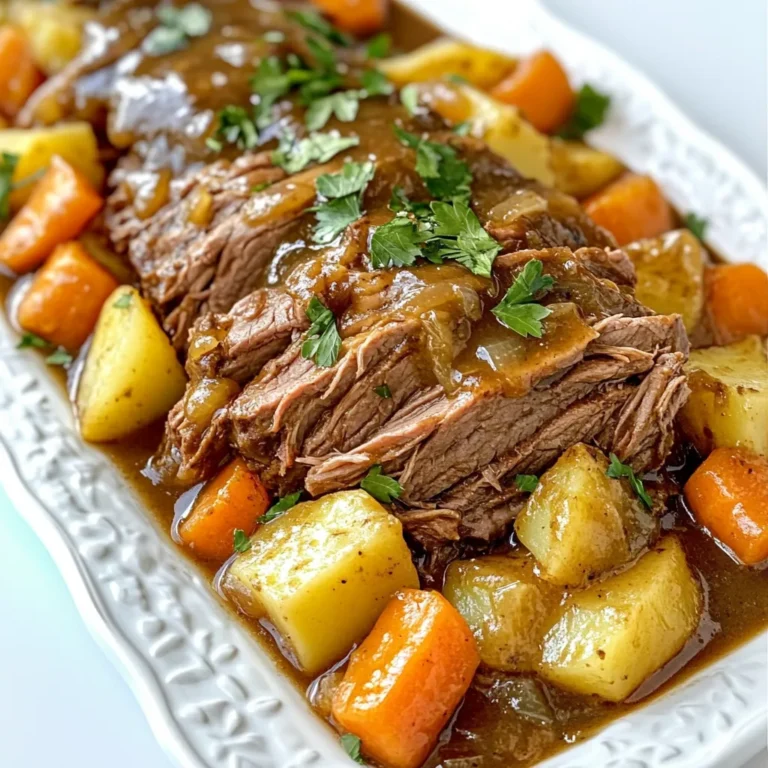
Savory Slow Cooker Pot Roast with Gravy Delight

To make a great Steak Bomb Sandwich, you will need: - 1 lb ribeye steak, thinly sliced - 1 large green bell pepper, sliced - 1 large onion, sliced - 2 tablespoons olive oil - 1 teaspoon garlic powder - 1 teaspoon black pepper - Salt to taste - 4 hoagie rolls - 1 cup provolone cheese, shredded - 1 tablespoon Worcestershire sauce - Fresh parsley, chopped (for garnish) These ingredients create a tasty and satisfying sandwich. The ribeye steak brings rich flavor, while the peppers and onions add sweetness and crunch. To customize your sandwich, consider adding: - Sliced mushrooms - Jalapeños for heat - Spinach or arugula for freshness - Different cheese types like mozzarella or cheddar These options let you make the sandwich your own. Mix and match to find your favorite combination. If you don’t have ribeye steak, try: - Sirloin or flank steak - Grilled chicken for a lighter option - Tofu for a vegetarian choice You can also swap the hoagie rolls for: - Sub rolls or baguettes - Lettuce wraps for a low-carb option These substitutions keep the flavors fun while catering to your needs. Don't hesitate to get creative! {{ingredient_image_1}} Start by gathering your ingredients. Thinly slice 1 lb of ribeye steak. Next, slice 1 large green bell pepper and 1 large onion. Heat 2 tablespoons of olive oil in a large skillet over medium-high heat. This oil helps cook the veggies and adds flavor. Add the sliced onions and green bell peppers to the hot skillet. Sauté for about 5-7 minutes. You want them tender and slightly caramelized. After they are done, take them out and set them aside. In the same skillet, add the thinly sliced ribeye steak. Sprinkle it with 1 teaspoon of garlic powder, 1 teaspoon of black pepper, and a pinch of salt. Cook for 3-5 minutes. Make sure to turn the steak occasionally until it is browned. Once browned, stir in 1 tablespoon of Worcestershire sauce. Mix everything well. Then, return the sautéed onions and bell peppers to the skillet. Mix everything together for another minute until heated through. Preheat your oven to 350°F (175°C). Slice the hoagie rolls open, but not all the way through. Lay them on a baking sheet. Divide the steak mixture evenly among the rolls. Top each roll with 1 cup of shredded provolone cheese. Bake in the oven for about 5-7 minutes. You want the cheese to melt and bubble. After baking, remove the sandwiches from the oven. Garnish with fresh chopped parsley. Serve immediately for a tasty treat! To make the best steak, start with good meat. I love ribeye because it has great flavor. Slice it thin for quick cooking. Heat your pan until it’s hot but not smoking. This helps get a nice sear on the steak. Cook it for just a few minutes. You want it brown but not dry. Let it rest for a minute before serving. This keeps it juicy. When cooking your veggies, keep an eye on the time. Sauté them for about 5-7 minutes. You want them tender but still crisp. If they start to brown too fast, lower the heat. This helps them cook evenly. Make sure to stir often. This way, all sides get cooked and coated in flavor. Presentation makes your steak bomb sandwich more fun. Use parchment paper or wooden boards to serve. This gives a rustic look. Add a side of crispy fries or a salad for balance. A sprinkle of fresh parsley on top makes it pop. It’s all about making it look as good as it tastes! Pro Tips Slice Against the Grain: For tender steak, always slice the ribeye against the grain. This shortens the muscle fibers and makes each bite easier to chew. Cheese Melting Trick: To achieve a perfectly melted provolone, cover the sandwiches with aluminum foil while baking for the first few minutes, then remove it to allow the cheese to brown. Customize Your Veggies: Feel free to add other vegetables like mushrooms or jalapeños for extra flavor and texture. Just sauté them along with the onions and peppers. Serve with Dipping Sauce: Consider serving your Steak Bomb Sandwiches with a side of marinara or aioli for dipping. It adds an extra layer of flavor and a fun twist! {{image_2}} Cheese can change your steak bomb sandwich. Provolone is classic, but try others too. - Mozzarella: This cheese melts well and adds a mild taste. - Cheddar: Sharp cheddar gives a nice kick of flavor. - Pepper Jack: This cheese adds spice and creaminess. Mixing cheeses can also create new flavors. Choose what you love. You can add many veggies to your steak bomb sandwich. Here are some tasty options: - Mushrooms: Sauté them for an earthy flavor. - Spinach: Add fresh spinach for a bit of crunch and color. - Tomatoes: Use sliced tomatoes for freshness. Feel free to mix and match. The goal is to create your perfect sandwich. If you like heat, spice up your steak bomb sandwich. Here are some ideas: - Jalapeños: Add sliced jalapeños for a nice kick. - Hot Sauce: Drizzle your favorite hot sauce on top. - Spicy Aioli: Mix mayo with sriracha for a creamy, spicy sauce. Experimenting with heat can make your sandwich stand out. Enjoy creating your own spicy twist! To store leftover steak bomb sandwiches, wrap each one tightly in plastic wrap. This keeps the bread fresh and the filling tasty. You can also use a sealed container. Make sure to store them in the fridge. They will last up to three days. For best results, reheat the sandwiches in the oven. Preheat your oven to 350°F (175°C). Place the sandwich on a baking sheet and cover it with foil. Heat for about 10-15 minutes, or until warmed through. You can also microwave them, but the bread may become soft. If you do use the microwave, heat for 30 seconds, then check if it's warm enough. If you want to freeze your steak bomb sandwiches, wrap each one well in foil. Then place them in a freezer bag to avoid freezer burn. They can last up to three months in the freezer. When ready to eat, thaw them in the fridge overnight. Reheat them in the oven as mentioned above for the best taste. A Steak Bomb Sandwich is a tasty meal that features thin slices of ribeye steak. You cook the steak with peppers and onions, then load it into a hoagie roll. Topping it with provolone cheese makes it even better! This sandwich is hearty and full of flavor. It's a popular choice for lunch or a quick dinner. Yes, you can use other meats! You might try chicken, pork, or even turkey. Just remember to slice the meat thinly for the best texture. Each type of meat will give the sandwich a different taste. For example, chicken adds a light flavor, while pork brings a sweeter note. Feel free to experiment! The best Steak Bomb Sandwich often comes from local delis or sandwich shops. Check out places that focus on fresh ingredients. You can also find great versions at food trucks that serve gourmet sandwiches. If you're feeling adventurous, try making your own at home with fresh ingredients! In this post, we explored the recipe for a delicious Steak Bomb Sandwich. We covered essential ingredients, cooking methods, and helpful tips to get it just right. You learned about adding your favorite toppings and ways to customize your sandwich. Remember, choosing the right cheese can elevate your meal. Follow the storage tips for leftovers to enjoy later. Keep experimenting with flavors and making it your own! Making a Steak Bomb Sandwich can be fun and tasty if you follow these steps. Enjoy the cooking!

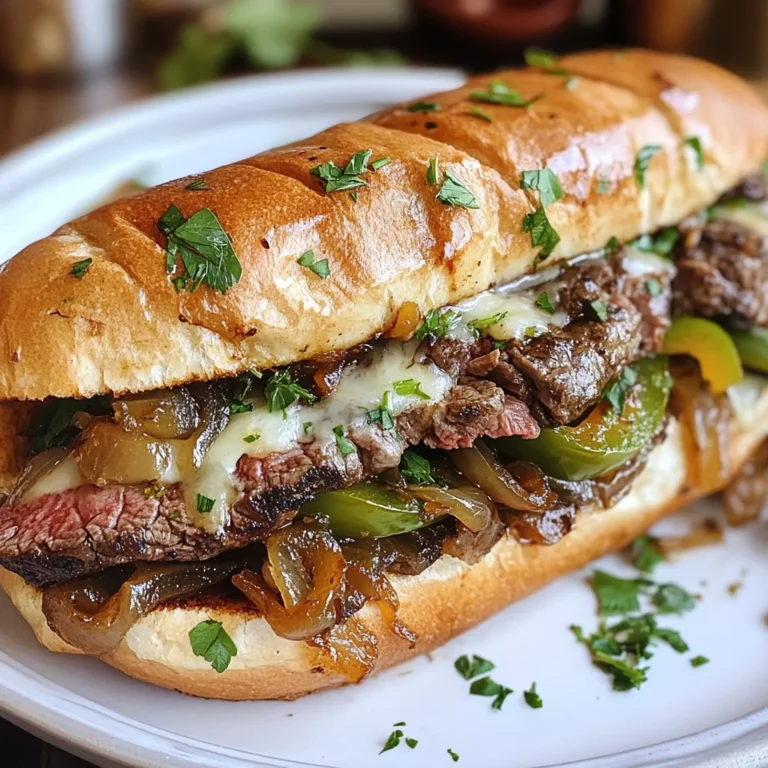
Savory Steak Bomb Sandwich Easy Recipe and Tips

To make Santa Fe Chicken Skillet, gather these items: - 1 lb boneless, skinless chicken breasts, diced - 1 tablespoon olive oil - 1 onion, chopped - 2 cloves garlic, minced - 1 bell pepper (any color), diced - 1 can (15 oz) black beans, rinsed and drained - 1 cup corn kernels (fresh, frozen, or canned) - 1 can (14.5 oz) diced tomatoes with green chilies - 1 teaspoon ground cumin - 1 teaspoon smoked paprika - ½ teaspoon chili powder - Salt and pepper to taste - 1 cup shredded cheddar cheese - Fresh cilantro, chopped (for garnish) - Lime wedges (for serving) You can make your skillet even better with these extras: - Avocado slices for creaminess - Jalapeños for a spicy kick - Sour cream for added richness - Tortilla chips for crunch If you don’t have an ingredient, don’t worry! Try these swaps: - Chicken: Use turkey or tofu for a different protein. - Olive oil: Swap for canola or avocado oil. - Black beans: Kidney beans or pinto beans work too. - Corn: Use peas if corn is not available. - Cheese: Try Monterey Jack or pepper jack for more flavor. These changes keep the dish tasty and fun! {{ingredient_image_1}} First, gather all your ingredients. You will need: - 1 lb boneless, skinless chicken breasts, diced - 1 tablespoon olive oil - 1 onion, chopped - 2 cloves garlic, minced - 1 bell pepper (any color), diced - 1 can (15 oz) black beans, rinsed and drained - 1 cup corn kernels (fresh, frozen, or canned) - 1 can (14.5 oz) diced tomatoes with green chilies - 1 teaspoon ground cumin - 1 teaspoon smoked paprika - ½ teaspoon chili powder - Salt and pepper to taste - 1 cup shredded cheddar cheese - Fresh cilantro, chopped (for garnish) - Lime wedges (for serving) Make sure you have a large skillet ready for cooking. Heat the olive oil in the skillet over medium-high heat. Add the diced chicken. Season it with salt and pepper. Cook for about 5-7 minutes. You want the chicken to be golden brown and cooked through. Once done, remove it from the skillet and set it aside. In the same skillet, add the chopped onion and bell pepper. Sauté these for about 3-4 minutes. You want them to soften. After that, add the minced garlic and cook for 1 more minute until it smells good. Now, stir in the black beans, corn, and diced tomatoes with green chilies. Add the cumin, smoked paprika, and chili powder. Mix everything well and let it simmer for 5 minutes. This is where the flavors come together. Next, return the cooked chicken to the skillet. Stir to combine everything. Let it cook for another 2-3 minutes to heat through. Now, reduce the heat to low. Sprinkle the shredded cheddar cheese on top. Cover the skillet and let it sit for about 2-3 minutes. This allows the cheese to melt perfectly. Finally, remove the skillet from heat. Garnish your dish with chopped cilantro and serve with lime wedges. Enjoy your tasty and simple Santa Fe Chicken Skillet! To make a great Santa Fe Chicken Skillet, start with fresh chicken. Use boneless, skinless chicken breasts. Dice them evenly for even cooking. Sear the chicken until golden brown. This gives it a nice flavor. Don't rush this step; it adds depth to your dish. Use a mix of spices. Ground cumin and smoked paprika are key. They bring warmth and a bit of smokiness. Adjust the chili powder for your taste. If you like more heat, add extra. Always taste as you go! Let the mixture simmer long enough. This step helps flavors blend well. When you add the cheese, cover the skillet. This allows it to melt perfectly. Fresh cilantro adds brightness. Always add it just before serving. One common mistake is overcooking the chicken. This can lead to dry meat. Cook it until golden brown and just cooked through. Another mistake is skipping the seasoning. Salt and pepper are essential. Taste your dish at each step. It ensures a balanced flavor. Do not rush the simmering phase. It’s important for flavor development. If you skip it, your skillet may taste bland. Lastly, don’t forget the garnishes! Cilantro and lime add freshness. They brighten up the dish and make it pop. Presentation matters, even for a skillet meal. Use a nice, large skillet. Serve it straight from the pan for a rustic look. Garnish with chopped cilantro on top. It adds color and freshness. Place lime wedges on the side. This gives a nice touch and lets guests customize. Consider serving it with a colorful side salad. This adds vibrancy to your meal. You can also use a bright plate to showcase the dish. Remember, we eat with our eyes first! Pro Tips Marinate the Chicken: For extra flavor, marinate the diced chicken in lime juice, cumin, and paprika for 30 minutes before cooking. Customizable Spice Level: Adjust the chili powder to your taste; add more for a spicier dish or reduce for a milder flavor. Use Fresh Ingredients: Whenever possible, use fresh corn and bell peppers to enhance the overall taste and texture of the dish. One-Pan Cooking: To save on cleanup, serve the dish directly from the skillet you cooked it in, garnished with cilantro and lime wedges. {{image_2}} You can make a tasty vegetarian Santa Fe skillet easily. Swap the chicken for diced tofu or tempeh. Both options soak up flavors well. You can also add more veggies like zucchini, mushrooms, or spinach. Just sauté them with the onion and bell pepper. This gives you a colorful and healthy dish. Want to heat things up? Add jalapeños or diced green chilies to the skillet. These spicy ingredients will kick up the flavor. You can also sprinkle some cayenne pepper or hot sauce while cooking. Adjust the spice to your taste. A little heat can change the whole dish! Cheddar cheese is great, but you can try other cheeses too. Crumbled feta adds a tangy taste. Monterey Jack offers a creamy melt. For a unique flavor, use pepper jack cheese. It combines spice and creaminess. Experiment with different cheeses to find your favorite blend. To keep your Santa Fe Chicken Skillet fresh, let it cool first. Place leftovers in an airtight container. Make sure to store them in the fridge. They can last up to three days. Label the container with the date. This helps you keep track of freshness. If you want to save it for later, freezing is a great option. Divide the skillet into smaller portions. Use freezer-safe containers or bags. Remove as much air as you can to prevent freezer burn. It can stay frozen for up to three months. When you're ready to eat, just thaw it in the fridge overnight. Reheating is simple. You can use the microwave or stovetop. If using a microwave, heat in short bursts. Stir it well in between to warm evenly. For the stovetop, add a splash of water to prevent sticking. Heat on low until warmed through. Enjoy your meal just like the first time! I love to serve Santa Fe Chicken Skillet with rice or tortillas. You can also add a side salad for a fresh touch. Avocado slices or guacamole make great toppings too. The lime wedges add a nice zing. This dish pairs well with black beans and corn on the side as well. Yes, you can make this recipe in advance. Just cook the chicken and veggies as directed. Let it cool, then store it in the fridge for up to three days. When ready to eat, reheat it on the stove. Add cheese at the end and let it melt. This helps keep the flavors fresh and tasty. Santa Fe Chicken Skillet is quite healthy. It uses lean chicken, beans, and lots of veggies. Black beans boost fiber and protein. Corn adds vitamins and sweetness. You can control the salt and fat, too. This meal is colorful and packed with nutrients. It makes a balanced meal that is good for you. This blog covered all you need for a Santa Fe Chicken Skillet. We explored key ingredients, preparation steps, and cooking tips. You learned how to avoid common mistakes and make it look great. I gave ideas for variations, like vegetarian options and different cheeses. Finally, we discussed how to store and reheat leftovers. With this knowledge, you can cook a tasty meal that suits your taste and lifestyle. Enjoy your cooking and make it your own!

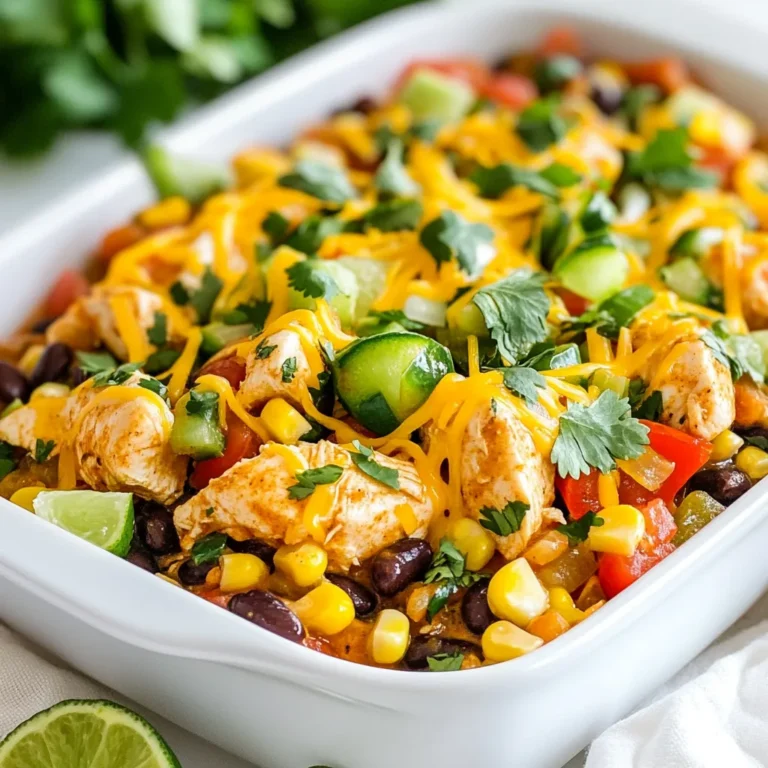
Santa Fe Chicken Skillet Tasty and Simple Meal

PREV 1 … 49 50 51 … 57 NEXT
meal twig

explore

DessertsDinnerAppetizersDrinks

Our Policies

  • Cookie Policy
  • Copyright Policy
  • Disclaimer
  • GDPR Policy
  • Terms Of Use
Back to Top
  • About
  • Contact Us
  • Privacy Policy
© 2025 meal twig