FREE DINNER EBOOK! Get your copy!
  • Cookie Policy
  • GDPR Policy
  • Disclaimer
  • Terms Of Use
  • Visit my other site: Fun Cookie Recipes
meal twig
  • Home
  • Dinner
  • Desserts
  • Drinks
  • Appetizers
  • Contact
  • About
  • Privacy Policy
  • Home
  • Dinner
  • Desserts
  • Drinks
  • Appetizers
  • Contact
  • About
  • Privacy Policy
  • Cookie Policy
  • GDPR Policy
  • Disclaimer
  • Terms Of Use
Visit my other site: Fun Cookie Recipes

HOME / CATEGORIES /

Latest

- 1 pound ground turkey - 12 ounces whole wheat pasta (penne or fusilli) - 1 medium onion, finely chopped - 3 cloves garlic, minced - 1 bell pepper (red or yellow), diced - 1 can (14.5 ounces) diced tomatoes - 1 cup spinach leaves, roughly chopped - Fresh basil leaves, for garnish - Grated Parmesan cheese, for serving - ½ teaspoon red pepper flakes (adjust to taste) - 1 teaspoon dried oregano - 1 teaspoon paprika - 2 tablespoons olive oil - Salt and pepper to taste {{ingredient_image_1}} Start by boiling a large pot of water. Add a good amount of salt to this water. This step helps flavor the pasta. Once the water bubbles, add 12 ounces of whole wheat pasta. Cook it according to the package instructions until it is al dente. This usually takes about 8 to 10 minutes. After cooking, drain the pasta in a colander. Be sure to save about 1 cup of the pasta water for later. In a large skillet, heat 2 tablespoons of olive oil over medium heat. Once the oil is hot, add 1 pound of ground turkey. Cook the turkey for about 5 to 7 minutes. Break it apart with a spatula as it cooks. You want it to brown nicely. While cooking, season the turkey with salt and pepper. This adds flavor right from the start. Next, add the finely chopped onion and diced bell pepper to the skillet. Sauté these for about 4 to 5 minutes. You want them to soften but not lose their color. Then, stir in 3 cloves of minced garlic. Cook for another minute until it smells great. Pour in one can of diced tomatoes, including the juices. Add 1 teaspoon of dried oregano, 1 teaspoon of paprika, and ½ teaspoon of red pepper flakes. Mix it all well and let it simmer for about 5 minutes. This helps the flavors blend together nicely. - Ensuring perfect al dente pasta: Start by boiling water in a large pot. Add a good amount of salt. Cook the pasta just until it’s firm to the bite. Check the package for cooking time. Remember, you want it al dente, not mushy. - Browning ground turkey effectively: Use medium heat to cook the turkey. Break it apart with a spatula as it cooks. Let it sit for a moment to get a nice brown color. This step adds great flavor to your dish. - Adjusting spice levels: You can tweak the heat by using more or less red pepper flakes. If you like it hot, add a bit more. If you prefer milder flavors, cut back on the spice. - Adding herbs for freshness: Fresh basil is a star in this dish. Chop it up and stir it in right before serving. It brightens the flavors and adds a lovely aroma. - Pairing with sides or salad: This pasta goes great with a simple green salad. A side of garlic bread also works well. These sides balance the meal and add variety. - Presentation ideas with garnishes: To make your dish look special, sprinkle grated Parmesan cheese on top. Add fresh basil leaves for color. A colorful plate makes the meal more inviting. Pro Tips Use Lean Turkey: Opt for lean ground turkey to keep the dish healthy and reduce excess fat while still enjoying great flavor. Add More Veggies: Feel free to toss in additional vegetables like zucchini or mushrooms for extra nutrition and texture. Fresh Herbs Boost Flavor: Incorporate fresh herbs like parsley or thyme for an aromatic enhancement that elevates the dish. Store Leftovers Properly: Keep any leftovers in an airtight container in the fridge for up to 3 days for a quick and convenient meal. {{image_2}} You can easily change the ground turkey in the recipe. Try using ground chicken, beef, or even pork. Each meat brings a different flavor to the dish. If you prefer something leaner, turkey is a great choice. For those who need gluten-free options, swap the whole wheat pasta for brown rice or gluten-free pasta. Both will work well and keep the taste delicious. Adding different veggies can make this dish even better. Try mushrooms, zucchini, or carrots. They bring extra color and nutrition to your meal. You can also add canned beans or lentils for more protein. This makes the dish heartier and more filling. If you're looking to lower carbs, use spiralized vegetables like zucchini or squash instead of pasta. This makes a light and fresh dish. For vegan or vegetarian options, skip the turkey and use a plant-based ground meat. You can also add extra beans for protein. This way, you keep the dish tasty and nutritious. After cooking your ground turkey pasta, let it cool down. Store leftovers in an airtight container. This keeps the flavors fresh and the dish safe to eat. In the fridge, it lasts about 3 to 4 days. Always check for signs of spoilage before eating. To freeze your pasta, let it cool completely. Place it in freezer-safe bags or containers. Make sure to remove as much air as possible. This helps prevent freezer burn. It can last in the freezer for up to 3 months. When you're ready to eat it, thaw it overnight in the fridge. Reheat it gently on the stove or in the microwave. Add a splash of water to keep it moist. For easy meal prep, you can cook a big batch of this pasta. Portion it into single servings. This makes it easy to grab for lunch or dinner. You can also prep the turkey and veggies in advance. Store them in separate containers in the fridge. When you're ready to cook, just combine everything and heat it up. You can use ground chicken, ground beef, or ground pork. Each option gives a different taste and texture. Ground chicken is lean like turkey. Ground beef adds more flavor. Ground pork brings a bit of sweetness. If you want to keep it meat-free, try lentils or mushrooms. Both options add great texture and flavor. Yes, you can prep this dish ahead. Cook the pasta and sauce separately. Store them in airtight containers. Keep the pasta and sauce in the fridge for up to three days. When ready to eat, just heat them together on the stove. Add a splash of pasta water to keep it moist. This saves time on busy days! To spice things up, add more red pepper flakes. You can also mix in some diced jalapeños or a splash of hot sauce. If you like it really hot, try adding fresh chili peppers. Just remember to start with a little, then taste it. You can always add more heat! This blog post covered a simple yet delicious recipe featuring ground turkey, whole wheat pasta, and fresh veggies. I shared step-by-step instructions for cooking, along with tips to enhance flavor and variations for different diets. Remember, making this dish your own is easy. Use your favorite ingredients and adjust seasonings to match your taste. Whether you meal prep or enjoy it fresh, this recipe is perfect for any occasion. Get ready to enjoy a healthy, tasty meal you’ve made yourself!

Gordon Ramsay Ground Turkey Pasta Tasty Dinner Idea

For the Peanut Chicken Skillet, you need the following main items: - 1 lb (450g) chicken breast, cut into bite-sized pieces - 2 tablespoons peanut oil - 1 medium onion, diced - 3 cloves garlic, minced - 1-inch piece of ginger, grated - 1 red bell pepper, sliced - 1 cup broccoli florets - ½ cup unsweetened peanut butter You’ll also need some pantry staples to create the sauce: - 2 tablespoons soy sauce - 1 tablespoon honey - 1 tablespoon rice vinegar - 1 teaspoon sriracha (adjust to taste) - ¼ cup chicken broth or water To make your dish pop, add these garnishes: - 4 green onions, sliced - Crushed peanuts By gathering these ingredients, you set the stage for a tasty meal. Each item plays a key role in building flavor and texture. Whether you’re a novice or a pro, this recipe can shine with fresh ingredients and a few pantry staples. {{ingredient_image_1}} First, gather your ingredients. You need chicken, peanut oil, onion, garlic, ginger, bell pepper, broccoli, peanut butter, soy sauce, honey, rice vinegar, sriracha, chicken broth, green onions, and crushed peanuts. 1. Heat the Oil: In a large skillet, heat 2 tablespoons of peanut oil over medium heat. 2. Cook the Chicken: Add 1 pound of chicken breast pieces. Sauté for about 5-7 minutes. Cook until the chicken is browned and no longer pink. Remove the chicken and set it aside. 3. Sauté Vegetables: In the same skillet, add 1 diced onion, 3 minced garlic cloves, and 1-inch grated ginger. Cook for 2-3 minutes until the onion turns clear. 4. Add Peppers and Broccoli: Toss in 1 sliced red bell pepper and 1 cup of broccoli florets. Cook for about 5 minutes. Stir often until the veggies stay crisp but tender. - Heating oil: 1 minute or until hot. - Cooking chicken: 5-7 minutes. - Sautéing onion, garlic, and ginger: 2-3 minutes. - Cooking peppers and broccoli: 5 minutes. - Preparing the sauce: 2 minutes. - Combining all ingredients: 2-3 minutes. Total cooking time is about 25 minutes, making this dish quick and enjoyable. - Cut chicken into small, uniform pieces. This helps them cook evenly. - Do not overcrowd the skillet. Cook in batches if needed. - Make sure the skillet is hot before adding the chicken. This gives a nice sear. - Let the chicken rest after cooking. This keeps it juicy and tender. - Always check that the chicken is cooked through, with no pink inside. To make your peanut chicken skillet shine, focus on fresh ingredients. Use ripe veggies like red bell peppers and crunchy broccoli. They add color and taste. A great tip is to sauté your garlic and ginger until fragrant before adding anything else. This step brings out their flavor. Don't forget the peanut butter! Choose a creamy, unsweetened type for the best sauce. One common mistake is overcooking the chicken. Cook just until it's no longer pink. This keeps it juicy. Also, avoid adding too much liquid to your sauce. If it’s too thin, it won’t coat the dish well. Lastly, don’t skip the garnishes! Sliced green onions and crushed peanuts give your dish a nice crunch. Adjusting the spice level is easy. Start with a small amount of sriracha, then taste. If you want more heat, add a bit more. You can also mix in red pepper flakes for a different flavor. If you prefer milder dishes, skip the sriracha. The sweet honey balances flavors nicely, making it a perfect dish for all tastes. Pro Tips Perfectly Cooked Chicken: Ensure that the chicken is cut into uniform pieces for even cooking. Use a meat thermometer to check for a safe internal temperature of 165°F (74°C). Vegetable Crunch: To maintain the vibrant color and crunch of the vegetables, avoid overcooking them. Aim for a tender but crisp texture. Customizing the Spice Level: Adjust the amount of sriracha according to your heat preference. Start with less and add more as needed to avoid overpowering the dish. Garnishing for Flavor: Don't skip the garnishes! Sliced green onions and crushed peanuts not only add flavor but also enhance the visual appeal of the dish. {{image_2}} You can change the chicken for shrimp or tofu. Both add unique tastes. If you want a kick, use spicy peanut butter. You can also swap the veggies. Try snap peas or carrots. Each change brings a new twist. To make this dish vegetarian, replace chicken with firm tofu. Just cube the tofu and sauté it as you would the chicken. For a vegan option, use maple syrup instead of honey. This keeps the dish sweet and tasty without animal products. Peanut butter is great, but you can use almond or cashew butter too. Each nut gives a different flavor. For sauces, try tahini or sunbutter for a nut-free version. Mix up the sauces to keep the meal exciting every time you cook it. To keep your peanut chicken skillet fresh, let it cool first. Transfer the leftovers to an airtight container. It will stay good in the fridge for up to three days. Make sure to store the rice or quinoa separately to avoid sogginess. When you're ready to eat, heat the leftovers in a skillet over medium heat. Stir occasionally to ensure even warming. If it's too thick, add a splash of chicken broth or water. This helps bring back the dish’s creamy texture. You can freeze the peanut chicken skillet for later. Place it in a freezer-safe container. It lasts about two months in the freezer. To reheat, thaw it overnight in the fridge, then follow the reheating tips above for best results. Yes, you can use frozen chicken. However, it’s best to thaw it first. When thawed, the chicken cooks better and tastes great. To thaw chicken, place it in the fridge overnight or use the microwave's defrost setting. This method helps keep your chicken juicy and tender. You can serve this dish with cooked jasmine rice or quinoa. Both options soak up the peanut sauce well. For added crunch, consider a side of fresh salad or steamed veggies. You can also pair it with warm naan or whole wheat wraps for a fun twist. To make the recipe low-carb, skip the rice or quinoa. Instead, serve it over a bed of zucchini noodles or cauliflower rice. These options are low in carbs but still yummy. You can also increase the amount of veggies like broccoli and bell peppers for added fiber and nutrients. This blog post explored the Peanut Chicken Skillet, detailing its key ingredients and cooking steps. We discussed tips for perfecting flavor and avoiding common mistakes. You learned how to customize this dish and substitute ingredients for different tastes. I also shared storage tips to keep leftovers fresh. In my final thoughts, this recipe is versatile and easy to make. Enjoy trying new flavors and sharing them with others!

Peanut Chicken Skillet Quick and Simple Meal Recipe

To make this vegan mac and cheese, you need a few key items: - 8 oz elbow pasta (choose gluten-free if you prefer) - 1 cup raw cashews, soaked in water for 4 hours or overnight - 1 cup unsweetened almond milk (or any plant-based milk) - 1/4 cup nutritional yeast - 2 tablespoons lemon juice - 1 tablespoon olive oil - 1 teaspoon garlic powder - 1/2 teaspoon onion powder - 1/2 teaspoon smoked paprika - Salt and pepper to taste These ingredients create a creamy, cheesy flavor without using dairy. The cashews add richness, while nutritional yeast gives a cheesy taste. If you want to switch some ingredients, here are some alternatives: - Use other plant-based milks like soy or oat milk. - Swap raw cashews for soaked almonds or sunflower seeds. - Try lime juice instead of lemon juice for a different tang. - Use coconut oil instead of olive oil for a hint of sweetness. These swaps can change the flavor and texture slightly, so feel free to experiment. Add more flavor and flair with these optional ingredients: - Fresh chives or parsley for garnish - A sprinkle of extra nutritional yeast for a cheesier bite - Crushed red pepper flakes for some heat - A dash of mustard powder for a tangy twist These extras make your dish more fun and tasty. Garnishing with fresh herbs also adds nice color and freshness. {{ingredient_image_1}} Start by bringing a large pot of salted water to a boil. Add 8 oz of elbow pasta to the pot. Cook it until al dente, as per the package instructions. This usually takes about 7 to 10 minutes. Once it is done, drain the pasta and set it aside. Make sure not to rinse it; you want the pasta to hold onto the creamy sauce. Next, we will make the sauce. In a high-speed blender, add 1 cup of soaked and drained cashews. These give the sauce its creamy texture. Pour in 1 cup of unsweetened almond milk. Then, add 1/4 cup of nutritional yeast for a cheesy flavor. Squeeze in 2 tablespoons of lemon juice for brightness. Add 1 tablespoon of olive oil, 1 teaspoon of garlic powder, 1/2 teaspoon of onion powder, and 1/2 teaspoon of smoked paprika. Season with salt and pepper to taste. Blend this mixture until it is completely smooth and creamy. If it seems too thick, add a little more almond milk. Now, it’s time to bring it all together. Take the pot you used for the pasta and add the cooked elbow pasta back into it. Pour the creamy cashew sauce over the pasta. Stir well to coat all the pasta evenly. Place the pot over low heat and cook for about 2 to 3 minutes. Stir constantly until everything is heated through. Taste and adjust the seasoning with more salt, pepper, or a splash of lemon juice if needed. Serve this delicious vegan mac and cheese right away. For a pop of color, you can garnish it with fresh chives or parsley. Enjoy! To get that creamy texture, soak the cashews. Soak them in water for at least four hours. This softens them and makes blending easy. Use a high-speed blender for a smooth sauce. If it’s too thick, add a bit more almond milk. Blend until it looks like a thick cream. Taste is key! Start with the base of garlic powder, onion powder, and smoked paprika. They add depth to the sauce. If you want more zing, add extra lemon juice. For a cheesy flavor, bump up the nutritional yeast. You can also use salt and pepper to fit your taste. Serve the mac and cheese in a rustic bowl for charm. Top it with a sprinkle of nutritional yeast. Add fresh chives or parsley for color. A few lemon wedges on the side can give a nice touch. This not only looks good but enhances the flavor too! Pro Tips Soak Cashews Longer: For an even creamier sauce, soak the cashews overnight. This will make them easier to blend and provide a smoother texture. Nut-Free Option: If you have nut allergies, substitute the cashews with silken tofu or sunflower seeds for a creamy consistency without the nuts. Flavor Boost: Add a splash of your favorite hot sauce or a pinch of cayenne pepper to the sauce for an extra kick of flavor. Leftover Storage: Store any leftovers in an airtight container in the fridge for up to 3 days. Reheat on the stove with a splash of plant-based milk to regain creaminess. {{image_2}} You can change the taste of your vegan mac and cheese easily. For a spicy kick, add diced jalapeños or a dash of cayenne pepper. If you love herbs, mix in fresh basil or thyme. These flavors bring new life to the dish. Experiment with your favorites! Want to switch things up? Use sunflower seeds instead of cashews for a nut-free option. If you prefer a creamier sauce, try using coconut milk. This swap adds a nice sweetness. You can also use soy or oat milk based on your taste. Making this dish gluten-free is simple! Just use gluten-free elbow pasta. For a nut-free version, replace cashews with cooked potatoes and carrots. Blend them with plant-based milk for a smooth sauce. This way, everyone can enjoy the meal without worry. To keep your leftover vegan mac and cheese fresh, store it in an airtight container. Make sure to cool it to room temperature first. Place the container in the fridge. It will stay good for about 3 to 5 days. If you want to keep it longer, consider freezing it. When you want to enjoy your leftover mac and cheese, take it out of the fridge. Add a splash of almond milk to keep it creamy. Heat it gently in a pot over low heat. Stir often to avoid burning. You can also use a microwave. Place it in a microwave-safe bowl and cover it. Heat in short bursts, stirring in between, until warm. To freeze vegan mac and cheese, use a freezer-safe container. Leave some space at the top for expansion. It will keep well for up to 2 months. To thaw, move it to the fridge for a few hours or overnight. You can also thaw it in the microwave. Once thawed, reheat as mentioned above. This way, you can enjoy creamy, delicious vegan mac and cheese anytime! Yes, you can make Vegan Mac and Cheese ahead. Just cook the pasta and sauce separately. Store them in airtight containers in the fridge for up to three days. When you're ready to eat, combine them and heat gently. This keeps the pasta nice and firm, not mushy. If you don’t have nutritional yeast, try using vegan cheese shreds. You can also use tahini or ground sunflower seeds. These options give a different flavor but still add creaminess. Absolutely! Kids love the creamy texture and cheesy taste. You can adjust the flavors to suit their taste. Use less garlic or skip the spices if needed. This meal is fun and healthy for little ones. To add spice, mix in red pepper flakes or a dash of hot sauce. You can also use spicy smoked paprika instead of regular. Start with a little, taste, and adjust until you reach the heat you like. Vegan mac and cheese is easy to make and full of flavor. You can choose main ingredients for a creamy base and add fun flavors with alternatives. Follow the step-by-step guide to cook the pasta and create the sauce. Remember to mix in tips for the perfect texture and adjust flavors to your liking. Enjoy your dish fresh, stored, or frozen. With so many variations, you can make this meal fit any taste. Get creative in the kitchen and have fun!

Vegan Mac and Cheese Creamy and Delicious Recipe

To make low-carb ricotta meatballs, gather the following ingredients: - 1 cup ricotta cheese - 1 lb ground beef (or ground turkey for a lighter option) - 1/2 cup almond flour - 1/4 cup grated Parmesan cheese - 1 egg - 2 cloves garlic, minced - 1 teaspoon Italian seasoning - 1/2 teaspoon salt - 1/4 teaspoon black pepper - 1 cup marinara sauce (low-carb option) - Fresh basil leaves, for garnish These meatballs fit well into a low-carb diet. Each serving has about: - 320 calories - 25 grams of protein - 8 grams of carbs - 5 grams of fiber This makes the net carbs around 3 grams per serving. They offer great protein and healthy fats, perfect for keeping you full. You can customize this recipe to fit your taste or diet. Here are some swaps: - Ground turkey: Use this for a leaner meatball option. - Almond flour: You can swap this with coconut flour, but use less. - Low-carb marinara: Make sure to pick a sauce with no added sugars. - Herbs: Fresh herbs can boost flavor. Try parsley or oregano. These substitutions keep the dish low in carbs while adding variety. {{ingredient_image_1}} Start by gathering all your ingredients. You need ricotta cheese, ground beef or turkey, almond flour, Parmesan, an egg, garlic, and spices. Preheat your oven to 400°F (200°C) and line a baking sheet with parchment paper. This helps with cleanup later. In a big bowl, add your ricotta cheese, ground beef, almond flour, Parmesan cheese, egg, minced garlic, Italian seasoning, salt, and black pepper. Mix everything well with your hands. Once mixed, form the meat into balls about 1.5 inches wide. Place the meatballs on your lined baking sheet. Bake them for 20-25 minutes until they are brown and cooked through. While the meatballs bake, heat the marinara sauce in a small pot over medium heat until warm. After baking, gently put the meatballs in the warm sauce to coat them. Serve hot and garnish with fresh basil leaves. To keep your meatballs moist, do not overmix the meat. Mix just until combined. Use ricotta cheese for a creamy texture. Almond flour helps bind the meatballs without adding carbs. If you want firmer meatballs, add a bit more almond flour. Always check the meatballs for doneness; they should reach an internal temperature of 160°F (71°C). To keep your meatballs moist, use ricotta cheese. It adds creaminess and flavor. Mixing in ground beef or turkey also helps. The fat in the meat retains moisture during cooking. Avoid overmixing your meatball mixture. This can make them tough. Form your meatballs gently for a tender texture. One common mistake is cooking at too high a temperature. Always bake meatballs at 400°F (200°C). This ensures they cook through without burning. Another mistake is not checking doneness. Use a meat thermometer. Meatballs should reach 165°F (74°C). Also, don’t overcrowd the baking sheet. Space them out for even cooking. Line your baking sheet with parchment paper. This prevents sticking and makes cleanup easy. Bake meatballs on the middle rack for even heat. Baste them in marinara sauce after baking. This adds flavor and moisture. Let them rest for a few minutes before serving. This allows juices to settle. Pro Tips Use Fresh Ingredients: Fresh ricotta and minced garlic can significantly enhance the flavor of your meatballs. Don't Overmix: Mix the ingredients just until combined to keep the meatballs tender and avoid a tough texture. Customize Seasoning: Feel free to add your favorite herbs or spices for a personal touch, such as red pepper flakes for heat. Let Them Rest: Allow the meatballs to rest for a few minutes after baking to help them retain their juices when serving. {{image_2}} You can easily swap the ground beef for ground chicken or pork. Each protein adds a unique taste. Ground chicken gives a lighter flavor, while pork adds a rich taste. Both options work well with the ricotta. Just ensure that you adjust cooking times. Light proteins may cook faster. You can customize the flavor of your meatballs with herbs or spices. Try adding fresh parsley or oregano for a fresh taste. For a kick, mix in red pepper flakes. You can also use smoked paprika for a deeper flavor. Be bold! Make the flavors your own. These meatballs shine when served over zucchini noodles or cauliflower rice. Zucchini noodles add crunch and freshness. Cauliflower rice gives a nice, hearty base. Both are low in carbs and pair well with marinara. Add a sprinkle of cheese or fresh herbs to elevate your dish! To store leftover meatballs, let them cool first. Place them in an airtight container. You can keep them in the fridge for up to three days. Make sure the lid seals well to prevent air from getting in. When you are ready to eat, reheat the meatballs gently. You can use the microwave or the oven. If using the microwave, place them on a microwave-safe plate. Heat in short bursts, checking often to avoid overcooking. If using the oven, set it to 350°F (175°C) and bake for about 10 minutes until warm. To freeze meatballs, place them on a baking sheet in a single layer. Freeze them for about an hour until firm. Then, transfer the meatballs to a freezer bag. They can last for up to three months. When ready to use, thaw them in the fridge overnight before reheating. If you need them fast, you can cook them straight from the freezer; just add extra cooking time. Each serving of these low carb ricotta meatballs has about 5 grams of carbs. This count comes mainly from the almond flour and marinara sauce. If you choose a low-carb marinara, you can keep those carbs low. Always check the labels on your ingredients to be sure. Yes, you can use cottage cheese instead of ricotta. Cottage cheese will give a different texture, but it works well. Just blend it a bit if you want it smoother. You’ll still get that creamy taste in your meatballs. To check if the meatballs are cooked, you can use a meat thermometer. The center should be 160°F (71°C) for beef or turkey. You can also cut one open. It should be brown inside, with no pink showing. If they look golden brown outside, you’re on the right track! In this article, we covered the key ingredients for low-carb meatballs and their nutritional benefits. You learned how to prepare and cook them perfectly, along with tips to keep them moist. Variations and serving ideas help expand your recipe options. Lastly, we discussed storage techniques and common FAQs to enhance your cooking skills. With these insights, you're now ready to create delicious low-carb meatballs that suit your taste. Enjoy your cooking adventure!

Low Carb Ricotta Meatballs Flavorful and Easy Recipe

- 2 cups fresh or frozen cranberries - 1 cup sugar - 1 cup water - 1 teaspoon vanilla extract - 1/2 teaspoon cinnamon - 1 cup dark chocolate chips - 2 tablespoons coconut oil To create chocolate-dipped cranberry sauce, gather these main ingredients. Fresh or frozen cranberries provide a bright, tart flavor. Sugar and water help balance the tartness. Vanilla extract and cinnamon add warmth and depth. Dark chocolate chips bring richness, while coconut oil gives the chocolate a smooth texture. - Sea salt for garnish A sprinkle of sea salt is key. It enhances the sweet and tart notes. The salt creates a lovely contrast to the chocolate. This simple touch makes every bite more exciting. {{ingredient_image_1}} - Rinse the cranberries under cold water. - If you use frozen cranberries, you do not need to thaw them. - In a medium saucepan, combine cranberries, sugar, water, vanilla extract, and cinnamon. - Bring the mixture to a boil over medium heat, stirring often. - Once it boils, lower the heat and let it simmer for about 10-15 minutes. - Cook until the cranberries burst and the sauce thickens. - Remove the pan from heat and let the sauce cool slightly. - Transfer the sauce to a bowl and let it cool to room temperature. - Move the bowl to the fridge and chill for at least one hour. - In a microwave-safe bowl, mix dark chocolate chips and coconut oil. - Microwave in 30-second intervals, stirring between, until smooth. - Once the cranberry sauce is chilled, use a small cookie scoop or spoon. - Form small mounds of cranberry sauce and place them on a parchment-lined baking sheet. - Dip each mound into the melted chocolate, ensuring they are fully coated. - While the chocolate is warm, sprinkle a small pinch of sea salt on each mound. - Chill the baking sheet in the fridge for about 30 minutes until the chocolate sets. - Using high-quality chocolate: Always choose good chocolate. It makes a big difference in taste. Dark chocolate works best for a rich flavor. Look for chocolate that has at least 60% cocoa for the best results. - Adjusting sweetness to taste: Taste your cranberry sauce before dipping. If you want it sweeter, add more sugar while cooking. Remember, the chocolate adds some sweetness too. Balance is key for the perfect treat. - Temperature control for chocolate: Keep an eye on your chocolate temperature. If it’s too hot, it can separate. If too cool, it will not coat well. Aim for a smooth, melted consistency. - Suggestions for coating thickness: When dipping, don’t rush it! Make sure each piece is well-coated. A thicker layer adds to the yum factor but may take longer to set. Try different thicknesses to find what you like best. - Pairing with desserts or snacks: These bites go great with ice cream or cake. They also work well on a cheese board. Try serving them with salty snacks for a nice contrast. - Creative serving ideas: Arrange your chocolate-dipped cranberry sauce on a platter. Add some fresh berries or nuts around them. This way, they look fancy and taste even better! Pro Tips Use Fresh Cranberries: Fresh cranberries provide a better texture and flavor compared to frozen ones, enhancing the overall quality of your sauce. Adjust Sweetness: Depending on your taste preference, you can adjust the amount of sugar in the recipe. Feel free to reduce it or replace it with a natural sweetener like honey. Experiment with Spices: While cinnamon is great, consider adding other spices such as nutmeg or allspice for a unique twist on your cranberry sauce. Storage Tips: Store any leftover chocolate-dipped cranberry sauce in an airtight container in the refrigerator for up to a week for a delightful snack or dessert. {{image_2}} You can switch up your chocolate for a new taste. Milk chocolate offers a sweeter flavor, while white chocolate adds creaminess. You can also use flavored chocolate. Try mint chocolate for a fresh twist or orange chocolate for a bright flavor. Get creative by adding spices or extracts. A pinch of nutmeg or a splash of almond extract can elevate the taste. You can also mix in nuts like walnuts or pecans. Dried fruits, such as cherries or apricots, can add a chewy texture. Use chocolate-dipped cranberry sauce in fun ways. It makes a great addition to a cheese board, pairing well with cheeses and crackers. You can also serve it as a topping for desserts. Pour it over ice cream or cake for a delicious surprise. To store your chocolate-dipped cranberry sauce, place it in an airtight container. This keeps it fresh and prevents it from absorbing other smells. You can use glass or plastic containers. Make sure the sauce is cool before sealing it. If you want to freeze chocolate-dipped bites, layer them in a single row in a freezer-safe container. Use parchment paper between layers to avoid sticking. When you want to serve them, take out the bites and let them thaw in the fridge. This keeps their taste and texture best. Chocolate-dipped cranberry sauce can last up to two weeks in the fridge. If you freeze it, it can stay good for about three months. Watch for signs of spoilage, like a sour smell or an odd color. If you see these signs, it's best to throw it away. Chocolate-dipped cranberry sauce is a sweet and tart treat. It combines homemade cranberry sauce with rich chocolate. You start by cooking fresh or frozen cranberries with sugar, water, vanilla, and cinnamon. Once the sauce cools, you dip small mounds into melted dark chocolate. This mix gives a delightful burst of flavor in each bite. Yes, you can use frozen cranberries. They work just as well as fresh ones. You don’t need to thaw them before cooking. Just rinse them, and follow the recipe as usual. This makes it easy to enjoy this treat any time of year! The chocolate takes about 30 minutes to set in the fridge. After you dip the cranberry mounds, place the baking sheet in the refrigerator. This cools the chocolate and makes it firm. You’ll know it’s ready when it feels solid and shiny. While you might find some variations in stores, pre-made chocolate-dipped cranberry sauce is rare. It’s easy and fun to make at home. Plus, you can control the flavors and sweetness. Making it yourself ensures freshness and taste that store-bought can’t match. Chocolate-dipped cranberry sauce pairs well with many foods. Try it with cheese on a charcuterie board. It also tastes great with vanilla ice cream or whipped cream. You can use it as a topping on pancakes or waffles too. The sweet and tart balance makes it versatile! In this post, we covered how to make chocolate-dipped cranberry sauce. We discussed the key ingredients, step-by-step instructions, and tips to ensure success. Understanding variations and storage options can help you enjoy this treat longer. Final thoughts: This sauce is versatile, tasty, and easy to make. It’s perfect for any occasion and pairs well with many desserts. Enjoy experimenting and sharing this delightful dish!

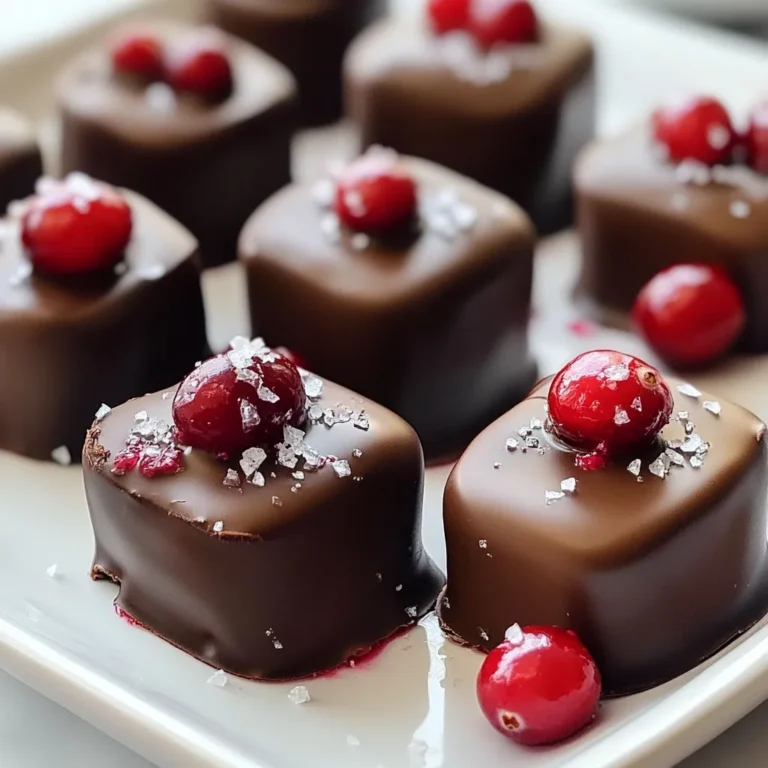
Chocolate Dipped Cranberry Sauce Irresistible Delight

When making creamy spinach stuffed salmon, you need a few key ingredients. Each one adds to the flavor and texture of this dish. Here’s what you’ll need: - 4 salmon fillets (6 oz each) - 1 cup fresh spinach, chopped - 1 cup cream cheese, softened - 1/2 cup grated Parmesan cheese - 1/4 cup breadcrumbs - 2 cloves garlic, minced - 1 tablespoon lemon juice - 1 teaspoon dried dill - 1/2 teaspoon salt - 1/4 teaspoon black pepper - 2 tablespoons olive oil Each ingredient plays a role. The salmon provides a rich base, while the spinach and cream cheese create a delightful stuffing. The garlic adds a punch, and the lemon juice brightens the dish. Using high-quality salmon makes a big difference. Fresh spinach gives the stuffing a vibrant color and taste. Grated Parmesan adds a nice depth. Breadcrumbs help bind everything together, ensuring a perfect texture. When you gather your ingredients, keep them fresh. This will help your salmon shine. Trust me, using quality items elevates the entire meal! {{ingredient_image_1}} Setting the Oven First, preheat your oven to 375°F (190°C). This step is key to cooking the salmon evenly. Preparing the Stuffing Mixture In a mixing bowl, add the chopped spinach, softened cream cheese, grated Parmesan cheese, breadcrumbs, minced garlic, lemon juice, dill, salt, and black pepper. Mix these well until they blend into a smooth stuffing. This creamy filling makes the dish special. Creating Pockets in the Fillets Take each salmon fillet and carefully slice the top lengthwise. This cut creates a pocket for the stuffing. Make sure not to cut all the way through. This helps keep the filling inside. Filling the Salmon with Spinach Mixture Now, take the spinach mixture and fill each pocket. Use a spoon to pack it in well. The more you stuff, the better the flavor! Searing in the Skillet Heat olive oil in a skillet over medium heat. Once hot, place the stuffed salmon fillets in the skillet, skin-side down. Sear them for about 3-4 minutes until the skin gets crispy. This adds a nice crunch. Baking to Perfection Transfer the seared salmon to a baking dish. Bake in your preheated oven for 12-15 minutes. The salmon is done when it flakes easily with a fork. Let it rest for a few minutes before serving. This helps keep it juicy. - Choosing Quality Ingredients: Start with fresh salmon fillets. Look for bright color and firm texture. Fresh spinach should be vibrant green. For creaminess, use full-fat cream cheese and good-quality Parmesan. These choices make a big difference in taste. - Alternative Seasonings or Add-ins: You can add a pinch of cayenne for heat or some sun-dried tomatoes for sweetness. Fresh herbs like parsley or basil can also enhance the flavor. Experimenting helps you find your favorite mix. - Adjusting Cook Time for Thickness: Thicker salmon fillets need more time. For fillets thicker than 1 inch, add an extra 2-3 minutes when baking. Always check for doneness before serving. - Monitoring Doneness with a Fork: To check if the salmon is done, gently flake it with a fork. If it flakes easily and is opaque in the center, it’s ready. This method ensures you avoid overcooking. - Plating and Garnishing Ideas: Serve the salmon on a white plate for contrast. Drizzle with olive oil and sprinkle fresh dill or lemon zest on top. This adds color and looks appetizing. - Serving Suggestions with Side Dishes: Creamy spinach stuffed salmon pairs well with roasted vegetables or a light salad. Lemon wedges on the side add a nice touch and enhance the dish's flavors. Pro Tips Choose Fresh Salmon: Opt for wild-caught salmon if possible, as it tends to have a better flavor and texture compared to farmed varieties. Mix the Stuffing Well: Ensure that all ingredients for the stuffing are mixed thoroughly to achieve a consistent flavor in each bite. Don't Overcook: Keep an eye on the cooking time to avoid dry salmon. It should be just cooked through and flake easily. Add Extra Flavor: Consider adding a pinch of nutmeg or a dash of hot sauce to the spinach stuffing for an extra layer of flavor. {{image_2}} Different Cheeses You can change the cheese in the stuffing. Cream cheese is great, but try ricotta or goat cheese for a twist. They add different textures and flavors. If you're feeling adventurous, mix in some feta for a salty kick. Alternative Vegetables Spinach is fantastic, but don’t be shy! Swap it for kale or Swiss chard. You can even use artichoke hearts for a unique flavor. Just make sure to chop them up nicely. This keeps the stuffing creamy and delicious. Grilling vs. Baking Grilling adds a smoky taste. If you want to grill, preheat your grill. Use indirect heat to cook the salmon gently. Keep an eye on it to avoid burning. Baking is simple and keeps the fish moist. Both methods work well! Air Fryer Option The air fryer is a fun twist. Preheat it to 350°F (175°C). Place the stuffed salmon in the basket. Cook for about 10-12 minutes. You’ll get a nice crispy outside while keeping the inside creamy. It’s a quick way to enjoy this dish! Low-Carb or Keto-Friendly Suggestions For a low-carb meal, skip the breadcrumbs. Use almond flour instead. It gives a nice crunch without the carbs. You can also add nuts for extra flavor and texture. This keeps your dish tasty and healthy. Dairy-Free Adjustments If you want a dairy-free option, use a dairy-free cream cheese. There are many brands available today. You can also add nutritional yeast to give a cheesy flavor without the dairy. This way, everyone can enjoy the meal! Refrigeration Tips After you finish your creamy spinach stuffed salmon, let it cool first. Place the leftovers in an airtight container. Store them in the fridge for up to three days. Make sure to cover the dish well to keep it fresh. If you want to keep the salmon longer, freezing is a great option. Freezing Options To freeze leftovers, wrap each salmon fillet in plastic wrap. Then place them in a freezer bag. Remove as much air as you can before sealing. You can freeze the stuffed salmon for up to three months. When you're ready to eat, thaw it overnight in the fridge. Best Methods for Reheating To reheat your salmon, the oven works best. Preheat your oven to 350°F (175°C). Place the salmon on a baking sheet. Heat it for about 10-15 minutes. This keeps the salmon moist and tasty. You can also use a microwave for a quicker option. Heat on low power for one to two minutes. Avoiding Dryness To avoid dryness, cover the salmon with foil when reheating. This traps moisture and keeps the salmon tender. You can also add a splash of water or broth before reheating. This will help keep it juicy and delicious. What can I serve with creamy spinach stuffed salmon? You can pair this salmon with many sides. I love serving it with roasted veggies. A fresh salad adds a nice crunch too. You might enjoy rice or quinoa for a hearty option. Lemon wedges also brighten the plate and flavor. Can I prepare the stuffing in advance? Yes, you can! Make the stuffing the day before. Store it in your fridge until you are ready to use it. This saves time and adds convenience to your cooking. What if the salmon is overcooked? If your salmon is dry, add a sauce or a drizzle of olive oil. A squeeze of lemon juice helps too. This adds moisture and brightens the taste. How to fix bland stuffing? If the stuffing lacks flavor, try adding more seasoning. A pinch of salt or pepper can help. You can also mix in a teaspoon of herbs like thyme or basil. These add depth and make it more tasty. Can I use frozen spinach instead of fresh? Yes, you can use frozen spinach! Just thaw it first and squeeze out the water. This keeps your stuffing from getting soggy. How can I make the dish spicier? To give it heat, add red pepper flakes or cayenne pepper. You can also mix in chopped jalapeños for a fresh kick. Adjust the spice to your taste! Stuffed salmon offers a tasty blend of fresh flavors. We discussed key ingredients like fresh salmon, creamy spinach, and seasoning essentials. I shared step-by-step instructions to help you prep, stuff, and cook the salmon. Remember, quality ingredients lead to the best taste. Use these tips to customize the recipe or try other cooking methods. Whether you store leftovers or answer common questions, this dish is versatile. Enjoy your time cooking and experimenting with this delicious recipe!

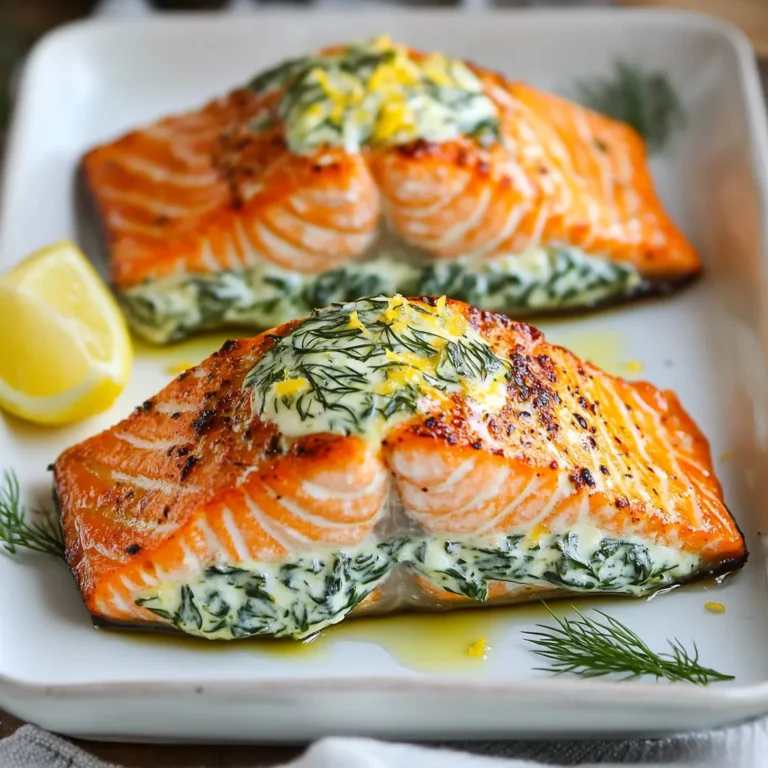
Creamy Spinach Stuffed Salmon Delightful Dinner Treat

- 2 cups cooked chicken, shredded - 1 cup mozzarella cheese, shredded - 4 large flour tortillas - 4 cloves garlic, minced - 1 tablespoon olive oil - 1 teaspoon dried oregano - 1/2 teaspoon red pepper flakes (optional) - 1/2 cup spinach leaves - Salt and pepper to taste - Fresh parsley, chopped (for garnish) You can swap a few ingredients for a different taste. Use cooked turkey instead of chicken. If you want a creamy twist, try using cream cheese instead of mozzarella. For a lighter option, use whole wheat or corn tortillas. If you don’t have fresh spinach, you can use arugula or kale. If you want to skip the heat, leave out the red pepper flakes. To make these wraps, you'll need a few tools. Grab a medium skillet for cooking. You'll also need a spatula for stirring. Use a cutting board and knife to chop garlic and parsley. A large platter helps serve the wraps nicely. Lastly, get a clean surface for assembling your wraps. {{ingredient_image_1}} First, heat one tablespoon of olive oil in a medium skillet over medium heat. Add four cloves of minced garlic. Sauté the garlic for about one minute until it smells great. Next, add two cups of shredded cooked chicken to the skillet. Sprinkle in one teaspoon of dried oregano, and if you like spice, add half a teaspoon of red pepper flakes. Season with salt and pepper to taste. Stir everything well and cook for about three to four minutes until heated through. After that, take the skillet off the heat. Stir in one cup of shredded mozzarella cheese. Mix until the cheese melts and combines with the chicken. This step is key for that melty goodness! Now, lay a large flour tortilla flat on a clean surface. Put a portion of the chicken mix right in the center. Add a few fresh spinach leaves on top for some crunch and color. To get the best melt, use fresh mozzarella. It melts beautifully and gives a nice stretch. If you want extra flavor, try mixing in a bit of cream cheese with the mozzarella. This adds creaminess and richness to your wraps. Always remove the skillet from heat before adding cheese. This helps the cheese melt evenly without burning. To fold your tortilla, start by folding the sides over the filling. Then, roll it up tightly from the bottom. This keeps the filling secure inside. Make sure to roll it snug but not too tight. If it’s too tight, the wrap might burst while cooking. Repeat this with the other tortillas until you use all the filling. Once rolled, place each wrap seam side down in a hot skillet for cooking. To boost the taste of your melty garlic chicken wraps, focus on seasonings. Garlic is key, but you can add more. Try fresh herbs like basil or thyme for a bright flavor. A squeeze of lemon juice adds a nice zing, too. For heat, use red pepper flakes. Adjust the amount to match your spice level. Always taste as you go. This will help you find the perfect blend that you love. You can cook the chicken wraps in a skillet or an air fryer. A skillet gives a nice, crispy finish. Heat oil in the skillet, then cook the wraps seam side down. Flip them after a few minutes. If you use an air fryer, set it to 375°F. Cook for about 6-8 minutes. This method makes them extra crispy. Make sure to check often to avoid burning. How you serve your wraps matters. Place them on a large platter for a fun look. Add a side of ranch or garlic aioli for dipping. A sprinkle of fresh parsley makes the dish pop. You can also cut the wraps in half for easy eating. This way, guests can see the melty goodness inside. Enjoy the smiles when you present this tasty dish! Pro Tips Use Fresh Garlic: Freshly minced garlic enhances the flavor significantly compared to pre-minced versions. Don’t Overfill the Wraps: To prevent bursting, fill the tortillas moderately to ensure a secure roll. Perfectly Crispy Wraps: For extra crunch, brush the outside of the wraps with a little olive oil before cooking. Experiment with Cheese: While mozzarella is delicious, try adding some cheddar or pepper jack for a unique twist! {{image_2}} You can easily make these melty garlic chicken wraps vegetarian. Simply swap the chicken for a mix of veggies. Use bell peppers, mushrooms, and zucchini for a colorful filling. Sauté the veggies with garlic like you would with chicken. They will absorb the great garlic flavor and still taste amazing. For those who want different proteins, try using shredded beef or turkey. You can even use canned beans as a protein source. Black beans or chickpeas work well. Just make sure to season them well with garlic and herbs. They will add a nice twist to your wraps. Adding sauces can take your wraps to the next level. Try ranch, garlic aioli, or a spicy sriracha sauce. You can drizzle these sauces inside the wrap or serve them on the side. These additions can change the flavor and make each bite exciting. To keep your Melty Garlic Chicken Wraps fresh, store them in the fridge. Place the wraps in an airtight container. This helps prevent them from drying out. They will stay good for about 3 to 4 days. Make sure to cool them down first. This keeps the texture nice. When it's time to eat, you can reheat the wraps easily. Use a skillet for the best results. Heat it over medium-low heat. Place the wrap in the skillet seam side down. Cook for 2-3 minutes on each side. This makes the wrap warm and crispy again. You can also use a microwave. Heat them for about 30 seconds. Just know, the wrap might get a little soft. If you want to save some for later, freezing works great. Wrap each Melty Garlic Chicken Wrap in plastic wrap. Then, place them in a freezer bag. Squeeze out the air to avoid freezer burn. They can last up to 2 months in the freezer. When you are ready to eat, thaw them in the fridge overnight. After that, reheat them in a skillet or microwave. Enjoy the melty goodness! Yes, you can use leftover rotisserie chicken. It saves time and adds great flavor. Just shred the chicken into bite-sized pieces. Then, follow the same steps in the recipe. The garlic and cheese will blend well with the seasoned chicken. I love using mozzarella cheese for this wrap. It melts beautifully and adds a creamy texture. You can also try cheddar or pepper jack for a different flavor. Just remember to shred the cheese for easy melting. To make this dish gluten-free, swap out the flour tortillas for gluten-free ones. Many brands offer great options. Check the label to ensure they are certified gluten-free. The rest of the ingredients are naturally gluten-free. Enjoy your wraps without worry! We explored key ingredients and tools to prepare your dish. You learned cooking steps and tips for melting cheese. I shared ways to enhance flavors with seasonings and variations for different diets. We also covered storage tips for leftovers and answered common questions. With this knowledge, you can experiment and make the dish your own. Enjoy cooking and sharing your creation!

Melty Garlic Chicken Wraps Delicious and Flavorful Dish

- 1 cup basmati rice - 2 cups vegetable broth - 1 cup mushrooms (cremini or button), sliced - 1 small onion, finely chopped - 2 cloves garlic, minced - 2 tablespoons olive oil - 1 teaspoon thyme (dry or fresh) - Salt and pepper to taste - 1/4 cup fresh parsley, chopped (for garnish) - 1/4 cup sliced almonds (toasted, optional for crunch) Each serving of Mushroom Rice Pilaf contains: - Calories: 250 - Protein: 5 grams - Carbohydrates: 42 grams - Fat: 8 grams - Fiber: 2 grams This dish is a great source of energy. It also offers a good mix of healthy fats and carbs. To make your Mushroom Rice Pilaf even better, consider these options: - Add 1/2 cup of peas for sweetness. - Mix in 1/4 cup of grated Parmesan cheese for creaminess. - Toss in 1/2 cup of diced bell peppers for extra color and crunch. - For a spicy kick, include red pepper flakes. These optional ingredients can enhance the dish’s taste and make it unique to your liking. Enjoy experimenting! {{ingredient_image_1}} To make Mushroom Rice Pilaf, start by rinsing 1 cup of basmati rice under cold water. Rinse until the water is clear. This step is key to getting fluffy rice. Next, heat 2 tablespoons of olive oil in a medium saucepan over medium heat. Add 1 small finely chopped onion and sauté for about 3-4 minutes. You want it to be soft and translucent. Now, add 2 cloves of minced garlic and 1 cup of sliced mushrooms. Cook this mixture for 5-7 minutes. Stir often, so the mushrooms brown nicely and release their moisture. Once the mushrooms are ready, stir in the rinsed rice for 2 minutes. This allows the rice to soak up all those great flavors. Pour in 2 cups of vegetable broth, then add 1 teaspoon of thyme, salt, and pepper to taste. Bring everything to a boil, then reduce the heat to a simmer. Cover the pan with a lid and let it cook for 15-18 minutes. You’ll know it’s done when the rice is tender and the liquid is absorbed. After cooking, take the pan off the heat and let it sit for 5 minutes. This resting period helps the rice become fluffier. Finally, fluff the rice with a fork and mix in 1/4 cup of chopped fresh parsley. If you like a crunch, sprinkle on 1/4 cup of toasted almonds. Rinsing rice is an important step. It removes excess starch. Starch can make rice sticky. Rinse the rice in a fine mesh strainer or bowl. Use cold water and swish the rice around with your hand. Keep rinsing until the water runs clear. This usually takes about 1-2 minutes. Proper rinsing is key for fluffy rice. Cooking times matter for perfect Mushroom Rice Pilaf. Sauté the onion for 3-4 minutes on medium heat. Then, cook the garlic and mushrooms for 5-7 minutes. After adding the broth and rice, bring it to a boil. Once boiling, lower the heat to a simmer and cover. Cook for 15-18 minutes. After cooking, let it rest for 5 minutes. Following these steps will ensure your dish turns out great. To make your rice fluffy, rinse it well. Rinse the basmati rice under cold water until the water runs clear. This removes extra starch. Extra starch can make the rice sticky. After rinsing, let the rice soak for about 10-15 minutes. This helps it cook evenly. When cooking, let the rice rest after it’s done. Cover it for 5 more minutes. This step helps the grains separate. Use a medium saucepan for cooking this dish. A saucepan with a tight-fitting lid is best. You’ll need a wooden spoon or spatula to stir. A measuring cup and a cutting board are also helpful. A knife for chopping the onion and garlic is essential. If you want to fluff the rice later, a fork works well. For toasting almonds, a small skillet is handy. Thyme adds a great touch to the pilaf. You can use dried or fresh thyme based on what you have. Fresh parsley gives it a bright finish. For more flavor, try adding bay leaves while cooking. If you enjoy heat, a pinch of red pepper flakes can spice it up. You can also add a squeeze of lemon for brightness. Experiment with these to find your favorite blend! Pro Tips Rinse Your Rice: Rinsing the basmati rice until the water runs clear helps remove excess starch, resulting in fluffier grains. Enhance Flavor: For an extra flavor boost, consider sautéing the mushrooms in a bit of butter along with the olive oil. Let It Rest: After cooking, let the rice sit covered for 5 minutes to allow the steam to finish the cooking process and enhance texture. Garnish Wisely: Adding fresh herbs and toasted nuts not only elevates the presentation but also adds depth in flavor and texture. {{image_2}} You can switch up the mushrooms in this dish. Each type adds a unique taste. For a richer flavor, try shiitake mushrooms. They give a nice earthy touch. If you want something milder, use button mushrooms. They are easy to find and work well. Mix different types for a fun twist. You can use oyster or portobello mushrooms too. Each choice changes the flavor but keeps it delicious. Making this dish vegetarian or vegan is simple. Use vegetable broth instead of chicken broth. It keeps the dish plant-based. You can skip the almonds or replace them with seeds for crunch. If you want a creamier texture, add a splash of coconut milk. This change adds a hint of sweetness. For extra protein, toss in some cooked lentils. They blend well with the rice and mushrooms. You can add more ingredients to make your pilaf unique. Try mixing in some peas or carrots for color. These veggies add nutrients and a sweet taste. For a spicy kick, add red pepper flakes. You can also stir in some spinach at the end for a fresh touch. If you love herbs, add fresh basil or dill. These herbs brighten the dish and add aroma. Use your creativity to make your pilaf stand out! To store leftover Mushroom Rice Pilaf, first let it cool. Place it in an airtight container. Make sure to keep it in the fridge. It will stay fresh for about 3-4 days. If you want to keep it longer, freezing is a great option. When reheating, add a splash of vegetable broth or water. This keeps the rice moist. Heat it in a pan over low heat, stirring gently. You can also use a microwave. Cover the bowl with a damp paper towel for even heating. This method helps keep the flavors bright. To freeze, scoop the pilaf into freezer-safe bags. Remove as much air as possible, then seal tightly. Label the bags with the date. Mushroom Rice Pilaf can last for up to 3 months in the freezer. To eat, thaw it overnight in the fridge before reheating. This keeps the taste fresh and delicious. You can serve Mushroom Rice Pilaf with many dishes. It pairs well with roasted chicken or grilled fish. Try it alongside sautéed vegetables for a healthy meal. You can also serve it with a fresh salad. It adds a nice touch to any festive dinner. To prepare Mushroom Rice Pilaf ahead, cook it as usual. After cooking, let it cool completely. Store it in an airtight container in the fridge. It stays fresh for up to three days. When ready to serve, reheat it on the stove or in the microwave. Add a splash of broth to keep it moist. Yes, Mushroom Rice Pilaf is gluten-free. The main ingredient, basmati rice, contains no gluten. Just ensure that your vegetable broth is also gluten-free. This makes it a safe choice for those with gluten sensitivities. Enjoy it without worry! Mushroom Rice Pilaf offers great flavor and texture. We’ve covered ingredients, cooking steps, and helpful tips to make this dish shine. Variations let you customize to your taste, while proper storage keeps leftovers fresh. Enjoy this dish with your favorite sides or make it ahead for easy meals. Balancing nutrition with great flavor, this recipe checks all the boxes. Whether it’s for a cozy dinner or a meal prep idea, you’re set to impress. Go ahead and try it out!

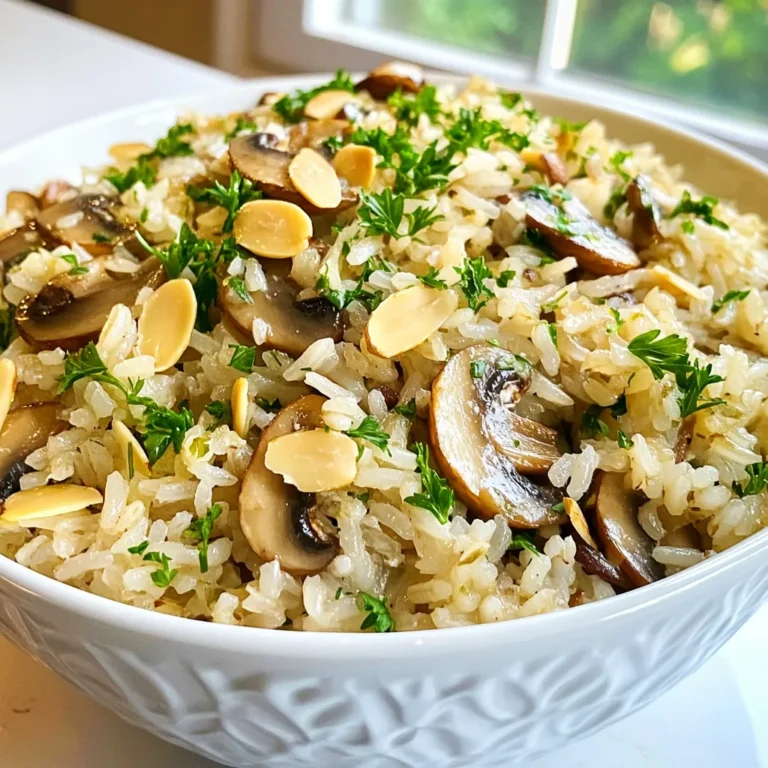
Mushroom Rice Pilaf Flavorful and Easy Side Dish

- 2 boneless, skinless chicken breasts - 1 cup breadcrumbs (preferably panko for extra crispiness) - 1/2 cup grated Parmesan cheese - 1 teaspoon garlic powder - 1 teaspoon dried oregano - 1/2 teaspoon salt - 1/2 teaspoon black pepper - 1 cup marinara sauce - 1 cup shredded mozzarella cheese - Fresh basil leaves for garnish (optional) When I make air fryer chicken Parmesan, I focus on fresh, quality ingredients. The chicken needs to be boneless and skinless for easy cooking. I love panko breadcrumbs because they give a nice crunch. Using grated Parmesan cheese adds a rich flavor that pairs well with the chicken. Next, I mix garlic powder, oregano, salt, and black pepper into the breadcrumbs. This blend gives the chicken a nice, savory taste. Even a small dash of these spices can make a big difference. For toppings, marinara sauce is key. It adds moisture and flavor to each bite. I also sprinkle shredded mozzarella cheese on top. It melts beautifully and creates that classic cheesy layer. Lastly, I like to add fresh basil leaves for a bright finish. They add color and a burst of flavor. Each ingredient plays a role in making this dish a hit. {{ingredient_image_1}} First, preheat your air fryer to 400°F (200°C). This step is key for getting that crispy texture. The hot air will cook the chicken evenly and give it a nice golden color. Next, let's mix the breadcrumb mixture. In a shallow bowl, combine: - 1 cup breadcrumbs (preferably panko for extra crispiness) - 1/2 cup grated Parmesan cheese - 1 teaspoon garlic powder - 1 teaspoon dried oregano - 1/2 teaspoon salt - 1/2 teaspoon black pepper Mix these well to combine all the flavors. In another bowl, beat 1 large egg. This will help the breadcrumbs stick. Dip each chicken breast into the egg, making sure to coat it fully. Then, transfer it to the breadcrumb mixture. Press down firmly to coat both sides evenly. This step is crucial for that crunchy crust you want. Now, it’s time to air fry the chicken. Place the coated chicken breasts in the air fryer basket in a single layer. You may need to cook in batches if your fryer is small. Air fry the chicken at 400°F (200°C) for 10 minutes. After 10 minutes, carefully flip the chicken breasts over. Air fry for another 5 minutes. Check that they are golden brown and cooked through. The internal temperature should reach 165°F. Once cooked, remove the chicken from the air fryer. Spoon marinara sauce over each piece. Sprinkle a generous amount of shredded mozzarella cheese on top. Return the chicken to the air fryer and cook for an additional 2-3 minutes. This step melts the cheese and makes it bubbly. Carefully remove the chicken and let it rest for a couple of minutes. If you like, garnish with fresh basil leaves. Enjoy your crispy, delicious Air Fryer Chicken Parmesan! To get that crispy coating, I recommend using panko breadcrumbs. They are light and airy, giving a great crunch. You can also mix in some grated Parmesan cheese for extra flavor. When coating the chicken, dip it in the beaten egg first. Make sure it’s fully covered. This step helps the breadcrumbs stick better. Then, place the chicken in the breadcrumb mixture. Press down firmly on both sides. This ensures that every bit gets coated well. The air fryer has limited space. If you have two chicken breasts, cook them in a single layer. If they don’t fit, cook in batches. This way, each piece gets even heat and crispiness. Make sure to leave some space between the chicken pieces. This helps air circulate and cook the chicken evenly. To know if your chicken is done, check the internal temperature. It should reach 165°F (75°C). Use a meat thermometer for accuracy. This ensures the chicken is safe to eat and perfectly cooked. With these tips, your Air Fryer Chicken Parmesan will be a hit! Enjoy the crispy delight. Pro Tips Choose the Right Breadcrumbs: Using panko breadcrumbs will give your chicken a much crispier texture compared to regular breadcrumbs. Don’t Overcrowd the Air Fryer: Make sure to leave enough space between the chicken breasts in the air fryer for even cooking and maximum crispiness. Check for Doneness: Always use a meat thermometer to ensure the internal temperature of the chicken reaches 165°F for safe consumption. Let it Rest: Allow the chicken to rest for a couple of minutes after cooking; this helps the juices redistribute, making it more tender and flavorful. {{image_2}} You can switch up the chicken breasts for other cuts. Chicken thighs or tenders work great! They add more flavor and stay juicy. Just follow the same steps for coating and cooking. The cooking time may change slightly. Always check they reach 165°F inside. Want a meat-free meal? Try eggplant or zucchini! Cut them into thick slices. Then, coat them just like the chicken. Eggplant gives a nice texture, while zucchini adds a fresh taste. Air fry them until golden brown, about 10 to 15 minutes. Top with marinara and cheese for a tasty dish. Want to spice things up? Add extra flavors to your coating! Mix in some paprika or Italian seasoning. You can also try garlic salt for a bolder taste. Fresh herbs like parsley or thyme can bring brightness. Experiment until you find your favorite mix! To keep your Air Fryer Chicken Parmesan fresh, store it in the fridge. Place leftovers in an airtight container. This will keep moisture in and prevent the chicken from drying out. You can store it for up to three days. Always allow the chicken to cool before sealing it. The best way to reheat your chicken is in the air fryer. Set the air fryer to 350°F (175°C) and cook for about five minutes. This method keeps the chicken crispy while warming it through. You can also use a microwave, but it may make the coating less crispy. If you want to freeze your chicken, let it cool completely first. Wrap each piece tightly in plastic wrap, then place them in a freezer-safe bag. This will help prevent freezer burn. You can freeze it for up to three months. To thaw, move it to the fridge overnight before reheating. Cooking chicken breasts in an air fryer usually takes about 15 minutes. First, air fry for 10 minutes at 400°F (200°C). Then, flip the chicken and cook for another 5 minutes. Always check that the inside reaches 165°F to ensure it’s safe to eat. Yes, you can make Air Fryer Chicken Parmesan without breadcrumbs. For gluten-free options, try crushed nuts, like almonds or walnuts. You can also use ground oats or cornmeal for a different texture. These alternatives still give great flavor and crunch. You have many choices for sides! A fresh salad pairs well with the chicken. Garlic bread adds a nice touch, too. You might also enjoy pasta with marinara sauce. Roasted veggies or steamed broccoli are healthy options that balance the dish. This blog post covered how to make Air Fryer Chicken Parmesan. We discussed the key ingredients, like chicken breasts, breadcrumbs, and marinara sauce. You learned the steps to prepare and cook the dish, ensuring a crispy coating. We also explored tips for storage and variations, so you can make it your own. Trying this recipe can bring fun and flavor to your meals. Enjoy crafting your version of this tasty dish!

Air Fryer Chicken Parmesan Easy Crispy Delight

- 4 boneless, skinless chicken breasts - 1 tablespoon olive oil - 1 teaspoon garlic powder - 1 teaspoon onion powder - 1 teaspoon paprika - Salt and pepper to taste - 1 cup heavy cream - 1 cup chicken broth - ½ cup grated Parmesan cheese - 1 cup sun-dried tomatoes, chopped - 1 cup fresh spinach - Fresh basil leaves, for garnish For this recipe, I prefer using boneless, skinless chicken breasts. They cook evenly and stay moist. You can also use thighs if you like more flavor and fat. Just adjust cooking times as needed. If you're out of chicken broth, you can use vegetable broth. This adds a nice flavor without the meat. For a lighter option, swap heavy cream for half-and-half or coconut cream. You can use feta cheese instead of Parmesan for a salty twist. Here are some quick conversions: - 1 tablespoon = 3 teaspoons - 1 cup = 8 ounces - ½ cup = 4 ounces These conversions help when adjusting the recipe for different servings. Always keep these handy when cooking! {{ingredient_image_1}} Seasoning the Chicken Breasts First, take four chicken breasts. Place them in a large bowl. Sprinkle garlic powder, onion powder, paprika, salt, and pepper on both sides. Use your hands to coat the chicken well. Cooking Techniques for Chicken Heat a large skillet over medium-high heat. Pour in one tablespoon of olive oil. Wait for the oil to shimmer. This means it is hot enough to cook. Searing Tips for Optimal Flavor Carefully add the seasoned chicken breasts to the skillet. Sear them for about 5 to 7 minutes on each side. Look for a golden brown color. This will give your chicken a nice flavor. Once cooked, remove the chicken and set it aside. Deglazing and Building Flavor Lower the heat to medium. Pour in one cup of chicken broth. Use a wooden spoon to scrape the browned bits from the skillet. This adds great flavor. Let it simmer for 2-3 minutes. Adding Cream and Cheese to the Sauce Now stir in one cup of heavy cream and half a cup of grated Parmesan cheese. Mix until the cheese melts and the sauce is smooth and creamy. Incorporating Vegetables into the Sauce Add one cup of chopped sun-dried tomatoes and one cup of fresh spinach. Stir until the spinach wilts. This adds color and nutrients to your dish. Combining Chicken with the Sauce Return the chicken to the skillet. Spoon the creamy sauce over each piece. This helps the chicken soak up the flavor. Simmering for Proper Temperature Let the chicken simmer in the sauce for about 3 to 5 minutes. This warms the chicken through and melds all the flavors. Presentation Techniques Plate the chicken with the sauce drizzled on top. For a stunning look, serve it on a bed of mashed potatoes or pasta. Sprinkle extra Parmesan cheese and add fresh basil leaves for garnish. - Overcooking or Undercooking Chicken: Use a meat thermometer. Chicken is safe at 165°F. This helps keep it juicy and tender. - Balancing Seasoning for the Sauce: Taste as you go. Add salt and pepper slowly. This helps you avoid a bland or overly salty sauce. - Texture Tips for Creaminess: Stir the sauce gently. This keeps it smooth. If it gets too thick, add a splash of chicken broth. - Suggested Spices and Herbs: Try adding Italian seasoning or a pinch of red pepper flakes. These add depth and warmth to the dish. - Adding Extra Ingredients for Variety: Consider mushrooms or bell peppers. They bring extra flavor and texture. You can also swap sun-dried tomatoes for fresh ones if you prefer. - Pairing with Side Dishes: Serve it over pasta or rice. Fluffy mashed potatoes work great, too. This helps soak up the delicious sauce. For a fresh touch, add a side salad with tangy dressing. Pro Tips Perfectly Cooked Chicken: Ensure the chicken reaches an internal temperature of 165°F (75°C) for safety and juiciness. Flavor Boosting: Marinate the chicken in olive oil, garlic, and herbs for at least 30 minutes before cooking for enhanced flavor. Thickening the Sauce: If the sauce is too thin, let it simmer for a few extra minutes to help it thicken up nicely. Serving Suggestions: Pair this dish with crusty bread or a side salad to balance the richness of the creamy sauce. {{image_2}} Alternatives for Heavy Cream If you want a lighter dish, use half-and-half or coconut milk. These options still create a creamy texture. For a dairy-free version, try cashew cream or silken tofu blended until smooth. Variations Using Different Proteins You can swap chicken for turkey, pork, or tofu. Each protein brings its own flavor. If using pork, adjust cooking time, as it cooks faster than chicken. For tofu, press it to remove excess water, then sauté until golden brown. Other Vegetable Options Feel free to add bell peppers, zucchini, or mushrooms. Each vegetable adds color and flavor. You can also use frozen spinach if fresh is not available. Just thaw and squeeze out water before adding to the sauce. Slow Cooker Method To use a slow cooker, season the chicken and place it in the pot. Pour the broth and cream over it. Add the sun-dried tomatoes and spinach on top. Cook on low for 4-5 hours or high for 2-3 hours. The chicken will be tender and soak up all the flavors. Oven-Baking Instructions For oven-baking, preheat the oven to 375°F (190°C). After searing the chicken, place it in a baking dish. Pour the creamy sauce over it. Cover with foil and bake for 25-30 minutes. This method keeps the chicken juicy and lets the sauce thicken. Instant Pot Version Using an Instant Pot can save time. Sear the chicken in the pot first. Then, add the broth and cream. Seal the lid and cook on high pressure for 8-10 minutes. Quick-release the steam and stir in the sun-dried tomatoes and spinach. Enjoy a quick, tasty meal! - Refrigerating Leftovers: After cooking, let the chicken cool down. Place it in a sealed container. Store it in the fridge. It stays fresh for about 3 to 4 days. Always check for any odors before eating. - Freezing Instructions for Longevity: For longer storage, freeze the chicken. Wrap it tightly in plastic wrap and then foil. Use a freezer bag for extra protection. It can last up to 3 months in the freezer. Label the bag with the date. - Reheating Tips for Best Results: To reheat, use the microwave or the stove. If using the stove, add a splash of chicken broth to keep it moist. Heat on low to avoid drying out the chicken. Stir the sauce to keep it creamy. - How Long Will It Last in the Fridge? Properly stored, Creamy Marry Me Chicken lasts about 3 to 4 days in the fridge. Enjoy it within this time for the best taste. - Signs of Spoilage to Look For: Check for any off smells or changes in color. If the chicken feels slimy, it's time to discard it. Always trust your senses when it comes to food safety. To add heat, use crushed red pepper flakes. Start with half a teaspoon and adjust. You can also add diced jalapeños for a fresh kick. If you want a smoky flavor, try smoked paprika. It gives a nice depth while adding some spice. Yes! You can swap Parmesan for mozzarella, cheddar, or goat cheese. Each cheese changes the flavor. Mozzarella gives a creamy stretch, while cheddar adds sharpness. Goat cheese brings a tangy twist. Feel free to mix and match for fun! This dish pairs well with fluffy mashed potatoes or pasta. Both soak up the sauce nicely. You can also serve it with rice or a fresh green salad. Add some crusty bread to scoop up the sauce. Enjoy the meal! In this post, we explored how to create Creamy Marry Me Chicken. We covered the ingredients, step-by-step cooking methods, and tips to avoid common mistakes. You learned how to make a rich sauce while ensuring the chicken stays juicy. Don't forget to try different variations and sides to make it your own. With proper storage techniques, you can enjoy leftovers too. Follow these simple steps for a flavorful dish that impresses. Happy cooking!

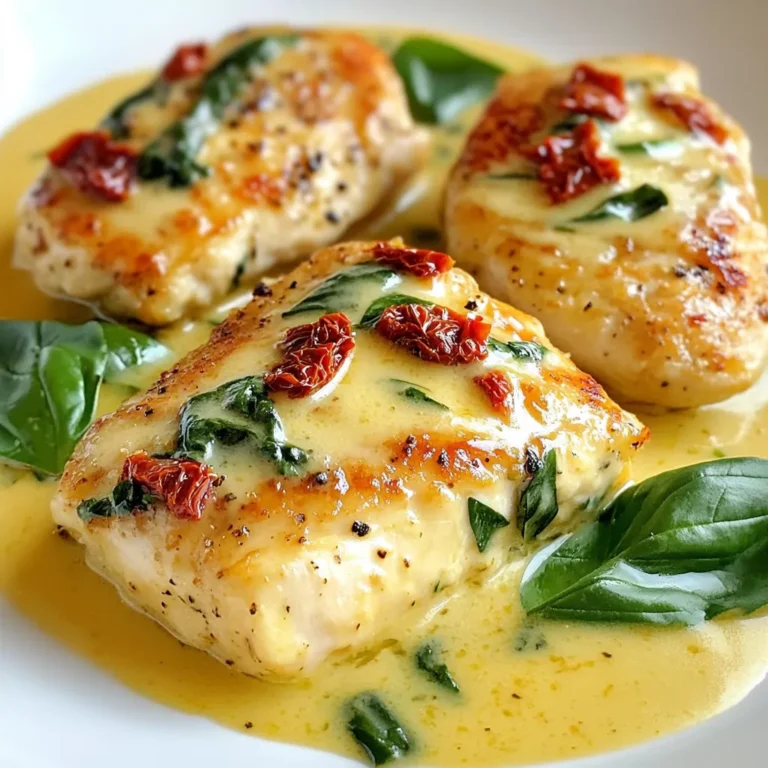
Creamy Marry Me Chicken Delightful Flavor Dish

PREV 1 … 45 46 47 … 57 NEXT
meal twig

explore

DessertsDinnerAppetizersDrinks

Our Policies

  • Cookie Policy
  • Copyright Policy
  • Disclaimer
  • GDPR Policy
  • Terms Of Use
Back to Top
  • About
  • Contact Us
  • Privacy Policy
© 2025 meal twig