FREE DINNER EBOOK! Get your copy!
  • Cookie Policy
  • GDPR Policy
  • Disclaimer
  • Terms Of Use
  • Visit my other site: Fun Cookie Recipes
meal twig
  • Home
  • Dinner
  • Desserts
  • Drinks
  • Appetizers
  • Contact
  • About
  • Privacy Policy
  • Home
  • Dinner
  • Desserts
  • Drinks
  • Appetizers
  • Contact
  • About
  • Privacy Policy
  • Cookie Policy
  • GDPR Policy
  • Disclaimer
  • Terms Of Use
Visit my other site: Fun Cookie Recipes

HOME / CATEGORIES /

Latest

- 2 boneless, skinless chicken thighs - 1 cup buttermilk (or plant-based milk for a dairy-free option) - 1 tablespoon fish sauce - 1 tablespoon Sriracha sauce (adjust to taste) - 1 cup all-purpose flour - 1 teaspoon cornstarch - 1 teaspoon garlic powder - 1 teaspoon onion powder - 1 teaspoon salt - 1/2 teaspoon black pepper - Oil for frying To make the best Thai fried chicken sandwich, you need chicken thighs. They are juicy and tender. The marinade uses buttermilk, fish sauce, and Sriracha. This mix adds flavor and keeps the chicken moist. For the breading, we need flour and cornstarch. The cornstarch makes the chicken crispier. Seasoning is key here. Garlic powder, onion powder, salt, and black pepper give it a nice taste. - Spicy mayo (mix mayonnaise with Sriracha to taste) - Fresh vegetables (lettuce, cucumbers, cilantro) - 4 brioche or whole wheat hamburger buns Next, we have the toppings. I love spicy mayo. Just mix mayonnaise with Sriracha for a kick. Fresh veggies like lettuce, cucumbers, and cilantro add crunch and freshness. Finally, pick your buns. Brioche is soft and buttery, while whole wheat is a healthier choice. Both work great for this sandwich. Enjoy each bite! {{ingredient_image_1}} How to Prepare the Marinade In a large bowl, mix 1 cup of buttermilk, 1 tablespoon of fish sauce, and 1 tablespoon of Sriracha. This blend adds rich flavor to the chicken. Place your 2 boneless, skinless chicken thighs in the mixture. Ensure they are fully covered. Marination Duration and Tips Cover the bowl and chill it in the fridge. Let the chicken marinate for at least 1 hour. For even better taste, marinate overnight. This time helps the flavors soak in well. Preparing the Breading Mixture In another bowl, combine 1 cup of all-purpose flour, 1 teaspoon of cornstarch, 1 teaspoon of garlic powder, 1 teaspoon of onion powder, 1 teaspoon of salt, and 1/2 teaspoon of black pepper. Mix well until everything is even. Dredging Steps for Perfect Coating Once the chicken has marinated, take it out and let the excess buttermilk drip off. Dredge each thigh in the flour mixture. Press lightly to coat well. This step is key for a crispy finish. Oil Temperature and Safety Tips In a deep skillet, add enough oil to cover the bottom by about 1 inch. Heat the oil over medium-high heat until it reaches around 350°F (175°C). Use a thermometer for accuracy. Always be careful when handling hot oil. Cooking Time for Crispy Chicken Place the coated chicken thighs in the hot oil. Fry for about 5-7 minutes on each side. Look for a golden brown color. Use a meat thermometer to check that the internal temperature is at least 165°F (74°C). Layering Ingredients for Flavor On each brioche or whole wheat bun, spread a good amount of spicy mayo. Then, add some crisp lettuce leaves, the fried chicken, and sliced cucumbers. Top with fresh cilantro for a burst of flavor. Serving Suggestions Serve the sandwiches hot and enjoy them right away. These flavors blend well and create a wonderful meal. Try pairing them with fries or a fresh salad for a complete dish. Temperature Checks Keep your oil hot. Aim for 350°F (175°C). Use a thermometer to check. If the oil is too cool, the chicken will soak up oil. Too hot, and it burns. Test the oil by dropping a small piece of bread. If it bubbles, you’re ready to fry! Avoiding Oil Splatters To prevent splatters, use a deep skillet with high sides. Carefully lower the chicken into the oil. Use tongs to avoid splashing. You can also cover the pan partially with a splatter screen. This helps keep your kitchen clean. Adjusting Spice Levels Not a fan of heat? Reduce the Sriracha in your marinade. For more spice, add extra Sriracha or some chili flakes. Always taste your spicy mayo. Adjust it to match your heat level. Recommended Serving Sides Pair your sandwich with crunchy coleslaw or sweet potato fries. A light salad can balance the meal too. Fresh mango or a fruit salad adds a nice touch. Marinating in Advance For the best flavor, marinate your chicken overnight. This allows all the flavors to soak in. If short on time, try to marinate for at least one hour. Storing Leftovers Keep leftover chicken in an airtight container. Make sure it cools to room temperature first. Store it in the fridge for up to three days. Reheat it in the oven for that crispy texture. Pro Tips Marination Matters: The longer you marinate the chicken, the more flavorful and tender it will be. Aim for at least 1 hour, but overnight is ideal. Oil Temperature: Ensure your oil is hot enough (around 350°F or 175°C) before adding the chicken. This prevents the chicken from becoming greasy and helps achieve that perfect crispy texture. Double Dredge for Extra Crunch: For an even crispier coating, consider double dredging the chicken. After the first coating, dip it back in the buttermilk and then coat it again in the flour mixture. Customizing Heat: Adjust the amount of Sriracha in the marinade and spicy mayo to suit your heat preference, or experiment with different hot sauces for unique flavor profiles. {{image_2}} - Gluten-Free Options You can make this sandwich gluten-free. Use gluten-free flour instead of all-purpose flour. Make sure the other ingredients, like the sauces and buttermilk, are gluten-free too. This way, everyone can enjoy the crunch. - Vegan Alternatives To make a vegan version, swap the chicken for crispy tofu or tempeh. Use plant-based milk for the marinade. Replace fish sauce with soy sauce or coconut aminos. This way, you keep the bold flavors without using any animal products. - Adding Mango or Pineapple Want to add a tropical kick? Try adding fresh mango or pineapple slices to your sandwich. The sweetness balances the spice from the Sriracha. This twist brings a bright and fresh taste with every bite. - Different Sauces to Try Feel free to mix up your sauces! Instead of spicy mayo, try peanut sauce or a sweet chili sauce. These sauces add different flavors and can make your sandwich even more exciting to eat. - Air Fryer Instructions If you want a healthier option, try using an air fryer. Coat the chicken as usual and place it in the air fryer. Cook at 400°F (200°C) for about 12-15 minutes, flipping halfway. This gives you crispy chicken without all the oil. - Baking in the Oven You can also bake the chicken. Preheat your oven to 425°F (220°C). Place the coated chicken on a baking sheet. Bake for about 20-25 minutes or until golden. This method is easy and still gives a great crunch. After enjoying your Thai fried chicken sandwich, cool any leftovers before storing. Let the sandwich sit at room temperature for about 30 minutes. This helps prevent moisture. Place the leftover chicken and toppings in separate containers. - Recommended Storage Containers: - Use airtight containers or resealable bags. - Vacuum-sealed bags work great for longer storage. - Label the containers with the date for easy tracking. To enjoy your sandwich again, reheating is key to keeping it crispy. - Best Methods for Maintaining Crispiness: - Use an oven or an air fryer for the best results. - Avoid the microwave, as it can make the bread soggy. - Time and Temperature Guidelines: - Preheat your oven to 350°F (175°C). - Place the sandwich on a baking sheet. - Heat for about 10-15 minutes, checking for warmth. - If using an air fryer, set it to 350°F (175°C) and heat for 5-7 minutes. Following these steps will help keep your Thai fried chicken sandwich tasty and enjoyable. The best way to marinate chicken is to use a flavorful mix. For this sandwich, I combine buttermilk, fish sauce, and Sriracha. Here are some tips to get the most flavor: - Marinate for at least 1 hour: For great taste, let the chicken sit in the marinade. - Overnight is better: If you have time, marinate overnight for deeper flavor. - Ensure full coverage: Make sure the chicken is fully submerged in the marinade. This method makes the chicken tender and packed with flavor, perfect for frying. If you want more heat in your sandwich, here are some ideas: - Add more Sriracha: Mix extra Sriracha into the marinade or the spicy mayo. - Use chili flakes: Sprinkle chili flakes in the flour mixture for added spice. - Add jalapeños: Slice fresh jalapeños and layer them in the sandwich. These simple tweaks will kick up the heat without losing the tasty flavors. Yes, you can freeze this sandwich, but it takes a few steps: - Cool Before Freezing: Let the cooked chicken cool down to room temperature. - Wrap Properly: Wrap the chicken tightly in plastic wrap or foil. - Store in an Airtight Container: Place wrapped chicken in a freezer bag or container. When you're ready to eat, thaw it in the fridge overnight before reheating. Pairing the right sides can elevate your meal. Here are some popular options: - Crispy Fries: Classic fries or sweet potato fries work well. - Coleslaw: The crunch and tanginess of coleslaw complement the sandwich nicely. - Thai Salad: A fresh, herb-filled salad adds a light touch. These sides balance the richness of the sandwich, making for a satisfying meal. You learned how to make a Thai Fried Chicken Sandwich from start to finish. We covered the key ingredients, marinating tips, and cooking steps. Plus, I shared ways to store leftovers and heat them up. This dish is fun to make and easy to tweak. You can adjust the spice level or swap ingredients to fit your taste. Remember, practice makes perfect. Enjoy your cooking journey and create a sandwich that impresses everyone!

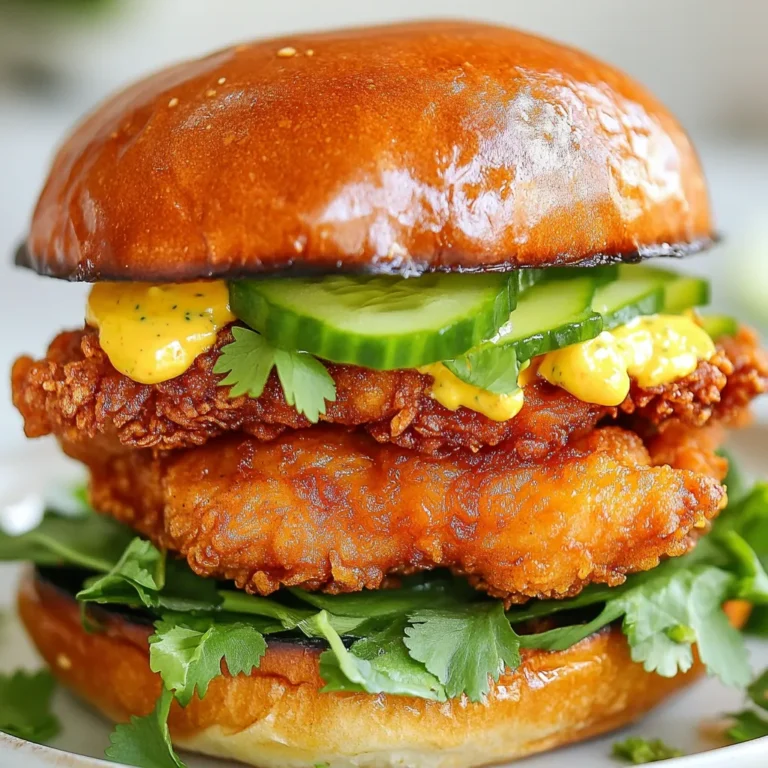
Thai Fried Chicken Sandwich Tasty and Irresistible Meal

- 1 lb ground beef - 8-10 medium flour tortillas - 2 cups shredded cheese (cheddar or a blend) - 1 small onion, finely chopped - 2 cloves garlic, minced - 1 can (10 oz) enchilada sauce (mild or hot) - 1 can (15 oz) black beans, drained and rinsed - 1 cup corn kernels (fresh or frozen) - 1 teaspoon chili powder - 1 teaspoon cumin - 1 teaspoon smoked paprika - Salt and pepper to taste - Sour cream - Chopped cilantro - Additional toppings like jalapeños or avocado This list of ingredients will help you create a dish that is hearty and full of flavor. The ground beef serves as the main protein, while the tortillas hold everything together. The shredded cheese adds a creamy texture when melted. Each spice enhances the dish's flavor, giving it a delicious kick. Feel free to mix and match your favorite garnishes to make your enchiladas even better! {{ingredient_image_1}} To start, heat a large skillet over medium heat. Add 1 pound of ground beef. Cook until you see no pink. Use a wooden spoon to break it apart. This step is key for even cooking. Once brown, drain any excess fat from the skillet. This helps keep your dish from being greasy. Next, add 1 small chopped onion and 2 cloves of minced garlic to the skillet. Stir and sauté until the onion looks clear. This should take about 3 to 4 minutes. The smell will be amazing! Then, mix in 1 can of drained black beans and 1 cup of corn. Add 1 teaspoon of chili powder, 1 teaspoon of cumin, and 1 teaspoon of smoked paprika. Pour in half of the enchilada sauce. Stir for another 3 to 5 minutes. Season with salt and pepper to taste. Now, it's time to fill the tortillas. Preheat your oven to 375°F (190°C). Take a tortilla and place about 1/4 cup of the beef mixture in the center. Add a sprinkle of shredded cheese. Roll it up tightly and place it seam-side down in a greased baking dish. Do this for all the tortillas until you use up the filling. Once all the tortillas are filled, pour the remaining enchilada sauce over the top. Sprinkle the rest of the cheese on top. Place the dish in your preheated oven and bake for about 20 to 25 minutes. You want the cheese to melt and bubble nicely. The aroma will fill your kitchen! To make your enchiladas stand out, adjust the spice levels to suit your taste. If you like heat, add more chili powder or try a hotter sauce. If you prefer mild flavors, go for a mild enchilada sauce. Using fresh ingredients also boosts the taste. Fresh onions, garlic, and corn bring bright flavors to your dish. You can prepare these enchiladas ahead of time. Just assemble them, cover, and refrigerate. They stay fresh for up to two days. When you’re ready to bake, just pop them in the oven. For longer storage, freeze them before baking. Wrap them tightly in foil or plastic wrap. They can last up to three months in the freezer. Pair your enchiladas with sides like rice or a fresh salad. Refried beans also make a great match. For drinks, try a cold soda or a refreshing margarita. You can also serve them with a light beer for a casual meal. Pro Tips Use Fresh Ingredients: Fresh vegetables and herbs can elevate the flavor of your enchiladas, bringing brightness to the dish. Customize the Heat: Adjust the spiciness by choosing a hotter enchilada sauce or adding diced jalapeños to the beef mixture. Cheese Choices: Experiment with different cheeses like pepper jack for a kick or a Mexican blend for a more authentic taste. Make-Ahead Meal: Prepare the filling and assemble the enchiladas a day in advance, then simply bake them when you're ready to serve. {{image_2}} You can easily swap out ground beef for other meats. Ground turkey or chicken works great. These meats are leaner but still tasty. If you want something different, try using shredded beef or pork. Both add a rich flavor. For a plant-based option, use lentils or black beans instead of meat. You can also try crumbled tofu for a protein boost. Just season it well to enhance the taste. You can choose from many enchilada sauces. A green sauce gives a fresh kick, while a mole sauce adds depth. If you like it spicy, try a chipotle sauce for a smoky flavor. You can also make your own enchilada sauce. Here’s a very simple recipe: - 1 can (15 oz) tomato sauce - 1 tablespoon chili powder - 1 teaspoon cumin - 1 teaspoon garlic powder - Salt to taste Mix these ingredients in a bowl and adjust to your taste. Homemade sauce can make your enchiladas even better. You can cook enchiladas in several ways. The stovetop method is quick. Just prepare them in a skillet and let them simmer. For a hands-off approach, try a slow cooker. Layer the tortillas, beef mixture, and sauce in the slow cooker. Cook on low for 4 hours. This method keeps everything moist and full of flavor. These variations let you enjoy enchiladas in new ways. Try them out and see what you love! After making your ground beef enchiladas, you may have some leftovers. Store them in an airtight container. This keeps them fresh for up to 3 days. Make sure to let them cool down before sealing the container. If they are still warm, steam can form and spoil the meal. If you want to save enchiladas for later, freezing works well. First, allow the enchiladas to cool completely. Then, wrap each one tightly in plastic wrap. Place the wrapped enchiladas in a freezer-safe bag or container. They can last up to 2 months in the freezer. When you're ready to eat, take them out and thaw in the fridge overnight. To reheat, bake at 350°F (175°C) for about 25 minutes. Cover them with foil to prevent drying out. To enjoy your enchiladas safely, eat them within 3 days when refrigerated. In the freezer, they can stay good for 2 months. Always check for signs of spoilage. If you see mold or smell something off, it’s best to toss them. To enhance the flavor of your enchiladas, consider adding these spices: - Chili powder - Cumin - Smoked paprika These spices give depth and warmth. You can also add more garlic or onion for a fresh taste. Mixing in some fresh herbs, like cilantro, can brighten the dish. Yes, you can use corn tortillas. They have a different texture and a slightly nutty taste. Corn tortillas are more fragile, so warm them up first. This helps prevent tearing. Flour tortillas are softer and more flexible, making them easier to roll. Try these sides for a great meal: - Mexican rice - Refried beans - Guacamole - Pico de gallo These add color and flavor to your plate. You can also serve a simple salad for freshness. You learned how to make delicious ground beef enchiladas with easy steps. We covered the essential ingredients, from tortillas to cheese, along with flavor enhancers like spices and sauce. I shared tips to elevate the taste and advice for making enchiladas ahead of time. Exploring variations lets you customize the recipe to your taste. Remember, storing leftovers properly keeps your enchiladas fresh. Enjoy your cooking and make this dish a family favorite!

Ground Beef Enchiladas Hearty and Flavorful Meal

- 12 oz rigatoni pasta - 1 lb Italian sausage - 1 tablespoon olive oil - 1 small onion, finely chopped - 3 cloves garlic, minced - 1 cup heavy cream - 1 cup chicken broth - 1 ½ cups spinach, fresh - ½ cup grated Parmesan cheese - ½ teaspoon red pepper flakes (optional) - Salt and pepper to taste - Fresh basil leaves for garnish To create a rich and flavorful creamy sausage rigatoni, you need fresh ingredients. Start with rigatoni pasta. This pasta holds sauce well and gives a great bite. Next, use Italian sausage. You can choose mild or spicy based on your taste. For cooking, olive oil is a must. It adds flavor and helps brown the sausage. Add a small onion and garlic for aroma. They bring depth to the dish. Heavy cream creates a smooth sauce. Chicken broth adds more flavor and helps thin the cream. Fresh spinach brightens the dish and adds nutrients. Grate some Parmesan cheese for a cheesy finish. Red pepper flakes can give a kick, but they are optional. Don’t forget salt and pepper for seasoning. Finally, fresh basil leaves are perfect for garnish. They add color and a fresh taste. Gather these ingredients for a delightful meal that you can enjoy any night. {{ingredient_image_1}} First, fill a large pot with water. Add a good amount of salt. Bring the water to a boil. Next, add the rigatoni. Cook it according to the package instructions. You want it to be al dente, which means it should have a slight bite. Once cooked, drain the pasta in a colander. Remember to save about one cup of the pasta water for later! In a large skillet, heat one tablespoon of olive oil over medium heat. Once hot, add the Italian sausage. Use a wooden spoon to break the sausage into smaller pieces. Cook it until it is browned and fully cooked, which takes about 5 to 7 minutes. This step builds great flavor and texture. Now, it’s time to add the onion and garlic. Stir them into the sausage. Sauté this mix for 3 to 4 minutes. You want the onion to turn translucent and fragrant. After that, pour in the chicken broth. Bring it to a gentle simmer. Then, add the heavy cream. Stir well and let it cook for 3 to 4 minutes. This thickens your sauce nicely. Next, add the fresh spinach into the sauce. Stir until it wilts down. If the sauce seems too thick, use the reserved pasta water. Add it a little at a time until you reach your desired consistency. Finally, add the cooked rigatoni to the skillet. Toss everything together so the pasta is well coated in the creamy sauce. When serving, use deep bowls for a nice presentation. Top the rigatoni with fresh basil leaves and a sprinkle of grated Parmesan cheese. This adds a fresh touch and makes it look extra special! - How to adjust thickness: If your sauce is too thick, add some reserved pasta water. Start with a little and mix well. This water has starch, which helps thicken the sauce without losing flavor. If it's too thin, let it simmer longer to reduce. - Suggestions for creaminess: For a creamier sauce, consider adding more heavy cream. You can also use mascarpone cheese for extra richness. Stir it in after you add the broth. - Choosing between mild or spicy sausage: The choice between mild or spicy sausage depends on your taste. Mild sausage gives a great base flavor. Spicy sausage adds a kick to the dish. You can mix both for a balanced flavor. - Alternative meat options: If you want to switch things up, try turkey or chicken sausage. These options are lighter but still tasty. For a vegetarian version, use plant-based sausage or mushrooms for texture. - Best rigatoni brands: Look for brands like Barilla or De Cecco. They cook evenly and hold sauce well. You can also try artisanal brands for a unique flavor. - Cooking pasta to al dente: Cook rigatoni until it's just firm to the bite. This usually takes 10-12 minutes. Test a piece a minute before the time is up. This keeps the pasta from becoming mushy when you mix it with the sauce. Pro Tips Use Quality Sausage: Opt for high-quality Italian sausage for a more flavorful dish. Fresh or homemade varieties can elevate the taste significantly. Adjust Creaminess: If you prefer a lighter sauce, substitute half of the heavy cream with Greek yogurt or reduce the amount of cream used. Perfect Pasta Cooking: Make sure to cook the rigatoni just until al dente, as it will continue cooking slightly when mixed with the sauce. Fresh Herbs for Garnish: Enhance the flavor profile by adding fresh herbs like parsley or chives along with the basil for extra color and taste. {{image_2}} You can make a tasty vegetarian version of creamy sausage rigatoni. Start by swapping the Italian sausage for veggie alternatives, like plant-based sausage or mushrooms. These options add great flavor and texture. To adjust for flavor, add extra spices. Use Italian seasoning, garlic powder, and red pepper flakes. These will give your dish a rich taste. You can also add more garlic for a stronger kick. Want to enhance your rigatoni? Consider adding mushrooms. They bring a nice earthy flavor. Simply slice them and sauté with the onions and garlic. You can also mix in different greens or herbs. Try kale, arugula, or fresh parsley. These will add color and nutrients to your dish. Experiment with flavors to find what you like best. Using seasonal vegetables can make this dish unique. In spring, add asparagus or peas. For fall, try butternut squash or pumpkin. These veggies not only taste great but also keep your meal fresh and exciting. Adjusting spices can change up the flavor profile. In summer, go lighter with basil and lemon zest. In winter, add warming spices like nutmeg or cinnamon. This keeps your creamy sausage rigatoni interesting all year round. To keep your creamy sausage rigatoni fresh, store it in airtight containers. Glass containers work well. Make sure to cool the dish to room temperature first. Refrigerate leftovers within two hours. This dish stays tasty for up to three days in the fridge. Reheat your creamy sausage rigatoni on the stove or in the microwave. If using the stove, add a splash of chicken broth or cream. This helps keep the sauce from drying out. Stir often to heat evenly. In the microwave, cover the bowl with a damp paper towel. Heat in short bursts, checking every 30 seconds. You can freeze creamy sausage rigatoni for later use. Allow it to cool completely, then place it in a freezer-safe container. It can last up to three months in the freezer. To thaw, move it to the fridge for several hours or overnight. Reheat it on the stove or in the microwave, just like before. Yes, you can prepare this dish in advance. Here are some tips for meal prep: - Cook the rigatoni and sausage separately. - Store each component in airtight containers. - Combine them just before serving to keep everything fresh. If you need a cream alternative, try these options: - Half-and-half for a lighter version. - Whole milk mixed with a bit of butter. - Coconut cream for a dairy-free option. Add some heat with these suggestions: - Use spicy Italian sausage instead of mild. - Toss in extra red pepper flakes. - Add diced jalapeños or crushed chili peppers. Yes, you can switch up the pasta. Recommended alternatives include: - Penne for a similar shape and texture. - Fusilli for a fun twist. - Farfalle for a unique presentation. This dish lasts about 3 to 5 days in the fridge. Store it in an airtight container for best results. This blog post shared a great recipe for creamy sausage rigatoni. We covered key ingredients, like rigatoni, Italian sausage, and fresh spinach. I also provided steps for cooking, sauce creation, and serving suggestions. Plus, tips for perfecting the sauce and storage options were included. Now, you can enjoy this dish with your own twists. With a few changes, you can make it your own! Try different meats, veggies, or spices for extra flavor.

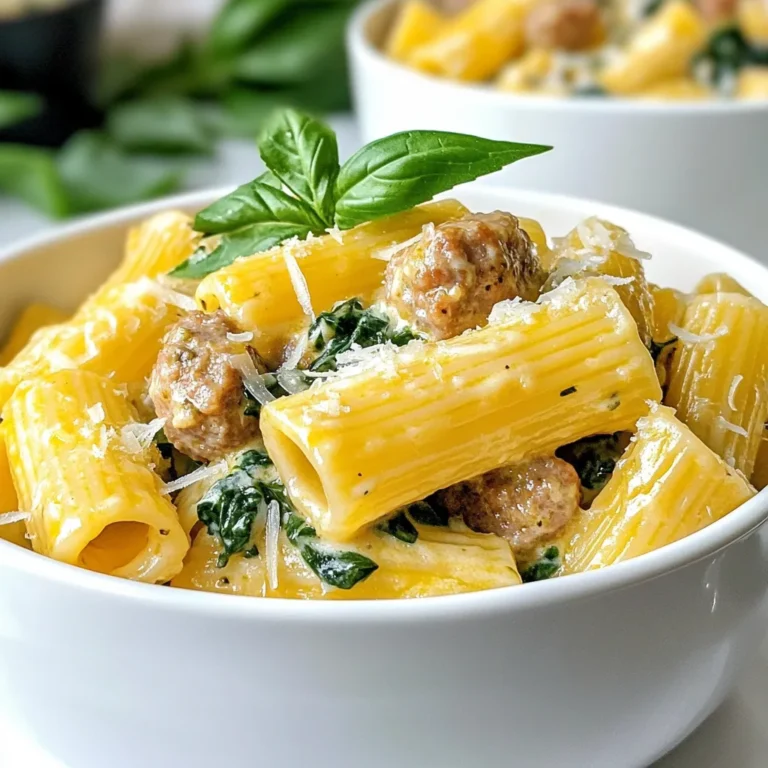
Creamy Sausage Rigatoni Rich and Flavorful Dish

To make a tasty Chicken Fajita Casserole, you will need: - 1 lb boneless, skinless chicken breasts, cut into strips - 1 tablespoon olive oil - 1 bell pepper (red or yellow), sliced - 1 medium onion, sliced - 2 garlic cloves, minced - 1 teaspoon ground cumin - 1 teaspoon smoked paprika - ½ teaspoon chili powder - Salt and pepper, to taste - 1 can (15 oz) black beans, drained and rinsed - 1 cup corn kernels (fresh or frozen) - 1 cup salsa (mild or spicy, as preferred) - 2 cups cooked rice (white, brown, or cauliflower rice) - 1 ½ cups shredded cheese (cheddar or Mexican blend) - Fresh cilantro, for garnish (optional) These ingredients come together to create a warm, flavorful dish that everyone will love. You can add fun toppings to make your casserole even better. Here are some ideas: - Avocado slices for creaminess - Sour cream for tangy flavor - Sliced jalapeños for heat - Lime wedges for a zesty kick - Extra cheese for cheese lovers These toppings add freshness and flavor to your casserole. Feel free to mix it up! Here are some great substitutions: - Use turkey or shrimp instead of chicken for a different protein. - Swap black beans for kidney beans or pinto beans. - Try quinoa instead of rice for a healthier option. - Use dairy-free cheese for a vegan version. These easy substitutions keep the dish fun and interesting while catering to various diets. {{ingredient_image_1}} Start by preheating your oven to 350°F (175°C). In a large skillet, heat one tablespoon of olive oil over medium heat. Add one pound of boneless, skinless chicken breasts cut into strips. Cook these until they are no longer pink, which takes about 5 to 7 minutes. Next, toss in one sliced bell pepper and one medium onion. Add two minced garlic cloves, cooking them until they are tender, about 3 to 5 minutes. Season the mix with one teaspoon each of ground cumin and smoked paprika, and a half teaspoon of chili powder. Add salt and pepper to taste. In a large mixing bowl, combine one can of drained and rinsed black beans and one cup of corn kernels. Next, add one cup of salsa, choosing mild or spicy based on your taste. Fold in the chicken and vegetable mixture. Finally, stir in two cups of cooked rice, whether it’s white, brown, or even cauliflower rice. Ensure everything is mixed well. Transfer the casserole mix into a greased dish, spreading it evenly. Top it off with one and a half cups of shredded cheese, covering the entire surface. Bake in your preheated oven for 25 to 30 minutes. The cheese should be bubbly and slightly golden. Once done, let the casserole cool for 5 minutes before serving. If you like, you can garnish with fresh cilantro for an extra touch. Enjoy this savory meal with family or friends! To make the best Chicken Fajita Casserole, start with fresh chicken. I like to cut my chicken into strips. This helps it cook evenly. Use a large skillet for sautéing. Medium heat works best here. It allows the chicken to get a nice sear. Stir the chicken often, so it cooks evenly. After the chicken is cooked, add the veggies. Bell peppers and onions add great flavor. A dry casserole is not what we want. To keep it moist, do not overcook the chicken. Cook it until just done, about 5-7 minutes. Adding salsa helps too. It adds moisture and flavor. Use black beans and corn, as they also keep the dish juicy. When mixing the ingredients, be gentle. This helps keep everything moist and tasty. To boost flavor, I love using spices. Cumin and smoked paprika give warmth. Chili powder adds a nice kick. Feel free to adjust the spice levels to your taste. For extra fun, add some diced jalapeños for heat. You can also mix in some lime juice for a zesty touch. Finally, topping with cheese adds richness and creaminess. Pro Tips Use Fresh Ingredients: Fresh bell peppers and onions will enhance the flavor and texture of your casserole, making it more vibrant and delicious. Customize Your Spice Level: Adjust the chili powder and salsa to your taste preference, whether you like it mild or extra spicy. Make It Ahead: This casserole can be prepared in advance and stored in the refrigerator for up to 24 hours before baking. Just cover it tightly with plastic wrap. Experiment with Toppings: Try adding sliced jalapeños, avocado, or a dollop of sour cream on top before serving for extra flavor and texture. {{image_2}} You can make a vegetarian version of this dish. Use plant-based chicken strips or just skip the meat. Replace chicken with extra beans or veggies like zucchini and mushrooms. You can also add more peppers for color and flavor. This keeps the dish tasty and healthy. To make this casserole gluten-free, check the salsa and cheese labels. Many brands offer gluten-free options. Use rice that is labeled gluten-free. Brown rice or cauliflower rice works well. You can enjoy this meal without worrying about gluten. Adjust the heat to your liking. For a spicy kick, add jalapeños or use hot salsa. You can also mix in crushed red pepper flakes. If you prefer mild flavors, stick to mild salsa and skip the spicy added ingredients. This way, everyone can enjoy their meal. After you make the chicken fajita casserole, let it cool. Store it in an airtight container. It will stay fresh for up to three days in the fridge. Make sure to keep it covered to prevent it from drying out. If you're not eating it right away, put it in the fridge within two hours of cooking. To freeze the casserole, let it cool completely first. Place it in a freezer-safe container. You can also use a freezer bag for easy storage. It will keep well for up to three months. When you're ready to eat it, thaw it in the fridge overnight before reheating. To reheat, you can use the oven or microwave. If using the oven, preheat it to 350°F (175°C). Place the casserole in a baking dish and cover it with foil. Heat for about 20-25 minutes until warm. For the microwave, scoop a portion into a microwave-safe bowl. Heat for 2-3 minutes, stirring halfway. Always check the center to make sure it's hot. Enjoy your tasty meal! Yes, you can use other proteins. Ground turkey or beef works well. Shrimp or tofu are great for a twist. Just make sure to adjust cooking times. Cook the protein until it's safe to eat. To add heat, use hotter salsa or add jalapeños. You can also sprinkle in cayenne pepper or use spicy sausage. For an extra kick, add fresh chili peppers. Adjust the spice level to match your taste. Left-over casserole lasts about 3 to 4 days in the fridge. Store it in an airtight container. Make sure it cools down before putting it away. Reheat it in the oven or microwave when you’re ready to eat. In this article, we explored how to make a tasty chicken fajita casserole. We covered the main ingredients, optional toppings, and even substitutions. I shared step-by-step instructions for preparation and baking, plus tips to keep it moist. You also learned about fun variations, storage guidelines, and answers to common questions. I hope you feel confident to try making this dish. It's easy, fun, and perfect for sharing. Enjoy your cooking adventure!

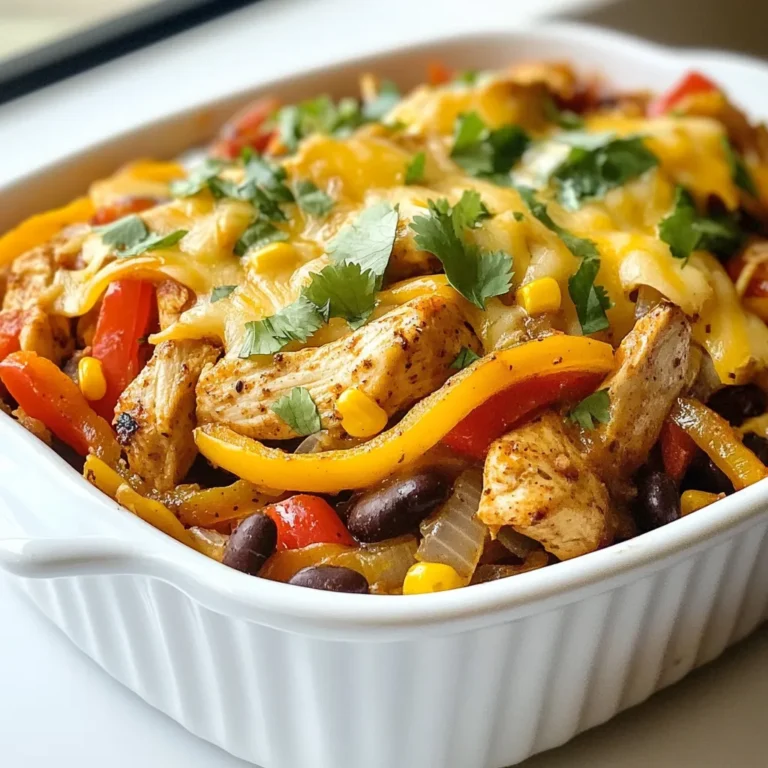
Savory Chicken Fajita Casserole Easy and Tasty Meal

- 1 lb ground beef (lean) - 1 tablespoon sesame oil - 3 cloves garlic, minced - 1 inch piece fresh ginger, grated - 1 red bell pepper, finely diced - 1 cup shiitake or button mushrooms, finely chopped - 2 green onions, thinly sliced - 1/4 cup soy sauce (or tamari) - 1 tablespoon rice vinegar - 1 tablespoon brown sugar - 1 teaspoon chili paste (optional) - 1 head of butter or iceberg lettuce - Chopped cilantro for garnish You can use ground turkey, chicken, or even plant-based meat instead of beef. For gluten-free options, use tamari instead of soy sauce. You can add extra veggies like carrots or zucchini for more crunch and nutrition. To cook these wraps, you need a large skillet or wok for even heating. A wooden spoon or spatula works best for mixing. Don't forget measuring cups and spoons to get the amounts right. {{ingredient_image_1}} - Heat sesame oil in a skillet. - Add 1 pound of ground beef. Brown it well. - Drain any excess fat from the skillet. - Add minced garlic and grated ginger. Cook for 1-2 minutes. - Pour in diced red bell pepper and chopped mushrooms. Sauté for 4-5 minutes. - Mix in a soy sauce mixture. This includes 1/4 cup soy sauce, 1 tablespoon rice vinegar, and 1 tablespoon brown sugar. - Stir in sliced green onions and remove from heat. - Wash and prepare the lettuce leaves. Ensure they are crisp. - Assemble the wraps by scooping the beef mixture into each lettuce leaf. How to perfectly brown the beef: Start with a hot skillet. Add sesame oil and let it heat up. Then, add the ground beef in small chunks. This helps it brown better. Stir the beef only a few times. Let it sit for a minute before stirring again. This gives it a nice color and flavor. Best method for sautéing vegetables: First, add your garlic and ginger. Cook them for a minute or two. This boosts the flavor. Then, add the diced red bell pepper and mushrooms. Stir them often, but let them sit occasionally. This helps them get tender and develop a nice taste. Keeping lettuce leaves crisp: Wash the leaves gently and dry them with a towel. You want them dry to stay crisp. Store them in the fridge until you are ready to serve. If you can, put them in a container lined with a paper towel. This helps absorb any moisture. Adjusting spice levels with chili paste: If you like heat, add more chili paste. Start with one teaspoon and taste. You can always add more, but you can't take it out. Mix it well into the beef after you add the soy sauce. Recommended garnishes for added flavor: Chopped cilantro and extra green onions add fresh taste. Sprinkle them on top of your wraps just before serving. You can also add crushed peanuts for a nice crunch. Using fresh herbs for more aroma: Fresh herbs make a big difference. Try using basil or mint along with cilantro. These herbs add a bright flavor to your wraps. Just chop them finely and mix them in before serving. Best side dishes to pair: Serve your wraps with rice or quinoa. They complement the beef nicely. You can also add a simple cucumber salad for a refreshing crunch. Ideas for dipping sauces: A soy sauce mix with lime juice works well. You can also try a peanut sauce for a rich taste. Both will enhance the flavors of your wraps. Creative ways to serve leftovers: Use leftover beef in a stir-fry. Add it to fried rice or make a salad. You can also create a grain bowl with the beef, veggies, and some sauce. Pro Tips Choose the Right Beef: Opt for lean ground beef to keep the wraps lighter and healthier. You can also substitute with ground turkey or chicken for a different flavor. Prep Veggies Ahead: Chopping all your vegetables before you start cooking can save you time and make the cooking process smoother. Customize the Heat: Adjust the amount of chili paste according to your spice preference. You can also use fresh chopped chilies for a fresher flavor. Serve Fresh: These wraps are best served immediately after assembling to maintain the crispiness of the lettuce. Prepare the filling ahead but assemble just before serving. {{image_2}} You can easily adjust this recipe to fit different diets. - Paleo-friendly variations: Use ground turkey or chicken instead of beef. Skip the sugar and soy sauce. Use coconut aminos for flavor. - Keto-friendly modifications: Choose lean beef and add extra veggies. Use less sugar or a keto-friendly sweetener. This keeps carbs low while adding flavor. - Vegetarian alternatives: Substitute ground beef with finely chopped mushrooms or tempeh. Use soy sauce and rice vinegar to keep it tasty. You can switch up the flavors to match your taste. - Different sauces to use: Try hoisin sauce or teriyaki sauce for a sweet twist. You can also use sriracha for heat. - Spice level adjustments: If you like it hot, add more chili paste or fresh chili. If you prefer mild, skip the spice or use bell peppers. - Experimenting with toppings: Top with crushed peanuts, sesame seeds, or sliced radishes. Fresh herbs like mint or basil can add a nice touch too. Wraps don't have to be just lettuce! - Other types of lettuce to use: Butter lettuce is great, but you can also try romaine or even radicchio for a colorful twist. - Grain wraps or gluten-free options: Use rice wraps or corn tortillas. These are easy to find and work well. - Using tortillas or rice paper for wraps: Tortillas give a nice chewy texture, while rice paper can add a fun, crispy bite. To keep your Asian beef lettuce wraps fresh, store them properly. First, let the beef mixture cool down to room temperature. After that, use an airtight container to keep the flavors intact. Glass containers work well, but plastic ones are also fine. Make sure to separate the beef mixture from the lettuce leaves. This way, the leaves stay crisp and fresh for your next meal. You can freeze the beef mixture if you have leftovers. To freeze it, place the cooled beef mixture in a freezer-safe bag or container. Squeeze out any excess air and seal it tightly. This helps prevent freezer burn. When you want to eat it, move the mixture to the fridge to thaw overnight. You can also use the microwave for quick thawing. Once thawed, reheat it in a skillet over medium heat until hot. Leftovers last about 3 to 4 days in the fridge when stored correctly. Check for signs of spoilage before eating. If you see mold or smell something sour, it’s best to throw it away. Always trust your senses; they are your best guide for food safety. How can I make Asian beef lettuce wraps ahead of time? You can prepare the beef filling a day before. Just store it in the fridge. When ready, warm it up and serve in fresh lettuce. Can I use chicken or tofu instead of beef? Yes, both chicken and tofu work well. Ground chicken is a great swap. Tofu needs to be crumbled for the best texture. What can I serve with Asian beef lettuce wraps? Serve these wraps with rice or noodles. Fresh veggies or a simple salad add crunch, too. What type of lettuce is best for wraps? Butter lettuce or iceberg lettuce works best. They are crisp and hold the filling well. Should I cook the vegetables before adding them to the beef? Yes, cook the vegetables first. This way, they soften and blend well with the beef. How do I prevent the lettuce from wilting? Keep lettuce leaves dry and chilled until serving. This helps them stay crisp and fresh. Can I use pre-made sauce to save time? Absolutely! Pre-made sauces can speed things up. Look for low-sodium options for a healthier choice. What's a good soy sauce alternative for a gluten-free recipe? Tamari is a great choice. It has a similar taste and is gluten-free. How can I adjust the recipe for larger batches? Simply double or triple the ingredients. Ensure your skillet is large enough for even cooking. In this post, we explored how to make delicious Asian beef lettuce wraps. We covered all the key ingredients, helpful substitutions, and essential cooking tools. I provided step-by-step instructions to ensure success. We also shared tips for enhancing flavor and offered variations for different diets. These wraps are easy to make and full of flavor. Feel free to experiment and make them your own! Enjoy every bite and happy cooking!

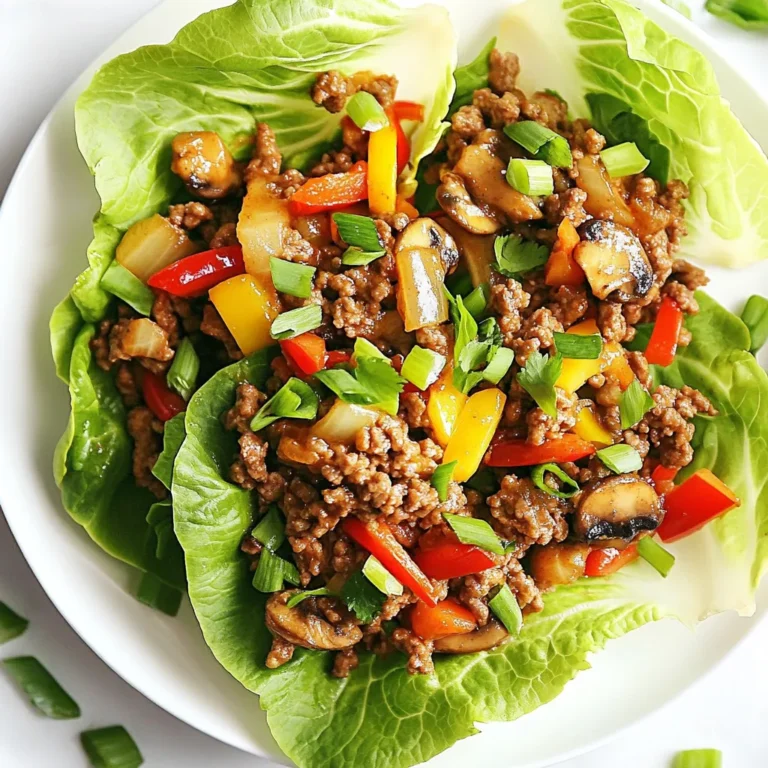
Asian Beef Lettuce Wraps Simple Flavorful Meal

- Ground turkey or chicken - Greek yogurt In this soup, I love using ground turkey or chicken. They both add lean protein and keep the dish light. If you want more flavor, you can use chicken. It adds a rich taste to the soup. Greek yogurt is my secret for creaminess. It makes the soup smooth without heavy cream. Plus, it adds extra protein! - Black beans - Kidney beans - Diced tomatoes with green chilies - Corn - Onion and garlic Next, let’s talk about the veggies and legumes. Black beans and kidney beans pack a protein punch. They also add fiber, which keeps you full. Diced tomatoes with green chilies give a nice kick. Corn sweetens the mix and adds texture. Onions and garlic bring depth to the flavor. Sauté them first to unlock their rich taste. - Taco seasoning - Chicken or vegetable broth - Olive oil - Salt and pepper Now, for the seasonings and broth. Taco seasoning is key to that classic flavor. It blends perfectly with the other ingredients. I use chicken or vegetable broth to build the soup’s base. Olive oil helps sauté the onion and garlic. Don’t forget salt and pepper! They round out the flavors and make everything pop. This soup is not just tasty; it is also filling. It’s a warm hug in a bowl, perfect for any day! {{ingredient_image_1}} First, heat one tablespoon of olive oil in a large pot over medium heat. Add one diced onion and sauté it until it turns translucent, about 4 to 5 minutes. This step brings out the sweet flavor of the onion and sets a great base. Next, stir in three minced garlic cloves. Cook them for one more minute until they smell fragrant. Now, it’s time to add the protein. Place one pound of ground turkey or chicken into the pot. Cook it until it’s browned and fully cooked, about 6 to 7 minutes. Break the meat apart with a spatula as it cooks. This ensures even cooking and helps to mix it well with the onion and garlic. Once the meat is cooked, mix in one packet of taco seasoning. Stir well to coat the meat evenly with the spices. This gives the soup that classic taco flavor we love. Next, pour in four cups of chicken or vegetable broth. Add in one can of rinsed and drained black beans, one can of rinsed and drained kidney beans, one can of diced tomatoes with green chilies, and one can of drained corn. Stir everything together until it’s well combined. Bring the soup to a simmer. Cover the pot and let it cook for about 15 to 20 minutes. This time allows all the flavors to meld together and creates a rich, hearty soup. After simmering, remove the pot from heat. Now, stir in one cup of Greek yogurt until it’s fully mixed in. This step adds creaminess to the soup without using heavy cream. If the soup is too thick, you can add more broth until it reaches your desired texture. Finally, taste the soup and adjust the seasoning with salt and pepper as needed. This is your chance to make it perfect for your taste buds. Now, your high protein creamy taco soup is ready to serve! To boost the flavor of your soup, use fresh herbs like cilantro. Chop it finely and sprinkle it on top before serving. This adds a bright taste and a nice color. You can also adjust the spice level by adding more taco seasoning. If you want it spicier, try adding a pinch of cayenne or diced jalapeños. For extra creaminess, Greek yogurt is key. It makes the soup rich and smooth. If you want to switch things up, try cream cheese or sour cream instead. If your soup is too thick, add more broth. Stir in a little at a time until you reach your perfect texture. Toppings can make your soup even better. Add shredded cheese for richness, avocado slices for creaminess, and lime wedges for a zesty kick. Pair your soup with tortilla chips for crunch or a fresh salad for balance. These sides will bring your meal to the next level. Pro Tips Use Lean Meat: Opt for lean ground turkey or chicken to keep the soup healthy without sacrificing flavor. Customize the Heat: Adjust the spice level by choosing regular or hot taco seasoning, or add fresh jalapeños for an extra kick. Make it Vegetarian: Substitute the meat with extra beans or lentils for a delicious vegetarian version that still packs a protein punch. Garnish for Freshness: Fresh cilantro, avocado, and lime not only enhance the flavor but also add a refreshing touch to the soup. {{image_2}} You can swap ground turkey or chicken for other proteins. Tofu is a great choice for a plant-based option. Crumble firm tofu and cook it like the meat. It absorbs flavors well and makes the soup filling. If you prefer beef, use ground beef instead of turkey. This option brings a richer taste and hearty texture. To make the soup vegetarian or vegan, remove the meat and Greek yogurt. Use vegetable broth for a full flavor. You can add more beans or lentils to keep the protein high. For gluten-free options, check your taco seasoning. Some brands may contain gluten. Use certified gluten-free seasoning to keep it safe. Adding more vegetables can boost the soup's nutrition. Try bell peppers, zucchini, or spinach for extra color and taste. You can also adjust the spice levels. For mild flavor, use less taco seasoning. If you like heat, add jalapeños or hot sauce. Feel free to experiment with different flavors to make it your own! You can store High Protein Creamy Taco Soup in the fridge for about 3-4 days. Use an air-tight container to keep it fresh. Glass or plastic containers work well. Make sure the soup cools down before sealing it. This helps avoid moisture buildup, which can lead to spoilage. To freeze the soup, let it cool completely. Pour it into freezer-safe bags or containers. Leave some space at the top as the soup may expand. It is best to freeze it in smaller portions for easy use later. For thawing, place the soup in the fridge overnight. You can also use the microwave on low power for quick thawing. When you’re ready to enjoy your soup, there are a few ways to reheat it. You can use the stove for even heating. Just pour the soup into a pot and warm it on low heat. Stir often to prevent sticking. The microwave is also an option. Heat it in short bursts, stirring in between. To keep the creaminess, add a bit more Greek yogurt after reheating. This will help restore that rich texture. Make sure to taste it again for seasoning, as flavors may change during storage. Enjoy your tasty soup! You can use ground beef or pork instead. If you want a vegetarian option, try crumbled tofu or tempeh. Both options will bring their own flavor and texture to the soup. Just remember to adjust the cooking time if you choose a different meat. Yes, you can. Start by browning the meat in a pan for flavor, then add it to your slow cooker. Mix in all the other ingredients, except for the Greek yogurt and cheese. Cook on low for 6-8 hours or on high for 3-4 hours. Stir in the Greek yogurt before serving for creaminess. There are several ways to boost protein. Add more beans, like black or kidney beans. You can also mix in some cooked lentils or even quinoa. These options will not only add protein but also enhance the soup's texture. Absolutely! You can add diced jalapeños or a splash of hot sauce to the soup. If you love heat, use spicy taco seasoning instead of regular. Adjust the amount based on your spice tolerance for the perfect kick. Serve this soup with tortilla chips for crunch. You can also pair it with a fresh salad topped with lime dressing. Cornbread is another great option to soak up the soup. Each side adds a fun twist to your meal! In this blog post, we explored how to create a delicious creamy taco soup. We covered key ingredients like ground turkey, Greek yogurt, beans, and spices. You learned step-by-step instructions for preparing the base and combining everything. We shared helpful tips for flavor and texture, along with serving and storage advice. Feel free to customize the recipe to fit your needs. Enjoy making and sharing this hearty dish!

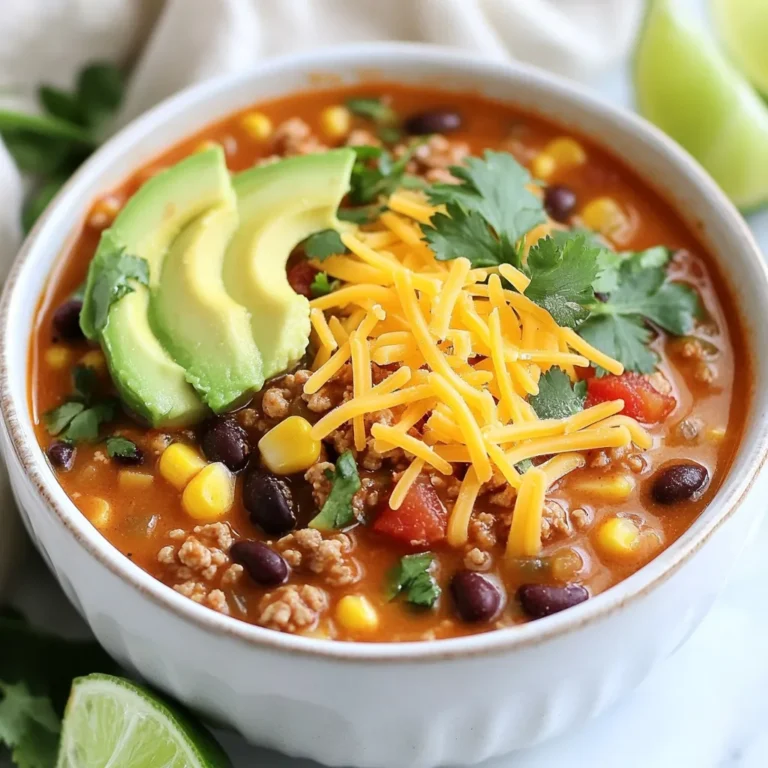
High Protein Creamy Taco Soup Flavorful and Filling

- 8 oz spaghetti or linguine - 2 medium zucchinis, sliced into half moons - 1 lb large shrimp, peeled and deveined - 2 cups cherry tomatoes, halved - 3 cloves garlic, minced - 1 teaspoon red pepper flakes - 3 tablespoons olive oil - 1 lemon, juiced and zested - Fresh basil leaves, for garnish - Salt and pepper, to taste - Grated Parmesan cheese, for serving When I make Tomato Zucchini Shrimp Pasta, I love choosing fresh ingredients. For the main ingredients, I prefer using spaghetti or linguine. These pastas hold the sauce well. Zucchini adds a nice crunch and color. The shrimp brings a sweet and savory flavor. Cherry tomatoes add a juicy burst in every bite. Garlic gives a depth of flavor that makes it all come together. Now, let’s talk about seasonings. Red pepper flakes add just the right kick. You can adjust the heat based on your taste. Olive oil is great for sautéing and adds richness. The zest and juice of a fresh lemon brighten the dish. Finally, fresh basil leaves are perfect for garnish. They add a lovely aroma and fresh taste. You may also want to add salt and pepper to taste. Grated Parmesan cheese is optional, but it brings a wonderful creaminess. This simple blend of ingredients makes Tomato Zucchini Shrimp Pasta a delightful and tasty meal. {{ingredient_image_1}} To cook the pasta, start by boiling a large pot of salted water. Once it boils, add 8 oz of spaghetti or linguine. Stir it gently. Cook according to the package instructions until the pasta is al dente. This means it should be firm but not hard. When done, save 1/2 cup of the pasta water. Drain the pasta and set it aside. In a large skillet, heat 2 tablespoons of olive oil over medium heat. Add the shrimp. Cook for about 2-3 minutes. You want them to turn pink and opaque. This shows they're fully cooked. Season with salt and pepper for extra taste. Once done, remove the shrimp from the skillet and set them aside. In the same skillet, add the last tablespoon of olive oil. Now, add 3 cloves of minced garlic and 1 teaspoon of red pepper flakes. Sauté for about 30 seconds. You want to smell the garlic but not burn it. Then, add the sliced zucchinis and 2 cups of halved cherry tomatoes. Cook for about 4-5 minutes. The zucchinis should be tender but still bright. This step makes the dish colorful and tasty. To prevent overcooking shrimp, watch the color closely. They should turn pink and opaque. This takes about 2 to 3 minutes. Remove them from the heat as soon as they change color. You can always add them back later. Reserving pasta water is key for the sauce. Save about ½ cup before draining. This starchy water helps bind the pasta and sauce. It adds creaminess without extra fat. Try fresh herbs like parsley or thyme for extra flavor. They can brighten the dish. You might also use dried herbs if fresh ones are not available. Different types of pasta work well too. You can swap spaghetti for penne or fettuccine. Each pasta brings a new texture and feel to the dish. For plating, use a large bowl to show off the colors. Twirl the pasta with a fork for a neat look. Top with fresh basil and a sprinkle of cheese. Pair the dish with a simple side salad. A mix of greens with a light vinaigrette works great. You can also serve it with garlic bread for a hearty meal. Pro Tips Perfect Pasta: Always cook your pasta al dente for the best texture. It will continue to cook slightly after being combined with the other ingredients. Fresh Shrimp: Use fresh or high-quality frozen shrimp for optimal flavor. Always ensure they are peeled and deveined for convenience. Zucchini Tips: Try not to overcook the zucchini; it should be tender but still have a slight crunch to add texture to your dish. Lemon Zest: Don't skip the lemon zest! It adds a bright, fresh flavor that elevates the entire dish. {{image_2}} You can switch out zucchini for other tasty veggies. Bell peppers add color and crunch. Asparagus gives a nice texture and flavor. Both options work well in this dish. If you want to try different seafood, scallops or fish can be great choices. They cook quickly and add unique tastes. Feel free to mix and match based on what you have at home. To make this dish gluten-free, swap regular pasta for gluten-free pasta. Many brands offer good options that cook well. Just check the package for cooking times. If you're looking for a vegan version, skip the shrimp and cheese. Use chickpeas or tofu instead for protein. You can also add more vegetables for extra flavor and nutrition. To add depth, consider using white wine or broth in the skillet. These liquids bring out the flavors of the shrimp and veggies. Just add them after sautéing the garlic. Experimenting with cheeses can also change the dish. Try feta for a tangy kick or mozzarella for a creamy touch. Each cheese brings a unique flavor to the meal. To store your Tomato Zucchini Shrimp Pasta, let it cool first. Use an airtight container to keep it fresh. Place the container in the fridge. It can last for up to three days. If you want to keep it longer, freezing is a great option. When reheating pasta, the best method is using the stovetop. Add a splash of water or olive oil to a pan. Heat on low and stir often. This will help keep the pasta from sticking. You can also refresh the flavors by adding a squeeze of lemon juice or a sprinkle of fresh herbs. To freeze the dish, make sure it cools completely first. Portion it into freezer-safe bags or containers. Remove as much air as possible to avoid freezer burn. It can stay frozen for about three months. When you want to eat it, thaw in the fridge overnight. Then, reheat it on the stovetop as mentioned above. Can I use frozen shrimp? Yes, you can use frozen shrimp. Just thaw them first. Place them in cold water for about 15 minutes. This method keeps them from cooking unevenly. What type of pasta works best for this recipe? Spaghetti or linguine works best. They hold the sauce well. You can also try penne or fettuccine if you prefer. How can I make this dish spicy? Add more red pepper flakes for heat. You can also mix in sliced jalapeños. Adjust the spice to fit your taste. Caloric content per serving Each serving has about 400 calories. This includes the shrimp, pasta, and veggies. Breakdown of macronutrients - Protein: 25 grams - Carbohydrates: 55 grams - Fat: 10 grams This breakdown helps you track your intake. Can I prepare this dish without shrimp? Yes, you can leave out the shrimp. You can add more veggies instead. Mushrooms or bell peppers work well. What are the best vegetarian substitutions? Use chickpeas or tofu for protein. Both options add texture and flavor. You can also add more zucchini or spinach for extra nutrients. In this blog post, you learned how to make a delicious tomato zucchini shrimp pasta. We covered the main ingredients and seasonings, with easy steps for perfect cooking. I shared tips on enhancing flavors and serving ideas to impress your guests. You can also explore variations and smart storage methods. Cooking should be fun, so don’t hesitate to try new flavors. Whether you stick to the basics or make swaps, enjoy this dish your way! Happy cooking!

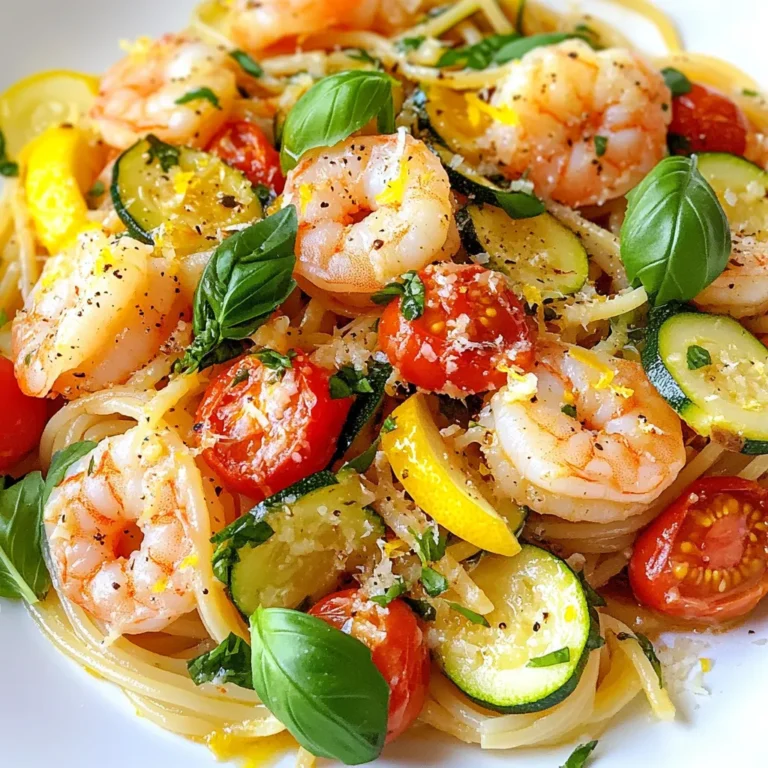
Tomato Zucchini Shrimp Pasta Flavorful and Simple Meal

To make Cinnamon Roll Cheesecake, gather these ingredients: - 1 ½ cups graham cracker crumbs - ½ cup unsalted butter, melted - 2 tablespoons sugar - 3 (8 oz) packages cream cheese, softened - 1 cup sugar - 1 teaspoon vanilla extract - 3 large eggs - 1 teaspoon ground cinnamon - ½ cup sour cream - ¼ cup heavy cream - ½ cup brown sugar - 1 tablespoon ground cinnamon (for swirl) - 1 cup powdered sugar (for glaze) - 2 tablespoons milk (for glaze) Each ingredient plays a key role in the final taste and texture. The graham cracker crumbs create a crunchy base. Use 1 ½ cups for the crust. Melt ½ cup of unsalted butter to bind the crumbs. The sugar adds sweetness, with 2 tablespoons for the crust and 1 cup for the filling. For the cheesecake filling, you need three packages of 8 oz cream cheese. These must be softened for easy mixing. Add 1 teaspoon of vanilla extract for flavor. Use three large eggs to bind everything together. The ground cinnamon enhances the warm, cozy vibe of the dessert. Sour cream (½ cup) and heavy cream (¼ cup) add richness and creaminess. Brown sugar (½ cup) and 1 tablespoon of ground cinnamon create the sweet swirl. Finally, the glaze uses 1 cup of powdered sugar and 2 tablespoons of milk for a smooth finish. You can swap some ingredients if needed. If you want a gluten-free crust, use gluten-free graham crackers. You can replace unsalted butter with coconut oil for a dairy-free option. If you don't have sour cream, plain yogurt works well. For a lighter cheesecake, use low-fat cream cheese. You can skip the heavy cream and add more sour cream. If you want a sweeter glaze, add more powdered sugar. Feel free to mix and match based on what you have on hand! {{ingredient_image_1}} Start by setting your oven to 325°F (165°C). This temperature helps the cheesecake bake evenly. While the oven warms up, gather your baking tools. You will need a 9-inch springform pan for easy release. A medium bowl and a large mixing bowl will also come in handy. In a medium bowl, mix 1 ½ cups of graham cracker crumbs, ½ cup of melted unsalted butter, and 2 tablespoons of sugar. Stir until the mixture is crumbly. Press this mix into the bottom of your springform pan. Bake it for 10 minutes, then let it cool. This crust is a sweet base for your cheesecake. Take a large mixing bowl and add 3 packages of softened cream cheese, 1 cup of sugar, and 1 teaspoon of vanilla extract. Beat these ingredients until they are smooth and creamy. This step is key for a rich filling. Next, add 3 large eggs one at a time, mixing well after each addition. Then stir in 1 teaspoon of ground cinnamon, ½ cup of sour cream, and ¼ cup of heavy cream. Mix until everything is well combined. In a small bowl, mix together ½ cup of brown sugar and 1 tablespoon of ground cinnamon. Pour half of the cheesecake batter over the cooled crust. Sprinkle half of the cinnamon-sugar mix over it. Use a knife to swirl gently. Pour the rest of the cheesecake batter on top and repeat the swirl with the remaining cinnamon-sugar mixture. The swirls create a beautiful look and add flavor. Place your springform pan into a larger baking dish filled with hot water. This water bath helps the cheesecake bake without cracking. Bake for about 60 to 70 minutes. The edges should be set, but the center should jiggle slightly. Once done, turn off the oven and crack the door open. Let the cheesecake cool inside for one hour. After that, move it to the fridge to chill for at least 4 hours or overnight. This cooling time makes it firm and delicious. To avoid cracks in your cheesecake, use a water bath. This method keeps moisture in the oven. It helps the cheesecake bake evenly. Wrap the springform pan in foil. Set it in a larger pan filled with hot water. Bake it gently at 325°F. This way, the edges cook without drying out. For a smooth and creamy texture, start with softened cream cheese. Beat it well with sugar. Mix on low speed to avoid air bubbles. Add eggs one at a time, mixing just until combined. Overmixing can make it dense. Sour cream and heavy cream add richness, so don’t skip them. Check for doneness by looking at the edges. They should be set, but the center should jiggle slightly. It will continue to firm up while cooling. Turn off the oven and crack the door open. Let it cool slowly for an hour in the oven. This helps prevent sudden temperature changes that cause cracks. Pro Tips Ensure Cream Cheese is Softened: Let the cream cheese sit at room temperature for at least an hour before using. This will help achieve a smooth and creamy texture in your cheesecake filling. Use a Water Bath: Baking your cheesecake in a water bath helps regulate temperature and prevents cracks. Wrap the bottom of your springform pan in aluminum foil to avoid any water leaks. Chill Overnight: For the best texture and flavor, allow your cheesecake to chill in the fridge overnight. This allows the flavors to meld and the cheesecake to set perfectly. Drizzle Glaze Just Before Serving: To keep the glaze from soaking into the cheesecake, drizzle it just before serving. This ensures it remains visually appealing and adds a fresh touch. {{image_2}} You can easily change the flavor of your Cinnamon Roll Cheesecake. To add vanilla, just mix in an extra teaspoon of vanilla extract. This boosts the sweet taste and makes it richer. For a fall twist, try pumpkin spice. Add one teaspoon of pumpkin spice to the cheesecake mix instead of cinnamon. This gives your dessert a warm, cozy flavor. The crust can also change to suit your taste. Instead of graham crackers, you can use crushed Oreos for a chocolatey kick. Just mix the crushed Oreos with melted butter and press it into the pan. Another option is a nut crust. Blend almonds or pecans with butter and sugar for a crunchy base. This adds texture and flavor to your cheesecake. You don’t have to make a big cheesecake. You can make mini cheesecakes using a muffin tin. Just divide the crust and filling into the cups. Bake them for about 20-25 minutes. For cheesecake bars, pour the batter into a lined baking dish. Bake it the same way. Once it cools, cut it into squares. These options are fun for parties or small servings! To keep your cinnamon roll cheesecake fresh, store it in the fridge. Place leftovers in an airtight container. If you use plastic wrap, make sure it covers the cheesecake well. It will last for about five days in the fridge. You can freeze this cheesecake for longer storage. First, slice the cheesecake into pieces. Wrap each piece tightly in plastic wrap. Then, place the wrapped slices in a freezer-safe bag. It will stay good for up to three months in the freezer. When you are ready to eat, let it thaw overnight in the fridge. To enjoy your cheesecake warm, reheat it gently. Place a slice on a microwave-safe plate. Heat it in the microwave for about 15-20 seconds. Check to see if it’s warm enough. Avoid overheating, as it can change the texture. Enjoy your delicious cinnamon roll cheesecake! Cinnamon Roll Cheesecake is a sweet treat that combines cheesecake and cinnamon rolls. It has a creamy filling with rich cinnamon flavor. The cheesecake sits on a crumbly graham cracker crust. A swirl of cinnamon-sugar adds a special touch. It’s a dessert that pleases many palates. Yes, you can make this recipe ahead of time. I often prepare it a day before serving. This allows the flavors to meld and improve. Just remember to chill it for at least four hours. It will taste even better after resting in the fridge. You can serve it with whipped cream for extra creaminess. Fresh fruits like berries also work well. A drizzle of caramel or chocolate sauce adds a nice flair. These options enhance the flavor and presentation of your cheesecake. Cinnamon Roll Cheesecake lasts about five to seven days in the fridge. Store it in an airtight container to keep it fresh. If you notice any changes in texture or smell, it’s best to toss it. Enjoy your dessert while it’s at its best! We explored the full process of making Cinnamon Roll Cheesecake. We covered the ingredients you need and how to measure them. You learned how to make the crust and filling, swirl the mixture, and bake it perfectly. I shared tips to avoid cracks and keep your cheesecake creamy. We also looked at fun variations and storage ideas to keep it fresh. With this knowledge, you can create a delicious dessert that impresses everyone. Enjoy baking and sharing this tasty treat!

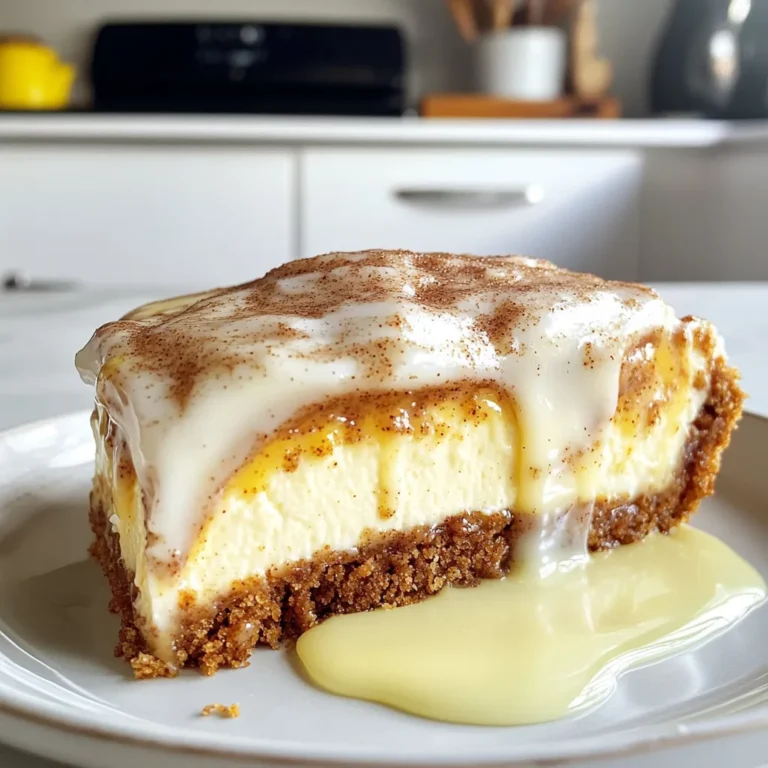
Cinnamon Roll Cheesecake Delightful and Easy Recipe

- 4 salmon fillets - 2 cups fresh spinach, chopped - 1 cup cream cheese, softened - 1/4 cup feta cheese, crumbled - 1 tablespoon blackening seasoning - 2 garlic cloves, minced - 1 tablespoon olive oil - Lemon wedges - Salt and pepper The main ingredients in this recipe create a great base. Salmon fillets are rich in flavor and healthy fats. Fresh spinach adds a vibrant color and nutrients. Cream cheese makes the filling creamy while feta adds a tangy bite. Together, they turn a simple dish into a gourmet meal. For seasoning, blackening seasoning adds a spicy kick. You can buy it or make it yourself. The garlic brings an aromatic touch that blends well with the other flavors. Olive oil helps to cook the garlic and spinach, making them soft and tasty. Don’t forget the garnishes! Lemon wedges give a fresh burst of flavor. Salt and pepper enhance the taste of the salmon. Each bite will be flavorful and enjoyable. This dish is easy to make and perfect for any meal. With these ingredients, you'll impress your family and friends. Enjoy cooking! {{ingredient_image_1}} 1. Preheat your oven to 400°F (200°C). This step gets your cooking area ready. 2. Sauté garlic and spinach in a skillet. Heat 1 tablespoon of olive oil over medium heat. Add 2 minced garlic cloves and cook for about 1 minute until fragrant. Then, add 2 cups of chopped spinach. Stir for 3-4 minutes until wilted. Remove from heat and let it cool. 1. In a mixing bowl, combine cheese and spinach mixture. Mix 1 cup of softened cream cheese and 1/4 cup of crumbled feta cheese with that sautéed spinach. 2. Season to taste with salt and pepper. This adds a nice flavor to your filling. 1. Cutting pockets in the salmon fillets. Take 4 salmon fillets and slice them horizontally. Be careful not to cut all the way through. You want a nice pocket for stuffing. 2. Stuffing the salmon is next. Fill each salmon pocket with the spinach and cheese mix. Press gently to ensure it stays inside. 1. Searing the salmon is the first cooking step. In the same skillet, heat it on high. Sear each stuffed salmon fillet for 2-3 minutes on each side until the outside is nicely charred. 2. Baking instructions come next. Transfer the seared salmon to a baking dish. Bake in your preheated oven for 7-10 minutes or until cooked through. This simple method gives you a tasty blackened salmon stuffed with spinach. Enjoy serving it with lemon wedges for a bright finish! To get that bold blackened taste, you can make your own seasoning. Here’s a simple recipe: - 1 tablespoon paprika - 1 teaspoon cayenne pepper - 1 teaspoon onion powder - 1 teaspoon garlic powder - 1 teaspoon dried thyme - 1 teaspoon salt - 1 teaspoon black pepper Mix these spices well. When you apply the seasoning, do it evenly. Use your hands for a good coat on the fish. This helps the salmon get a nice crust. Cooking salmon at the right temperature is key. I recommend cooking it at 400°F (200°C). This keeps the fish moist. To check if your salmon is done, look for a light pink color inside. It should flake easily with a fork. If it’s still dark, give it a few more minutes. Pair your blackened salmon with sides like rice or roasted veggies. They add color and texture. For a drink, a chilled white wine like Sauvignon Blanc works well. It balances the spice and makes each bite refreshing. Pro Tips Choose Fresh Ingredients: Use the freshest spinach and salmon available for the best flavor and texture. Control the Spice Level: Adjust the amount of blackening seasoning to your taste. You can make it milder or spicier depending on personal preference. Rest Before Serving: Allow the salmon to rest for a few minutes after baking. This helps the juices redistribute, resulting in a moister fillet. Experiment with Cheese: Feel free to substitute different types of cheese, like goat cheese or cream cheese with herbs, to customize the flavor of the stuffing. {{image_2}} You can change the stuffing to suit your taste. Adding other vegetables can give new flavors. Try bell peppers, mushrooms, or zucchini. These options add color and nutrients to your meal. You can also use different cheeses. Cream cheese and feta are great, but consider goat cheese or cheddar. Each cheese brings a unique taste. Mixing them can really boost the flavor. You can choose how you cook your salmon too! Grilling is a fun option. It adds a smoky flavor that pairs well with the blackening spice. Just keep an eye on the heat to avoid burning. Baking is easy and yields tender salmon. If you want a crispy finish, try using an air fryer. Cook the salmon at 375°F for about 10-12 minutes. Check for doneness, and enjoy a crunchy outside! Dietary needs vary, and this dish can fit many of them. For gluten-free variations, ensure your blackening seasoning is gluten-free. Most spices are, but check labels to be safe. You can also make low-fat options. Use low-fat cream cheese and skip the feta. This change keeps the dish tasty while cutting calories. Enjoy your salmon without worry! To store leftover salmon, place it in an airtight container. This keeps it fresh and tasty. You can also wrap the salmon tightly in plastic wrap. Make sure to cool it to room temperature before refrigerating. Leftover salmon can last about 3 days in the fridge. To ensure it tastes great, eat it within that time. Freezing stuffed salmon is easy and smart. First, let it cool completely. Then, wrap each piece tightly in plastic wrap. You can also use aluminum foil for extra protection. After wrapping, place the salmon in a freezer bag. Remove as much air as possible. Stuffed salmon can freeze well for up to 3 months. To thaw, move the salmon to the fridge overnight. If you’re in a hurry, you can also use the cold water method. Just seal the salmon in a bag and submerge it in cold water for about an hour. Reheating stuffed salmon can be tricky. You want to keep it moist and avoid dryness. The best way is to use the oven. Preheat your oven to 300°F (150°C). Place the salmon in a baking dish and cover it with foil. Heat for about 15-20 minutes, or until warmed through. You can also use a microwave, but be careful. Heat it in short bursts of 30 seconds. This way, you can check on it and avoid overcooking. Always check the center to ensure it's warm before eating. Yes, you can use frozen salmon. Start by thawing the salmon in the fridge overnight. If you're short on time, place the salmon in a sealed bag and submerge it in cold water for about an hour. This keeps the fish safe and helps it thaw evenly. After thawing, remove any excess moisture with paper towels. Then, follow the recipe as usual. Blackened salmon pairs well with many sides. Here are some of my favorites: - Steamed broccoli - Roasted asparagus - Garlic mashed potatoes - Quinoa salad - Rice pilaf These sides add color and flavor to your meal. They balance the richness of the salmon. Yes, you can prepare the salmon ahead of time. Stuff the salmon fillets and store them in the fridge for up to 24 hours. When you're ready to cook, just sear and bake them. If you cook the salmon first, store it in an airtight container. It stays fresh in the fridge for 3-4 days. Reheat gently to keep it moist. Blackened salmon can be spicy, but you control the heat. The blackening seasoning has paprika, cayenne, and other spices. If you want less heat, use less cayenne or make your own mix. Taste it before applying to the fish. This way, you get the flavor you love without too much spice. This post covered a tasty blackened salmon recipe with rich stuffing. You learned about the main ingredients, flavorful seasonings, and handy cooking tips. I shared alternatives for stuffing and various cooking methods. To sum up, making stuffed salmon is simple and fun. With practice, you’ll perfect the taste and texture. Enjoy experimenting with your favorite flavors and serving ideas. Happy cooking!

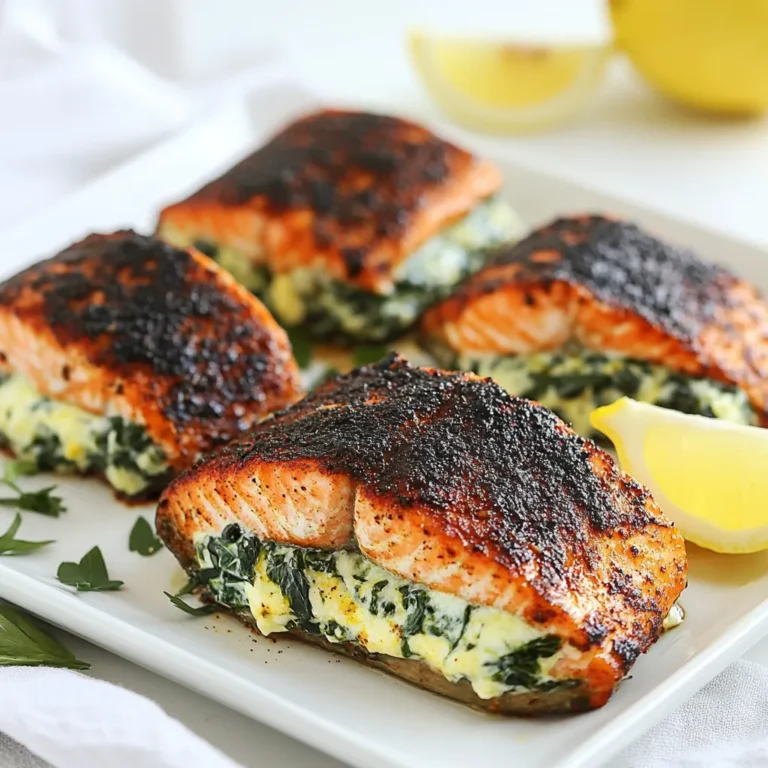
Blackened Salmon Stuffed with Spinach Delight

- 2 cups cooked chicken, shredded - 3 cups fresh spinach, chopped - 1 cup cream cheese, softened - 1 cup shredded mozzarella cheese - 1/2 cup grated Parmesan cheese - 1 cup cherry tomatoes, halved - 3 cloves garlic, minced - 1 teaspoon garlic powder - 1 teaspoon onion powder - 1 teaspoon dried Italian herbs (like basil, oregano, and thyme) - Salt and pepper to taste - 1 tablespoon olive oil - 1/4 cup breadcrumbs (optional, for topping) - Breadcrumbs for a crunchy topping - Fresh basil leaves for garnish - Crusty baguette for serving This recipe serves 4-6 people. Each serving is a good source of protein and healthy fats. It provides vitamins from spinach and tomatoes. The cream cheese and cheese add richness and flavor. For a healthier version, you can reduce the amount of cheese or use low-fat options. This dish is filling, making it perfect for a cozy dinner. {{ingredient_image_1}} 1. Preheat your oven to 350°F (175°C). This step warms the oven for baking. 2. Heat olive oil in a large skillet over medium heat. Add minced garlic. Cook it for about 1 minute. The garlic should smell great. 3. Add chopped spinach to the skillet. Sauté until it wilts, which takes about 3-4 minutes. This makes the spinach soft and tasty. 4. Mix ingredients in a large bowl. Combine softened cream cheese, shredded chicken, wilted spinach, half of the mozzarella cheese, grated Parmesan cheese, and halved cherry tomatoes. 5. Season the mix with garlic powder, onion powder, and dried Italian herbs. Add salt and pepper to taste. Stir everything together well. 6. Transfer the mixture into a greased baking dish. Spread it out evenly for even cooking. 7. Top the mixture with the remaining mozzarella cheese. If you want a crunchy topping, sprinkle breadcrumbs over it. 8. Bake in the preheated oven for 25-30 minutes. Look for a golden brown and bubbly top. This shows it’s ready. 9. Remove from the oven and let it cool slightly. This helps to avoid burns when serving. - Serve in individual bowls for a nice touch. - Drizzle with a bit of olive oil for extra flavor. - Garnish with fresh basil leaves to add color. - Pair with crusty baguette or a side salad for a complete meal. To get the best texture, make sure to use cooked chicken. Shred it into bite-sized pieces. This helps it mix well with the creamy filling. Sauté the spinach just until it wilts. Overcooking can make it slimy. If you want a crunchy top, don’t skip the breadcrumbs. They add a nice contrast to the creamy dish. To boost flavor, use fresh herbs when you can. Fresh basil or thyme will add a great taste. Also, don’t forget to season well with salt and pepper. This simple step can really make a big difference. For an extra kick, try adding a pinch of red pepper flakes. You can also mix in some sun-dried tomatoes for a fun twist. One common mistake is not heating the cream cheese enough. If it’s too firm, it won’t mix well. Always soften it before mixing it with other ingredients. Another mistake is baking it too long. Keep an eye on it to avoid drying it out. Lastly, don’t skip the cherry tomatoes. They add great color and flavor to your bake. Pro Tips Tip Title: Enhance Flavor: Add a splash of lemon juice before serving to brighten the dish's flavors. Tip Title: Cheese Variations: Experiment with different cheeses like goat cheese or feta for a unique twist. Tip Title: Make Ahead: Prepare the dish a day in advance and store it in the refrigerator for easy baking the next day. Tip Title: Serving Suggestions: Serve with garlic bread or a light salad to complement the creamy texture of the bake. {{image_2}} You can switch the chicken for other proteins. Try using cooked turkey for a lighter dish. Shredded rotisserie chicken also works well for quick prep. For a vegetarian twist, consider using chickpeas or lentils. They add protein and texture without meat. If you love seafood, use shrimp or crab. Both pair well with the creamy sauce. To make this dish dairy-free, replace the cream cheese with a plant-based alternative. You can find cashew cream cheese or almond-based cream cheese in stores. Use a dairy-free mozzarella for the cheese layer. Nutritional yeast also adds a cheesy flavor without dairy. Coconut cream can replace the cream cheese, adding richness. Always check labels to ensure they fit your needs. Add extra flavor with spices and herbs. A pinch of red pepper flakes gives heat. Fresh herbs like basil or parsley can brighten the dish. You can also mix in some sun-dried tomatoes for a tangy twist. Try adding a splash of lemon juice for freshness. If you prefer a smoky flavor, include smoked paprika. Each small change can make a big difference in taste! To keep your Creamy Chicken Spinach Bake fresh, let it cool first. Use an airtight container to store leftovers. Place it in the fridge. It should stay good for up to three days. When storing, make sure to seal it well. This will keep it from drying out. When you are ready to enjoy leftovers, preheat your oven to 350°F (175°C). Place the dish in the oven for about 15-20 minutes. This will warm it through. If you want to keep it moist, cover it with foil. You can also reheat in the microwave. Use a microwave-safe dish and heat it in short bursts. Stir and check often to avoid hot spots. If you want to keep it longer, freezing is a great option. Place the cooled dish in a freezer-safe container. Make sure to label it with the date. It can last up to three months in the freezer. To reheat, let it thaw overnight in the fridge. Then, bake it in the oven to get that tasty, crispy top again. Yes, you can use frozen spinach in this recipe. Just make sure to thaw and drain it well. Frozen spinach often contains extra water. If you don’t drain it, your dish may become watery. Using frozen spinach can save you time, but fresh spinach has a nicer texture. This dish pairs well with many sides. Here are a few ideas: - Crusty baguette for dipping. - A fresh side salad with a light dressing. - Steamed vegetables like broccoli or green beans. - Rice or quinoa for a filling meal. These sides help balance the creamy texture and add freshness to your plate. To make this dish low-carb, swap out a few ingredients. Here’s how: - Use cauliflower rice instead of breadcrumbs. - Skip the breadcrumbs entirely for fewer carbs. - Use a low-carb cheese option, if you prefer. These changes keep it delicious while lowering the carbs. Enjoy without guilt! This blog post covers everything you need for a delicious Creamy Chicken Spinach Bake. We explored the key ingredients and gave you options to make it yours. I shared step-by-step instructions to make cooking easy. Plus, you learned tips for perfect texture and flavor. We looked at variations for different diets and how to store leftovers. With these insights, you can confidently create this dish. Enjoy your cooking and savor each bite!

Creamy Chicken Spinach Bake Simple Delight Recipe

PREV 1 … 44 45 46 … 57 NEXT
meal twig

explore

DessertsDinnerAppetizersDrinks

Our Policies

  • Cookie Policy
  • Copyright Policy
  • Disclaimer
  • GDPR Policy
  • Terms Of Use
Back to Top
  • About
  • Contact Us
  • Privacy Policy
© 2025 meal twig