FREE DINNER EBOOK! Get your copy!
  • Cookie Policy
  • GDPR Policy
  • Disclaimer
  • Terms Of Use
  • Visit my other site: Fun Cookie Recipes
meal twig
  • Home
  • Dinner
  • Desserts
  • Drinks
  • Appetizers
  • Contact
  • About
  • Privacy Policy
  • Home
  • Dinner
  • Desserts
  • Drinks
  • Appetizers
  • Contact
  • About
  • Privacy Policy
  • Cookie Policy
  • GDPR Policy
  • Disclaimer
  • Terms Of Use
Visit my other site: Fun Cookie Recipes

HOME / CATEGORIES /

Latest

You can use fresh or canned peaches. If using fresh, slice four cups. Make sure they are ripe for the best flavor. If using canned, drain them well. Both options work well in this dessert. You will need one cup of granulated sugar. This adds sweetness to the peaches. Don't forget one teaspoon of cinnamon. It gives the dish a warm, inviting flavor. Mix both with your peaches for a tasty blend. Choose a box of yellow cake mix. A 15.25 oz box is perfect. This mix makes it easy and quick. It adds a nice, fluffy texture. You can also use white cake mix if you prefer. The choice is yours! Start by preheating your oven to 350°F (175°C). In a large bowl, mix together the sliced peaches, sugar, and cinnamon. If you use fresh peaches, let them sit for 10 minutes. This step helps the peaches release their tasty juices. After they sit, give the mix a gentle stir to combine all the flavors. Pour the peach mixture into a greased 9x13-inch baking dish. Spread it out evenly so every bite has good flavor. Next, sprinkle the dry yellow cake mix over the peach layer. Make sure to cover the peaches completely with a nice, even layer. This helps create a soft cake on top. Then, take your melted butter and drizzle it evenly over the cake mix. This step adds richness and helps the cake bake up golden. If you want a crunchy texture, sprinkle chopped pecans on top. They add a nice twist to your dessert. Place the baking dish in the preheated oven. Bake for 35-40 minutes. Keep an eye on the top; it should turn golden brown. You’ll know it’s done when the peach filling bubbles around the edges. Once it’s ready, take it out and let it cool for about 10 minutes. Serving it warm with vanilla ice cream makes each bite even better. Enjoy the sweet and warm flavors! To get the best texture, use fresh peaches. If you use canned peaches, make sure to drain them well. Mixing the peaches with sugar and cinnamon helps them become sweet and juicy. Let the peach mix sit for about 10 minutes. This step lets the peaches release their juices, making the filling more flavorful. Spread the peach mixture evenly in the baking dish. When you sprinkle the cake mix, cover the peaches completely. This keeps the cake moist and adds a nice crust on top. Serve your peach cobbler dump cake warm for the best taste. Adding a scoop of vanilla ice cream on top makes it even better. The cold ice cream melts slightly, creating a creamy layer. You can also serve it with whipped cream for a lighter touch. For extra crunch, sprinkle some chopped pecans on top before baking. They add flavor and a nice texture contrast. Consider pairing it with a cup of coffee or tea for a cozy dessert time. One common mistake is not draining canned peaches. This can make your dessert too watery. Another mistake is skipping the cooling time. Letting it cool for 10 minutes helps the filling set. Avoid using too much butter, as it can make the cake soggy. Finally, don't skip the even layer of cake mix. If it’s uneven, some parts may bake faster than others. Following these tips will help you make the perfect peach cobbler dump cake every time! {{image_2}} You can change the fruit in this recipe. Try apples, blueberries, or cherries. Each fruit brings its own taste. Apples work well with cinnamon, making it warm and cozy. Blueberries add a sweet burst, and cherries give a nice tartness. Just swap the peaches for your choice. Keep the sugar amount the same or adjust to your taste. If you need a gluten-free option, use gluten-free cake mix. Many brands offer good choices now. Also, check for gluten-free oats as a topping. You can mix them in with the cake mix for extra texture. This way, everyone can enjoy a slice of this tasty treat. To boost the flavor, add some extra spice. Vanilla or almond extract adds a nice touch. You can also fold in some nuts for crunch. Chopped pecans or walnuts work great. If you like a sweeter taste, drizzle some honey or maple syrup on top after baking. These small changes can make this dessert even more delightful. To store leftover Peach Cobbler Dump Cake, first let it cool to room temperature. Then, cover the dish tightly with plastic wrap or aluminum foil. You can also use an airtight container. This keeps the cake fresh. Store it in the fridge for up to 3 days. If you want to save some for later, freezing works well. Cut the cobbler into squares. Wrap each piece in plastic wrap. Then place them in a freezer bag. Squeeze out as much air as you can. You can freeze it for up to 3 months. When you are ready to eat it, just thaw it in the fridge overnight. To reheat the cobbler, preheat your oven to 350°F (175°C). Place the cobbler in an oven-safe dish. Heat it for about 15-20 minutes, or until warm. You can also use a microwave. Heat it in short bursts of 30 seconds. Check often to avoid overheating. Enjoy it warm, especially with a scoop of vanilla ice cream! Yes, you can use frozen peaches. Just thaw them first. Drain any extra liquid. This will help keep your dump cake from getting too soggy. Frozen peaches work well if you are not in peach season. They can still give you that sweet, juicy taste. To boost flavor, try adding a splash of vanilla extract. You can also mix in some nutmeg or ginger. These spices add warmth and depth. For a twist, add some lemon juice to the peach mix. It brightens the flavors and enhances the sweetness. Serve your dump cake warm with vanilla ice cream. The cold ice cream melts into the warm dessert, making it extra yummy. You can also top it with whipped cream or a drizzle of caramel sauce. Fresh berries make a nice touch, too. Enjoying it with friends makes it even better! This blog post covered how to make a delicious Peach Cobbler Dump Cake. We explored fresh peach options, sugar and spice, and cake mix choices. The step-by-step guide showed you how to prepare the peach mixture, layer the ingredients, and bake it. Tips for getting the right consistency and ideas for serving were included. We also talked about variations, storage, and answered common questions. Now, you can enjoy a tasty treat that’s easy to make and share. Happy baking!

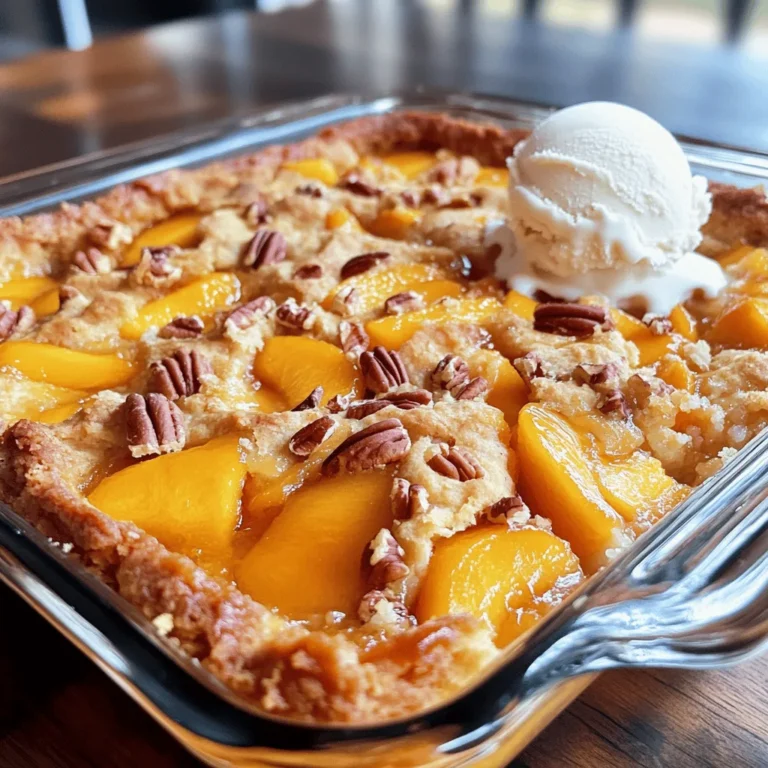
Peach Cobbler Dump Cake Delightful and Easy Recipe

- 2 lbs chicken wings, cleaned and patted dry - 3 tablespoons olive oil - 1 teaspoon garlic powder - ½ cup grated Parmesan cheese - 1 teaspoon onion powder - 1 teaspoon smoked paprika - ½ teaspoon black pepper - 1 teaspoon salt - 2 tablespoons fresh parsley, finely chopped - 1 lemon, zested and juiced Gathering the right ingredients makes all the difference. For crispy air fryer garlic Parmesan wings, chicken wings are your main star. They should be fresh and well cleaned. The olive oil helps them crisp up nicely. Garlic powder adds that tasty punch, while the grated Parmesan cheese gives a rich flavor. Next, we have the seasonings. Onion powder and smoked paprika bring warmth and depth. Black pepper and salt enhance the taste, making every bite savory. Don’t forget the fresh ingredients! Parsley adds color and freshness, and the lemon brings brightness. Zesting and juicing the lemon elevates the dish. Each component plays a role in creating crispy, flavorful wings that you will love. {{ingredient_image_1}} Start by cleaning and drying your chicken wings. In a large bowl, combine the wings with olive oil, garlic powder, onion powder, smoked paprika, black pepper, and salt. Toss everything together until the wings are well coated. This step ensures every wing gets full flavor. You want the spices to cling well, so mix thoroughly. Next, preheat your air fryer to 400°F (200°C). This usually takes about 5 minutes. Preheating helps the wings cook evenly and get crispy. Once preheated, arrange the wings in the air fryer basket. Lay them in a single layer without overcrowding. This helps them crisp up better. Cook the wings for 25 to 30 minutes. Flip them halfway through to ensure even cooking. Keep an eye on them so they don’t burn. When the wings are golden brown and crispy, take them out. Immediately toss them in a large bowl with grated Parmesan, lemon zest, lemon juice, and chopped parsley. The heat from the wings helps the cheese melt slightly, making them extra tasty. Plate the wings on a serving platter. You can garnish with extra parsley and lemon wedges for a nice touch. This adds color and makes the dish look appealing. Enjoy your crispy, flavorful wings with your favorite dipping sauce! To get crispy wings, cook them at 400°F (200°C). This temperature gives you that golden crunch. Airflow is key in an air fryer. Arrange the wings in a single layer. Do not stack them. This helps hot air circulate and crisps every wing. You can add more flavor with marinades or rubs. Try a mix of soy sauce and honey for a sweet twist. For something spicy, mix in cayenne pepper or hot sauce. You can also explore seasoning blends like Italian herbs or cajun spices for a unique touch. Always handle raw chicken with care. Wash your hands before and after touching it. Use separate cutting boards for chicken and other foods. Cook the wings until they reach 165°F (74°C) for safety. Make sure to clean all surfaces that touched raw chicken. Pro Tips Dry Wings for Extra Crispiness: Ensure the chicken wings are thoroughly dried before seasoning. This helps achieve that extra crispy texture when air frying. Don’t Overcrowd the Basket: Air needs to circulate around the wings for even cooking. Cook in batches if necessary to avoid overlapping. Adjust Cooking Time for Size: If your wings are larger or smaller than average, adjust the cooking time accordingly. Always check for doneness before serving. Use Fresh Ingredients: Fresh parsley and freshly grated Parmesan cheese will elevate the flavor of your wings significantly compared to dried or pre-packaged versions. {{image_2}} You can twist the classic flavor of garlic parmesan wings. Buffalo style garlic parmesan wings bring a spicy kick. Add hot sauce to the wings before tossing them in parmesan. This mix offers heat and creaminess that is hard to resist. Another fun option is the lemon herb variation. Instead of just garlic, add dried herbs like thyme or rosemary to the wings. This will give a bright, fresh taste. You can even add more lemon juice for a zesty punch. If you need gluten-free options, check your seasonings. Some mixes contain gluten. Stick to pure spices and ensure the wings are not cross-contaminated. Most chicken wings are naturally gluten-free, so you’re in luck! For low-carb alternatives, skip the breadcrumbs or flour coatings. Use the same seasonings for flavor without the carbs. This way, you can enjoy crispy wings without adding extra carbs to your meal. Wings pair well with many sides. Think about crispy coleslaw, potato wedges, or a fresh garden salad. Each of these sides adds texture and flavor to your meal. Dipping sauces can enhance your wings. Ranch and blue cheese are classics. For a twist, try honey mustard or a spicy aioli. These sauces can take your garlic parmesan wings to the next level! To keep your wings fresh, let them cool first. Place the wings in a shallow, airtight container. You can also wrap them tightly in plastic wrap. Store them in the fridge for up to three days. This keeps the wings tasty and safe to eat later. When it's time to enjoy your wings again, you want them crispy. The best way to reheat them is in the air fryer. Set it to 375°F (190°C) and heat the wings for about 5-7 minutes. This method revives their crunchy texture. You can also use an oven at the same temperature for similar results. Just place them on a baking sheet and heat for about 10 minutes. If you want to save wings for a longer time, freezing is a great option. First, let them cool completely. Then, place the wings in a freezer-safe bag. Remove as much air as possible before sealing. Label the bag with the date. You can freeze them for up to three months. When you're ready, thaw them in the fridge overnight before reheating. Cook wings in the air fryer for 25 to 30 minutes at 400°F (200°C). Flip the wings halfway to help them cook evenly. This time and temperature give you crispy, golden wings. Yes, you can use frozen wings. Just add about 5 to 10 minutes more cooking time. Make sure to check that they are cooked through before serving. For best results, thaw wings overnight in the fridge before cooking. Thawed wings allow for better seasoning and crispness. If your wings are not crispy, check a few things. First, make sure you did not overcrowd the air fryer basket. Air needs to flow around the wings. Second, ensure you used enough oil; it helps them crisp up. Finally, you might need to increase the cooking time a bit. Yes, you can use other oils. Olive oil is great for flavor and health. You might also try avocado oil, which has a high smoke point. Coconut oil adds a unique taste, but it can be heavier. Each oil changes the flavor slightly, so pick one that you like best. We explored how to make crispy air-fried chicken wings with simple ingredients and easy steps. You learned about main ingredients like chicken wings and Parmesan cheese, plus essential seasonings. We also shared tips for the best flavor and safety when cooking. Remember, you can offer variations to fit dietary needs and pair these wings with great sides. Enjoy your delicious wings and impress your friends and family with your skills!

Air Fryer Garlic Parmesan Wings Crispy and Flavorful

To make these tasty tacos, gather the following ingredients: - 1 lb shrimp, peeled and deveined - 2 tablespoons Cajun seasoning - 2 tablespoons olive oil - 8 small corn tortillas - 1 cup shredded red cabbage - 1 cup shredded carrots - 1/4 cup chopped fresh cilantro - 1/4 cup sour cream - 2 tablespoons lime juice - Salt and pepper to taste When choosing shrimp, look for a few key signs of freshness. First, fresh shrimp should have a clean, salty smell, not a strong fishy odor. Next, check the color. Shrimp should be firm and translucent, with a slight sheen. Avoid any shrimp that looks dull or has black spots. Lastly, if buying frozen, ensure the shrimp is properly sealed and frost-free, as freezer burn can affect taste. To whip up these Cajun shrimp tacos, you need a few basic tools: - A large mixing bowl for marinating shrimp and mixing the slaw - A skillet for cooking shrimp and warming tortillas - A spatula for flipping shrimp - A knife and cutting board for prepping vegetables - Measuring spoons for accurate ingredient portions With these ingredients and tools ready, you're set to create a bold and tasty meal that will impress anyone! Start by marinating the shrimp. In a bowl, combine the shrimp, olive oil, and Cajun seasoning. Toss until the shrimp are well coated. Let them sit for at least 15 minutes. This step helps the shrimp soak up all the bold flavors. Next, prepare the slaw. In a separate bowl, mix shredded red cabbage, shredded carrots, and chopped fresh cilantro. Add lime juice, salt, and pepper. Stir well to combine. Set this aside. The slaw adds a crunchy and fresh taste to your tacos. Now, it’s time to cook the shrimp. Heat a large skillet over medium-high heat. Add the marinated shrimp to the skillet. Cook for 2-3 minutes on each side. The shrimp should turn pink and opaque when done. Remove them from heat. While the shrimp cook, warm the tortillas. Use the same skillet to lightly warm the corn tortillas. Heat them for about 30 seconds on each side. This makes them soft and easy to fold. Now, assemble your tacos. On each tortilla, place a generous amount of spicy shrimp. Top with a scoop of the prepared slaw. The mix of flavors and textures will be perfect. For serving, drizzle sour cream over the tacos. You can also add more cilantro for extra color. These tacos are best enjoyed fresh. Serve them with lime wedges on the side for a zesty kick. To make the best Cajun seasoning, mix spices like paprika, garlic powder, and cayenne. I love using a blend of herbs for depth. You can adjust the heat by adding more or less cayenne. For a bolder taste, let the seasoning sit for an hour before using it. This allows the flavors to meld and become richer. For perfect shrimp, choose medium to large ones. They cook quickly and have a nice bite. Marinate them in olive oil and Cajun seasoning for at least 15 minutes. This step is key! Cook the shrimp on high heat for just 2-3 minutes per side. Look for a pink and opaque color to know they’re done. Overcooking makes shrimp tough, so watch closely! The slaw can really enhance your tacos. Try adding diced jalapeños for a spicy kick. You can also mix in some mango for a sweet touch. For crunch, add sliced radishes or green onions. Lime juice adds brightness, but you can experiment with apple cider vinegar too. Feel free to swap red cabbage for green or add some chopped nuts for texture! {{image_2}} You can easily make these tacos vegan. Swap the shrimp for firm tofu. Start by pressing the tofu to remove extra water. Cut it into cubes and marinate it with Cajun seasoning and olive oil. Cook the tofu in the skillet until golden. This brings a nice crunch and flavor to your tacos. If you like spice, boost the heat! Add cayenne pepper or chili powder to the Cajun seasoning. You can also mix in some sliced jalapeños when cooking the shrimp. This will give your tacos a fiery kick. Spice lovers will enjoy this addition a lot. Feel free to get creative with toppings! Try adding sliced avocado for creaminess. You can also use pico de gallo for a fresh touch. Instead of sour cream, try a spicy aioli or a zesty salsa. Each option adds a unique twist to your tacos. Explore different flavors and find your favorite combination! If you have leftover tacos, store them right. Place the shrimp and slaw in separate containers. This keeps the tortillas from getting soggy. Use airtight containers for the best results. Leftover tacos can last in the fridge for two days. To reheat the shrimp, use a skillet. Heat it over medium heat. Add the shrimp and cook for a few minutes. Stir often to warm them through. For the tortillas, warm them in the skillet for about 30 seconds on each side. This helps them stay fresh and tasty. Store leftover slaw in a sealed container. Keep it in the fridge. It can last for up to three days. If the slaw looks watery, drain some liquid before serving. For the best taste, eat it fresh. You can enjoy these tacos with a fresh side. Consider a simple salad or beans. A corn salad pairs well too. You might also like avocado slices for creaminess. For drinks, try a cold limeade or a light beer. These will balance the flavors and add fun. Yes, you can prep ahead. Marinate the shrimp and store it in the fridge. You can also make the slaw early. Keep it in a sealed container for freshness. Warm the shrimp and tortillas just before serving. This saves time and helps with busy days. To feed more people, simply double the ingredients. Use two pounds of shrimp and adjust the seasoning. Also, increase the tortillas and slaw. This keeps everything balanced. Remember to cook in batches if needed. This way, you ensure everyone gets a tasty taco. Yes, there are gluten-free tortillas available. Look for corn or rice-based options. These work well for this recipe. Check labels to ensure they fit your needs. Gluten-free tortillas will still hold the shrimp and slaw beautifully. Enjoying this dish can be easy for everyone! Cajun shrimp tacos are a fun dish to make and enjoy. We covered the best ingredients, shrimp selection tips, and essential tools. You learned how to marinate, cook, and serve the shrimp with slaw. I shared tricks to perfect seasoning and texture. You can even try vegan options or add heat. Lastly, we discussed storage and answers to common questions. Enjoy creating your tacos while exploring flavors that excite your taste buds.

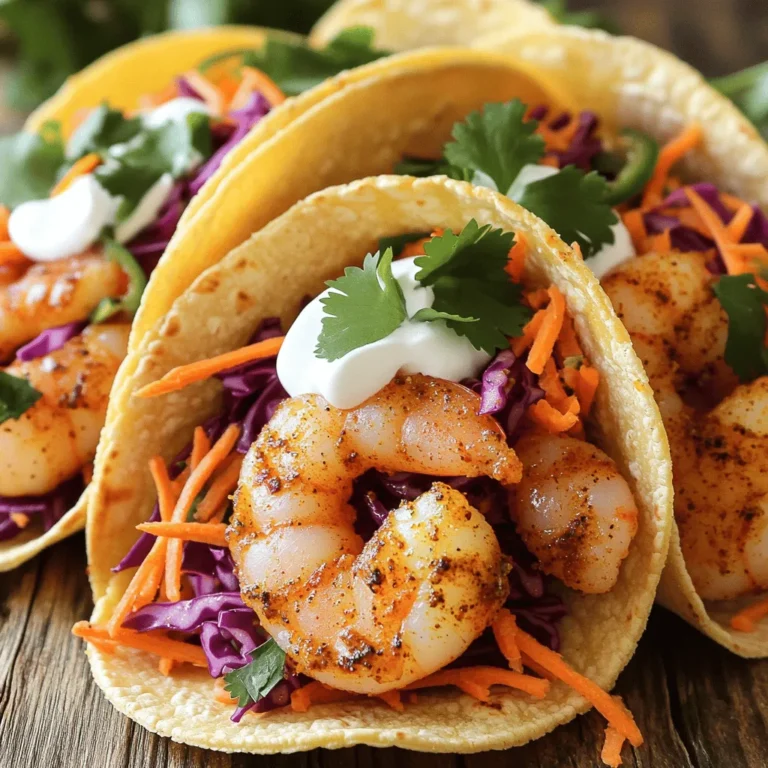
Cajun Shrimp Tacos with Slaw Bold and Tasty Meal

- 1 ½ cups all-purpose flour - 1 cup granulated sugar - ½ cup unsalted butter, softened - 2 large eggs - 1 teaspoon vanilla extract - ½ cup sour cream - ½ cup lemonade (freshly squeezed is best) - Zest of 1 lemon - ½ teaspoon baking powder - 1 teaspoon baking soda - ¼ teaspoon salt - ¾ cup fresh raspberries You might wonder about substitutions. If you don’t have sour cream, use plain yogurt. It works well and keeps the cupcakes moist. For the best lemon flavor, always choose fresh lemons. Bottled lemon juice lacks the vibrant taste of fresh juice. To make these cupcakes, gather your tools: - Cupcake pan - Mixing bowls and mixer - Measuring cups and spoons These items make mixing easy and ensure you get the right amounts. With the right tools, your baking will be smooth and fun! 1. Preheat your oven to 350°F (175°C). This step is key for fluffy cupcakes. 2. Line a cupcake pan with paper liners. This makes it easy to remove the cupcakes later. 3. In a large bowl, cream together ½ cup unsalted butter and 1 cup granulated sugar. Beat until the mixture is light and fluffy. This might take a few minutes, but it’s worth it! 1. Add 2 large eggs, one at a time. Mix well after adding each egg. This helps the batter come together nicely. 2. Stir in 1 teaspoon vanilla extract and the zest of 1 lemon. The zest adds a bright flavor. 3. In a separate bowl, whisk together 1 ½ cups all-purpose flour, ½ teaspoon baking powder, 1 teaspoon baking soda, and ¼ teaspoon salt. This ensures the dry ingredients are mixed well. 4. Gradually add the dry mixture to the butter mix. Alternate with ½ cup sour cream and ½ cup lemonade. Mix until just combined. Avoid overmixing. 5. Gently fold in ¾ cup fresh raspberries. Be careful not to crush them; you want lovely chunks of fruit. 1. Divide the batter evenly among the cupcake liners. Fill each one about 2/3 full to allow for rising. 2. Bake in the preheated oven for 18-20 minutes. Check for doneness by inserting a toothpick into the center. If it comes out clean, they're ready! 3. Once baked, let the cupcakes cool in the pan for 5 minutes. Then, transfer them to a wire rack to cool completely. This step prevents sogginess. To ensure the perfect cupcake texture, start with room temperature ingredients. This helps the butter cream well with sugar. Cream until it looks light and fluffy. Mix the batter gently after adding dry ingredients. This keeps the cupcakes soft and tender. To avoid overmixing the batter, add flour slowly. Mix just until combined. If you see dry flour, stop stirring. Folding in raspberries should be gentle. Use a spatula to keep them whole. This adds bursts of flavor in every bite. For the best frosting options, use lemon or raspberry icing. A lemon buttercream pairs nicely. You can also try a cream cheese frosting. Both flavors enhance your cupcakes. They add richness and a tangy taste. To create vibrant decorations, use fresh raspberries on top. A sprinkle of lemon zest gives color and flair. You can also add edible glitter for fun. These small touches make your cupcakes stand out. To serve and embellish cupcakes for special occasions, use colorful liners. A nice plate adds style too. Arrange the cupcakes in a circle. This makes a lovely display for parties. Suggestions for pairing with drinks include iced tea or lemonade. Both drinks complement the fruity flavors. A refreshing drink makes the cupcakes even better. Consider serving them at summer gatherings or picnics for smiles all around. {{image_2}} You can change the flavor of your Raspberry Lemonade Cupcakes by adding different fruits. Try blueberries or strawberries for a fun twist. You can also mix in some diced peaches for a summer vibe. If you want to make these cupcakes gluten-free, use almond flour or a gluten-free mix. For vegan options, substitute eggs with flaxseed meal and use plant-based butter. While lemon or raspberry frosting is a classic choice, you can explore other flavors. Cream cheese frosting adds a rich taste. A simple whipped cream topping is light and fluffy. For a layered cupcake, frost one layer with lemon and another with raspberry. This will give your cupcakes a fun look and taste. Decorating your cupcakes can be a blast! Use edible flowers like pansies for a beautiful touch. Fresh fruit, such as whole raspberries or lemon slices, can also brighten up your cupcakes. Get creative with cupcake wrappers too. You can find colorful or themed wrappers to make your treats stand out. Presentation matters, so think about using a cake stand for serving. To keep your raspberry lemonade cupcakes fresh, use airtight containers. Place them in a container with a lid. This helps seal in moisture. You can also use plastic wrap to cover them. Store them at room temperature for the best taste. Avoid placing them in direct sunlight or near heat. If you want to freeze your cupcakes, wait until they cool completely. Wrap each cupcake in plastic wrap. Then, place them in a freezer-safe bag. They can last up to three months in the freezer. When you are ready to eat them, take them out. Let them thaw at room temperature for about an hour. If you want to warm them, use a microwave for about 10 seconds. Raspberry lemonade cupcakes stay fresh at room temperature for about three days. If you store them in the fridge, they can last for about a week. Check for signs that they have gone bad. If you see mold or smell something off, it’s best to discard them. Enjoy your treats while they are fresh! For smooth and even frosting, start with room-temperature icing. Use a spatula to spread it gently. You can also use a piping bag for a fancy look. This gives a nice swirl on top. If you want a fun design, try different piping tips. A small offset spatula can help smooth out edges too. Yes, you can use frozen raspberries. They will work just fine. Thaw them first and drain excess juice. This helps keep your batter from getting too wet. Frozen raspberries may break apart more easily, so fold them in gently. To check if the cupcakes are done, use a toothpick. Insert it into the center of a cupcake. If it comes out clean, they are ready. Another sign is a golden top and a firm feel. If they spring back when touched, they are perfect. This blog post covered everything you need for making raspberry lemonade cupcakes. We explored the essential ingredients, tips, tools, and step-by-step baking instructions. I shared tips for perfect texture and presentation ideas for special occasions. Remember, you can customize flavors and frostings to suit your taste. Proper storage will keep your treats fresh, ensuring they stay delicious longer. With these insights, you're ready to create delightful cupcakes. Enjoy baking and impressing your friends with your tasty treats!

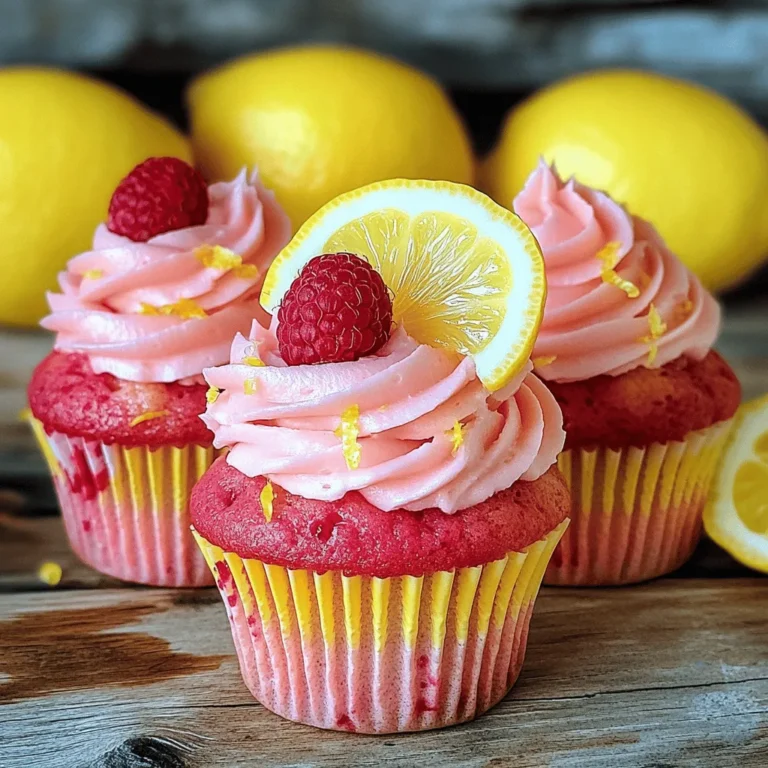
Raspberry Lemonade Cupcakes Refreshing Summer Treat

- 1 lb (450g) chicken breast, thinly sliced - 2 tablespoons soy sauce - 2 tablespoons cornstarch - 1 tablespoon olive oil - 1 orange, juiced and zested - 1 tablespoon honey - 1 teaspoon fresh ginger, grated - 3 cloves garlic, minced - 1 red bell pepper, sliced - 1 cup broccoli florets - 1 cup snap peas The main ingredients are key to making this dish shine. Chicken breast serves as the protein base. I love using fresh vegetables like red bell pepper, broccoli, and snap peas for crunch and color. The sauce gets its zing from fresh orange juice and zest. Honey adds a touch of sweetness, while garlic and ginger bring warmth and depth. - Salt and pepper to taste - Green onions, sliced (for garnish) - Sesame seeds (for garnish) Seasoning elevates the dish. A sprinkle of salt and pepper brings out all the flavors. I finish with green onions and sesame seeds for a nice touch. They add flavor and a lovely visual appeal. Don't skip this step; it makes your stir fry look and taste gourmet! - Marinate the Chicken Start by slicing the chicken breast thinly. In a bowl, mix the chicken with soy sauce, cornstarch, and a pinch of salt and pepper. Make sure every piece is well-coated. Let this marinate for at least 15 minutes. This step makes the chicken tender and adds flavor. - Whisk the Orange Sauce While the chicken marinates, juice the orange and zest it. In a small bowl, combine the orange juice, zest, honey, grated ginger, and minced garlic. Whisk this mixture well and set it aside. This sauce will bring a bright, citrusy flavor to the dish. - Cook the Chicken Heat the olive oil in a large skillet or wok over medium-high heat. Once hot, add the marinated chicken in a single layer. Cook for about 4-5 minutes, stirring occasionally. The chicken should turn golden brown and be fully cooked. Once done, remove it from the skillet and set it aside. - Stir-Fry the Vegetables In the same skillet, add the sliced red bell pepper, broccoli florets, and snap peas. Stir-fry for about 3-4 minutes. The vegetables should be vibrant and slightly tender but still crisp. This keeps their nutrients intact and adds texture to your dish. - Combine and Thicken the Sauce Return the cooked chicken to the skillet. Pour the orange sauce over everything. Toss to combine well. Cook for an additional 2-3 minutes. This allows the sauce to thicken slightly and coat all the ingredients. Taste and adjust the seasoning with more salt and pepper if needed. Remove from heat and garnish with sliced green onions and sesame seeds. Marination Time Marinate the chicken for at least 15 minutes. This time allows the soy sauce to soak in. It helps make the chicken tender and tasty. If you can, marinate longer for even more flavor. Balance of Sweetness and Savory The orange juice and honey bring sweetness to this dish. Combine them with soy sauce for a savory kick. Taste your sauce and adjust as needed. Add more honey for sweetness or soy sauce for saltiness. Importance of High Heat Stir-frying works best over high heat. This method cooks the chicken fast and keeps it juicy. It also makes the veggies bright and crisp. Heat the oil until it shimmers before adding the chicken. Stir-Fry Order for Crisp Vegetables Cook the chicken first, then remove it from the pan. Add the vegetables next. Start with the harder ones, like broccoli, and then add softer ones like bell peppers. This order keeps everything crisp and fresh. {{image_2}} You can switch the chicken for tofu or shrimp. Tofu is a great option for a plant-based meal. Press and cube it before marinating. Shrimp cooks fast, so add it last to keep it tender. Both choices soak up the orange glaze well. Consider using beef or pork if you want something heartier. Thinly slice the meat for even cooking. Marinate it the same way as chicken. Each protein brings its unique taste. Seasonal vegetables can change the dish's feel. Try carrots, zucchini, or snap peas for a fresh twist. Use what you find at the market. Fresh veggies keep the meal bright and crisp. Adding nuts can give a nice crunch. Toasted cashews or almonds work well. They add texture and a lovely nutty flavor. Mix them in just before serving for the best crunch. - Refrigeration Tips: Place leftovers in an airtight container. They last for up to three days in the fridge. Make sure to cool the stir fry to room temperature before sealing. This helps keep it fresh. - Freezing Instructions: For longer storage, freeze the stir fry in a freezer-safe container. It can stay good for up to three months. When ready to eat, thaw it overnight in the fridge before reheating. - Best Methods for Maintaining Flavor: Reheat the stir fry in a skillet over medium heat. Add a splash of water or extra orange juice to keep it moist. Stir often so everything heats evenly. - Avoiding Sogginess: To prevent sogginess, do not microwave the stir fry. Microwaving can make the chicken and veggies lose their crispness. Always use the skillet method for the best taste and texture. How can I make it spicier? To add heat, mix in some red pepper flakes or chopped fresh chili. You can also use spicy sauces like Sriracha or chili garlic sauce. Just start with a little, and taste as you go. Can I use bottled orange juice? Yes, you can use bottled orange juice for this dish. Fresh juice adds a bright flavor, but bottled juice works well too. Just choose a brand that is pure juice without added sugars. What to serve with Orange Glazed Chicken Stir Fry? Serve this dish over steamed rice or noodles for a full meal. You can also pair it with a simple salad or some steamed veggies for extra crunch and nutrition. Caloric Content per Serving Each serving of Orange Glazed Chicken Stir Fry has about 300 calories. This dish is balanced with protein and vegetables, making it a healthy choice. Healthier Ingredient Substitutes You can swap out chicken for tofu or shrimp for a lighter option. Use low-sodium soy sauce to cut back on salt. For a sweeter sauce, try maple syrup instead of honey. Can I make it in advance? Yes, you can prep this dish ahead of time. Marinate the chicken and chop the veggies a few hours before cooking. Just store everything in the fridge until you’re ready to stir-fry. How do I adjust cooking time for larger servings? When cooking for more people, increase the ingredients but keep the cooking times similar. Cook in batches if your skillet is small. This helps everything cook evenly and stay tender. This article covered how to make a delicious orange glazed chicken stir fry. We discussed key ingredients, preparation steps, and cooking techniques. You learned tips for flavor balance and how to customize the dish with different proteins and veggies. Remember to store leftovers properly to keep them tasty. Try this recipe and enjoy a meal that's both simple and packed with flavor. Cooking at home can be fun and rewarding. Feel free to experiment and make it your own!

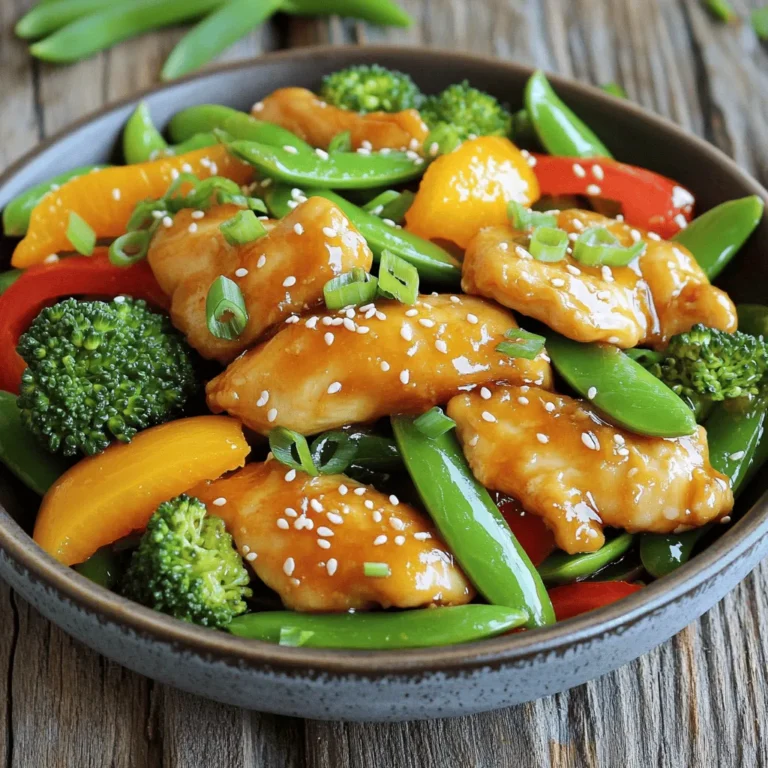
Orange Glazed Chicken Stir Fry Flavorful Dinner Idea

Baked Blueberry French Toast Cups are a sweet and easy breakfast. They are perfect for a lazy weekend or a special brunch. You can prepare them quickly and bake them in just 25-30 minutes. This recipe makes 12 tasty cups that everyone will love. Here are the main ingredients you need for this recipe: - 8 slices of bread (preferably brioche or challah), cut into small cubes - 2 cups fresh blueberries - 4 large eggs - 1 cup milk (dairy or non-dairy) - 1/4 cup maple syrup - 1 teaspoon vanilla extract - 1 teaspoon cinnamon - 1/4 teaspoon nutmeg - 1 tablespoon butter (for greasing) Each ingredient adds flavor and texture. The bread forms the base. Blueberries add a burst of sweetness. Eggs and milk create a creamy mixture. You can also add these optional ingredients for extra flavor: - Powdered sugar (for dusting, optional) Dusting with powdered sugar gives a nice touch. It adds sweetness and makes the cups look pretty. Feel free to skip this if you prefer a less sweet dish. Using these ingredients, you can create a delightful breakfast treat that is fun to eat. First, you need to preheat your oven to 350°F (175°C). While it heats, grab your muffin tin and lightly grease it with butter. This step helps your French toast cups release easily after baking. In a large mixing bowl, whisk together the eggs, milk, maple syrup, vanilla extract, cinnamon, and nutmeg. Mix until everything is well blended. Next, add the cubed bread to the egg mixture. Gently fold the bread until all pieces soak up the mixture. This soaking is key to a soft and tasty cup. Then, carefully add the fresh blueberries. Fold them in gently to keep them whole. Now, it’s time to fill the muffin tin. Spoon the mixture evenly into each cup, filling them about 3/4 full. This allows room for the cups to rise during baking. Place the muffin tin in the preheated oven. Bake for 25-30 minutes. You want the tops to turn a golden brown and the centers to set. Keep an eye on them as they bake. It’s hard to resist the warm, sweet smell! Once baked, let the French toast cups cool for a few minutes. This makes them easier to remove from the tin. Use a butter knife to gently loosen each cup from the sides. Carefully lift them out and place them on a serving plate. For a fun touch, you can dust the tops with powdered sugar. This adds a sweet finish and makes them look even more inviting. Enjoy these delightful bites warm! To get the best texture, let the bread soak well. This step is key. It helps the bread absorb the egg mixture. If you rush this, your cups may be dry. Aim for a soft, custardy inside. Bake them just until the tops are golden brown. This keeps the centers moist and fluffy. For these cups, use brioche or challah. Both are soft and sweet, which adds to the flavor. You can use day-old bread too. It soaks up the mixture better. Avoid using bread that is too crusty. Crusty bread can lead to tough cups that are hard to eat. Use fresh blueberries for the best taste. If you want more flavor, add a splash of lemon juice. This gives a bright taste that pairs well with blueberries. Consider adding a pinch of salt to the egg mixture. Salt brings out the sweetness of the maple syrup. You can also sprinkle some nuts on top before baking for extra crunch! {{image_2}} You can switch up the berries in these cups. Try raspberries, strawberries, or blackberries. Each berry gives a new taste. Use 2 cups of any berry you like. Mix them in just like you do with blueberries. You can even combine different berries for a fun twist. Each option brings a unique flavor that makes breakfast special. Want a gluten-free version? You can use gluten-free bread. Look for options made from rice or almond flour. Cut the bread into small cubes, just like the recipe says. The rest of the steps remain the same. You will still enjoy those fluffy, delicious French toast cups without the gluten. Add toppings to make your French toast cups even better. Here are some ideas: - Chopped nuts like walnuts or pecans for crunch. - Chocolate chips for a sweet surprise. - Coconut flakes for a tropical touch. - Cream cheese for a rich, creamy layer. Feel free to mix in your favorites. These options let you get creative and make each batch unique. Enjoy exploring these variations! To keep your baked blueberry French toast cups fresh, store them in an airtight container. Place parchment paper between layers to avoid sticking. They will last for up to three days in the fridge. If you want to keep them longer, freezing is a great option. Reheat your French toast cups in the oven for the best results. Set your oven to 350°F (175°C). Place the cups on a baking sheet and cover them with foil. Heat for about 10-15 minutes, or until warmed through. You can also use the microwave, but they may become a bit soggy. Heat them in 30-second bursts until warm. To freeze, let the cups cool completely. Place them in a single layer on a baking sheet. Once frozen, transfer them to a freezer-safe bag. They can stay in the freezer for up to two months. When you're ready to enjoy, thaw them overnight in the fridge before reheating. Yes, you can prepare the Baked Blueberry French Toast Cups ahead. Just follow these steps: - Mix the egg mixture and bread as usual. - Place the mixture in the muffin tin but do not bake it yet. - Cover the tin with plastic wrap and store it in the fridge overnight. - The next morning, simply bake them as directed. This saves time for busy mornings. You will know the French toast cups are done when they look golden brown. A toothpick inserted in the center should come out clean. If it has wet batter, give them a few more minutes. The edges may puff up a bit, and the tops should not jiggle. These cups pair well with many tasty sides. Here are some ideas: - A drizzle of more maple syrup for extra sweetness. - Whipped cream for a creamy topping. - Fresh fruit like strawberries or bananas for added flavor. - A dollop of yogurt to balance the sweetness. These sides can make your meal even better! You now have a complete guide to making delicious Baked Blueberry French Toast Cups. We covered the needed ingredients and step-by-step instructions. Tips for texture and flavor help perfect your dish. We explored variations for everyone, including gluten-free options. You can store and reheat these cups easily. Try these cups for a tasty breakfast treat. Enjoy sharing them with friends and family! You’ll love the fun of making and serving them. Everyone will ask for the recipe.

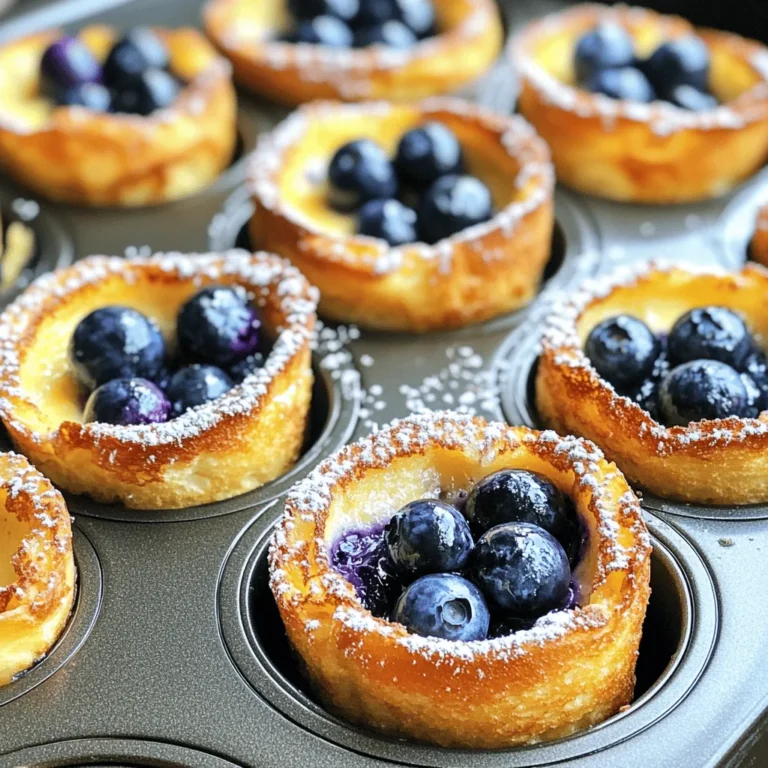
Baked Blueberry French Toast Cups Easy and Delicious

- 1 lb ground chicken - 1/2 cup breadcrumbs - 1 cup sweet chili sauce To make sweet chili chicken meatballs, you need a few key ingredients. Ground chicken is the star. It gives the meatballs a nice texture. Breadcrumbs hold everything together, keeping the meatballs moist. Sweet chili sauce adds that perfect blend of sweet and spicy. - 1/4 cup grated Parmesan cheese - 1/4 cup green onions, finely chopped - 1/4 cup cilantro, finely chopped - 1 garlic clove, minced - 1 egg, lightly beaten - 1 teaspoon salt - 1/2 teaspoon black pepper - 1/2 teaspoon red pepper flakes (optional) These optional ingredients boost the flavor. Parmesan cheese adds richness. Green onions and cilantro give freshness. Garlic adds depth. Eggs help bind the meatballs, while salt and black pepper enhance the taste. Red pepper flakes bring heat if you like it spicy. - Mixing bowl - Skillet - Baking sheet You only need a few tools to make these meatballs. A mixing bowl is key for combining the ingredients. A skillet is perfect for cooking them evenly. A baking sheet helps you shape the meatballs before cooking. With these ingredients and tools, you are set to make sweet chili chicken meatballs that will wow your friends and family! To start, gather all the ingredients in a large mixing bowl. You will need: - 1 lb ground chicken - 1/2 cup breadcrumbs - 1/4 cup grated Parmesan cheese - 1/4 cup green onions, finely chopped - 1/4 cup cilantro, finely chopped - 1 garlic clove, minced - 1 egg, lightly beaten - 1 teaspoon salt - 1/2 teaspoon black pepper - 1/2 teaspoon red pepper flakes (optional) Mix everything well until you see no dry spots. Be careful not to overmix. Overmixing makes the meatballs tough. You want them soft and tender. Next, shape the mixture into small meatballs. Aim for about 1 inch in diameter. Place them on a baking sheet lined with parchment paper. Now, heat 2 tablespoons of sesame oil in a large skillet over medium heat. Once the oil is hot, add the meatballs in batches. Avoid crowding the pan. This helps them cook evenly. Cook for about 6-8 minutes, turning them to brown all sides. Make sure they reach an internal temperature of 165°F. Once cooked through, remove the meatballs from the skillet. Place them in a large mixing bowl. Pour 1 cup of sweet chili sauce over the meatballs. Gently toss to coat them well. Then, return the coated meatballs to the skillet for 2-3 more minutes on low heat. This warms the sauce and helps the flavors mix. Enjoy your sweet chili chicken meatballs! To make great sweet chili chicken meatballs, texture is key. You want them soft and tender. The first rule is to not overmix the meat. When you mix the ground chicken with other ingredients, do it gently. If you mix too much, the meatballs can become tough. - Mix until just combined. - Keep the meatballs small, around 1 inch in size. This size helps them cook evenly and stay moist. Remember, a light touch goes a long way! You can cook your meatballs in two main ways: skillet frying or baking. - Skillet Frying: This method gives a nice crust. Heat sesame oil in a skillet over medium heat. Cook the meatballs in batches. Don’t overcrowd the pan, or they will steam instead of brown. - Baking: For a healthier option, you can bake them. Preheat your oven to 400°F. Place the meatballs on a baking sheet and cook for about 20 minutes. To check for doneness, use a meat thermometer. The internal temperature should reach 165°F. This ensures they are safe to eat. Pair these meatballs with some tasty side dishes. They go great with steamed jasmine rice. You can also serve them with a fresh green salad. For presentation, arrange the meatballs on a platter. Garnish with extra chopped green onions and cilantro. A drizzle of sweet chili sauce on top makes it look even better. This simple touch impresses your guests and makes the dish pop! {{image_2}} You can swap ground chicken for ground turkey or beef. Both options work well. Just keep the other ingredients the same. This change can add different flavors and textures. For a vegetarian option, use chickpeas or lentils. Mash them up and follow the same steps. These meatballs stay tasty and satisfying! Get creative with flavors! Add spices like cumin or paprika for a twist. You can also use different sauces. Try adding soy sauce or hoisin sauce for a unique touch. For dipping sauces, mix plain yogurt with herbs. You can also blend peanut butter with a bit of soy sauce. These will enhance the meatballs and add zing! Do you like it mild or spicy? If you prefer mild, skip the red pepper flakes. You can also add just a pinch for a hint of heat. For spicy lovers, boost the red pepper flakes or add sriracha to the sauce. Taste as you go, and adjust it to fit your tongue. This way, everyone can enjoy the meatballs! Sweet chili chicken meatballs last about 3 to 4 days in the fridge. Store them in an airtight container to keep them fresh. Make sure they cool down first before sealing. This helps prevent moisture build-up. To freeze meatballs, first cool them completely. Then, place them in a single layer on a baking sheet. Once frozen solid, transfer them to a freezer bag. This method prevents them from sticking together. They can stay frozen for up to 3 months. To reheat, take the meatballs from the freezer and thaw overnight in the fridge. You can warm them in a skillet on low heat or microwave them. Add a splash of water to keep them moist. You can enjoy leftover meatballs in various ways. Chop them up and add them to a stir-fry with veggies. They also taste great in a sub sandwich with cheese. Another option is to mix them into pasta with marinara sauce. Serve with a green salad for a balanced meal. To check if the meatballs are cooked, use a meat thermometer. The safe internal temperature is 165°F. Insert the thermometer into the center of a meatball. If it reads 165°F or higher, your meatballs are done. Cooking time is also a good guide. If the meatballs are golden brown on the outside and firm to the touch, they are likely cooked. Always cut one open to check if the inside is no longer pink. Yes, you can make these meatballs ahead of time. Form the meatballs and place them on a baking sheet. Cover them and store them in the fridge for up to a day. This saves time for busy nights. You can also freeze them. Just place the uncooked meatballs on a baking sheet and freeze until firm. Then, transfer them to a freezer-safe bag. They can last for up to three months. When ready to cook, no need to thaw; just add a few extra minutes to the cooking time. Sweet chili chicken meatballs pair well with many sides. Here are some ideas: - Steamed jasmine rice - Fresh green salad - Stir-fried vegetables - Noodles with soy sauce - Garlic bread For drinks, try a light beer or iced tea. These flavors complement the sweet and spicy notes of the meatballs well. Enjoy your meal! These sweet chili chicken meatballs are simple and tasty. We covered the key ingredients and tools needed to make them. I shared step-by-step instructions and tips to achieve perfect texture and flavor. You can even try different proteins or spice levels. Remember, storing them correctly will keep them fresh longer. These meatballs are versatile and easy to enjoy in many ways. Use your favorite sides to make a great meal. Enjoy your cooking adventure!

Sweet Chili Chicken Meatballs Easy and Flavorful Dish

To make this tasty dish, you need a few key items. Here’s what you will need: - 1 cup rolled oats - 1 cup almond milk (or milk of choice) - 1/2 cup pumpkin puree - 1 tablespoon maple syrup (or honey) - 1 teaspoon pumpkin pie spice - 1/2 teaspoon vanilla extract - A pinch of salt These ingredients create a creamy and flavorful base. The oats soak up the liquid and flavors overnight, making them soft and delicious by morning. You can add some optional ingredients to make your oats even better. Consider these: - 1/4 cup Greek yogurt (optional for creaminess) - Chopped walnuts or pecans for topping - Whipped cream (optional, for serving) Greek yogurt adds creaminess and protein. Nuts provide a nice crunch, while whipped cream makes it feel special. This dish is not just tasty; it is also good for you. Here are some quick facts: - Oats are high in fiber and can help keep you full. - Pumpkin is packed with vitamins A and C. - Maple syrup adds sweetness with some minerals. This breakfast is a great way to start your day. It offers a mix of healthy carbs, fats, and protein. Enjoy your pumpkin pie overnight oats and feel good about your meal! To start, gather your ingredients. You need rolled oats, almond milk, pumpkin puree, maple syrup, pumpkin pie spice, vanilla extract, Greek yogurt, and a pinch of salt. In a medium bowl, combine these. Stir well until everything is mixed. This helps blend the flavors. Next, divide the mixture into two airtight containers. Seal them tightly. Refrigerate overnight or for at least four hours. This soaking time is key. It allows the oats to soften and soak up the goodness. When mixing, you can adjust the sweetness. If you want it sweeter, add more maple syrup or honey. The Greek yogurt is optional but adds creaminess. If you skip it, your oats will still taste great. Always use airtight containers. This keeps the oats fresh and prevents spills. Store them in the fridge. They will last up to five days. This makes it easy to grab a quick breakfast. The next morning, stir your oats again. This helps mix the settled ingredients. Top with chopped walnuts or pecans for a nice crunch. For a special treat, add whipped cream on top. Serve in clear jars to show off those beautiful layers. You can even sprinkle a dash of pumpkin pie spice on top. This adds a lovely touch. Enjoy your cozy fall breakfast! To get your oats just right, focus on the liquid ratio. Use 1 cup of almond milk for every cup of rolled oats. This balance keeps the oats creamy, not too thick or runny. If you prefer thicker oats, add a bit more oats. If you like them creamier, add more milk. Let the oats soak overnight. This way, they absorb the milk and flavors. Start with 1 tablespoon of maple syrup. After mixing, taste it. If you want more sweetness, add a little more syrup or honey. For spice, the pumpkin pie spice adds warmth. You can adjust this too. If you love cinnamon, add more cinnamon to enhance the flavor. Just remember, a little goes a long way! If you have leftover oats, store them in the fridge for up to 4 days. You can enjoy them cold or heat them up. If you have extra pumpkin puree, use it in smoothies or muffins. This helps cut down on waste. You can also top your oats with leftover nuts or fruits. Get creative and enjoy every bite! {{image_2}} You can switch the milk to fit your needs. Almond milk works great, but other options exist. Try oat milk or coconut milk for a different taste. Rice milk is also a good choice if you want something lighter. Each milk will change the flavor a bit, so feel free to explore. Adding extras can make your oats even better. Chia seeds add a nice crunch and fiber. You can mix in flaxseeds for healthy fats. If you like sweetness, try diced apples or a few raisins. A scoop of protein powder can boost nutrition, too. These choices keep it fun and tasty! In fall, you can add cranberries or pecans for a festive touch. In winter, try adding orange zest for a bright flavor. In spring, a scoop of yogurt can lighten the dish. In summer, fresh berries or peaches are perfect. Each season brings new tastes to enjoy in your oats! To keep your pumpkin pie overnight oats fresh, use airtight containers. Glass jars work well. Fill each jar with the oat mixture. Seal them tight and place them in your fridge. This helps the oats soak up all the flavors. You can store them for up to five days. Just remember to stir before you eat. Yes, you can freeze pumpkin pie overnight oats. Use freezer-safe containers or bags. Fill them with the oat mixture, leaving some space for expansion. They can last up to three months in the freezer. To eat, thaw them overnight in the fridge. Give them a good stir before serving. Pumpkin pie overnight oats last five days in the fridge. If they change color or smell sour, it's best to toss them. Any watery separation is normal. Just stir it back in. If you see mold, throw it away right away. Always check before you dig in! Overnight oats are a simple way to prepare oatmeal. You mix oats with liquid and let them soak overnight. This process makes the oats soft and creamy. You can flavor them with fruits, spices, or yogurt, like in this pumpkin pie recipe. They are easy to make and perfect for busy mornings. Yes, you can use fresh pumpkin. First, cook the pumpkin until soft. Then, blend it until smooth. This way, you get a fresh taste. Canned pumpkin puree is still a great choice for convenience. It saves time and is always ready to use. You can store pumpkin pie overnight oats in the fridge for up to five days. Just make sure to use an airtight container. They may thicken a bit, so stir in some milk if needed. This makes them creamy and tasty again. Steel-cut oats are not the best choice for overnight oats. They do not soak up liquid as well as rolled oats. If you want to use them, cook them first or let them soak longer. Rolled oats give you the right texture for this recipe. You can use many toppings for your overnight oats. Try fresh fruit like bananas, berries, or apples. You can also use seeds, like chia or flaxseeds. A drizzle of honey or maple syrup adds sweetness. For a fun twist, add chocolate chips or coconut flakes. Pumpkin pie overnight oats are easy to make and taste great. We covered essential ingredients, including optional adds to boost flavor. You learned how to prepare, mix, and store your oats for the best results. I shared tips on adjusting texture and flavor, plus ways to enjoy leftovers. Explore variations to fit your taste and needs. Lastly, I shared storage tips and answered common questions. With this guide, you can prepare delicious, nutritious oats that are full of flavor. Enjoy your breakfast adventure!

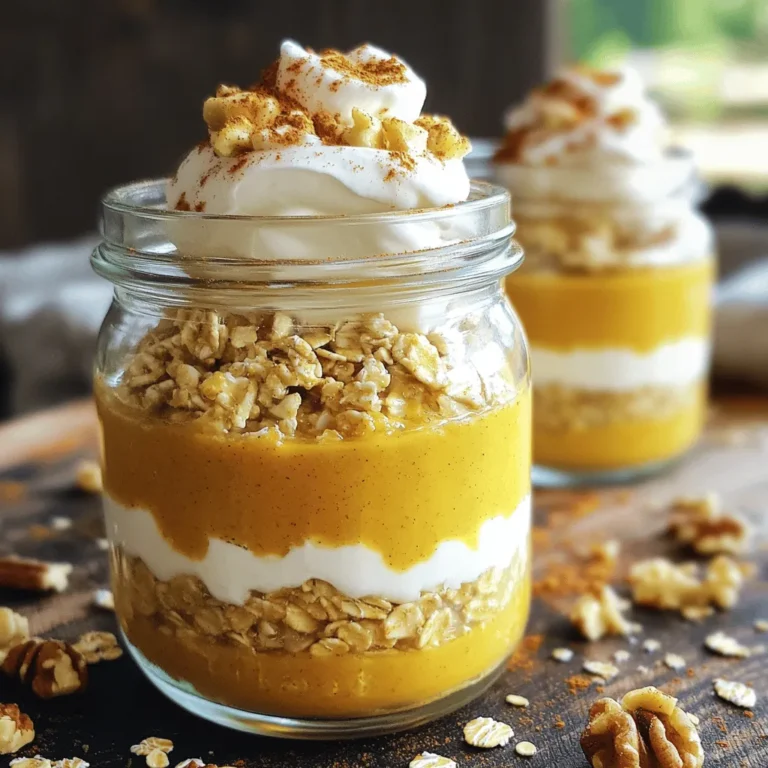
Pumpkin Pie Overnight Oats Comforting Fall Breakfast

To make the Caramelized Onion Gruyere Quesadillas, you need a few key items. Here’s what you’ll need: - 2 large onions, thinly sliced - 2 tablespoons olive oil - 1 tablespoon butter - Salt and pepper to taste - 1 cup Gruyere cheese, grated - 4 large flour tortillas - 1 tablespoon fresh thyme leaves (optional) - 1/2 teaspoon garlic powder - Sour cream and salsa for serving These ingredients create a rich and tasty flavor. The sweet onions blend well with the creamy Gruyere. Having the right tools makes cooking easier. Here are some tools you will need: - Large skillet - Spatula - Grater - Knife - Cutting board With these tools, you can prepare the quesadillas efficiently. The skillet helps in caramelizing the onions perfectly. If you can’t find Gruyere cheese, you can use other cheeses. Cheddar or fontina works well too. For tortillas, corn tortillas can be a good swap. They add a different flavor and texture. To make the best caramelized onions, start by slicing two large onions thinly. Heat two tablespoons of olive oil and one tablespoon of butter in a large skillet over medium heat. Once the butter melts, add the sliced onions. Sprinkle a pinch of salt over them. This helps draw out moisture and enhances flavor. Stir the onions occasionally for about 15 to 20 minutes, until they soften and turn a rich brown color. Keep an eye on the heat; if they brown too fast, lower it. When the onions are ready, season them with salt, pepper, and half a teaspoon of garlic powder. If you want extra flavor, add one tablespoon of fresh thyme leaves. Set the onions aside. Next, it’s time to assemble your quesadillas. Wipe down your skillet and return it to medium heat. Place one large flour tortilla in the skillet. Sprinkle half of it with a generous amount of grated Gruyere cheese. On top of the cheese, spread a layer of your caramelized onions. Then, add a little more Gruyere cheese on top. This extra cheese helps the quesadilla stick together. Fold the tortilla over to make a half-moon shape. Repeat with the remaining tortillas, layering cheese and onions in each one. Now, let’s cook those quesadillas! Cook each one for about 3 to 4 minutes on each side. You want the tortilla to turn golden brown and the cheese to melt. Once they are cooked, remove them from the skillet and slice each quesadilla into wedges. Serve them warm with sour cream and salsa on the side. For a fresh touch, garnish with extra thyme leaves. Enjoy every bite of this tasty delight! To get the best caramelized onions, you need patience. Start with medium heat in a large skillet. Add your sliced onions with a pinch of salt. Stir them every few minutes. This keeps them from sticking and helps them cook evenly. If they start to brown too fast, turn the heat down. The goal is a rich, golden brown color. This process takes about 15 to 20 minutes. Don’t rush it! The sweet flavor comes from slow cooking. For cheese that melts nicely, use grated Gruyere. Grated cheese melts faster and more evenly than slices. Spread half of the cheese on one half of the tortilla. This allows the heat to reach it quickly. Cooking on medium heat helps the cheese melt without burning the tortilla. Flip the quesadilla once the bottom is golden brown. Cook the other side until the cheese is bubbly. You can cook quesadillas in different ways. A skillet is great for a nice crisp. Heat a bit of oil in the skillet before adding the quesadilla. You can also use a grill for a smoky flavor. Place the quesadillas on the grill for a few minutes. Both methods give delicious results. Choose what works best for you! {{image_2}} You can make these quesadillas even better with veggies. Try adding fresh spinach or mushrooms. These add flavor and nutrition. Sauté the spinach briefly until wilted. For mushrooms, slice and cook them until soft. Mix them with the caramelized onions. This will give you a tasty twist. Want to add protein? Chicken or beans work great! If you use chicken, cook it and shred it first. Mix it with the onions for a hearty filling. For beans, black beans or pinto beans are perfect. Rinse them well and mash slightly. This adds creaminess to your quesadillas. If you like heat, add jalapeños or spicy cheese. Slice fresh jalapeños and sprinkle them on top of the cheese. For cheese, use pepper jack for a kick. This will give your quesadillas a bold flavor. You can also mix in some crushed red pepper flakes for extra spice. To keep your leftover quesadillas fresh, place them in an airtight container. Store them in the fridge for up to three days. If you want to save them longer, consider freezing them. Make sure to let them cool before storing. To reheat quesadillas and keep them crispy, use a skillet. Heat the skillet over medium heat. Place the quesadilla in the skillet for about two to three minutes on each side. This method revives the crispiness and melts the cheese nicely. You can also use an air fryer. Set it to 350°F and heat for about five minutes. To freeze quesadillas, wrap each one tightly in plastic wrap. Then, place them in a freezer-safe bag or container. They can last for up to three months. When you're ready to enjoy them, thaw in the fridge overnight. To reheat, use the skillet method for the best texture. To make the best caramelized onions, start by slicing two large onions thinly. Use a large skillet and heat two tablespoons of olive oil and one tablespoon of butter over medium heat. Add the onions and sprinkle with a pinch of salt. Cook the onions for about 15 to 20 minutes, stirring occasionally. This slow cooking process helps them become soft and sweet. If they begin to brown too fast, lower the heat. Once they are golden and soft, season with salt, pepper, and garlic powder. For extra flavor, add fresh thyme leaves. Yes, you can use other types of cheese. Cheddar and mozzarella are great substitutes. Cheddar gives a sharp flavor, while mozzarella adds a gooey texture. However, Gruyere cheese has a unique nutty taste that complements the caramelized onions well. If you want to try something new, mix different cheeses for added flavor. These quesadillas pair well with sour cream and salsa. You can also serve them with guacamole or a fresh salad. A side of roasted vegetables adds a nice touch, too. If you want some crunch, try tortilla chips. Each side dish enhances the flavor of the quesadillas and makes for a delightful meal! In this blog post, we explored how to make delicious Caramelized Onion Gruyere Quesadillas. We covered essential ingredients, recommended tools, and helpful tips for perfecting caramelized onions. Our step-by-step instructions made assembly and cooking easy. You can also spice things up with variations and learn how to store leftovers. As you try out this recipe, remember to enjoy the process. With a few simple steps, you’ll create a satisfying dish that pleases everyone. Happy cooking!

Caramelized Onion Gruyere Quesadillas Tasty Delight

- Ripe avocados - Large eggs - Salt and pepper - Paprika - Fresh chives - Shredded cheese - Hot sauce (optional) Choosing the right ingredients is key to making avocado egg breakfast boats. Start with ripe avocados; they should feel slightly soft when you press them. The perfect avocado will create a creamy base for the egg. Next, use large eggs for a good fit in the avocado halves. You will need salt and pepper for seasoning. A touch of paprika adds a nice warmth and color. Fresh chives lend a bright, onion-like flavor that brightens each bite. For the cheese, I recommend either cheddar or feta. Both melt beautifully and add richness. Finally, if you like heat, grab some hot sauce for a spicy kick. - Calories per serving: About 300-350 calories - Breakdown of macronutrients: - Protein: 18g - Carbohydrates: 12g - Fats: 25g Avocados and eggs are both nutrient-rich foods. Avocados provide healthy fats, fiber, and vitamins. They help keep your heart healthy. Eggs offer quality protein and essential nutrients like vitamin D and choline. Together, they make a filling, balanced breakfast. Enjoy this tasty and healthy treat! 1. Preheating the oven Start by preheating your oven to 375°F (190°C). This step warms the oven, so your avocado egg boats cook evenly. 2. Cutting and preparing avocados Next, cut your ripe avocados in half. Remove the pits carefully. Scoop out a small part of the flesh. This creates a little well for the egg. Be gentle; you want to keep the avocado's shape. 3. Placing avocados in baking dish Now, take those avocado halves and place them in a small baking dish. You can also use a baking sheet lined with parchment paper. This helps keep them steady while they bake. 1. Adding eggs and seasoning Crack one egg into each avocado half. Let the egg white fill the well. If needed, you can remove a bit of the white to fit better. Then, season the eggs with salt, pepper, and paprika for extra flavor. 2. Baking time and tips for doneness Place your dish in the oven. Bake for about 15-20 minutes. Check the eggs for doneness. If you like runny yolks, take them out early. For firmer yolks, leave them in longer. 3. Serving suggestions Once the eggs are cooked to your liking, remove the dish from the oven. If you want, drizzle hot sauce over the top for a spicy kick. Serve your avocado egg boats on a colorful plate. Add extra chives and a few cherry tomatoes on the side for a vibrant touch. - Choosing the right avocado: Look for ripe avocados that yield slightly when you press them. They should not be too soft or too hard. A perfect avocado will hold its shape and make a nice boat for the egg. - Adjusting cooking time for preferences: Bake the avocado egg boats for 15-20 minutes. If you like runny yolks, check them at 15 minutes. For firmer yolks, leave them in longer. Watch closely to avoid overcooking. - Tips for seasoning: Use salt and pepper to taste. A light sprinkle of paprika adds flavor and color. Fresh chives give a nice herbal note. Feel free to experiment with your favorite spices. - Ideal pairings for breakfast: These avocado egg boats pair well with crispy bacon or sausage. Fresh fruit salad adds a sweet touch. A glass of fresh juice brightens the meal. - Presentation tips: Serve the avocado boats on a colorful plate. Add extra chives on top for a pop of green. Include cherry tomatoes or radishes for color and crunch. - Adding sides like toast or fruit: Toasted bread is great for scooping up the eggs. You can also serve sliced fruit, like oranges or berries, to balance the dish. {{image_2}} You can change ingredients to suit your taste. Here are some swaps to try: - Alternative cheeses: Instead of cheddar or feta, use mozzarella or goat cheese. Each cheese adds a unique taste. - Different seasonings or spices: Try taco seasoning, garlic powder, or even Italian herbs for a fresh twist. Each option brings its own flair. - Veggie additions: Add spinach or diced tomatoes for extra nutrition. Peppers or onions can also give a nice crunch and flavor. This recipe is flexible for different diets. Here are some options: - Vegetarian version: Simply skip the eggs and use a mix of roasted veggies instead. This keeps it hearty and filling. - Gluten-free options: This dish is naturally gluten-free. Just ensure any added seasonings are also gluten-free. - Keto-friendly adaptations: Keep the eggs and avocados. You can add bacon or sausage for extra protein and flavor without carbs. Feel free to mix and match these variations to make your perfect avocado egg breakfast boat! To keep your avocado egg breakfast boats fresh, store them in the fridge. Place the leftovers in an airtight container. This will help prevent them from drying out. You can keep them for up to two days. If you notice the avocado turning brown, that’s normal. Just scrape off the top layer before eating. When it comes to reheating, I suggest using the oven or a toaster oven. Preheat it to 350°F (175°C). Place the avocado boats in a baking dish. Heat them for about 10 minutes, or until warmed through. This keeps the texture nice and creamy. You can prepare these breakfast boats in advance for busy mornings. Simply follow the recipe up to the baking step. Cover the prepared avocados with plastic wrap. Store them in the fridge for up to a day. If you want to freeze them, I recommend only freezing the avocado halves without the egg. Scoop out a little flesh, then freeze them in a bag. When you’re ready, thaw them in the fridge overnight. Add the egg and toppings fresh before baking. This way, you'll enjoy the best taste and texture. Can I use scrambled eggs instead of whole eggs? Yes, you can use scrambled eggs. Just cook them lightly before adding. Fill the avocado well with the scrambled eggs. This option can make the dish fluffier and mix well with the avocado. What can I serve with avocado egg boats? You can serve them with toast, fresh fruit, or a side salad. Slices of whole-grain bread complement the boats well. A few cherry tomatoes add color and flavor too. How can I make this recipe without oven access? You can use a microwave! Place the avocado halves in a microwave-safe dish. Cook for about 2-3 minutes until the egg sets. Check often to avoid overcooking. What are the best spices to add for flavor? Try adding cumin, garlic powder, or chili flakes for a kick. Fresh herbs like parsley or cilantro also enhance the taste. Customize the spices to fit your mood! In this blog post, we explored a tasty avocado egg boat recipe. We looked at the ingredients, nutritional benefits, and easy steps to prepare them. I shared tips for perfecting your dish and offered variations to suit your taste. We also covered storage and common questions to ensure your success. These avocado egg boats make for a fun but simple meal. Try them out for breakfast or brunch. Enjoy your cooking and experiment with flavors!

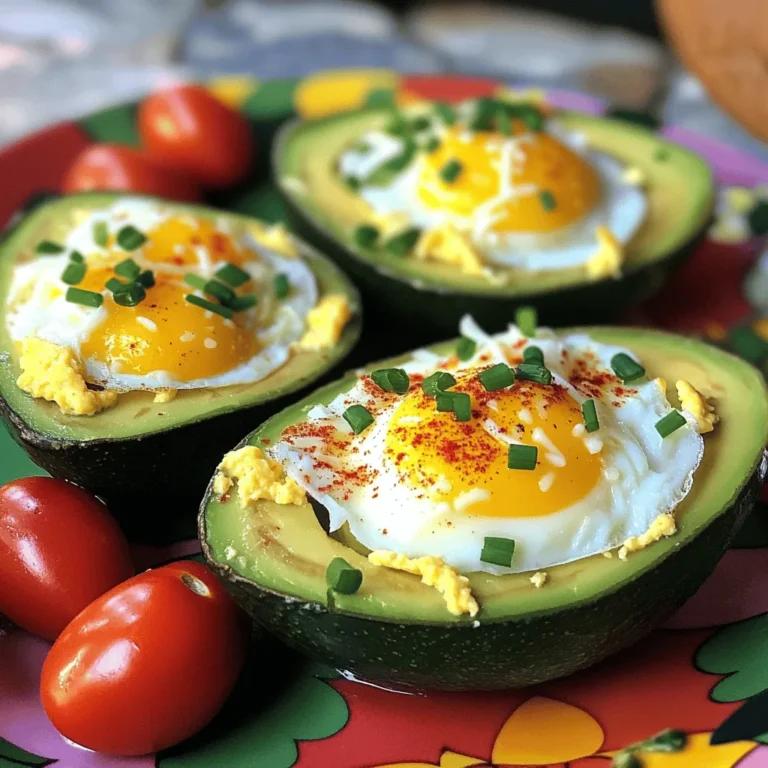
Avocado Egg Breakfast Boats Flavorful Morning Treat

PREV 1 … 42 43 44 … 57 NEXT
meal twig

explore

DessertsDinnerAppetizersDrinks

Our Policies

  • Cookie Policy
  • Copyright Policy
  • Disclaimer
  • GDPR Policy
  • Terms Of Use
Back to Top
  • About
  • Contact Us
  • Privacy Policy
© 2025 meal twig