FREE DINNER EBOOK! Get your copy!
  • Cookie Policy
  • GDPR Policy
  • Disclaimer
  • Terms Of Use
  • Visit my other site: Fun Cookie Recipes
meal twig
  • Home
  • Dinner
  • Desserts
  • Drinks
  • Appetizers
  • Contact
  • About
  • Privacy Policy
  • Home
  • Dinner
  • Desserts
  • Drinks
  • Appetizers
  • Contact
  • About
  • Privacy Policy
  • Cookie Policy
  • GDPR Policy
  • Disclaimer
  • Terms Of Use
Visit my other site: Fun Cookie Recipes

HOME / CATEGORIES /

Latest

- 2 cups cooked rice (white or brown) - 2 cups cooked chicken, shredded or diced - 1 cup broccoli florets - 1 cup carrots, diced - 1 can (10.5 oz) cream of chicken soup - 1 cup chicken broth - 1 cup shredded cheddar cheese - 1 teaspoon garlic powder - 1 teaspoon onion powder - ½ teaspoon salt - ¼ teaspoon black pepper - ½ cup breadcrumbs - 2 tablespoons olive oil Gathering the right ingredients is key to making this delicious chicken rice casserole. You can use either white or brown rice, depending on what you like. Both work great in this dish. Shredded or diced chicken adds protein and flavor. You can use leftover chicken or rotisserie chicken to save time. Fresh vegetables, like broccoli and carrots, add color and crunch. They also make the dish healthier. The cream of chicken soup and chicken broth create a creamy base that ties everything together. Shredded cheddar cheese adds a comforting layer on top. For seasoning, garlic powder and onion powder are must-haves. They give your casserole that savory depth. Don't forget salt and black pepper to enhance all the flavors. The breadcrumbs mixed with olive oil make a crispy topping, adding texture. With these ingredients on hand, you are ready to create a meal that your whole family will enjoy! {{ingredient_image_1}} First, preheat your oven to 350°F (175°C). This step helps your casserole cook evenly. While the oven warms up, grab a 9x13-inch casserole dish. Grease it lightly to keep food from sticking. A quick spray of cooking oil works well. In a large mixing bowl, combine 2 cups of cooked rice, 2 cups of shredded chicken, 1 cup of broccoli florets, and 1 cup of diced carrots. This mix adds great flavor and nutrition. In another bowl, whisk together 1 can of cream of chicken soup, 1 cup of chicken broth, 1 teaspoon of garlic powder, 1 teaspoon of onion powder, ½ teaspoon of salt, and ¼ teaspoon of black pepper. Make sure it’s smooth. Pour this soup mixture over the rice and chicken mix. Stir until everything is well combined. Transfer your mixture into the greased casserole dish. Spread it out evenly. Now, sprinkle 1 cup of shredded cheddar cheese over the top. This cheese adds creaminess and richness. In a small bowl, mix ½ cup of breadcrumbs with 2 tablespoons of olive oil until coated. Evenly sprinkle this breadcrumb mix over the cheese layer. This will give a nice crunch. Place the casserole in your preheated oven. Bake for 25-30 minutes. You’ll know it’s done when the top is golden brown and bubbly. Keep an eye on it to avoid overbaking. To check doneness, insert a fork into the center. If it feels hot and bubbly, it’s ready! To boost flavor, you can add herbs and spices. Try thyme or rosemary for a fresh taste. You can also use leftover ingredients. If you have extra veggies or proteins, toss them in! This keeps waste down and makes the dish even better. For cooking chicken, I suggest using rotisserie chicken for ease. It saves time and adds great flavor. If you cook your own chicken, season it well and cook it until juicy. For perfect rice, always use the right water-to-rice ratio. Rinse the rice until the water runs clear to remove excess starch. Serve this casserole with a crisp side salad to balance the meal. A light vinaigrette pairs well with the rich casserole. For garnishing, sprinkle fresh parsley or chives on top. This adds color and freshness to the dish. Pro Tips Use Leftover Chicken: This recipe is perfect for using up leftover roast chicken or rotisserie chicken, making it a quick and easy meal option. Add More Veggies: Feel free to customize the vegetable mix by adding bell peppers, peas, or spinach for extra nutrition and flavor. Make It Ahead: Prepare the casserole ahead of time and refrigerate it, then bake it when you're ready to serve for a hassle-free dinner. Cheese Variations: Experiment with different types of cheese such as mozzarella or pepper jack for a unique twist on the flavor profile. {{image_2}} You can switch the proteins in this dish. Turkey works well if you have it. Tofu is great for a plant-based meal. Just make sure to cook it well before mixing it in. For dairy-free options, try using coconut milk instead of cream of chicken soup. For gluten-free, choose a gluten-free soup and broth. Both swaps taste great! Feel free to add other vegetables. Peas, bell peppers, or spinach can brighten the dish. You can use frozen veggies if fresh ones aren’t available. Just make sure to thaw and drain them first. Fresh produce adds a nice crunch, but frozen is quick and easy! To give your casserole a Southwestern twist, add black beans and corn. Spice it up with some chili powder too. For a Mediterranean touch, mix in sun-dried tomatoes and olives. You can also use feta cheese instead of cheddar. These flavors change the whole dish while keeping it familiar! To keep your chicken rice casserole fresh, store it in an airtight container. Ensure it cools down first. Place it in the fridge for up to three days. If you wish to save it longer, freeze it. Use freezer-safe containers or heavy-duty bags. It can last up to three months in the freezer. When you want to enjoy leftovers, reheating in the microwave is quick. Place a portion in a microwave-safe bowl. Heat it for one to two minutes, stirring halfway. If you prefer, you can also reheat in the oven. Preheat your oven to 350°F (175°C). Place the casserole in an oven-safe dish and cover it with foil. Bake for about 15-20 minutes or until hot throughout. In the fridge, your casserole will stay good for about three days. Always check for signs of spoilage. If you notice any off smells, discoloration, or mold, it's best to toss it. When stored properly, frozen casserole can last for three months without losing its taste. No, using uncooked rice is not a good idea. The rice needs to be cooked first. If you use uncooked rice, it will not absorb the flavors well and will stay hard. Always start with cooked rice for the best texture. You can prepare the casserole a day in advance. Mix all the ingredients and place them in the casserole dish. Cover it with plastic wrap and store it in the fridge. When you are ready to bake, just remove the wrap and bake as directed. Yes, you can make a vegetarian version. Replace the chicken with cooked tofu or chickpeas. Use vegetable broth instead of chicken broth. You can also add more veggies like bell peppers or spinach for extra flavor. This dish pairs well with a fresh side salad. You can also serve it with roasted vegetables for more color and nutrition. Garlic bread or dinner rolls are great for soaking up the creamy sauce, too. Enjoy! This blog post detailed the steps to create a tasty chicken rice casserole. You learned about the main ingredients, mixing and baking instructions, and tips to enhance flavor. I also shared variations and how to store leftovers wisely. Use these tips for your next meal. Enjoy cooking, and get creative with your casserole. You can make it yours! Each bite will be delicious and satisfying. Happy eating!

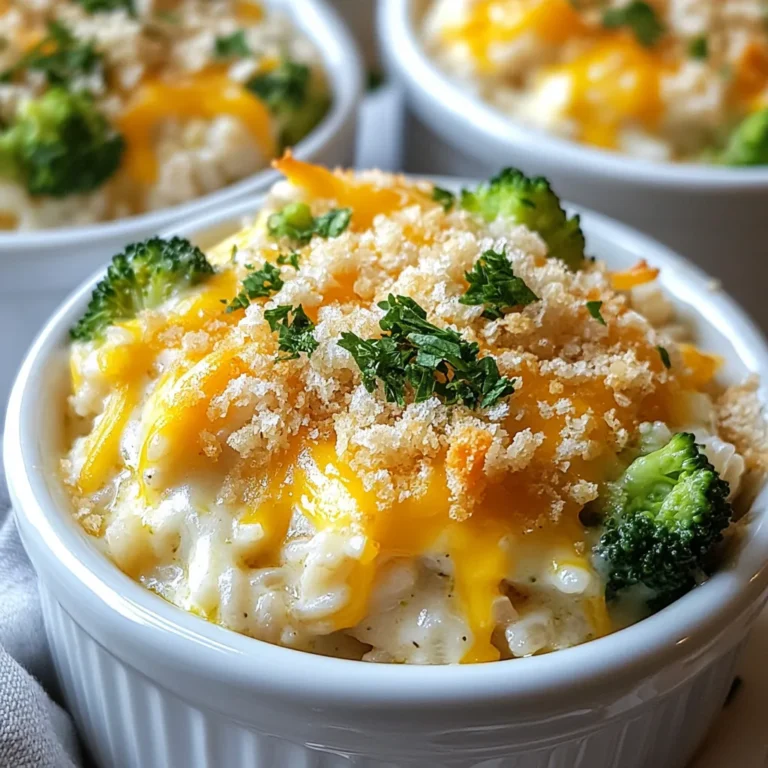
Savory Chicken Rice Casserole Easy Family Meal

- 1 baguette, sliced into 1/2-inch pieces - 1 cup fresh strawberries, hulled and diced - 1/4 cup fresh basil leaves, chopped - 1 tablespoon balsamic glaze - 1 tablespoon honey - 1/2 teaspoon lemon zest - 1/4 teaspoon salt - 1/4 teaspoon black pepper - 1/2 cup ricotta cheese (optional for spreading) - Olive oil for brushing - Baking sheet - Medium bowl - Oven The main ingredients for this bruschetta are simple yet fresh. You need a crispy baguette, sweet strawberries, and fragrant basil. These three items create a bright flavor. For the additional ingredients, balsamic glaze adds tang. Honey gives a touch of sweetness. The lemon zest adds a bright note, while salt and black pepper balance the flavors. If you want creamy texture, ricotta cheese works well. Lastly, a little olive oil helps the bread crisp up nicely in the oven. You'll need a baking sheet to toast the bread, a medium bowl to mix the toppings, and an oven to bake the slices. With these ingredients and tools, you're ready to make a delicious and fresh appetizer. - Preheat oven to 400°F (200°C). - Slice the baguette into 1/2 inch pieces and arrange on a baking sheet. - Brush each slice with olive oil. To start, you want to get your oven nice and hot. This helps the bread toast evenly. Slicing the baguette should be easy if you use a sharp knife. Make sure to lay the slices flat on the baking sheet. The olive oil adds flavor and helps the bread crisp up. - Bake for 8-10 minutes until golden and crisp. - Remove from oven and let cool slightly. While the bread toasts, keep an eye on it. You want a nice golden color, which means it's ready. Let the slices cool for a bit. This makes them easier to handle when you add toppings. - Combine strawberries, basil, balsamic glaze, honey, lemon zest, salt, and black pepper in a bowl. - Toss gently and let sit for 5-10 minutes to meld flavors. For the topping, chop the strawberries and basil before adding them to a bowl. The balsamic glaze adds a sweet tang. The honey and lemon zest enhance the flavors. Letting the mix sit allows the tastes to blend. - Spread a dollop of ricotta cheese on each toasted slice (optional). - Spoon the strawberry and basil mixture over the toasted baguette slices. - Drizzle with extra balsamic glaze if desired. Now comes the fun part! If you choose to use ricotta, spread a little on each slice for creaminess. Then, spoon the strawberry mixture on top. A drizzle of balsamic glaze adds a nice touch and looks pretty too. - Look for ripe, sweet strawberries. - Avoid mushy or overly soft fruit. When picking strawberries, I always check for bright color. I want them to smell sweet too. Fresh strawberries will add a burst of flavor to your bruschetta. Look for berries that are firm and shiny. The best ones will have a deep red hue. - Bake until golden brown for enhanced texture. - Optionally, grill the bread for added flavor. Toasting the bread is key. I bake the sliced baguette until it’s golden brown. This gives a nice crunch. If you prefer, grilling the bread adds a lovely smoky taste. Both methods will bring out the best in your bruschetta. - Use high-quality balsamic glaze for depth of flavor. - Add a pinch of fresh cracked pepper for added spice. For the best taste, I choose a rich balsamic glaze. It adds a sweet and tangy touch. A pinch of fresh cracked black pepper kicks up the flavor, making each bite exciting. These small changes can elevate your bruschetta to a whole new level. {{image_2}} You can switch up the cheese for more flavor. Substitute ricotta with goat cheese for a tangy twist. Goat cheese adds a creamy, sharp taste that pairs well with strawberries. If you want a richer texture, try cream cheese. This gives a smooth and creamy base that enhances the flavors of the topping. Strawberries are great, but you can try other fruits too. Raspberries offer a tart flavor that complements the sweetness. Peaches add a juicy, sweet touch that's perfect for summer. You can also add diced avocado for a creamy and buttery touch. It creates a nice balance with the sweet toppings. To boost the flavor, consider adding minced garlic to the topping. It adds a savory note that plays well with the sweetness of the strawberries. For a sweeter taste, drizzle the bruschetta with honey or agave syrup. This extra sweetness will make every bite a delight. After enjoying your strawberry basil bruschetta, store any leftovers in an airtight container. This keeps the flavors fresh. Enjoy them within two days for the best taste. Freezing assembled bruschetta is not a good idea. The fresh ingredients lose their texture. However, you can freeze the toasted baguette slices. Once frozen, you can use them later, making it easy to whip up a quick snack. To reheat, use a toaster oven. This method keeps the bread crispy and tasty. Avoid the microwave, as it can make the bread chewy and soft. Yes, prepare the toppings in advance but wait to assemble until serving. This way, the bread stays crisp and the toppings fresh. Prepping the mixture ahead saves you time. Just remember to store the toppings in the fridge until you are ready to serve. Pair with a fresh salad or a charcuterie board. A light salad enhances the flavors. A charcuterie board adds variety and fun to your meal. Both options balance the sweetness of the bruschetta well. Increase ingredients proportionately and assemble just before serving. This makes sure everyone gets a taste. It's easy to multiply the recipe. Just keep the toppings ready and toast the bread when guests arrive. Yes, all ingredients are vegetarian-friendly. The fresh strawberries and basil shine in this dish. It’s a great choice for any gathering, ensuring everyone can enjoy it. This blog post showed you how to create a delicious Strawberry Basil Bruschetta. You learned to choose fresh ingredients, make a simple topping, and toast baguette slices. Remember, fresh strawberries and quality balsamic glaze make all the difference. Try different cheeses or fruits to mix it up. Enjoy your creation right away for the best taste. Keep leftovers in the fridge and reheat in the toaster oven. This recipe will impress your friends at any gathering. Enjoy every bite!

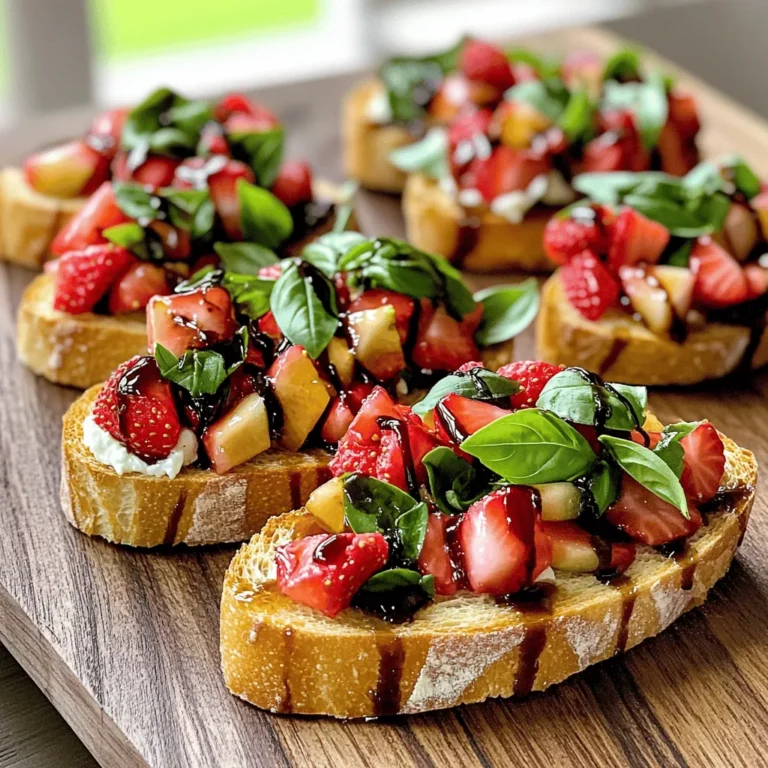
Strawberry Basil Bruschetta Delightful Fresh Flavor

- 500g potato gnocchi - 2 cups fresh spinach, chopped - 1 cup heavy cream - 1 cup grated Parmesan cheese - 2 tablespoons olive oil - 3 cloves garlic, minced - Salt and pepper to taste - 1/2 teaspoon nutmeg - Fresh parsley, chopped for garnish Each ingredient in this dish plays a big role in taste. The potato gnocchi gives a soft base. Fresh spinach adds color and nutrients. Heavy cream makes the sauce rich and smooth. Parmesan cheese brings a salty and nutty flavor. Garlic adds warmth, while nutmeg gives a hint of spice. - Salt - Black pepper These pantry staples are simple but important. Salt boosts flavors, while black pepper adds a touch of heat. Always taste your dish as you cook. Adjust seasoning as needed for the best flavor. When choosing fresh spinach, look for bright green leaves. Avoid any yellow or wilting leaves. For garlic, choose firm cloves with no soft spots. Fresh potatoes for gnocchi should feel smooth and firm. Finally, select good-quality Parmesan cheese. It should have a strong aroma and a hard texture. Quality ingredients make a happy dish. To cook the gnocchi, start by filling a large pot with water. Add a good amount of salt to the water. Bring the water to a boil over high heat. When the water boils, add the potato gnocchi. Cook them until they float to the top, which usually takes just a few minutes. This shows they are done. Once they float, drain the gnocchi in a colander. Set them aside while you make the sauce. For the creamy spinach sauce, take a large skillet and add olive oil. Heat it over medium heat. Once the oil is warm, add minced garlic. Sauté the garlic for about one minute until it smells great. Then, add the chopped spinach to the skillet. Cook the spinach until it wilts, which should take about two to three minutes. Next, pour in the heavy cream. Stir it well and let it simmer for around five minutes. This helps the sauce get a bit thick. After that, mix in the grated Parmesan cheese and nutmeg. Season with salt and pepper to taste. Stir until the cheese melts and the sauce becomes creamy. Once the creamy sauce is ready, it’s time to combine everything. Add the cooked gnocchi to the skillet with the sauce. Gently toss the gnocchi so they get coated in the creamy goodness. Cook for an additional two minutes to heat everything through. Remove the skillet from the heat. Now, you can serve your creamy spinach Parmesan gnocchi right away. Garnish with chopped fresh parsley for a nice touch. Enjoy your tasty dish! To get that rich, creamy sauce, use heavy cream. This will give your dish a nice body. When you heat the cream, do it gently. If you cook it too fast, it may curdle. Stir the sauce often to keep it smooth. Adding Parmesan cheese at the right time helps too. Mix it in when the cream is hot but not boiling. This lets the cheese melt perfectly. One mistake is overcooking the gnocchi. Cook them just until they float. If you let them go too long, they will turn mushy. Another mistake is rushing the sauce. Let it simmer for a bit. This helps the flavors blend and thicken. Make sure you season well with salt, pepper, and nutmeg. A little seasoning goes a long way. If you don’t have heavy cream, use half-and-half. It won't be as rich, but it works. For a lighter option, try Greek yogurt. Just add it at the end for creaminess. You can swap out the Parmesan cheese too. Use any hard cheese you like, such as Pecorino. If you need a dairy-free version, almond or coconut cream can do the trick. Just check for taste, as they may change the flavor a bit. {{image_2}} You can add protein to make this dish heartier. Chicken or shrimp work great. Simply cook the protein in the skillet before adding garlic. This adds flavor and richness. For a plant-based option, try tofu or chickpeas. Cook them until golden for a nice texture. This dish is easy to make vegetarian or vegan. For a vegetarian version, use vegetable broth instead of cream. You can also use a plant-based cheese. For a vegan take, swap the heavy cream for coconut milk. This gives a nice creaminess too. Boost the flavor with a few simple add-ins. Add sun-dried tomatoes for a sweet twist. Fresh herbs like basil can brighten the dish. For a spicy kick, sprinkle in some red pepper flakes. You can even add lemon zest for a fresh taste. These small changes can create exciting new flavors. To keep your creamy spinach parmesan gnocchi fresh, place it in an airtight container. Make sure it cools to room temperature first. Store it in the fridge for up to three days. Avoid letting it sit out too long, as this can spoil the dish. If you want to keep it longer, freezing is a great option. When you're ready to enjoy the leftovers, reheat gently. You can use a skillet over low heat. Add a splash of cream or water to help loosen the sauce. Stir often to keep the gnocchi from sticking. Heating in the microwave is quick, but it might dry out the dish. Heat in 30-second bursts, stirring in between, until warm. To freeze your gnocchi dish, let it cool completely. Portion it into freezer-safe bags or containers. Squeeze out as much air as possible before sealing. This helps prevent freezer burn. You can freeze it for up to two months. When ready to eat, thaw it overnight in the fridge before reheating. Yes, you can use different cheeses. Mozzarella gives a nice stretch. Feta adds a tangy flavor. Cheddar gives a sharp taste. You can mix cheeses for more flavor. Just remember to adjust salt as needed. Each cheese will change the sauce's taste. To make this dish gluten-free, choose gluten-free gnocchi. Many brands offer it now. You can make your own gnocchi using gluten-free flour. Check labels for hidden gluten in any sauces or ingredients. This way, you enjoy the dish without worry. Yes, you can prepare this dish ahead. Cook the gnocchi and sauce separately. Store them in the fridge. When ready to eat, combine and heat. This keeps the gnocchi from getting mushy. Just add a splash of cream if it thickens too much. You learned how to make creamy spinach parmesan gnocchi from scratch. We covered key ingredients, step-by-step cooking, and tips for the perfect dish. I shared ways to add protein and make this meal vegetarian or vegan. Storing and reheating your leftovers keeps this dish fresh and delicious. Now, you can impress others with your cooking skills. Enjoy every bite and make this dish your own!

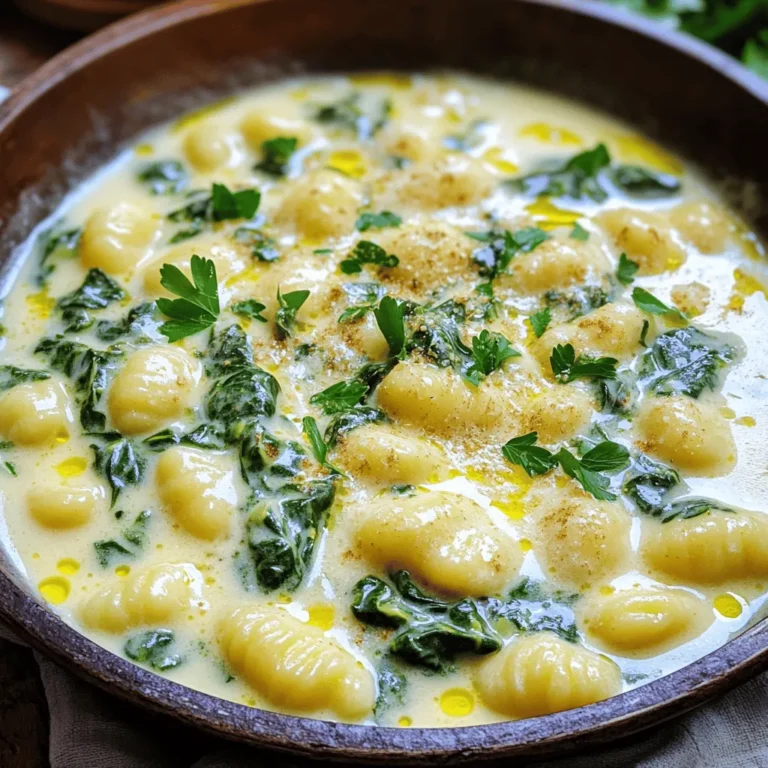
Creamy Spinach Parmesan Gnocchi Flavorful Delight Recipe

- 1 cup whole wheat flour - 1/2 cup rolled oats - 1 teaspoon baking powder - 1/2 teaspoon baking soda These ingredients form the base of our muffins. Whole wheat flour adds fiber and nutrients. Rolled oats provide a hearty texture. Baking powder and soda help the muffins rise, making them fluffy. - 1/2 cup grated zucchini - 1/2 cup shredded carrots - 1/4 cup finely chopped red bell pepper - 1/4 cup finely chopped spinach Adding veggies boosts flavor and nutrition. Grated zucchini keeps muffins moist. Shredded carrots add sweetness. Red bell pepper brings a nice crunch, while spinach adds color and iron. - 2 large eggs - 1/2 cup Greek yogurt - 1/4 cup milk (dairy or plant-based) - 1/4 cup olive oil - 1 teaspoon garlic powder - 1/4 cup grated cheese (optional) Eggs bind the mixture together. Greek yogurt makes the muffins creamy. Milk adds moisture, and olive oil keeps them tender. Garlic powder gives a savory kick. If you want, sprinkle in cheese for extra flavor. - Preheat oven to 350°F (175°C). - Prepare muffin tin with liners or cooking spray. - In a large bowl, combine 1 cup whole wheat flour, 1/2 cup rolled oats, 1 teaspoon baking powder, 1/2 teaspoon baking soda, 1/2 teaspoon salt, 1/4 teaspoon black pepper, and 1 teaspoon garlic powder. Mix well until everything blends. - In another bowl, beat 2 large eggs. - Mix in 1/2 cup Greek yogurt, 1/4 cup milk, and 1/4 cup olive oil. Stir until smooth. - Gently fold in 1/2 cup grated zucchini, 1/2 cup shredded carrots, 1/4 cup finely chopped red bell pepper, and 1/4 cup finely chopped spinach into the wet mixture. - Pour the wet mixture into the dry mixture. Stir gently until just combined. Avoid over-mixing. - Divide the batter evenly among the muffin cups, filling them about 3/4 full. - Bake in the preheated oven for 20-25 minutes. Use a toothpick to check doneness. It should come out clean. - Let the muffins cool in the pan for 5 minutes. - Transfer them to a wire rack to cool completely. For an appealing look, serve warm or at room temperature on a platter. Garnish with fresh herbs for color. Enjoy them with cream cheese or hummus. To make great muffins, avoid over-mixing the batter. When you mix too much, muffins can become tough. Stir just until the wet and dry ingredients combine. Measuring ingredients properly is key. Use dry measuring cups for flour and oats. Spoon the flour into the cup and level it off with a knife. This way, you get the right amount. Add herbs or spices to boost flavor. Try mixing in some chopped fresh basil or a pinch of paprika. These small changes can make a big difference. You can also add different cheeses. Cheddar or feta can add richness. Just fold in the cheese after mixing the wet and dry ingredients. Balancing wet and dry ingredients is vital. The right ratio keeps your muffins from being dry or soggy. Make sure you measure your yogurt, milk, and oil carefully. Using different oils can impact flavor and texture too. Olive oil is a great choice for a fruity taste. You can also try avocado oil for a lighter flavor. {{image_2}} You can switch up the veggies for fun! Using kale instead of spinach adds a nice twist. Kale has a strong taste and packs in nutrients. You can also try sweet potatoes or butternut squash. Both add a sweet flavor and extra fiber. Just grate or mash them before adding. If you need a gluten-free option, it’s easy! Simply swap the whole wheat flour with gluten-free flour. This change keeps your muffins soft while making them safe for those with gluten allergies. Just make sure the gluten-free flour blends well with the other ingredients. Want to make your muffins a bit sweeter? You can add fruits like bananas or blueberries. They bring natural sweetness and moisture. You can also use maple syrup or honey to sweeten the muffins. These options are great for adding flavor without refined sugar. Just adjust the other liquids to balance it out. To keep your veggie packed breakfast muffins fresh, place them in the fridge. Use an airtight container to prevent moisture loss. Wrap each muffin in plastic wrap first for extra protection. This method will keep them tasty for up to a week. To freeze muffins, let them cool completely. Then, wrap each muffin in plastic wrap. Place them in a freezer-safe bag or container. This keeps them fresh for about three months. To thaw, simply take one out and leave it on the counter. For a warm muffin, microwave it for 15-20 seconds. These muffins stay fresh for about five days in the fridge. If you freeze them, they last about three months. Always check for signs of spoilage, like a change in smell or texture, before eating. Enjoy your muffins while they are at their best! Yes, you can make these muffins ahead of time. Store them in an airtight container. They stay fresh for about 3-4 days. For longer storage, freeze them. Wrap each muffin in plastic wrap. Place them in a freezer-safe bag. To reheat, simply microwave for 20-30 seconds. You can also warm them in the oven at 350°F (175°C) for about 10 minutes. Absolutely! If you don’t have Greek yogurt, you can use regular yogurt or sour cream. Applesauce is another great choice. It adds moisture and a bit of sweetness. You could also use silken tofu for a dairy-free option. Just blend it until smooth. Each of these options will keep your muffins moist and tasty. To keep your muffins from getting soggy, make sure to squeeze out excess moisture from the veggies. Grated zucchini and spinach can hold water. Use a clean kitchen towel to help with this. Also, don’t over-mix the batter. Mix just until combined. Finally, bake your muffins until golden brown. This will help them stay fluffy and light. You can tell if your muffins are done by checking the tops. They should be golden brown and spring back when touched. For a more precise test, insert a toothpick into the center of a muffin. If it comes out clean or with just a few crumbs, they are ready. If it has wet batter, bake a few more minutes. These veggie-packed breakfast muffins are simple and full of flavor. You learned how to mix essential dry and wet ingredients, fold in fresh vegetables, and bake them to perfection. I shared tips to avoid common mistakes and enhance taste. You also explored tasty variations and got smart storage tips. Making these muffins can support your health and offer quick breakfasts. With a little practice, they can become a family favorite. Enjoy your baking adventure!

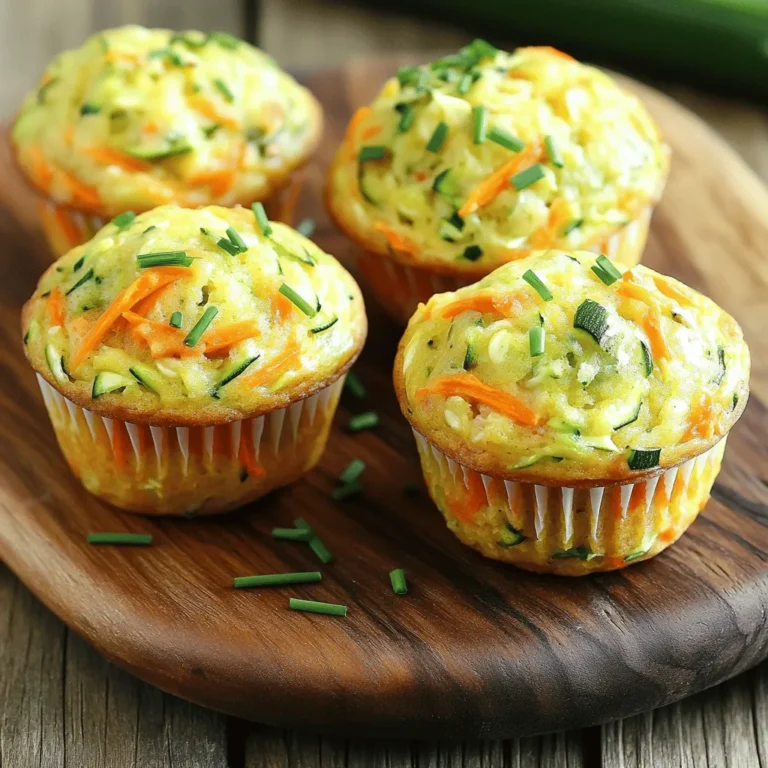
Veggie Packed Breakfast Muffins Healthy and Tasty Treat

- 4 salmon fillets (6 oz each) - 1/4 cup pure maple syrup - 2 tablespoons Dijon mustard - 2 tablespoons soy sauce (low-sodium) - 1 tablespoon olive oil - 2 cloves garlic, minced - 1 teaspoon fresh ginger, grated - Salt and pepper to taste - Lemon wedges and fresh parsley for garnish When you make Maple Dijon Glazed Salmon, you start with fresh salmon fillets. I recommend choosing fillets that are about 6 ounces each. This size cooks well and stays moist. Next, you need pure maple syrup. This syrup gives the dish its sweet and rich flavor. Avoid imitation syrup if you can. It won't taste the same. You will also need Dijon mustard. This mustard adds a nice tang to the glaze. It balances the sweetness of the maple syrup perfectly. Low-sodium soy sauce is key here. It brings umami to the dish without making it too salty. This lets the other flavors shine through. For the additional components, olive oil helps blend the glaze. It also keeps the salmon from sticking to the baking sheet. You will want two cloves of minced garlic and one teaspoon of grated ginger. These add depth and warmth to the glaze. Finally, you will season the salmon with salt and pepper. This simple step enhances all the other flavors. For garnish, lemon wedges and fresh parsley make the dish look great. They also add a fresh touch when serving. - Preheat the oven to 400°F (200°C). - Prepare the baking sheet with parchment paper. This keeps the salmon from sticking. - In a small bowl, whisk together the maple syrup, Dijon mustard, soy sauce, olive oil, minced garlic, and grated ginger. Mix until smooth. This glaze gives the salmon a sweet and tangy flavor. - Place the salmon fillets skin-side down on the prepared baking sheet. Season them with salt and pepper. This step adds flavor right to the fish. - Brush the glaze generously over each salmon fillet. Reserve a small amount for later. The glaze will create a nice shine and flavor. - Bake in the preheated oven for 12-15 minutes. The salmon should flake easily with a fork when done. The glaze gets bubbly and caramelized. - In the final 2 minutes of baking, brush the reserved glaze over the salmon. This adds an extra layer of flavor that everyone will love. To know when your salmon is done, look for a few signs. The fish should change from a bright pink to a lighter, flaky color. You can also gently poke it with a fork. If it flakes easily, it's ready. The best internal temperature for salmon is 145°F (63°C). Use a meat thermometer to check the thickest part of the fillet. This way, you ensure it's safely cooked and juicy. To make your dish even better, try adding herbs and spices. Fresh dill, thyme, or parsley can add a lovely touch. You can also sprinkle a pinch of cumin or paprika for warmth. To balance the sweetness of the maple syrup, add a splash of lemon juice or vinegar. The acidity cuts through the sweetness and brings out the flavors. This balance makes each bite more exciting and delicious. {{image_2}} You can change the ingredients for different tastes. If you don’t have maple syrup, try honey or agave syrup. These sweeteners will still give you a great glaze. For Dijon mustard, you can use whole grain mustard or spicy brown mustard if you want a kick. If you want to switch up the fish, salmon is not your only choice. Trout and tilapia also work well with the glaze. These fish have a nice texture and flavor that will hold up to the sweet and tangy sauce. To add a little heat, sprinkle some chili flakes on top of the salmon before baking. This small change will make your dish exciting! You can also mix in fresh herbs like cilantro or basil to add freshness. Fruits can enhance the dish, too. Try adding orange juice or zest to the glaze. Pineapple chunks can also add a sweet and tropical twist. You can even add slices of these fruits around the salmon while baking. This will create a beautiful and flavorful meal! To keep your Maple Dijon Glazed Salmon fresh, place leftovers in an airtight container. This helps lock in flavor and moisture. You should refrigerate the salmon within two hours of cooking. It stays good in the fridge for up to three days. When you’re ready to eat it, simply reheat in the oven or microwave. If you want to save your glazed salmon for later, freezing is a great option. First, let the salmon cool completely. Then, wrap each fillet tightly in plastic wrap. Place the wrapped salmon in a freezer-safe bag or container. It can last in the freezer for up to three months. When you're ready to enjoy it again, thaw the salmon in the fridge overnight. For the best texture, avoid rapid thawing in hot water or the microwave. Reheat gently to keep it moist and flavorful. Can I use frozen salmon for this recipe? Yes, you can use frozen salmon. Thaw it in the fridge overnight. If you’re short on time, you can run it under cold water for about 30 minutes. Make sure it is fully thawed before cooking. This ensures even cooking and better flavor. What side dishes pair well with Maple Dijon Glazed Salmon? Several sides go well with this dish. Here are some ideas: - Steamed asparagus - Roasted Brussels sprouts - Garlic mashed potatoes - Quinoa salad - Fresh green salad Each of these options complements the sweet and tangy flavor of the salmon. How to tell if salmon is cooked correctly? To check if salmon is cooked, look for its color. It should be opaque and flake easily with a fork. The internal temperature should reach 145°F (63°C). Use a meat thermometer for accuracy. If you check it and it’s still a bit translucent, give it a few more minutes. Can I grill the salmon instead of baking? Absolutely! Grilling adds a nice char and flavor. Heat your grill to medium-high. Place the salmon on a well-oiled grill grate. Cook it for about 6-8 minutes per side. Brush it with the glaze while grilling for extra flavor. Just watch it closely to avoid overcooking. This recipe shows how to prepare Maple Dijon Glazed Salmon easily. I shared the main ingredients and step-by-step instructions to make it tasty. Remember to adjust flavors and try different fish if you want. Storing leftovers follows simple practices for the best taste. You can enjoy this dish in many ways and impress friends or family. Cooking should be fun and rewarding! Experiment to find the perfect balance of flavors for your palate. Now, grab your ingredients and start cooking!

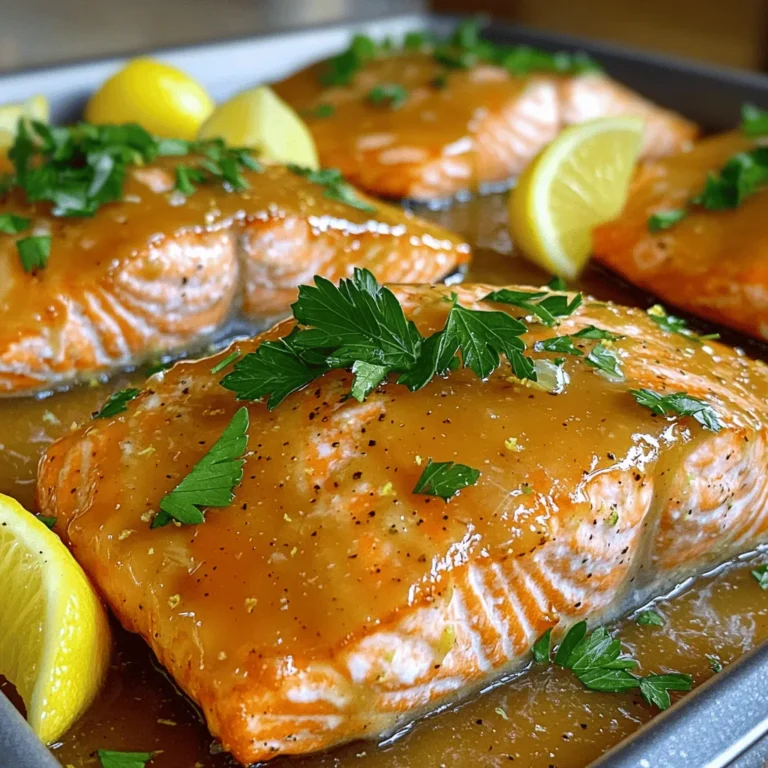
Maple Dijon Glazed Salmon Rich and Flavorful Recipe

To make Raspberry Almond Shortbread Bars, gather these simple ingredients: - 2 cups all-purpose flour - 1/2 cup powdered sugar - 1 cup unsalted butter, softened - 1/2 teaspoon almond extract - 1/4 teaspoon salt - 1 cup fresh raspberries (or frozen, thawed and drained) - 1/4 cup sliced almonds - 1 tablespoon granulated sugar (for topping) Each ingredient plays a key role in the flavor and texture of these bars. The flour gives structure. The butter adds richness, while the powdered sugar sweetens the dough. Almond extract brings a lovely nutty taste. Fresh raspberries add a tart contrast, and sliced almonds provide a crunchy finish. You might want to change things up. Here are some good options: - Alternatives for fresh raspberries: You can use strawberries or blueberries. They work well and provide a fruity burst. - Options for sugar types: You can swap powdered sugar with granulated sugar if you prefer. Just keep in mind, the texture may change slightly. - Vegan alternatives for butter: Use vegan butter or coconut oil. Both options will still make delicious bars. These substitutions let you customize the recipe to fit your taste or dietary needs. 1. First, preheat your oven to 350°F (175°C). This helps bake the bars evenly. 2. Next, grease a 9x9 inch baking pan. Line it with parchment paper, leaving some overhang. This makes it easy to lift the bars out later. 3. In a mixing bowl, cream together 1 cup of softened butter and 1/2 cup of powdered sugar. Beat until the mixture is light and fluffy. 1. Now, add 2 cups of all-purpose flour, 1/2 teaspoon of almond extract, and 1/4 teaspoon of salt to the butter mix. 2. Mix until just combined; the dough will be crumbly. It should hold together when pressed. 3. Take about two-thirds of the dough and press it evenly into the bottom of your prepared pan. This forms the shortbread base. 1. Spread 1 cup of fresh raspberries over the pressed dough. Make sure to cover it evenly. 2. Crumble the remaining one-third of dough over the raspberries. This creates a nice texture. 3. Sprinkle 1/4 cup of sliced almonds on top. 4. Finally, add 1 tablespoon of granulated sugar over everything. This adds sweetness and a nice crunch when baked. - How to achieve perfect golden edges: Bake the bars at 350°F (175°C) for 25-30 minutes. Keep an eye on the edges as they turn golden brown. If the center still looks pale, give it a few more minutes. The golden color shows the shortbread is done. - Avoiding undercooked centers: Use a toothpick to test the center. Insert it into the middle of the bars. If it comes out clean, your bars are ready. If it has wet batter, bake them a bit longer. - Presentation ideas for serving: Cut the cooled bars into squares or rectangles. Place them on a nice platter. Add fresh raspberries and a dusting of powdered sugar for a pretty finish. - Pairing options with beverages: Enjoy these bars with a cup of tea or coffee. The nutty flavor of almond pairs well with both. You can also serve them with a glass of chilled lemonade for a refreshing treat. - Fixing crumbly dough: If your dough is too crumbly, it may need more moisture. Add a teaspoon of cold water or milk. Mix gently until it holds together better. - Handling overbaked edges: If you bake the bars too long, the edges may become hard. To fix this, let them cool completely. Then, trim off the overbaked edges with a sharp knife. This will help keep the soft center intact. {{image_2}} You can make these bars even more exciting with a few simple changes. Adding citrus zest, like lemon or orange, brings a fresh twist. Just mix in a teaspoon of zest when you add the almond extract. Using different nuts can also change the taste and texture. Try chopped walnuts or hazelnuts instead of almonds for a unique flavor. If you want to switch up the fruit, strawberries or blueberries work great. Just use the same amount as raspberries. You can also use jam instead of fresh fruit. Spread a layer of your favorite jam on the dough base before adding the crumbled topping. This gives a sweet and fruity flavor that everyone will love. For gluten-free options, replace the all-purpose flour with gluten-free flour. Make sure to check that your other ingredients are gluten-free too. If you want a low-sugar treat, you can use a sugar substitute in place of powdered sugar. Just check the package for the right amount to use. These small changes let everyone enjoy these tasty bars! To keep your Raspberry Almond Shortbread Bars fresh, use an airtight container. Glass or plastic containers both work well. Store them at room temperature, away from heat and light. This keeps them soft and tasty for days. You can freeze these bars for later. First, let them cool completely. Then, wrap them in plastic wrap, and place them in a freezer bag. Don't forget to squeeze out the air. To defrost, take them out a few hours before serving. Let them sit at room temperature. This way, they taste fresh again. These bars last about a week at room temperature. Keep an eye out for any signs of spoilage. If you see mold or an off smell, it’s best to throw them away. Enjoy your sweet treats while they’re fresh! Can I use frozen raspberries? Yes, you can! Frozen raspberries work well. Just thaw and drain them before use. This ensures your bars do not get too soggy. How to make these bars ahead of time? You can make these bars a day in advance. Bake and cool them fully. Store the bars in an airtight container at room temperature. This keeps them fresh. Can I replace almond extract with vanilla extract? You can swap almond extract for vanilla extract. The taste will change a bit, but it will still be tasty. Caloric content per serving Each bar has about 150 calories. This is a nice treat without overdoing it. Breakdown of nutritional values - Total fat: 8g - Saturated fat: 5g - Carbohydrates: 20g - Sugars: 6g - Protein: 2g These bars offer a sweet bite with some healthy fats. What to do if my bars are not browning? If your bars are not browning, check your oven temperature. You can also extend the baking time by 5 minutes. Watch closely to prevent burning. Adjustments for high-altitude baking At high altitudes, reduce sugar by 1 to 2 tablespoons. Increase baking time by 5 to 10 minutes. You may need to add a bit more flour to keep the bars firm. You now have a complete guide to making delicious raspberry shortbread bars. We covered the key ingredients, optional substitutes, and easy step-by-step instructions. You learned tips to get the best results and explored tasty variations. With proper storage techniques, your bars will stay fresh, too. Enjoy experimenting with different fruits and flavors. Baking is simple and fun, and this recipe is perfect for anyone to try. Happy baking!

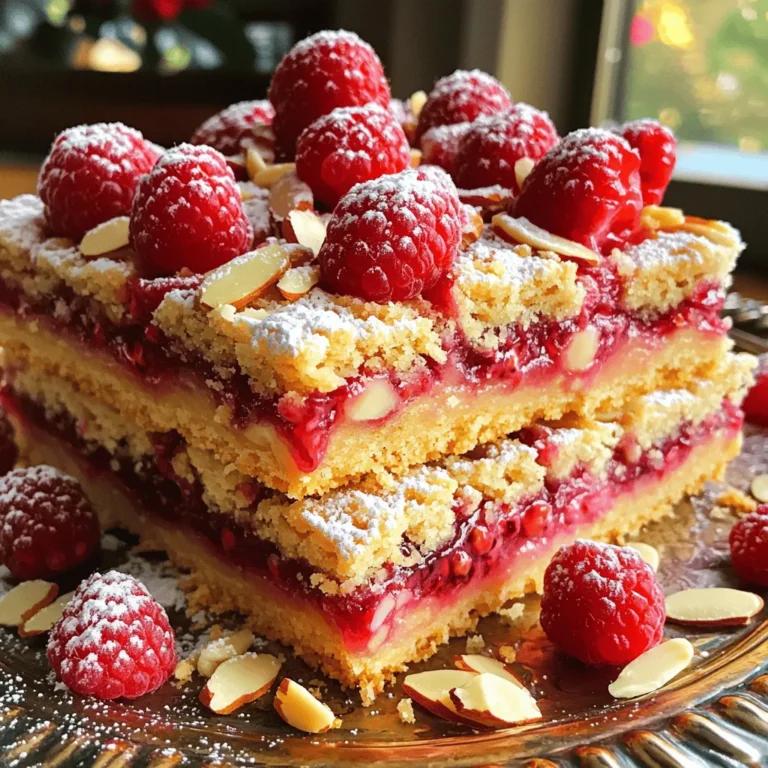
Raspberry Almond Shortbread Bars Simple and Tasty Treat

- 2 cups cooked chicken, shredded - 1 cup cream cheese, softened - 1 cup shredded mozzarella cheese - 1/2 cup sour cream - 1/4 cup chopped green onions - 1 cup enchilada sauce (low carb if possible) - 8 oz almond flour tortillas (or your favorite low carb tortillas) - 1 teaspoon garlic powder - 1 teaspoon cumin - Salt and pepper to taste - Fresh cilantro, for garnish The main ingredients in this dish create a creamy, rich filling. The shredded chicken gives protein and texture. Cream cheese and sour cream add creaminess. Mozzarella cheese melts beautifully, giving a nice top layer. Green onions add a fresh pop of flavor. You can customize this recipe with a few easy add-ins. Consider adding: - Diced jalapeños for a spicy kick - Black olives for a briny touch - Corn for a hint of sweetness - Avocado slices for added creaminess - Extra spices like chili powder for more warmth These optional add-ins can make your enchiladas even more exciting. Choose what suits your taste and diet. Each serving of these enchiladas offers: - Calories: 450 - Protein: 30g - Carbs: 10g - Fat: 30g This dish is low in carbs and high in protein. It fits well into a low-carb diet. Enjoy these enchiladas without worry. {{ingredient_image_1}} To start, gather your ingredients. You will need cooked chicken, cream cheese, mozzarella cheese, and sour cream. Chop the green onions and measure out the spices. Mix the shredded chicken in a bowl with cream cheese, half the mozzarella, sour cream, green onions, garlic powder, cumin, salt, and pepper. Stir it well until smooth. This creamy mix will be the heart of your enchiladas. Next, you will roll your enchiladas. Take an almond flour tortilla and lay it flat. Spoon 2-3 tablespoons of your chicken mixture onto the center. Roll it up tightly and place it seam-side down in a greased baking dish. Keep rolling with the rest of the tortillas and filling. Once done, pour the enchilada sauce evenly over the top. Don't forget to sprinkle the remaining mozzarella cheese on top for that cheesy goodness. Now, it's time to bake! Preheat your oven to 350°F (175°C). Place your baking dish in the oven and bake for 25-30 minutes. You want the cheese to melt and bubble. When it's done, take it out and let it cool for a few minutes. Garnish with fresh cilantro for a pop of color and flavor. Enjoy your delicious low carb white chicken enchiladas! To keep your enchiladas moist, use a good amount of sauce. Pour the sauce over the rolled enchiladas before baking. This step prevents them from drying out. You can also cover the dish with foil during the first part of baking. Remove the foil in the last few minutes to get that nice, bubbly cheese. One mistake is not seasoning your chicken mix well. Always add salt and pepper to boost flavor. Another error is overcooking the enchiladas. Bake just until the cheese melts, not longer. This keeps the dish tender. Lastly, avoid using too much filling. If you overstuff, the tortillas may tear, making a mess. Shredding chicken is easy if you use the right method. For best results, use cooked chicken that is still warm. This makes it easier to pull apart. You can use two forks to shred it quickly. If you want a smoother texture, use a stand mixer. Just mix on low for a few seconds. This will give you perfectly shredded chicken without much effort. Pro Tips Use Rotisserie Chicken: For a quicker preparation, consider using store-bought rotisserie chicken. It saves time and adds a delicious flavor. Customize Your Sauce: Feel free to add spices or additional ingredients to your enchilada sauce for a personalized kick. Chipotle powder or diced jalapeños can enhance the heat. Cheese Variations: Experiment with different types of cheese, such as pepper jack or cheddar, for a unique flavor profile that complements the chicken. Make Ahead: These enchiladas can be assembled in advance and stored in the refrigerator. Just bake them when you’re ready to eat for a fuss-free meal. {{image_2}} You can swap out some ingredients to make these enchiladas even better. Use Greek yogurt instead of sour cream for a tangy twist. If you want more veggies, try adding spinach or bell peppers to the chicken mix. You can also use shredded cauliflower instead of chicken for a vegetarian option. This keeps the dish low carb while adding more flavors. If you want to change the sauce, try a green salsa verde. It gives a fresh taste that works well with chicken. You can also use a homemade cheese sauce for a creamier option. For toppings, consider diced avocados or fresh tomatoes. These add color and nutrition to your meal. To spice things up, add jalapeños to the chicken mixture. You can also use a spicy enchilada sauce if you prefer. Another option is to sprinkle chili powder in the filling. This adds warmth without overwhelming the dish. Adjust the heat based on your taste. A little spice can elevate the flavor and make your enchiladas truly special. To keep your enchiladas fresh, let them cool first. Place them in an airtight container. If you stack them, put parchment paper between layers. This helps stop sticking. You can store them in the fridge for up to three days. If you want to freeze your enchiladas, wrap each one tightly in plastic wrap. Then, place them in a freezer-safe bag. Remove as much air as possible. They can last up to three months in the freezer. When it's time to eat, just thaw in the fridge overnight. To reheat, place the enchiladas in a baking dish. Preheat your oven to 350°F (175°C). Cover the dish with foil to keep them moist. Bake for about 20 minutes. For extra cheesy goodness, remove the foil for the last five minutes. You want the cheese melted and bubbly! Yes, you can use regular tortillas. However, keep in mind that they add more carbs. Almond flour tortillas help keep the dish low-carb and gluten-free. If you choose regular tortillas, the flavor and texture will differ slightly, but the dish will still taste great. To make these enchiladas dairy-free, replace cream cheese and sour cream with vegan options. Use cashew cream or coconut cream. Look for dairy-free cheese to keep the cheesy flavor. Make sure your enchilada sauce is also dairy-free. This way, you can enjoy these enchiladas without dairy. There are many tasty side dishes to serve with these enchiladas. Consider making a fresh salad with greens and avocado. You can also serve Mexican-style cauliflower rice. Grilled veggies add a nice touch too. For a crunchy side, try tortilla chips with guacamole. Each side enhances your meal! Low Carb White Chicken Enchiladas are easy to make and taste great. We learned about the main ingredients, how to prepare them, and ways to avoid mistakes. We also explored different variations and storage tips to keep your meals fresh. By following these steps and suggestions, you can create a dish that everyone will love. Enjoy your cooking and savor each bite of this delicious low-carb option.

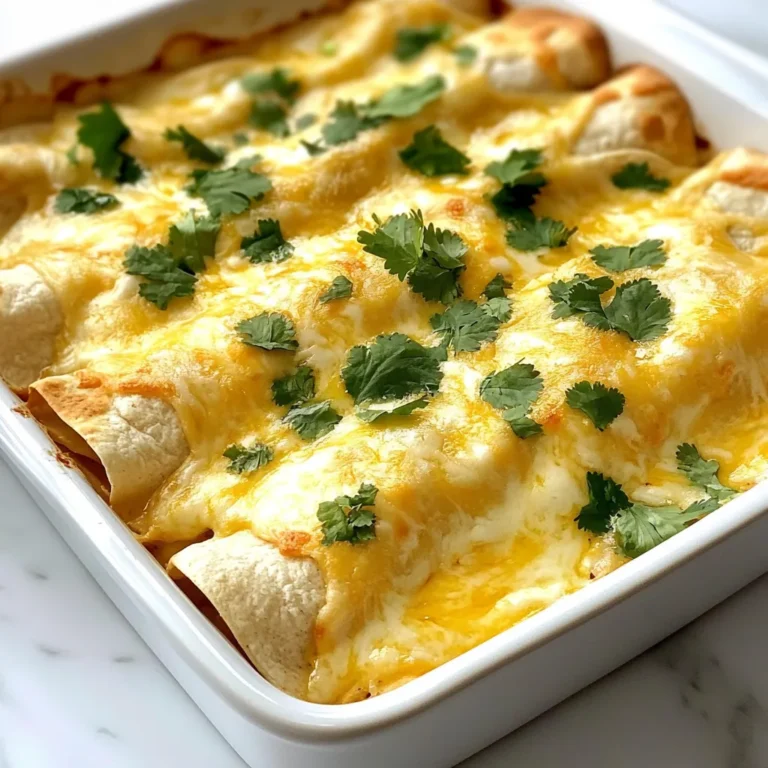
Low Carb White Chicken Enchiladas Flavorful Delight

- 1.5 lbs boneless, skinless chicken thighs - 1 onion, finely chopped - 3 garlic cloves, minced - 2 cups chicken broth - 1 cup carrots, sliced - 1 cup celery, chopped - 1 teaspoon dried thyme - 1 teaspoon dried rosemary - Salt and pepper to taste - 1 cup frozen peas For this dish, I use chicken thighs because they stay juicy and tender. The onion and garlic add depth. The carrots and celery bring color and crunch. The thyme and rosemary give it a cozy flavor. Don't forget salt and pepper; they enhance the taste. The frozen peas add a nice pop of sweetness at the end. - 2 cups all-purpose flour - 1 tablespoon baking powder - 1 teaspoon salt - 1 cup milk - 2 tablespoons butter, melted These dumplings are fluffy and soft. The flour and baking powder make them rise. The salt brings out the flavor, while the milk and butter keep them moist. Mix them well for the best texture. - 1 tablespoon chopped fresh parsley Fresh parsley brightens up the dish. It adds color and a fresh taste. Just sprinkle it on top before serving for a lovely finish. - Set your Instant Pot to sauté mode. - Add some oil. Once hot, toss in the chopped onion. - Sauté for about 3-4 minutes until soft. - Next, add the minced garlic. Cook for 1 more minute until fragrant. - Season the chicken thighs with salt, pepper, thyme, and rosemary. - Place the seasoned chicken into the Instant Pot. - Pour in the chicken broth. Add the sliced carrots and chopped celery. - Close the lid and set the Instant Pot to cook on high pressure for 10 minutes. - After cooking, let the pressure release naturally for 10 minutes. - Carefully do a quick release to remove any remaining pressure. - Take out the chicken thighs and shred them with two forks. - Put the shredded chicken back in the pot. Stir in the frozen peas. - In a bowl, mix the flour, baking powder, and salt. - Gradually add in the milk and melted butter. Mix until a soft dough forms. - Drop spoonfuls of the dumpling dough on top of the chicken mixture. - Make sure not to stir. Close the lid again. - Set to high pressure and cook for 5 minutes. - Once done, do a quick release. - Serve hot, garnished with chopped fresh parsley. To make your chicken and dumplings shine, adjust the seasoning to fit your taste. Start with salt and pepper; add more if needed. You can also include extra herbs or spices. Try adding garlic powder or a pinch of paprika for a warm kick. Fresh herbs like thyme or rosemary can enhance the dish's aroma. Experiment until you find your perfect balance, and don’t be afraid to taste as you go. Common mistakes can ruin your dumpling texture. Avoid overmixing the dough; it should be soft and slightly sticky. If your dough is too dry, add more milk gradually. If too wet, sprinkle in more flour. Check the consistency by dropping a spoonful onto the chicken mixture. It should hold its shape. Remember, fluffy dumplings need a light touch. Different Instant Pot models may vary in cooking times. If yours cooks faster, reduce the time by a minute or two. For larger batches, increase the cooking time slightly to ensure everything cooks through. Always check the chicken’s internal temperature; it should reach 165°F for safety. Adjusting these times can make your dish perfect every time. {{image_2}} You can make this dish healthier by using leaner cuts of chicken. Chicken breasts work well and have less fat. Another option is to use low-fat milk or non-dairy alternatives like almond or oat milk. These choices cut down on calories while still keeping the dish creamy and tasty. Don’t be afraid to mix things up with your vegetables. You can add peas or corn for a pop of color and sweetness. If you like a little heat, sprinkle in some red pepper flakes or Cajun seasoning. These additions can take the flavor to a new level, making your meal even more enjoyable. If you need a gluten-free option, use gluten-free flour for your dumplings. This keeps the dish friendly for those with gluten sensitivities. For thickening the broth, you can use cornstarch or arrowroot powder instead of regular flour. This way, you keep the same great taste without the gluten. To store leftovers, place chicken and dumplings in an airtight container. Keep them in the fridge. They will stay fresh for about three to four days. Make sure to let them cool before sealing the container. This helps avoid soggy dumplings. You can freeze chicken and dumplings for longer storage. Use freezer-safe containers or bags. Remove as much air as possible to prevent freezer burn. They can last up to three months in the freezer. When you are ready to enjoy them, thaw overnight in the fridge. Reheat in a pot on low heat, stirring gently. Add a splash of chicken broth if needed to keep them moist. Making chicken and dumplings ahead of time is easy. Prepare the whole dish and store it in portions. You can use small containers for single servings. This way, you have quick meals ready to go. It saves time and effort on busy days. Just reheat and enjoy! Cooking this dish takes about 45 minutes. You will spend 15 minutes prepping. The cook time is 10 minutes for the chicken. Then you need 5 minutes for the dumplings. Allow for 10 minutes of natural pressure release. Yes, you can use frozen chicken. Just remember to add a few extra minutes to the cook time. Frozen chicken thighs will need about 12 to 15 minutes under high pressure. Ensure the pieces are not stuck together for even cooking. Chicken and dumplings is a complete meal. However, you can pair it with simple sides. Consider a fresh green salad for a light touch. Breadsticks or crusty bread are also great for dipping in the broth. Definitely! You can swap the chicken for plant-based protein. Tofu or chickpeas work well. Use vegetable broth instead of chicken broth. You can also add more veggies for extra flavor and nutrition. In this post, we covered how to make Instant Pot Chicken and Dumplings. I shared key ingredients, step-by-step instructions, and tips for flavor and perfect dumplings. Variations help you adapt the dish to fit your taste or dietary needs. Finally, proper storage and reheating tips ensure you enjoy leftovers. This recipe is simple, quick, and satisfying. You can impress family and friends with this flavorful dish any time you like. Enjoy cooking and making delicious memories!

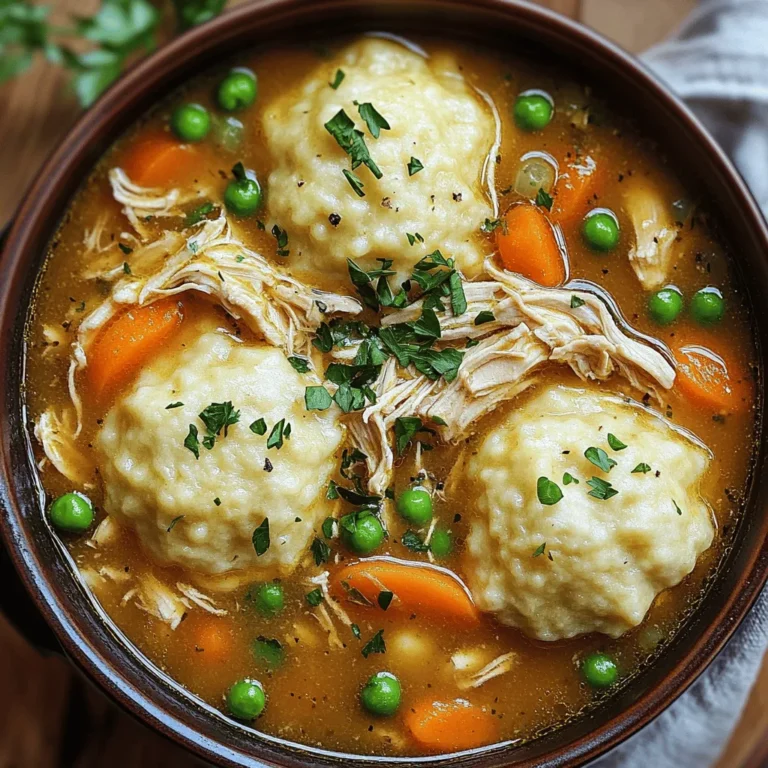
Instant Pot Chicken and Dumplings Easy Comfort Meal

To make Blueberry Lemon Cheesecake Bars, you'll need fresh and simple ingredients. Here’s what you should gather: - 1 ½ cups graham cracker crumbs - ½ cup unsalted butter, melted - 2 tablespoons sugar - 16 oz cream cheese, softened - 1 cup sugar - 2 large eggs - 1 teaspoon vanilla extract - 2 tablespoons lemon juice - Zest of 1 lemon - 1 cup fresh blueberries - Powdered sugar for dusting (optional) These ingredients work together to create a rich and creamy dessert. The graham cracker crumbs form a tasty base. The cream cheese gives the bars their creamy texture. Fresh blueberries add a burst of flavor and color. If you want to mix things up, consider using different fruits. Raspberries or strawberries pair well with lemon. You can also try adding nuts for a crunchy texture. Each variation lets you have fun while making these bars. Enjoy experimenting! To start, preheat your oven to 325°F (163°C). This is the perfect temperature for baking cheesecake bars. Next, line an 8x8 inch baking pan with parchment paper. Leave some overhang. This makes it easy to lift the bars out later. In a mixing bowl, combine 1 ½ cups of graham cracker crumbs, ½ cup of melted unsalted butter, and 2 tablespoons of sugar. Mix well until the crumbs look like wet sand. Press this mixture firmly into the bottom of your pan. Make sure it is even. Pre-bake this crust in the oven for about 10 minutes. After, let it cool slightly. Now, let’s prepare the filling. In a large bowl, beat 16 ounces of softened cream cheese with an electric mixer. Mix until it is smooth and creamy. Gradually add in 1 cup of sugar, mixing until it is well blended. Then, add 2 large eggs, one at a time, mixing well each time. Add 1 teaspoon of vanilla extract, 2 tablespoons of lemon juice, and the zest of 1 lemon. Mix until just combined. Gently fold in 1 cup of fresh blueberries. Make sure they are evenly spread in the cream cheese mixture. Pour the cheesecake filling over your pre-baked crust. Spread it evenly across the top. Now, it's time to bake. Place the pan in the oven for 35-40 minutes. The center should be set but still slightly jiggly. Look for the edges to be firm while the middle is a little soft. This means your bars are done. Once finished, remove them from the oven and let them cool to room temperature. After cooling, refrigerate them for at least 4 hours or overnight. This helps the bars set well. When chilled, lift the cheesecake out of the pan using the parchment paper. Cut the bars into squares. If you like, dust them with powdered sugar for a nice finish. Enjoy your delicious Blueberry Lemon Cheesecake Bars! Making blueberry lemon cheesecake bars can seem easy, but mistakes do happen. Here are some common pitfalls: - Overmixing the batter: This can add too much air and cause cracks. Mix just until combined. - Not letting cream cheese soften: Cold cream cheese makes lumpy batter. Always let it sit out first. - Skipping the pre-bake: Pre-baking the crust helps keep it firm. Don’t skip this step. To avoid cracks or overbaking: - Bake at the right temperature: Keep your oven at 325°F. A too-hot oven can lead to cracks. - Check for doneness: The center should be slightly jiggly. It will firm up as it cools. - Cool slowly: After baking, let the bars cool in the oven with the door slightly open. This helps prevent cracks. Now, let’s talk about how to serve these tasty bars. Here are some ideas: - Garnish with fresh fruit: Add a few blueberries and lemon slices on top. It adds color and flavor. - Dust with powdered sugar: A light sprinkle gives a nice finish and looks great. - Serve with whipped cream: A dollop of cream balances the tanginess of the cheesecake. For beverages, pair these bars with: - Iced tea: A refreshing drink that complements the lemon flavor. - Lemonade: This drink enhances the citrus notes. - Coffee: The rich taste of coffee pairs well with the creamy bars. Enjoy these tips for a perfect treat! {{image_2}} You can easily change some ingredients in these bars. If you want a different crust, try using crushed cookies. Oreos or even almond flour work well. For a gluten-free option, consider using gluten-free graham crackers or ground nuts. If you need vegan options, replace the cream cheese with a plant-based version. You can also use aquafaba, the liquid from canned chickpeas, instead of eggs. This swap helps keep the texture light and fluffy. Feel free to get creative with flavors. You can add raspberry or strawberry for a twist. Mixing in chocolate chips can also make these bars even more delightful. Consider seasonal fruits, too. In summer, fresh peaches or cherries work beautifully. In fall, try adding pumpkin spice for a cozy flavor. Each variation can make your cheesecake bars unique and exciting! To keep your blueberry lemon cheesecake bars fresh, use these tips: - Refrigerate: Place bars in an airtight container. This keeps moisture in and prevents drying out. - Wrap: For extra protection, wrap bars in plastic wrap before placing them in the container. - Freeze: If you want to store them longer, freeze the bars. Cut them into squares, then wrap each piece in plastic wrap and place in a freezer bag. These methods help maintain flavor and texture for later enjoyment. You can enjoy your cheesecake bars for a while. Here’s what you need to know: - Refrigerator: These bars last up to 5 days when stored properly. - Freezer: In the freezer, they can stay good for about 2 months. Watch for signs of spoilage. If you see mold or a strange smell, it’s best to toss them out. Always trust your senses when it comes to food safety! You can make these bars a day in advance. After baking, let them cool. Then, refrigerate them for at least four hours. This helps the flavors blend and the texture set well. Yes, you can use frozen blueberries. Just remember to thaw and drain them first. They may release more juice, which can make the filling slightly wetter. To cut cheesecake bars neatly, use a sharp knife. Dip the knife in hot water and wipe it dry. This keeps the cuts clean and helps avoid messy edges. You can find the full recipe right here in this article. It includes all the ingredients and steps needed to make these tasty bars. You can try using Greek yogurt for a lighter option. It won’t be as rich, but it can still be creamy and delicious. Just make sure it is plain and unsweetened. In this post, I shared how to make delicious blueberry lemon cheesecake bars. We covered the ingredients needed, precise steps for preparation and baking, plus helpful tips to avoid common mistakes. I also offered ideas for variations and how to store your bars. Enjoying these treats is easy when you follow these steps. So go ahead, create your bars, and share them with friends. You'll be proud of your creation!

Blueberry Lemon Cheesecake Bars Easy and Delicious Treat

To make the Honey Garlic Meatball Skillet, you will need: - 1 lb ground beef (or ground turkey) - 1/2 cup breadcrumbs - 1/4 cup grated Parmesan cheese - 1 large egg - 2 cloves garlic, minced - 1 teaspoon salt - 1/2 teaspoon black pepper - 1/4 cup honey - 1/4 cup soy sauce (low sodium preferred) - 1 tablespoon rice vinegar - 1 tablespoon sesame oil - 1 teaspoon grated ginger - 2 cups broccoli florets - 1 red bell pepper, sliced - 2 tablespoons green onions, chopped (for garnish) These ingredients make a rich and flavorful dish. The meatballs are tender and juicy, while the sauce adds a sweet and savory touch. You can mix in extra items to enhance the dish. Consider adding: - Carrots, sliced thin - Snap peas for crunch - Mushrooms, sliced - Spinach for color and nutrition These add-ins boost flavor and nutrition. You can tailor the dish to your taste. For a deeper flavor, try these seasonings: - Red pepper flakes for heat - Garlic powder for extra garlic flavor - Onion powder to enhance the meatballs Feel free to adjust these seasonings. They help create a unique taste that fits your style. First, gather your ingredients. In a large bowl, mix 1 pound of ground beef or turkey. Add in 1/2 cup of breadcrumbs and 1/4 cup of grated Parmesan cheese. Crack in 1 large egg and add 2 minced garlic cloves. Sprinkle in 1 teaspoon of salt and 1/2 teaspoon of black pepper. Mix everything well until it’s combined. Now, shape the mixture into small balls about 1 inch wide. You should get around 20 meatballs. Place them on a plate and set them aside for later. Next, heat a large skillet over medium heat. Drizzle some sesame oil into the pan. Once it’s hot, add the meatballs. Cook them for about 5 to 7 minutes until they are brown on all sides. Once done, take them out and set them aside. In the same skillet, toss in 2 cups of broccoli florets and 1 sliced red bell pepper. Sauté these for about 3 to 4 minutes. You want them to be tender but still a bit crisp. While the veggies are cooking, grab a small bowl. Whisk together 1/4 cup of honey, 1/4 cup of low-sodium soy sauce, 1 tablespoon of rice vinegar, and 1 teaspoon of grated ginger. Once your veggies are ready, add the meatballs back to the skillet. Pour the honey garlic sauce over them and the veggies. Stir everything together to coat it well. Cook for another 3 to 4 minutes until the sauce thickens and everything is hot. Finally, remove it from heat. Top with 2 tablespoons of chopped green onions for a fresh touch. Enjoy your honey garlic meatball skillet! To make great meatballs, mix the meat with care. Use a large bowl for this. Combine ground beef, breadcrumbs, Parmesan, egg, garlic, salt, and pepper. Mix until just blended. Over-mixing can make them tough. Shape meatballs into 1-inch balls. This size helps them cook evenly. The sauce is key for flavor. Use honey and soy sauce for a sweet and salty mix. Add rice vinegar for a hint of tang. Grate ginger for an extra layer of taste. Whisk these together well before adding to the skillet. Pour it over the meatballs and veggies. Stir to coat everything well in the sauce. This ensures each bite is tasty. Serve the meatball skillet warm, right from the pan. It looks great and is easy to share. Garnish with chopped green onions for a pop of color. This dish pairs well with rice or noodles. You can also serve it with a side salad. Enjoy it with friends or family for a fun meal! {{image_2}} You can swap ground beef for ground turkey or chicken. They both work well. For a plant-based option, try using lentils or chickpeas. These choices keep flavor and texture. Broccoli and red bell pepper are great, but feel free to mix it up. You can use green beans, carrots, or even zucchini. Just chop them into small pieces. This keeps them tender when cooked. To make this dish gluten-free, use gluten-free breadcrumbs. You can also skip the breadcrumbs for a low-carb meal. For a lighter option, try using cauliflower rice instead of regular rice. It adds fiber and keeps the meal healthy. After you enjoy your Honey Garlic Meatball Skillet, store leftovers properly. First, let the dish cool down. Then, place it in an airtight container. Make sure to keep it in the fridge. Your leftovers will stay fresh for up to three days. To keep flavors intact, avoid leaving it out at room temperature. When you're ready to eat again, reheating is easy. You can use the microwave or a skillet. For the microwave, put your portion on a plate and cover it. Heat for one to two minutes, checking halfway through. If using a skillet, add a small splash of water to prevent sticking. Heat on medium until everything is warm. If you want to save some for later, freezing works great. First, let the meatballs cool completely. Then, arrange them on a baking sheet in a single layer. Freeze for one hour to firm them up. After that, transfer them to a freezer bag or container. Label the bag with the date. You can freeze them for up to three months. When ready to use, thaw overnight in the fridge before reheating. Yes, you can make the meatballs ahead of time. Form them and store them in the fridge. They will stay fresh for up to two days. For longer storage, freeze them. Place the meatballs in a single layer on a baking sheet. After they freeze, transfer them to a freezer bag. When you’re ready to cook, just thaw them and follow the recipe. Making the meatballs ahead saves time on busy days. If you need a substitute for honey, try maple syrup. It has a similar sweetness and texture. Agave nectar is another option; it's also sweet and easy to find. For a lower-calorie choice, use a sugar substitute like stevia. Just remember, the flavor will change a bit. Each option can give your dish a unique twist. To add some heat, try adding red pepper flakes to the sauce. Start with a small amount, like half a teaspoon. If you want more spice, feel free to add more. You can also use sriracha or chili paste in the sauce for a kick. Just mix it in when you whisk the sauce. For extra flavor, toss in some diced jalapeños when cooking the vegetables. This blog post covered honey garlic meatballs from start to finish. You learned about key ingredients and optional add-ins that enhance flavor. We walked through each step to prepare this dish perfectly. Tips and variations offered new ideas, like protein swaps and low-carb options. Lastly, I shared how to store and reheat leftovers. Give this recipe a try. Enjoy the process and taste the results! You’ll impress your family and friends with this easy and delicious dish.

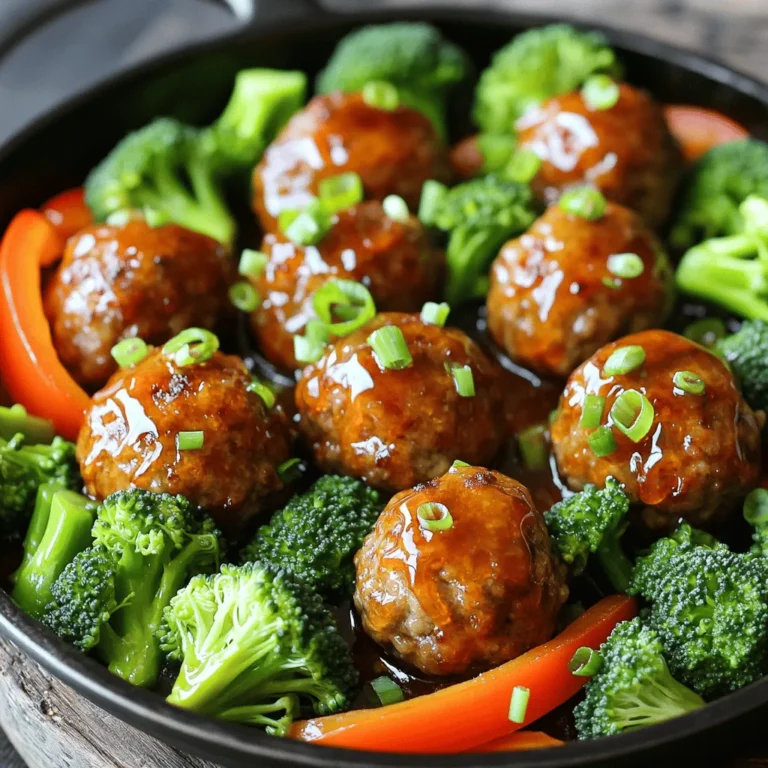
Honey Garlic Meatball Skillet Savory One-Pan Delight

PREV 1 … 39 40 41 … 57 NEXT
meal twig

explore

DessertsDinnerAppetizersDrinks

Our Policies

  • Cookie Policy
  • Copyright Policy
  • Disclaimer
  • GDPR Policy
  • Terms Of Use
Back to Top
  • About
  • Contact Us
  • Privacy Policy
© 2025 meal twig