FREE DINNER EBOOK! Get your copy!
  • Cookie Policy
  • GDPR Policy
  • Disclaimer
  • Terms Of Use
  • Visit my other site: Fun Cookie Recipes
meal twig
  • Home
  • Dinner
  • Desserts
  • Drinks
  • Appetizers
  • Contact
  • About
  • Privacy Policy
  • Home
  • Dinner
  • Desserts
  • Drinks
  • Appetizers
  • Contact
  • About
  • Privacy Policy
  • Cookie Policy
  • GDPR Policy
  • Disclaimer
  • Terms Of Use
Visit my other site: Fun Cookie Recipes

HOME / CATEGORIES /

Latest

- 1 cup rolled oats - ½ cup almond butter or peanut butter - ½ cup unsweetened shredded coconut - ¼ cup honey or maple syrup - ¼ cup dark chocolate chips - 1 teaspoon vanilla extract - ¼ teaspoon sea salt - Optional: 2 tablespoons chia seeds or hemp seeds Using fresh ingredients is key to making great energy bites. Rolled oats form the base. They add fiber and help you feel full. Nut butter gives richness and protein. You can choose almond or peanut butter based on your taste. Sweeteners like honey or maple syrup add sweetness and stickiness. Dark chocolate chips bring a rich flavor. Vanilla extract adds warmth, while sea salt balances sweetness. If you're looking for extra nutrition, chia or hemp seeds are great additions. - Benefits of oats: Oats are high in fiber. They help with digestion and keep you full longer. - Health advantages of nut butter: Nut butter is a good source of protein and healthy fats. It supports heart health and energy. - Advantages of dark chocolate: Dark chocolate is rich in antioxidants. It can boost your mood and provide a delicious taste. Each ingredient plays a role in making these bites tasty and good for you. Combining them leads to a snack that not only satisfies but also nourishes. - Dairy-free options: Use almond or coconut milk in recipes that call for dairy. - Nut-free alternatives: Try sunflower seed butter or soy nut butter if you avoid nuts. - Sugar substitutes: Use agave syrup or stevia instead of honey or maple syrup for a lower-calorie option. These substitutions help you customize the bites based on your dietary needs. Making these small changes keeps the recipe flexible and fun. 1. In a large mixing bowl, combine the rolled oats, almond or peanut butter, shredded coconut, honey or maple syrup, vanilla extract, and sea salt. 2. If you want more nutrition, add chia seeds or hemp seeds. This adds a nice crunch. 3. Mix everything well. You can use your hands to ensure it all comes together. You want a sticky mixture. 4. Fold in dark chocolate chips. Make sure they spread evenly throughout the mix. 1. Chill the mixture in the refrigerator for about 30 minutes. This helps it firm up. 2. After chilling, scoop out tablespoon-sized portions. Roll them into balls using your palms. 3. Place the energy bites on a parchment-lined baking sheet. 4. Refrigerate again for another 30 minutes. This makes the bites firmer and easier to eat. - For a fun presentation, arrange the energy bites on a decorative plate. You can also use a mason jar for a cute display. - Sprinkle some extra shredded coconut on top for added flair. - Pair these bites with a glass of milk or a smoothie for a tasty snack. - Overmixing or undermixing: Mixing too much can make the bites tough. If you mix too little, they won't hold together. Aim for a well-blended texture. Use your hands if needed for a good mix. - Incorrect chilling times: Chilling is key. If you skip this step, the bites will be too soft. Chill for at least 30 minutes before rolling. This makes the mixture easier to shape. - Adding spices like cinnamon: A little cinnamon brings warmth and depth. Just a pinch can change the flavor. Try it for a cozy twist. - Suggestions for nut variations: You can switch almond butter for cashew or sunflower seed butter. Each nut adds a unique taste and texture. Experiment to find your favorite! - Involving children in the preparation: Kids love to help! Let them mix and scoop. This makes cooking fun and teaches them about food. - Making it fun with different shapes: Use cookie cutters to shape the bites. This adds a playful touch. Kids can make stars, hearts, or any shape they like! {{image_2}} You can boost the taste of your energy bites by adding dried fruits. Try chopped dates, cranberries, or apricots. These fruits add natural sweetness and chewiness. You can also mix in spices for a flavor twist. Cinnamon or nutmeg adds warmth. A pinch of sea salt brings out all the flavors. To make these bites vegan, swap honey for maple syrup. This simple change keeps your snack plant-based. For gluten-free options, ensure your oats are certified gluten-free. This small step helps everyone enjoy these tasty bites safely. Think beyond snacking! Use these energy bites as toppings on yogurt or smoothie bowls. They add crunch and flavor. You can also toss them into trail mixes. This makes a perfect snack for hikes or road trips. Enjoy the energy boost wherever you go! Store your Coconut Chocolate Energy Bites in airtight containers. This keeps them fresh longer. Place the bites in the fridge to avoid spoilage. The cool air helps maintain their texture and flavor. To freeze energy bites, place them in a single layer on a tray. Once frozen, transfer them to a freezer-safe bag or container. This method prevents sticking. For thawing, simply take out the number of bites you want. Let them sit at room temperature for about 10-15 minutes before enjoying. These energy bites last in the fridge for up to one week. Look for signs of spoilage like an off smell or a change in texture. If they feel dry or hard, it’s best to discard them. Keeping an eye on these signs ensures you enjoy them at their best! Each energy bite has about 100 calories. If you make 12 to 15 bites, that adds up quickly. These bites are a tasty snack that gives you energy without too many calories. They mix oats, nut butter, and dark chocolate for a healthy treat. Yes, you can use almond butter or peanut butter. Each nut butter adds a unique flavor. Almond butter gives a sweet taste, while peanut butter has a strong, nutty flavor. You can also try sunflower seed butter for a nut-free option. They take about 10 minutes to prep and 1 hour to chill. The total time is around 1 hour and 10 minutes. You mix the ingredients, chill them, and then shape the bites. It is quick and easy! Yes, you can add protein powder. It boosts nutrition and keeps you full longer. Use about 1 to 2 tablespoons in the mix. Choose a flavor that complements the bites, like vanilla or chocolate. This blog post covers how to make delicious Coconut Chocolate Energy Bites. You learned about key ingredients, their health benefits, and how to prepare and store them. I shared tips to avoid common mistakes and suggested fun ways to get kids involved. Lastly, you discovered variations and answers to frequently asked questions. These tasty bites are easy to make and nutritious too. Enjoy creating your own versions and sharing them with family and friends. Healthy snacks can be exciting and fun!

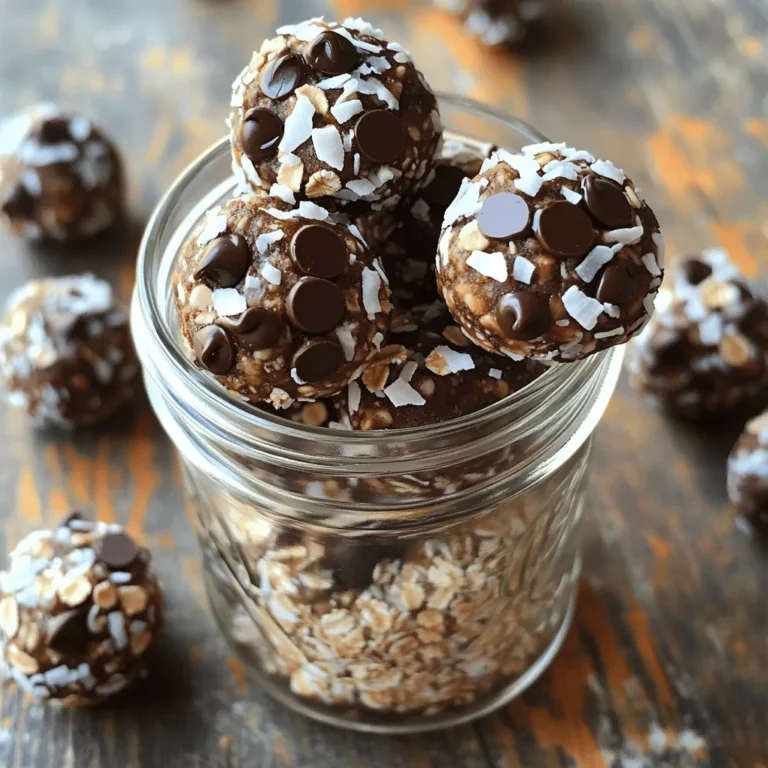
Coconut Chocolate Energy Bites Quick and Easy Recipe

- Pasta options: You can use penne, fettuccine, or spaghetti. Each type brings its own texture. Penne holds sauce well, while fettuccine offers a smooth bite. Spaghetti is classic and fun to twirl. Choose what you love! - Sun-dried tomatoes: Use sun-dried tomatoes packed in oil for the best flavor. Drain and chop them before adding to your dish. This makes them easier to mix into the sauce. They add a rich, tangy taste that shines. - Cream and cheese: Heavy cream gives a silky texture. You can swap it with half-and-half for a lighter option. For cheese, grated Parmesan is perfect. If you’re out, try Pecorino Romano. Both melt well and add depth to the sauce. To cook pasta perfectly, boil salted water. Add your pasta and check the time on the package. You want it al dente, which means it should be firm to the bite. This is key for keeping the right texture in your dish. After cooking, save 1/2 cup of pasta water. This starchy water helps adjust your sauce later. Drain the pasta but do not rinse it. Rinsing removes the starch that helps sauce stick. Start by sautéing garlic in olive oil. Heat the oil over medium heat, then add minced garlic. Cook it for about 1 minute. You want the garlic fragrant but not brown. Burning garlic can make your sauce bitter. Next, add the sun-dried tomatoes. Stir them in and cook for 2 to 3 minutes. This step infuses the oil with flavor. The sun-dried tomatoes will add a rich taste to your sauce. Lower the heat and pour in the heavy cream. Stir well and let it simmer for 2 to 3 minutes. This will thicken the sauce a bit. Once thickened, mix in grated Parmesan cheese, dried basil, and oregano. Stir until the cheese melts and the sauce is smooth. Season with salt and pepper to taste. Now, it’s time to mix the pasta and sauce. Add the drained pasta to the skillet. Toss the pasta gently to coat it in the creamy sauce. This is where the magic happens! If your sauce feels too thick, use the reserved pasta water. Add a little at a time until your sauce reaches the right consistency. You want a creamy sauce that clings to each piece of pasta. To boost the flavor of your creamy sun-dried tomato pasta, try adding a pinch of red pepper flakes. This heat complements the rich cream. You can also add a squeeze of fresh lemon juice for brightness. When it comes to herbs, fresh basil gives a strong flavor. You can chop it and add it at the end. Dried herbs are easier and still tasty. Use one teaspoon of dried basil or oregano while cooking. For a smooth cream sauce, keep the heat low when adding the cream. This helps it thicken slowly without curdling. Stir constantly to blend everything well. If your sauce seems too thick, just add a little reserved pasta water. This keeps it creamy. To make sure your pasta doesn’t stick, stir it right after you add it to the sauce. Toss it gently for even coating. Adding a drizzle of olive oil to the pasta water also helps. For a stunning dish, serve the pasta in deep bowls. Garnish with fresh basil leaves on top. A sprinkle of extra Parmesan cheese adds a nice touch. You can also serve it alongside a crisp green salad for balance. {{image_2}} You can add protein to your creamy sun-dried tomato pasta for a heartier meal. Here are some options: - Chicken: Cook bite-sized pieces in a skillet until golden. Add them to the sauce just before mixing in the pasta. - Shrimp: Sauté shrimp in olive oil until pink. Toss them in the pasta mix for a seafood twist. - Vegan substitutes: Try chickpeas or tofu. Cook them until golden and mix into the dish. Each protein adds its own flavor. Cook chicken and shrimp until fully done. For tofu, pan-fry to get a nice crust. Adding veggies boosts nutrition and flavor. Here are my favorites: - Spinach: Toss in fresh spinach at the end. It wilts quickly and adds color. - Zucchini: Sauté diced zucchini for a light crunch. Cook until tender, about 3-4 minutes. - Bell peppers: Slice and cook them until soft. They add sweetness to the dish. You can add these veggies while cooking the sun-dried tomatoes. This way, they soak up all the flavors. Want to switch up the sauce? Here are some ideas: - Dairy-free cream options: Use coconut cream or cashew cream. They keep the dish creamy without dairy. - Spicy variations: Add red pepper flakes for heat. Start with a pinch and adjust based on your taste. These sauce alternatives make for a unique twist on the classic recipe. Experiment to find which variation you love best! To keep your creamy sun-dried tomato pasta fresh, follow these steps: - Refrigerate promptly: Place leftovers in an airtight container. Store them in the fridge within two hours of cooking. This helps prevent bacteria growth. - Use within 3-4 days: For the best taste, eat the leftovers within this time frame. When reheating, do this: - Add moisture: Splash a bit of water or extra cream into the pasta. This keeps it creamy and prevents it from drying out. - Heat gently: Use a skillet over low heat. Stir often to ensure even warming. This method keeps the texture just right. If you want to save your creamy pasta for later, freezing is a great option. Here's how: - Cool first: Let the pasta cool completely before freezing. This helps avoid ice crystals, which can make it soggy. - Use freezer-safe containers: Place the pasta in a container or a freezer bag. Remove as much air as possible to prevent freezer burn. - Label and date: This way, you know when to use it. It can last up to three months in the freezer. For thawing and reheating: - Thaw in the fridge: Move the pasta to the fridge a day before you plan to eat it. This keeps it safe and helps it thaw evenly. - Reheat slowly: Warm it in a skillet on low heat. Add a splash of cream or water as needed. Stir often to keep the sauce smooth. Following these tips will help you enjoy your creamy sun-dried tomato pasta even after the first serving! Can I use fresh tomatoes instead of sun-dried? Yes, you can use fresh tomatoes. They will add a different taste and texture. Chop them up and cook them down a bit longer to get a similar flavor. What can I substitute for heavy cream? You can use coconut milk or cashew cream for a lighter option. These will still give you a creamy texture. How long does cooked pasta last in the fridge? Cooked pasta lasts about 3 to 5 days in the fridge. Make sure to store it in an airtight container. Why is my sauce too thick or thin? If the sauce is too thick, add a bit of reserved pasta water. If it’s too thin, let it simmer longer to thicken up. What to do if the pasta is overcooked? If the pasta is overcooked, you can try to mix it with the sauce quickly. It might help absorb some moisture. Options for gluten-free or vegan diets For gluten-free, use rice or quinoa pasta. For vegan, use plant-based cream and nutritional yeast instead of cheese. Nutritional information for health-conscious consumers This dish has a good balance of carbs, fats, and protein. Adjust portions to fit your diet plan. In this post, we explored how to make creamy sun-dried tomato pasta. You learned about key ingredients and step-by-step cooking tips. We discussed ways to enhance flavor and shared variations to fit your taste. Storing leftovers and reheating from the freezer was also covered. Cooking this dish can be simple and fun. With practice, you'll create a meal that impresses. Enjoy trying new flavors and techniques to make this dish your own. Happy cooking!

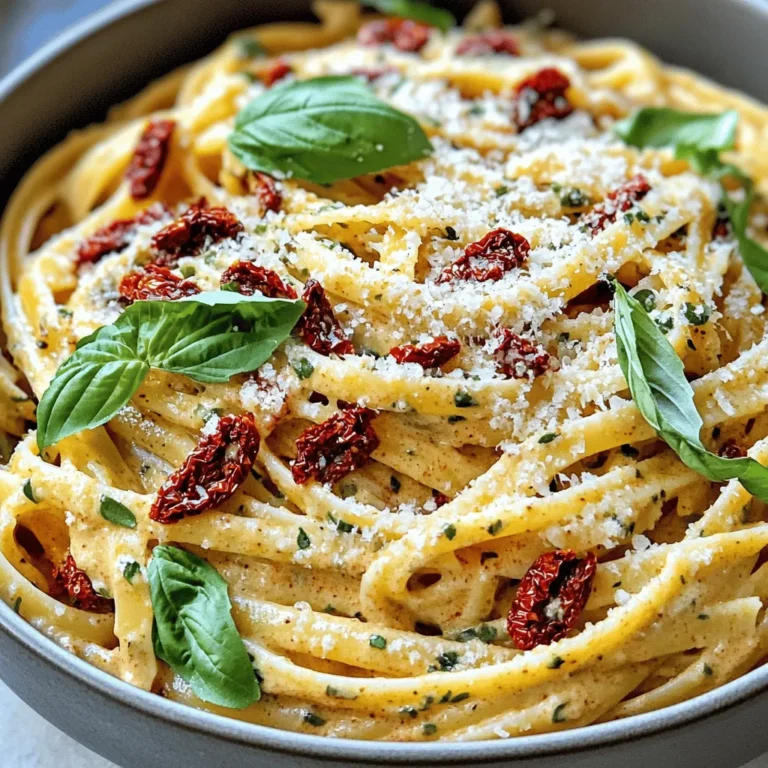
Creamy Sun-Dried Tomato Pasta Delicious and Quick Meal

- 1 lb Brussels sprouts, trimmed and halved - 2 tablespoons olive oil - Salt and pepper to taste - 3 tablespoons honey - 2 tablespoons Sriracha sauce - 1 tablespoon soy sauce - 1 garlic clove, minced - 1 teaspoon sesame seeds (optional, for garnish) - Chopped green onion (for garnish) For Brussels sprouts, use fresh ones for the best taste. Frozen sprouts can work, but they may not crisp well. Olive oil adds richness, but you can swap it for avocado oil. Honey gives sweetness, but maple syrup is a great vegan option. For heat, adjust Sriracha to your liking or try chili paste. Soy sauce adds depth, but tamari works for gluten-free diets. - Calories: 150 - Total Fat: 8g - Saturated Fat: 1g - Cholesterol: 0mg - Sodium: 200mg - Total Carbohydrates: 19g - Dietary Fiber: 6g - Sugars: 8g - Protein: 4g This dish is rich in vitamins and minerals. Brussels sprouts are high in fiber and vitamin C. The honey adds natural sugars, while Sriracha brings that spicy kick. Enjoy this tasty twist on a classic veggie! First, gather your ingredients. You will need: - 1 lb Brussels sprouts, trimmed and halved - 2 tablespoons olive oil - Salt and pepper to taste - 3 tablespoons honey - 2 tablespoons Sriracha sauce - 1 tablespoon soy sauce - 1 garlic clove, minced - 1 teaspoon sesame seeds (optional, for garnish) - Chopped green onion (for garnish) Next, preheat your oven to 400°F (200°C). This step is key for crispy sprouts. In a mixing bowl, toss the halved Brussels sprouts with olive oil, salt, and pepper. Make sure every sprout gets a nice coat. This helps them roast evenly. Spread the coated Brussels sprouts on a baking sheet lined with parchment paper. This keeps them from sticking. Roast in the oven for 20-25 minutes. Halfway through, turn the sprouts for even cooking. They should be tender and crispy when done. While the sprouts roast, prepare your honey Sriracha sauce. In a small bowl, whisk together honey, Sriracha, soy sauce, and minced garlic. Mix until everything combines well. When the Brussels sprouts finish roasting, take them out of the oven. Drizzle the honey Sriracha sauce over them. Toss gently to coat all the sprouts. Return the baking sheet to the oven for an extra 5 minutes. This step allows the sauce to caramelize a bit, adding flavor. Finally, take them out and transfer to a serving dish. Garnish with sesame seeds and chopped green onions. Enjoy your delicious, flavorful meal! To get that ideal crunch, choose fresh Brussels sprouts. They should be bright green and firm. Trim the ends and cut them in half. This helps them roast evenly. Use enough olive oil to coat the sprouts well. Too little oil leads to soggy veggies. Roast them in a single layer on the baking sheet. This allows for proper airflow and crispness. Don’t overcrowd the pan; give each sprout space. Halfway through roasting, give them a good toss. This ensures all sides get that nice golden color we love. Feel free to tweak the honey Sriracha sauce. If you like it sweeter, add more honey. For extra heat, increase the Sriracha. Want a tangy twist? Try adding a splash of lime juice. You can also mix in some ginger for a warm, spicy kick. If soy sauce isn’t your thing, coconut aminos are a great swap. This keeps the flavor rich while being soy-free. Use a sturdy baking sheet for even roasting. A rimmed sheet prevents any sauce spills. Parchment paper is a must; it stops sticking and makes cleanup easy. A mixing bowl helps you toss the sprouts with oil and spices. Lastly, a whisk is handy for blending the sauce smoothly. These tools make your cooking process smooth and enjoyable. {{image_2}} For a vegan version, swap honey for maple syrup. It adds sweetness and keeps the dish plant-based. Use two tablespoons of maple syrup instead of honey. The Sriracha sauce remains the same. It brings the heat that we love. This small change makes the dish suitable for everyone. Trust me, the flavors stay bold and delicious. This recipe is already gluten-free if you choose the right soy sauce. Look for tamari, a great gluten-free option. It has a rich taste that compliments the Sriracha well. Make sure to check labels on your Sriracha. Some brands might contain gluten. With these easy swaps, you can enjoy Honey Sriracha Brussels Sprouts without worry. Brussels sprouts pair beautifully with many dishes. For meat lovers, serve them with grilled chicken or steak. The sweet and spicy sauce enhances the meat flavors. If you prefer a vegetarian dish, try serving them with quinoa or brown rice. This adds texture and makes a filling meal. For a lighter option, pair with a fresh salad. Mixing and matching helps fit any diet. Enjoy experimenting with your favorites! To keep your Honey Sriracha Brussels sprouts fresh, let them cool first. Place them in an airtight container. They can last in the fridge for about 3 to 4 days. Make sure to store them without any extra sauce. This helps keep them crisp for later. When you want to enjoy your leftovers, preheat your oven to 350°F (175°C). Spread the Brussels sprouts on a baking sheet. Heat them for about 10-15 minutes. This method helps them regain their crispness. You can also use a microwave, but they may turn soft. If using a microwave, heat them in short bursts, checking often. You can freeze Brussels sprouts, but it’s best to do it before cooking. First, wash and trim the sprouts. Blanch them in boiling water for 3 minutes, then cool them in ice water. Once cool, drain and pat dry. Place them in a freezer-safe bag or container. They can last up to 3 months in the freezer. When ready to cook, thaw them overnight in the fridge before roasting. Brussels sprouts take about 20 to 25 minutes to roast at 400°F (200°C). They should become tender and crispy. Remember to turn them halfway through cooking for even crispness. This helps them roast well and get a nice golden color. If your sprouts are larger, they may need a few extra minutes. Check for doneness with a fork. If it easily pierces the sprout, it's ready! Yes, you can! If you want to avoid Sriracha, try using another hot sauce. You could use chili garlic sauce for a similar kick. If you prefer a milder flavor, use sweet chili sauce or even barbecue sauce. Each option will give a unique taste to the Brussels sprouts. Mixing your favorite sauce can lead to tasty results. Just keep an eye on the balance of sweet and spicy. Honey Sriracha Brussels sprouts pair well with many dishes. Here are some great options: - Grilled chicken or shrimp - Quinoa or brown rice - Roasted sweet potatoes - A fresh green salad - Stir-fried vegetables These sides add color and flavor, making your meal more complete. Mix and match these sides to find your favorite combination! Understanding how to prepare Honey Sriracha Brussels sprouts can elevate your cooking. We covered essential ingredients, preparation steps, and tips for a perfect dish. You learned ways to customize the sauce and adapt the recipe for different diets. Proper storage and reheating ensure you enjoy leftovers without losing flavor. Keep these insights in mind as you experiment in your kitchen. I hope this helps you cook delicious Brussels sprouts that impress everyone at your table. Happy cooking!

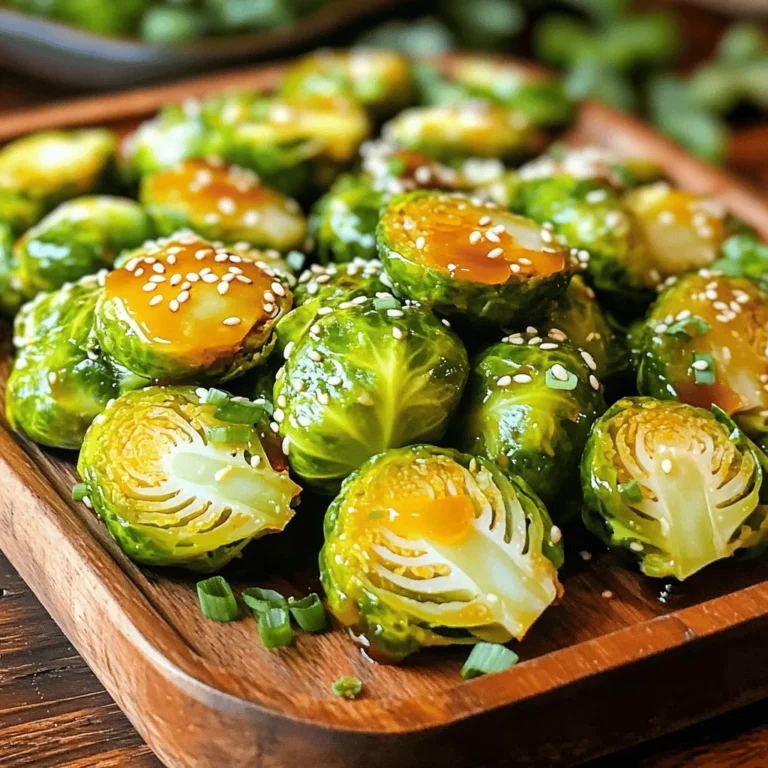
Honey Sriracha Brussels Sprouts Flavorful and Crisp

- 1 pound ground turkey - 1 tablespoon olive oil - 1 medium onion, diced - 2 cloves garlic, minced - 1 bell pepper (red or green), diced - 1 zucchini, diced - 1 can (14.5 ounces) diced tomatoes, drained - 1 teaspoon Italian seasoning - 1 teaspoon smoked paprika - Salt and pepper to taste - 1 cup spinach, chopped - 1/4 cup feta cheese, crumbled (optional) - Fresh parsley, chopped (for garnish) To make a savory ground turkey skillet, you need fresh ingredients. Start with one pound of ground turkey. It has a mild flavor that goes well with spices. Use a tablespoon of olive oil to cook the turkey and veggies. Olive oil adds richness to the dish. Next, you need a medium onion and two cloves of garlic, both diced and minced. These ingredients bring out the best flavors. Add one bell pepper, either red or green, diced for a pop of color and crunch. A zucchini, diced, adds texture and nutrients. For some juicy goodness, use a can of diced tomatoes, drained. Spice it up with one teaspoon of Italian seasoning and one teaspoon of smoked paprika. Salt and pepper will enhance all the flavors. You can also add one cup of chopped spinach. It wilts quickly and adds a great green color. If you like cheese, sprinkle some crumbled feta on top. This is optional but adds a nice tang. Lastly, garnish with fresh parsley for a touch of brightness. With these ingredients, you create a delightful one-pan meal. Each bite is packed with flavor and nutrition. {{ingredient_image_1}} 1. Heat oil and sauté aromatics Start by heating 1 tablespoon of olive oil in a large skillet over medium heat. Once the oil warms, add 1 medium diced onion and 2 cloves of minced garlic. Sauté these for about 2-3 minutes. You want them to smell good and turn soft. 2. Cooking ground turkey Next, raise the heat to medium-high. Add 1 pound of ground turkey to the skillet. Use a spatula to break it apart as it cooks. Keep stirring until the turkey is browned and fully cooked, which takes about 5-7 minutes. 3. Adding vegetables and simmering Now it's time for the veggies! Stir in 1 diced bell pepper and 1 diced zucchini. Cook these for another 3-4 minutes. The veggies should feel tender. Then, add 1 can of drained diced tomatoes, 1 teaspoon of Italian seasoning, 1 teaspoon of smoked paprika, and salt and pepper to taste. Mix it all well. Let this cook for about 5 minutes on low heat. This helps all the flavors blend together. 4. Finishing touches Finally, fold in 1 cup of chopped spinach. Cook it just until it wilts, which is about 1-2 minutes. If you like, sprinkle 1/4 cup of crumbled feta cheese on top before serving. For a bright finish, garnish with some chopped fresh parsley. Serve this dish hot right from the skillet. Enjoy it with crusty bread or over rice for a hearty meal! - Best practices for seasoning: Always season your turkey early. Use salt and pepper right after adding the turkey to the skillet. This helps the meat absorb the flavors well. Italian seasoning and smoked paprika add depth. Adjust these to your taste. - Achieving perfect texture for turkey: Cook the turkey on medium-high heat. This will help it brown nicely. Break it up as it cooks. This makes sure every piece gets flavor and cooks evenly. - Tips for vegetable doneness: Add the bell pepper and zucchini after the turkey is cooked. Cook them until soft but still bright. This keeps their color and nutrients intact. Keep an eye on them; they should be tender but not mushy. - Ideas for side dishes and garnishes: Crusty bread is great for soaking up juices. Serve it with rice for a filling meal. You can also pair it with a fresh salad for a light touch. Sprinkle crumbled feta on top for a creamy finish. - Plating tips for an appealing presentation: Serve the dish straight from the pan for a rustic look. If you prefer, plate individual servings. Add extra feta and fresh parsley for color. This makes the dish look inviting and tasty. Pro Tips Use Lean Turkey: Opt for lean ground turkey (93% or 99% lean) for a healthier dish that still retains flavor without excess fat. Customize Your Veggies: Feel free to swap in your favorite vegetables like carrots or broccoli based on what's in season or what you have on hand. Add More Spice: If you like heat, consider adding a pinch of red pepper flakes or diced jalapeños for extra flavor. Meal Prep Friendly: This dish is great for meal prep! Store leftovers in airtight containers for quick lunches throughout the week. {{image_2}} You can swap ground turkey with other meats. Try ground chicken or lean beef. For a plant-based meal, use lentils or tofu. Both options offer great taste and protein. You can change the veggies too. Use broccoli, carrots, or sweet potatoes instead of zucchini. Each one brings a different flavor and texture. If you have dietary needs, swap feta cheese for a dairy-free option. Nutritional yeast can give a cheesy flavor without dairy. To boost flavor, add spices like cumin or chili powder. A pinch of red pepper flakes will add heat. You can also mix in fresh herbs like basil or cilantro for a fresh taste. For cooking methods, this dish shines in a skillet. But you can also bake it in the oven. Just transfer the mixture to a baking dish and cover it with foil. Bake at 375°F for about 20 minutes. This method keeps everything moist and flavorful. These variations allow you to make the dish your own. Mix and match to create your perfect savory ground turkey skillet. To keep your savory ground turkey skillet fresh, follow these tips: - Refrigeration: Place leftovers in an airtight container. This keeps moisture in and air out. Your dish will stay good for 3-4 days in the fridge. - Freezing: If you want to freeze it, let it cool first. Then, transfer it to a freezer-safe container. Label it with the date. It can last up to 3 months in the freezer. When you're ready to eat, just thaw it in the fridge overnight before reheating. For safe reheating, here are my favorite methods: - Microwave: Place the dish in a microwave-safe bowl. Cover it with a lid or a damp paper towel. Heat for 1-2 minutes, stirring halfway through. - Stovetop: Pour the leftovers into a skillet over low heat. Stir often until heated through. This helps keep the flavor and texture nice. No matter how you reheat it, check to make sure it's hot all the way through. Enjoy your meal just as it was meant to be! Can I use frozen ground turkey? Yes, you can use frozen ground turkey. Just thaw it first. You can do this in the fridge overnight. If you're in a hurry, use the microwave. Cook the turkey until it is fully browned. What are some good side dishes to serve? Some great sides include: - Crusty bread - Cooked rice - Quinoa - A fresh green salad These sides complement the skillet well. They also add more nutrients to your meal. How can I make it lower in calories? To lower the calories: - Use less oil or a cooking spray. - Skip the feta cheese. - Add more vegetables like carrots or broccoli. These changes will keep the dish tasty while cutting calories. In this article, we explored making a savory ground turkey skillet. We covered key ingredients like ground turkey, vegetables, and spices. I shared step-by-step cooking instructions to guide you through. Tips helped you enhance flavor and texture, while serving suggestions added flair. We discussed variations for dietary needs and storage practices. Enjoy your cooking adventure and make it your own! Good food brings joy and comfort.

Savory Ground Turkey Skillet Easy One-Pan Delight

- 8 oz Lo Mein noodles - 1 tablespoon sesame oil - 2 cloves garlic, minced - 1 small onion, sliced - 1 bell pepper (red or green), thinly sliced - 1 cup broccoli florets - 1 cup snap peas - 1 carrot, julienned - 2 green onions, chopped - 3 tablespoons soy sauce - 1 tablespoon oyster sauce (optional for extra umami) - 1 teaspoon ginger, grated - Salt and pepper to taste - Sesame seeds for garnish Gathering the right ingredients is key for a great stir-fried lo mein. Start with Lo Mein noodles. They give the dish its classic chewy texture. You’ll also need sesame oil, which adds a nutty flavor. Garlic and ginger bring a fresh kick. For vegetables, I love using onion, bell pepper, broccoli, snap peas, and carrot. They add color and crunch. Soy sauce provides saltiness, while oyster sauce adds depth. You can skip the oyster sauce if you want, but I think it’s worth it. Lastly, don’t forget salt and pepper to taste, and sesame seeds for a nice finish. With these ingredients, you’re set to create a dish that’s both quick and delicious! {{ingredient_image_1}} - Boil water in a large pot. - Add 8 oz of Lo Mein noodles. Cook according to package instructions, usually 3-4 minutes. - Drain the noodles and rinse under cold water to cool. Set them aside. - Heat 1 tablespoon of sesame oil in a large wok over medium-high heat. - Add 2 cloves of minced garlic and 1 teaspoon of grated ginger. Sauté for about 30 seconds until fragrant. - Toss in 1 small sliced onion, 1 thinly sliced bell pepper, and 1 julienned carrot. - Incorporate 1 cup of broccoli florets and 1 cup of snap peas. - Cook the vegetables for about 5-7 minutes until they are tender-crisp. This method gives your dish a great texture and flavor. Each step builds on the last, making it easy to follow. Enjoy every moment of cooking! - How to avoid overcooking noodles: Cook the Lo Mein noodles for just 3-4 minutes. Drain and rinse them quickly under cold water to stop cooking. This keeps them firm. - Cooking vegetables for optimal texture: Stir-fry vegetables like bell peppers, broccoli, and snap peas for 5-7 minutes. This time keeps them tender-crisp. - Flavor balancing between soy and oyster sauce: Start with 3 tablespoons of soy sauce. Add 1 tablespoon of oyster sauce for umami. Adjust to your taste. - Recommended cookware: wok vs skillet: Use a wok for high heat and easy tossing. A skillet works too but may not allow for the same stirring ease. - Tools for easy stirring and serving: A long spatula helps mix and serve the noodles. Tongs can also make serving easier. - Best accompaniments: Serve lo mein with spring rolls or dumplings. They complement the meal well. - How to present the dish attractively: Use a large platter. Top with sesame seeds and green onions for added color and texture. Pro Tips Use Fresh Ingredients: Fresh vegetables will enhance the flavor and texture of your Lo Mein. Choose vibrant, crisp veggies for the best results. Don't Overcook Noodles: Ensure the Lo Mein noodles are cooked al dente. They will continue to cook slightly when added to the hot stir-fry. High Heat is Key: Stir-frying at a high temperature will help achieve that signature smoky flavor and keep the veggies crunchy. Customize Your Protein: Feel free to add your choice of protein, such as chicken, shrimp, or tofu, for a more satisfying meal. {{image_2}} You can easily change up the protein in your stir-fried lo mein. If you want a meat option, try adding chicken or shrimp. These proteins cook quickly and add great flavor. For a vegetarian twist, use tofu or tempeh. Both options soak up sauces well and provide a nice texture. Lo mein noodles are delicious, but you can swap them for other noodles. Try using spaghetti or rice noodles if you want something different. If gluten is a concern, look for gluten-free noodles. These will still taste great and work well in your stir fry. To make your dish even tastier, think about adding different sauces. Teriyaki or hoisin sauce can give your noodles a sweet flavor. If you like heat, sprinkle in some chili flakes or szechuan pepper. These little changes can turn a simple dish into something special. Stir-fried lo mein noodles last about 3 to 4 days in the fridge. To store them properly, place the cooled noodles in an airtight container. This keeps them fresh and prevents them from drying out. Before you eat leftovers, check for any off smells or changes in texture. Yes, you can freeze stir-fried lo mein! To do this, let the dish cool completely. Then, place it in a freezer-safe container or bag. Squeeze out any extra air to avoid freezer burn. When you’re ready to eat, thaw it overnight in the fridge. Reheat it in a pan over medium heat until hot, stirring often to ensure even warming. Preparing lo mein in advance is a great idea for quick meals. Cook a big batch and store it in portions. Use small containers for easy grab-and-go meals. Keep veggies and noodles separate if you want them fresh longer. This way, you can enjoy delicious lo mein all week! You can make Lo Mein noodles at home by mixing flour and water. Combine two cups of all-purpose flour with about three-quarters of a cup of water. Knead the dough for about five minutes. Roll it out thin and cut it into strips. Cook the noodles in boiling water for 3-4 minutes until tender. Rinse and cool before using. Yes, you can use any vegetables you like. Try bell peppers, carrots, or even zucchini. Broccoli and snap peas work great too. Just make sure to cut them into small pieces for even cooking. Be creative with seasonal veggies for added flavor and color. Lo Mein uses soft noodles, while Chow Mein uses crispy noodles. In Lo Mein, you mix the noodles with sauce and veggies. For Chow Mein, you fry the noodles until they are crunchy. Both dishes are delicious but offer different textures. Stir Fried Lo Mein can be healthy, depending on your ingredients. Using fresh veggies adds nutrients. Choose low-sodium soy sauce to cut back on salt. You can also add lean protein, like chicken or tofu, for more health benefits. Balance is key to a healthy meal. Yes! To make Stir Fried Lo Mein vegan, skip the oyster sauce. Use only soy sauce and add some extra spices for flavor. You can also add tofu for protein. This way, you can enjoy a hearty meal without any animal products. This blog post covered how to make delicious stir-fried lo mein. We explored essential ingredients, step-by-step cooking, helpful tips, variations, and storage tips. Now you have everything to prepare a tasty dish that can fit any preference. Experiment with different proteins and sauces for your unique twist. Enjoy your cooking journey, and remember, practice makes perfect! Happy eating!

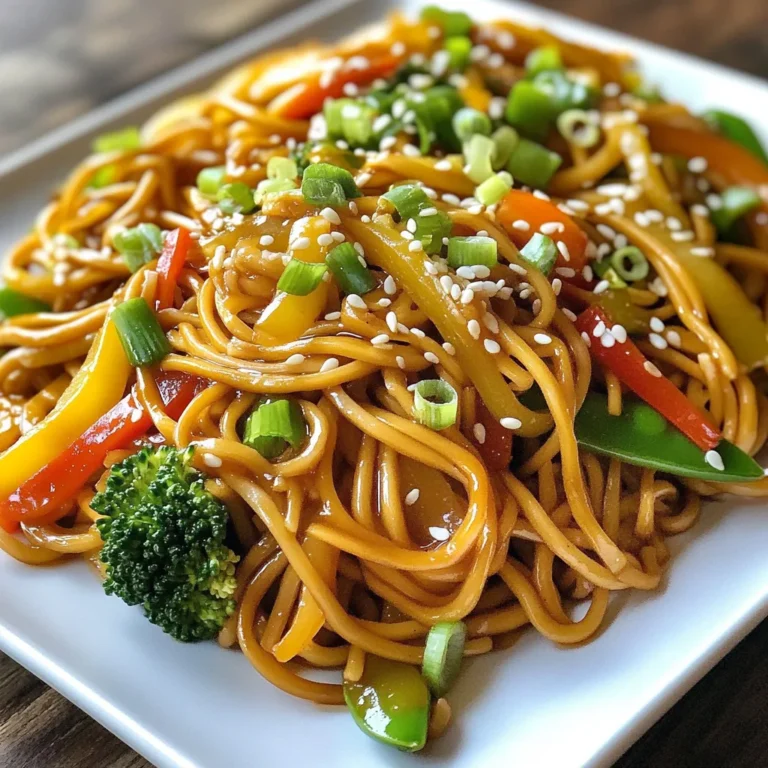
Stir Fried Lo Mein Noodles Quick and Easy Recipe

For these tasty kabobs, you will need: - 1 lb boneless, skinless chicken breasts, cut into 1-inch cubes - 1/4 cup honey - 2 tablespoons lime juice - 1 tablespoon lime zest - 2 tablespoons olive oil - 2 cloves garlic, minced - 1 teaspoon ground cumin - 1 teaspoon paprika - Salt and pepper to taste - 1 red bell pepper, cut into 1-inch pieces - 1 yellow bell pepper, cut into 1-inch pieces - 1 red onion, cut into wedges - Wooden skewers (soaked in water for 30 minutes if using) The chicken is the star of this dish. I prefer using boneless, skinless breasts for tenderness. Cut them into cubes for even cooking. The veggies add color and crunch. Red and yellow bell peppers bring sweetness. Red onion adds a nice bite. All these flavors work well with the honey lime marinade. When shopping, look for chicken that feels firm and has no smell. Fresh bell peppers should be bright and firm. Check for smooth skin and no spots. For the onion, pick ones that feel heavy. They should have no soft spots. Fresh ingredients make a big difference in taste. Always choose what looks and smells the best! To start, gather a medium bowl. Add 1/4 cup honey, 2 tablespoons lime juice, and 1 tablespoon lime zest. Next, pour in 2 tablespoons olive oil and toss in 2 cloves of minced garlic. Then, sprinkle in 1 teaspoon ground cumin and 1 teaspoon paprika. Finally, season with salt and pepper to taste. Mix everything well until it blends smoothly. This marinade will give your chicken a sweet and tangy flavor. Now, take your 1 pound of boneless, skinless chicken breasts. Cut them into 1-inch cubes. Place these cubes into the marinade you just made. Make sure each piece gets good coverage. Cover the bowl and put it in the fridge. Let the chicken marinate for at least 30 minutes. For even more flavor, you can marinate it for up to 2 hours. While your chicken marinates, prep your vegetables. Cut 1 red bell pepper, 1 yellow bell pepper, and 1 red onion into 1-inch pieces. Once your chicken is ready, take wooden skewers and soak them in water for about 30 minutes. This keeps them from burning on the grill. Now, start threading the marinated chicken and the vegetable pieces onto the skewers. Alternate between chicken and veggies for a colorful look. Preheat your grill to medium-high heat. When it’s hot, place the kabobs on the grill. Cook them for about 10 to 12 minutes. Turn the kabobs occasionally so they cook evenly. Use a meat thermometer to check the chicken. It should reach an internal temperature of 165°F (75°C). After grilling, let the kabobs rest for a few minutes. This helps keep them juicy and tasty. Enjoy your flavorful honey lime chicken kabobs! To grill perfect kabobs, preheat your grill to medium-high heat. This ensures even cooking and great grill marks. Soak wooden skewers in water for 30 minutes before using. This helps prevent burning. When threading the skewers, alternate chicken and vegetables. This mix adds flavor and color. Keep space between pieces for better heat flow. Use the marinade to boost flavor. Honey and lime create a sweet and tangy taste. The garlic adds depth, while cumin and paprika bring warmth. Marinade the chicken for at least 30 minutes. For more flavor, let it soak for up to 2 hours. You can also add herbs like cilantro or parsley for freshness. Always wash your hands before and after handling raw chicken. Use separate cutting boards for chicken and vegetables. This helps prevent cross-contamination. Cook chicken until it reaches 165°F (75°C). A meat thermometer takes the guesswork out of cooking. Let your kabobs rest for a few minutes after grilling. This keeps them juicy and safe to eat. {{image_2}} You can switch things up by using shrimp or tofu. Shrimp cooks fast and adds a nice touch. Just marinate it like chicken. Tofu, on the other hand, soaks up flavors well. Use firm tofu and press it first. Cut it into cubes and follow the same marinating steps. Both options will give you a tasty kabob. Feel free to mix in different veggies. Zucchini, mushrooms, and cherry tomatoes are great choices. Just cut them into similar sizes. You can also try adding pineapple for a sweet twist. The more colorful your kabobs, the more fun they look on the grill! If you like heat, spice it up! Add chili powder or hot sauce to your marinade. Sriracha or cayenne pepper work well too. Just start with a little and taste it. You can also include jalapeños on the skewers for extra kick. This adds bold flavors and keeps your taste buds excited! To store leftover kabobs, let them cool first. Place them in an airtight container. You can keep them in the fridge for up to three days. This keeps the flavors fresh and tasty. When you want to eat the kabobs again, reheating is easy. Use a microwave or an oven. For the microwave, heat for one to two minutes. If you use an oven, set it to 350°F (175°C). Heat for about ten minutes. Ensure they are warm throughout. This keeps them juicy and safe to eat. If you want to save kabobs for later, freezing works great. Wrap each kabob in plastic wrap. Then, place them in a freezer-safe bag. They can stay in the freezer for up to three months. When you are ready to eat them, thaw them in the fridge overnight. Then, reheat as needed. This way, you can enjoy your delicious kabobs anytime! You can serve these kabobs with many tasty sides. Fresh salad adds crunch and color. Fluffy rice pairs well with the sweet and tangy flavors. Grilled corn on the cob complements the meal nicely. You might also enjoy a zesty coleslaw for extra texture. Marinating chicken for at least 30 minutes works well. For a deeper flavor, marinate for up to 2 hours. The honey and lime mix gives the chicken a great taste. Just don’t go over two hours, as it can make the chicken too soft. Yes, you can make these kabobs in the oven! Preheat your oven to 400°F (200°C). Place the kabobs on a baking sheet lined with foil. Bake for about 15-20 minutes, turning halfway. Use a meat thermometer to check that the chicken is cooked through. Some great sides for kabobs include grilled vegetables, couscous, or a bright quinoa salad. You can also serve pita bread and hummus for a fun twist. Don’t forget to add a refreshing drink, like iced tea or lemonade, to complete the meal. In this guide, I covered how to make Honey Lime Chicken Kabobs. We explored the best ingredients, step-by-step instructions, cooking tips, and fun variations. I shared safe methods for grilling and storing leftovers. By using fresh ingredients and simple techniques, you can create tasty kabobs. Remember, these kabobs are easy to customize and perfect for any meal. Enjoy your cooking and delight in every bite!

Honey Lime Chicken Kabobs Flavorful Grilled Delight

To make Chocolate Peanut Butter Overnight Oats, you'll need these main ingredients: - 1 cup rolled oats - 2 cups almond milk (or any milk of choice) - 2 tablespoons unsweetened cocoa powder - 2 tablespoons peanut butter (creamy or crunchy) - 2 tablespoons maple syrup (or honey) - 1 tablespoon chia seeds - 1 teaspoon vanilla extract - Pinch of salt These ingredients work together to create a rich, creamy, and satisfying breakfast. The rolled oats provide the base, while cocoa powder adds chocolate flavor. Peanut butter gives it a nutty taste and creaminess. Maple syrup or honey sweetens the mix, and chia seeds add a nice texture. You can make your oats even tastier with these optional toppings: - Banana slices - Crushed peanuts - Chocolate chips - Shredded coconut These toppings not only add flavor but also make your dish look beautiful. You can mix and match to suit your taste. If you love crunch, go for crushed peanuts. For a sweet touch, add chocolate chips. While almond milk is great, you can use other milks too. Here are some suggestions: - Soy milk - Oat milk - Coconut milk - Regular cow’s milk Each milk gives a unique taste and texture. If you're looking for creaminess, try coconut milk. For a protein boost, soy milk is a good choice. Use what you love! Start by gathering your ingredients. You will need: - 1 cup rolled oats - 2 cups almond milk (or any milk of choice) - 2 tablespoons unsweetened cocoa powder - 2 tablespoons peanut butter (creamy or crunchy) - 2 tablespoons maple syrup (or honey) - 1 tablespoon chia seeds - 1 teaspoon vanilla extract - Pinch of salt In a mixing bowl or a large jar, combine all these ingredients. Mix well until everything blends together. Make sure the peanut butter spreads evenly through the oats. This will ensure every bite has that rich flavor. The chia seeds will help thicken the oats as they sit overnight. If you want your oats to look nice, consider layering them. You can alternate layers of oats with your toppings. Try adding some banana slices or crushed peanuts between layers. This makes for a pretty presentation. It also adds texture. You can use a clear jar to show off those layers. After mixing, seal the container tightly. Place it in the fridge overnight. Let it chill for at least 4-6 hours for the best texture. In the morning, give the oats a good stir. If you want them thinner, add a splash of milk. Then, top them with your favorite extras. You can use chocolate chips, shredded coconut, or more banana slices. Enjoy your delicious and healthy breakfast! To make your oats creamy, always use rolled oats. They soak up the liquid well. Mix your oats with milk and let them rest overnight. This helps them soften. Using chia seeds also adds creaminess. They swell and create a nice texture. Stir well before serving to break up any clumps. If you want it even creamier, add more milk in the morning. You can easily scale this recipe for meal prep. Just double or triple the ingredients. Use a larger jar or bowl to mix everything. Divide the mixture into individual jars for easy grab-and-go breakfasts. You can store these jars in the fridge for up to five days. This way, you always have a quick, healthy meal ready. Adjust the sweetness to fit your taste. If you like it sweeter, add more maple syrup or honey. You can also try other sweeteners like agave or stevia. For different flavors, add spices like cinnamon or nutmeg. Mixing in a bit of vanilla extract enhances the overall taste, too. Don't hesitate to experiment with different toppings. Sliced bananas, crushed peanuts, or chocolate chips all make great choices. {{image_2}} Adding protein boosts your overnight oats. I like to mix in a scoop of protein powder. You can also use Greek yogurt for a creamy texture. It adds extra protein and a nice tang. If you prefer plant-based options, silken tofu works well too. Just blend it until smooth before mixing with other ingredients. For a fun twist, try adding spices. A pinch of cinnamon or nutmeg can elevate the flavor. You can also switch out the cocoa powder for carob powder for a different taste. If you want a fruity touch, add some berries or diced apples. These fruits pair nicely with chocolate and peanut butter. This recipe is easy to make vegan and gluten-free. Use almond milk or oat milk for dairy-free options. Make sure your oats are labeled gluten-free. You can replace honey with agave syrup for a plant-based sweetener. These swaps keep the oats tasty while meeting dietary needs. After you enjoy your Chocolate Peanut Butter Overnight Oats, store any leftovers in the fridge. Use an airtight container to keep them fresh. This will prevent odors from mixing with your oats. If you made extra servings, separate them into individual jars. This makes it easy to grab a delicious breakfast on busy mornings. You can enjoy your overnight oats cold or warm them up. To reheat, simply add a splash of milk. Then, microwave in short bursts of 30 seconds. Stir between each burst until they reach your desired warmth. Be careful not to overheat, or they may become dry. Your Chocolate Peanut Butter Overnight Oats can last in the fridge for about 3 to 5 days. The oats will soak up the liquid and soften over time. If they look dry, stir in more milk. However, if you notice any strange smells or colors, it's best to toss them. Enjoy your tasty, easy breakfast without worry! Rolled oats are the best choice for overnight oats. They soak up liquid well. This gives them a creamy texture. Quick oats can work too, but they may become mushy. Steel-cut oats are not ideal since they need more time to soften. Yes, you can use other nut butters! Almond butter, cashew butter, or sunflower seed butter are great options. Each nut butter adds a unique flavor. Just keep the amount the same as peanut butter. These oats last about 3 to 5 days in the fridge. Store them in an airtight container. This keeps them fresh and tasty. If you add toppings, do so right before serving for the best crunch. Yes, this recipe is perfect for meal prep! You can make a batch ahead of time. Simply divide the mixture into jars. This way, you have a quick breakfast ready all week. This blog post covered the key ingredients to make delicious overnight oats. We explored main components, optional toppings, and plant-based milk choices. I shared step-by-step instructions for preparation and serving, plus tips for creamy textures and meal prep. We discussed tasty variations, storage methods, and common questions, ensuring you feel ready to create your own oats. Remember, customizing your overnight oats can make this dish truly yours. Enjoy experimenting and discovering new flavors with each batch. Your journey to perfect overnight oats starts now!

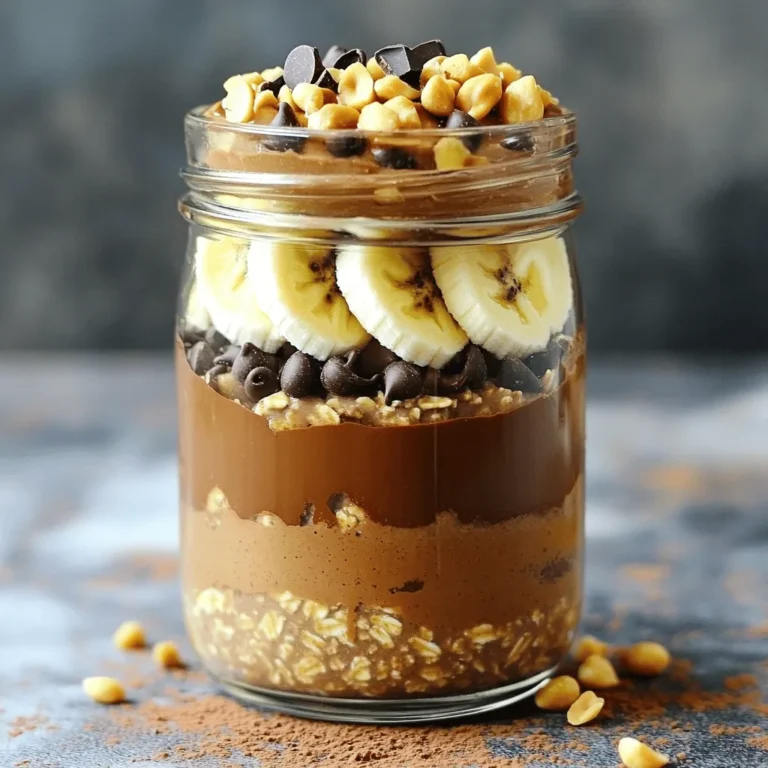
Chocolate Peanut Butter Overnight Oats Simple Delight

- 1 lb boneless, skinless chicken thighs - 1 cup cornstarch - 1 teaspoon salt - 1 teaspoon black pepper - 2 large eggs - Oil for frying - 1 cup freshly squeezed orange juice - Zest of 1 orange - 2 tablespoons soy sauce - 3 tablespoons honey - 1 tablespoon rice vinegar - 1 teaspoon fresh ginger, minced - 2 garlic cloves, minced - Sesame seeds - Chopped green onions I love using boneless, skinless chicken thighs for this dish. They stay juicy and tender. You will need cornstarch to create that perfect crunchy coating. Salt and black pepper add a simple yet essential flavor base. For the sauce, freshly squeezed orange juice brings a bright taste. The zest of one orange adds even more citrus scent. Soy sauce gives depth, while honey adds sweetness. Rice vinegar balances the flavors, and ginger and garlic add a nice kick. When ready to serve, sprinkle sesame seeds and chopped green onions on top. This makes the dish look vibrant and inviting. Enjoy the layers of flavor and the crispiness that make this recipe special. First, mix the marinade ingredients in a bowl. Combine 1 cup of orange juice, the zest of 1 orange, 2 tablespoons of soy sauce, 3 tablespoons of honey, 1 tablespoon of rice vinegar, 1 teaspoon of minced ginger, and 2 minced garlic cloves. Add 1 pound of cut chicken thighs to the bowl. Make sure the chicken gets coated well. Let it marinate for at least 30 minutes, or up to 2 hours for more flavor. In one shallow dish, mix together 1 cup of cornstarch, 1 teaspoon of salt, and 1 teaspoon of black pepper. In another shallow dish, beat 2 large eggs until smooth. This will help your chicken get a nice crispy coating. Heat a large skillet or deep fryer with about 1 to 2 inches of oil. Aim for a temperature of 350°F (175°C). Carefully add the coated chicken pieces in batches. Fry them until they turn golden brown and crispy, which takes about 5 to 7 minutes per batch. Use a slotted spoon to remove the chicken. Place it on paper towels to drain any extra oil. In a saucepan, pour in the reserved marinade. Heat it over medium heat until it begins to simmer. Cook for about 5 minutes until the sauce thickens slightly. This sauce packs a punch and will coat the chicken beautifully. Once you finish frying the chicken, add it to the sauce. Toss everything gently to make sure each piece is coated evenly. Plate your crispy orange chicken and sprinkle sesame seeds and chopped green onions on top. Serve it hot to enjoy at its best! To get that perfect crispiness, start with the right frying temperature. Heat your oil to about 350°F (175°C). This helps create a nice golden brown crust. If the oil is too cool, the chicken will soak up the oil and become soggy. Avoid overcrowding the pan. Fry the chicken in batches to keep the temperature steady. When you add too many pieces at once, the heat drops. This can lead to uneven cooking and less crispy chicken. Marinating the chicken longer gives it a deeper flavor. I suggest at least 30 minutes, but letting it sit for up to 2 hours works wonders. This allows the chicken to soak up all those tasty ingredients. You can also customize the sauce ingredients to fit your taste. Want it sweeter? Add more honey. Feel like a kick? Toss in some chili flakes. A little creativity goes a long way! Using the right tools makes cooking easier. I recommend a heavy, deep skillet for frying. A cast-iron skillet holds heat well and gives great results. A slotted spoon is also handy to lift the chicken out of the oil. A digital thermometer will help you track the oil's temperature accurately. This ensures your chicken fries perfectly every time. {{image_2}} You can switch up the protein in crispy orange chicken. If you prefer a leaner option, use chicken breast. It will still taste great. For a plant-based choice, try tofu. Just make sure to press the tofu to remove excess water. This helps it absorb the marinade well. Cut either option into bite-sized pieces like the chicken thighs. Want some heat? Spice things up by adding chili flakes or chili sauce. This gives your dish a zesty kick. Start with a small amount, then add more to your taste. Mix it right into the sauce for even flavor. You can also sprinkle chili flakes right on top before serving. While the orange sauce is fantastic, you can change it up. Try using lemon or lime juice instead of orange juice. This gives the dish a different citrus twist. You can also switch the sweetener. Maple syrup or agave can replace honey. Each option gives a new layer of flavor. Be creative and find the mix you like best! To keep your crispy orange chicken fresh, refrigerate it right after it cools. Place the chicken in an airtight container. This will help it stay tasty for up to three days. Make sure not to stack the pieces too high. This keeps them from getting soggy. For the best reheating, use an oven or air fryer. Preheat your oven to 375°F (190°C). Spread the chicken on a baking sheet. Heat for about 10-15 minutes. This helps to keep the chicken crispy. If you use an air fryer, set it to 350°F (175°C) for 5-7 minutes. This also works well to maintain the crunch. You can freeze your crispy orange chicken. For best results, freeze the chicken and sauce separately. Place them in freezer-safe bags or containers. This way, you can thaw only what you need. You can keep them in the freezer for about three months. When ready, thaw in the fridge overnight before reheating. Yes, you can use frozen chicken. Thaw it safely in the fridge overnight. If you need it quicker, submerge the chicken in cold water. Change the water every 30 minutes until thawed. Pat the chicken dry before marinating. This helps the marinade stick well. To make this recipe gluten-free, use gluten-free soy sauce. Many brands offer this. For cornstarch, you can use the same ingredient since it is gluten-free. Always check labels to confirm. This way, you can enjoy the dish without gluten. Crispy orange chicken pairs well with many sides. Here are some ideas: - Steamed rice - Fried rice - Broccoli - Stir-fried veggies - Noodles These sides complement the flavors of the chicken. They also make your meal more complete and colorful. Enjoy your cooking! You now have all the tools to make crispy orange chicken at home. We covered the key ingredients, step-by-step instructions, and helpful tips for success. Remember, marinating the chicken well will boost its flavor. Frying at the right temperature will keep it crispy. You can even mix it up with different proteins or sauces. Enjoy your cooking journey, and don’t hesitate to experiment. Your taste buds will thank you!

Crispy Orange Chicken Flavorful and Easy Recipe

- 4 cups fresh spinach leaves, washed and dried - 2 cups strawberries, hulled and sliced - 1/2 cup crumbled feta cheese - 1/4 cup red onion, thinly sliced - 1/4 cup sliced almonds, toasted for extra flavor - 2 tablespoons poppy seeds - 1/4 cup olive oil - 2 tablespoons apple cider vinegar - 1 tablespoon honey - Salt and pepper to taste - Large salad bowl - Small mixing bowl - Whisk - Skillet The fresh ingredients are key to this salad's taste. Spinach gives a crisp base, while strawberries add sweetness. The feta cheese brings a creamy texture that balances the flavors. Red onion gives a sharp bite that contrasts nicely with the fruit. Toasted almonds add crunch and depth. Poppy seeds bring a fun visual touch and a slight nutty flavor. For the dressing, olive oil serves as a smooth base. Apple cider vinegar adds a tangy kick. Honey sweetens the mix, while salt and pepper enhance all the flavors. To prepare, gather your essential equipment. A large salad bowl helps you mix everything easily. A small mixing bowl and whisk are perfect for the dressing. Finally, a skillet is needed to toast the almonds and boost their flavor. With these ingredients and tools, you’re ready to create a delicious Strawberry Spinach Poppy Seed Salad! First, wash and dry 4 cups of fresh spinach leaves. This step is key. Clean spinach helps maintain a crisp texture. Next, add the spinach to a large salad bowl. Then, layer 2 cups of hulled and sliced strawberries evenly on top. The sweet strawberries add flavor and color. Now, sprinkle 1/2 cup of crumbled feta cheese over the strawberries. The feta brings creaminess and tang. Lastly, scatter 1/4 cup of thinly sliced red onion. This will add a nice bite to your salad. Toasting the almonds brings out their nutty flavor. Heat a dry skillet over medium heat. Add 1/4 cup of sliced almonds to the skillet. Stir them frequently for about 3-4 minutes. Watch closely, as they can burn easily. When they turn golden and fragrant, they are ready. Now, add the toasted almonds to the salad. Their crunch adds great texture to the mix. Now, let's make the dressing. In a small bowl, whisk together 1/4 cup of olive oil, 2 tablespoons of apple cider vinegar, and 1 tablespoon of honey. Add 2 tablespoons of poppy seeds, salt, and pepper to taste. Whisk until all the ingredients combine well. This dressing adds a sweet and tangy flavor to the salad. Drizzle the dressing over the salad just before serving. This keeps the spinach fresh and crisp. Finally, gently toss the salad to coat all the ingredients in the dressing. Enjoy this fresh and tasty salad right away! To keep your Strawberry Spinach Poppy Seed Salad fresh, proper storage is key. First, wash and dry spinach leaves thoroughly. Store them in a container lined with a paper towel to absorb moisture. Keep strawberries in a separate container in the fridge. This helps them stay firm and juicy. When it comes to dressing, add it just before serving. This keeps the salad crisp and prevents sogginess. Presentation matters, especially for a vibrant salad like this. Use a clear glass bowl to show off the bright colors. It makes the salad look more inviting. For a beautiful garnish, add whole strawberries on top. A sprinkle of poppy seeds adds a nice touch. These small details enhance the visual appeal and make your dish pop. You can boost the flavor of your salad with a few simple tweaks. Consider adding sliced avocado for creaminess or blueberries for extra sweetness. If you like a bit of crunch, try adding sunflower seeds. Adjust the seasoning to your taste. A pinch more salt or a dash of pepper can elevate the overall flavor. Always taste as you go to find the perfect balance. {{image_2}} You can change this salad with other fruits. Blueberries add a nice sweet touch. Raspberries bring a tart flavor that contrasts well with the strawberries. You can also try peaches in summer for a juicy twist. Cheese is another fun area to explore. While feta is creamy and rich, you could use goat cheese for a tangy flavor. Alternatively, try a sharp cheddar for a different taste. Each cheese brings its own spin to this fresh salad. Making this salad vegan is simple. Just skip the feta cheese and use avocado for creaminess. You can also add chickpeas for protein. They offer a nice texture and boost the salad's nutrition. If you need gluten-free options, you're in luck! All the ingredients are naturally gluten-free. Just ensure any dressing you use is also free from gluten. This way, everyone can enjoy the salad without worry. Dressing can change the whole vibe of your salad. If you want a citrus kick, try a lemon vinaigrette. It brightens the flavors nicely. For a creamier option, use yogurt mixed with herbs. Balancing flavors is key when switching dressings. If your new dressing is tangy, add a touch of honey to keep it sweet. You can also adjust the salt and pepper to match your choice. This way, your salad stays delicious no matter how you dress it! To keep your salad fresh, refrigerate leftovers right away. Place the salad in an airtight container. This helps maintain the crispness of the spinach and strawberries. Avoid dressing the salad until you're ready to eat. The dressing can make the greens soggy. For long-term storage, you can freeze some salad components. However, fresh spinach and strawberries do not freeze well. Instead, consider freezing leftover feta cheese or toasted almonds. They can last for up to three months in the freezer. When ready to use, thaw them in the fridge overnight. Check for signs of spoilage to ensure safety. Look for wilted spinach or mushy strawberries. If the salad smells off, it’s best to discard it. Proper storage practices help keep your ingredients fresh for longer. Always use clean utensils when serving to prevent bacteria. You can make this salad ahead of time with a few easy steps. First, wash and dry your spinach leaves. Store them in a dry container with a paper towel to absorb extra moisture. Keep the strawberries sliced and stored separately to avoid sogginess. You can also prepare the dressing in advance. Just mix olive oil, apple cider vinegar, honey, poppy seeds, salt, and pepper in a small jar. When you're ready to serve, toss everything together. This method keeps your salad fresh and tasty. Yes, you can easily swap nuts or seeds if you have allergies. If you can't use almonds, try walnuts, pecans, or sunflower seeds. Each option adds a unique taste and texture. For a nut-free version, pumpkin seeds work well. They give some crunch and a bit of nutrition. Make sure the substitutes fit your dietary needs. This salad pairs well with many dishes. It goes great with grilled chicken or fish for a light meal. You can also serve it alongside a warm quiche or a hearty sandwich. For a vegetarian option, enjoy it with a quinoa bowl or a veggie wrap. This salad's fresh flavors complement many main dishes, making it a versatile choice for any table. This blog post covered how to make a delicious Strawberry Spinach Poppy Seed Salad. You learned about fresh ingredients, how to prepare the salad, and make a tasty dressing. I shared tips for storage and serving ideas, along with variations to suit your needs. Remember, you can always adapt this salad with different fruits or dressings. Enjoy creating this refreshing dish in your kitchen!

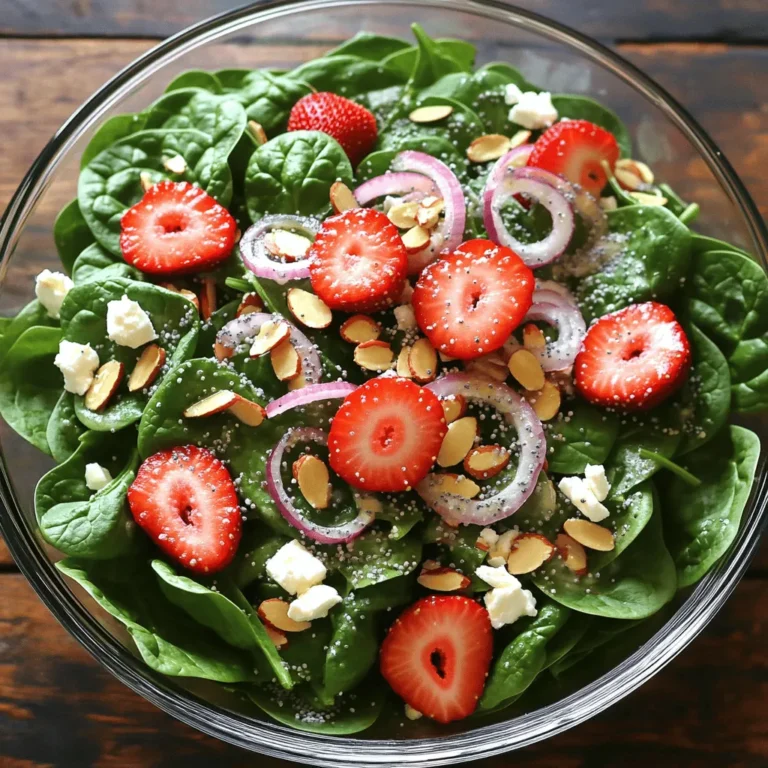
Strawberry Spinach Poppy Seed Salad Fresh and Tasty

- 12 oz penne pasta - 1 lb smoked sausage (like andouille), sliced - 1 tablespoon olive oil - 1 medium onion, diced - 3 cloves garlic, minced - 1 bell pepper (red or green), diced - 1 cup heavy cream - 1 cup chicken broth - 2 teaspoons Cajun seasoning - 1 cup cherry tomatoes, halved - Salt and pepper to taste - Fresh parsley, chopped (for garnish) - Grated Parmesan cheese (optional) Creamy Cajun sausage pasta comes together with a few simple ingredients. Each one adds flavor and texture. First, we have the penne pasta, which is perfect for holding the sauce. The smoked sausage, like andouille, adds a savory kick. Olive oil is essential for sautéing and adds richness. Next, diced onion and bell pepper bring sweetness and color. Garlic gives a punch of aroma. Heavy cream makes the dish rich and creamy. Chicken broth adds depth. Cajun seasoning brings that unique spice blend, while cherry tomatoes add freshness. Lastly, don't forget salt and pepper to taste. Garnish with fresh parsley for a pop of color. If you like, add grated Parmesan cheese for extra creaminess. These ingredients all work together to make the meal hearty and flavorful. Start by bringing a large pot of salted water to a boil. This step is key to flavoring the pasta. Once the water bubbles, add 12 ounces of penne pasta. Cook it according to the package directions until it is al dente. This usually takes around 10-12 minutes. After that, drain the pasta and set it aside. Next, take a large skillet and heat 1 tablespoon of olive oil over medium heat. Once the oil is hot, add 1 pound of sliced smoked sausage, like andouille. Cook the sausage for about 5-7 minutes until it turns brown and is heated through. This step adds a rich flavor to your dish. Once browned, remove the sausage from the skillet and keep it aside. In the same skillet, add the diced onion and bell pepper. You can use either red or green bell pepper based on your taste. Sauté them for about 5 minutes until they soften. Then, add 3 cloves of minced garlic. Cook the garlic for another minute. This will give your dish a lovely aroma and flavor. Now, pour in 1 cup of chicken broth and stir it with the vegetables. Bring the mixture to a gentle simmer. Then, add 1 cup of heavy cream along with 2 teaspoons of Cajun seasoning. Stir everything until it blends well. Let this simmer for about 3-5 minutes. This thickens the sauce and enhances the flavors. Now it's time to bring everything together. Add the cooked sausage back into the skillet, along with 1 cup of halved cherry tomatoes. Stir until everything is coated with the creamy sauce. Let it bubble for another 2 minutes. Finally, add the cooked penne pasta to the skillet. Toss gently to mix everything well. Make sure the pasta is fully coated with the sauce. Season with salt and pepper to taste. To get the best sauce, you can adjust the thickness with cream. If you want it richer, add more cream. For a lighter sauce, use less cream. Taste the sauce as you go. You can also change the flavor with seasoning. If it’s too plain, add more Cajun seasoning, salt, or pepper. A squeeze of lemon can brighten it up too. Use salted water for boiling the pasta. This helps the pasta get more flavor. It makes a big difference. Add the penne only when the water is boiling. This keeps it from clumping together. Stir the pasta once in a while to keep it loose. Pair your pasta with a fresh salad or garlic bread. A crisp salad adds crunch. Garlic bread adds a nice touch. For drinks, try a light white wine or iced tea. They complement the flavors well. To make your dish look great, sprinkle fresh parsley on top. You can also add grated Parmesan cheese if you like it cheesy. {{image_2}} You can swap out smoked sausage for other meats. Chicken works well in this dish. It adds a nice flavor without overpowering the sauce. Shrimp is another great choice. It cooks quickly and gives a seafood twist to the meal. For a meat-free meal, use plant-based sausage. It provides the same great taste without animal products. You can also add extra vegetables. Try zucchini, spinach, or mushrooms. They enhance the dish and add more nutrients. Adjusting the Cajun seasoning lets you control the heat. Start with less if you are sensitive to spice. You can always add more later. If you like extra heat, chop up jalapeños. They bring a nice kick that pairs well with the creamy sauce. To keep your creamy Cajun sausage pasta fresh, follow these steps: - Refrigeration: Place the leftover pasta in an airtight container. It will stay good for about 3 to 4 days in the fridge. Make sure to let it cool down before sealing the container. - Freezing: If you want to freeze it, put the pasta in a freezer-safe bag. Squeeze out any extra air to prevent freezer burn. It can last up to 3 months. When you're ready to eat it, let it thaw overnight in the fridge. To enjoy your pasta again, reheating properly is key: - Creaminess: When reheating, add a splash of heavy cream or chicken broth. This helps keep the sauce creamy and prevents it from drying out. - Microwave vs Stovetop: The microwave is quick, but the stovetop gives better results. For the stovetop, heat on low. Stir often so it warms evenly. Use a lid to keep the moisture in. If you use the microwave, heat in 30-second intervals, stirring in between. These tips will help you savor every bite of your creamy Cajun sausage pasta! Cajun seasoning is a spice blend that packs a punch. It usually has paprika, cayenne pepper, garlic powder, onion powder, and black pepper. This mix brings warmth and a bit of heat. It gives your dishes that famous Louisiana flavor. You can buy it at stores or make your own at home. Just mix those spices for a tasty kick. Yes, you can easily make this dish gluten-free! Use gluten-free penne pasta instead of regular pasta. There are many great options made from rice, corn, or quinoa. Just cook them as you would regular pasta. This way, everyone can enjoy this creamy Cajun sausage pasta without worry. Creamy Cajun sausage pasta lasts about 3 to 4 days in the fridge. Store it in an airtight container to keep it fresh. If you want to save it longer, you can freeze it for up to 3 months. Just thaw it in the fridge before reheating. This blog post shared a simple recipe for Creamy Cajun Sausage Pasta. We covered ingredients, step-by-step cooking tips, and variations for your taste. Remember to adjust flavors to your liking and try different proteins for fun. Store leftovers well to enjoy later. With these easy steps, you can create a satisfying meal that impresses. Dive in confidently, experiment, and enjoy every bite!

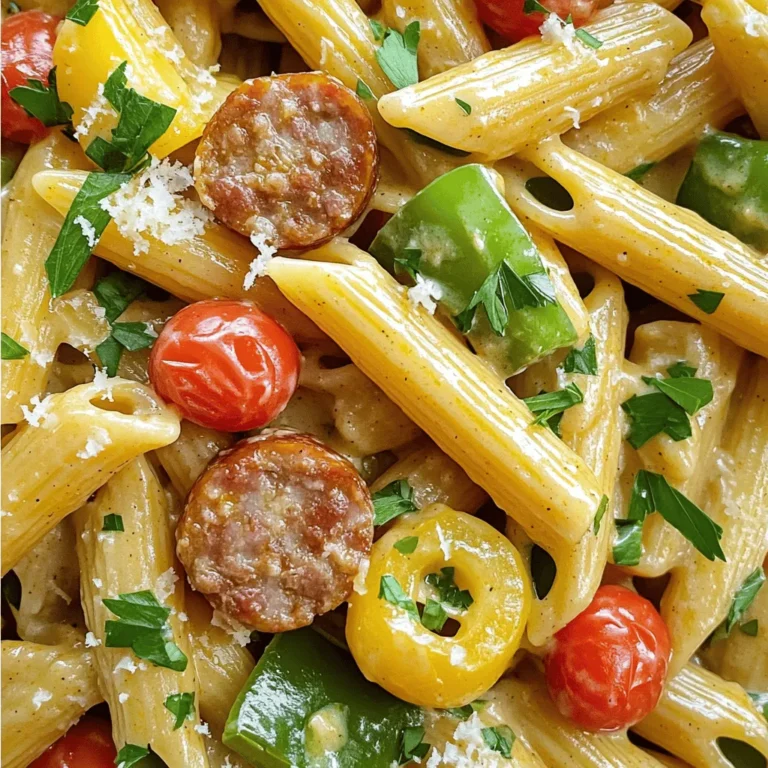
Creamy Cajun Sausage Pasta Hearty and Flavorful Meal

PREV 1 … 38 39 40 … 57 NEXT
meal twig

explore

DessertsDinnerAppetizersDrinks

Our Policies

  • Cookie Policy
  • Copyright Policy
  • Disclaimer
  • GDPR Policy
  • Terms Of Use
Back to Top
  • About
  • Contact Us
  • Privacy Policy
© 2025 meal twig