FREE DINNER EBOOK! Get your copy!
  • Cookie Policy
  • GDPR Policy
  • Disclaimer
  • Terms Of Use
  • Visit my other site: Fun Cookie Recipes
meal twig
  • Home
  • Dinner
  • Desserts
  • Drinks
  • Appetizers
  • Contact
  • About
  • Privacy Policy
  • Home
  • Dinner
  • Desserts
  • Drinks
  • Appetizers
  • Contact
  • About
  • Privacy Policy
  • Cookie Policy
  • GDPR Policy
  • Disclaimer
  • Terms Of Use
Visit my other site: Fun Cookie Recipes

HOME / CATEGORIES /

Latest

- 4 boneless, skinless chicken breasts - 1/4 cup honey - 1/4 cup fresh lime juice The main ingredients set the stage for this dish. Boneless, skinless chicken breasts offer a lean protein source. Honey adds a touch of sweetness, while fresh lime juice brings zesty flavor. Together, they create a perfect balance. - 2 tablespoons olive oil - 2 cloves garlic, minced - 1 teaspoon ground cumin - 1 teaspoon smoked paprika The marinade gives depth to the chicken. Olive oil keeps it moist. Garlic adds aroma and flavor. Ground cumin and smoked paprika bring warmth and spice. This mix brightens up your dish. - Salt and pepper to taste - Fresh cilantro for garnish (optional) Seasoning is key. Salt and pepper enhance all the flavors. Fresh cilantro adds a pop of color and brightness. Use it if you love fresh herbs. It's optional, but it makes the dish look great! To start, I whisk together the marinade ingredients. You will need honey, lime juice, olive oil, minced garlic, ground cumin, and smoked paprika. I add salt and pepper to taste. Make sure to mix until everything is well combined. This step is key for a great flavor. Next, I pour the marinade over the chicken. If I use a resealable bag, I seal it tightly. If I use a dish, I cover it well. This ensures that every piece gets an even coating of the marinade. An even coat means more flavor! For the best flavor, I recommend marinating the chicken for at least one hour. If you can, marinate it overnight. The longer the chicken sits in the marinade, the better the taste. When marinating, I place the chicken in the fridge. This helps keep it safe and fresh. I also flip the bag or stir the chicken in the dish halfway through. This way, every part gets the marinade. Before I grill, I preheat the grill to medium-high heat. This step is important for getting nice grill marks on the chicken. Once the grill is hot, I remove the chicken from the marinade. I let the extra marinade drip off. I discard the leftover marinade to avoid any risk of bacteria. I then place the chicken on the grill. I grill it for about 6-7 minutes on each side. I always check that the internal temperature reaches 165°F (74°C). This ensures the chicken is safe to eat. After grilling, I remove the chicken from the grill. I let it rest for about 5 minutes. Resting helps the juices stay inside the chicken, making it tender and juicy. When ready to serve, I slice the chicken and sprinkle fresh cilantro on top if I like. Serving it with lime wedges adds a nice touch. You can also place it on a platter for a beautiful presentation. Enjoy your meal! To get those nice grill marks, preheat your grill to medium-high heat. Make sure it's hot before you place the chicken on it. This helps create those beautiful lines. Press the chicken down gently with a spatula for a few seconds after placing it on the grill. This step can help you get even better marks. To check doneness, use a meat thermometer. Insert it into the thickest part of the chicken. The ideal temperature is 165°F (74°C). If you don’t have a thermometer, cut into the chicken. The juices should run clear, not pink. For the best flavor, marinate the chicken for at least one hour. However, if you have time, let it sit overnight. This allows the flavors to soak in deeply. When marinating, make sure the chicken is fully coated with the marinade. You can use a resealable bag or a dish. For even marinating, flip the chicken halfway through the time. This helps each piece absorb the marinade equally. You can add extra spices or herbs to boost the flavor. Consider adding chili powder for some heat. Fresh herbs like thyme or rosemary can also add a nice touch. Just mix them into the marinade before adding the chicken. Pair your Honey Lime Grilled Chicken with sides like rice, salad, or grilled veggies. The sweet and tangy flavors go well with many dishes. Lime wedges on the side also add a fresh kick. {{image_2}} You can swap chicken breasts for chicken thighs. Chicken thighs have more fat, making them juicy. They also soak up the marinade well. This change gives you a richer flavor. You can also try using shrimp instead. Shrimp cooks quickly and takes on the honey lime taste beautifully. Just be sure to watch the cooking time. Shrimp usually cooks in just a few minutes. You can add citrus variations for more depth. Try orange or lemon juice in place of lime juice. Each fruit gives a different twist. You can mix them for a fun flavor blast. Using different herbs can also change the taste. Fresh basil or mint adds a sweet touch. Cilantro is great, but don't be afraid to experiment. Find what you love! Grilling is the classic way to cook this dish. It gives the chicken nice grill marks and a smoky flavor. But you can also oven-bake it if it's rainy. Set the oven to 400°F (200°C) and bake for about 25-30 minutes. Using a skillet is another option. Heat some oil in a pan over medium heat. Cook the marinated chicken for about 6-7 minutes per side. This method is quick and keeps the chicken moist. To keep your Honey Lime Grilled Chicken fresh, store it in the fridge. Place the chicken in an airtight container. This helps prevent it from drying out. You can keep it in the fridge for up to three days. If you have more leftovers, consider freezing the chicken. Wrap each piece in plastic wrap. Then place the wrapped chicken in a freezer bag. This method helps maintain flavor and texture. Frozen grilled chicken lasts for about three months. When reheating, avoid drying out the chicken. The best method is to use an oven. Preheat your oven to 350°F (175°C). Place the chicken on a baking sheet. Cover it with foil to keep moisture in. Heat for about 15-20 minutes, or until warm. You can also reheat on the stovetop. Use a skillet over medium heat. Add a splash of water or broth to keep it moist. Heat each side for about 4-5 minutes. Always check the internal temperature before serving. It should reach 165°F (74°C) for safety. Enjoy your tasty leftovers! For the best flavor, I recommend marinating the chicken for at least one hour. If you have more time, let it marinate overnight. The longer it sits, the more the flavors blend into the meat. Yes, you can use different sweeteners. Maple syrup or agave nectar works well as a substitute. These options will give a similar sweet taste, but each will add its own twist to the flavor. The chicken should reach an internal temperature of 165°F (74°C). This ensures it is safe to eat and remains juicy. Use a meat thermometer to check this for perfect results. You can prepare the marinade ahead of time. Marinate the chicken and keep it in the fridge. This makes it easy to grill when you are ready. Just remember to let it rest after grilling for full flavor. Many side dishes work great with this chicken. Here are a few ideas: - Grilled vegetables - Rice or quinoa - Fresh salad - Corn on the cob These sides balance the flavors and make your meal complete. In this blog post, I shared a simple recipe for Honey Lime Grilled Chicken. You learned about the main ingredients, marinade components, and the best cooking methods. I provided tips to perfect your grilling and variations for different proteins. Remember to store leftovers properly and follow reheating guidelines for the best taste. Grilling this dish can create a healthy and tasty meal. I hope you feel excited to try this recipe and enjoy diverse flavors as you cook.

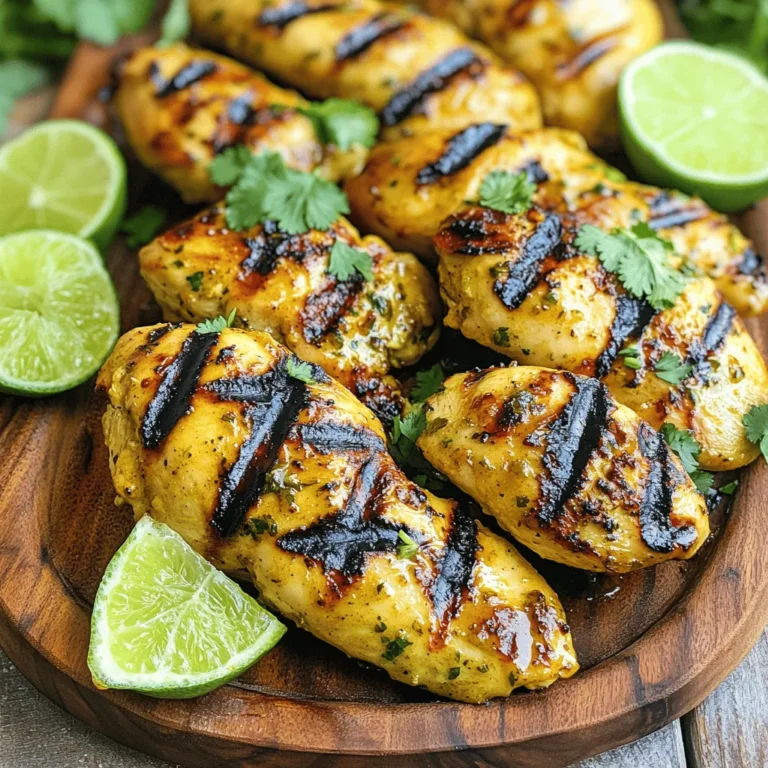
Honey Lime Grilled Chicken Flavorful and Simple Meal

- 4 cups fresh broccoli florets - 1 medium onion, diced - 2 cloves garlic, minced - 4 cups vegetable broth - 1 cup heavy cream - 2 cups sharp cheddar cheese, grated The main stars of this soup are fresh broccoli and sharp cheddar cheese. Broccoli gives the soup a bright green color and a healthy boost. Sharp cheddar adds a wonderful cheesy flavor that makes this soup so comforting. Diced onion and minced garlic bring depth and warmth. Vegetable broth gives a nice base, while heavy cream adds richness. - 1 teaspoon mustard powder - 1/2 teaspoon paprika - Salt and pepper to taste - 2 tablespoons olive oil Seasonings make a big difference. Mustard powder adds a slight tang. Paprika gives a bit of warmth and color. Salt and pepper bring out all the flavors. Olive oil is great for sautéing, adding a light and fruity taste. - Crusty bread for serving - Extra cheese for garnish Crusty bread is perfect for dipping. It adds texture and is a great way to enjoy the soup. Adding extra cheese on top gives a rich finish. You can also use leftover broccoli florets for garnish, making your soup look even more appealing! First, let’s sauté the onions and garlic. In a large pot, heat 2 tablespoons of olive oil over medium heat. Add 1 medium diced onion. Cook it for about 5 minutes until it turns translucent. Next, stir in 2 minced garlic cloves. Cook for 1 more minute until you smell that lovely garlic aroma. Now it's time to add the broccoli and broth. Toss in 4 cups of fresh broccoli florets and pour in 4 cups of vegetable broth. Bring this mixture to a boil. Once boiling, reduce the heat and let it simmer for about 10 to 12 minutes. You want the broccoli to be tender but not mushy. After simmering, grab your immersion blender. Blend the soup until it’s nice and smooth. If you prefer some texture, blend only half of the soup. This way, you’ll have some broccoli pieces left for a bit of crunch. Now, we will incorporate the cream and cheese. Return the pot to low heat. Stir in 1 cup of heavy cream and 2 cups of grated sharp cheddar cheese. Add 1 teaspoon of mustard powder and 1/2 teaspoon of paprika for extra flavor. Keep stirring until the cheese melts, making the soup creamy and rich. Lastly, season to taste with salt and pepper. If you like it thicker, add more cream or broth. Make it just how you like it! Choosing the right type of cheddar is key. I recommend using sharp cheddar. It gives a rich and bold flavor. You can also mix in some mild cheddar for balance. Adding herbs or spices can elevate your soup. Consider thyme or basil for freshness. A pinch of cayenne pepper adds a nice kick. Adjust the thickness with broth or cream. If your soup is too thick, add more broth. For extra creaminess, pour in more heavy cream. If you want to thicken the soup, consider using cornstarch. Mix a tablespoon of cornstarch with water. Stir it into the soup while it simmers. Garnishing techniques make your soup look great. Sprinkle extra cheddar cheese on top. Add a few broccoli florets for color. Serving with sides can enhance the meal. Crusty bread pairs nicely with this soup. It’s perfect for dipping and adds texture. {{image_2}} To make this soup vegan or dairy-free, use coconut milk instead of heavy cream. Swap sharp cheddar with a plant-based cheese. This keeps the dish creamy and rich. For gluten-free needs, ensure the vegetable broth has no gluten. Most broths are safe, but check labels. You can add proteins like cooked chicken for a heartier soup. Simply shred the chicken and mix it in before serving. Adding other vegetables can boost flavor and nutrition. Carrots bring sweetness, while spinach adds vibrant color. Toss these in when you add the broccoli for a nice balance. To spice things up, add chopped peppers for a kick. Jalapeños or bell peppers work well. Experiment with different cheeses too. Gouda or Monterey Jack can change the taste. Mixing cheeses can create a unique flavor blend. Try different combinations to find your favorite! Your creamy broccoli cheddar soup will stay fresh in the fridge for about 4 to 5 days. Make sure to let it cool down to room temperature first. Then, transfer it to an airtight container. This will keep the soup from drying out and absorbing other odors. If you want to store the soup for longer, freezing is a great option. To freeze, let the soup cool completely. Pour it into freezer-safe bags or containers, leaving some space for expansion. Label them with the date. The soup can last up to 3 months in the freezer. When you’re ready to eat, take it out and thaw it overnight in the fridge. Reheating the soup can be simple. You can use the stove or microwave. For the stove, pour the soup into a pot. Heat it on low, stirring often. For the microwave, place it in a safe bowl and heat in short bursts, stirring in between. To keep the soup creamy, add a splash of milk or cream while reheating. This helps restore its rich texture. To thicken your soup, you can use cornstarch. Mix one tablespoon of cornstarch with two tablespoons of cold water. Stir this mixture into the soup while it simmers. This will help thicken it without changing the taste. Another option is to add more cheese. The cheese will melt and create a creamier texture. You can also mash some of the broccoli with a fork. This adds body and keeps the flavor intact. Yes, you can use frozen broccoli in this recipe. Frozen broccoli is often blanched before freezing, which helps it cook faster. Just add it to the pot in the same way as fresh broccoli. Keep an eye on the cooking time since frozen broccoli may need less time to soften. You may want to adjust the broth slightly to ensure the soup stays creamy. This soup pairs nicely with crusty bread. A slice of sourdough or a baguette works great for dipping. You can also serve it with a simple salad for a light meal. A side of roasted vegetables adds a nice touch too. If you want a heartier option, consider grilled cheese sandwiches. They complement the soup's creamy texture perfectly. This blog post covered how to make delicious creamy broccoli cheddar soup. We looked at key ingredients, including fresh broccoli, onions, garlic, and sharp cheddar. Then, I shared easy steps to prepare, blend, and finish the soup. We also discussed tips to enhance flavors and different variations. In closing, this soup is not just a meal; it's a warm hug in a bowl. Give it a try and enjoy every spoonful!

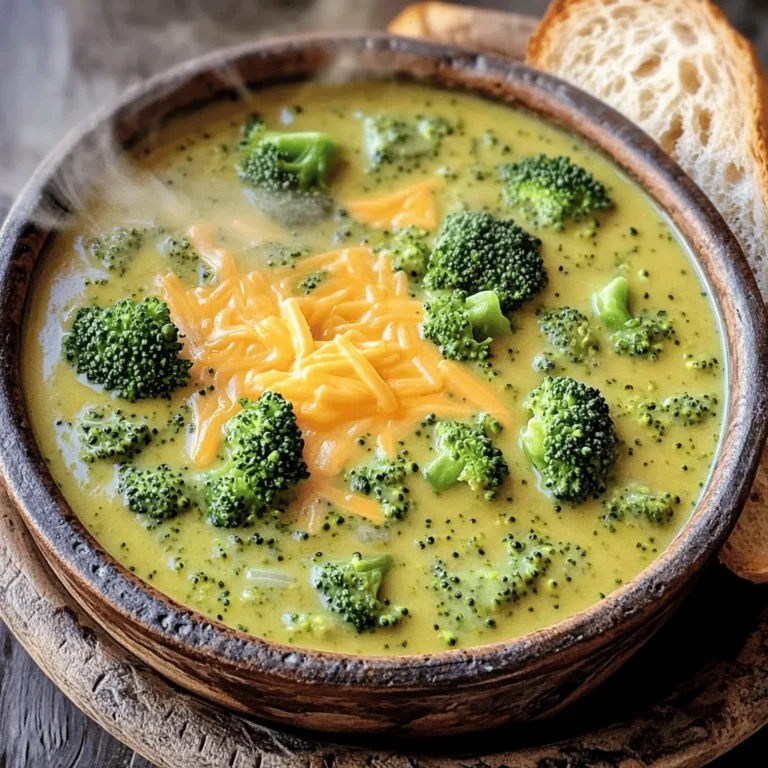
Creamy Broccoli Cheddar Soup Simple and Savory Recipe

To make crispy air fryer falafel, you need a few key ingredients: - 1 can (15 oz) chickpeas, drained and rinsed - 1 small onion, roughly chopped - 2-3 garlic cloves, minced - 1/4 cup fresh parsley, chopped - 1/4 cup fresh cilantro, chopped - 1 teaspoon ground cumin - 1 teaspoon ground coriander - 1/2 teaspoon baking powder - 1/2 teaspoon baking soda - Salt and pepper to taste - 2 tablespoons olive oil - 1/4 cup all-purpose flour (or chickpea flour for a gluten-free option) These ingredients work together to create a flavorful and crispy falafel. Chickpeas are the main base, while onion and garlic add great flavor. Herbs like parsley and cilantro bring freshness. You can customize your falafel with a few extra ingredients: - Lemon zest for brightness - Chili powder for heat - Ground black pepper for spice - Finely chopped bell pepper for sweetness - Sesame seeds for crunch Adding these ingredients can change the taste and texture. Feel free to mix and match based on your preferences. If you need a gluten-free option, simply replace the all-purpose flour with chickpea flour. Chickpea flour binds well and keeps the falafel crispy. You can also check labels on the baking powder to ensure it is gluten-free. These simple changes let you enjoy delicious falafel while meeting your dietary needs. To make the falafel mix, start with a food processor. Add the drained chickpeas, chopped onion, minced garlic, parsley, and cilantro. Pulse this mix until it is coarse. You want it mixed well but not a paste. Next, add the cumin, coriander, baking powder, and baking soda. Don’t forget to add salt and pepper! Pulse again to mix in the spices. Scrape the sides of the bowl, then add olive oil and flour. Pulse a few more times. The mixture should hold together when pressed but not stick to your hands. Now it's time to shape the falafel. Wet your hands to stop the mix from sticking. Form the mixture into small balls, about 1.5 inches wide. Place the shaped falafels in a bowl. Lightly brush or spray them with olive oil. This helps make the falafel crispy when cooked. Make sure not to overcrowd them. Preheat your air fryer to 375°F (190°C) for about 5 minutes. Place the falafel balls in the air fryer basket in a single layer. If you have a lot, cook them in batches. Air fry the falafels for 12-15 minutes. Flip them halfway through so they cook evenly. You’ll know they’re done when they are golden brown and crispy on the outside. Once cooked, carefully take them out and let them cool a bit before serving. To get your falafel extra crispy, use these tips: - Preheat the air fryer: Always preheat your air fryer to 375°F (190°C) for 5 minutes. This step helps kickstart the cooking process. - Don’t overcrowd: Place falafel balls in a single layer. Too many in the basket will steam them instead of crisping them. - Use oil wisely: Lightly brush or spray the falafel with olive oil before cooking. This helps create that golden, crispy skin. Many beginners make these errors: - Overprocessing the mixture: Stop pulsing when you have a coarse mix. A paste will ruin the texture. - Ignoring the flour: The right amount of flour helps bind the falafel. Too little will make them fall apart. - Flipping too late: Flip the falafel halfway through cooking. This promotes even browning on both sides. Add some fun to your falafel: - Add spices: Try adding smoked paprika or cayenne pepper for a spicy kick. - Herbs galore: Experiment with fresh dill or mint to change up the flavor. - Cheesy twist: For a unique touch, mix in some feta cheese for a savory bite. {{image_2}} To add a kick to your falafel, try this spicy version. You can mix in a teaspoon of cayenne pepper or some finely chopped jalapeños. This will give your falafel a nice heat. If you like it even spicier, add more. The spices will blend well with the chickpeas and herbs. The original falafel recipe is already vegan. However, you can enhance it by adding more spices. Try adding smoked paprika or even a pinch of cinnamon for depth. These small changes can make a big difference. Just ensure to keep the base ingredients the same for the best texture. There are many Mediterranean ingredients you can try. Consider adding sun-dried tomatoes for a tangy twist. You can also use fresh mint instead of or in addition to parsley. Another option is to mix in some feta cheese for creaminess, but this would not be vegan. These changes can give your falafel a unique spin. Enjoy exploring these flavors! You can store leftover falafel in an airtight container. Place them in the fridge for up to four days. Make sure they cool completely before sealing. This helps keep them crispy. If you want to keep them longer, consider freezing. To reheat falafel, use the air fryer. Set it to 350°F (175°C) for about 5 to 8 minutes. This method helps restore the crispy texture. You can also use a skillet over medium heat. Just add a little oil to keep them from sticking. Freezing falafel is simple. First, let them cool completely. Then, arrange them in a single layer on a baking sheet. Freeze for about 1 hour. Once frozen, transfer them to a freezer-safe bag. They can stay fresh for up to three months. When ready to eat, air fry them straight from the freezer. Cook for 15 to 20 minutes, flipping halfway through. Enjoy your quick and tasty meal! Yes, you can! If using dried chickpeas, soak them overnight. This helps them soften. Then, cook them until tender before blending. Canned chickpeas are already soft, which saves time. You will know the falafel is cooked when it turns golden brown. The outside should be crisp, and the inside should be warm and tender. A quick poke can help. If it feels firm, it’s ready! Falafel pairs well with many sides. You can serve it with: - Tahini sauce - Tzatziki sauce - Pita bread - Fresh salad - Hummus - Pickled vegetables Mix and match to create a tasty feast! Leftover falafel can last in the fridge for about 3 to 4 days. Store them in an airtight container. This keeps them fresh and ready for your next meal. Yes, you can! Make the batter and store it in the fridge. Use it within 24 hours for the best taste. Just remember to shape them before cooking for a crispy finish! We explored how to make crispy air fryer falafel, from ingredients to storage. I shared key tips to ensure you achieve the best taste and texture. Remember to customize your falafel and experiment with flavors. With a few easy steps, you'll have a tasty meal ready in no time. Enjoy your cooking journey and let your creativity shine!

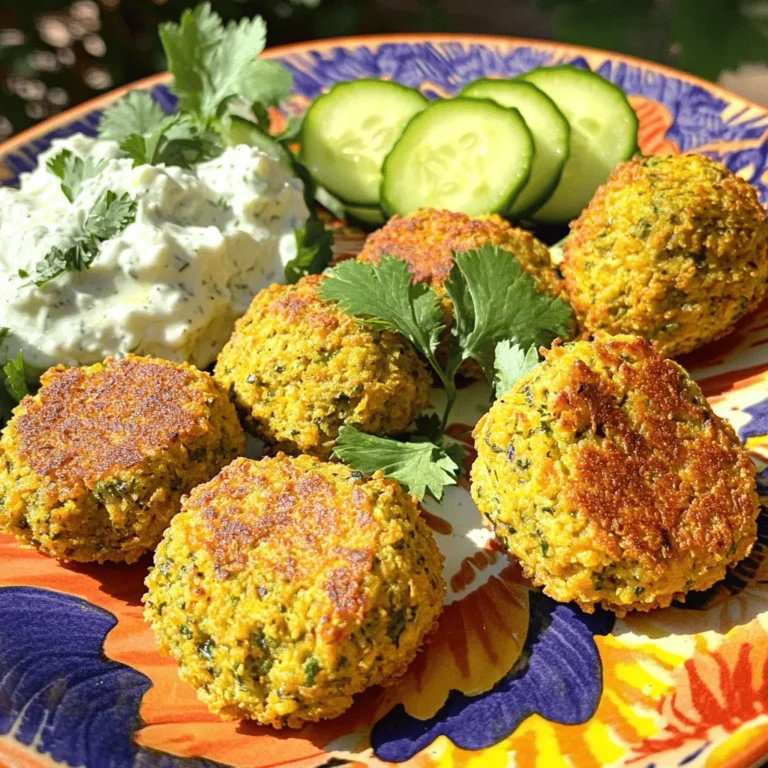
Crispy Air Fryer Falafel Quick and Tasty Recipe

- 1 pound boneless, skinless chicken breast - 1 tablespoon olive oil - 1 teaspoon chili powder - 1 teaspoon cumin - 1 teaspoon garlic powder - 1 teaspoon onion powder - 1 can (15 oz) black beans, rinsed and drained - 1 cup corn kernels (fresh or frozen) - 1 cup diced tomatoes (canned or fresh) - 1 cup cooked brown rice or quinoa I use boneless, skinless chicken breast for this dish. It cooks quickly and stays juicy. Olive oil adds richness and helps the spices stick. The spices, like chili powder, cumin, garlic, and onion powder, give great flavor. Black beans are packed with protein and fiber. Corn adds sweetness and color, while diced tomatoes bring freshness. I often choose brown rice or quinoa as the base for added nutrition. - 1 cup shredded low-fat cheese (cheddar or Mexican blend) - ½ cup plain Greek yogurt (for topping) - Fresh cilantro, chopped (for garnish) - Lime wedges (for serving) I love topping these bowls with low-fat cheese. It melts beautifully and adds creaminess. Greek yogurt is a fantastic substitute for sour cream. It’s thick, tangy, and rich in protein. Fresh cilantro gives a vibrant touch and brightens every bite. Lime wedges add a zesty flavor that enhances the dish. This dish is high in protein. Each serving offers around 30 grams from chicken, beans, and yogurt. The chicken breast packs the most protein, while beans add fiber and nutrients. This meal is balanced with carbs from rice or quinoa, keeping you full. Greek yogurt boosts protein even more while keeping fat low. It also includes probiotics, which are good for gut health. {{ingredient_image_1}} First, preheat your oven to 375°F (190°C). This ensures a hot environment for cooking. Next, heat one tablespoon of olive oil in a large skillet over medium heat. Season the chicken breast with chili powder, cumin, garlic powder, onion powder, salt, and pepper. Place the chicken in the skillet and cook for about 6-7 minutes on each side. The chicken should be fully cooked and no longer pink in the middle. Once done, remove it from the skillet and let it rest for a few minutes before shredding. Once the chicken has cooled, it’s time to shred it. I like to use two forks for this task, but you can also use your hands if you prefer. Shred the chicken into bite-sized pieces and set it aside. This step makes it easier to combine with the other ingredients later. In a large mixing bowl, combine the shredded chicken with the black beans, corn, and diced tomatoes. Add in the cooked brown rice or quinoa. Mix everything well to ensure the flavors blend. This mixture is now ready to be portioned into serving bowls. Divide the chicken and bean mixture evenly among four serving bowls. Top each bowl with a generous handful of shredded low-fat cheese. Now, place the bowls in the preheated oven for about 5-7 minutes. This allows the cheese to melt and get bubbly, making it extra delicious. After removing the bowls from the oven, let them cool for a minute. Top each bowl with a dollop of plain Greek yogurt for creaminess. Finally, sprinkle fresh cilantro on top for a burst of flavor. Serve with lime wedges on the side to add a zesty kick. - To ensure juicy chicken, use a meat thermometer. Cook until it reaches 165°F. This helps keep the chicken moist. - If you want spice, try adding cayenne pepper. For a milder taste, use paprika. - Use fresh herbs like oregano instead of dried. Fresh herbs give a bright flavor boost. - Pair the bowls with a side of mixed greens or tortilla chips. This adds crunch and freshness. - For dietary needs, use quinoa instead of rice for gluten-free options. Swap out cheese for avocado for a dairy-free choice. - Store prepped ingredients in airtight containers. This keeps them fresh for up to three days. - For reheating, pop the bowl in the microwave for 2-3 minutes. You can also heat it in the oven at 350°F for about 10 minutes. Pro Tips Marinate for More Flavor: For an extra burst of flavor, marinate the chicken in the spice mix and olive oil for at least 30 minutes before cooking. Cheese Variations: Experiment with different types of cheese, such as pepper jack for a spicy kick or mozzarella for a milder flavor. Meal Prep Friendly: These bowls are great for meal prep! Assemble them without the yogurt and cheese, then store in the fridge for up to 4 days. Customize Your Toppings: Feel free to add your favorite toppings like avocado, jalapeños, or salsa to personalize each bowl to your taste. {{image_2}} You can easily swap the chicken with turkey if you want a change. Turkey has a similar taste and keeps the protein high. If you're looking for a plant-based option, try using tofu. Tofu absorbs flavors well, making it a great fit for enchilada bowls. You can even use jackfruit for a more unique texture. Each option gives you a delicious way to enjoy this meal. Add more vegetables to your bowls for extra nutrition. Chopped bell peppers, zucchini, or spinach blend well with the other ingredients. You can also try different grains like quinoa or farro for a fun twist. To amp up the flavor, add salsa or jalapeños. These ingredients add a nice kick and lend depth to the dish. Incorporating regional flavors can make your bowls unique. For example, use black beans for a classic Mexican style, or try pinto beans for a Southwestern flair. You can also experiment with different types of rice, like cilantro-lime rice for a zesty touch. Each twist lets you explore new tastes while keeping the meal high in protein. To keep your chicken enchilada bowls fresh, store leftovers in airtight containers. This helps prevent moisture loss and keeps flavors intact. Make sure to let them cool before sealing. They can last in the fridge for up to 3-4 days. If you want to save your enchilada bowls for later, freezing is a great option. Divide the bowls into portions and wrap them tightly in plastic wrap. Place them in freezer-safe bags or containers. They can stay good in the freezer for up to 2-3 months. When you're ready to eat, take a bowl out and let it thaw in the fridge overnight. To reheat, you can use the microwave or oven. If using the microwave, heat for about 3-5 minutes. If using the oven, preheat to 350°F (175°C) and bake for 15-20 minutes until heated through. Enjoy your delicious meal again! Each serving of the chicken enchilada bowl has about 30 grams of protein. The chicken breast is a great source of lean protein. Adding black beans also boosts the protein content. This makes it filling and nutritious, perfect for a high-protein meal. Yes, you can use a slow cooker. Just season the chicken and place it in the slow cooker. Add the olive oil, spices, black beans, corn, and tomatoes. Cook on low for 6-8 hours or high for 3-4 hours. Once done, shred the chicken and mix with the other ingredients. If you want a low-carb option, skip the brown rice or quinoa. Instead, use cauliflower rice. You can also add more veggies like zucchini or bell peppers. These swaps keep the dish tasty while lowering the carbs. To add more flavor, try using different spices. You can add smoked paprika or chipotle powder for a smoky taste. Adding a squeeze of lime juice before serving brightens the dish. You can also top with salsa or avocado for extra flavor. Yes, you can make this recipe vegan. Substitute the chicken with jackfruit or tofu. Use vegan cheese instead of regular cheese. Replace Greek yogurt with a dairy-free yogurt. These swaps keep the meal delicious while making it plant-based. This article gives you a simple guide to making delicious chicken enchilada bowls. We covered main ingredients like chicken, beans, and spices. I showed you how to prepare the chicken, layer the ingredients, and add tasty toppings. Remember, using Greek yogurt boosts the protein and lowers calories. Experiment with different proteins and flavors to find your favorite twist. Whether you enjoy leftovers or make a big batch, these bowls are fun and easy. Try them today for a tasty and healthy meal!

Chicken Enchilada Bowls High Protein Nourishing Meal

To make Avocado Egg Salad Lettuce Wraps, you need these key ingredients: - 4 hard-boiled eggs, peeled and chopped - 1 ripe avocado, mashed - 2 tablespoons Greek yogurt (or mayonnaise) - 1 tablespoon Dijon mustard - 1 tablespoon fresh lemon juice - 2 tablespoons red onion, finely diced - 1 tablespoon fresh dill, chopped (or parsley) - Salt and pepper to taste - 1 head of Romaine or Butter lettuce, leaves separated These ingredients blend well to create a creamy, flavorful filling. You can add your touch to this recipe. Here are some optional ingredients: - Chopped celery for a crunch - Sriracha for a spicy kick - Chopped olives for a briny flavor - Sun-dried tomatoes for a sweet twist Feel free to mix and match to suit your taste! Each ingredient offers unique health benefits: - Eggs: High in protein and vitamins, they help build muscles. - Avocado: Packed with healthy fats, it supports heart health. - Greek Yogurt: A great source of probiotics, it aids digestion. - Lemon Juice: Rich in vitamin C, it boosts your immune system. - Dill: Full of antioxidants, it promotes overall health. These ingredients not only taste great but also nourish your body. First, gather your ingredients. You need four hard-boiled eggs, one ripe avocado, and two tablespoons of Greek yogurt. You also need one tablespoon of Dijon mustard and fresh lemon juice. Don't forget the red onion, fresh dill, salt, and pepper. Lastly, grab a head of Romaine or Butter lettuce. Wash the lettuce and separate the leaves. In a large mixing bowl, add the chopped hard-boiled eggs. Next, add the mashed avocado. Use a fork to mix them gently. You want some egg chunks to stay intact. Then, add the Greek yogurt, Dijon mustard, and lemon juice. Stir until everything is well combined. Finally, add the diced red onion and the fresh dill. Mix again, making sure all the flavors blend. Now it's time to make the wraps! Take a lettuce leaf and place it on a flat surface. Spoon a good amount of the avocado egg salad into the center of the leaf. Wrap the leaf around the filling like a taco. Press gently to hold it all together. Repeat this process with the other leaves and filling. Arrange the wraps on a platter and garnish with extra dill or parsley. Serve with lemon wedges for a fresh touch. Enjoy your healthy meal! To get the best texture, chop your eggs well. You want some chunks, not mush. Mixing the eggs with the avocado helps keep it creamy but still chunky. This mix gives a nice bite. Avoid over-mixing to keep the eggs from turning too soft. The goal is a smooth blend with a bit of crunch. For a tasty kick, add lemon juice right after mashing the avocado. It keeps the color bright. Don’t skip the Dijon mustard; it adds depth. Fresh herbs like dill or parsley boost the flavor, too. If you like spice, consider adding a pinch of cayenne pepper. Always taste and adjust salt and pepper to your liking. Arrange the lettuce wraps on a nice platter. Garnish with extra dill or parsley on top. For a pop of color, add lemon wedges around the wraps. This makes the dish look fresh and inviting. It’s all about making it appealing for your guests. Use different shapes of lettuce for variety, too. {{image_2}} You can easily change the flavors in your avocado egg salad. Here are some fun swaps: - Greek yogurt: Try sour cream for a tangy twist. - Dijon mustard: Use yellow mustard for a milder taste. - Fresh herbs: Swap dill for chives or cilantro for a new flavor. - Spices: Add paprika or cayenne for a kick. These swaps keep the dish fresh and exciting. You can mix and match based on your taste. Lettuce wraps are great for holding your egg salad. Here are some tasty options: - Romaine: Crunchy and sturdy, perfect for filling. - Butter lettuce: Soft and smooth, easy to wrap. - Iceberg: Crisp and refreshing, great for a classic feel. - Collard greens: A strong choice for a hearty wrap. Choosing the right lettuce can change the whole experience. Each type adds its own texture and flavor. You can make this dish fit different diets. Here are some ideas: - Vegan: Replace eggs with chickpeas. Mash them with avocado and yogurt. - Low-Carb: Skip the yogurt and use more avocado. This keeps the salad creamy. - Gluten-Free: Use any of the lettuce options as wraps. These changes ensure everyone can enjoy this meal. You can cater to your guests’ needs easily. To keep your avocado egg salad fresh, store it in an airtight container. This helps prevent air from drying it out. Make sure the container is clean and dry. I recommend using a glass container for easy cleanup. If you have extra lettuce leaves, keep them separate. This way, they stay crisp and fresh. Your avocado egg salad will last about 3 to 4 days in the fridge. Be sure to check for any changes in smell or color before eating. If it looks or smells off, it’s best to toss it. Use clear labels to mark when you made it. This helps you keep track of freshness. I don’t recommend freezing avocado egg salad. Avocado can become brown and mushy when frozen. If you want to meal prep, store the salad in the fridge. You can prepare the eggs and mash the avocado ahead of time. Keep the dressing separate until you are ready to eat. This keeps everything fresh and tasty. Yes, you can use other greens. Try spinach, kale, or collard greens. These options add unique flavors. They also provide different textures. Just make sure they are large enough to hold the filling. To prepare this salad ahead of time, you can store the egg salad separately. Keep it in an airtight container in the fridge. You can wrap the lettuce leaves in a damp paper towel. This will keep them fresh. When you're ready to eat, assemble the wraps. To boost protein, try adding cooked chicken or turkey. You could also add chickpeas or tofu for a veggie option. Nuts like walnuts or almonds add crunch and protein too. Just be mindful of the flavors you combine. Avocado egg salad lettuce wraps combine fresh flavors and healthy ingredients. We covered key ingredients, preparation steps, and tips to enhance texture and taste. I shared tips for storing leftovers and even suggested variations for dietary needs. This dish is simple, fun, and perfect for any meal. With options for everyone, you can enjoy a tasty bite while staying healthy. Give it a try, and you’ll find your new favorite recipe!

Avocado Egg Salad Lettuce Wraps Healthy Fresh Meal

For a great white chicken chili, you need simple yet tasty ingredients. Here’s what you will need: - 2 cups cooked chicken, shredded - 1 tablespoon olive oil - 1 medium onion, diced - 2 cloves garlic, minced - 1 jalapeño, seeded and diced - 1 teaspoon ground cumin - 1 teaspoon chili powder - 1/2 teaspoon smoked paprika - 3 cups chicken broth - 2 cans (15 oz each) white beans, drained and rinsed - 1 cup corn (fresh or frozen) - 1 cup heavy cream (or coconut milk for a dairy-free option) - Salt and pepper to taste - Fresh cilantro, chopped (for garnish) - Lime wedges (for serving) These ingredients work together to create a warm and creamy dish. The chicken gives protein, while the beans add fiber. The spices bring warmth and depth. The cream (or coconut milk) adds richness. When you finish your chili, the garnish of cilantro and lime gives a fresh touch. Heat one tablespoon of olive oil in a large pot over medium heat. Add one medium diced onion. Cook it until it’s soft and clear for about three to four minutes. Then, stir in two cloves of minced garlic and one diced jalapeño. Cook for one more minute. You want the mix to smell great! Next, sprinkle in one teaspoon of ground cumin, one teaspoon of chili powder, and half a teaspoon of smoked paprika. Stir everything well to coat the onions and peppers. Let it cook for one to two minutes. This step adds a rich flavor to your chili. Now, pour in three cups of chicken broth. Add two cans of drained and rinsed white beans and one cup of corn to the pot. Bring this mixture to a gentle simmer. The warmth helps all the flavors come together. After the broth is simmering, stir in two cups of shredded cooked chicken. Let it cook for about ten to fifteen minutes. This allows the chicken to absorb those lovely flavors from the broth and spices. Lower the heat and slowly add one cup of heavy cream. Stir well to mix it in. Season with salt and pepper to your taste. Allow it to simmer for another five minutes. Make sure it doesn’t boil, as you want it creamy, not curdled. Ladle the hot chili into bowls. Garnish with fresh chopped cilantro. Serve with lime wedges on the side. A squeeze of lime adds a nice touch. Enjoy your warm, flavorful bowl of white chicken chili! To make your white chicken chili even better, try adding toppings. Some great choices are: - Fresh cilantro - Lime wedges - Avocado slices - Shredded cheese These toppings add fresh taste and color. You can also use homemade broth. Homemade broth has richer flavor than store-bought. If you have time, make your broth. It will make a big difference. For great flavor, sauté your onions and garlic well. Heat the olive oil over medium heat. This helps bring out the spices. Stir often to avoid burning. Cook until the onions are soft and clear. Simmering the chili is important too. Once you add the chicken, let it cook for 10-15 minutes. This helps all the flavors mix well together. Don't skip this step! If you want a lighter dish, use coconut milk instead of heavy cream. It gives the same creaminess but is dairy-free. You can also use less chicken and add more beans. This lowers calories and boosts fiber. Enjoy your chili, no matter your diet! {{image_2}} You can change the protein in this chili. Use turkey instead of chicken for a tasty twist. Ground turkey works well and keeps the dish light. If you want a vegetarian option, try using jackfruit or tofu. Both mimic the texture of chicken. They soak up flavors and add heartiness. You can make this chili as spicy as you like. If you want more heat, add extra jalapeños. You can also try using hotter peppers, like serranos or habaneros. Just remember to adjust the amount slowly. Taste as you go to avoid overpowering the dish. This way, you can enjoy a perfect balance of heat. Feel free to switch out the beans in this recipe. While white beans are great, you can use black beans or pinto beans. They add different flavors and textures. If you want a unique touch, try lentils or chickpeas. These options also boost protein and fiber, making your chili even better. To keep your white chicken chili fresh, store it in a glass or plastic container. Let it cool to room temperature before sealing. Place it in the fridge. It should stay good for up to four days. For longer storage, you can freeze it. Use freezer-safe bags or containers. Make sure to leave some space for the chili to expand when frozen. Reheat your chili slowly to keep the flavor. Use a pot on low heat. Stir often to prevent sticking. If it seems too thick, add a splash of chicken broth or water. You can also use the microwave. Heat it in short bursts of one minute. Stir in between to ensure even heating. In the fridge, your white chicken chili lasts about four days. In the freezer, it can stay fresh for up to three months. Just remember to label your containers with dates. This way, you know when to enjoy your delicious meal again! To thicken White Chicken Chili, you have a few options. You can add more beans, as they help create a creamy texture. You can also try mashing some beans against the pot's side. Another method is to mix in cornstarch. Simply whisk one tablespoon of cornstarch with cold water, then stir it into the chili. Let it cook for a few minutes until it thickens. Lastly, simmering the chili longer can help reduce liquid, making it thicker. Yes, you can easily substitute heavy cream. For a dairy-free option, use coconut milk. It gives a nice creaminess and adds a hint of sweetness. You can also try almond milk or oat milk, but they may not be as rich. If you want a lighter option, use half-and-half. Just remember, any substitute will change the flavor a bit, so choose what you like best. White Chicken Chili pairs well with many sides. You can serve it with cornbread or tortilla chips for a crunchy contrast. A fresh salad adds a nice, light touch. If you want something heartier, try rice or quinoa. You can also offer toppings like avocado, cheese, or sour cream to enhance the meal. White Chicken Chili can be mild or spicy, depending on your taste. The jalapeño adds some heat, but you can adjust it. If you like it hot, leave the seeds in the jalapeño. You can also add more spicy peppers or hot sauce. For a milder version, remove the seeds and use less jalapeño. Tasting as you go is key! This blog post covered all you need for white chicken chili. We explored key ingredients, detailed cooking steps, and offered tips for flavor and dietary needs. You can play with spices, proteins, and beans to make it your own. Remember, good chili is all about waiting for the flavors to meld. Store leftovers properly and reheat carefully to keep it tasty. Enjoy the process and get creative in your kitchen!

White Chicken Chili Flavorful and Comforting Recipe

- 1 lb Brussels sprouts, trimmed and halved - 3 tablespoons olive oil - 2 tablespoons honey - 1 tablespoon Sriracha sauce - 1 tablespoon soy sauce - 1 teaspoon garlic powder - Salt and pepper to taste - Sesame seeds (for garnish) - Chopped green onions (for garnish) The key to great Honey Sriracha Brussels sprouts starts with fresh ingredients. I love using 1 pound of Brussels sprouts, trimmed and halved. This helps them cook evenly. Next, you'll need 3 tablespoons of olive oil. This oil gives the sprouts a nice crisp. For the sweet and spicy kick, grab 2 tablespoons of honey and 1 tablespoon of Sriracha sauce. You can adjust the Sriracha based on how spicy you like it. Add 1 tablespoon of soy sauce for depth of flavor. Now, let’s season these sprouts. You’ll want 1 teaspoon of garlic powder for that aromatic touch. Don’t forget salt and pepper to taste. Finally, for garnish, I sprinkle sesame seeds and chopped green onions on top. This adds a lovely crunch and color. These ingredients come together for a tasty roasted delight that’s hard to resist! - Preheat your oven to 400°F (200°C). - Trim the stem of each Brussels sprout and cut them in half. - In a small bowl, whisk together the honey, Sriracha, soy sauce, garlic powder, salt, and pepper. Mix it until it is smooth and well-combined. - In a large bowl, toss the halved Brussels sprouts with the olive oil. Make sure they are well-coated. - Pour the honey Sriracha mixture over the Brussels sprouts and toss again to coat evenly. - Spread the Brussels sprouts on a baking sheet lined with parchment paper in a single layer. - Roast them in the preheated oven for 20-25 minutes. Stir halfway through to help them cook evenly and get crispy. - When they turn golden brown and caramelized, take them out of the oven. - Let them cool for a few minutes before serving. - Garnish with sesame seeds and chopped green onions. Enjoy your tasty roasted delight! To ensure even cooking, make sure to spread the Brussels sprouts in a single layer. This helps them roast evenly. Stir them halfway through cooking for extra crispiness. If you want to adjust the spice level of Sriracha, start with less. You can add more after tasting. This way, you control the heat. If you want it milder, mix in a bit more honey. For ideal side dishes, pair these Brussels sprouts with rice or quinoa. They also go well with grilled chicken or fish. For meal prep or parties, serve these sprouts on a big platter. You can also pack them in lunch boxes. Just remember to add the sesame seeds and green onions before serving to keep them fresh. {{image_2}} You can switch up the sauces for this dish. Teriyaki sauce adds a sweet touch. Chili garlic sauce brings more heat. Both work well with Brussels sprouts. You can also swap Brussels sprouts with other veggies. Try cauliflower, broccoli, or carrots. They cook well and soak up the sauce. Each choice gives a new flavor twist. This recipe is great for various diets. For vegetarians and vegans, use maple syrup instead of honey. It keeps the sweetness without using animal products. For gluten-free options, choose a gluten-free soy sauce. Many brands offer this now. It lets everyone enjoy this tasty dish without worry. To keep your Honey Sriracha Brussels sprouts fresh, follow these steps. First, let them cool completely after cooking. This helps avoid steam buildup in the container. Next, place the Brussels sprouts in an airtight container. You can use glass or plastic; both work well. Store them in the fridge for up to four days. If you want to keep them longer, consider freezing them. Just note that freezing may change their texture. When it’s time to enjoy your leftovers, you want them crispy. The best way to reheat Brussels sprouts is in the oven. Preheat your oven to 350°F (175°C). Spread the sprouts in a single layer on a baking sheet. Heat them for about 10-15 minutes. This will help restore their crunch. You can also use an air fryer for a quicker option. Set it to 350°F (175°C) and heat for about 5-7 minutes. Enjoy them hot and crispy! Can I make this recipe ahead of time? Yes, you can prepare the Brussels sprouts ahead of time. You can wash and cut them, then store them in the fridge. Keep the sauce separate until you are ready to cook. This way, the sprouts stay fresh and crisp. How long do Brussels sprouts last in the fridge? Fresh Brussels sprouts can last about 3 to 5 days in the fridge. Store them in a plastic bag or a container with a lid. Make sure they remain dry to avoid spoilage. Can I use frozen Brussels sprouts for this recipe? You can use frozen Brussels sprouts, but they may not be as crispy. Thaw them first and pat them dry. Follow the same cooking steps, but watch the roasting time. Adjust it as needed for even cooking. In this blog post, we explored how to make delicious Honey Sriracha Brussels sprouts. We covered the main ingredients, preparation steps, and tips for the best results. I shared ways to vary the recipe and how to store leftovers. Remember, you can swap sauces or use other veggies. This dish is easy, tasty, and great for any meal. Enjoy cooking and impressing your friends with this dish! Stay creative and make it your own!

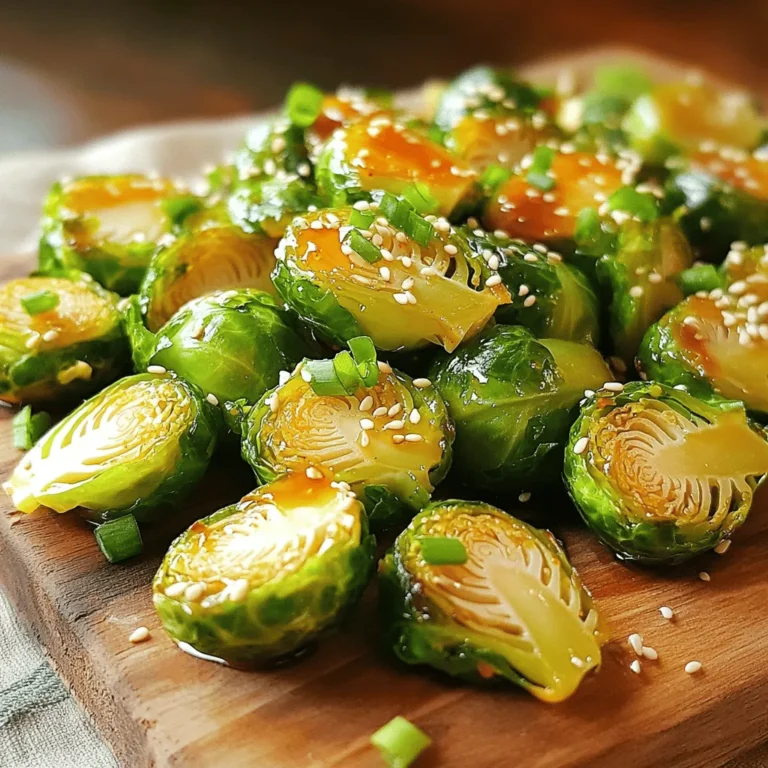
Honey Sriracha Brussels Sprouts Tasty Roasted Delight

To make Jalapeño Cheddar Cornbread Muffins, you will need the right base ingredients. Gather these items: - 1 cup cornmeal - 1 cup all-purpose flour - 1 tablespoon baking powder - 1/2 teaspoon salt - 1/4 teaspoon black pepper - 1 cup buttermilk (or milk with a splash of vinegar) - 1/4 cup honey - 1/4 cup vegetable oil - 2 large eggs Start by measuring each ingredient carefully. Mix the cornmeal, flour, baking powder, salt, and black pepper in a large bowl. This mix creates the fluffy base for your muffins. The cheese you choose can make a big difference. I recommend using sharp cheddar cheese for a bold flavor. It melts well and adds richness. You could also try pepper jack for extra spice or even a mix of both! Cheese brings a gooey texture and complements the heat from the jalapeños. Fresh jalapeños pack a punch with their crispness and flavor. Use 1-2 fresh jalapeños, deseeded and finely chopped, for the best taste. If you prefer dried jalapeños, remember they are less spicy. Dried jalapeños won’t give the same fresh kick, so adjust the quantity accordingly. Fresh jalapeños add brightness and enhance the muffin's overall taste. Start by preheating your oven to 400°F (200°C). This gets it hot and ready for baking. Next, line a muffin tin with paper liners or lightly grease each cup with oil. This helps the muffins release easily after baking. In a large bowl, whisk together the cornmeal, all-purpose flour, baking powder, salt, and black pepper. Make sure these dry ingredients blend well. This step builds the foundation for our muffins. The cornmeal gives a nice texture, while the flour binds everything together. In another bowl, mix the buttermilk, honey, vegetable oil, and eggs until smooth. If you don't have buttermilk, use milk with a splash of vinegar. This mix adds moisture and flavor. Honey brings a touch of sweetness, balancing the spice of the jalapeños. Pour the wet mix into the dry mix. Stir gently until just combined; do not overmix. Now, fold in the shredded cheddar cheese and chopped jalapeños. If you like, add chopped cilantro for more flavor. This step gives the muffins their signature taste and exciting kick. Spoon the batter into the prepared muffin tin, filling each cup about 2/3 full. Bake in the oven for 15-20 minutes. You’ll know they’re ready when they turn golden and a toothpick inserted in the center comes out clean. Let them cool for a few minutes in the tin, then transfer to a wire rack. Enjoy your fresh Jalapeño Cheddar Cornbread Muffins warm! To get soft and fluffy muffins, use a mix of cornmeal and flour. This blend gives the muffins a nice crumb. Make sure to measure your dry ingredients using a spoon. Spoon the flour and cornmeal into the measuring cup and level it off. This method keeps the muffins light. Overmixing can lead to dense muffins, so stir gently when combining wet and dry ingredients. For extra flavor, try adding cheese. Sharp cheddar works best, but you can mix it with pepper jack for a spicy twist. Fresh cilantro adds a bright taste, too. If you want more heat, add extra jalapeños or some chopped green chilies. You can also mix in a handful of corn kernels for a sweet crunch. Bake your muffins at 400°F (200°C) for 15-20 minutes. Check them at 15 minutes with a toothpick. If it comes out clean, your muffins are ready. If not, give them a few more minutes. Keep an eye on them to avoid overbaking. Each oven is different, so adjust time as needed. {{image_2}} If you like sweet and spicy, add corn or diced peaches. These fruits add a sweet twist. You can also mix in some brown sugar for extra sweetness. Balance the heat of jalapeños with a splash of honey. This combo makes a fun flavor mix. To make these muffins gluten-free, swap the all-purpose flour for a gluten-free blend. Look for a blend that has xanthan gum. This helps with texture and rise. You can still use cornmeal for a tasty base. Your muffins will be fluffy and delicious without the gluten. These muffins pair well with soups and salads. Serve them with chili for a hearty meal. They also go well with a fresh garden salad. The muffins add warmth and fun to any dish. Try them alongside a bowl of creamy tomato soup for a cozy vibe. Enjoying these muffins with your favorite soups or salads makes for a complete meal. To keep your Jalapeño Cheddar Cornbread Muffins fresh, store them in an airtight container. This helps keep moisture in and prevents them from drying out. If you have leftovers, let them cool completely first. Then, layer them with parchment paper to avoid sticking. You can keep them at room temperature for up to two days. For longer storage, place them in the fridge for up to a week. When you're ready to enjoy your muffins again, reheating is easy. You can use a microwave or an oven. For the microwave, just heat one muffin for about 20-30 seconds. If you want a crispier texture, use the oven. Preheat the oven to 350°F (175°C). Wrap the muffins in foil and heat for about 10-15 minutes. This will refresh them nicely! Freezing is a great option if you want to save muffins for later. Allow the muffins to cool completely. Then, wrap each one in plastic wrap and place them in a freezer bag. They can last up to three months in the freezer. When you're ready to eat, thaw them in the fridge overnight. Reheat them as mentioned above for the best taste. Enjoy these muffins anytime! Yes, you can use regular milk. Just add a splash of vinegar to make it tangy. This helps mimic buttermilk's flavor and acidity in the recipe. Store the muffins in an airtight container. Keep them at room temperature for up to three days. For longer storage, place them in the fridge. These muffins pair well with chili, soups, or salads. They also make a great side for grilled meats. The spicy and cheesy flavor enhances your meal. The spice level depends on how many jalapeños you use. One jalapeño adds mild heat. Two jalapeños bring more spice. Adjust according to your taste. Absolutely! You can prepare the batter a day in advance. Store it in the fridge until you're ready to bake. This helps the flavors meld nicely. You learned how to make delicious Jalapeño Cheddar Cornbread Muffins. We covered ingredients, from fresh to dried jalapeños and types of cheese. You discovered step-by-step instructions to bake these muffins with perfect texture. Tips and tricks helped enhance the flavor. Various serving options were provided, along with storage tips for leftovers. Now, you can enjoy these tasty muffins anytime. Happy baking!

Jalapeño Cheddar Cornbread Muffins Flavorful Delight

- 1 cup spinach leaves, packed - 1 ripe banana - 1/2 cup pineapple chunks (fresh or frozen) - 1/2 cup coconut water - 1/2 ripe avocado - 1 tablespoon chia seeds - Juice of 1 lime - 1/2 inch piece of fresh ginger, peeled and grated - Ice cubes (optional) What are the health benefits of spinach? Spinach is a powerhouse of nutrients. It has vitamins A, C, and K. These vitamins help keep your skin and bones strong. Spinach also offers iron, which supports energy levels. It is low in calories but high in fiber. This makes it great for digestion. What is the nutritional profile of avocado? Avocado is rich in healthy fats. These fats help your heart stay healthy. It also has vitamins E and C. These vitamins support skin health and boost your immune system. Plus, avocados provide potassium, which helps balance blood pressure. What are the benefits of chia seeds and coconut water? Chia seeds are tiny but mighty. They are packed with fiber, protein, and omega-3 fatty acids. These nutrients help keep you full and support brain health. Coconut water is hydrating and full of electrolytes. It helps replenish fluids, especially after a workout. Together, they make this smoothie a nutrition superstar. Start by washing the spinach. Rinse it under cool water and shake off any excess. This step makes sure your smoothie stays clean and fresh. Next, grab your fruits. Peel the banana and chop it into smaller pieces. For the pineapple, if you're using fresh, cut it into chunks. If you're using frozen, just measure out half a cup. Lastly, peel and grate the ginger. This adds a nice kick to your smoothie. Now, let's blend! First, add the packed spinach leaves and coconut water to your blender. Blend on high until the mixture is smooth. This step helps the spinach break down. Once smooth, it's time to add the rest of the ingredients. Toss in the banana, pineapple chunks, avocado, lime juice, chia seeds, and grated ginger. Blend until everything is creamy and well mixed. If you want a colder, thicker smoothie, add some ice cubes and blend again. After blending, taste your smoothie. If you want it sweeter, add more banana or pineapple. Blend again briefly to mix. Pour the smoothie into glasses. For a fun touch, sprinkle some extra chia seeds on top. Enjoy your tasty, nutrient-packed tropical green smoothie! - Choosing ripe fruits for sweetness: Ripe fruits bring out the best flavor. Use a banana that has brown spots for natural sweetness. Pineapple should have a sweet smell at the base. - Using fresh versus frozen ingredients: Fresh fruits give a bright taste. Frozen fruits can create a cooler texture. Both options work well, so choose based on what you have. - Suggested add-ins like protein powder or sweeteners: You can add protein powder to make this smoothie a meal. Honey or agave syrup can sweeten it up if needed. - Tips for balancing flavors with citrus: Lime juice brightens the smoothie. It helps balance the sweetness of the banana and pineapple. Add more lime for extra zing! - Best types of blenders for smoothies: A high-speed blender works best for a smooth blend. Brands like Vitamix or NutriBullet are great choices. - Cleaning tips for easy maintenance: Clean your blender right after use. Fill it with warm water and a drop of soap. Blend it for a quick clean-up! {{image_2}} You can switch fruits in your Tropical Green Smoothie. Try mango or papaya for a sweet twist. They add a rich flavor and creamy texture. If you want a slight tang, use ripe kiwi. Feel free to mix fruits based on what you have. You can also use different leafy greens. Kale works great, adding more nutrients. Its strong taste blends well with sweet fruits. To keep it dairy-free, use nut milk like almond or coconut. These milks add creaminess without dairy. You can also add vegan yogurt for extra protein. If you need more protein, consider hemp seeds or pea protein. Both mix well and keep the smoothie smooth. You can turn your smoothie into a bowl. Just use less liquid when blending. This makes it thicker. Pour it into a bowl and add fun toppings. Try fresh fruit slices, nuts, or seeds. Granola adds crunch, while coconut flakes add sweetness. This makes your smoothie bowl not just tasty but also pretty! To keep your Tropical Green Smoothie fresh, store it in the fridge. Use a mason jar or an airtight container. This way, it stays cold and tasty for up to 24 hours. If you see separation, just shake it up before drinking. You can freeze your smoothie for later. Pour it into ice cube trays or small containers. This makes it easy to grab a portion when you need it. To thaw, just leave it in the fridge overnight. If you're in a hurry, place it in a bowl of warm water for a quick thaw. Yes, you can use frozen fruits in this smoothie. Frozen fruits can save time and add a nice chill. They also keep longer than fresh ones. Just make sure they are unsweetened. This keeps your smoothie healthy. If you use frozen pineapple, it may make your smoothie creamier. Be sure to blend well for a smooth texture. To make this smoothie thicker, you can try a few options. First, add more banana or avocado. Both fruits add creaminess. You can also use less coconut water. Another option is to add ice cubes. Blend the ice until smooth for a cold, thick drink. Lastly, chia seeds help thicken the smoothie as they soak up liquid. Yes, this smoothie works well for meal prep. You can make it ahead and store it in the fridge for up to 24 hours. Use mason jars for easy storage. Just remember to shake or stir it before drinking. You can also freeze portions in ice cube trays. When you're ready, blend the cubes for a quick, refreshing drink. This blog post showed you how to make a healthy smoothie using fresh ingredients. You learned about the benefits of spinach, avocado, chia seeds, and coconut water. We walked through each step, from prepping to blending, and shared tips for the best results. Variations let you customize your drink. Storing it properly ensures you can enjoy it later. With this knowledge, you are ready to create your own tasty smoothies. Choose your fruits, blend, and enjoy a burst of health and flavor!

Tropical Green Smoothie Nutrient-Packed Refreshment

- 1 lb sirloin steak, cut into bite-sized pieces - 4 tablespoons unsalted butter - 4 cloves garlic, minced - 1 teaspoon fresh rosemary, chopped - 1 teaspoon fresh thyme, chopped The main ingredients for garlic butter steak bites are simple yet flavorful. I love using sirloin steak for its tenderness and rich taste. Cut the steak into small pieces for quick cooking. Unsalted butter gives the dish a rich base, while fresh garlic adds a strong, aromatic touch. The herbs, rosemary and thyme, bring a fresh, earthy flavor. - Salt and pepper to taste - 1 tablespoon olive oil - Fresh parsley, chopped (for garnish) Seasoning your steak bites with salt and pepper is key. This enhances the natural flavor of the meat. I like to add olive oil to the pan for a nice sear. Finally, fresh parsley on top adds a pop of color and freshness. It makes the dish look appealing and adds a hint of flavor. Together, these ingredients create a dish that is not only delicious but also easy to make. You can enjoy garlic butter steak bites as a main dish or a tasty appetizer. Seasoning the steak Start by cutting your sirloin steak into bite-sized pieces. Sprinkle salt and pepper all over the steak. Make sure every piece gets enough seasoning. This step is key for flavor. Letting the steak rest Now, let the seasoned steak sit at room temperature for about 15 minutes. This helps the steak cook evenly. Don't skip this step; it makes a big difference. Heating the skillet Grab a large skillet and put it on the stove. Heat olive oil over medium-high heat. You want the oil hot enough for searing. Searing the steak bites Add the steak bites in one layer. If your skillet is small, do this in batches. Sear them for 2-3 minutes on each side. Look for a nice brown color. Cook them to your liking, then take them out and set aside. Making the garlic butter sauce In the same skillet, lower the heat to medium. Add unsalted butter and let it melt. Toss in minced garlic, chopped rosemary, and thyme. Stir for 1-2 minutes. Keep stirring until the garlic smells great and turns lightly golden. Be careful not to burn it! Tossing steak in garlic butter Put the cooked steak bites back into the skillet. Toss them in the garlic butter until they are well coated. Cook for one more minute to warm them up. Garnishing before serving Finally, take the skillet off the heat. Sprinkle freshly chopped parsley on top. This adds color and flavor. Your garlic butter steak bites are ready to enjoy! For garlic butter steak bites, I recommend using sirloin steak. This cut is tender and flavorful. Look for steak with bright red color and some marbling. Marbling means small white flecks of fat in the meat, which adds flavor. When selecting steak, ask your butcher for help if needed. They can guide you to the best cuts. To get your steak just right, use a meat thermometer. Aim for 130°F for medium-rare and 140°F for medium. If you like it well done, go for 160°F. Start with high heat for searing. This gives a nice brown crust. Then lower the heat to cook it evenly. This way, your steak stays juicy and tasty. You can add extra flavor with spices. Try a pinch of smoked paprika or chili flakes for a kick. Fresh herbs like oregano or basil work well too. For serving, consider sides like mashed potatoes or grilled veggies. They pair nicely with the rich garlic butter flavor. Enjoy experimenting with flavors! {{image_2}} You can cook garlic butter steak bites in different ways. Each method gives a unique taste and texture. 1. Grilling vs. Skillet Cooking Grilling adds a smoky flavor. It gives a nice char on the outside. If you prefer a juicy, tender bite, use a skillet. The skillet lets you control the heat. You can cook them evenly. Both methods work well. Choose the one you like best. 2. Oven-Baked Garlic Butter Steak Bites You can also bake these steak bites. Preheat your oven to 400°F. Toss the steak with olive oil, salt, and pepper. Spread them on a baking sheet. Bake for about 10-15 minutes. In the last few minutes, add the garlic butter mixture. This method is easy and keeps the steak moist. Your garlic butter steak bites can have different flavors. It’s fun to experiment with spices and herbs. 1. Spicy Garlic Butter Steaks If you like heat, add some crushed red pepper flakes. Mix them into the garlic butter. This adds a nice kick to each bite. You can also use hot sauce for extra heat. 2. Adding Citrus Flavors A splash of lemon juice brightens the dish. You can mix it into the garlic butter. The fresh taste cuts through the richness. Lime juice works well too. Try both and see what you like! You can modify this recipe for different diets. 1. Gluten-Free Options This recipe is naturally gluten-free. Just be sure to check any sauces or extras you add. Some may contain gluten. 2. Low-Carb Alternatives If you’re on a low-carb diet, you’re in luck! This dish is already low in carbs. Serve it with a side of veggies instead of bread or rice. Zucchini noodles or steamed broccoli pair nicely. Enjoy your meal without guilt! To keep your garlic butter steak bites fresh, store them in an airtight container. This helps avoid moisture and keeps the meat tasty. Place the container in the fridge. You can keep them for 3 to 4 days. If you want to store them longer, consider freezing them. They can last up to 3 months in the freezer. Just remember to label your container with the date. When you reheat steak bites, you want to keep them juicy and flavorful. The best method is to use a skillet. Heat a bit of olive oil over medium heat. Add the steak bites and stir for a few minutes until they warm up. You can also use a microwave, but it may dry them out. If you use this method, cover the dish with a damp paper towel. This traps steam and helps keep the steak moist. For safety, make sure the steak reaches an internal temperature of 165°F before eating. This ensures it’s safe and ready to enjoy. To make garlic butter, you need only a few things. Start with unsalted butter and fresh garlic. Here’s how: - 4 tablespoons unsalted butter - 4 cloves garlic, minced - 1 teaspoon fresh rosemary, chopped - 1 teaspoon fresh thyme, chopped 1. In a skillet, melt the butter over medium heat. 2. Add the minced garlic, rosemary, and thyme. 3. Stir for 1-2 minutes until the garlic smells good and gets a light color. This garlic butter adds great flavor to your steak bites. You can use it on other dishes too! Yes, you can use various cuts for steak bites. While I love sirloin, other cuts work well too. Here are some good options: - Ribeye: This cut is juicy with great flavor. - Filet mignon: It’s tender and perfect for special meals. - Flank steak: This cut is lean and tasty when sliced thin. Make sure to cut the steak into bite-sized pieces. Adjust cooking time based on the cut you pick! A few sides go well with garlic butter steak bites. Here are my favorites: - Roasted vegetables: They add color and flavor. - Mashed potatoes: Creamy potatoes are a comforting choice. - Salad: A fresh salad balances the richness of the steak. Feel free to mix and match! These sides will enhance your meal and make it even better. In this article, I shared how to make delicious garlic butter steak bites. We covered key ingredients like sirloin steak, fresh garlic, and herbs. I outlined steps from preparation to cooking and garnishing. I also offered tips for selecting steak and enhancing flavors. These bites are easy to customize, whether you grill or bake. You can adjust to fit your diet too. Enjoy these steak bites with your favorite sides. Happy cooking!

Garlic Butter Steak Bites Tasty and Easy Recipe

PREV 1 … 37 38 39 … 57 NEXT
meal twig

explore

DessertsDinnerAppetizersDrinks

Our Policies

  • Cookie Policy
  • Copyright Policy
  • Disclaimer
  • GDPR Policy
  • Terms Of Use
Back to Top
  • About
  • Contact Us
  • Privacy Policy
© 2025 meal twig