FREE DINNER EBOOK! Get your copy!
  • Cookie Policy
  • GDPR Policy
  • Disclaimer
  • Terms Of Use
  • Visit my other site: Fun Cookie Recipes
meal twig
  • Home
  • Dinner
  • Desserts
  • Drinks
  • Appetizers
  • Contact
  • About
  • Privacy Policy
  • Home
  • Dinner
  • Desserts
  • Drinks
  • Appetizers
  • Contact
  • About
  • Privacy Policy
  • Cookie Policy
  • GDPR Policy
  • Disclaimer
  • Terms Of Use
Visit my other site: Fun Cookie Recipes

HOME / CATEGORIES /

Latest

- 2 medium zucchinis - 1 cup breadcrumbs (panko or regular) - ½ cup grated Parmesan cheese - 1 teaspoon garlic powder - ½ teaspoon onion powder - ½ teaspoon dried oregano - ½ teaspoon salt - ¼ teaspoon black pepper - 2 large eggs - Olive oil spray The first step to making these Air Fryer Zucchini Parmesan Chips is gathering your ingredients. You'll need two medium zucchinis. Choose firm zucchinis for the best crunch. Next, grab one cup of breadcrumbs. You can use panko for extra crunch or regular breadcrumbs if that’s what you have. You'll also need half a cup of grated Parmesan cheese. This cheese adds a rich flavor that pairs well with the zucchini. For spices, you will need one teaspoon of garlic powder, half a teaspoon of onion powder, half a teaspoon of dried oregano, half a teaspoon of salt, and a quarter teaspoon of black pepper. These spices give the chips a savory kick. To bind everything together, you will need two large eggs, beaten well. Lastly, have some olive oil spray on hand. This spray will help your chips become golden and crispy without adding too much fat. With these ingredients ready, you are set to make a tasty snack that everyone will love! First, set your air fryer to 400°F (200°C). Preheat it for about 5 minutes. This step helps the chips cook evenly and become crispy. In a shallow bowl, mix the following ingredients: - 1 cup breadcrumbs (panko or regular) - ½ cup grated Parmesan cheese - 1 teaspoon garlic powder - ½ teaspoon onion powder - ½ teaspoon dried oregano - ½ teaspoon salt - ¼ teaspoon black pepper Stir them together until well combined. This mixture will give your chips a tasty crust. Take two medium zucchinis and slice them thinly. In another bowl, beat 2 large eggs. Dip each zucchini slice into the egg, letting the extra drip off. Next, coat it in the breadcrumb mixture. Press gently so the crumbs stick well. Place the coated zucchini chips in a single layer in the air fryer basket. Don't let them overlap; this ensures they cook well. You may need to work in batches. Lightly spray the tops with olive oil. Cook for 10-12 minutes. Flip them halfway through. They should turn golden brown and crispy. Once cooked, transfer the zucchini chips to a wire rack. This helps keep them crispy. Serve them right away with marinara sauce or your favorite dip. Enjoy your crunchy delight! To get your zucchini chips super crispy, cut them thin. Aim for about 1/4 inch thick. Thinner slices crisp better. Use panko breadcrumbs for extra crunch, too! They have a light texture that works great in the air fryer. Don't overcrowd the basket. Leave space between the chips. This allows hot air to flow well, creating a perfect crunch. Soggy chips can be a bummer. To stop this, make sure to pat your zucchini slices dry before coating them. Use a clean kitchen towel or paper towel. The less moisture, the crisper the chips! Also, spray just enough olive oil on top of the chips before cooking. This will help them crisp without getting greasy. Always be careful when using your air fryer. First, ensure it is on a stable surface. Use oven mitts when handling hot parts, as they can get hot. Never touch the basket directly after cooking. Always unplug the fryer when not in use. Lastly, keep it clean. A clean air fryer works better and lasts longer. {{image_2}} You can easily switch up the flavor by adding different cheeses. Mozzarella gives a nice stretch and mild taste. Cheddar adds a sharp kick. You can mix these cheeses with Parmesan for a tasty blend. Just remember, the more cheese, the richer the flavor. Experiment to find your favorite combination. If you love heat, try making spicy zucchini chips. Add cayenne pepper or red pepper flakes to the breadcrumb mix. Start with a small amount and taste as you go. This will give the chips a nice kick! You can also dip them in a spicy sauce for extra heat. This variation is perfect for those who enjoy bold flavors. For a fun twist, explore different breading options. You can use crushed cornflakes for an extra crunch. Almond flour offers a low-carb choice that’s gluten-free. If you want a nutty flavor, try ground pistachios or walnuts. Each option brings a unique taste and texture to your chips. Don't hesitate to mix and match to find your perfect bite! To keep your leftover zucchini chips fresh, wait until they cool. Place them in an airtight container. You can store them at room temperature for up to two days. If you want them to last longer, refrigerate them. They will stay good for about a week in the fridge. Just remember, the longer they sit, the less crispy they become. When you’re ready to enjoy your leftover chips, you can reheat them in the air fryer. Preheat the air fryer to 350°F (175°C). Place the chips in the basket in a single layer. Heat them for about 3-5 minutes. This will help restore their crunchiness. You can also use a toaster oven if you don’t have an air fryer. If you want to save your zucchini chips for later, freezing is a great option. Start by letting them cool completely. Place the chips on a baking sheet in a single layer. Freeze them for about an hour. Then, transfer the frozen chips to a freezer bag. Remove as much air as possible before sealing. They can stay in the freezer for up to three months. When you're ready to eat them, you can cook them straight from the freezer. Just add a few extra minutes to the cooking time. You can use your oven to make zucchini chips. Preheat the oven to 225°F (110°C). Slice the zucchini thinly, then coat them in the egg and breadcrumb mix as in the air fryer method. Place them on a baking sheet lined with parchment paper. Bake for about 1 hour, flipping halfway through. Keep an eye on them so they don’t burn. Using frozen zucchini is not ideal for this recipe. Frozen zucchini contains more water, making it hard to get crispy chips. If you only have frozen zucchini, thaw it and drain excess water. Then, follow the same steps to coat and cook. Zucchini Parmesan chips taste great with various dipping sauces. Here are some options to try: - Marinara sauce - Ranch dressing - Garlic aioli - Spicy sriracha mayo These sauces add flavor and fun to your snacking experience. Leftover zucchini chips can last up to 3 days if stored properly. Keep them in an airtight container at room temperature. They may lose some crunch, but can still be tasty. If you want to enjoy them crispy again, reheat in the air fryer for a few minutes. Yes, you can make a vegan version of zucchini chips. Replace eggs with a mixture of ground flaxseed and water. For every egg, mix 1 tablespoon of flaxseed with 2.5 tablespoons of water. Let it sit for a few minutes until it thickens. Use this mixture to coat your zucchini slices, and follow the rest of the recipe as usual. This blog post covered how to make tasty zucchini chips. We talked about the right ingredients and step-by-step instructions to get crispiness. Tips help you avoid soggy chips and ensure safety. Variations let you get creative with flavors, and storage info keeps your snacks fresh. Enjoy this healthy treat and make it your own! You’ll love sharing these chips with friends and family.

Air Fryer Zucchini Parmesan Chips Crunchy Delight

- 2 cups all-purpose flour - 1 ½ cups granulated sugar - ¾ cup unsweetened cocoa powder - 1 teaspoon baking soda - ½ teaspoon salt - 1 cup buttermilk, room temperature - ½ cup vegetable oil - 2 large eggs, room temperature - 2 teaspoons vanilla extract - 1 tablespoon black food coloring - 1 cup boiling water You can swap some ingredients if needed. For a dairy-free version, use almond milk instead of buttermilk. Add a tablespoon of vinegar to the almond milk to mimic buttermilk. For eggs, use flax eggs. Mix 1 tablespoon of ground flaxseed with 2.5 tablespoons of water. Let it sit for five minutes to thicken. You can also use a gluten-free flour blend instead of all-purpose flour. This keeps the cake just as tasty! To make this cake, gather these tools: - Two 9-inch round cake pans - Mixing bowls (one large and one medium) - Whisk or electric mixer - Measuring cups and spoons - Rubber spatula - Cooling rack - Parchment paper (optional, for easy cake removal) With these ingredients and tools, you're set to make a spooky and delicious Halloween Black Velvet Cake! {{ingredient_image_1}} Gather all your ingredients first. This makes it easy to mix. In a large bowl, combine: - 2 cups all-purpose flour - 1 ½ cups granulated sugar - ¾ cup unsweetened cocoa powder - 1 teaspoon baking soda - ½ teaspoon salt Whisk the dry ingredients well. In another bowl, mix: - 1 cup buttermilk, room temperature - ½ cup vegetable oil - 2 large eggs, room temperature - 2 teaspoons vanilla extract - 1 tablespoon black food coloring Whisk until smooth. Pour the wet mix into the dry mix. Stir until just combined. Then, add 1 cup boiling water. The batter will be thin, but that's okay. Next, preheat your oven to 350°F (175°C). Prepare two 9-inch round cake pans by greasing and flouring them. Pour the cake batter evenly into the pans. Bake for 30-35 minutes. To check if it's done, insert a toothpick in the center. If it comes out clean, the cakes are ready. Once baked, let the cakes cool in the pans for 10 minutes. Carefully remove them from the pans and place them on a wire rack. Let them cool completely. This step is key, as frosting on warm cakes can melt. Once cool, you're ready to frost and decorate your Halloween Black Velvet Cake! To get a soft and moist cake, use room temperature ingredients. This helps them mix better. The buttermilk adds moisture and a nice tang. When you add boiling water, it helps the cocoa bloom. This makes the cake rich in flavor. Don't overmix the batter. Mix just until combined to keep the cake light. For a fun look, use cream cheese frosting. You can mix in some black food coloring for a spooky vibe. Use black and orange sprinkles to give it a festive touch. Adding small toy spiders or ghosts on top adds to the fun. Place the cake on a dark plate to enhance the Halloween theme. Spread the frosting evenly on the cake layers. Use a spatula to get smooth edges. If you want a textured look, use the back of a spoon or a fork. You can pipe the frosting for a more fancy design. Practice makes perfect! Enjoy the process and let your creativity shine. Pro Tips Use Room Temperature Ingredients: Let your buttermilk, eggs, and other refrigerated items come to room temperature before mixing. This helps create a smoother batter and ensures even baking. Don’t Overmix the Batter: Mix the wet and dry ingredients until just combined. Overmixing can lead to a dense cake rather than a light and fluffy texture. Check for Doneness: Start checking your cakes a few minutes before the suggested baking time. Insert a toothpick in the center; if it comes out clean or with a few moist crumbs, the cakes are done. Chill Your Frosting: If using cream cheese frosting, chill it for about 30 minutes before frosting the cake. This makes it easier to spread and helps it hold its shape better. {{image_2}} You can spice up your Halloween Black Velvet Cake with fun flavors. Try adding a teaspoon of cinnamon for warmth. You can also add a pinch of nutmeg for a cozy flavor. If you love citrus, mix in some orange zest. This gives a nice contrast to the rich chocolate taste. Each of these flavors adds a unique twist to the cake. Feel free to experiment with your favorite spices! While cream cheese frosting is classic, consider other options too. A dark chocolate ganache pairs well with the cake's richness. You can make it by melting chocolate with cream. For a lighter touch, use whipped cream frosting. It adds a nice, airy bite. You can also try a simple vanilla buttercream for a sweet contrast. Mix in some black cocoa powder for a darker color. Don't forget to add sprinkles or spooky decorations on top! Want to serve cake in a fun way? Try making mini Halloween Black Velvet Cakes! Use a muffin tin or small cake pans. Pour the batter into each cup, filling them halfway. Bake as usual, checking for doneness. These mini cakes are cute and easy to serve. You can frost them individually. This makes them perfect for parties or gatherings. Everyone will love these personal-sized treats! To keep your Halloween Black Velvet Cake fresh, store it at room temperature. Place the cake in an airtight container or wrap it tightly with plastic wrap. This helps prevent it from drying out. If you use cream cheese frosting, keep it in the fridge. Just let it sit out for a bit before serving. You can freeze this cake for later use. First, let the cake cool completely. Wrap each layer in plastic wrap tightly. Then, place the wrapped layers in a freezer bag. Label the bag with the date. You can freeze it for up to three months. When you're ready, thaw the cake in the fridge overnight. When stored properly, the cake stays fresh for about 3-5 days at room temperature. If kept in the fridge, it can last up to a week. If you freeze it, remember to use it within three months for the best flavor. Enjoy your spooky treat! Yes, you can use regular food coloring. However, the cake may not look as spooky. A mix of blue and red can create a dark hue. But it won't give you that perfect black color. For the best results, I recommend sticking with black food coloring. It gives the cake its signature look and vibe. To make the cake more moist, add a little extra buttermilk. You can also try using cake flour instead of all-purpose flour. Another tip is to ensure you do not overmix the batter. Mixing just until combined keeps the cake light and fluffy. Adding a simple syrup after baking can also help with moisture. This cake pairs well with cream cheese frosting. The tanginess balances the sweetness. You can also top it with vanilla ice cream for a fun twist. Dark chocolate ganache is another great choice for a richer flavor. For drinks, a spiced cider or hot cocoa works well too. Yes, you can make this cake in advance. Bake the cake, then let it cool completely. Wrap it tightly in plastic wrap. Store it in the fridge for up to three days. You can also freeze the cakes for up to a month. Just thaw them in the fridge before frosting. Definitely! You can use a gluten-free flour blend. Just make sure it is a 1:1 blend for best results. You might need to add a bit of xanthan gum for better texture. Always check the labels of your ingredients to ensure they are gluten-free. This blog post covered everything you need to create a spooky black velvet cake. You learned about key ingredients and useful substitutions. I shared step-by-step instructions for baking and cooling. We explored tips for perfecting texture and adding festive décor. You also discovered flavor variations and storage tips to keep your cake fresh. Remember, baking should be fun! Experiment and make this cake your own. Enjoy every bite!

Halloween Black Velvet Cake Spooktacular Recipe

To make this tasty Pumpkin Cream Cheese Swirl Bread, gather these ingredients: - 1 ½ cups all-purpose flour - 1 tsp baking soda - ½ tsp baking powder - ½ tsp salt - 1 tsp ground cinnamon - ½ tsp ground nutmeg - ¼ tsp ground ginger - ½ cup granulated sugar - ½ cup packed brown sugar - ½ cup vegetable oil - 2 large eggs - 1 cup canned pumpkin puree - 1 tsp vanilla extract - 8 oz cream cheese, softened - ¼ cup powdered sugar - 1 tsp vanilla extract (for cream cheese mixture) - ½ cup chopped pecans or walnuts (optional) You can change some ingredients to fit your needs: - Use whole wheat flour for a healthier choice. - Swap vegetable oil for melted coconut oil. - Replace granulated sugar with coconut sugar for a lower glycemic index. - For a dairy-free option, try vegan cream cheese. - If you don't like nuts, leave them out or use chocolate chips instead. Always pick fresh, high-quality ingredients for the best flavor: - Use pure pumpkin puree, not pumpkin pie filling. - Check the dates on spices; fresh spices give better taste. - Choose organic eggs for richer flavor and better texture. - When buying cream cheese, look for brands with minimal additives. - Fresh nuts should smell nutty and not stale; choose wisely! 1. Start by preheating your oven to 350°F (175°C). Grease a 9x5 inch loaf pan. This step helps your bread come out easily. 2. In a medium bowl, whisk together: - 1 ½ cups all-purpose flour - 1 tsp baking soda - ½ tsp baking powder - ½ tsp salt - 1 tsp ground cinnamon - ½ tsp ground nutmeg - ¼ tsp ground ginger Set this bowl aside. 3. In a large bowl, mix: - ½ cup granulated sugar - ½ cup packed brown sugar - ½ cup vegetable oil Stir these together well. 4. Add to the large bowl: - 2 large eggs - 1 cup canned pumpkin puree - 1 tsp vanilla extract Mix until everything is smooth. 5. Slowly add the dry mix to the wet one. Stir gently. Do not overmix, or your bread may be tough. 6. In another bowl, beat together: - 8 oz cream cheese, softened - ¼ cup powdered sugar - 1 tsp vanilla extract Keep mixing until it is creamy and smooth. 7. Pour half of the pumpkin batter into the loaf pan. 8. Dollop half of the cream cheese mix on top. 9. Use a knife to swirl the two together gently. This creates a nice marbled look. 10. Add the rest of the pumpkin batter on top. 11. Spoon the remaining cream cheese mixture on top. Swirl gently again. 12. If you want, sprinkle with: - ½ cup chopped pecans or walnuts This adds crunch and flavor. To get that perfect swirl, use a knife. Dip it into the batter and cream cheese mix. Move it gently back and forth. Avoid stirring too much. You want to see both the pumpkin and cream cheese. This way, each slice will have a beautiful pattern. The swirls should look like waves, not just mixed. This adds both beauty and flavor to your bread. Enjoy your baking journey! To make your pumpkin cream cheese swirl bread moist, use fresh ingredients. Make sure your canned pumpkin is not expired. It should be smooth and thick. When mixing, avoid overmixing. This helps keep the air in the batter. The air gives your bread a light texture. Adding oil also helps keep it moist. You can use vegetable oil or melted coconut oil. One common mistake is not measuring ingredients correctly. Use measuring cups and spoons for accuracy. Another mistake is skipping the cream cheese mixture. This gives your bread a rich flavor. Also, remember to swirl gently. If you mix too hard, the layers will blend too much. Lastly, always check your oven temperature. An oven that is too hot can burn the bread. Serve your pumpkin cream cheese swirl bread warm. It tastes great with butter or cream cheese spread. You can also drizzle honey or maple syrup on top. For a festive touch, dust with powdered sugar. Pair it with a hot drink like coffee or tea for a cozy treat. This bread is great for breakfast or dessert! {{image_2}} You can mix up the flavors in your pumpkin cream cheese swirl bread. Try adding chocolate for a tasty twist. Just fold in half a cup of mini chocolate chips into the batter. You can also add more spices. A dash of allspice or cloves can give it a warm kick. If you like the taste of vanilla, add an extra splash to the cream cheese mix. This bread can be a fun way to explore different flavors! If you need gluten-free bread, swap the all-purpose flour for a gluten-free mix. Many brands work well in this recipe. For a vegan option, replace the eggs with flax eggs. To make a flax egg, mix 1 tablespoon of ground flaxseed with 2.5 tablespoons of water, and let it sit for a few minutes. You can also use a plant-based cream cheese. These simple swaps can help everyone enjoy this treat! Adding ingredients can make the bread even better. Chopped nuts like pecans or walnuts give a nice crunch. If you love chocolate, mix in some dark or white chocolate chips. You can also add dried fruit, like cranberries, for a sweet surprise. Just be sure to adjust the sugar if you add sweet items. These add-ins can make your bread unique and fun to share! To keep your pumpkin cream cheese swirl bread fresh, wrap it tightly in plastic wrap. This helps keep moisture in and prevents it from drying out. You can also use a resealable plastic bag. Store it at room temperature for up to three days. If you want to keep it longer, the fridge is a good option. Just remember to wrap it well. Freezing is a great way to save your bread for later. First, let the bread cool completely. Then, wrap it in plastic wrap, followed by aluminum foil. This double wrap helps prevent freezer burn. You can freeze it for up to three months. When you are ready to eat it, just thaw it in the fridge overnight. To reheat your pumpkin cream cheese swirl bread, slice it into pieces. Place the slices in a toaster or toaster oven for a few minutes. This will warm the bread and make it tasty again. If you prefer, you can also use a microwave. Heat the slices for about 15 to 20 seconds. Just be careful not to overheat it, or it may get tough. Enjoy your delicious bread warm! Yes, you can use fresh pumpkin. You need to cook and mash it first. Cut the pumpkin into small pieces. Boil or steam them until soft. Once cool, mash them well. Make sure it's smooth and not too watery. This gives your bread a fresh taste. Check the bread at about 55 minutes. Insert a toothpick in the center. If it comes out clean, the bread is ready. If it has batter on it, bake for a few more minutes. Keep an eye on it to avoid overbaking. If your bread is too dense, it may be from overmixing. Mix the wet and dry ingredients just until combined. Also, check your baking soda and baking powder. Make sure they are fresh. If they are old, they might not rise well. Adding a bit more liquid can also help. This blog shared key details for baking delicious bread. We covered ingredients, substitutions, and tips for quality. The step-by-step instructions guide you through preparation and baking. You learned tricks for moist bread and common mistakes to avoid. Variations let you explore new flavors and dietary needs. Finally, storage tips help you keep bread fresh. I hope you feel ready to bake your best bread yet. Enjoy your kitchen adventures!

Pumpkin Cream Cheese Swirl Bread Easy and Delicious

- 1 large pre-made flatbread or pizza dough - 2 medium yellow onions, thinly sliced - 1 tablespoon olive oil - 1 teaspoon balsamic vinegar - 1 teaspoon sugar - 1 cup grated Gruyere cheese - Salt and pepper - 1/2 cup fresh arugula (for topping) - 1 tablespoon fresh thyme leaves (optional) - Skillet - Baking sheet - Parchment paper - Knife and cutting board Using the right ingredients makes all the difference. For this flatbread, I love using yellow onions. Their sweetness shines when caramelized. The Gruyere cheese adds richness and a nutty flavor. I suggest using a pre-made flatbread for ease. It saves time and still tastes great. If you want to make it special, fresh arugula on top adds a peppery bite. You can also play with flavors. Add salt and pepper to taste for balance. Fresh thyme leaves are optional but add a lovely herbal note. Gather your tools before you start. A skillet is key for cooking the onions. A baking sheet lined with parchment paper makes clean-up easy. Have your knife and cutting board ready for slicing the onions. These simple yet flavorful ingredients help you create a delightful dish that everyone will enjoy! 1. Heat a skillet over medium heat. Add 1 tablespoon of olive oil. 2. Slice 2 medium yellow onions thinly. Add the onions to the hot oil. 3. Cook the onions for about 20 to 25 minutes. Stir them often until they turn soft and golden brown. 4. Add 1 teaspoon of balsamic vinegar, 1 teaspoon of sugar, salt, and pepper. Stir well and cook for another 5 minutes. 5. Remove the skillet from heat and set the onions aside. 1. Preheat your oven to 425°F (220°C). 2. Place your large flatbread or pizza dough on a baking sheet lined with parchment paper. 3. Spread the caramelized onions evenly over the flatbread. Use a spoon to ensure every bite gets some onion. 4. Grate 1 cup of Gruyere cheese and sprinkle it generously on top of the onions. 1. Bake the flatbread in the preheated oven for about 12 to 15 minutes. Watch for the cheese to bubble and the edges to turn golden brown. 2. Once done, remove it from the oven. Let it cool for a minute. 3. Top with fresh arugula and optional thyme leaves. 4. Slice the flatbread into squares and serve warm. - Ideal cooking temperature: Cook onions over medium heat. This helps them brown slowly. If the heat is too high, they might burn. - Stirring techniques for even cooking: Stir the onions every few minutes. This keeps them from sticking and helps them cook evenly. - Why choose Gruyere? Gruyere melts well and has a rich, nutty flavor. It adds depth to the flatbread. - Alternative cheese options for flavor variations: Try mozzarella for a milder taste or goat cheese for a tangy kick. - Pairing with salads or appetizers: Serve this flatbread with a fresh arugula salad. The peppery greens balance the sweetness of the onions. - Ideal wine pairings: A light white wine, like Sauvignon Blanc, complements the flavors nicely. {{image_2}} You can use many bases for your flatbread. Whole wheat flatbreads add more fiber. They have a nutty flavor. Gluten-free options are great for those who avoid gluten. You can find pre-made gluten-free flatbreads at many stores. If you want to make your own dough, try using almond flour or chickpea flour for a unique twist. To make this flatbread special, think about adding herbs. Fresh basil or rosemary can boost the taste. You might also want to add spices like smoked paprika for warmth. For extra toppings, consider sautéed mushrooms or sweet bell peppers. They will add more texture and flavor to your flatbread. If you follow a vegan diet, you can substitute cheese. Try using a plant-based cheese that melts well. Nutritional yeast is another option for a cheesy flavor. For the caramelization process, you can lower the sugar. Use maple syrup or honey to keep it sweet without too much sugar. This way, you can enjoy a delicious flatbread that fits your needs. To keep your flatbread fresh, store it in the refrigerator. Place it in an airtight container. You can also wrap it tightly in plastic wrap. This keeps moisture out and helps it last longer. If you want to save it for later, freezing is a great option. Wrap individual pieces in plastic wrap, then place them in a freezer bag. This method helps it stay fresh for up to three months. When you are ready to enjoy your flatbread again, use the oven for reheating. Preheat your oven to 350°F (175°C). Place the flatbread directly on the oven rack or on a baking sheet. This method keeps the crust crispy. Heat for about 10 minutes or until warm. If you prefer the microwave, use it, but be aware it may make the flatbread soft. To maintain crispiness, reheat for short intervals. Your caramelized onion and Gruyere flatbread will stay fresh in the fridge for about 3 to 4 days. Always check for signs of spoilage before eating. If you see any mold or if it smells sour, it’s time to toss it. Keeping it stored properly will help you enjoy it longer. Yes, you can use other cheeses. Here are some great options: - Fontina: It melts well and has a rich flavor. - Mozzarella: This cheese gives a lovely stretch and mild taste. - Goat cheese: This adds a tangy twist and creamy texture. - Feta: Crumbled feta can add a salty kick. Feel free to mix and match! Making flatbread is easy! Here’s a simple way: 1. Mix equal parts of flour and water. 2. Add a pinch of salt and knead the dough. 3. Roll it out into thin circles. 4. Cook on a hot skillet for 2-3 minutes on each side. That's it! You now have fresh flatbread. This flatbread pairs well with many sides. Here are some ideas: - A fresh green salad with a light vinaigrette. - Roasted vegetables for added flavor and color. - A bowl of tomato soup for a comforting meal. - A cheese platter with assorted cheeses and fruits. These sides enhance the flatbread's taste and make a nice meal. This blog post covered how to make delicious caramelized onion and Gruyere flatbread. I shared the key ingredients, tools, and step-by-step instructions. You learned tips for perfecting caramelization and different ways to customize your dish. Flatbread is versatile and fun to make. Enjoy trying various flavors and pairings. Your culinary skills will surely impress anyone who tries your tasty creation! Now, it's time to gather your ingredients and start cooking!

Caramelized Onion & Gruyere Flatbread Delight Recipe

To make these tasty tacos, you need: - 1 lb boneless, skinless chicken breasts - 1/4 cup fresh lime juice (about 2-3 limes) - 1/4 cup fresh cilantro, chopped (plus extra for garnish) - 2 tablespoons olive oil - 2 cloves garlic, minced - 1 teaspoon cumin - 1 teaspoon chili powder - 1/2 teaspoon smoked paprika - Salt and pepper to taste - 8 small corn tortillas - 1 cup shredded red cabbage - 1 avocado, sliced These ingredients come together to create a fresh and zesty flavor. Want to kick up the taste? Here are some optional items: - 1/2 cup crumbled queso fresco - Lime wedges for serving Adding queso fresco gives creaminess. Lime wedges add brightness when squeezed on top. Top your tacos for extra crunch and flavor. Consider these: - Additional chopped cilantro - Shredded lettuce - Sliced jalapeños for heat - Salsa or pico de gallo These toppings make your tacos even more delightful and colorful! Start by making a zesty marinade. In a bowl, mix 1/4 cup lime juice, 1/4 cup chopped cilantro, 2 tablespoons olive oil, and 2 cloves minced garlic. Add 1 teaspoon cumin, 1 teaspoon chili powder, and 1/2 teaspoon smoked paprika. Don’t forget salt and pepper to taste! Next, add 1 pound of boneless, skinless chicken breasts to the bowl. Make sure each piece gets covered in the marinade. Cover the bowl and put it in the fridge. Let it marinate for at least 30 minutes. For more flavor, try to marinate it for 1-2 hours. Time to cook the chicken! You can either grill it or use a skillet. First, preheat your grill or skillet over medium-high heat. Take the chicken out of the marinade. Let the excess marinade drip off. If grilling, place the chicken on the grill. Cook for about 6-7 minutes on each side. Use a meat thermometer to check for doneness; it should reach 165°F. If using a skillet, follow the same cooking time. After cooking, let the chicken rest for 5 minutes. This helps keep it juicy. Now it’s taco time! Slice the chicken into thin strips. While the chicken rests, warm up 8 small corn tortillas. You can do this on the grill or in a dry skillet. Heat them for about 1-2 minutes on each side until they are soft. To assemble, lay a few chicken slices on each tortilla. Top with shredded red cabbage and sliced avocado. If you like, sprinkle some crumbled queso fresco on top. Don’t forget to add extra cilantro for garnish! Serve your tacos with lime wedges on the side for a fresh squeeze. Enjoy this bright and flavorful meal! A great marinade makes all the difference. For Cilantro Lime Chicken Tacos, use fresh ingredients. Combine lime juice, chopped cilantro, olive oil, minced garlic, cumin, chili powder, smoked paprika, salt, and pepper in a bowl. Whisk until mixed well. This mix gives the chicken flavor and moisture. Marinade your chicken for at least 30 minutes. For the best taste, try 1-2 hours. The longer it sits, the more flavor it absorbs. To cook juicy chicken, preheat your grill or skillet. Aim for medium-high heat. When ready, remove the chicken from the marinade. Let excess liquid drip off. Cook the chicken for about 6-7 minutes per side. Use a meat thermometer to check the internal temperature. It should reach 165°F. Once cooked, let the chicken rest for 5 minutes. This step keeps it juicy. After resting, slice the chicken into thin strips for easy taco assembly. As you assemble your tacos, warm the corn tortillas. You can do this on the grill or in a dry skillet. Warm them for 1-2 minutes on each side. This makes them soft and easy to fold. Lay a few slices of chicken on each tortilla. Top with shredded red cabbage and sliced avocado. If you like, sprinkle crumbled queso fresco on top. Finally, add a few extra cilantro leaves for color and flavor. Serve with lime wedges on the side for a zesty kick. {{image_2}} You can switch out chicken for other meats or proteins. Try using shrimp or fish for a fresh twist. They work well with the cilantro and lime flavors. Ground turkey or beef also makes tasty tacos. Just adjust the cooking time for these options. Each protein adds its own unique taste and texture. For a vegetarian option, use black beans or lentils. They are protein-rich and filling. Season them with lime juice and spices for great flavor. If you prefer a vegan taco, use grilled portobello mushrooms. They have a meaty texture. Top with your favorite fresh veggies, like bell peppers or corn. If you want a low-carb option, use spinach or lettuce leaves. They work great as taco shells. Just fill them with the marinated chicken or your choice of filling. This keeps the meal light and fresh. You still get all the bright flavors without the tortillas. You can store leftover chicken in an airtight container. This keeps it fresh. Make sure it cools down first. It will last in the fridge for about 3 to 4 days. If you want to keep it longer, freeze it. Wrap it tightly in plastic wrap or foil. Frozen chicken stays good for up to 3 months. When you’re ready to eat, just thaw it in the fridge overnight. I recommend storing assembled tacos separately for the best taste. If you store them together, the tortillas get soggy. Place leftover filling in a container. Store any toppings like cabbage and avocado in separate bags. You can keep these in the fridge for 1 to 2 days. When you’re ready to eat, just reassemble your tacos. To reheat chicken, use the oven or a skillet. Preheat the oven to 350°F. Place the chicken on a baking sheet. Heat for about 10-15 minutes. In a skillet, warm the chicken over medium heat for about 5 minutes. For tortillas, warm them in a dry skillet for 1-2 minutes on each side. This keeps them soft and tasty. Enjoy your tacos just like they were fresh! You can marinate the chicken for at least 30 minutes. For the best taste, aim for 1 to 2 hours. This time allows the flavors to soak in deeply. If you marinate overnight, the chicken will be extra flavorful. Just be careful not to go over 24 hours. The acid in lime juice can make the chicken mushy. Yes, you can prepare different parts ahead of time. You can marinate the chicken early in the day and cook it later. The chicken stays tasty and juicy. You can also warm the tortillas in advance. Just store them in a clean towel to keep them warm. However, I suggest assembling tacos just before you eat. This keeps the tortillas fresh and crispy. These tacos pair well with several sides. Here are some tasty options: - Mexican rice - Black beans - Corn salad - Grilled vegetables - Fresh guacamole Each side adds a fun flavor to your meal and makes it even more satisfying. Enjoy mixing and matching! Cilantro lime chicken tacos are fun and easy to make. We covered key ingredients, from marinades to toppings. I shared tips to ensure juicy chicken and tasty tacos. You learned about variations like vegetarian options and how to store leftovers. In closing, these tacos can fit any meal. Experiment with flavors and enjoy the process. You can create a dish that delights everyone. Try these recipes today and make them your own!

Cilantro Lime Chicken Tacos Fresh Flavorful Delight

When you make Chocolate Chip Banana Oat Cookies, you need simple and good ingredients. Here’s what you will use: - 2 ripe bananas, mashed - 1 cup rolled oats - 1/2 cup almond flour - 1/2 teaspoon baking soda - 1/4 teaspoon salt - 1/4 cup honey or maple syrup - 1/2 teaspoon vanilla extract - 1/3 cup dark chocolate chips - Optional: 1/4 cup chopped walnuts or pecans These ingredients come together to create a tasty cookie. Each item plays a special role. The ripe bananas add sweetness and moisture. Rolled oats give great texture. Almond flour keeps the cookies soft. Baking soda helps them rise, while salt boosts flavor. Honey or maple syrup acts as a natural sweetener. Vanilla extract adds warmth. Dark chocolate chips give a rich taste. If you like, walnuts or pecans add a nice crunch. Prep Time: 10 minutes Total Time: 25 minutes Servings: 12 cookies This recipe is easy and quick. You can enjoy these cookies fresh from the oven in just 25 minutes! First, set your oven to 350°F (175°C). This temperature helps the cookies bake evenly. While the oven heats, grab a baking sheet and line it with parchment paper. This step keeps the cookies from sticking and makes clean-up easy. Next, take your ripe bananas and mash them in a large bowl. You want them smooth but not too runny. Then, mix in the rolled oats, almond flour, baking soda, and salt. Stir until the dry ingredients blend well with the bananas. Now, pour in your honey or maple syrup and add the vanilla extract. Mix everything until you have a smooth dough. Finally, gently fold in the dark chocolate chips. If you like nuts, add the walnuts or pecans now. To shape the cookies, use a tablespoon or cookie scoop. Drop spoonfuls of dough onto the lined baking sheet. Make sure to leave space between each cookie. This space helps them bake evenly. Next, flatten each cookie a bit with the back of your spoon. Bake the cookies in the oven for 12 to 15 minutes. Look for golden brown edges as a sign they are done. After baking, let them cool on the sheet for 5 minutes before moving them to a wire rack. For the best cookies, your dough must have the right consistency. Start with ripe bananas. They should be soft and easy to mash. If your bananas are firm, your cookies may turn out dry. Mix the dry ingredients well before adding wet ones. This helps blend flavors evenly. Measuring your ingredients is key. Use a kitchen scale for accuracy. If you don’t have one, use measuring cups. Make sure to scoop your flour lightly. Don’t pack it down. For honey or syrup, a liquid measuring cup works best. Arrange your cookies neatly on a decorative plate. A simple white plate makes the colors pop. You can sprinkle extra chocolate chips on top for a lovely touch. A few whole nuts can also add charm. This small step can impress your guests. Consider serving cookies warm. This makes them taste even better. You can also add a scoop of ice cream next to the cookies. It makes a fun dessert! To keep your cookies fresh, store them in an airtight container. They can last up to a week. If you want to keep them longer, consider freezing them. Place cookies in a single layer in a freezer bag. This keeps them from sticking together. When reheating, use the microwave. Just 10 to 15 seconds will bring back warmth. For a crispy edge, pop them in the oven for a few minutes at 350°F. Enjoy your delicious cookies anytime! {{image_2}} You can change the flavors in these cookies easily. Adding spices like cinnamon or nutmeg makes them warm and cozy. Just a pinch can bring a new twist to the taste. You can also switch the chocolate. Try milk chocolate or even white chocolate for a sweeter treat. Each type of chocolate adds its own charm. If you need a gluten-free option, use oat flour instead of almond flour. It works just as well and keeps the cookie soft. For a vegan choice, swap honey with maple syrup. It adds sweetness without any animal products. These changes make the cookies good for different diets. You can add fun mix-ins to change the texture and flavor. Dried fruits like cranberries or apricots add chewiness. Chia seeds can also boost nutrition and add crunch. If you like nuts, consider walnuts or pecans. They add a nice crunch and nutty flavor. Each mix-in gives a new taste and feel to the cookies. To make cookies chewy, use these tips: - Use brown sugar: Brown sugar holds more moisture than white sugar. - Don’t overbake: Remove them when the edges are golden but the center is soft. - Add extra oats: More oats can help create a chewy texture. - Chill the dough: This helps the cookies spread less while baking. These simple steps help your Chocolate Chip Banana Oat Cookies stay soft and chewy. Yes, you can freeze these cookies. Here are some guidelines: - Cool completely: Let the cookies cool before freezing. - Use an airtight container: This will keep them fresh and prevent freezer burn. - Layer with parchment paper: If stacking, place parchment between layers to avoid sticking. - Thawing: Leave them at room temperature for a few hours before enjoying. Freezing preserves the taste and texture of your cookies for later treats. If you don’t like banana, try these alternatives: - Applesauce: It offers moisture and sweetness. Use the same amount as bananas. - Pumpkin puree: This adds flavor and keeps the cookies moist. - Yogurt: Use plain yogurt for a creamy texture. It might change the taste slightly. These substitutions keep your cookies tasty and enjoyable without bananas. If you love these cookies, try these great recipes: - Peanut Butter Oatmeal Cookies: A nutty twist with rich flavor. - Healthy Chocolate Chip Cookies: Lower in sugar but high in taste. - Pumpkin Oat Cookies: Perfect for fall with warm spices. To make these cookies, you will need: - Mixing bowl - Fork or potato masher - Measuring cups and spoons - Baking sheet - Parchment paper - Cookie scoop or tablespoon - Wire rack for cooling These cookies are not just tasty; they are also good for you. Here’s a quick look at the nutrition: - Calories: About 120 per cookie - Carbohydrates: 18g - Fiber: 2g - Protein: 2g - Healthy Fats: From almond flour and optional nuts These cookies pack a punch with fiber from oats and bananas. Enjoy the sweetness from honey or maple syrup, along with dark chocolate benefits! In this blog post, I shared a simple, tasty recipe for Chocolate Chip Banana Oat Cookies. You learned about the ingredients, step-by-step instructions, and tips for perfect cookies. We explored fun variations and how to store your cookies for freshness. Baking these cookies is easy and rewarding. You can modify the recipe to fit your tastes or dietary needs. Try making these delicious treats today, and enjoy the sweet rewards of your work!

Chocolate Chip Banana Oat Cookies Simple and Tasty

- 2 large sweet potatoes, peeled and diced - 1 can of black beans, drained and rinsed - 1 can of kidney beans, drained and rinsed - 1 can of diced tomatoes (14 oz) - 1 bell pepper (red or green), chopped - 1 medium onion, chopped - 3 cloves garlic, minced - 1 cup vegetable broth - 2 tablespoons chili powder - 1 tablespoon cumin - 1 teaspoon smoked paprika - Salt and pepper to taste - 2 tablespoons olive oil - Fresh cilantro, chopped (for garnish) - Avocado slices (for serving) I love how each ingredient in this vegan sweet potato chili brings a unique flavor. Sweet potatoes add a creamy texture and natural sweetness. The black and kidney beans offer protein and heartiness. Fresh vegetables like tomatoes, bell peppers, and onions make the dish vibrant and colorful. The spices are essential. Chili powder gives warmth, cumin adds depth, and smoked paprika brings a lovely smokiness. I always choose vegetable broth for a rich base without meat. Olive oil helps sauté the veggies, making them soft and tasty. Finally, you can top your chili with fresh cilantro and avocado. These add a burst of freshness. You can also adjust the amount of spice to your liking. I recommend tasting as you go. This way, you can make it just right for you! 1. Start by chopping your vegetables. Take the onion and bell pepper. Dice them into small pieces. This helps them cook evenly and blend well in the chili. 2. Next, heat olive oil in a large pot over medium heat. Add the chopped onion and bell pepper. Sauté for about five minutes. You want them to soften and become fragrant. 3. Now, it's time to add garlic and spices. Stir in the minced garlic, chili powder, cumin, and smoked paprika. Cook this mix for one to two minutes. The spices will release their flavors, making your kitchen smell amazing. 1. Add the diced sweet potatoes to the pot. Stir them in with the onion and spices. This ensures the sweet potatoes soak up all the great flavors. 2. Pour in the vegetable broth and the can of diced tomatoes (with juices). Add in the black beans and kidney beans too. Give everything a good stir. Make sure the sweet potatoes are underwater in the liquid. 3. Bring your chili to a boil. Then, reduce the heat to low. Cover the pot and let it simmer for about 30 to 35 minutes. Stir occasionally to stop it from sticking to the pot. You want the sweet potatoes to be soft and tender. 4. Once the sweet potatoes are cooked through, taste your chili. Adjust the seasoning with salt and pepper as needed. This step is key for building flavor. 5. Serve your chili hot! Garnish with fresh cilantro and avocado slices on top. This adds a nice touch and enhances the flavor. To ensure your sweet potatoes cook well, cut them into even pieces. This helps them cook at the same rate. When you add them to the pot, stir them with the other ingredients. This mix helps the sweet potatoes soak up all the flavors. Stir the chili often while it cooks. This prevents it from sticking to the pot. If you notice it starting to stick, add a splash of vegetable broth. This keeps the chili smooth and delicious. To add more flavor, consider using extra spices. A bit of oregano or a dash of cayenne pepper can boost the taste. You can also add fresh lime juice to brighten the dish. It adds a nice zing! For garnishing, fresh cilantro and avocado slices work well. They add color and flavor. You can also sprinkle some diced red onion for extra crunch. Serve the chili in bright bowls for a fun look. Don't forget a lime wedge on the side for extra freshness! {{image_2}} You can switch up the beans in this chili. Other great options include pinto beans or chickpeas. These beans add a different texture and flavor. You can also mix in lentils for extra protein. If you want to try different veggies, go for zucchini or corn. Both add a nice sweetness. You can also use carrots for a bit of crunch. Feel free to add more bell peppers for extra color and taste. For a slow cooker version, start by sautéing the onion and bell pepper. Then, add everything to the slow cooker. This method lets the flavors blend well. Cook on low for 6-8 hours or high for 3-4 hours. If you prefer using an Instant Pot, brown the onion and bell pepper first. Then, add all other ingredients. Seal the lid and cook on high pressure for about 10 minutes. Quick-release the steam and enjoy your chili. Try out these variations to make the dish your own! To store leftover chili, let it cool first. Once cool, transfer it to a container. Use an airtight container for best results. This keeps the chili fresh and keeps out air. You can safely store it in the fridge for up to five days. If you want to enjoy it later, freezing is a great option. For freezing, use freezer-safe bags or containers. Make sure to leave some space in the container. The chili will expand as it freezes. You can freeze this chili for up to three months. When you’re ready to eat, thaw it overnight in the fridge. Reheat it in a pot on the stove or in the microwave until hot. Enjoy your tasty, reheated chili! You can enjoy vegan sweet potato chili with many sides. Here are some great options: - Cornbread: It adds a nice sweetness. - Rice: White or brown rice soaks up the chili well. - Tortilla chips: Crunchy chips are fun to dip. - Avocado slices: They add creaminess and freshness. - Fresh salad: A crisp salad balances the warmth of the chili. To add heat to your chili, try these ideas: - Extra chili powder: Add more in the cooking step. - Jalapeños: Chop and add them when you sauté the onion. - Hot sauce: Stir in your favorite hot sauce before serving. - Cayenne pepper: A pinch of cayenne gives a nice kick. - Spicy beans: Use spicy canned beans for added heat. Yes, this chili is naturally gluten-free! Here's how: - Use gluten-free vegetable broth: Check labels to be sure. - Avoid any added sauces: Ensure they are gluten-free. - Check canned beans: Most are gluten-free, but confirm. By following these tips, you can enjoy a tasty gluten-free meal. To wrap up, we've explored how to make vegan sweet potato chili. We covered essential ingredients, step-by-step instructions, and helpful tips. You can customize this dish with various beans and spices. Remember, storing leftovers is easy—just use the right containers. Whether you choose to use a slow cooker or Instant Pot, you'll enjoy a tasty meal. Try new flavors and have fun with your choices. Vegan sweet potato chili offers warmth and comfort in every bowl.

Vegan Sweet Potato Chili Hearty and Flavorful Dish

- 4 large eggs - 1 ripe avocado - 1 tablespoon Dijon mustard - 1 tablespoon plain Greek yogurt - 1 tablespoon lime juice - 1 small red onion, finely chopped - 1 small jalapeño, deseeded and minced - Salt and pepper to taste - Fresh cilantro leaves, chopped - Whole grain bread or lettuce leaves for serving This zesty avocado egg salad combines rich flavors and bright colors. Each ingredient plays a key role in creating depth and freshness. The eggs bring protein and creaminess, while the avocado adds a buttery texture. Dijon mustard offers a tangy bite, and the Greek yogurt keeps it light and smooth. Lime juice brightens the dish, adding a splash of freshness. Red onion brings a mild sweetness and crunch. The jalapeño adds a hint of heat, which you can adjust based on your taste. Lastly, fresh cilantro gives a herbaceous note that ties everything together. Use whole grain bread for a filling sandwich or serve it on crisp lettuce leaves for a lighter option. Each bite delivers a burst of flavor that you will love! - Place 4 large eggs in a pot and cover with cold water. - Bring the water to a boil, then reduce heat and simmer for 9-10 minutes. - After boiling, cool the eggs in an ice bath for easy peeling. - Once cool, chop the eggs into small pieces. - In a bowl, mash 1 ripe avocado until creamy. - Mix in 1 tablespoon of Dijon mustard, 1 tablespoon of plain Greek yogurt, and 1 tablespoon of lime juice. - Gently fold the chopped eggs into the avocado mixture. - Add 1 small finely chopped red onion and 1 small minced jalapeño. - Season with salt and pepper to taste. Adjust lime juice for more zest if you like. To get perfect hard-boiled eggs, start with fresh eggs. Place them in a pot and cover with cold water. Bring the water to a boil. When it boils, reduce the heat and let them simmer for 9-10 minutes. After cooking, move the eggs to an ice bath. This cools them quickly and makes peeling easier. Let them sit in the ice bath for at least 5 minutes. If you like heat, use jalapeño. For a milder flavor, use a sweet bell pepper instead. You can also try other peppers like poblano or banana peppers. Just remember to remove the seeds if you want less spice. Start with a small amount and taste as you go. This way, you can find your perfect spice level. Want to take your egg salad up a notch? Add fresh herbs like dill or parsley. Chives also work well for a light onion flavor. A pinch of smoked paprika can add a nice depth too. If you like tang, try adding a splash of apple cider vinegar. These small changes make a big difference in flavor! {{image_2}} You can switch up the protein in this dish. Try adding cooked chicken for a heartier meal. Chickpeas can add a nice texture and boost plant-based protein. If you want a vegan option, tofu works well too. Just crumble it before mixing. Each choice gives you a new flavor experience. To make this salad vegan, swap the eggs and dairy. Use mashed chickpeas instead of eggs. For creaminess, try avocado or a vegan yogurt. Lime juice adds the needed tang. Be sure to season well, as flavor is key in this vegan version. Want to mix it up? Add different dressings or spices. Smoked paprika offers a warm, rich flavor. You can also use garlic powder for a savory kick. Experiment with fresh herbs like dill or parsley for added freshness. Each tweak creates a unique twist on the classic salad. To store your Zesty Avocado Egg Salad, place it in an airtight container. This keeps it fresh and prevents odors from other foods. Try to finish it within three days for the best taste. If you have leftovers, always remember to cover the salad with plastic wrap or a lid. This helps keep it from browning, especially the avocado. Freezing avocado egg salad isn't the best option, but it can work. If you choose to freeze it, use a freezer-safe container. Leave some space at the top because it may expand. When you're ready to eat it, thaw the salad in the fridge overnight. After thawing, mix it well before serving. You might want to add a bit more lime juice to freshen the taste. In the fridge, the salad lasts about three days. After that, the flavors change, and the avocado may brown. If you notice any off smells or colors, it's best to toss it out. Enjoy your salad when it's fresh for the brightest flavors. Yes, you can make Zesty Avocado Egg Salad ahead of time. First, prepare it as directed. After mixing, store it in an airtight container. This keeps it fresh in the fridge for up to two days. If you want it extra fresh, add the avocado just before serving. This prevents browning. Zesty Avocado Egg Salad pairs well with many sides. Here are some great options: - Whole grain bread for sandwiches - Lettuce leaves for a lighter option - Fresh veggies like carrots and cucumbers - Chips for a crunchy contrast - A green salad for more color and crunch To make more servings, simply scale the ingredients up. For example, double the eggs and avocado for eight servings. Keep the same ratio for the other ingredients. This ensures the taste stays balanced. If you are unsure, start with small increments. Taste as you go for the best outcome. This blog post shared how to make a tasty Zesty Avocado Egg Salad. You learned the key ingredients, simple steps, and helpful tips to perfect your dish. We also discussed fun variations and storage tips to keep your salad fresh. In conclusion, this recipe is easy to customize and great for meals. Try it today and enjoy a delicious, healthy treat!

Zesty Avocado Egg Salad Fresh and Flavorful Dish

- 1 lb large shrimp, peeled and deveined - 1 lb smoked sausage, sliced into rounds - 2 cups baby potatoes, halved - 1 bell pepper, diced (any color) - 1 medium onion, chopped - 3 tablespoons Cajun seasoning - 3 tablespoons olive oil - 2 cloves garlic, minced - Salt and pepper to taste Each ingredient plays a key role in building flavor. The shrimp adds sweetness and a nice texture. Smoked sausage gives a rich, smoky taste. Baby potatoes bring heartiness and soak up all the spices. Bell peppers add a pop of color and crunch, while onions provide a savory base. Cajun seasoning combines spices, heat, and depth. Olive oil helps blend flavors and keeps everything moist. Garlic adds a wonderful aroma, while salt and pepper enhance all the tastes. - Fresh parsley for garnish - Lemon wedges for serving Adding fresh parsley brightens the dish and adds color. Lemon wedges give a zesty kick when served. They balance the richness and enhance the flavors, making your meal even better. - Calories per serving: Approximately 400 - Macronutrient breakdown: - Protein: 25g - Carbohydrates: 30g - Fat: 20g This meal is not only tasty but also packs a good amount of protein and healthy fats. It's filling and satisfying, making it a great meal for any occasion. To start, gather your ingredients. You need: - 1 lb large shrimp, peeled and deveined - 1 lb smoked sausage, sliced into rounds - 2 cups baby potatoes, halved - 1 bell pepper, diced (any color) - 1 medium onion, chopped - 3 tablespoons Cajun seasoning - 3 tablespoons olive oil - 2 cloves garlic, minced - Salt and pepper to taste First, wash and chop your veggies. Halve the baby potatoes and dice the bell pepper. The onion should be chopped well. This helps all flavors mix nicely. Next, in a large bowl, combine the shrimp, sausage, potatoes, bell pepper, and onion. Drizzle in the olive oil. Then, sprinkle the Cajun seasoning, minced garlic, salt, and pepper over everything. Toss gently until all pieces are well-coated. This step makes your meal full of flavor. Now, let’s prepare the foil packs. Tear off large sheets of aluminum foil, about 18 inches long. You need enough space for the mixture to steam. Divide the shrimp and sausage mixture evenly among the foil sheets. Gather the edges of the foil and fold them over the mixture. Make sure to seal tightly to keep all the juices inside. This step is key for keeping your meal tender and juicy. You can cook these foil packs on a grill or in the oven. Preheat your grill or oven to 400°F (200°C). Place the foil packs on the grill or on a baking sheet if using the oven. Cook for about 20-25 minutes. Check for doneness when the shrimp turn pink and the potatoes become tender. Cooking times may vary, so keep an eye on them. Once cooked, carefully remove the packs from the heat. Let them rest for a few minutes. This step helps the flavors settle. When you’re ready, open the packs and garnish with fresh parsley. Serve with lemon wedges for a bright touch. Enjoy! To cook shrimp and sausage well, choose fresh ingredients. Fresh shrimp cooks faster than frozen. If using frozen shrimp, thaw them first. For the sausage, any smoked variety works great. Slice it into rounds for even cooking. For potatoes, cut them in half for quick cooking. Make sure they are roughly the same size. This helps them cook evenly with the shrimp and sausage. You can parboil the potatoes for five minutes before adding them to the foil packs. This gives them a head start. To boost flavor, use Cajun seasoning generously. This blend adds a spicy kick. You can also try adding a splash of hot sauce for extra heat. Marinade the shrimp and sausage for at least 30 minutes before cooking. This allows the flavors to blend well. Other great options include adding lemon zest or smoked paprika. These will enhance the dish and add layers of flavor. Serve the foil packs on a bright platter. This makes for a fun presentation! Let guests open their packs at the table. It adds excitement to the meal. You can garnish with fresh parsley for a pop of color. Pair these packs with a simple green salad or some crusty bread. A cold drink, like lemonade or iced tea, makes a perfect match. Enjoy your meal with family and friends! {{image_2}} You can switch the smoked sausage with chicken or turkey sausage. Both give great flavor. If you want a lighter option, use shrimp only. For a vegetarian twist, try using firm tofu or tempeh. Both absorb flavors well. You can also add more veggies like zucchini or corn to the mix. You can cook these foil packs in the oven or over a campfire. For the oven, just set it to 400°F (200°C) and follow the same steps. If using a campfire, place the packs on hot coals for about 20-25 minutes. Keep an eye on them! For a slow cooker, combine all ingredients in the pot. Cook on low for 4-5 hours, stirring halfway through. Change your ingredients with the seasons. In spring, add asparagus or snap peas. In summer, try fresh corn or tomatoes. For fall, sweet potatoes or pumpkin can work great. Winter is perfect for hearty root veggies like carrots or parsnips. Adapting the recipe helps keep it fresh and exciting. To keep your Cajun shrimp and sausage foil packs fresh, use airtight containers. Place the cooled foil packs in the container. If you do not have a container, you can wrap them tightly in plastic wrap. Store them in the fridge for up to three days. Reheat foil packs in the oven or on the grill. Preheat your oven to 350°F (175°C). Place the foil packs on a baking sheet and heat for about 10-15 minutes. If you're using a grill, place the packs over medium heat for about the same time. To avoid rubbery shrimp, do not overheat them. Shrimp cook quickly, so check often. You can freeze both uncooked and cooked foil packs. If freezing uncooked packs, seal them tightly in aluminum foil and place them in a freezer bag. They last up to three months. When ready, thaw them in the fridge overnight before cooking. For cooked packs, let them cool completely before freezing. Reheat them directly from frozen or after thawing. It takes about 20 to 25 minutes to cook Cajun shrimp and sausage foil packs. You want the shrimp to turn pink and the potatoes to be tender. Preheat your grill or oven to 400°F (200°C) before cooking. This helps the food cook evenly. Check the packs after 20 minutes to see if they are ready. If the shrimp is not pink or the potatoes are still hard, cook for a few more minutes. Yes, you can use frozen shrimp in this recipe. Just make sure to thaw them before cooking. To thaw shrimp quickly, place them in a bowl of cold water for about 15 to 20 minutes. Pat them dry with a paper towel before mixing them with the other ingredients. This helps the seasoning stick better. If you add frozen shrimp directly, the cooking time may be longer. Many sides go great with Cajun shrimp and sausage foil packs. Here are a few ideas: - Corn on the cob - Steamed broccoli - Garlic bread - Coleslaw - Rice or quinoa These sides add color and flavor to your meal. They also help balance the spices from the Cajun seasoning. Enjoy experimenting to find your favorite pairings! This article covered everything needed to make flavorful Cajun Shrimp & Sausage Foil Packs. We explored the essential ingredients like shrimp, sausage, and spices. I shared cooking methods, tips, and variations, allowing for creativity. Cooking should be fun and simple. Use these tips to make your meal tasty and enjoyable. Whether you cook on a grill or in the oven, you can create a dish that impresses. Enjoy every bite and happy cooking!

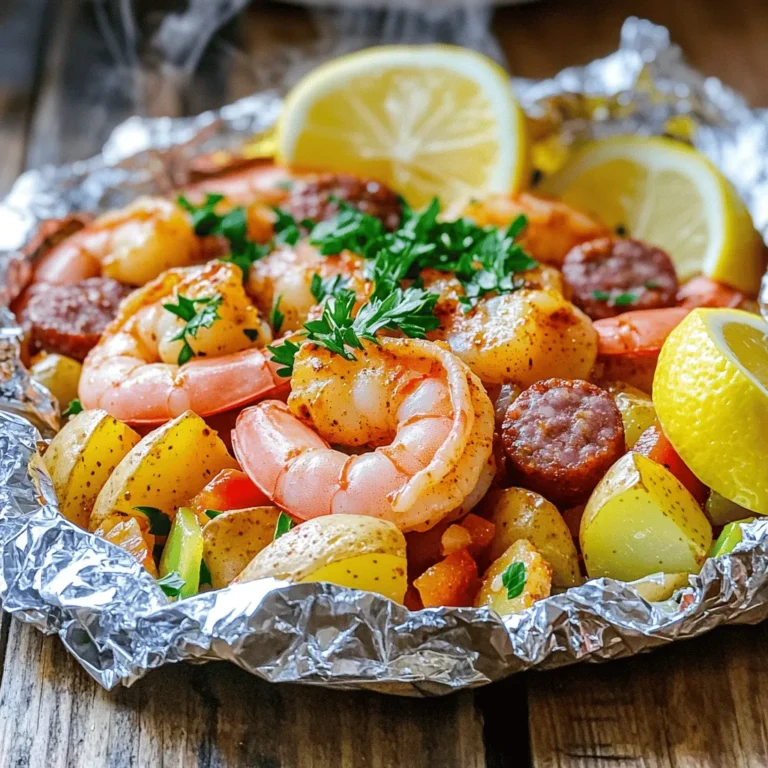
Cajun Shrimp & Sausage Foil Packs Tasty and Simple Meal

- 1 cup rolled oats - 1 cup shredded unsweetened coconut - ½ cup almond butter - ¼ cup honey or maple syrup - ½ cup dark chocolate chips - ½ cup chopped almonds - 1 teaspoon vanilla extract - A pinch of salt Gathering the right ingredients is key to making Almond Joy Energy Balls. The rolled oats give the balls a hearty texture. Shredded coconut adds sweetness and a tropical twist. Almond butter is creamy and rich, while honey or maple syrup brings a natural sweetness. Dark chocolate chips add a touch of indulgence. Chopped almonds give a nice crunch and boost the flavor. A teaspoon of vanilla extract enhances all the tastes, while a pinch of salt balances the sweetness. - Mixing bowls - Baking sheet - Parchment paper - Measuring cups and spoons You will need a few simple tools for this recipe. Mixing bowls help combine the ingredients easily. A baking sheet lined with parchment paper makes cleanup a breeze. Measuring cups and spoons ensure you get the right amounts. This equipment makes the process smooth and fun! - Combine dry ingredients in a large mixing bowl. - Mix wet ingredients in a separate bowl. - Combine both mixtures until well mixed. Start by adding the rolled oats, shredded coconut, and chopped almonds into a big bowl. This mix gives the energy balls a crunchy base. Make sure to stir well to break up any clumps. In another bowl, mix the almond butter, honey or maple syrup, vanilla extract, and a pinch of salt. Stir until smooth and creamy. Now, pour this wet mix into the dry bowl. Use a spatula to combine, ensuring every bit is mixed. - Scoop out portions and roll into balls. - Place on baking sheet lined with parchment paper. Next, grab a small scoop of the mixture. Roll it into a ball, about the size of a golf ball. You want them to be bite-sized and easy to eat. Once you have rolled all the mixture, place each ball on a baking sheet lined with parchment paper. This prevents sticking and makes cleanup easy. - Refrigerate for at least 30 minutes. - Store in an airtight container. Now, it’s time to chill. Place the baking sheet in the fridge for at least 30 minutes. This helps the energy balls set and hold their shape. After they are firm, transfer them to an airtight container. Store them in the fridge for up to a week. Enjoy these tasty bites whenever you need a quick energy boost! If you run out of almond butter, try using peanut butter. It gives a nice taste too. Sunflower seed butter is great if you need a nut-free option. For sweeteners, honey works well, but maple syrup is a tasty swap. You can even use agave nectar for a different flavor. To get the right consistency, make sure you mix dry and wet ingredients well. If the mix feels too dry, add a tiny bit of water. To make the balls less sticky, wet your hands before rolling them. This simple trick helps the mix not stick to your fingers. You can add fun mix-ins to boost flavor. Try dried fruits like cranberries or apricots for a sweet twist. A pinch of cinnamon or nutmeg can make them extra special. For toppings, coat the balls in more shredded coconut or drizzle melted chocolate on top. Get creative and make them your own! {{image_2}} To make these energy balls even more chocolatey, you can add cocoa powder. Just mix in about two tablespoons with the dry ingredients. You can also use chocolate almond butter instead of regular almond butter. This change gives a rich chocolate flavor without extra steps. Either way, you deepen the taste and keep the fun texture. If you want to make vegan Almond Joy Energy Balls, you can swap out honey for maple syrup. This keeps them plant-based. Also, be sure to check that all ingredients are vegan-friendly. Choose dark chocolate chips that do not have milk. With these small changes, everyone can enjoy this tasty treat. For a nut-free version, replace almond butter with sunflower seed butter. This option keeps a creamy texture without nuts. You’ll also want to skip the chopped almonds. Instead, consider adding pumpkin seeds for crunch. This way, you still get a satisfying bite while making it safe for those with nut allergies. To keep your Almond Joy Energy Balls fresh, use airtight containers. These containers block air and moisture, which can spoil the taste. Store them in a cool, dark place or in the fridge. The fridge is best for keeping them tasty longer. In the refrigerator, these energy balls last up to a week. If you want to keep them longer, freeze them. Place the balls in a single layer on a baking sheet. Once frozen, transfer them to a freezer-safe bag. They can last for up to three months in the freezer. These energy balls pair well with drinks like almond milk or coconut water. You can also enjoy them with fresh fruit like bananas or apples. For a fun snack platter, arrange the energy balls on a wooden board and sprinkle shredded coconut on top. This way, they look great and taste even better. Almond Joy Energy Balls stay fresh for about a week. Store them in an airtight container in the fridge. If you want them to last longer, you can freeze them. Just thaw them when you are ready to eat. Yes, you can make these energy balls gluten-free. Just use certified gluten-free oats. This small change makes them safe for those with gluten sensitivities. Enjoy them without worry! Almond Joy Energy Balls are a great snack choice. Each ball has good fats, fiber, and some protein. They provide energy while being delicious. You can expect around 150 calories per ball, depending on size and ingredients. Absolutely! You can use carob chips or white chocolate chips if you prefer. You might even try chopped dark chocolate or dried fruits for a twist. This way, you can create a flavor that you love. Yes, kids love these energy balls! They are tasty and packed with nutrients. You can feel good serving them as a snack or dessert. Just make sure to watch for any nut allergies. These Almond Joy Energy Balls are easy to make and tasty. You combine simple ingredients, like oats and chocolate. You can customize them with your favorite flavors and serve them as healthy snacks. Storing them in the fridge keeps them fresh longer. I hope you see how fun and healthy these energy balls can be. Enjoy making your own versions!

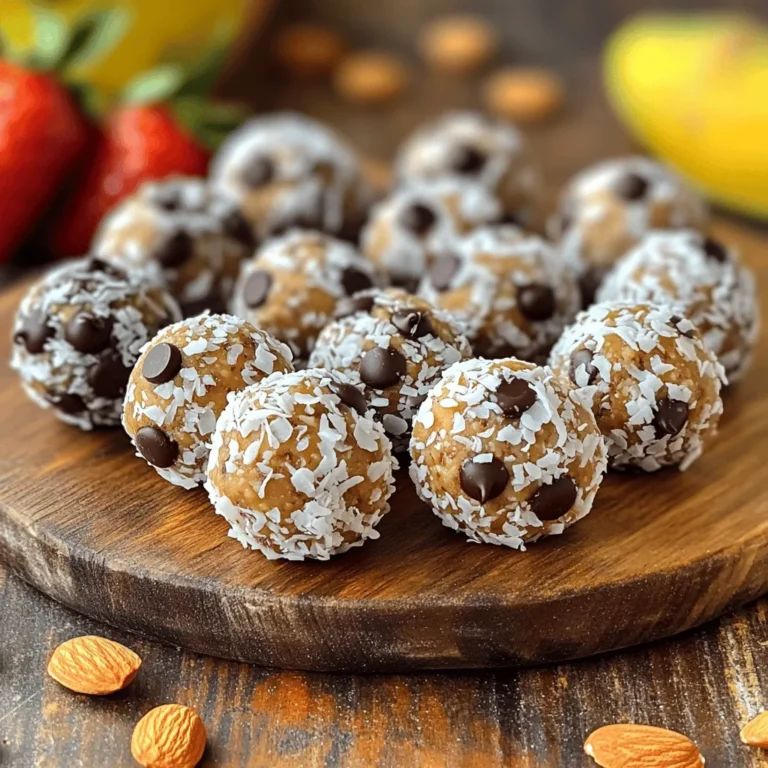
Almond Joy Energy Balls Tasty and Healthy Snack

PREV 1 … 36 37 38 … 57 NEXT
meal twig

explore

DessertsDinnerAppetizersDrinks

Our Policies

  • Cookie Policy
  • Copyright Policy
  • Disclaimer
  • GDPR Policy
  • Terms Of Use
Back to Top
  • About
  • Contact Us
  • Privacy Policy
© 2025 meal twig