FREE DINNER EBOOK! Get your copy!
  • Cookie Policy
  • GDPR Policy
  • Disclaimer
  • Terms Of Use
  • Visit my other site: Fun Cookie Recipes
meal twig
  • Home
  • Dinner
  • Desserts
  • Drinks
  • Appetizers
  • Contact
  • About
  • Privacy Policy
  • Home
  • Dinner
  • Desserts
  • Drinks
  • Appetizers
  • Contact
  • About
  • Privacy Policy
  • Cookie Policy
  • GDPR Policy
  • Disclaimer
  • Terms Of Use
Visit my other site: Fun Cookie Recipes

HOME / CATEGORIES /

Latest

To make the best air fryer jalapeño poppers, gather these items: - 8 large fresh jalapeño peppers - 1 cup cream cheese, softened - 1/2 cup shredded cheddar cheese - 1/4 cup grated Parmesan cheese - 1/2 teaspoon garlic powder - 1/2 teaspoon onion powder - 1/2 teaspoon smoked paprika - Salt and pepper to taste - 1/2 cup panko bread crumbs - 1 tablespoon olive oil When picking jalapeños, look for bright green and firm peppers. The skin should be smooth and free of wrinkles. Avoid any with dark spots or soft areas. Freshness matters. The flavor is best when they are at peak ripeness. You can mix up the cheese for different flavors. Cream cheese is a must, but you can try: - Goat cheese for a tangy twist - Pepper jack for extra heat - Mozzarella for a milder taste Experiment with your favorites to find a blend you love! Start by preheating your air fryer to 375°F (190°C). This step helps the jalapeño poppers cook evenly and become crispy. Next, take 8 large fresh jalapeño peppers. Slice them in half lengthwise. Use a spoon to remove the seeds and membranes. This step makes the poppers less spicy if you want. In a medium bowl, mix together: - 1 cup cream cheese, softened - 1/2 cup shredded cheddar cheese - 1/4 cup grated Parmesan cheese - 1/2 teaspoon garlic powder - 1/2 teaspoon onion powder - 1/2 teaspoon smoked paprika - Salt and pepper to taste Stir until the mixture is smooth and creamy. This cheese filling adds a rich flavor to each popper. Take the cheese mixture and spoon it into each jalapeño half. Fill them generously. Make sure each half has enough cheese. In a small bowl, combine: - 1/2 cup panko bread crumbs - 1 tablespoon olive oil Mix until the crumbs are well-coated. This topping gives your poppers a crunchy texture. Place the stuffed jalapeños in the air fryer basket. Arrange them in a single layer, leaving space between them. Cook for 10-12 minutes. Look for a golden brown and crispy top. When done, remove them from the air fryer and let them cool for a couple of minutes. Enjoy your delicious jalapeño poppers! Set your air fryer to 375°F (190°C). This heat cooks the jalapeño poppers evenly. The high heat helps the cheese melt and the panko crisp. Keep an eye on them for the last few minutes. You want a nice golden brown color. To control the heat, remove all seeds and membranes from the jalapeños. This step reduces the spiciness. If you like it hot, leave some seeds in. You can also mix in a bit of hot sauce into the cheese filling for an extra kick. Serve the poppers on a colorful platter. Add a side of ranch or chipotle sauce for dipping. This adds flavor and fun to your dish. Garnish with chopped cilantro or green onions. It makes the dish look fresh and appealing. {{image_2}} You can easily make these poppers vegetarian. Just skip the cheese with a mix of beans and spices. Use mashed avocado or cashew cream for a vegan twist. These swaps keep the flavor and texture great, while still being meat-free. Want to jazz them up? Try adding crispy bacon bits for a savory crunch. Fresh herbs like cilantro or chives can add a nice touch too. You can also mix in other cheeses, like pepper jack, for an extra kick. Dipping sauces make these poppers even better. Ranch is a classic choice, but try chipotle sauce for a smoky flavor. You could also use salsa or guacamole for a fresh taste. Each sauce adds a new layer of flavor, making each bite fun! To keep your jalapeño poppers fresh, place them in an airtight container. Store them in the fridge for up to three days. Make sure they cool down before sealing the container. This will help keep them crispy and tasty. To reheat, set your air fryer to 350°F (175°C). Place the poppers in the basket and heat for about 5-7 minutes. This method keeps them crispy. You can also use an oven. Preheat it to 350°F (175°C) and bake for about 10-15 minutes. Check them often to avoid burning. You can freeze jalapeño poppers for later. To freeze, place them on a baking sheet in a single layer. Freeze them for about two hours until firm. Then, transfer them to a freezer bag. They can last up to three months. When ready to cook, you can air fry them from frozen. Just add a few minutes to the cooking time. Yes, you can use frozen jalapeños. They may be softer after cooking. Thaw them first for best results. Always check for quality and flavor. Jalapeño poppers pair well with ranch dressing or chipotle sauce. You can also serve them with fresh veggies or tortilla chips. A cold drink like soda or beer complements the heat too. Look for a golden brown color on top. The cheese should be bubbly and the panko crispy. If unsure, you can check with a fork. They should feel firm but soft inside. Yes, you can prepare them a few hours in advance. Just cover them and keep them in the fridge. Cook them right before serving for the best texture. Any air fryer that can reach 375°F works well. A model with a basket style helps with even cooking. Look for one with a good capacity to fit all your poppers at once. In this blog post, we explored how to make perfect jalapeño poppers. We discussed ingredient selection, including fresh jalapeños and cheese alternatives. You learned step-by-step instructions for preparing and air frying them. We also covered tips for spice levels, presentation, and even variations like vegetarian options. Don't forget about proper storage and reheating methods. Now, you can impress friends and family with your air fryer skills. Enjoy making these tasty treats!

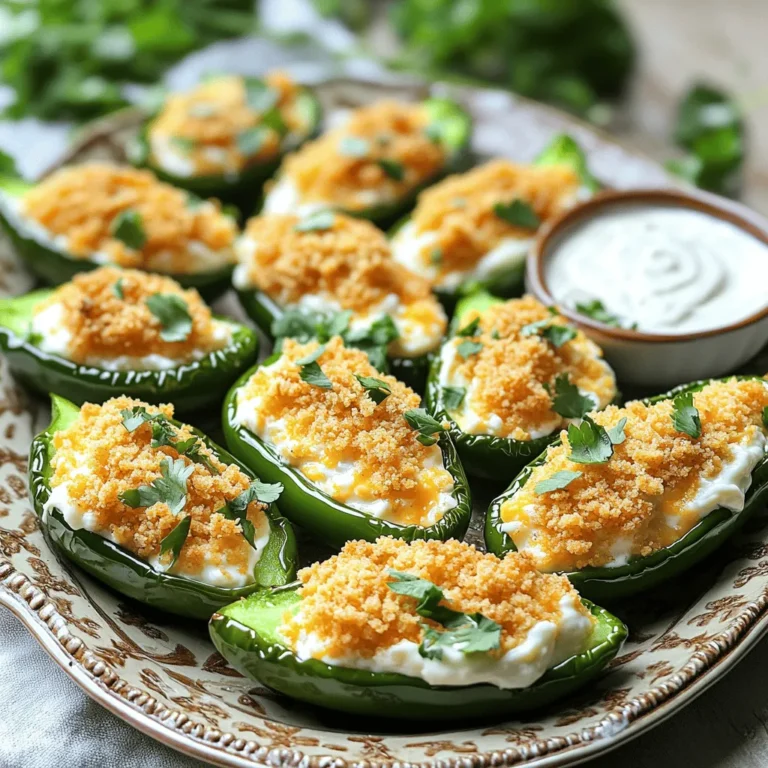
Air Fryer Jalapeño Poppers Crispy and Flavorful Snack

To make Brown Sugar Cinnamon Apple Pie Bars, gather these items: - 2 cups all-purpose flour - 1/2 cup brown sugar, packed - 1/2 cup granulated sugar - 1/2 cup unsalted butter, melted - 1 teaspoon baking powder - 1/2 teaspoon baking soda - 1/4 teaspoon salt - 1 large egg - 2 teaspoons vanilla extract - 3 medium-sized apples, peeled, cored, and diced (about 3 cups) - 1 tablespoon lemon juice - 1 tablespoon ground cinnamon - 1 tablespoon cornstarch You can easily switch some ingredients if needed. For flour, use gluten-free flour for a gluten-free option. You can replace brown sugar with coconut sugar for a healthier choice. If you want less sugar, use less granulated sugar. For eggs, try flaxseed meal mixed with water as an egg replacement. Finally, use any tart apples like Granny Smith or Honeycrisp if you can't find the ones listed. To bake these delicious bars, you will need: - A 9x9-inch baking pan - Mixing bowls for dry and wet ingredients - A spatula or wooden spoon for mixing - Parchment paper for easy removal - An oven to bake your bars Having these tools ready will make your baking fun and easy! First, preheat your oven to 350°F (175°C). This step is key for even baking. Next, grease a 9x9-inch baking pan. You can also line it with parchment paper. This makes it easy to lift out the bars later. In a medium bowl, mix the dry ingredients. Combine 2 cups of flour, 1/2 cup brown sugar, 1/2 cup granulated sugar, 1 teaspoon baking powder, 1/2 teaspoon baking soda, and 1/4 teaspoon salt. Stir well to blend. Then, add 1/2 cup melted unsalted butter, 1 large egg, and 2 teaspoons vanilla extract. Mix until the dough is soft and smooth. Press about two-thirds of the dough into the bottom of the pan. This creates a nice base for your bars. In another bowl, take 3 medium-sized apples, peeled, cored, and diced. Toss them with 1 tablespoon lemon juice, 1 tablespoon ground cinnamon, and 1 tablespoon cornstarch. Make sure the apples are well coated. Spread this apple mixture evenly over the dough layer in the pan. Crumble the remaining dough over the top. Now, it’s time to bake! Place the pan in the oven and bake for 25-30 minutes. The top should turn golden brown, and the apples need to be tender. Once done, let the bars cool in the pan for about 15 minutes. Then, lift them out using the parchment paper. Cut into squares, and enjoy your delicious creation! For the best texture in your Brown Sugar Cinnamon Apple Pie Bars, start with cold butter. This helps create a flaky crust. Use a gentle touch when mixing the dough. Don't overwork it; you want it soft and slightly crumbly. Press the dough firmly into the pan, but do not pack it too tightly. This keeps the crust tender. To boost flavor, try adding a pinch of nutmeg with the cinnamon. This adds warmth and depth. You can also mix in a splash of apple cider for a fruity twist. For a fun surprise, fold in some chopped nuts or dried cranberries with the apples. These add texture and extra taste. One common mistake is using overripe apples. Choose firm apples for the best bite. Another mistake is not measuring ingredients accurately. Use measuring cups and spoons for exact amounts. Also, don’t skip the cornstarch; it thickens the apple filling and prevents a soggy bottom. Finally, allow the bars to cool completely before cutting. This helps them hold their shape. {{image_2}} You can make these bars more fun by adding nuts or dried fruits. Walnuts or pecans add a nice crunch. Just chop them up and mix them in with the apples. If you like sweetness, try adding raisins or dried cranberries. They pair well with cinnamon and apples. You don’t have to stick with just one type of apple. Different apples bring different flavors. For a tart taste, use Granny Smith apples. For a sweeter option, Honeycrisp or Fuji apples work well. You can even mix different kinds for a layered flavor experience. If you need a gluten-free version, it is easy to switch the flour. Use a gluten-free all-purpose blend instead of regular flour. Make sure your baking powder is gluten-free too. This way, everyone can enjoy the sweet, cinnamon flavor of these bars without worry. After you bake the bars, let them cool. Once cooled, place them in a tight container. Use parchment paper to separate layers if you stack them. This helps keep them fresh. Store the bars at room temperature for up to three days. If you want them to last longer, store them in the fridge for about a week. You can freeze these tasty bars too. First, cool them completely. Then, cut them into squares. Wrap each square in plastic wrap. Place the wrapped bars in a freezer bag or container. They will stay fresh for up to three months. When you're ready to eat them, take out as many as you want! To reheat, take a bar from the fridge or freezer. If it's frozen, let it thaw in the fridge overnight. For a warm treat, place the bar on a microwave-safe plate. Heat it for about 15-20 seconds in the microwave. You can also warm it in the oven. Set the oven to 350°F (175°C) and heat for about 5-10 minutes. Enjoy the gooey goodness! Yes, you can try different sugars. Brown sugar gives a rich flavor. White sugar adds sweetness without extra taste. You can mix them too. Just keep the same amounts. Look for a golden brown top. You can also poke a bar with a toothpick. If it comes out clean, they are done. Apples should feel tender but not mushy. Yes, you can make the dough in advance. Wrap it tightly and chill in the fridge. This helps the flavors blend. I suggest using it within two days for best results. You can serve these bars warm or cold. Dust with powdered sugar for a sweet touch. Add whipped cream or ice cream for extra delight. Pair with a cup of coffee for a perfect treat! This blog post covered key ingredients, step-by-step instructions, and helpful tips for making delicious bars. You learned about possible ingredient swaps and special tools you need. I shared ways to enhance flavor and avoid common mistakes. There are many fun variations to try, including adding nuts or making a gluten-free option. Finally, I provided storage tips to keep your bars fresh. Enjoy creating your own unique bars and don’t hesitate to experiment! The right ingredients and methods can take your baking to the next level.

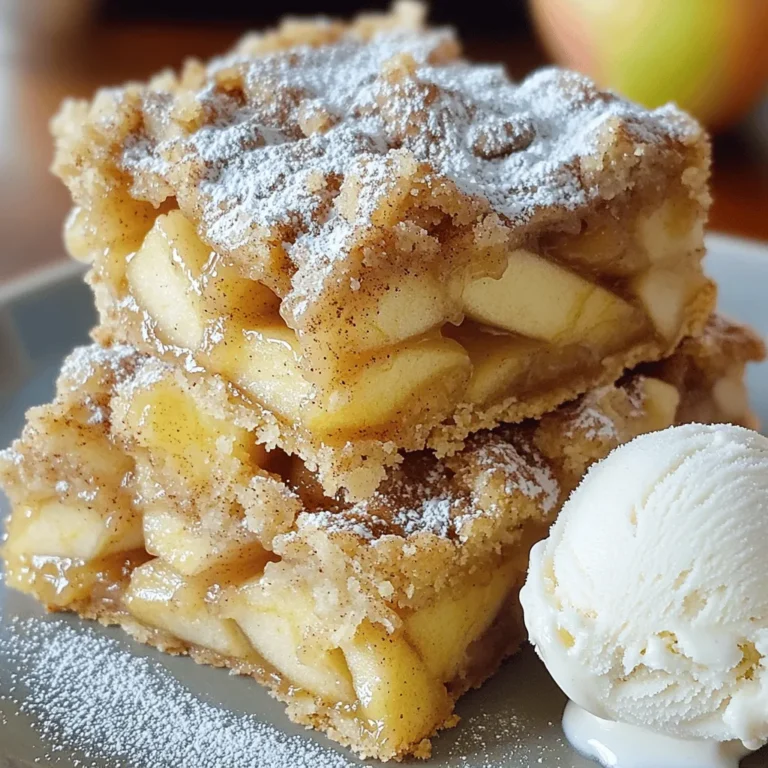
Brown Sugar Cinnamon Apple Pie Bars Delightful Treat

- 1 pound ground beef or turkey - 1/2 cup breadcrumbs - 1/4 cup grated Parmesan cheese - 1 large egg - 1/2 cup honey - 1/4 cup soy sauce (low sodium preferred) - 1 tablespoon rice vinegar - 2 cloves garlic, minced - 1 teaspoon dried oregano - 1 teaspoon onion powder - Salt and pepper to taste - 1/2 teaspoon crushed red pepper flakes (optional for heat) - Fresh parsley, chopped (for garnish) In this recipe, I love using either ground beef or turkey. Both work well and give great flavor. The breadcrumbs and Parmesan cheese help bind the meatballs, making them tender. I always add an egg to help hold everything together. For the sauce, honey brings sweetness. Soy sauce adds depth, and rice vinegar gives a nice tang. They blend to create a lovely glaze. Now, let’s talk about seasoning. Garlic is a must for that rich flavor. Dried oregano adds a warm taste, while onion powder gives depth. Salt and pepper bring it all together. If you like heat, add crushed red pepper flakes. Gather these ingredients, and you are ready to make delicious honey garlic meatballs! Mixing the ingredients In a large bowl, add 1 pound of ground beef or turkey. Then, mix in 1/2 cup of breadcrumbs and 1/4 cup of grated Parmesan cheese. Next, crack in 1 large egg and add 2 cloves of minced garlic. Sprinkle in 1 teaspoon of dried oregano, 1 teaspoon of onion powder, and salt and pepper to taste. Use your hands to mix everything until it’s well combined. Shaping the meatballs Now, take the mixture and shape it into small meatballs, about 1 inch in diameter. You should end up with around 20 to 25 meatballs. Try to keep them all the same size for even cooking. Combining the sauce ingredients In a separate bowl, whisk together 1/2 cup of honey, 1/4 cup of low-sodium soy sauce, and 1 tablespoon of rice vinegar. If you want some heat, add 1/2 teaspoon of crushed red pepper flakes. Mix until the ingredients are well blended. Placing meatballs in the slow cooker Place the shaped meatballs in the slow cooker in a single layer. Pour the honey garlic sauce over the meatballs, making sure they are all coated. Cooking times and settings Cover the slow cooker with its lid. Set it on low for 4 to 5 hours or on high for 2 to 3 hours. Cook until the meatballs are tender and fully cooked. Once they are done, carefully stir the meatballs to coat them in the sauce before serving. To get meatballs just right, focus on texture and flavor. Use a mix of ground meat and breadcrumbs. The breadcrumbs help keep them moist. Add grated Parmesan for a rich taste. Keep the size uniform, about one inch wide, for even cooking. A common mistake is overmixing the meat. Mix just until combined. Overmixing makes the meat tough. Also, don’t skip the egg; it acts as a binder. Slow cooking is simple with a few best practices. First, brown the meatballs in a pan if you want more flavor. This step adds depth, though it’s optional. Ensure your slow cooker is set to the right temperature. Low is best for 4-5 hours. High works for 2-3 hours. Stir the meatballs gently halfway through for even cooking. Pair these meatballs with simple sides. Steamed rice or mashed potatoes work well. Fresh veggies or a salad add color and crunch. For garnishing, sprinkle chopped parsley on top. This adds a fresh touch and looks nice. Consider serving with toothpicks for easy eating. Enjoy your meal! {{image_2}} You can switch ground beef for ground chicken or turkey. This change gives a lighter flavor. Chicken or turkey meatballs are also lower in fat. If you want, try meat alternatives like lentils or chickpeas. These options are great for plant-based diets. Just make sure to adjust cooking times since they may differ. You can change the taste by adding different spices or sauces. Try ginger for a bit of warmth. A little sesame oil can give an Asian twist. If you want more heat, add more crushed red pepper flakes. You can also mix in some barbecue sauce for a smoky flavor. Each new flavor adds a twist to the dish. These meatballs are perfect for meal prep. You can pack them with rice or veggies for lunch. They freeze well, making them great for busy days. You can toss them in pasta or serve them on sliders. Another fun idea is to make a meatball sub with cheese. This way, you can enjoy the same dish in many ways. Store leftovers in an airtight container. This keeps them fresh for up to four days. Make sure the meatballs cool down before sealing. Place them in the fridge as soon as possible. You can freeze cooked meatballs and sauce together. First, let them cool fully. Then, transfer them to freezer-safe bags or containers. Remove as much air as you can. They can last for three months in the freezer. To reheat, you have a few good options. The microwave is quick; just heat on medium power. Stir halfway through to warm evenly. The oven gives a nice texture. Heat at 350°F for about 15-20 minutes. You can also reheat them in a pan over low heat. Add a bit of water to keep them moist. Yes, you can use turkey. Ground turkey is leaner than beef. This makes it a healthier choice. Turkey has less fat, which can help lower calorie intake. It also absorbs flavors well. You still get a tasty meal while making it healthier. You can pair these meatballs with several sides. Rice is a great option. White or brown rice soaks up the sauce nicely. Noodles are also a good fit. You can serve them on a bed of noodles for a fun twist. Steamed veggies add color and nutrition. Broccoli, green beans, or carrots work well. To make this recipe gluten-free, use gluten-free breadcrumbs. Many brands offer this option now. Check labels to ensure they are certified gluten-free. You can also swap soy sauce for tamari. Tamari is a gluten-free soy sauce. This keeps all the flavors while removing gluten. This blog post covered how to make delicious honey garlic meatballs. We looked at key ingredients like ground meat, honey, and spices. Then, I shared step-by-step instructions for preparation, sauce-making, and cooking. I included tips for perfect meatballs and ideas for many serving variations. Remember, you can easily freeze leftovers or try turkey instead of beef. Meatballs offer many chances to be creative. Enjoy making them for meals that your family will love!

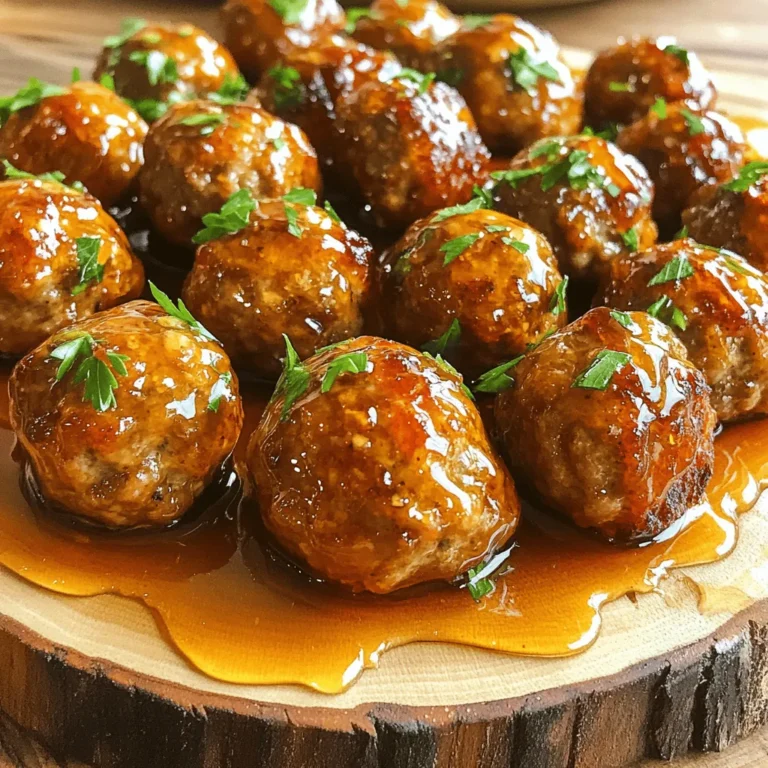
Honey Garlic Meatballs Slow Cooker Simple Recipe

- 2 medium chicken breasts, diced - 2 cups fresh spinach, roughly chopped - 1 cup cherry tomatoes, halved - 3 cloves garlic, minced - 1 teaspoon Italian seasoning - 1/2 teaspoon red pepper flakes (optional) - 3 tablespoons olive oil - 1/2 cup heavy cream - Salt and pepper to taste - Grated Parmesan cheese for garnish Each serving of this meal offers great nutrition. You get about: - Calories: 480 - Protein: 35g - Fat: 36g - Carbohydrates: 8g - Fiber: 2g - Net Carbs: 6g You can add your own twist with these options: - Mushrooms for extra umami. - Bell peppers for a sweet crunch. - Zucchini for more veggies. - Fresh basil for a burst of flavor. - Avocado for creaminess. These choices can change the taste and nutrition. Mix and match to suit your family’s taste. Enjoy the process! {{ingredient_image_1}} Start by dicing two medium chicken breasts into bite-sized pieces. This helps the chicken cook evenly. Heat two tablespoons of olive oil in a large skillet over medium heat. Once hot, add the diced chicken to the skillet. Season it with salt, pepper, and one teaspoon of Italian seasoning. Cook the chicken for 6 to 8 minutes until it turns golden brown and is cooked through. Once done, remove the chicken and set it aside on a plate. In the same skillet, add one tablespoon of olive oil. Then, toss in three cloves of minced garlic and, if you like heat, add half a teaspoon of red pepper flakes. Sauté these for about one minute until they smell great. Next, add one cup of halved cherry tomatoes to the skillet. Cook them for 2 to 3 minutes until they soften and burst with flavor. Now it’s time to add the greens! Toss in two cups of roughly chopped fresh spinach. Stir it until it wilts, which takes about 1 to 2 minutes. After that, lower the heat and pour in half a cup of heavy cream. Stir everything to mix well. Let it simmer gently. Finally, return the cooked chicken to the skillet. Mix it all together and let it simmer for another 2 to 3 minutes. This helps all the flavors blend perfectly. If needed, adjust the seasoning with more salt and pepper before serving. To cook chicken perfectly, start with good quality meat. Use chicken breasts that are fresh and not frozen. Dice them into even pieces for even cooking. This ensures each piece cooks at the same rate. Heat your skillet well before adding the chicken. This helps to create a nice golden crust. Sauté the chicken for about 6-8 minutes. Make sure to stir it occasionally for even browning. Once cooked, let it rest for a minute before adding it back to the skillet. Seasoning is key to making this dish shine. Start with salt and pepper. These simple spices bring out the best in the chicken. Italian seasoning adds a nice herbal flavor. If you like a kick, add red pepper flakes. Use them sparingly if you're not used to heat. The heavy cream adds richness, so balance it with the right amount of seasoning. Taste your dish as you go. Adjust the seasoning until it’s just right for you. When sautéing vegetables, heat your skillet with olive oil first. This oil helps to avoid sticking and adds flavor. Start with garlic to build a strong base. Cook it for about one minute until fragrant. Then, add the cherry tomatoes. They should soften but still hold some shape. Finally, add the spinach. Stir it until it wilts down, which takes about 1-2 minutes. This method keeps the veggies bright and fresh, adding great texture to your meal. Pro Tips Use Fresh Ingredients: Fresh spinach and ripe cherry tomatoes will enhance the flavors of this dish significantly. Always aim for the freshest produce available. Customize the Heat: Adjust the amount of red pepper flakes according to your heat preference. For a milder dish, you can omit them entirely. Perfect Cooking Time: Ensure that the chicken is cooked through but not overcooked. Check that the internal temperature reaches 165°F (75°C) for safety. Garnish for Flavor: Don't skip the grated Parmesan cheese at the end. It adds a savory depth that complements the creamy sauce beautifully. {{image_2}} You can switch up the protein in this dish. If you want, use shrimp or turkey instead of chicken. Both options cook quickly and taste great with the sauce. You can even try tofu for a plant-based dish. Just remember to adjust cooking times. Shrimp cooks fast, while turkey may need a bit longer. Adding extra veggies can boost flavor and nutrition. Bell peppers, zucchini, or mushrooms work well here. Slice them thin so they cook fast. You can mix and match based on your taste. Broccoli or asparagus can also add a nice crunch. Just toss them in when you add the spinach. Want to add more flavor without extra carbs? Consider adding olives or artichoke hearts. Both add a salty kick. You can also toss in some sun-dried tomatoes for a richer taste. For a touch of zest, add lemon juice before serving. Each of these options will keep your meal low-carb and delicious. To store leftover Keto Chicken Spinach Tomato Skillet, let it cool first. Place it in an airtight container. This helps keep it fresh and tasty. Store it in the fridge for up to three days. Make sure to label your container with the date. When you're ready to eat, reheat the skillet on the stove. Use low heat to warm it up slowly. Stir it often to prevent sticking. You can also use the microwave. Heat it in short bursts, about 30 seconds at a time. Check it until it warms through. If you want to freeze this dish, use freezer-safe bags or containers. Make sure to remove as much air as possible. This helps prevent freezer burn. You can freeze it for up to three months. To eat it later, thaw it overnight in the fridge. Then, reheat it as mentioned above. Yes, you can make this dish dairy-free. Instead of heavy cream, use coconut cream or unsweetened almond milk. These options will still give a nice texture. Just remember to adjust the seasoning, as these substitutes can change the flavor. You might also skip the grated Parmesan cheese. This change keeps the dish creamy without dairy. This skillet meal is great on its own, but you can pair it with other dishes. Serve it over zucchini noodles or cauliflower rice for a low-carb option. You could also add a side salad with fresh greens and a light vinaigrette. This adds crunch and freshness to your meal. Keep it simple and healthy! Yes, this recipe is perfect for meal prep. You can make it ahead and store it in the fridge. Use airtight containers to keep it fresh. It stays good for three to four days. Reheat it in a skillet or microwave when you’re ready to eat. This makes busy weeknights so much easier! This blog post covered everything you need to make a great Keto Chicken Spinach Tomato Skillet. We looked at the ingredients, cooking steps, and storage tips. You learned how to prep the chicken and sauté your veggies just right. Remember, cooking is about fun and creativity. Don’t be afraid to switch up ingredients. With the right tips, you can make this dish your own. Enjoy your cooking and make it a delicious meal!

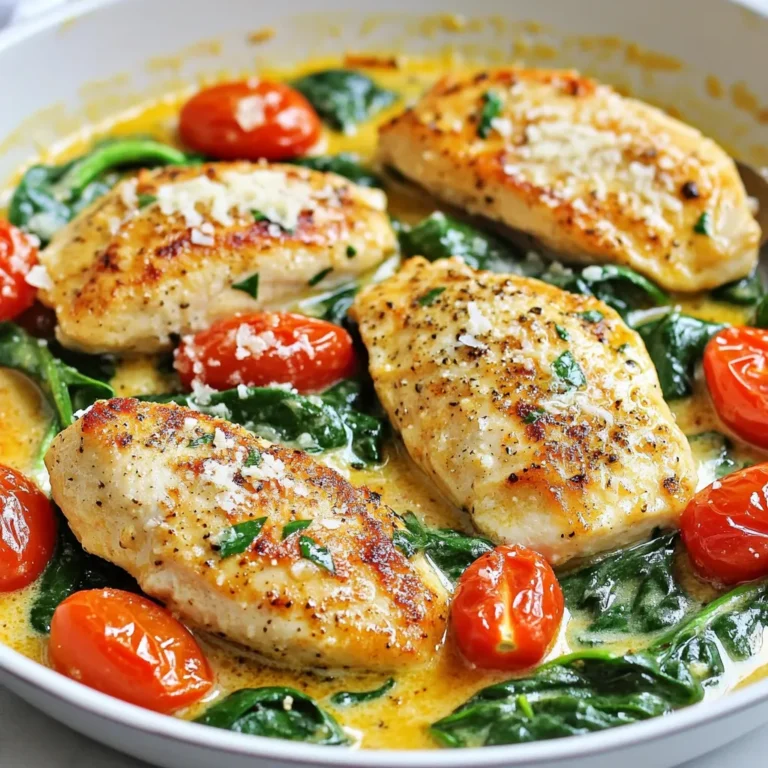
Keto Chicken Spinach Tomato Skillet Easy Weeknight Meal

To make your Cajun Steak Tips Rigatoni, gather these items: - 1 lb steak tips (sirloin or flank steak), cut into bite-sized pieces - 2 tablespoons Cajun seasoning (store-bought or homemade) - 1 tablespoon olive oil - 12 oz rigatoni pasta - 1 cup heavy cream - 1 cup cherry tomatoes, halved - 1 cup baby spinach - 1/2 cup grated Parmesan cheese - Salt and pepper to taste - Fresh parsley, chopped (for garnish) Choosing high-quality ingredients makes a big difference. Look for fresh steak tips. Sirloin or flank steak works best for this dish. Check that the meat looks bright and has a nice marbling. Use fresh cherry tomatoes for sweetness. They should be firm and vibrant. Fresh baby spinach adds color and nutrition. Opt for good quality Parmesan cheese to enhance the flavor. Aged cheese gives a richer taste. Lastly, use extra virgin olive oil for the best results. You can use either homemade or store-bought Cajun seasoning. Store-bought is quick and easy. Check the label for quality ingredients. If you want more control over flavors, make your own. Mix paprika, cayenne, garlic powder, onion powder, and thyme. This way, you adjust the spice level to your liking. Homemade seasoning adds a personal touch. It makes the dish truly your own. {{ingredient_image_1}} Start by cutting the steak into bite-sized pieces. Use sirloin or flank steak for the best flavor. Next, take 2 tablespoons of Cajun seasoning. Sprinkle it all over the steak tips. Make sure every piece is coated well. Let the steak sit for about 15 minutes. This helps the flavors soak in. While the steak is marinating, grab a large pot. Fill it with water and add a pinch of salt. Bring the water to a boil. Add 12 ounces of rigatoni pasta to the pot. Cook the pasta until it's al dente, which means it should still have a little bite. This usually takes about 10-12 minutes. Once done, drain the pasta but save 1/2 cup of the cooking water for later. Set the rigatoni aside. Heat 1 tablespoon of olive oil in a large skillet over medium-high heat. Once hot, add the marinated steak tips. Cook for about 3-4 minutes until they are browned. Remove the steak from the skillet and set it aside. In the same skillet, add 1 cup of halved cherry tomatoes. Sauté them for about 2 minutes until they soften. Next, pour in 1 cup of heavy cream. Bring it to a simmer and reduce the heat to low. Add the cooked rigatoni and 1 cup of baby spinach to the skillet. Stir until the spinach wilts and everything combines well. Return the steak tips to the skillet. Toss everything together. If the sauce is thick, add the reserved pasta water a little at a time. Finally, stir in 1/2 cup of grated Parmesan cheese. Season with salt and pepper to taste. Cook for another 2 minutes to warm through. Let it sit for a minute to meld the flavors. To cook steak tips just right, choose sirloin or flank steak. These cuts are tender and flavorful. Season them well with Cajun seasoning. Let them marinate for 15 minutes. This step adds great flavor. When cooking, use medium-high heat. Cook for 3-4 minutes, turning once. Look for a nice brown crust. For medium-rare, the inside should reach 135°F. For a creamy sauce, heavy cream is key. Pour it into the skillet after cooking the steak and tomatoes. Let it simmer gently. This helps it thicken. If the sauce is too thick, add reserved pasta water. Start with a little and stir. Keep adding until you reach the desired creaminess. The sauce should coat the pasta well, not be runny. You can boost flavor with more ingredients. Consider adding garlic for depth. Sauté it with the tomatoes for great aroma. Fresh herbs like basil or thyme can elevate the dish. Toss them in right before serving. They add freshness and color. A squeeze of lemon juice can also brighten flavors. It adds a nice zing that balances the richness. Pro Tips Marinate for Flavor: Allow the steak tips to marinate for at least 15 minutes with the Cajun seasoning to enhance the flavor profile. Cooking Pasta: Ensure the water is well salted before boiling the rigatoni; this helps season the pasta as it cooks. Use the Right Heat: Sear the steak on medium-high heat for a nice crust while keeping it juicy inside. Avoid overcrowding the pan. Adjusting Sauce Thickness: If the sauce is too thick after adding the steak, gradually mix in reserved pasta water to achieve your desired consistency. {{image_2}} You can create a vegetarian version of Cajun steak tips rigatoni by using tofu or mushrooms. For tofu, choose firm blocks. Press the tofu to remove extra water. Cut it into bite-sized cubes. Marinate the tofu in the same Cajun seasoning. Sauté it in olive oil until golden brown. If you prefer mushrooms, use portobello or cremini. Slice them thick and sauté until tender. Both options will give you a hearty meal full of flavor. Rigatoni is great, but you can swap it for other pasta types. Penne, farfalle, or even fettuccine work well. Choose pasta based on your texture preference. Thicker pasta holds sauce better, while thinner pasta cooks faster. No matter the choice, cook according to package directions. Each pasta will give a unique twist to your dish. Seasonal vegetables can elevate your Cajun steak tips rigatoni. Think bell peppers, zucchini, or asparagus. Dice them and add them to the skillet with the cherry tomatoes. Sauté until they soften but still maintain a bite. This not only adds color but also boosts nutrition. You can mix and match based on what is fresh and available to you. Enjoy the extra crunch and flavor in your meal. After you enjoy your Cajun steak tips rigatoni, store leftovers in an airtight container. This keeps the dish fresh and safe. Let the pasta cool before sealing it. It’s best to eat leftovers within three days for the best flavor. To reheat your rigatoni, use a skillet on low heat. Add a splash of water or cream to help maintain moisture. Stir gently until heated through. Avoid the microwave if you want to keep the texture nice and creamy. You can freeze Cajun steak tips rigatoni if you want to save some for later. Use a freezer-safe container and seal it well. Label it with the date. When ready to eat, thaw it overnight in the fridge. Reheat gently as described above. This way, your meal stays delicious! You can use half-and-half or whole milk as a lighter option. If you want a dairy-free alternative, try coconut cream or cashew cream. These options will change the taste slightly but still work. Yes, you can! Cook the steak and pasta ahead of time. Store them separately in the fridge. When ready to eat, combine them and heat them in a skillet. Some great side dishes include garlic bread, a fresh green salad, or roasted vegetables. You can also serve it with coleslaw for a crunchy contrast. These sides balance the rich flavors of your dish. Cajun seasoning has a medium spice level. It usually includes paprika, cayenne, and garlic. You can adjust the spice by adding less seasoning or using a milder blend. To make it healthier, use whole grain rigatoni for more fiber. You can also add more veggies like bell peppers or zucchini. Reducing the amount of cream or cheese can cut calories while still keeping it tasty. This article covered everything you need for Cajun Steak Tips Rigatoni. We went over key ingredients, including quality options and the choice between homemade or store-bought seasonings. I shared steps for perfect steak, flavorful cream sauce, and how to cook rigatoni. Tips for getting the best results and tasty variations like vegetarian options followed. Lastly, I included advice on storing leftovers and reheating. With these insights, you can create a delicious meal that impresses. Enjoy cooking and sharing your tasty dish!

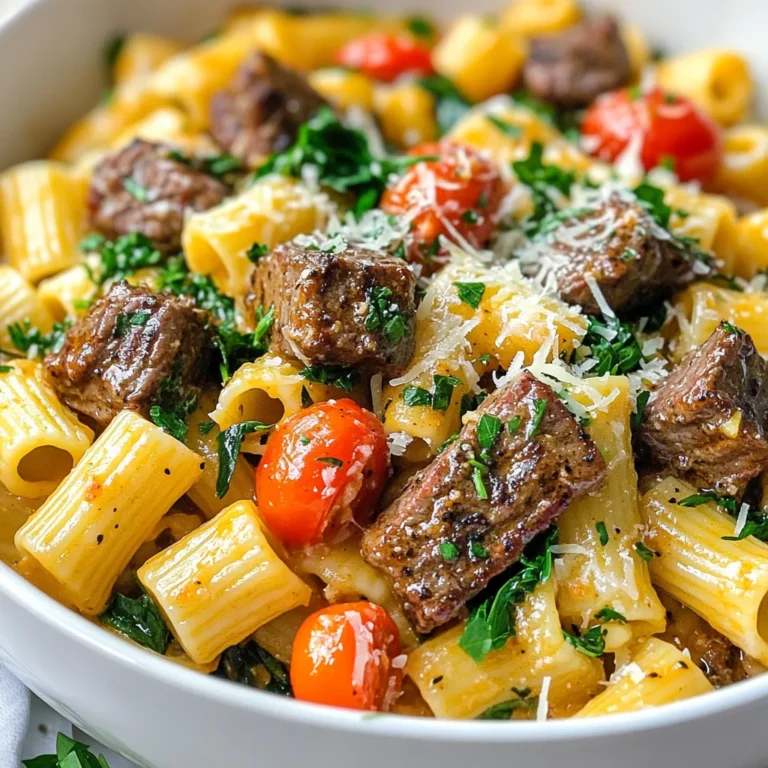
Cajun Steak Tips Rigatoni Flavorful Dinner Delight

- 2 pounds Yukon Gold potatoes, peeled and cubed - 10 cloves of garlic, unpeeled - ½ cup unsalted butter, softened - 1 cup heavy cream - Salt, to taste - Freshly ground black pepper, to taste - ¼ cup freshly chopped chives (optional) You can add extra flavors to your mashed potatoes. Try adding: - Cream cheese for a tangy taste - Sour cream for added richness - Grated Parmesan for a cheesy kick If you need to swap ingredients, here are some great options: - Use Russet potatoes instead of Yukon Gold for a fluffier mash. - Olive oil can replace butter for a dairy-free dish. - Greek yogurt works well in place of heavy cream for a lighter option. - Chives can be switched with parsley or green onions for a fresh twist. To roast garlic, first preheat your oven to 400°F (200°C). Take 10 cloves of unpeeled garlic and place them on a piece of foil. Drizzle a little olive oil on top. Wrap the foil tightly around the garlic. Roast it in the oven for 30-35 minutes. The garlic should feel soft and look caramelized. Let it cool for a bit. Once cool, squeeze the soft garlic out of the skins and set it aside. While the garlic roasts, prepare the potatoes. Use 2 pounds of Yukon Gold potatoes. Peel and cube them into even pieces. Put the cubed potatoes in a large pot. Cover them with cold water and add a pinch of salt. Bring the water to a boil over medium-high heat. Let the potatoes cook for about 15-20 minutes. You want them to be fork-tender. Once cooked, drain the potatoes and return them to the pot. Now comes the fun part! Add the softened butter and roasted garlic to the tender potatoes. Also, pour in 1 cup of heavy cream. Use a potato masher or a hand mixer to mash the potatoes. Keep mashing until you get your desired texture. If you want them creamier, mix in more heavy cream. Finally, season the mashed potatoes with salt and freshly ground black pepper. Stir well to combine all flavors. Enjoy this creamy delight! To get the best texture in your mashed potatoes, start with Yukon Gold potatoes. They have a creamy texture when cooked. Cook them until they are fork-tender, about 15-20 minutes. After boiling, drain them well to remove excess water. For mashing, use a potato masher for a chunkier feel or a hand mixer for a smoother blend. If you want it creamier, add more heavy cream little by little. The roasted garlic adds a rich flavor to the potatoes. Don’t skip this step! When mashing, mix in softened butter for a silky texture. Season your potatoes with salt and freshly ground black pepper. Taste as you go to find your perfect balance. For an extra burst of flavor, fold in fresh chives right before serving. They add a nice touch and a pop of color. Presentation makes food more inviting. Serve your creamy mashed potatoes in a large bowl. Create a small well in the center and add a pat of melted butter. This looks great and adds more flavor. To finish, sprinkle extra chives on top. You can also use a sprinkle of paprika for added color. This makes your dish not just tasty but also visually appealing! {{image_2}} You can make your creamy roasted garlic mashed potatoes even richer by adding cheese. Cheddar cheese works well for a sharp taste. Parmesan offers a nutty flavor. Just mix in a cup of shredded cheese while mashing. This adds creaminess and a yummy twist to the dish. Herbs can change the flavor of your mashed potatoes. Fresh rosemary gives a woodsy note. Thyme adds a nice earthiness. Try mixing in a tablespoon of chopped herbs right before serving. This small change brings new life to your dish and makes it even more special. If you want dairy-free mashed potatoes, use plant-based milk. Almond milk or coconut milk can replace heavy cream. Vegan butter is a great swap for regular butter. Just mash the potatoes with these options for a creamy texture. Your guests will love the taste without the dairy! To keep your creamy roasted garlic mashed potatoes fresh, store them in an airtight container. Let them cool to room temperature first. This helps prevent moisture build-up, which can spoil the dish. You can keep leftovers in the fridge for up to three days. Remember to label the container with the date, so you know when to use them. When you're ready to enjoy your mashed potatoes again, reheating them properly is key. Add a splash of heavy cream or a little butter before reheating. This keeps the potatoes creamy and smooth. Use a microwave-safe dish and cover it with a damp paper towel to retain moisture. Heat in short bursts, stirring often until warm. If you want to save your mashed potatoes for later, freezing is a great option. Scoop the potatoes into freezer-safe bags or containers. Remove as much air as possible to prevent freezer burn. You can freeze them for up to two months. When you're ready to eat them, thaw them overnight in the fridge before reheating. Adding a bit of cream or butter will help restore the creamy texture. To make your mashed potatoes creamier, use more heavy cream. Start with the amount in the recipe, then adjust. Adding softened butter helps too. You can also try using a hand mixer for a smoother texture. Remember, Yukon Gold potatoes are creamy by nature, so choose those for the best results. Yes, you can use other potatoes, but results may vary. Russet potatoes are starchy and make fluffy mashed potatoes. They absorb more liquid, so adjust your cream and butter. Red potatoes are waxy, which gives a different texture. They can be chunkier but still taste great. Creamy mashed potatoes pair well with many dishes. They go great with roasted chicken or beef stew. You can also serve them with grilled fish or a veggie stir-fry. For a special touch, try them with a rich gravy or a hearty mushroom sauce. This blog post covered how to make delicious, creamy mashed potatoes. We discussed the key ingredients, step-by-step instructions, and helpful tips. You learned about variations, storage, and common questions. Remember, the best mashed potatoes are creamy and full of flavor. Use the techniques shared to impress your family and friends. Enjoy experimenting with different ingredients and serving styles. Trust me, your mashed potatoes will shine at any meal!

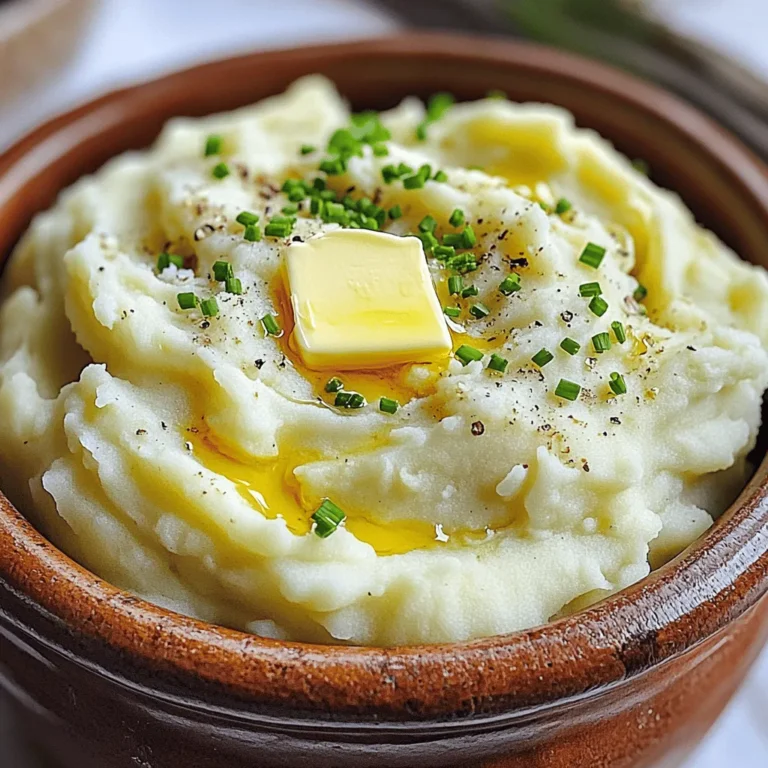
Creamy Roasted Garlic Mashed Potatoes Delightful Dish

- 8 ounces of rice noodles - 1 tablespoon of sesame oil - 2 cloves of garlic, minced - 1 red bell pepper, sliced - 1 cup of shredded carrots - 1 cup of snap peas - ½ cup of creamy peanut butter - ¼ cup of soy sauce - 2 tablespoons of honey or maple syrup - 2 tablespoons of rice vinegar - 1 tablespoon of sriracha These ingredients create a tasty meal. Rice noodles are the base. They soak up all the flavors. Fresh vegetables add color and crunch. The peanut sauce is creamy and rich. This mix is what makes it better than takeout. - 1 green onion, sliced - Chopped cilantro - Crushed peanuts Garnishes add flair and flavor. Green onions give a nice crunch. Cilantro adds freshness. Crushed peanuts give an extra texture. Feel free to use any or all of these. They make the dish look great! - Alternative noodles: You can use soba or whole wheat noodles. - Variations for dietary restrictions: Use almond butter for nut allergies. For gluten-free, choose gluten-free soy sauce. These swaps can help meet your needs. Don’t hesitate to mix things up. Cooking is all about finding what works for you! To start, boil 8 ounces of rice noodles in water. Cook them according to the package instructions. This usually takes about 4 to 6 minutes. The goal is to get them al dente, which means they should be firm but not hard. To keep them from sticking, drain the noodles and rinse them with cold water. This stops the cooking and cools them down. Next, heat 1 tablespoon of sesame oil in a skillet or wok over medium heat. Mince 2 cloves of garlic and add them to the pan. Sauté for about 30 seconds until the garlic smells amazing. Then, toss in 1 sliced red bell pepper, 1 cup of shredded carrots, and 1 cup of snap peas. Stir-fry for 3 to 4 minutes. The veggies should be tender-crisp, meaning they still have a bit of bite. Now, let’s make the peanut sauce. In a bowl, whisk together ½ cup of creamy peanut butter, ¼ cup of soy sauce, 2 tablespoons of honey or maple syrup, and 2 tablespoons of rice vinegar. Add 1 tablespoon of sriracha for some heat. Whisk until the mix is smooth. If it's too thick, add a bit of warm water to thin it out. Once your veggies are ready, add the drained noodles to the skillet. Pour the peanut sauce over the noodles and veggies. Toss everything together gently, making sure all the noodles are covered in sauce. Heat the mix for about 2 to 3 minutes until everything is warm. When serving, divide the noodles among bowls. For a nice touch, garnish with sliced green onions, chopped cilantro, and crushed peanuts. This adds color and a crunchy texture. Enjoy your Better-Than-Takeout Thai Peanut Noodles! - Avoiding mushy noodles: To keep rice noodles firm, cook them just until al dente. Rinse them in cold water right after. This stops cooking and keeps them from getting mushy. - Flavor enhancement suggestions: Boost the taste by adding a squeeze of fresh lime juice. You can also toss in some chopped peanuts or a sprinkle of sesame seeds for extra crunch. - Best practices for storing leftovers: Store leftover noodles in an airtight container. Keep them in the fridge for up to three days. If you know you won't eat them soon, consider freezing for longer storage. - Reheating tips: Reheat noodles in a skillet over medium heat. Add a splash of water or broth to help them regain moisture. Stir often to heat evenly. - Fixing overly thick sauce: If your sauce is too thick, add a little warm water or broth until it reaches your desired consistency. Whisk it well to combine. - Balancing flavors if too salty or sweet: If your dish tastes too salty, add a squeeze of lime juice. If it’s too sweet, mix in a splash of rice vinegar. This will help balance the flavors nicely. {{image_2}} You can make these Thai peanut noodles heartier by adding protein. Chicken, shrimp, or tofu work well. - For chicken, cut it into bite-sized pieces. Cook it in the skillet for about 5–7 minutes until it's no longer pink. - If using shrimp, add them after the garlic. They cook in about 3–4 minutes. - For tofu, use firm or extra-firm. Cube it and sauté for around 5–6 minutes until golden. To make this dish vegan, swap the honey for maple syrup. It gives a nice sweetness without animal products. For gluten-free noodles, use rice noodles, as this recipe suggests. Always check the soy sauce label. Look for gluten-free options to keep it safe for those with allergies. You can add lime juice for a zesty kick. Just squeeze half a lime into the sauce before mixing it in. Coconut milk also adds a creamy texture. Replace part of the peanut butter with coconut milk for a different taste. Feel free to mix in different veggies. Broccoli, zucchini, or baby corn all fit nicely. Experiment and find your favorite combo! To keep your Better-Than-Takeout Thai Peanut Noodles fresh, use airtight containers. This helps lock in flavor and moisture. Place your cooled noodles in the container. Store them in the fridge for up to four days. Make sure to label your containers. This way, you know what’s inside and when you made it. If you want to save some for later, freezing is a great option. To freeze, first let the noodles cool completely. Then, place them in freezer-safe bags. Remove as much air as possible before sealing. They can stay fresh for up to three months. When you're ready to eat, thaw them in the fridge overnight. Reheat in a pan over low heat, adding a splash of water if needed. Your Thai Peanut Noodles will taste best within four days in the fridge. After that, they may not be as fresh. Watch for signs of spoilage, like off smells or mold. If the noodles look or smell strange, it’s best to toss them out. Always trust your senses when it comes to food safety. Thai peanut noodles last about 3 to 5 days in the fridge. Store them in an airtight container. Make sure to cool them fully before sealing. Check for any off smells or mold before eating leftovers. Yes, you can make this dish in advance. Cook the noodles and veggies, then store them separately from the sauce. This keeps everything fresh. When ready to eat, just combine and heat. This makes for a quick meal on busy days. You can serve Thai peanut noodles with many sides. Try fresh spring rolls for a light touch. A simple cucumber salad pairs well too. If you want protein, grilled chicken or shrimp adds heartiness. The recipe can be spicy, depending on how much sriracha you add. If you like it mild, use less sriracha or skip it. For more heat, add more sriracha. Adjust to your taste for a perfect meal. In this post, I shared how to make delicious Thai peanut noodles. We covered key ingredients like rice noodles and peanut sauce, plus tips for cooking and serving. Remember to explore variations for different diets and tastes. From storage tips to common fixes, I aimed to make this dish easy and fun for you. Enjoy experimenting with flavors, and serve it your way. Happy cooking!

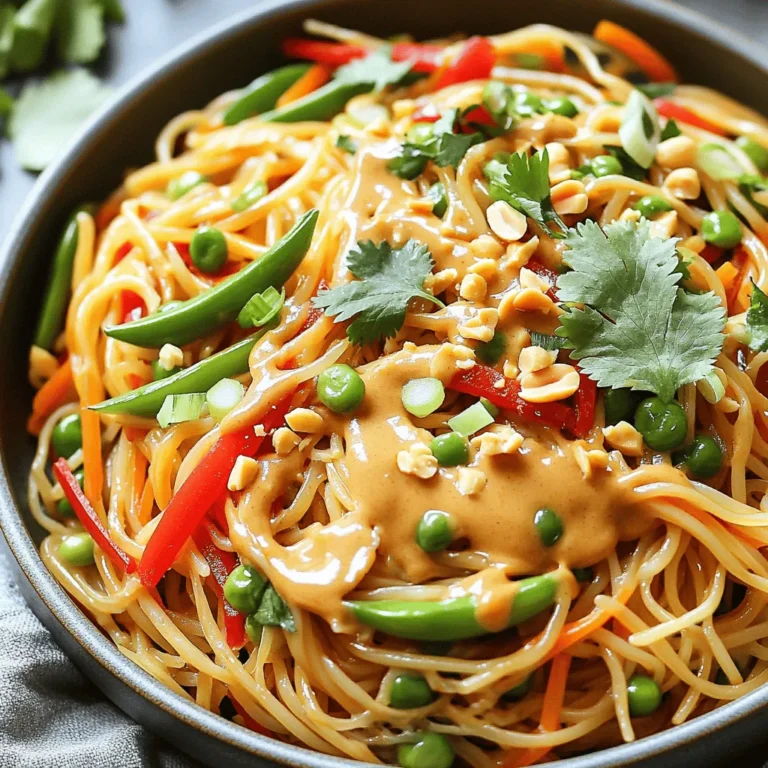
Better-Than-Takeout Thai Peanut Noodles Quick and Easy

- 4 boneless, skinless chicken thighs - 2 cups broccoli florets - 1 cup baby carrots, halved - 4 tablespoons honey - 4 cloves garlic, minced - 3 tablespoons soy sauce (low-sodium) - 2 tablespoons sesame oil - 1 teaspoon ginger, grated - Sesame seeds for garnish - Chopped green onions for garnish The main ingredients create a tasty base for this dish. Chicken thighs provide rich flavor and juiciness. Broccoli florets add crunch and color. Baby carrots give a sweet touch. The sauce components bring the dish to life. Honey adds sweetness, while garlic gives a strong flavor. Low-sodium soy sauce balances the sweet and savory tastes. Additional flavorings enhance the dish. Sesame oil adds a nutty note. Grated ginger brings warmth and depth. For garnish, sesame seeds and green onions add a fresh touch. They make the final dish look beautiful and appetizing. First, preheat your oven to 400°F (200°C). This step is key for even cooking. While the oven heats, you can make the marinade. In a mixing bowl, combine: - 4 tablespoons honey - 4 cloves garlic, minced - 3 tablespoons soy sauce (low-sodium) - 2 tablespoons sesame oil - 1 teaspoon ginger, grated Mix these ingredients well. The honey adds sweetness, while the garlic brings flavor. Next, take your chicken thighs and coat them in the marinade. Use a spoon or your hands to ensure every piece gets covered. This will help the chicken absorb all the flavors. Let the chicken sit in the marinade for 15 minutes. This short wait makes a big difference in taste. While the chicken marinates, wash and cut 2 cups of broccoli florets and 1 cup of baby carrots, halved. Lightly season the vegetables with salt and pepper. On a large sheet pan, spread the marinated chicken thighs in the center. Then, arrange the broccoli and carrots around the chicken. Drizzle any leftover marinade over the veggies. This way, they soak up the sweet garlic goodness too. Now, place the sheet pan in the preheated oven. Bake for 25-30 minutes. Check that the chicken reaches an internal temperature of 165°F (75°C) and the veggies are tender. For a crispy finish, switch the oven to broil for the last 3-5 minutes. Keep a watchful eye to prevent burning. Remove the pan from the oven and enjoy your delicious meal! Marinating the chicken is key for flavor. I suggest letting it sit for at least 15 minutes. This time allows the marinade to soak in. You want the honey and garlic to really shine through. To coat evenly, use your hands or a spoon. Make sure each piece is well-covered. This helps every bite taste amazing. Baking gives your chicken a nice, juicy texture. Broiling at the end adds a crisp finish. I recommend baking at 400°F for 25-30 minutes. Check the chicken's doneness with a meat thermometer. It should reach 165°F inside. If you don’t have one, cut into the chicken. It should look opaque and juices run clear. Pair this dish with rice or quinoa for a great meal. You can also serve it with a fresh salad. Presentation matters too! Use a nice plate or serve straight from the pan. Sprinkle sesame seeds and green onions on top. This adds color and crunch. Enjoy your beautiful and tasty creation! {{image_2}} Roasting different veggies can spice up your dish. Try bell peppers, zucchini, or even asparagus. They add color and taste. In summer, seasonal veggies like corn or green beans work well. Each option brings a unique flavor. If you want change, swap chicken for tofu or shrimp. Tofu absorbs flavors well and is a great vegetarian choice. If you choose shrimp, remember they cook faster. Adjust cooking time to about 15-20 minutes for shrimp. For tofu, bake for 25-30 minutes like chicken. Adding spices or herbs can make this meal exciting. Consider ginger, chili flakes, or fresh basil. You can also try a different sauce, like teriyaki or sweet chili. Each twist will give you a new taste experience. Experiment and find what you love! To store leftovers, first let the dish cool down. Place the honey garlic chicken and broccoli in an airtight container. Make sure to separate the chicken from the veggies if they are too soft. This keeps your chicken and broccoli fresh. Store it in the refrigerator for up to three days. You can enjoy it later or use it in another dish. The best way to reheat this dish is in the oven. Preheat your oven to 350°F (175°C). Place the chicken and broccoli on a baking sheet. Heat for about 10-15 minutes, or until warmed through. This method helps keep the chicken juicy and the broccoli crisp. You can use the microwave if you are short on time. Heat in 30-second bursts, stirring in between. This avoids soggy veggies and helps keep texture. Yes, you can freeze this meal! It’s perfect for meal prep. To freeze, first let the dish cool completely. Then, place the chicken and broccoli in a freezer-safe container. Make sure to leave some space for expansion. You can freeze it for up to three months. To thaw, place it in the fridge overnight. Reheat as mentioned above for the best results. Enjoy your meal even days later! If you want to swap out honey, try agave syrup. It has a similar sweetness. Maple syrup is another good choice. You could also use brown sugar dissolved in water. Just mix one cup of brown sugar with a half cup of warm water. This will give you a nice sweet flavor like honey. To add some heat, sprinkle red chili flakes over the chicken and veggies. You can also drizzle sriracha on top before serving. If you like fresh heat, try adding sliced jalapeños. They will give a nice kick and enhance the dish. To check if the chicken is done, use a meat thermometer. The center should reach 165°F (75°C). If you don't have a thermometer, look for clear juices when you cut into the chicken. The meat should not be pink. Make sure the outside is golden brown for the best look and taste. This dish combines marinated chicken, fresh veggies, and a tasty sauce. It’s easy to make with just a few steps. Remember to marinate your chicken for the best flavor. Feel free to mix in different veggies or proteins for variety. Leftovers store well, making this meal a great choice for busy days. Enjoy experimenting with flavors and serving suggestions that suit your taste. Healthy cooking can be simple and delicious!

Sheet-Pan Honey Garlic Chicken and Broccoli Delight

- 2 ripe bananas, sliced - 1 cup heavy whipping cream - 1/2 cup powdered sugar - 1 teaspoon vanilla extract - 1/2 cup vanilla pudding mix - 1 1/2 cups milk - 1 cup graham cracker crumbs - 1/4 cup unsweetened coconut flakes (optional) - Fresh mint leaves Gathering the right ingredients makes a big difference. I love using ripe bananas. They add the best flavor. The heavy whipping cream gives the parfait its dreamy texture. Powdered sugar sweetens the deal. A touch of vanilla extract enhances all the flavors. For pantry staples, I always keep vanilla pudding mix on hand. It helps create a creamy base. Milk adds the right consistency and richness. Graham cracker crumbs give a crunchy layer. You can also use coconut flakes for extra flair, but it’s not a must. If you want to dress up your parfaits, fresh mint leaves are a lovely touch. They add color and a fresh taste. Each layer works together to create a delightful dessert treat. - In a medium bowl, mix the vanilla pudding mix and milk until smooth. - Let the mixture sit for about 5 minutes to thicken. This gives it a nice, creamy texture. - In a separate bowl, beat the heavy whipping cream until soft peaks form. - Gradually add the powdered sugar and vanilla extract. Keep beating until stiff peaks form. This cream will add a fluffy touch to your parfaits. - Start by placing a layer of graham cracker crumbs at the bottom of your serving glasses. - Then, add a layer of the fluffy banana cream mixture over the crumbs. - Next, pile on some sliced bananas. - Repeat these layers until the glasses are full, ending with the fluffy cream on top. - For a fun finish, sprinkle coconut flakes over the top if you like. You can also add fresh mint leaves for a pop of color. To know when your whipped cream is ready, watch for soft peaks first. When you lift the beaters, the cream should hold its shape but still have a soft curve. Avoid overbeating by stopping as soon as you see stiff peaks form. Overbeaten cream turns grainy, losing its nice texture. For even layers, use the same amount of filling and bananas each time. This keeps layers neat and pretty. I recommend clear glasses so you can see all those beautiful layers. Mason jars or parfait cups work well too. You can add chocolate by mixing cocoa powder into the cream. Chopped nuts also add a nice crunch. Don’t be afraid to try other fruits like strawberries or blueberries for a fresh twist. Mix it up and find your favorite! {{image_2}} You can make chocolate banana cream parfaits by adding cocoa powder. Mix two tablespoons of cocoa powder into the vanilla pudding mix. This will give your parfaits a rich chocolate flavor. You can also top them with chocolate shavings or mini chocolate chips for extra fun. If you need a gluten-free dessert, switch to gluten-free graham crackers. You can find these at most grocery stores. Crush them just like regular graham crackers. This way, you can still enjoy that crunchy layer without the gluten. For a vegan twist, use coconut cream instead of heavy cream. Whip it just like you would regular cream. Use almond or oat milk for the pudding mix. There are many plant-based vanilla pudding mixes available too. These swaps keep the dessert creamy and delicious without dairy. To keep your parfaits fresh, store them in the refrigerator. Place them in airtight containers or cover with plastic wrap. This will help prevent them from absorbing other odors. Parfaits taste best when eaten within three days of making. After that, the bananas may turn brown and the layers can lose their texture. You can freeze parfaits, but it might change the texture. If you decide to freeze, do not freeze the assembled parfaits. Instead, freeze each layer separately. You can freeze the banana cream mixture and graham cracker crumbs in zip-top bags. When you want to enjoy a parfait, just thaw the layers in the fridge overnight. Since parfaits are best cold, you don’t need to reheat them. If you freeze the layers, thaw them slowly in the fridge. This helps maintain their taste and texture. Avoid microwaving the layers, as this can make them mushy and less enjoyable. Yes, you can use many fruits in this parfait! - Strawberries are a great choice. - Peaches add a nice sweetness. - Berries bring a tart flavor. - You can even try mangoes for a tropical twist. These fruits will mix well with the fluffy cream. The pudding needs about 5 minutes to set. - This time is key for a creamy texture. - Letting it rest helps it thicken properly. - If you skip this step, the parfait may be runny. Patience pays off with a perfect dessert! Yes, you can make these parfaits in advance! - Prepare the layers separately for best results. - Store the pudding and whipped cream in the fridge. - Assemble them right before serving. This keeps the layers fresh and tasty. Making them ahead saves you time on dessert day! In this post, we explored making delicious banana parfaits. You learned about the fresh and pantry ingredients, plus optional garnishes. The step-by-step guide showed how to prepare pudding and whipped cream, layer your parfait, and add tasty toppings. Remember to use fresh ingredients for the best flavor. Enjoy experimenting with variations and don’t be afraid to try new fruits. With these tips, your banana parfaits will impress everyone!

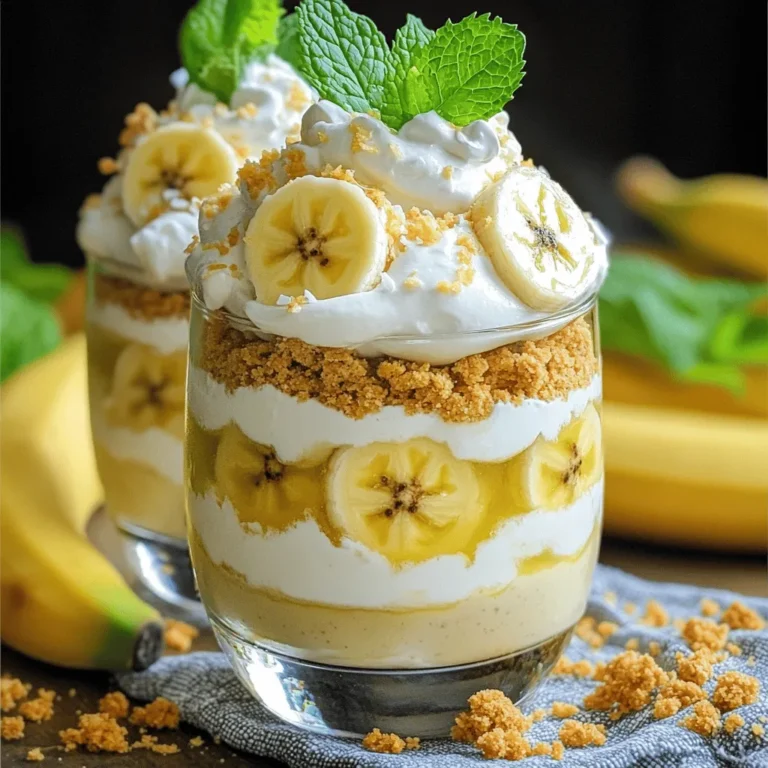
Fluffy Banana Cream Pie Parfaits Delightful Dessert Treat

- 4 tilapia fillets - 1 cup panko breadcrumbs - ½ cup grated Parmesan cheese - 1 teaspoon garlic powder - 1 teaspoon onion powder - ½ teaspoon paprika - ½ teaspoon black pepper - 1 teaspoon salt - 2 large eggs - 2 tablespoons Dijon mustard - Cooking spray (or olive oil spray) Gathering the right ingredients is key to making this dish shine. Start with fresh tilapia fillets. They should be firm and bright. Panko breadcrumbs add that crispy texture we all love. Use finely grated Parmesan cheese for a rich, savory flavor that melts beautifully. For seasoning, garlic and onion powders are must-haves. They add depth to the dish without overpowering the fish. Paprika gives a touch of color and a slight smokiness. Salt and black pepper balance all the flavors. You will need two large eggs and Dijon mustard to bind everything together. This mix helps the breadcrumbs stick well to the tilapia. A light spray of cooking oil keeps the fish from sticking to the air fryer, ensuring a perfect finish. With these ingredients, you are set for a crispy delight that will impress everyone at the table! First, I whisk two large eggs with two tablespoons of Dijon mustard in a bowl. This mixture will help the breadcrumbs stick to the fish. In another bowl, I mix one cup of panko breadcrumbs with half a cup of grated Parmesan cheese, one teaspoon of garlic powder, one teaspoon of onion powder, half a teaspoon of paprika, half a teaspoon of black pepper, and one teaspoon of salt. This blend gives the tilapia a tasty crust. Next, I take each tilapia fillet and dip it in the egg mixture. I let any extra egg drip off. After that, I coat both sides of the fillet with the breadcrumb mixture. I gently press to ensure the coating sticks well. This step is key for a crunchy texture. I preheat my air fryer to 400°F (200°C) for about five minutes. After preheating, I lightly spray the air fryer basket with cooking spray. I then arrange the coated tilapia fillets in a single layer in the basket. I make sure not to overcrowd it. A little extra spray on top helps create a crispy finish. I air fry the tilapia for 10 to 12 minutes. To ensure even cooking, I check the fillets halfway through. The fish is done when it turns golden brown and crispy. I also check if the internal temperature reaches 145°F (63°C) to confirm it is safe to eat. - Use fresh ingredients for optimal flavor. Fresh fish and new breadcrumbs make a big difference. - Don’t overcrowd the air fryer. Give each fillet space for hot air to circulate. This helps achieve that perfect crunch. - Adjust time based on thickness of fillets. Thin fillets cook faster, maybe around 10 minutes. Thicker ones may need up to 12 minutes. - Flip fillets halfway for even cooking. This step ensures both sides get golden and crispy. - Pairing with lemon wedges and sides is a great idea. The zest of the lemon brightens the dish and balances the richness. - Garnishing ideas for visual appeal include fresh herbs. Chopped parsley or dill adds color and freshness to your plate. {{image_2}} You can switch tilapia for other fish. Cod and haddock work well. Both fish have a mild taste and will soak up flavors nicely. They also fry up crispy, just like tilapia. Feel free to try salmon for a richer flavor. It has good fat and pairs well with the Parmesan crust. If you need a gluten-free version, use gluten-free breadcrumbs. They provide the same crunch. Many brands offer tasty options that work great in this recipe. Check your local store or try making your own. Just pulse gluten-free bread in a blender until crumbly. For a kick, add cayenne pepper or hot sauce to the breadcrumb mix. This gives a nice heat. Start with a small amount, about 1/4 teaspoon, and adjust to your taste. You can also drizzle hot sauce on the cooked fish before serving. This spicy twist adds fun and flavor to your meal! After enjoying your Air Fryer Parmesan Crusted Tilapia, store any leftovers in an airtight container. This keeps the fish fresh and helps maintain its flavor. I recommend eating leftovers within 2 days for the best taste. To reheat, the air fryer is your best friend. Set it to 350°F (175°C). Place the fillets inside and cook for about 5 minutes. This method keeps the crust crispy. If you're in a hurry, you can use the microwave. Place the tilapia on a microwave-safe plate. Cover it with a paper towel to keep moisture in. Heat for about 30 seconds to 1 minute, checking often to avoid overcooking. Yes, you can. Use a regular oven instead. Preheat your oven to 425°F (220°C). Place the coated tilapia on a baking sheet lined with parchment paper. Bake for about 15-20 minutes. Check if the fish is golden and crispy. This method will still give you a tasty meal. Look for a few signs. The tilapia should be opaque and flake easily with a fork. The internal temperature should reach 145°F (63°C). If it looks shiny or raw, it needs more time. Always trust your eyes and a food thermometer. You have many options! Here are some great sides to pair with your dish: - Steamed broccoli or green beans - A fresh garden salad - Roasted sweet potatoes - Quinoa or rice - Lemon wedges for a zesty kick These sides add color and flavor to your meal. They also balance the richness of the tilapia nicely. Enjoy your cooking! This blog post shared a simple and tasty recipe for Air Fryer Parmesan Crusted Tilapia. We covered the main ingredients and detailed the steps to make your dish delicious. I provided tips for a crispy crust and ways to adapt the recipe. Remember, you can switch up the fish or make it gluten-free. With easy storage and reheating tips, you’ll enjoy this meal anytime. Try this recipe for a quick, healthy dinner that impresses. Happy cooking!

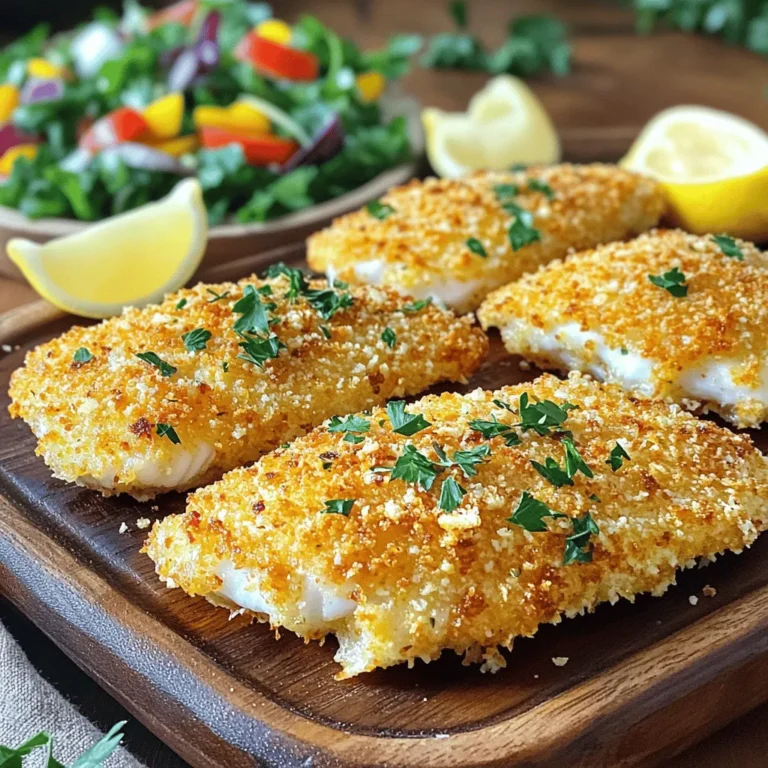
Air Fryer Parmesan Crusted Tilapia Crispy Delight

PREV 1 … 31 32 33 … 57 NEXT
meal twig

explore

DessertsDinnerAppetizersDrinks

Our Policies

  • Cookie Policy
  • Copyright Policy
  • Disclaimer
  • GDPR Policy
  • Terms Of Use
Back to Top
  • About
  • Contact Us
  • Privacy Policy
© 2025 meal twig