FREE DINNER EBOOK! Get your copy!
  • Cookie Policy
  • GDPR Policy
  • Disclaimer
  • Terms Of Use
  • Visit my other site: Fun Cookie Recipes
meal twig
  • Home
  • Dinner
  • Desserts
  • Drinks
  • Appetizers
  • Contact
  • About
  • Privacy Policy
  • Home
  • Dinner
  • Desserts
  • Drinks
  • Appetizers
  • Contact
  • About
  • Privacy Policy
  • Cookie Policy
  • GDPR Policy
  • Disclaimer
  • Terms Of Use
Visit my other site: Fun Cookie Recipes

HOME / CATEGORIES /

Latest

- 1 cup pure pumpkin puree - 1/2 cup brown sugar - 1/4 cup granulated sugar - 1/2 cup vegetable oil - 2 large eggs - 1 teaspoon vanilla extract - 1 1/2 cups all-purpose flour - 1 teaspoon baking powder - 1 teaspoon baking soda - 1 teaspoon ground cinnamon - 1/2 teaspoon ground nutmeg - 1/4 teaspoon ground ginger - 1/4 teaspoon salt - 1/2 cup chopped pecans (plus extra for topping) - 1/2 cup chocolate chips (optional) When I make Pumpkin Pecan Muffins, I rely on fresh, simple ingredients. The star of the show is pumpkin puree. This gives our muffins a rich, warm flavor. It also keeps them moist. I mix two types of sugar: brown and granulated. Brown sugar adds a nice caramel note. The granulated sugar helps with sweetness. Next, I use vegetable oil. It keeps the muffins tender. The two eggs help bind everything together. Don’t forget the vanilla extract! It enhances the overall taste. For the dry ingredients, I use all-purpose flour, baking powder, and baking soda. They help the muffins rise and become fluffy. Spices are key in this recipe. Ground cinnamon, nutmeg, and ginger bring warmth and depth. A pinch of salt balances the sweetness and enhances the flavors. Chopped pecans add crunch and a nutty taste. I also like to sprinkle more on top. If you want a sweet twist, add chocolate chips. They melt perfectly in the muffins. Gather these ingredients, and you're set for a delightful baking experience! 1. Preheat the oven and prepare the muffin tin First, set your oven to 350°F (175°C). This lets the oven get hot while you mix. Line your muffin tin with paper liners or greasing each cup with cooking spray. 2. Whisk together wet ingredients In a large bowl, add 1 cup of pure pumpkin puree. Next, mix in 1/2 cup of brown sugar and 1/4 cup of granulated sugar. Pour in 1/2 cup of vegetable oil, crack in 2 large eggs, and add 1 teaspoon of vanilla extract. Use a whisk to blend until the mixture is smooth and well combined. 3. Sift and combine dry ingredients In another bowl, sift together 1 1/2 cups of all-purpose flour, 1 teaspoon of baking powder, 1 teaspoon of baking soda, and spices: 1 teaspoon of ground cinnamon, 1/2 teaspoon of nutmeg, 1/4 teaspoon of ground ginger, and 1/4 teaspoon of salt. This mix brings out the best flavors. 1. Fold ingredients together correctly Gradually add the dry mixture into the wet mixture. Stir gently until just combined. Be careful not to overmix, as this keeps the muffins light and fluffy. 2. Fill muffin cups and prepare for baking Next, fold in 1/2 cup of chopped pecans. If you like, you can also add 1/2 cup of chocolate chips. Divide the batter evenly among the muffin cups, filling each about 3/4 full. Top each muffin with extra chopped pecans for a nice crunch. 3. Baking time and doneness check Place the tin in the preheated oven and bake for 20 to 25 minutes. To check if they are done, insert a toothpick into the center. If it comes out clean, your muffins are ready. After baking, let them cool in the tin for 5 minutes before moving them to a wire rack. How to avoid overmixing the batter To keep your muffins light, mix gently. When you add the dry ingredients to the wet ones, stir until just combined. It is okay if some flour shows. This helps avoid tough muffins. Ensuring muffins rise and have the perfect texture Use fresh baking powder and baking soda for a good rise. Make sure your oven is preheated to 350°F. Fill the muffin cups about 3/4 full. This allows space for the muffins to rise without spilling over. Ingredients substitutions for best results You can use coconut oil instead of vegetable oil for a different taste. If you don’t have brown sugar, try using all granulated sugar. For a dairy-free option, use almond milk instead of regular milk in any glaze. Serving suggestions for a beautiful display Serve your muffins on a rustic wooden board. A pretty cake stand also works well. You can add some fall leaves around them for a seasonal touch. Optional toppings for added flavor and flair Dust muffins with powdered sugar for sweetness. A simple glaze made of powdered sugar and milk is a great option too. You can even add a few extra chopped pecans on top for a nice crunch. {{image_2}} You can change up the taste of your pumpkin pecan muffins easily. Adding different nuts or fruits makes a big difference. Try walnuts or almonds for a new crunch. Dried cranberries or apples can add a sweet twist, too. Mixing in spices can also create unique flavors. For a warm taste, add cardamom or allspice. Want something zesty? A bit of orange zest gives a nice kick. Experimenting keeps each batch fun and fresh! For gluten-free muffins, use gluten-free all-purpose flour instead of regular flour. This swap keeps the texture right while catering to gluten-free diets. You can also make the muffins vegan. Replace eggs with flax eggs. To do this, mix one tablespoon of ground flaxseed with three tablespoons of water. Let it sit for five minutes until it thickens. Use plant-based oil instead of vegetable oil. These changes help everyone enjoy these tasty treats! To keep your pumpkin pecan muffins fresh, store them in an airtight container. This helps retain moisture and flavor. You can keep them at room temperature for up to three days. If you live in a humid area, the fridge may be a better option. Storing them in the fridge can extend freshness for about a week. However, the muffins may dry out a bit faster in the fridge. To freeze your muffins, let them cool completely first. Wrap each muffin in plastic wrap. Then, place them in a freezer-safe bag. This keeps them fresh for up to three months. When you want to enjoy one, simply take it out of the freezer. You can reheat the muffin in the microwave for about 20-30 seconds. For a crispier edge, pop it in the oven at 350°F (175°C) for a few minutes. This method makes them taste freshly baked! Can I use canned pumpkin instead of puree? Yes, you can use canned pumpkin. It is smooth and easy to mix. Just make sure it is pure pumpkin, not pumpkin pie filling. This gives your muffins a rich, pumpkin flavor without extra sugar. What can I substitute for eggs in this recipe? You can use applesauce, mashed banana, or flaxseed meal. For flaxseed, mix one tablespoon with three tablespoons of water. Let it sit for a few minutes. This will help bind the muffins just like eggs do. How do I know when the muffins are done baking? Insert a toothpick into the center of a muffin. If it comes out clean, the muffins are done. If it has wet batter, bake them for a few more minutes. The tops should also look golden brown. How to achieve a crunchy muffin top? For a crunchy top, add extra chopped pecans on top before baking. You can also sprinkle a bit of sugar on top to create a sweet crust. Baking at a slightly higher temperature for a few minutes helps too. Can I make mini muffins with this recipe? Yes, you can make mini muffins! Just fill the mini muffin cups about halfway. Bake for about 12-15 minutes, checking for doneness with a toothpick. What other flavors pair well with pumpkin and pecan? Chocolate pairs well for a rich taste. You can also add cranberries for a tart kick. Spices like cloves or allspice can enhance the warm flavor of pumpkin too. In this post, we explored how to make delicious pumpkin pecan muffins. We covered key ingredients, step-by-step instructions, expert tips, and delicious variations. You learned how to avoid common mistakes and keep your muffins fresh. Remember, experimenting with flavors and ingredients can lead to fun surprises. Whether you enjoy them warm or cold, these muffins are sure to please. Now, it’s your turn to bake and share these tasty treats!

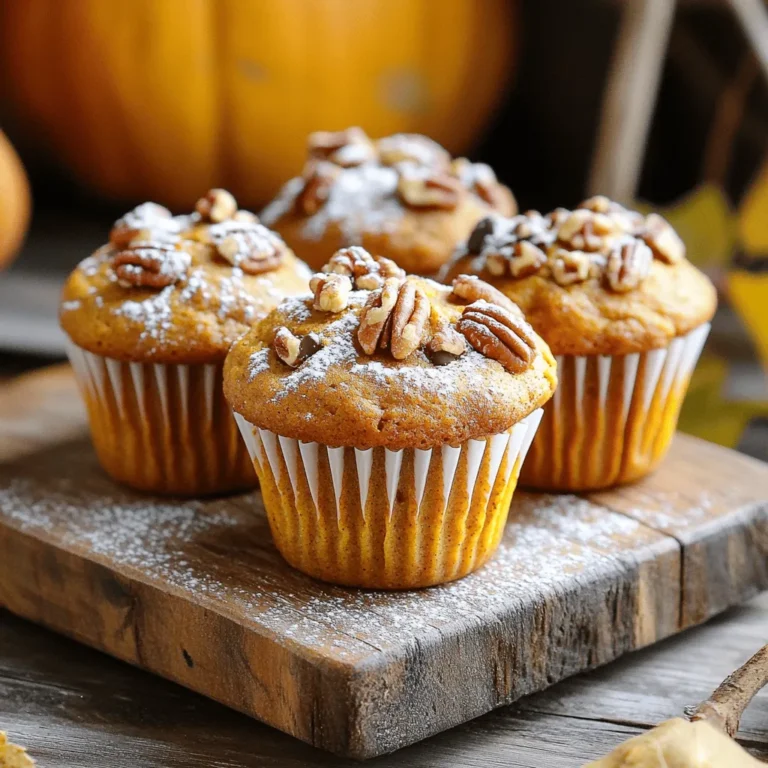
Pumpkin Pecan Muffins Delightful and Easy Recipe

To make No-Bake Peanut Butter Apple Energy Bites, you will need: - 1 cup rolled oats - 1/2 cup natural peanut butter - 1/2 cup diced apple (I suggest sweet types like Fuji or Honeycrisp) - 1/4 cup honey or maple syrup - 1/4 cup finely chopped walnuts - 1/4 teaspoon cinnamon - 1/4 teaspoon vanilla extract - Pinch of salt These ingredients blend well to give you a tasty, healthy snack. If you need a peanut butter substitute, try almond or cashew butter. These work great and have a similar texture. Sunflower seed butter is a good nut-free option. Each choice brings its own flavor, adding a twist to your bites. You can use honey or maple syrup in this recipe. Honey adds a rich sweetness. It also helps bind the mixture. Maple syrup gives a unique flavor. It is a great vegan option too. You can adjust the amount based on how sweet you like it. Try both to see which one you prefer! Start by taking a large mixing bowl. Add 1 cup of rolled oats and 1/2 cup of diced apple. You can use sweet apples like Fuji or Honeycrisp for the best flavor. Next, add 1/2 cup of natural peanut butter. This gives our bites a creamy texture and rich taste. Pour in 1/4 cup of honey or maple syrup for sweetness. Then, add 1/4 teaspoon of vanilla extract for extra flavor. Sprinkle in 1/4 cup of finely chopped walnuts, 1/4 teaspoon of cinnamon, and a pinch of salt. These add crunch and warmth. Mix everything together using your hands or a spatula. The mixture should feel sticky but hold together well. If it feels too crumbly, add a bit more honey or peanut butter. Once the mixture is well combined, it's time to shape the energy bites. Scoop out tablespoon-sized portions. Roll each portion into a ball using your hands. It can be messy, but that’s part of the fun! Place the shaped bites on a baking sheet lined with parchment paper. Make sure they have some space between them. This helps them not stick together. You should get about 12 to 15 energy bites from the mixture. Now, we need to chill the energy bites for a perfect texture. Place the baking sheet in the fridge for at least 30 minutes. This helps the bites firm up and makes them easier to eat. Once chilled, they are ready to enjoy. You can serve them in a small bowl or jar. A sprig of mint on top adds a nice touch! Enjoy these bites as a snack or before your workout for a boost of energy! To get the perfect texture, start by mixing all the dry ingredients first. This includes oats, walnuts, and cinnamon. Then, add the wet ingredients like peanut butter and honey. If the mixture feels too dry, add a little more peanut butter. If it is too wet, add more oats. The mix should be sticky, but hold shape well. You want to roll it into neat balls. Store any leftover energy bites in an airtight container. They will stay fresh in the fridge for up to a week. For longer storage, you can freeze them. Just place them in a freezer bag and remove as much air as possible. They can last for about three months in the freezer. You can make these bites more fun by adding extras. Try mixing in mini chocolate chips for sweetness. Dried fruits like cranberries or raisins work well too. You can also toss in seeds like chia or flax for extra crunch. Each add-in gives a new twist to the flavor profile. Experiment to find your favorite mix! {{image_2}} You can switch up the nut butter for a new taste. Almond butter adds a smooth, nutty flavor. Sunflower seed butter works well too. It’s great for nut-free diets. Cashew butter gives a creamy, rich taste. Just ensure it’s a natural option without added sugars. Adding seeds boosts nutrition and crunch. Chia seeds or flaxseeds are perfect for this. You can also mix in dried fruits like raisins or cranberries. These add sweetness and chewiness. Just remember to chop them small so they blend well. Chocolate chips can make these bites a sweet treat. Dark chocolate adds a rich taste, while white chocolate is creamier. For a tropical twist, add shredded coconut. It gives a chewy texture and a hint of sweetness. Mix and match to find your favorite combo! To keep your No-Bake Peanut Butter Apple Energy Bites fresh, store them in an airtight container. This helps prevent them from drying out. You can keep them in the fridge for up to one week. If you want to take them on the go, pack a few in a small bag. This makes a great snack for school or work. If you want to save energy bites for later, freezing is a great option. Place them in a single layer on a baking sheet first. Freeze them for about an hour. Once they are firm, transfer them to a freezer-safe bag or container. They can last in the freezer for up to three months. This way, you always have a healthy snack ready. To enjoy your frozen energy bites, take out only what you need. Let them sit at room temperature for about 15 minutes. This will make them soft and tasty again. You can also microwave them for 10-15 seconds if you want them warm. Enjoy your snacks anytime! Yes, you can make these energy bites vegan! To do this, swap honey for maple syrup. Both work well in this recipe. Use a natural peanut butter that contains only peanuts and salt. This simple change makes your bites plant-based and just as tasty. These energy bites can last about a week in the fridge. Store them in an airtight container. If you want them to last longer, you can freeze them. Just take out what you need, and they will quickly thaw at room temperature. Absolutely! You can use any sweet apple. Fuji and Honeycrisp are great choices, but feel free to experiment. Try Gala, Pink Lady, or even a tart apple for a different flavor. Just make sure to dice them small for the best texture. You now have a clear guide to making delicious energy bites. We covered the key ingredients, helpful steps, and tips to get the best texture. You learned about substitutions and how to store leftovers. Feel free to explore variations with different nut butters and add-ins for flavor. These bites are easy to customize and perfect for a quick snack. Enjoy making them your own!

No-Bake Peanut Butter Apple Energy Bites Delight

To make Creamy Lemon Chicken Orzo Soup, you need the following: - 2 tablespoons olive oil - 1 small onion, diced - 2 cloves garlic, minced - 2 medium carrots, sliced - 2 celery stalks, diced - 1 pound chicken breast, diced - 6 cups chicken broth - 1 cup orzo pasta - 1 cup heavy cream - Zest and juice of 1 large lemon - 1 teaspoon dried thyme - Salt and pepper to taste - Fresh parsley, chopped (for garnish) These ingredients create a rich and creamy base. The chicken adds protein, while the orzo gives it heartiness. You can enhance the soup with these optional ingredients: - A pinch of red pepper flakes for heat - Fresh lemon slices for garnish - Spinach or kale for extra greens These options can change the flavor profile. Feel free to mix and match based on what you enjoy. To prepare this soup, gather these cooking tools: - A large pot or Dutch oven for cooking - A cutting board and knife for chopping - A wooden spoon for stirring - Measuring cups and spoons for accuracy - Bowls for serving Having the right tools makes cooking easier. It helps you focus on what matters: creating a delicious meal. First, gather all your ingredients. You will need olive oil, onion, garlic, carrots, celery, chicken, chicken broth, orzo pasta, heavy cream, lemon, thyme, salt, pepper, and parsley. Dice the onion and chicken, mince the garlic, slice the carrots, and dice the celery. This setup makes cooking smooth and easy. In a large pot, heat 2 tablespoons of olive oil over medium heat. Add the diced onion and sauté it for 3-4 minutes. You want the onion to be soft and translucent. Next, stir in the minced garlic, sliced carrots, and diced celery. Cook these for about 5 minutes. Stir them occasionally until the vegetables soften. This step builds a great flavor base for the soup. Now, add the diced chicken breast to the pot. Cook it for 5-7 minutes, stirring often. You want the chicken to brown on all sides. Once browned, pour in 6 cups of chicken broth and bring this to a boil. When boiling, add 1 cup of orzo pasta, 1 teaspoon of dried thyme, and season with salt and pepper. Lower the heat to medium-low and let it simmer for about 10 minutes. You will know it’s done when the orzo is al dente. Then, stir in 1 cup of heavy cream, lemon zest, and lemon juice. Allow the soup to warm for 2-3 minutes before serving. Garnish with fresh parsley for a nice touch. To get the creamiest soup, use heavy cream. This thickens the soup and adds richness. Stir in the cream at the end of cooking. This keeps it fresh and smooth. You can also add a bit of lemon zest for extra flavor. Cook orzo separately to avoid mushiness. Add it to the soup when it is nearly done. This way, it stays firm. Cook it just until al dente, which means it is still slightly firm to bite. This ensures a nice texture in every spoonful. Taste your soup as you go. Start with salt and pepper, then adjust to your liking. Add more lemon juice for a brighter taste. If you want a herbal note, fresh thyme works great. Fresh parsley on top adds color and a fresh taste, too. {{image_2}} You can change the soup based on what you have. Swap chicken for shrimp or tofu. For veggies, add spinach, peas, or bell peppers. Each choice brings a new taste. If you like, try using sweet potatoes for a hint of sweetness. You can even add green beans for more crunch. This soup is flexible to fit your mood. If you need a gluten-free meal, use gluten-free orzo or rice. Both work well in this soup. For a dairy-free version, swap heavy cream with coconut milk. It adds a lovely flavor and keeps it creamy. You can also use almond milk for a lighter option. Just make sure it’s unsweetened to keep the soup savory. Want to spice things up? Add red pepper flakes or a dash of hot sauce. You can also mix in diced jalapeños for a fresh bite. If you love flavor, consider adding a pinch of smoked paprika. It gives a warm taste and pairs well with the lemon. Just be careful; a little spice goes a long way! To keep your creamy lemon chicken orzo soup fresh, store it in an airtight container. Make sure to let the soup cool down before sealing it. This helps prevent condensation, which can make the soup watery. You can keep it in the fridge for up to three days. If you want to enjoy it later, freezing is a great option. When it’s time to reheat, do it gently. Pour the soup into a pot over low heat. Stir often to avoid sticking. If the soup seems thick, add a splash of chicken broth to thin it out. Heat until warm, but don’t let it boil. This keeps the creamy texture smooth and tasty. To freeze the soup, use freezer-safe containers. Leave some space at the top for expansion. It’s best to freeze the soup without the cream added. When you’re ready to eat, thaw it overnight in the fridge. Then, reheat it on the stove and stir in the heavy cream. This way, your soup stays creamy and delicious! You can serve this soup with crusty bread. A warm baguette works great. You may also enjoy it with a fresh side salad. A simple mix of greens and lemon vinaigrette pairs well. Add some cheese on top for extra flavor. A sprinkle of Parmesan can make it even better. Yes, you can make this soup in a slow cooker. Start by sautéing the onion, garlic, carrots, and celery in a pan. This step adds great flavor. Then, transfer the veggies to your slow cooker. Add the chicken, broth, and thyme. Cook on low for 6-8 hours. Add the orzo during the last 30 minutes. Stir in the cream and lemon before serving. This soup can last about 3 to 4 days in the fridge. Store it in an airtight container to keep it fresh. If you notice any change in smell or color, toss it out. Reheat it on the stove or in the microwave. Adding a splash of broth can help restore its creaminess. This blog post covered making a creamy lemon chicken orzo soup. We discussed essential and optional ingredients, cooking tools, and step-by-step instructions. I shared tips for a creamy texture and flavor tweaks. We explored variations for dietary needs and storage best practices. In the end, enjoy your cooking and share this comforting dish with others. Your kitchen can be a place of joyful creativity.

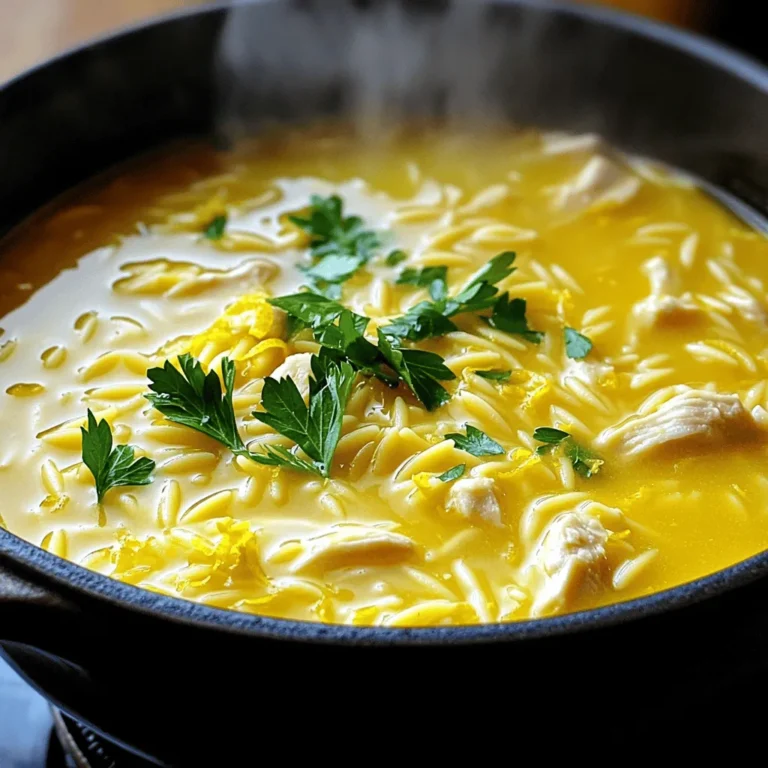
Creamy Lemon Chicken Orzo Soup Easy and Flavorful Meal

- 1 cup cottage cheese - 1 cup fresh strawberries, chopped - 2 large eggs Cottage cheese adds protein and creaminess. Fresh strawberries bring sweetness and flavor. Eggs help bind the mixture and create fluffiness. - 1 cup all-purpose flour - 1 tablespoon sugar (optional) - 1 teaspoon baking powder All-purpose flour gives structure to the pancakes. Sugar can sweeten the batter, but it’s not a must. Baking powder helps the pancakes rise and become light. - ½ teaspoon baking soda - ½ teaspoon vanilla extract - ½ teaspoon salt Baking soda balances the acidity of the batter. Vanilla extract adds a warm, sweet aroma. Salt enhances all the flavors in the pancakes. First, let’s start by combining the wet ingredients. In a medium bowl, whisk together 1 cup of cottage cheese, 2 large eggs, and ½ teaspoon of vanilla extract. Mix until everything looks smooth. Next, grab another bowl and sift together the dry ingredients. You need 1 cup of all-purpose flour, 1 tablespoon of sugar (if you like it sweet), 1 teaspoon of baking powder, ½ teaspoon of baking soda, and ½ teaspoon of salt. Once you have your dry mix ready, slowly add it to the wet mix. Stir gently until just combined. It’s okay if the mixture is a bit lumpy. Overmixing can make your pancakes tough, and we want them fluffy! Now, it’s time to fold in the star of the show—1 cup of chopped fresh strawberries. This will add sweetness and flavor to your pancakes. Now, let’s heat the skillet! Place a non-stick skillet or griddle over medium heat. Add a little olive oil or melted butter to prevent sticking. Once it’s hot, pour ¼ cup of batter onto the skillet for each pancake. Cook until small bubbles form on the surface, which should take about 2-3 minutes. Once you see those bubbles, flip the pancakes. Cook for another 2-3 minutes until they turn golden brown. Repeat this process with the rest of the batter. If needed, add more oil or butter to the skillet. These pancakes are best served warm. Drizzle with maple syrup for sweetness and top with extra strawberries for a fresh touch. You could also add whipped cream or yogurt if you like. Serve them with a side of bacon or eggs for a complete breakfast. Enjoy every bite! To make great pancakes, avoid overmixing the batter. Mix until just combined. The batter should be a bit lumpy. This keeps the pancakes fluffy. For the right consistency, focus on your ingredients. Use one cup of cottage cheese and one cup of flour. This balance helps the pancakes hold together. You can add spices to boost flavor. A pinch of cinnamon or nutmeg can make a big difference. They add warmth and depth to your pancakes. If you prefer a sweeter taste, try different sweeteners. Honey or maple syrup can replace sugar. They add a nice touch to the pancakes. Deciding between a skillet or a griddle is key. A skillet works well for small batches. A griddle is great for cooking many pancakes at once. Control the temperature while cooking. Medium heat is best. Too high can burn the pancakes before they cook through. Look for small bubbles to know when to flip them. {{image_2}} You can change up the fruit in these pancakes. If you love blueberries, use them instead of strawberries. They add a sweet and tangy taste. Just fold in a cup of fresh blueberries into the batter. You can also try bananas. Slice one ripe banana and mix it in. The pancakes will be sweet and creamy. If you need gluten-free options, swap the all-purpose flour for a gluten-free blend. This will keep the pancakes fluffy and tasty. For a dairy-free alternative, use almond or soy yogurt instead of cottage cheese. It gives a nice texture without the dairy. Want a twist? Add chocolate chips for a sweet treat. Just sprinkle a handful into the batter before cooking. Nut butters are another great option. Spread peanut or almond butter on top of the pancakes. This adds a rich, nutty flavor that pairs well with syrup. To store leftovers, let the pancakes cool. Place them in an airtight container. Make sure to separate layers with parchment paper. This keeps them from sticking. Store them in the fridge for up to three days. Freezing pancakes is easy. First, cool them completely. Then, stack pancakes with parchment paper in between. Place the stack in a freezer bag. Squeeze out air before sealing. You can freeze them for up to two months. For the best flavor, reheat pancakes in the toaster or oven. To use the oven, preheat it to 350°F (175°C). Place pancakes on a baking sheet for about 10 minutes. If you prefer the microwave, heat them for 20-30 seconds. This keeps them soft and warm. Enjoy them with fresh syrup or extra strawberries! Yes, you can use frozen strawberries. They will soften during cooking. This changes the texture a bit. Fresh strawberries give a firmer bite. For flavor, the difference is minor. I suggest thawing the frozen ones first. Drain any extra juice to avoid soggy pancakes. You can make these pancakes healthier with simple swaps. Try using whole wheat flour instead of all-purpose flour. This adds fiber. You can also cut the sugar or leave it out. Use Greek yogurt instead of some cottage cheese. This gives a protein boost. Lastly, consider using a sugar substitute, like honey or maple syrup, for sweetness. These pancakes taste great with many toppings. Maple syrup is a classic choice. Fresh strawberries on top add brightness. You could also sprinkle some nuts for crunch. Yogurt makes a creamy addition. Try serving with a side of scrambled eggs for extra protein. A fruit salad pairs nicely too! This article detailed how to make delicious cottage cheese strawberry pancakes. We explored main and dry ingredients, flavor enhancers, and essential cooking steps. I shared tips to perfect your pancakes and offered variations to suit different diets. Storing and reheating methods help preserve their flavor. Enjoy experimenting with these pancakes. You can customize them to suit your taste! Happy cooking!

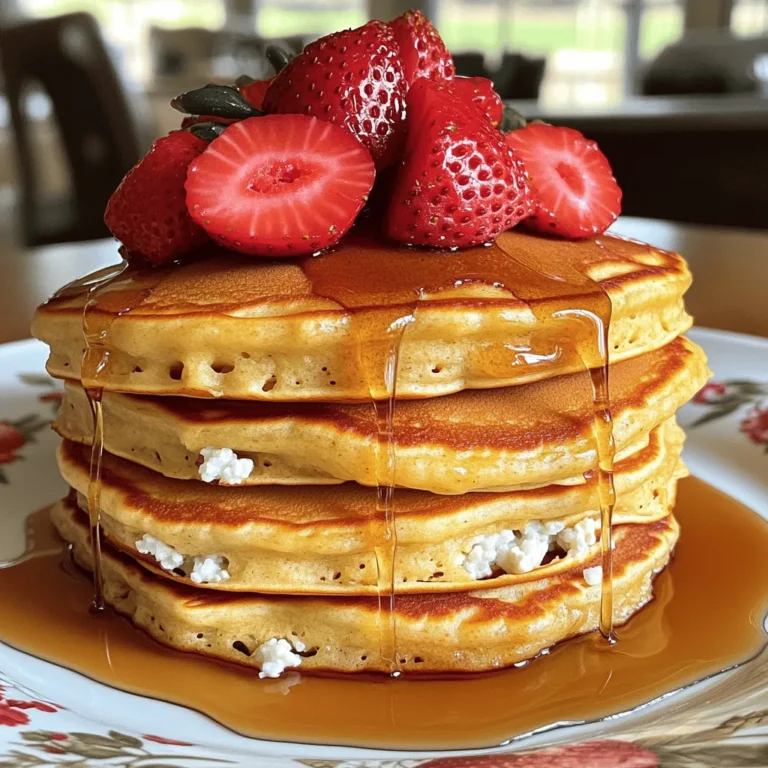
Cottage Cheese Strawberry Pancakes Delightful Morning Meal

- 6 medium apples (such as Granny Smith or Honeycrisp), peeled, cored, and sliced - 1 cup brown sugar, packed - 1 cup rolled oats - 1 cup all-purpose flour - 1 teaspoon cinnamon - 1/2 teaspoon nutmeg - 1/2 cup unsalted butter, melted - 1/2 cup butterscotch chips - 1/4 teaspoon salt - 1/4 cup chopped pecans (optional) - Vanilla ice cream, for serving You can swap apples for any firm variety. Try Fuji or Braeburn for a sweeter touch. Use coconut sugar if you want a less processed sweetener. For a gluten-free option, substitute all-purpose flour with almond flour or a gluten-free blend. If you want a nut-free version, you can skip the pecans. You can also use chocolate chips instead of butterscotch chips for a fun twist. This recipe serves 6-8 people. Each serving contains about 350 calories. It has around 14 grams of fat and 52 grams of carbs. The fiber content is about 3 grams, which adds a bit of health. If you add vanilla ice cream, remember that adds extra calories and sugar. You can reduce calories by cutting back on sugar or using less butter. First, pick 6 medium apples. I love using Granny Smith or Honeycrisp. They add a nice tartness. Peel, core, and slice the apples. In a large bowl, mix the sliced apples with half a cup of brown sugar, cinnamon, nutmeg, and salt. Toss well until all apples are coated. Let them sit for a bit. This helps the flavors blend and the apples soften. In another bowl, gather your dry ingredients: ½ cup of brown sugar, 1 cup of rolled oats, and 1 cup of all-purpose flour. Pour in ½ cup of melted unsalted butter. Mix until it looks crumbly. This topping is key for that perfect crisp. For a fun twist, stir in butterscotch chips and, if you like, some chopped pecans. They add a nice crunch. Now, layer the apple mixture into the bottom of your slow cooker. Spread it out evenly for the best results. Next, sprinkle the crumbly topping over the apples. Make sure to cover them fully. This will create a nice crust. Put the lid on the slow cooker and set it to low. Cook for 4 to 5 hours. Check for tenderness in the apples and a golden topping. When done, remove the lid and let it sit for about 15 minutes. This helps it firm up before serving. Enjoy your warm treat with a scoop of vanilla ice cream on top! For the best slow cooker butterscotch apple crisp, choose the right apples. I recommend Granny Smith or Honeycrisp. These apples have a nice balance of sweet and tart flavors. They also hold up well during cooking. Other good options include Fuji and Braeburn. Just avoid soft apples like Red Delicious. Their texture won't give you that perfect crisp. To get a crispy topping, use rolled oats and all-purpose flour. Mix them well with melted butter. This creates a crumbly texture that bakes nicely. Ensure you cover your apples evenly with the topping. If you want an extra crunch, add chopped pecans. They add flavor and texture. Just remember to watch your cooking time. If you overcook it, the topping can get soggy. Serve your butterscotch apple crisp warm in bowls. A scoop of vanilla ice cream on top makes it special. You can drizzle extra butterscotch sauce for added sweetness. For a fun twist, try serving it with caramel sauce. Pairing it with a cup of warm cider is also delightful. Enjoy this cozy dessert with family and friends! {{image_2}} You can make this butterscotch apple crisp a bit healthier. Swap brown sugar for coconut sugar. It has a similar taste but fewer calories. Use whole wheat flour instead of all-purpose flour. This adds fiber to your dish. You can also replace butter with coconut oil. This change gives it a nice flavor and makes it dairy-free. While apples shine in this recipe, you can try other fruits. Pears can add a juicy twist. You might also enjoy peaches or plums in summer. In fall, consider adding cranberries for a tart kick. Just remember to adjust the sugar if you use tart fruits. This keeps the balance of sweetness just right. The crumb topping is where you can get creative. Instead of oats, you can use crushed nuts for a nutty crunch. Almond flour is a great gluten-free option too. For a fun twist, sprinkle some chocolate chips on top. You could even add spices like ginger or cardamom for extra warmth. Don’t forget to add a drizzle of caramel for a sweet touch! After you enjoy your slow cooker butterscotch apple crisp, store leftovers in an airtight container. This keeps the crisp fresh and tasty. Place it in the fridge for up to three days. If you want to keep it longer, consider freezing it. To reheat your apple crisp, take it out of the fridge. You can use an oven or microwave. If you use an oven, preheat it to 350°F. Put the crisp in an oven-safe dish and cover it with foil. Heat for about 15-20 minutes. If you use a microwave, heat individual portions for 30 seconds to 1 minute until warm. You can freeze your apple crisp for up to three months. To freeze, let it cool completely. Then, wrap it tightly in plastic wrap and aluminum foil. This helps prevent freezer burn. When you're ready to eat it, thaw it in the fridge overnight. Reheat it in the oven for the best taste. Enjoy it warm with vanilla ice cream! Yes, you can use different sugars. White sugar works, but it will change the flavor. If you want a deeper taste, try using coconut sugar or maple sugar. Both options will add a nice twist to the apple crisp. Check the apples for tenderness and the topping for a golden color. The crisp cooks for 4-5 hours on low. You can poke an apple slice with a fork. If it goes in easily, the crisp is ready. Let it sit for about 15 minutes before serving. Yes, you can bake it in the oven. Preheat your oven to 350°F. Layer the apples in a baking dish and top with the crumb mixture. Bake for about 30-35 minutes or until the topping is golden brown. Enjoy the same great taste! In this blog post, we explored the key ingredients for a tasty apple crisp. We covered the best apples, how to make a crumb topping, and cooking in a slow cooker. Plus, I shared tips for crispy texture and serving ideas. Don't forget the variations, like healthier swaps or different fruit. Finally, I outlined how to store and reheat your leftovers. With these steps, you can create a delicious dessert that everyone will love. So grab your ingredients and start cooking!

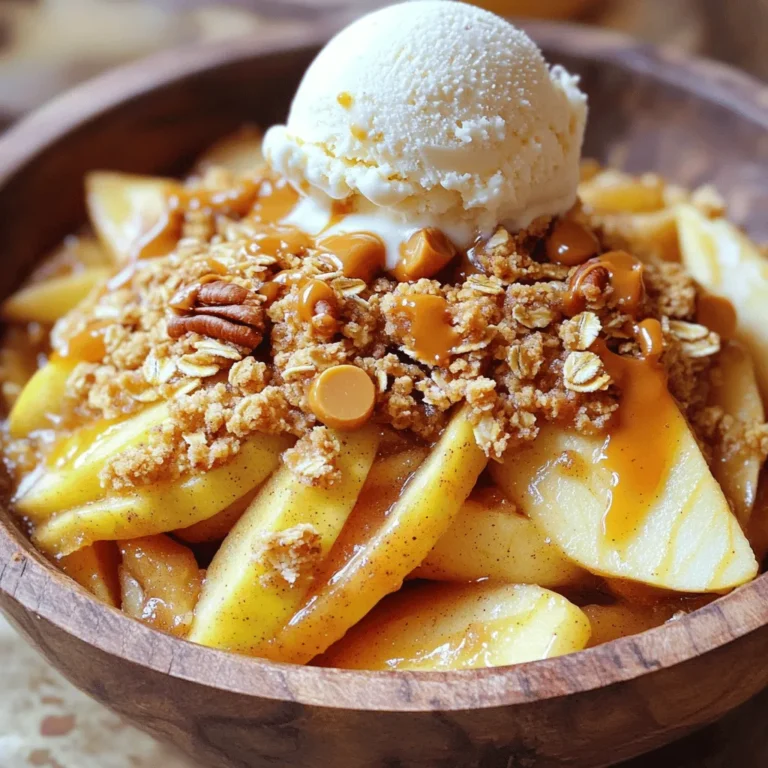
Slow Cooker Butterscotch Apple Crisp Delightful Treat

- 1 lb spicy chicken sausage, sliced into rounds - 2 cups bell peppers (mixed colors), sliced - 1 medium red onion, sliced - 2 cups broccoli florets The spicy chicken sausage is the star. It adds a nice kick. The mixed bell peppers bring color and sweetness. The red onion gives a sharp taste. Broccoli florets add crunch and nutrients. This mix makes your dish lively and fun. - 3 tablespoons olive oil - 1 tablespoon honey - 1 teaspoon smoked paprika - 1 teaspoon garlic powder - 1/2 teaspoon red pepper flakes (adjust to taste) - Salt and pepper to taste The olive oil helps everything cook well. Honey adds sweetness and balances the spice. Smoked paprika brings warmth and depth. Garlic powder gives a savory kick. Red pepper flakes let you adjust the heat. A bit of salt and pepper ties it all together. - Fresh parsley, chopped (for garnish) Fresh parsley is a bright touch. It adds color and freshness. Just sprinkle it over the dish before serving. This little step makes your meal look and taste great! 1. Preheat the oven: Set your oven to 400°F (200°C). This step warms the oven for even cooking. 2. Prepare vegetables and sausage: Slice 1 lb of spicy chicken sausage into rounds. Then, cut 2 cups of mixed bell peppers and 1 medium red onion. Lastly, get 2 cups of broccoli florets ready. 1. Combine sausage and veggies: In a large bowl, mix the sausage, bell peppers, red onion, and broccoli. 2. Whisk together seasonings: In a small bowl, whisk 3 tablespoons of olive oil, 1 tablespoon of honey, 1 teaspoon of smoked paprika, 1 teaspoon of garlic powder, and 1/2 teaspoon of red pepper flakes. Add salt and pepper to taste. 1. Toss and spread on sheet pan: Pour the honey mixture over the sausage and veggies. Toss to coat well. Spread everything in a single layer on a large sheet pan. 2. Bake and monitor cooking progress: Bake for 20-25 minutes. Stir halfway through cooking. This keeps everything cooking evenly. The veggies should be tender, and the sausage will get caramelized. - Ensuring even cooking: To get even cooking, spread the sausage and veggies in a single layer on the sheet pan. Stir the mix halfway through baking. This helps all ingredients cook evenly. - Adjusting spice levels: If you want more heat, add more red pepper flakes. For less spice, cut back on the flakes. You can also use mild sausage instead of spicy sausage for a different flavor. - Presentation tips: Serve the sheet pan right on the table for a homey touch. You can also transfer it to a nice platter. A squeeze of fresh lemon juice over the top adds a bright flavor. - Recommended side dishes: This dish pairs well with a simple green salad or crusty bread. You can also serve it with rice or quinoa to make it more filling. - Best sheet pan to use: A large, sturdy sheet pan works best. A half-sheet pan is ideal for this recipe. It gives enough space for all ingredients to roast nicely. - Recommended mixing bowls: Use a large mixing bowl for combining the sausage and veggies. A medium bowl is great for whisking the sauce. A glass bowl is easy to clean and lets you see all the ingredients. {{image_2}} You can switch up the sausage for a lighter option. Turkey sausage works great here. It has less fat, but still packs flavor. You can also use vegetarian sausage options. Many brands offer tasty plant-based choices that mimic the texture of meat. Look for those with good spices to keep the flavor strong. Both options keep the dish satisfying. Feel free to get creative with veggies. Seasonal veggies like zucchini, asparagus, or mushrooms can add new tastes. You can also grab frozen vegetable options. They are convenient and still nutritious. Just make sure to thaw them before baking. This helps them cook evenly with the sausage. Want more zing? Try adding citrus! A squeeze of lemon or lime can brighten the dish. You can also mix in different herbs. Fresh basil, thyme, or oregano can add depth. Experimenting with flavors helps customize your meal. This way, each time you make it, it can be a little different and exciting. After you enjoy your Spicy Honey Sausage Veggie Sheet Pan, store leftovers in the fridge. Use an airtight container to keep them fresh. Place it in the fridge within two hours of cooking. This helps prevent bacteria growth. You can enjoy the leftovers for up to four days. If you'd like to save some for later, freezing is a great option. Let the dish cool completely before freezing. Divide it into portions. Use freezer-safe bags or containers. This keeps your meal easy to grab later. When you’re ready to eat, reheat your meal in the oven. This keeps the sausage and veggies crispy. Preheat the oven to 350°F (175°C). Place the leftovers on a baking sheet. Heat for about 15 minutes or until hot. You can also use a microwave. Put the food on a microwave-safe plate. Cover it with a damp paper towel to maintain moisture. Heat it for 1 to 2 minutes, checking it often. This helps keep the flavors and texture. In the fridge, your Spicy Honey Sausage Veggie Sheet Pan lasts about four days. After that, it may lose flavor or texture. For freezing, it can last up to three months. Just remember to label your bags with the date. This way, you know when to use it. To make this dish, gather your ingredients. Start by preheating your oven to 400°F (200°C). In a bowl, mix sliced spicy chicken sausage, bell peppers, red onion, and broccoli. In a separate bowl, whisk olive oil, honey, smoked paprika, garlic powder, red pepper flakes, salt, and pepper. Pour this mix over the sausage and veggies. Toss until everything is well coated. Spread it on a sheet pan and bake for 20-25 minutes. Stir halfway through cooking. When done, garnish with fresh parsley and serve. Yes, you can! This recipe is very flexible. You can swap in any of your favorite veggies. Carrots, zucchini, or asparagus work well. Just keep the cooking time in mind. Make sure the veggies you choose cook at a similar rate. This way, everything will be tender and tasty. This sheet pan dish goes great with many sides. You can serve it with rice or quinoa for a hearty meal. A fresh salad adds a nice crunch. You could also pair it with warm bread to soak up the flavors. Each option brings something special to the table. The spice level depends on how much red pepper flakes you use. A half teaspoon adds a nice kick without overwhelming the dish. If you like it spicier, add more flakes. Just remember, you can always start small and taste as you go. This way, you can find the right heat for your palate. This blog post covers how to make a tasty spicy chicken sausage veggie dish. We discussed the main ingredients, seasonings, and steps for preparing and baking. I shared tips for even cooking, serving suggestions, and alternative ingredients. Finally, we explored storage options and answered common questions. I hope you feel ready to try this recipe. Simple steps and tasty flavors await you! Enjoy creating your dish!

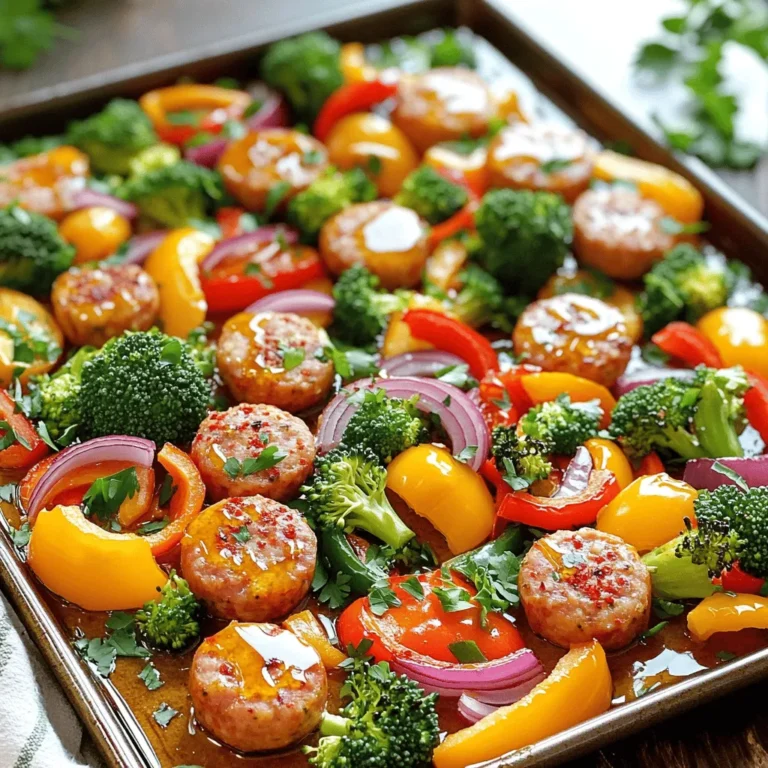
Spicy Honey Sausage Veggie Sheet Pan Flavor Boost

- 1 pound flank steak, thinly sliced against the grain - 1/4 cup soy sauce (low sodium) - 2 tablespoons brown sugar - 2 cloves garlic, minced - 1 tablespoon ginger, minced - 1 tablespoon sesame oil - 1 teaspoon red pepper flakes (adjust to taste) - 2 cups cooked rice (white, brown, or jasmine) - 1 cup broccoli florets - 1 bell pepper, sliced (red or green) - 1 carrot, julienned - 2 green onions, sliced - Sesame seeds for garnish The flank steak is the star of this dish. It’s tender and full of flavor. The marinade combines soy sauce, brown sugar, garlic, ginger, sesame oil, and red pepper flakes. This mix gives the beef a sweet and savory taste with just the right kick. You’ll also need fresh veggies. Broccoli, bell pepper, and carrot add color and crunch. They balance the richness of the beef. Green onions and sesame seeds are great for garnishing. They add a nice touch and extra flavor. - Kimchi for serving - Variations on rice types Kimchi can bring a spicy and tangy twist to your meal. It’s a great side that pairs well with the beef bowls. You can try different types of rice too. White rice is classic, but brown or jasmine rice also works well. This lets you customize your dish to your taste. With these ingredients, you get a balanced bowl of flavor and texture. Each bite is better than takeout! To start, you'll mix the marinade ingredients in a bowl. You'll need: - 1/4 cup soy sauce - 2 tablespoons brown sugar - 2 cloves garlic, minced - 1 tablespoon ginger, minced - 1 tablespoon sesame oil - 1 teaspoon red pepper flakes Whisk these together until smooth. Next, add 1 pound of thinly sliced flank steak. Make sure each slice gets covered with the marinade. Cover the bowl with plastic wrap. Let it sit in the fridge for at least 30 minutes. The longer you marinate, the more flavor it absorbs. For the vegetables, you can use a skillet or a wok. I recommend a wok for better heat distribution. Heat a tablespoon of sesame oil over medium-high heat. Add: - 1 cup broccoli florets - 1 bell pepper, sliced - 1 carrot, julienned Stir-fry these for about 5-7 minutes. You want them tender but still crisp. Look for vibrant colors. Once done, remove them from the heat and set aside. Next, use the same skillet or wok for the beef. Add the marinated flank steak directly to the hot pan. Stir-fry for about 3-5 minutes. You want it browned but not overcooked. To check doneness, look for a deep brown color and a slight firmness. When the beef is ready, return the cooked vegetables to the pan. Toss everything together gently. Heat through for an additional 1-2 minutes. This ensures that all the flavors meld together nicely. Now it's time to serve! Start with a generous scoop of cooked rice in each bowl. Top it with the beef and vegetable mixture. For a nice touch, garnish with sliced green onions and sesame seeds. If you like, add some kimchi on the side. It adds a great kick and completes the dish. When picking flank steak, look for meat that is bright red. It should have some fat, but not too much. Fresh meat feels firm and moist, not slimy. If you can, ask the butcher for a good cut. You can also try other cuts like sirloin or ribeye if flank steak is not available. To make your dish pop, add spices like black pepper or garlic powder. You can also drizzle some extra sesame oil on top before serving. For a deeper flavor, try marinating your steak longer, up to two hours. Some people love adding a splash of rice vinegar to the marinade for a tangy kick. If you want to feed more people, just double the ingredients. For fewer servings, cut the amounts in half. Leftovers are great for lunch the next day. You can freeze any extra beef or veggies in airtight bags. Just remember to label them with the date. To reheat, use a skillet over low heat to keep everything juicy. {{image_2}} If you want a meat-free meal, try these substitutes for beef and sauces: - Use tempeh or tofu instead of flank steak. - Replace soy sauce with tamari for a gluten-free option. - Use maple syrup instead of brown sugar for a vegan touch. For a veggie-packed bowl, add: - Zucchini, sliced into half-moons. - Mushrooms for a meaty texture. - Spinach or kale for added nutrients. You can swap out rice for other grains and options: - Quinoa offers protein and a nutty flavor. - Cauliflower rice is low-carb and light. - Brown rice adds fiber and a chewy texture. Tips for cooking different types of rice: - Rinse rice before cooking to remove excess starch. - Use a 1:2 ratio of rice to water for white rice. - For brown rice, use a 1:2.5 ratio and cook longer. Korean BBQ has many styles. Here are a few to explore: - Try using gochujang, a Korean red chili paste, for heat. - Add kimchi to your bowl for a classic touch. - Mix in BBQ sauce from other cuisines for a fun twist. You can create a fusion dish by adding: - Teriyaki sauce for a sweet, savory blend. - Thai basil for a fresh flavor kick. - Cilantro for a bright finish. To keep your Korean BBQ beef bowls fresh, store leftovers in an airtight container. Make sure to cool them to room temperature before sealing. This helps prevent bacteria. Keep your fridge temperature at 40°F or lower. Leftovers should be eaten within 3 to 4 days for the best taste. You can freeze your Korean BBQ beef bowls for later. Place the beef and veggies in a freezer-safe container. Add rice separately to keep it fresh. These bowls can last up to 3 months in the freezer. To use, thaw overnight in the fridge. Reheat in a skillet over low heat, stirring often, until warmed through. Each part of the dish lasts a different time. Cooked beef and veggies last about 3 to 4 days in the fridge. Cooked rice can last up to a week. Watch for signs of spoilage. If the beef smells off or has a slimy texture, it's time to toss it. Yes, you can! If flank steak is not available, try using sirloin or ribeye. Both cuts work well in this dish. They are tender and cook quickly, just like flank steak. For a leaner option, consider using tenderloin. Just remember, each cut may change the flavor slightly. If you need a soy sauce substitute, try tamari for a gluten-free option. Coconut aminos is another great choice that is soy-free. If you want a low-sodium option, look for reduced-sodium soy sauce. These alternatives keep the flavor while meeting your dietary needs. To make it spicier, add more red pepper flakes or even some sriracha. You can also use fresh chili peppers for a kick. If you prefer a milder taste, reduce the amount of red pepper flakes. You can also omit them entirely if you want a sweeter flavor. Yes, this recipe can be made gluten-free. Simply use tamari or coconut aminos instead of soy sauce. Make sure to check your rice and any other ingredients for gluten. With these simple swaps, you can enjoy a tasty bowl without gluten. Korean BBQ beef bowls are a great meal option. We learned about the main ingredients like flank steak and vegetables. Marinating the beef gives it flavor, while cooking techniques ensure perfect doneness. You can customize this dish by choosing rice types or adding kimchi. Remember to store leftovers properly for later enjoyment. This meal is versatile, easy to make, and a hit at any gathering. Enjoy experimenting with flavors, and make it your own!

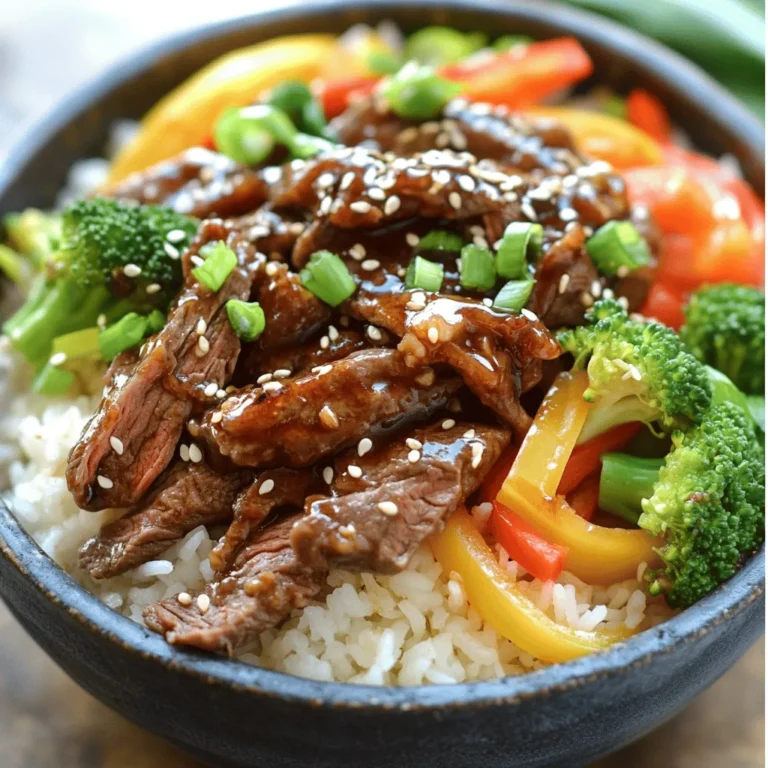
Korean BBQ Beef Bowls Tasty and Better Than Takeout

- 8 ounces linguine or spaghetti - 1 pound large shrimp, peeled and deveined - 4 tablespoons unsalted butter - 4 cloves garlic, minced - 1 teaspoon crushed red pepper flakes - Juice of 1 lemon - Zest of 1 lemon - 2 tablespoons fresh parsley, chopped - ½ cup grated Parmesan cheese (optional) - Large pot - Large skillet - Cooking utensils The main ingredients for garlic butter shrimp scampi pasta are simple. You need linguine or spaghetti, which brings a nice texture. Use large shrimp for better bites. Unsalted butter adds richness while garlic gives great flavor. The seasoning and garnish bring life to the dish. Crushed red pepper flakes add heat. Lemon juice and zest brighten the flavors. Fresh parsley gives a pop of color and freshness. You can add Parmesan cheese for creaminess, but it's optional. You will need a large pot to boil the pasta and a large skillet to sauté the shrimp. Having good cooking utensils helps mix everything well. With these ingredients and tools, you're ready to make a tasty meal in just 15 minutes! - Boil a large pot of salted water. - Add 8 ounces of linguine or spaghetti. - Cook according to the package until al dente. - Drain the pasta and save ½ cup of the pasta water. - In a large skillet, melt 2 tablespoons of unsalted butter over medium heat. - Add 4 cloves of minced garlic and let it cook for 30 seconds. - Toss in 1 pound of large shrimp, and sprinkle with salt, pepper, and crushed red pepper flakes. - Cook the shrimp for 2-3 minutes until they turn pink and opaque. - Squeeze the juice of 1 lemon into the skillet. - Add the zest of 1 lemon and the drained pasta. - Toss everything together so they mix well. - Taste your dish and adjust the seasoning as needed. - Stir in 2 tablespoons of chopped fresh parsley. - If you like, add ½ cup of grated Parmesan cheese for extra flavor. To get the best sauce, adjust the pasta water. When you drain the pasta, save some water. This helps make the sauce creamy. Start by adding a little at a time. Then mix it until it feels right. Lemon plays a big role in balancing flavors. The juice adds freshness. The zest gives a punch. Don’t skip these steps. They brighten the shrimp and pasta. Adjust the lemon to your taste, too. To sauté shrimp correctly, heat your skillet first. Use medium heat and add butter. Wait until it melts, then add garlic. After 30 seconds, add the shrimp. Cook them until they turn pink. This takes about 2 to 3 minutes. Don’t overcook, or they’ll be tough. Cooking pasta perfectly is key. Boil water with salt for flavor. Add the pasta when it’s bubbling. Stir it gently. Cook until it’s al dente, which means it should still have a bite. Drain and reserve that pasta water for the sauce. When serving, choose a large bowl or individual plates. This makes it look special. Garnish with fresh parsley for color. A sprinkle of Parmesan cheese adds richness. For a fresh touch, add lemon wedges on the side. This makes your dish inviting and beautiful. {{image_2}} You can change the shrimp in this dish. Chicken or scallops work well. For chicken, use boneless pieces. Cook them until golden and then add garlic. For scallops, sear them for a few minutes until they turn golden brown. They add a nice touch to the pasta. If you want a vegetarian dish, try mushrooms or zucchini. Both soak up the sauce well. You can also use chickpeas for more protein. Just sauté them with garlic and butter like you do with the shrimp. To make garlic butter shrimp scampi even tastier, add white wine. A splash of dry white wine adds depth. Pour it in after cooking the shrimp. Let it cook down for a minute. This step enhances the sauce's flavor. You can also adjust the spice levels. If you love heat, add more crushed red pepper flakes. For a milder taste, skip them or use less. This recipe is your canvas, so paint it how you like! You can swap the pasta for a gluten-free option. Brown rice pasta or quinoa pasta is great. They cook similarly and taste yummy. If you want to try different noodles, go for fettuccine or penne. Both will hold the sauce well and add a nice twist. Remember, the goal is to enjoy your meal, so pick what you love! - How to Store Leftovers: Let the pasta cool first. Place it in an airtight container. Cover it well to keep moisture in. You can also use plastic wrap over a bowl. - Shelf Life in the Fridge: Store your garlic butter shrimp scampi pasta in the fridge for up to three days. After that, it may lose its taste and texture. - Best Methods for Reheating without Drying Out: Use a skillet over low heat. Add a splash of water or broth. Stir often until heated through. This keeps the pasta moist and tasty. - Safe Microwave Tips: If you use a microwave, place the pasta in a microwave-safe dish. Add a bit of water. Cover it with a lid or microwave-safe wrap. Heat in short bursts, stirring in between, to ensure even heating. This dish is quick and easy. It takes only 15 minutes to make. Here’s the breakdown: - Prep Time: 5 minutes - Cook Time: 10 minutes - Total Time: 15 minutes With this simple plan, you can enjoy a tasty meal in no time. Yes, you can make this dish ahead of time. Here are some tips: - Storage: Keep leftovers in an airtight container. Store in the fridge for up to 2 days. - Reheating: Reheat gently in a skillet. Add a splash of water to keep it moist. You can also use the microwave. This way, you can savor the flavors later without losing taste. This pasta pairs well with many sides. Here are some ideas: - Side Dish Suggestions: - Garlic bread - Steamed vegetables - A simple green salad - Pairing with Appetizers and Salads: - Caprese salad - Bruschetta - Shrimp cocktail These options will enhance your meal and make it even more delightful. This post covered how to make garlic butter shrimp scampi pasta. We explored the key ingredients and kitchen tools you need. I shared step-by-step cooking instructions and tips for perfecting your dish. We also looked at different variations, storage methods, and FAQs. In conclusion, this dish is easy to make and full of flavor. Enjoy trying your own twists on it! Make it your own and share it with loved ones.

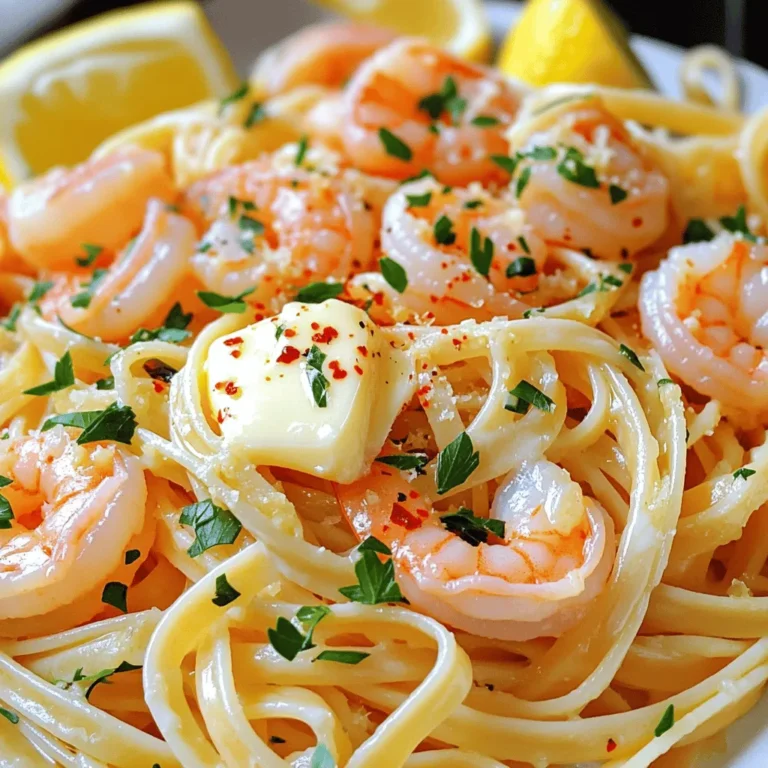
Garlic Butter Shrimp Scampi Pasta 15 Minutes Delight

- 2 cups all-purpose flour - 1 teaspoon baking powder - ½ teaspoon baking soda - 1 teaspoon pumpkin pie spice - ½ teaspoon salt To start, gather your dry ingredients. The all-purpose flour gives the biscotti structure. Baking powder and baking soda help it rise. Pumpkin pie spice brings warmth and flavor. Salt balances the sweetness, enhancing all the flavors. - ¼ cup unsalted butter, softened - ¾ cup granulated sugar - 2 large eggs - 1 teaspoon vanilla extract - 1 cup pumpkin puree (canned or fresh) Next, you’ll need the wet ingredients. Unsalted butter adds richness. Granulated sugar sweetens and helps create a light texture. Eggs bind everything together while adding moisture. Vanilla extract adds a lovely aroma. Pumpkin puree gives that classic fall flavor and keeps the biscotti soft. - 1 cup white chocolate chips - ¼ cup chopped pecans (optional) Finally, don’t forget the mix-ins! White chocolate chips add sweetness and creaminess. Chopped pecans give a nice crunch. You can skip the pecans if you want a smoother texture. These ingredients make the biscotti truly delightful. First, set your oven to 350°F (175°C). This temperature helps the biscotti bake evenly. Next, take a baking sheet and line it with parchment paper. This step keeps the biscotti from sticking and makes cleanup easy. In a bowl, whisk these dry ingredients together: - 2 cups all-purpose flour - 1 teaspoon baking powder - ½ teaspoon baking soda - 1 teaspoon pumpkin pie spice - ½ teaspoon salt Set this bowl aside. In a large mixing bowl, cream together: - ¼ cup unsalted butter, softened - ¾ cup granulated sugar Mix until it's light and fluffy. Next, add in: - 2 large eggs, one at a time - 1 teaspoon vanilla extract - 1 cup pumpkin puree Blend until well combined. Now, take your dry mix and fold it into the wet ingredients. Be careful not to overmix; just combine until you see no dry flour. If you want to add some fun, fold in: - 1 cup white chocolate chips - ¼ cup chopped pecans (optional) Transfer the dough onto a lightly floured surface. Shape it into a log about 12 inches long and 2-3 inches wide. Place this log onto your lined baking sheet. Now, it’s time for the first bake. Bake the log for 25-30 minutes, or until it feels firm to the touch. After that, cool it for about 10 minutes on the baking sheet. Once it has cooled, carefully slice the log into 1-inch wide pieces using a serrated knife. Arrange these slices cut side down on the baking sheet. Return the biscotti to the oven for a second bake. Bake for an additional 10-12 minutes until they are crisp and golden. Flip them halfway for even crispness. Finally, let the biscotti cool completely on a wire rack. Enjoy your tasty creation! To get the right texture for your biscotti, avoid overmixing. When you mix the dry and wet ingredients, do this gently. Overmixing can lead to tough biscotti. Instead, mix until you see no dry flour. You want a dough that feels firm but not too dry. It should hold its shape when you form it into a log. If it sticks to your hands, add a little flour. If it feels crumbly, mix in a tiny bit of water. To make your biscotti even more pumpkin-spiced, add a little more pumpkin pie spice. A half teaspoon more can boost the flavor without being too strong. You can also add a splash of maple syrup or a touch of brown sugar for extra richness. These ingredients deepen the taste and make each bite delightful. For serving, place your biscotti in a tall mug or a pretty box. This makes a great gift or a fun treat for yourself. Drizzling melted white chocolate on top adds a sweet touch. It makes the biscotti look fancy too. Use a spoon or a piping bag for a nice design. Enjoy them with coffee or tea for a cozy experience! {{image_2}} You can boost the taste of your pumpkin spice biscotti in fun ways. Adding nuts or dried fruits can give your biscotti a nice crunch. I love using chopped pecans for a rich, buttery flavor. You can also add dried cranberries or raisins for a sweet touch. Different types of chocolate can change the flavor as well. While white chocolate chips shine, dark chocolate can add a bold taste. Mix and match to find your favorite combination! If you need a gluten-free version, it’s easy to adapt! Use almond flour or a gluten-free flour blend. This keeps the texture light and gives a nice nutty flavor. Just follow the same steps in the recipe, and you won’t miss the gluten at all! For a vegan twist, you can replace the eggs. Use flax eggs or applesauce to bind the dough. This keeps the biscotti moist and delicious. Also, switch to plant-based butter and chocolate. There are many great options available that taste just as good. This way, you can enjoy pumpkin spice biscotti while sticking to your diet! To keep your pumpkin spice biscotti fresh, store them in an airtight container. This helps maintain their crispness. You can keep them at room temperature for up to a week. If you live in a humid area, use parchment paper between layers. This prevents them from getting soggy. For longer storage, freezing is the best option. Place the cooled biscotti in a freezer-safe bag. Remove as much air as possible before sealing. You can freeze them for up to three months. When you're ready to enjoy, thaw them at room temperature. For extra crispness, pop them back in the oven for a few minutes. When stored properly, these biscotti can last about a week at room temperature. In the freezer, they maintain quality for up to three months. After that, they may lose flavor and texture, but they are still safe to eat. Always check for any signs of spoilage before enjoying them. You can tell when biscotti is done by checking its firmness. During the first bake, the log should be firm to the touch, not soft. After slicing, for the second bake, look for a golden color and a crisp texture. A good rule is to bake until they are lightly brown and sound hollow when tapped. Yes, you can make these biscotti ahead of time. Bake them, then let them cool completely. Store them in an airtight container at room temperature for up to two weeks. If you want to keep them longer, you can freeze them for up to three months. Just thaw them at room temperature when you’re ready to enjoy. Pairing these biscotti can enhance your experience. For drinks, I recommend a warm latte or spiced chai. Both drinks match the pumpkin spice flavor well. You can also enjoy them with hot cocoa for a cozy treat. For food, consider a creamy cheese or a light fruit spread. These combinations create a delightful balance with the sweet biscotti. This post covers making delicious pumpkin spice biscotti. You learned about the needed ingredients, the mixing process, and baking steps. I also shared tips for perfect texture and flavor. There are ideas for variations to suit different diets, plus storage tips to keep your biscotti fresh. Enjoy making this treat as your new fall favorite. Whether you share them or savor them yourself, these biscotti will delight! Happy baking!

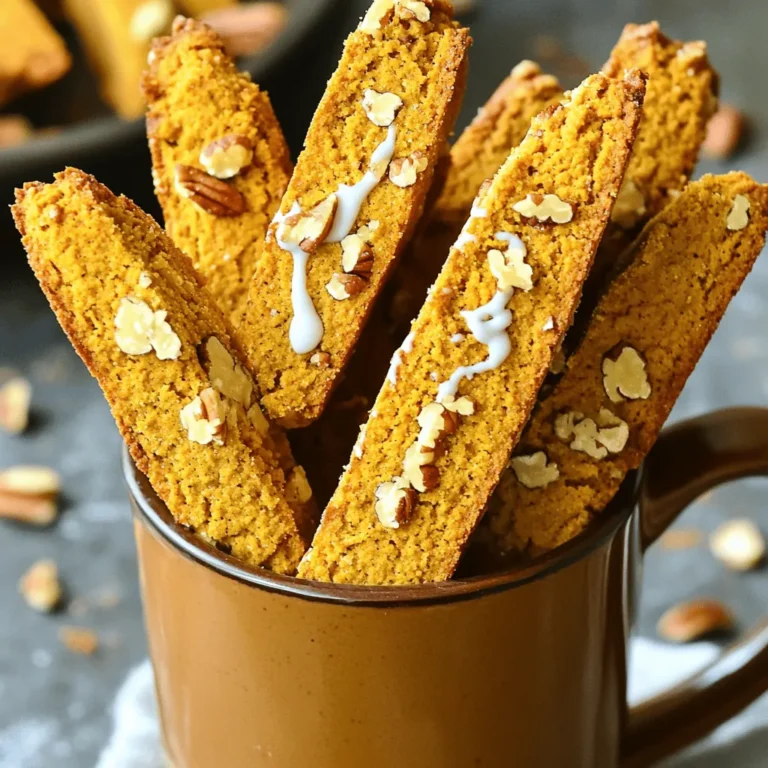
Pumpkin Spice Biscotti with White Chocolate Delight

- 1.5 lbs boneless, skinless chicken breasts, sliced into thin strips - 2 red bell peppers, sliced - 2 yellow bell peppers, sliced - 1 large red onion, sliced - 3 tablespoons olive oil - 2 tablespoons fajita seasoning (store-bought or homemade) - Juice of 1 lime - Fresh cilantro, chopped, for garnish - Tortillas, for serving - Avocado, sliced, for serving - Sour cream or Greek yogurt, for serving When I make chicken fajitas, I love to focus on fresh ingredients. The chicken is key. I use boneless, skinless chicken breasts for a tender bite. I slice them into thin strips for even cooking. Bell peppers add vibrant colors and sweet flavors. I like a mix of red and yellow peppers. They not only look great but taste amazing. The red onion adds a nice sweetness and crunch. Olive oil is essential for roasting. It helps the chicken and vegetables get that golden-brown finish. Don't skimp on the seasoning! Fajita seasoning brings all the flavors together. You can buy it or make your own. For a zesty kick, I squeeze fresh lime juice over everything. It brightens the dish. Fresh cilantro is a must for garnish. It adds a fresh taste that balances the dish perfectly. When serving, I enjoy warm tortillas. They wrap around the filling nicely. Slices of avocado bring a creamy texture. A dollop of sour cream or Greek yogurt adds richness. Each bite is a fiesta of flavors! - Preheat your oven to 425°F (220°C). Line a large sheet pan with parchment paper. - In a large mixing bowl, add the sliced chicken, red bell peppers, yellow bell peppers, and red onion. - Drizzle the olive oil over the mixture. Add the fajita seasoning and lime juice. - Toss all the ingredients together. Make sure everything is well coated. - Spread the mixture evenly on the sheet pan. Avoid overcrowding the pan for even cooking. - Bake for 20-25 minutes. Stir halfway through to help with roasting. - Warm the tortillas in the oven or on a skillet. - Fill each tortilla with the chicken and pepper mix. - Top with avocado slices, sour cream or Greek yogurt, and fresh cilantro. To make sure your chicken fajitas cook evenly, space the chicken and veggies well on the sheet pan. If they are too close together, they will steam instead of roast. This can make them soggy. Aim for a single layer. Set your oven to 425°F (220°C) for the best results. Bake for 20 to 25 minutes. Stir the mixture halfway through cooking. This ensures that everything gets nice and golden. You can customize your fajita seasoning to match your taste. Add more chili powder for heat, or some cumin for warmth. You can even mix in garlic powder for a kick. Marinating the chicken can boost the flavor. A simple mix of lime juice and olive oil works great. Let it marinate for at least 30 minutes, or overnight for more flavor. This makes your fajitas even tastier! {{image_2}} You can change things up with different proteins. Instead of chicken, try shredded beef, shrimp, or tofu. Each option offers a new taste. If you want a lighter meal, shrimp cooks fast and has great flavor. Tofu is great for a vegan option and soaks up all the spices. For veggies, switch bell peppers with zucchini, mushrooms, or corn. Zucchini adds a nice crunch and cooks well with the chicken. Mushrooms bring a savory taste and pair nicely with spices. Corn adds sweetness, giving your fajitas a fun twist. If you need gluten-free options, use corn tortillas. They hold the filling well and taste great. You can also serve your fajitas as a salad. Just skip the tortillas and place the chicken and veggies on a bed of greens. Drizzle with lime juice and add avocado for a fresh bite. Both ideas keep your meal fun and tasty while meeting different needs. To store your chicken fajitas, place them in an airtight container. Make sure the chicken and vegetables cool down first. This step helps keep them fresh. Store the container in the refrigerator. Chicken fajitas last about 3 to 4 days in the fridge. If you won’t eat them within this time, freeze them instead. They can stay in the freezer for 2 to 3 months. To reheat your chicken fajitas, use the oven or a skillet. For the oven, preheat it to 350°F (175°C). Spread the fajitas on a baking sheet and cover with foil. Heat for about 10 to 15 minutes. This method keeps the chicken juicy. In a skillet, heat over medium heat. Stir often, and add a splash of water if needed. This helps keep the vegetables crisp. Avoid using the microwave, as it may make the fajitas soggy. How do I make homemade fajita seasoning? To make homemade fajita seasoning, mix these spices: - 1 tablespoon chili powder - 1 teaspoon cumin - 1 teaspoon garlic powder - 1 teaspoon onion powder - 1 teaspoon smoked paprika - ½ teaspoon salt - ½ teaspoon black pepper This blend gives your fajitas a great kick! Can I make this recipe in advance? Yes, you can! Prepare the chicken and veggies ahead of time. Store them in the fridge for up to 24 hours. When ready, just bake them. This saves time on busy nights! What sides pair well with chicken fajitas? Here are some tasty side options: - Mexican rice - Refried beans - Corn salad - Chips and salsa These sides complement the fajitas nicely. Can I use frozen chicken for this recipe? You can use frozen chicken, but it's best to thaw it first. Frozen chicken can cook unevenly. Thaw it overnight in the fridge for perfect results. How do I know when the chicken is fully cooked? The chicken is done when it reaches 165°F (75°C) inside. Use a meat thermometer to check. The chicken should also be white and no longer pink. This ensures it’s safe to eat. To make tasty chicken fajitas, I shared key ingredients and easy steps. You learned about preparation, cooking, and serving. Adding tips on flavor and storage can enhance your meal. Remember, you can use different proteins and veggies for fun variations. Feel free to get creative with your fajitas! Enjoy each bite and make it your own. Happy cooking!

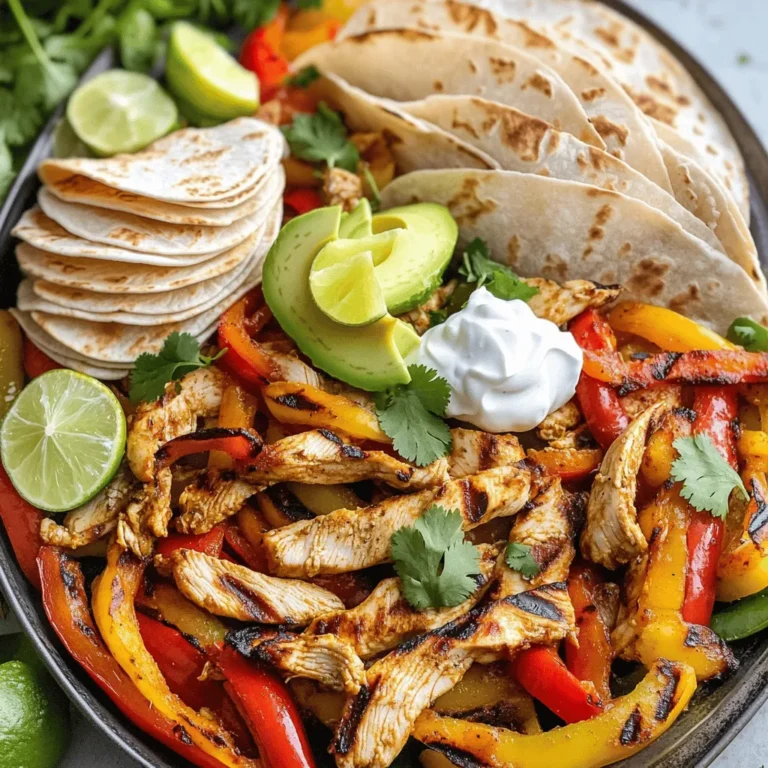
Chicken Fajitas with Bell Peppers Sheet Pan Delight

PREV 1 … 30 31 32 … 57 NEXT
meal twig

explore

DessertsDinnerAppetizersDrinks

Our Policies

  • Cookie Policy
  • Copyright Policy
  • Disclaimer
  • GDPR Policy
  • Terms Of Use
Back to Top
  • About
  • Contact Us
  • Privacy Policy
© 2025 meal twig