FREE DINNER EBOOK! Get your copy!
  • Cookie Policy
  • GDPR Policy
  • Disclaimer
  • Terms Of Use
  • Visit my other site: Fun Cookie Recipes
meal twig
  • Home
  • Dinner
  • Desserts
  • Drinks
  • Appetizers
  • Contact
  • About
  • Privacy Policy
  • Home
  • Dinner
  • Desserts
  • Drinks
  • Appetizers
  • Contact
  • About
  • Privacy Policy
  • Cookie Policy
  • GDPR Policy
  • Disclaimer
  • Terms Of Use
Visit my other site: Fun Cookie Recipes

HOME / CATEGORIES /

Latest

- 2 cups Greek yogurt (plain or flavored) - 1 cup granola (your choice, preferably nutty) - 1 cup mixed berries (strawberries, blueberries, raspberries) - 2 tablespoons honey or maple syrup - 1 teaspoon vanilla extract (optional) - A pinch of cinnamon (optional) - Fresh mint leaves - Extra honey or syrup for drizzle Greek yogurt parfait jars are simple and fun to make. First, choose your yogurt—plain or flavored. I love using Greek yogurt because it is creamy and packed with protein. You can also pick a nutty granola. It adds a great crunch and flavor. Next, use mixed berries. Strawberries, blueberries, and raspberries create a colorful look. Wash the berries well before adding them to the jars. If you use strawberries, remember to slice them for easy layering. For a sweet touch, consider optional add-ins. Honey or maple syrup brings out the sweetness. A dash of vanilla extract can add depth. If you want a hint of warmth, sprinkle in some cinnamon. Lastly, garnishing is key. Fresh mint leaves add a pop of color and flavor. A drizzle of honey on top makes it even more tempting. Enjoy creating your parfait jars! {{ingredient_image_1}} - Rinse and prepare mixed berries: Take your mixed berries, like strawberries, blueberries, and raspberries. Rinse them under cool water. If you use strawberries, slice them into halves or quarters. This helps with even layering. - Combine yogurt with sweeteners and spices: In a bowl, stir together Greek yogurt, honey or maple syrup, and vanilla extract. Mix well until smooth. If you enjoy a hint of spice, add a pinch of cinnamon. This adds warmth and flavor to the yogurt. - Start with yogurt layer: Grab clean glass jars or cups. Begin with about 1/4 cup of the yogurt mixture. Spoon it into the bottom of each jar. - Add granola layer: Next, sprinkle about 2 tablespoons of granola over the yogurt. This layer adds crunch to your parfait. - Top with mixed berries: Now, add about 1/3 cup of your fresh mixed berries on top of the granola. This layer brings sweetness and color to the parfait. - Repeat layering until jars are filled: Keep layering until your jars are filled. Aim for two to three layers, depending on jar size. Finish with a layer of yogurt and a few berries on top for a nice look. - Garnish and serving suggestions: Drizzle more honey on top if you like. Add fresh mint leaves for a pop of color. These small touches make your parfaits look beautiful and inviting. Choosing the right jars I love using clear glass jars. They show off your layers. Choose jars that are tall and narrow. This helps keep the layers neat. Small mason jars work great. You can also use parfait cups or even small bowls. Creative layering techniques Layering is key for a great look. Start with yogurt, then granola, and berries. Repeat until you reach the top. Make sure to alternate colors for a vibrant look. You can also mix in some berries with the yogurt for a fun twist. Suggested flavor combinations Greek yogurt is versatile. You can try different flavors. Mix in lemon zest for a fresh kick. You can use peach slices or banana for a sweet touch. For a twist, try coconut yogurt with pineapple. Alternative sweeteners Honey and maple syrup are popular. But you can use agave nectar or stevia too. These options let you control sweetness. Always taste as you go to find your perfect balance. Crunchy vs. soft granola Granola adds crunch. Choose nutty granola for great texture. If you want something softer, try oats. You can also mix soft granola with crispy for variety. Balancing fruit with yogurt consistency Fruits add juiciness. Use fresh berries, but think about their texture. Slice strawberries for smaller bites. Keep blueberries whole for a burst of flavor. Mixing soft fruit with yogurt gives a creamy feel. Pro Tips Use Fresh Ingredients: Always opt for fresh, seasonal berries for the best flavor and nutrition in your parfaits. Experiment with Yogurt Flavors: Don’t hesitate to try flavored Greek yogurt like vanilla or honey to enhance the sweetness of your parfait. Make Ahead for Convenience: These parfaits can be prepped the night before; just store them in the refrigerator for a quick breakfast. Customize Layers: Feel free to add nuts, seeds, or other fruits between layers for added texture and flavor. {{image_2}} Using seasonal fruits makes your parfaits fresh and fun. In spring, use strawberries and cherries. In summer, berries shine with blueberries and raspberries. Fall offers apples and pears, while winter brings citrus fruits like oranges and grapefruits. You can also adapt your parfaits for special holidays. For example, use pumpkin spice in the fall or add cranberries for festive winter treats. This keeps your snacks exciting and relevant to the season. You can make dairy-free parfaits by using plant-based yogurt, like almond or coconut yogurt. These options still taste great and keep the creamy texture. For a gluten-free choice, look for granola that is certified gluten-free. Many brands offer tasty blends without oats or wheat. This way, everyone can enjoy your parfaits without worry. Spice up your parfaits by adding nutmeg or cardamom. A pinch of these spices can add warmth and depth to your yogurt. If you crave something richer, stir in some chocolate or nut butter. A spoonful of almond butter or a drizzle of melted dark chocolate can elevate your parfait to a dessert-like treat. These twists make your parfaits unique and satisfying. To keep your Greek yogurt parfait jars fresh, store them in the fridge. Use airtight containers or jars with lids. This helps keep the layers intact. If you do not have lids, cover the jars with plastic wrap. Avoid stacking them on top of each other to prevent squishing. You can prepare your parfaits ahead of time. Make them the night before and chill them for a few hours. They taste great after chilling. This helps the flavors blend well. Aim for at least 30 minutes of chilling time before serving for the best taste. Greek yogurt parfaits can stay fresh for up to three days in the fridge. After that, they may lose flavor and texture. Watch for signs of spoilage, like a sour smell or watery yogurt. If the granola becomes soft, it’s best to eat them sooner. You can use different types of yogurt. Greek yogurt is thick and creamy. It has more protein than regular yogurt. Regular yogurt is thinner and can be tangy. Greek yogurt holds its shape well in parfaits. It creates nice layers. This makes it a great choice for your parfait jars. For vegan parfaits, choose plant-based yogurt. Almond, coconut, or soy yogurt works well. You can also use dairy-free yogurt. For sweetening, replace honey with maple syrup or agave. This keeps your parfaits vegan-friendly while still tasting delicious. Look for granola that is nutty and crunchy. Some great brands are Nature Valley, Kind, and Bear Naked. These brands have good flavor and texture. Choose one that has whole nuts and seeds for extra crunch. This will make your parfaits even more enjoyable. Yes, you can freeze yogurt parfaits. However, the texture may change after thawing. To freeze, layer the parfaits in airtight containers. Leave space at the top for expansion. When you want to eat one, thaw it in the fridge overnight. Enjoy it the next day for a quick snack! Creating a yogurt parfait is simple and fun. We explored main ingredients like Greek yogurt, granola, and mixed berries. Optional add-ins like honey or cinnamon can add flavor. Following step-by-step instructions helps you layer and garnish your parfait beautifully. Experiment with variations for seasonal fruits and dietary needs. Store leftovers properly and prepare them in advance. Remember, parfaits are versatile, allowing for many custom flavors. Enjoy your delicious and healthy treat!

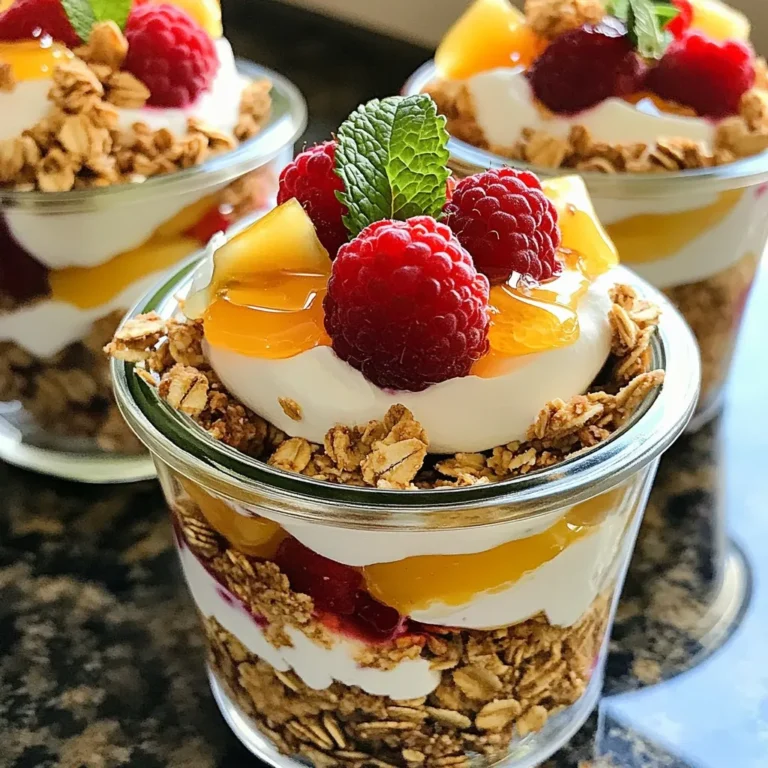
Greek Yogurt Parfait Jars Perfect for Easy Snacking

- 2 tablespoons olive oil - 1 medium onion, diced - 3 cloves garlic, minced - 1 can (28 oz) crushed tomatoes - 3 cups vegetable broth These base ingredients create a rich and warm soup. Olive oil adds depth. It helps sauté the onion and garlic, which builds a strong flavor. Diced onion gives a sweet base, while minced garlic brings a sharp kick. Crushed tomatoes provide acidity and sweetness. Vegetable broth rounds out the soup, making it hearty and comforting. - 10 oz cheese tortellini (fresh or frozen) - 1 cup heavy cream - 1 cup fresh basil leaves, chopped Cheese tortellini is the star. It gives a nice texture and bursts of flavor. You can use fresh or frozen, depending on what you have. Heavy cream adds richness and a smooth finish. Fresh basil leaves are a must. They add a vibrant color and a fresh taste that lifts the whole dish. - 1 teaspoon dried oregano - 1 teaspoon dried basil - Salt and pepper to taste - Grated Parmesan cheese for serving Seasoning is key to flavor. Dried oregano and basil deepen the taste of the soup. Salt and pepper enhance all the flavors. Finally, a sprinkle of grated Parmesan cheese on top adds a salty, nutty finish. It makes each bowl feel special. {{ingredient_image_1}} - Sautéing onion and garlic: Start by heating 2 tablespoons of olive oil in a large pot over medium heat. Add 1 medium diced onion and cook it for about 5 minutes. You want it to be soft and see-through. Next, add 3 minced garlic cloves. Cook for another minute until the garlic smells nice. - Combining tomatoes and broth: Pour in one 28-ounce can of crushed tomatoes and 3 cups of vegetable broth. Add 1 teaspoon of dried oregano and 1 teaspoon of dried basil. Season with salt and pepper to taste. Stir everything together well, so the flavors mix. - Bringing to boil and simmering: Raise the heat to bring your soup to a gentle boil. Once it starts bubbling, lower the heat and let it simmer for about 15 minutes. This helps the flavors blend together. - Adding tortellini: Now, it’s time to add the star of the show! Toss in 10 ounces of cheese tortellini, whether fresh or frozen. Cook the tortellini according to the package instructions, usually around 5 to 7 minutes, until they are tender and ready to eat. - Stirring in heavy cream: When the tortellini is cooked, stir in 1 cup of heavy cream. This is what makes your soup creamy and rich. Add 1 cup of chopped fresh basil and let it warm through for an additional 2 to 3 minutes. - Serving and garnishing: Serve the soup hot in deep bowls. Top each bowl with grated Parmesan cheese and a sprinkle of fresh basil. For a lovely touch, add a drizzle of olive oil on top. Enjoy your delicious creation! To boost the taste of your creamy tomato basil tortellini soup, adjust the seasoning. Start with salt and pepper. Taste as you go. You can add more if needed. For a deeper flavor, try using fresh herbs. Fresh basil adds brightness. Dried herbs work, but fresh ones shine. - Fresh herbs: Use 1 tablespoon of fresh basil for every teaspoon of dried. - Dried herbs: They are more potent, so use less. To ensure perfect tortellini texture, cook them just until tender. Follow the package instructions for timing. Overcooked tortellini can become mushy. When reheating the soup, do it on low heat. Stir often to prevent sticking. Adding a splash of broth helps keep the soup creamy and smooth. Serve your soup in deep bowls. It looks more appealing this way. Add a sprig of fresh basil on top for color. A drizzle of olive oil adds shine and richness. - Garnishing tips: Top with grated Parmesan cheese for a savory kick. This makes your dish look gourmet and delicious. Pro Tips Use Fresh Ingredients: Fresh basil and high-quality tomatoes can elevate the flavor profile of your soup, making it taste more vibrant and delicious. Adjust the Creaminess: For a lighter version, you can substitute half-and-half or whole milk for heavy cream without sacrificing too much flavor. Customize Your Tortellini: Experiment with different fillings for the tortellini, such as spinach and ricotta, to add a unique twist to the soup. Make It Ahead: This soup can be made in advance and stored in the refrigerator for up to 3 days. Reheat gently on the stove before serving. {{image_2}} You can easily change this soup to fit your taste. Here are some fun swaps: - Alternative proteins to add: Try adding cooked chicken or turkey for extra protein. You can also use beans or lentils for a vegetarian option. These add protein and texture. - Substituting with other vegetables: If you want more veggies, add spinach, kale, or carrots. They bring a nice crunch and extra nutrients to the dish. Need to make this soup fit your diet? Here are some tips: - Making it dairy-free: Swap heavy cream with coconut milk or a dairy-free cream. This keeps the soup creamy while being dairy-free. - Gluten-free options for tortellini: Look for gluten-free tortellini made from rice or corn. They work well and keep this dish gluten-free. Want to spice things up? Here are some ideas: - Adding spice or heat: For a kick, add red pepper flakes or a dash of hot sauce. This brings warmth and excitement to each bite. - Incorporating unique herbs: Try adding thyme or parsley for a twist. These herbs can change the flavor and make your soup even more interesting. To store your leftover creamy tomato basil tortellini soup, let it cool first. This helps prevent bacteria growth. Place it in an airtight container. I recommend using glass or BPA-free plastic containers. They keep the soup fresh and prevent any odors from mixing. You can store it in the fridge for up to three days. If you want to keep the soup longer, freezing is a great option. Start by letting the soup cool completely. Then, pour it into freezer-safe bags or containers. Leave some space at the top for expansion. You can freeze the soup for up to three months. When you're ready to eat, thaw it in the fridge overnight. Reheat it on the stove over low heat, stirring gently. If the soup is too thick, add a bit of vegetable broth or water. The creamy tomato basil tortellini soup has a good shelf life. In the fridge, it stays fresh for about three days. When frozen, it can last up to three months. Always check for signs of spoilage. If you see any mold or the soup has an off smell, it’s best to throw it away. Enjoy your soup while it's fresh for the best flavor! Yes, you can make this soup ahead of time. To prep, cook the soup as directed. Let it cool, then store it in an airtight container. This soup tastes even better the next day as the flavors meld. For best practices in storage: - Refrigerate: It lasts up to 3 days in the fridge. - Freeze: You can freeze it for up to 3 months. Avoid adding cream until you reheat it. This soup pairs well with many sides. Here are some great options: - Grilled cheese sandwiches: A classic combo. - Garlic bread: Perfect for dipping. - Salad: A light green salad balances the soup. For bread pairings, consider: - Crusty baguette: It adds texture. - Focaccia: Its flavor complements the soup. Absolutely! You can use various types of tortellini. Here are some options: - Spinach and cheese: Adds a fresh taste. - Meat-filled: For a heartier dish. - Mushroom: Brings an earthy flavor. Different tortellini may change cooking time slightly. Always check the package for best results. This blog post covered how to make a creamy tomato basil tortellini soup. We discussed the key ingredients, including olive oil, diced onions, and fresh basil. You learned step-by-step instructions for preparation, cooking, and garnishing. I shared tips for enhancing flavor and adjusting ingredients for dietary needs. Remember, you can vary this recipe to suit your taste. Enjoy your cooking, and don’t hesitate to make it your own! A warm bowl awaits you.

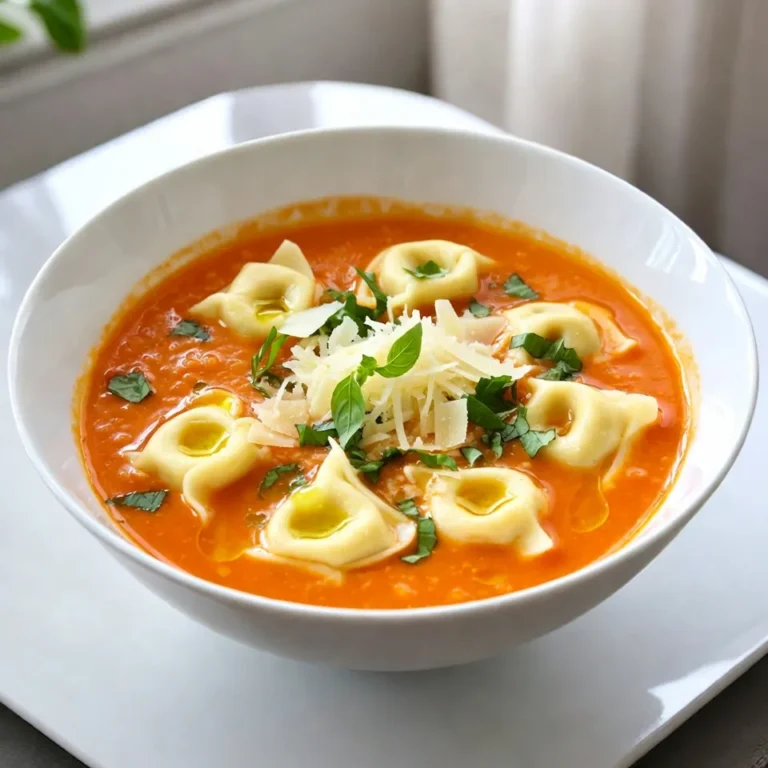
Creamy Tomato Basil Tortellini Soup Flavor Boost

- 4 fresh jalapeños, diced (remove seeds for less heat) - 1 medium onion, chopped - 3 cloves garlic, minced - 4 cups chicken or vegetable broth - 1 cup cream cheese, softened - 1 cup shredded sharp cheddar cheese - 1 cup frozen corn - 1 teaspoon smoked paprika - 1 teaspoon cumin - Salt and pepper to taste - 2 tablespoons olive oil - Fresh cilantro for garnish (optional) - Crumbled tortilla chips for topping Gathering the right ingredients makes a big difference in your soup. Fresh jalapeños bring the heat and flavor to your dish. You can remove the seeds for less spice. The onion and garlic add a nice base flavor that makes your soup shine. Choose either chicken or vegetable broth for your liquid. Cream cheese and cheddar give the soup its creamy texture. The corn adds a touch of sweetness, while smoked paprika and cumin add depth. Finally, you can add salt and pepper to taste. For toppings, crumbled tortilla chips add crunch, and cilantro adds freshness. {{ingredient_image_1}} 1. Sautéing the onion and garlic Heat 2 tablespoons of olive oil in a large pot over medium heat. Add the chopped onion. Cook until the onion is soft and clear, about 5 minutes. Next, stir in 3 minced garlic cloves. Cook for 1-2 minutes until garlic smells good. 2. Cooking the jalapeños Add 4 diced jalapeños to the pot. You can remove the seeds if you want less heat. Cook for 2-3 minutes until the jalapeños soften and release their flavor. 3. Adding broth and spices Pour in 4 cups of chicken or vegetable broth. Bring the mixture to a gentle simmer. Stir in 1 cup of frozen corn, 1 teaspoon of smoked paprika, and 1 teaspoon of cumin. Let it simmer for about 10 minutes. This step helps all the flavors mix well. 1. Melting cream cheese Lower the heat and add 1 cup of softened cream cheese. Stir it in until it melts completely. The soup will become creamy and rich at this point. 2. Mixing in cheddar cheese Next, mix in 1 cup of shredded sharp cheddar cheese. Stir until the cheese melts and blends smoothly into the soup. Taste and add salt and pepper as needed. 1. Blending for desired texture If you want a smooth soup, use an immersion blender to blend it until smooth. If you like some chunks, leave it as is. 2. Serving suggestions Serve the soup hot. Top with crumbled tortilla chips for crunch. You can also add fresh cilantro for a pop of color and flavor. Enjoy your delicious bowl of jalapeño popper soup! When you pick jalapeños, choose fresh ones. Fresh jalapeños have a vibrant green color. Look for firm peppers with smooth skin. Dried jalapeños can be used too, but they will change the taste. If you want less heat, remove the seeds before cooking. The seeds hold most of the heat. You can also remove the white inner membrane for even less spice. You can make your soup more exciting by adding spices. Consider using chili powder for a smoky taste. A dash of cayenne pepper can also add kick. Fresh herbs like cilantro or parsley add brightness and freshness too. Stir in some chopped herbs right before serving. This makes a big difference in flavor. When sautéing, heat your oil first. This helps the onion cook fast. Add the onion before garlic. Garlic can burn quickly, which makes it taste bitter. Cook onions until they are soft and clear. This takes about five minutes. Timing is key for flavor. Let your soup simmer for ten minutes to meld all the tastes together. This makes your soup rich and full of flavor. Pro Tips Adjust the Heat: If you prefer a milder soup, be sure to remove the seeds and membranes from the jalapeños before dicing. Cheese Choices: Experiment with different types of cheese; Monterey Jack or Pepper Jack can add a unique flavor twist! Texture Preference: For a creamier texture, blend the soup completely. For a chunkier version, blend just half of it. Garnish for Flavor: Fresh cilantro and crumbled tortilla chips not only add color but also enhance the flavor profile of the soup. {{image_2}} You can easily add proteins to your soup. Chicken or beans work well. If you want to include chicken, cook it in the pot after the onion and garlic. Shred the chicken before adding it. This adds great flavor and heartiness. For a vegetarian option, use black beans or chickpeas. They add protein and texture without meat. Just rinse and drain the beans before adding them to the soup. You can switch up the cream and cheese for different tastes. For a dairy-free option, use coconut cream or cashew cream. These keep the soup creamy without dairy. If you want a bolder flavor, try pepper jack cheese or gouda. They add a fun twist to the classic taste. Just make sure to melt them in slowly for a smooth blend. Adjust the spice level to suit your taste. For a spicier soup, add more diced jalapeños. If you want it milder, remove the seeds and use fewer peppers. You can also swap jalapeños for bell peppers. They provide sweetness without the heat. This way, you can customize the soup for everyone. To store leftover soup, let it cool first. Transfer it to a container. Use an airtight container for best results. You can keep it in the fridge for about 3 to 4 days. This soup tastes great even after a couple of days! You can reheat the soup on the stove or in the microwave. If using the stove, heat it over low heat. Stir often to keep it smooth. If using a microwave, heat in short bursts. Check and stir in between to make sure it warms evenly. This helps maintain the flavor and texture. If you want to keep the soup longer, freezing is a great option. Let it cool completely before freezing. Pour the soup into freezer-safe containers or bags. Make sure to leave some space at the top, as soup expands when frozen. For thawing, place it in the fridge overnight before serving. Reheat it on the stove or in the microwave as mentioned above. Enjoy your soup later without losing its yummy taste! You can serve many tasty sides with Jalapeño Popper Soup. Here are some ideas: - Recommended side dishes: A simple green salad pairs well. You can also enjoy this soup with Mexican rice or grilled veggies. - Ideal bread pairings: I love serving it with crusty bread or soft rolls. Cornbread adds a nice touch too. Yes, you can make this soup ahead of time. Here are my best practices for meal prep: - Make the soup a day before. It tastes even better the next day! - Store it in an airtight container in the fridge. It will keep for 3 to 4 days. - Reheat gently on the stove, adding a splash of broth if it thickens too much. You can easily change the heat level of the soup. Here are some tips for personalizing spice levels: - To make it milder, remove the seeds and membranes from the jalapeños. - Use fewer jalapeños if you prefer less heat. - Add a dollop of sour cream on top. It cools down the spice. If the soup turns out too spicy, you can fix it: - Add more cream cheese or cheese. This will help tone down the heat. - Stir in some sugar. A little sweetness can balance the spice. This blog post covers how to make delicious jalapeño popper soup. We explored essential ingredients, preparation steps, and ways to enhance flavor. I shared tips for choosing fresh jalapeños and adjusting heat levels. You can get creative with proteins and cheese. Storage info helps keep your soup fresh longer. Remember, you can make this soup ahead of time and pair it with your favorite sides. Try these ideas and enjoy a tasty bowl that fits your style!

Jalapeño Popper Soup Flavorful and Easy Recipe

- 500g fresh mushrooms (button, cremini, or a mix), sliced - 1 medium onion, finely chopped - 2 cloves garlic, minced - 3 tablespoons unsalted butter - 2 tablespoons all-purpose flour - 4 cups vegetable broth - 1 cup heavy cream or coconut cream - 1 teaspoon dried thyme - Salt and pepper to taste - Fresh parsley, chopped (for garnish) You can add more flavor and looks to your soup with simple garnishes. Here are a few ideas: - A drizzle of truffle oil for a fancy touch. - A sprinkle of grated Parmesan cheese for saltiness. - Croutons for added crunch. Not every ingredient may be handy. You can swap some items easily: - Use chicken broth instead of vegetable broth for more flavor. - Swap unsalted butter for olive oil to make it dairy-free. - Coconut cream works as a great dairy-free option for cream. These swaps help you make the soup fit your taste and needs. Enjoy the cooking! {{ingredient_image_1}} Making cream of mushroom soup is fun and easy. First, gather all your ingredients. You will need fresh mushrooms, onion, garlic, butter, flour, vegetable broth, cream, thyme, salt, and pepper. This recipe takes about 40 minutes from start to finish. 1. Start by melting the butter in a large pot over medium heat. 2. Add the chopped onions and cook for about 5 minutes. They should look translucent. 3. Next, add the minced garlic and cook for 1 more minute until it smells great. 4. Now, add the sliced mushrooms to the pot. Stir frequently and cook for 10 minutes. Let them soften and release their juices. 5. Sprinkle the flour over the mushrooms. Stir well for 2 minutes to get rid of the raw taste. 6. Gradually add the vegetable broth. Keep stirring to avoid lumps. Bring this mixture to a simmer. 7. Once it simmers, add the thyme, salt, and pepper. Let it cook for 15 minutes. This helps all the flavors mix well. 8. Use an immersion blender to puree the soup until it is smooth. If you don’t have one, you can use a regular blender. Just blend in batches and return it to the pot. 9. Lower the heat and stir in the heavy cream or coconut cream. Heat gently and taste for seasoning. 10. Finally, serve the soup warm and garnish it with fresh parsley. Using an immersion blender is a great way to blend soup. It is easy and saves time. Here are a few tips: - Make sure the soup is not too hot to avoid splashes. - Move the blender around to get a smooth texture. - Blend until you reach your desired creaminess. Enjoy your creamy dream of mushroom soup! To make your cream of mushroom soup shine, use fresh herbs. Thyme adds a warm touch. You can also try rosemary or sage for a different flavor. Fresh parsley gives a nice pop of color and taste when you serve. A sprinkle of nutmeg can deepen the flavor too. Just a pinch will do! One common mistake is cooking the mushrooms too fast. Let them cook until they are soft and their juices flow. This step adds rich flavor to the soup. Another mistake is skipping the flour step. This helps thicken the soup and gives it a nice texture. Always stir well to avoid lumps when adding broth. Lastly, don’t rush the simmering time. Letting it simmer helps the flavors blend perfectly. For a super creamy soup, use heavy cream or coconut cream. Adding them at the end gives a velvety texture. If you prefer a lighter option, try half-and-half instead. Blend the soup well to get that smooth consistency. If it feels too thick, add a bit more broth until it’s just right. Adjust the cream to your taste for the perfect balance! Pro Tips Choose Fresh Mushrooms: Always opt for fresh mushrooms for the best flavor and texture. Avoid any with blemishes or slimy spots. Blend for Creaminess: For an ultra-smooth texture, make sure to blend the soup thoroughly. An immersion blender is perfect for this task. Season Gradually: Taste and adjust seasoning throughout the cooking process. This way, you ensure the flavors develop fully. Garnish Wisely: Fresh herbs like parsley or chives not only enhance the presentation but also add a burst of freshness to the soup. {{image_2}} You can make this soup vegetarian by using vegetable broth. If you want a vegan version, swap the heavy cream with coconut cream. This keeps the soup rich and creamy without dairy. You can also use almond or cashew cream for a nutty taste. Adding a splash of soy sauce or tamari enhances the flavor too. For a dairy-free option, choose coconut cream or almond milk. Coconut cream gives a nice richness. Almond milk is lighter but still tasty. You can also use oat milk for a creamy texture. Just make sure to pick unsweetened versions to avoid odd flavors. To boost protein, try adding cooked lentils or chickpeas. Both blend well and add a nice texture. You can also stir in some spinach or kale for more greens. If you love crunch, toss in some toasted nuts. They add flavor and a delightful bite to your soup. To keep your leftover cream of mushroom soup fresh, use an airtight container. Make sure the soup is cool before sealing it. Store it in the fridge for up to three days. If you want to enjoy it later, freezing is a great option. You can freeze this soup for longer storage. Use freezer-safe containers or bags. Leave some space at the top, as soup expands when frozen. It can last up to three months in the freezer. Label the container with the date for easy tracking. When you’re ready to eat, thaw the soup in the fridge overnight if frozen. Heat the soup in a pot over low heat, stirring often. If it seems too thick, add a bit of broth or water to reach your desired consistency. Enjoy your warm, creamy soup! Yes, you can make this soup in advance. It tastes even better the next day. Just let it cool and store it in the fridge. Use an airtight container. When you are ready to eat, heat it gently on the stove. You can use fresh button mushrooms, cremini mushrooms, or a mix of both. Each type adds a unique flavor. For a deeper taste, add shiitake or portobello mushrooms. They enhance the soup’s earthy notes. To thicken the soup, you can use flour, cornstarch, or cream. The recipe uses flour. Cook it with the mushrooms first. If you want a thicker texture, add more cream or blend in some cooked potatoes. Yes, you can make this soup gluten-free. Simply replace all-purpose flour with a gluten-free flour blend. You can also use cornstarch mixed with water to thicken the soup. Enjoy a tasty, gluten-free version! This blog post covered how to make a rich cream of mushroom soup. We explored all the ingredients, step-by-step cooking, and tips for great flavor. You learned about vegetarian options, storing leftovers, and common mistakes to avoid. Use these steps and tips to create a delicious soup at home. Remember, practice makes perfect! Enjoy your cooking and share your tasty results with friends and family.

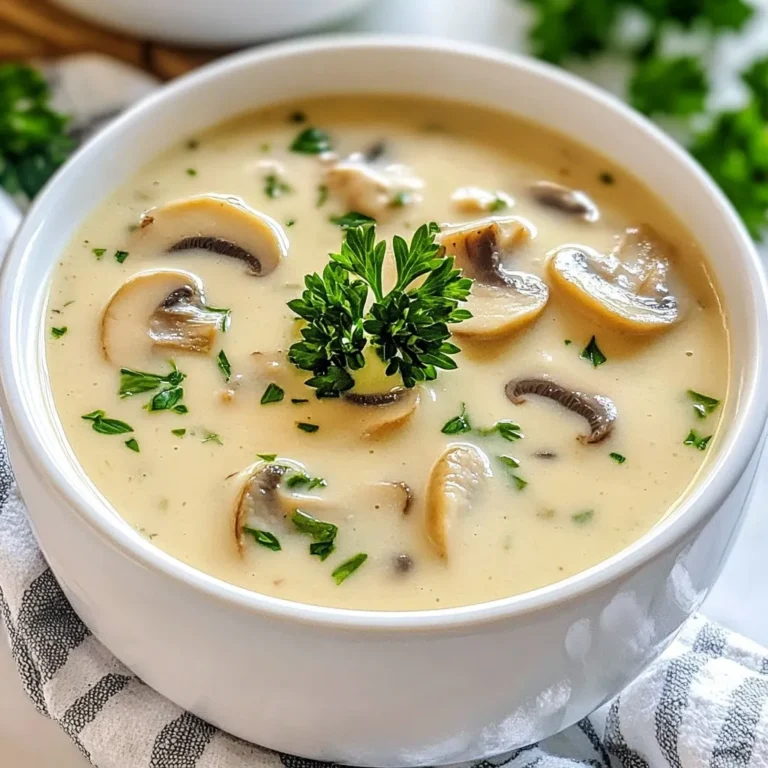
Cream of Mushroom Soup Simple and Tasty Recipe

To make classic deviled eggs, you will need: - 6 large eggs - 1/4 cup mayonnaise - 1 teaspoon Dijon mustard - 1 teaspoon apple cider vinegar - 1/4 teaspoon smoked paprika - Salt and pepper to taste - Chopped chives or green onions for garnish Fresh eggs make the best deviled eggs. Here are some tips: - Buy eggs a week before you plan to use them. - Check the sell-by date on the carton. - Store eggs in the main part of the fridge, not the door. - Use eggs that sink in water. Floating eggs are old. When choosing eggs, quality matters. Here’s what to think about: - Organic eggs come from chickens fed organic feed. - Free-range eggs often taste better and are more humane. - Store brands may be cheaper but check for quality. - Buy local eggs if possible; they are often fresher. Choosing the right ingredients can make your deviled eggs shine! {{ingredient_image_1}} First, take six large eggs. Place them in a pot and cover them with water. Make sure the water is about an inch above the eggs. Turn the heat to medium-high until the water boils. Once it starts boiling, cover the pot and turn off the heat. Let the eggs sit for 12 minutes. This method cooks the eggs evenly. After 12 minutes, transfer the eggs to an ice bath. Let them cool for about 5 minutes. This makes peeling much easier. Once the eggs are cool, peel them carefully. Slice each egg in half lengthwise. Gently remove the yolks and place them in a mixing bowl. Use a fork to mash the yolks until they are crumbly. Next, add 1/4 cup of mayonnaise, 1 teaspoon of Dijon mustard, and 1 teaspoon of apple cider vinegar to the bowl. Sprinkle in 1/4 teaspoon of smoked paprika, along with salt and pepper to taste. Stir until the mixture is creamy and smooth. This is the heart of your deviled eggs. Now, it’s time to fill the egg whites. You can use a spoon or a piping bag for this step. Spoon the yolk mixture carefully into each egg white half. Make sure to fill them generously. For a nice touch, sprinkle a little extra smoked paprika on top. Finally, garnish with chopped chives or green onions. This adds a fresh flavor and a pop of color to your dish. Enjoy your classic deviled eggs! To make the best hard-boiled eggs, start with fresh eggs. Older eggs are harder to peel. Use a pot that fits all eggs snugly. Cover them with cold water. Bring the water to a boil over medium-high heat. Once boiling, cover the pot and turn off the heat. Let the eggs sit for 12 minutes. This method ensures a creamy yolk without any green ring. Peeling eggs can be tricky, but I have a great tip. After cooking, place the eggs in an ice bath. Let them cool for about 5 minutes. This step helps separate the egg from the shell. Tap the egg gently on the counter to crack it. Roll the egg lightly to loosen the shell. Start peeling from the wider end where there is usually an air pocket. To elevate your deviled eggs, play with flavors. Add a splash of hot sauce for heat. Use smoked paprika for a rich flavor. Try adding fresh herbs like dill or basil. You can also mix in some chopped pickles for crunch. Experiment with different mustards to find your favorite blend. Adding these elements makes your deviled eggs stand out at any gathering. Pro Tips Fresh Eggs: For the best results, use eggs that are at least a week old. Fresh eggs can be harder to peel after boiling. Ice Bath: Always transfer your eggs to an ice bath immediately after boiling to stop the cooking process and make peeling easier. Piping the Filling: For a more elegant presentation, use a piping bag to fill the egg whites with the yolk mixture instead of spooning it in. Flavor Variations: Feel free to get creative! Add ingredients like avocado, bacon, or hot sauce to the yolk mixture for a unique twist. {{image_2}} To add a kick to your classic deviled eggs, go spicy! Start with the base recipe. Then, mix in some hot sauce or diced jalapeños. You can also use chipotle powder for a smoky heat. Spice lovers will enjoy this extra flavor! For a creamy and fresh twist, try avocado deviled eggs. Replace half the mayonnaise with ripe avocado. Mash it well with the yolks. This gives a rich texture and a vibrant green color. Don't forget to add lime juice for brightness! Take your deviled eggs on a trip to the Mediterranean. Mix in some finely chopped olives, sun-dried tomatoes, and feta cheese. These ingredients add a savory taste that makes the eggs unique. Garnish with fresh herbs, like dill or parsley, for a nice touch! After making deviled eggs, you might have some left. Store them in an airtight container. Use plastic wrap to cover them if you don’t have a container. Make sure to keep them in the fridge. This helps keep them fresh and safe to eat. Keep deviled eggs cold. Bacteria can grow if they sit out too long. Serve them chilled. If they are outside for more than two hours, throw them away. Always wash your hands before handling food. This keeps everything clean and safe. Deviled eggs stay fresh for about three days in the fridge. If they look or smell bad, it’s best to toss them. If you want to freeze them, it’s not recommended. Freezing changes the texture of the eggs. Enjoy your deviled eggs within the three-day window for the best taste! Yes, you can use other mustards. Yellow mustard adds a tangy flavor. Spicy brown mustard gives a kick. You can even try whole grain mustard for texture. Each type will change the taste slightly. Experiment to find your favorite mix! You can prepare deviled eggs a day in advance. Cook and peel the eggs. Store the egg whites and yolk mixture separately. Keep them in airtight containers in the fridge. When you are ready to serve, fill the whites just before your guests arrive. This keeps them fresh! Garnishes add color and flavor. You can use chopped chives or green onions for a fresh touch. Paprika gives a nice pop of color and flavor. Try crispy bacon bits for crunch. Fresh herbs, like dill or parsley, also work well. Let your creativity shine! You now have a complete guide to making deviled eggs. We covered ingredients, cooking tips, and fun variations. Remember, freshness matters for great taste. Pay attention to your egg preparation and assembly techniques, as they shape your final dish. With these tips, you can impress everyone with your flavor creations. Enjoy experimenting with garnishes and try new styles. You’ll find your favorites in no time. Happy cooking!

Classic Deviled Eggs Delightfully Simple Recipe

To make the avocado egg salad, you need these key ingredients: - 4 hard-boiled eggs, peeled and chopped - 1 ripe avocado, mashed - 2 tablespoons Greek yogurt (or mayonnaise for a richer taste) - 1 tablespoon Dijon mustard - 1 tablespoon fresh lemon juice - 2 green onions, chopped - 1 small celery stalk, finely diced - Salt and pepper to taste - 8 large lettuce leaves (such as romaine or butter lettuce) These ingredients come together to create a creamy and tasty salad. The hard-boiled eggs bring protein, while the avocado adds healthy fats. Greek yogurt keeps it lighter than mayonnaise but still creamy. Feel free to mix things up with these optional ingredients: - Fresh herbs like dill or parsley - Chopped bell peppers for crunch - Diced pickles for a tangy kick Adding these ingredients allows you to make the dish your own. Fresh herbs can brighten the flavor, while bell peppers add a nice crunch. For added flair, consider these toppings: - Sliced cherry tomatoes for color - Extra herbs for freshness - A sprinkle of paprika for spice These garnishes not only make the dish look appealing but also enhance the taste. A pop of color makes your meal more fun and inviting. Enjoy your Avocado Egg Salad Lettuce Wraps! {{ingredient_image_1}} To start, gather your ingredients. You will need four hard-boiled eggs, one ripe avocado, two tablespoons of Greek yogurt, one tablespoon of Dijon mustard, and one tablespoon of fresh lemon juice. Chop the hard-boiled eggs and mash the avocado in a large mixing bowl. Next, add the Greek yogurt or mayonnaise and the Dijon mustard. Pour in the lemon juice and mix everything well. This step creates a creamy base. Then, fold in the chopped green onions and finely diced celery. These add great crunch and flavor. Finally, season with salt and pepper to taste. Adjust as needed based on your preference. Now, take your large lettuce leaves. Romaine or butter lettuce works best. Spoon a generous amount of your avocado egg salad into the center of each leaf. Don’t be shy; fill it up! If you want, sprinkle fresh herbs like dill or parsley on top. This adds a nice touch and extra flavor. Next, fold the sides of the lettuce leaf over the filling. Roll it up gently to create a wrap. This makes it easy to eat and fun to serve. For a lovely presentation, serve the wraps on a platter. Place extra filling on the side for guests to enjoy. This allows everyone to customize their wraps. You can also garnish with more herbs or cherry tomato halves. This adds a pop of color and makes the dish more appealing. Remember, we eat with our eyes first! To make the best egg salad, start with fresh eggs. Boil them for about 10-12 minutes. This makes them easy to peel. Once peeled, chop them into small pieces. I like using a fork to mash the avocado right in the bowl. This saves time and adds flavor. Mix in Greek yogurt or mayonnaise for a creamier texture. Dijon mustard adds a nice zing. Don’t forget the lemon juice; it brightens the flavors. Lastly, add salt and pepper to your taste. This is your chance to make it just right! If you have leftovers, store them in an airtight container. This keeps the egg salad fresh. I recommend eating it within 2-3 days. If you notice the color changes, it’s time to toss it. Avoid leaving it out for too long. Always refrigerate your leftovers promptly. This keeps them safe to eat later. You can make this salad ahead of time! It tastes great after chilling in the fridge. Just prepare the salad and store it. I like to let the flavors blend overnight. Just remember to keep it in a sealed container. When it’s time to serve, spoon it into lettuce wraps. This makes a quick and tasty meal. Pro Tips Use Fresh Ingredients: Always opt for ripe avocados and fresh eggs to enhance the flavor and creaminess of your egg salad. Customize Your Dressing: Feel free to adjust the amount of Greek yogurt or mayonnaise based on your preferred creaminess level. Chill Before Serving: For a refreshing taste, let the egg salad sit in the refrigerator for 30 minutes before serving to allow the flavors to meld. Experiment with Herbs: Try different combinations of fresh herbs, such as cilantro or basil, to give your wraps a unique twist! {{image_2}} You can use many types of lettuce for your wraps. Romaine is sturdy and crunchy. Butter lettuce is soft and sweet. Both give a nice bite to your dish. Other options include green leaf or even cabbage. Each type adds a unique flavor and texture. You can easily swap ingredients based on your diet. For a dairy-free option, use avocado instead of Greek yogurt. If you want a vegan version, replace eggs with chickpeas. You can mash chickpeas to get a similar texture. For a low-fat option, reduce the amount of avocado or yogurt. Adding extra flavors can make your dish pop. Try mixing in spices like paprika or cumin. Fresh herbs like dill or parsley add bright notes. You could also add a dash of hot sauce if you like heat. These simple changes can elevate your avocado egg salad to new heights. To keep your avocado egg salad fresh, store it in an airtight container. This helps prevent it from drying out. You can use plastic wrap to cover the bowl if you prefer that method. Always place the container in the refrigerator right after making it. Freezing egg salad is not ideal because of the texture. When thawed, the eggs and avocado may become watery. If you want to freeze it, do so without the lettuce. Store your egg salad in a freezer-safe bag and remove as much air as possible. In the fridge, your avocado egg salad lasts about 2 to 3 days. If you freeze it, use it within 1 month for the best taste. Always check for any off smells or changes in texture before eating. Yes, you can make this salad ahead of time. It tastes great after chilling in the fridge for a few hours. Just keep it in an airtight container. This helps the flavors mix well. If you wait too long, the avocado may brown. Add lemon juice to slow this down. Prepare the salad one day ahead for a quick meal. Romaine and butter lettuce are the best choices for wraps. They are sturdy and hold the filling well. Romaine has a nice crunch, while butter lettuce is soft and tender. Both types make great vessels for the avocado egg salad. You can also try iceberg for a crunchy bite. Absolutely! You can add many vegetables to enhance the salad. Try diced bell peppers for sweetness or shredded carrots for crunch. Chopped cucumbers work well, too, adding freshness. Experiment with your favorites to make this salad your own. Just chop them small to blend well. You can store leftovers in the fridge for up to three days. Keep the salad in an airtight container. Check for any browning or off smells before eating. If it looks or smells strange, it’s best to throw it away. Always check first to stay safe. Avocado egg salad is a tasty dish that offers lots of ways to enjoy it. We covered main and optional ingredients, plus ideas for toppings. The steps to prepare and serve were simple, ensuring you can impress anyone. My tips on storage and variations help you make this meal last. I believe you can create a fun dish that meets your taste. With these ideas, you’ll enjoy a fresh, satisfying meal every time you make it. Happy cooking!

Avocado Egg Salad Lettuce Wraps Fresh and Simple Dish

- 2 cups diced cooked ham - 4 medium potatoes, peeled and diced - 1 medium onion, chopped - 2 cloves garlic, minced - 4 cups chicken broth - 2 cups whole milk (or a dairy-free alternative) - 1 cup shredded sharp cheddar cheese - 1 cup frozen mixed vegetables (peas, carrots, corn) - 1 teaspoon dried thyme - 1 teaspoon smoked paprika - Salt and pepper to taste - 2 tablespoons olive oil - Fresh parsley, chopped (for garnish) If you don't have cooked ham, try diced turkey or cooked bacon. For the potatoes, you can use sweet potatoes for a twist. If you want a lighter soup, swap whole milk for almond or oat milk. You can also replace cheddar cheese with gouda or mozzarella. For a veggie boost, add fresh spinach or kale instead of frozen vegetables. You will need a large pot for cooking your soup. A wooden spoon helps to mix the ingredients well. A sharp knife and cutting board are needed for chopping. Measuring cups and spoons will ensure you get the right amounts. Lastly, have a ladle ready for serving your warm, tasty soup. {{ingredient_image_1}} Start by gathering all your ingredients. You need: - 2 cups diced cooked ham - 4 medium potatoes, peeled and diced - 1 medium onion, chopped - 2 cloves garlic, minced - 4 cups chicken broth - 2 cups whole milk (or a dairy-free alternative) - 1 cup shredded sharp cheddar cheese - 1 cup frozen mixed vegetables (peas, carrots, corn) - 1 teaspoon dried thyme - 1 teaspoon smoked paprika - Salt and pepper to taste - 2 tablespoons olive oil - Fresh parsley, chopped (for garnish) Next, peel and chop the potatoes. Chop the onion and mince the garlic. In a large pot, heat the olive oil over medium heat. Add the chopped onion and sauté for about 3-4 minutes. You want the onion soft and clear. Now, add the minced garlic. Cook it for one more minute. You will smell its great flavor. Stir in the diced potatoes. Pour in the chicken broth until the potatoes are covered. Bring the pot to a boil. Once boiling, lower the heat to a simmer. Cook for about 15 minutes or until the potatoes are tender. Once the potatoes are soft, add the diced ham, frozen mixed veggies, thyme, and smoked paprika. Stir it all together and simmer for another 5 minutes. Pour in the whole milk and mix well. Allow it to simmer for another 5 minutes. This helps the soup thicken a little. Remove the pot from heat. Fold in the shredded cheddar cheese until it melts and makes the soup creamy. Finally, taste the soup and add salt and pepper as needed. Serve it hot and garnish with fresh chopped parsley. Enjoy your warm bowl of ham and potato soup! To make your ham and potato soup creamy, start with whole milk. This adds richness. You can also use heavy cream for an even thicker texture. If you prefer a lighter option, try a dairy-free milk like oat or almond milk. Another trick is to mash some cooked potatoes in the pot. This thickens the soup and gives it a smooth finish. Stir in the cheese at the end for a lovely melt. Herbs and spices can elevate your soup. I love using dried thyme and smoked paprika. Thyme adds a warm, earthy flavor. Smoked paprika gives a nice depth and a hint of smokiness. Fresh herbs like parsley make a great garnish. Feel free to experiment with garlic powder, onion powder, or even a dash of cayenne for a kick. Tasting as you go ensures the perfect balance. Serve this soup hot for the best taste. Pair it with crusty bread for dipping. A simple green salad on the side adds freshness. You can also top your soup with crispy bacon bits for extra crunch. For a cozy night, enjoy it with a glass of white wine. This soup is perfect for gatherings, so make a big pot and share! Pro Tips Use Leftover Ham: For an even more flavorful dish, use leftover ham from a holiday meal. It adds depth and reduces waste! Customize Vegetables: Feel free to customize the mixed vegetables based on your preference or what you have on hand. Fresh veggies can also be used for added crunch. Thickening the Soup: If you prefer a thicker soup, you can mash a portion of the potatoes after cooking or add a cornstarch slurry before adding the cheese. Cheese Variations: Experiment with different types of cheese, like Gruyère or Monterey Jack, for a unique twist on the classic flavor. {{image_2}} You can easily make this soup vegetarian. Just skip the ham. Use vegetable broth instead of chicken broth. Add more veggies like mushrooms, bell peppers, or spinach. For a creamy texture, blend some of the potatoes with the broth. This gives a nice base and keeps it rich. You can still add cheese if you like. Using a slow cooker makes this dish even easier. Start by sautéing the onion and garlic in a pan. Then, add everything else to the slow cooker. Toss in the diced potatoes, broth, and veggies. Set it on low for 6-8 hours or on high for 3-4 hours. Stir in the milk and cheese at the end. This method brings out all the flavors. Want to kick it up a notch? You can add a few fun extras. Try some diced jalapeños for heat. A splash of hot sauce can spice things up as well. Fresh herbs like chives or dill add a fresh touch. You can also toss in some crispy bacon bits for that extra crunch. Just make sure to mix these in at the end to keep all the flavors bright. To store leftover ham and potato soup, let it cool first. Use an airtight container. This keeps the soup fresh for up to three days in the fridge. If you want extra flavor, add more cheese before serving. You can freeze this soup too. Pour the cooled soup into freezer-safe bags or containers. Leave some space at the top for expansion. It will stay good for up to three months. When you’re ready to eat, just thaw it in the fridge overnight. Reheating is simple! You can use the stove or microwave. If using the stove, heat it in a pot over low heat. Stir often to avoid burning. For the microwave, use a safe bowl and heat in short bursts. Stir in between to warm evenly. If the soup thickens, add a splash of milk or broth to make it creamy again. Yes, you can. If you do not have ham, try chicken or turkey. Both work well in this soup. They add good flavor and protein. You can also use bacon for a smoky taste. Just cook it first before adding other ingredients. Absolutely! This ham and potato soup is great for meal prep. You can make a big batch and store it. It keeps well in the fridge for up to four days. Just warm it up when you are ready to eat. It also freezes nicely for up to three months. Portion it in containers for easy meals during the week. If you want to avoid dairy, there are many options. Almond milk or oat milk works well in this soup. You can also use coconut milk for a richer taste. Just make sure to choose unsweetened varieties. This way, you keep the soup savory and delicious. In this blog post, we explored the key ingredients, tools, and steps for making a delicious soup. I shared tips for enhancing flavor and achieving the perfect texture. We discussed variations like the vegetarian option and slow cooker method to suit different tastes. Proper storage and reheating tips help you enjoy your soup later. Remember, cooking is fun, and experimenting with ingredients can lead to great meals. This journey encourages you to try new methods and make your recipes unique. Keep cooking and enjoy every bite!

Ham & Potato Soup Flavorful Comfort Food Recipe

To make these easy slice and bake cookies, gather these simple items: - 1 cup unsalted butter, softened - 3/4 cup granulated sugar - 3/4 cup packed brown sugar - 1 large egg - 2 teaspoons vanilla extract - 2 1/4 cups all-purpose flour - 1 teaspoon baking powder - 1/2 teaspoon salt - 1 cup chocolate chips - 1/2 cup chopped nuts (optional) - Sprinkles or colored sugar for garnish (optional) You can add a twist to your cookies with these fun options: - Chopped dried fruit, like cranberries or cherries - Different types of chocolate, such as white or dark - A dash of cinnamon for warmth - Coconut flakes for a tropical touch If you need to swap out some ingredients, try these ideas: - Use coconut oil instead of butter for a dairy-free option. - Replace the egg with 1/4 cup of applesauce for a vegan version. - Use whole wheat flour for a healthier cookie. - Substitute brown sugar with coconut sugar for a lower glycemic index. These tips help you customize your cookies based on what you have or prefer. Enjoy the process of making them your own! {{ingredient_image_1}} First, gather your ingredients. You need: - 1 cup unsalted butter, softened - 3/4 cup granulated sugar - 3/4 cup packed brown sugar - 1 large egg - 2 teaspoons vanilla extract - 2 1/4 cups all-purpose flour - 1 teaspoon baking powder - 1/2 teaspoon salt - 1 cup chocolate chips - 1/2 cup chopped nuts (optional) - Sprinkles or colored sugar for garnish (optional) In a large mixing bowl, beat the butter, granulated sugar, and brown sugar. Mix until creamy and smooth. Add the egg and vanilla extract. Beat until well combined. In another bowl, whisk together the flour, baking powder, and salt. Slowly add this mix to the wet ingredients. Stir until just combined. Lastly, fold in the chocolate chips and nuts, if you like them. Now, divide the dough into two equal parts. Roll each part into a log about 2 inches wide. Wrap each log tightly in plastic wrap. Place the logs in the fridge for at least one hour. This makes them firm and easy to slice. You can also chill them longer if needed. Once the dough is firm, preheat your oven to 350°F (175°C). Line a baking sheet with parchment paper. Remove the logs from the fridge. Slice each log into 1/4-inch thick rounds. Place the slices on the prepared baking sheet. Leave space between each slice to let them spread. Sprinkle colored sugar or sprinkles on top if you want. Bake for 8-10 minutes until the edges turn golden. Let them cool on the baking sheet for a few minutes. Then, move them to a wire rack to cool completely. Enjoy your cookies! To make great slice and bake cookies, you need to chill the dough. Chilling firms the dough, making it easier to slice. Shape the logs evenly, about 2 inches in diameter. Use wax paper or plastic wrap to cover the logs tightly. This helps keep the shape while chilling. One common mistake is skipping the chilling step. If you don’t chill the dough, the cookies may spread too much. Another mistake is slicing them too thick. Aim for 1/4-inch thick slices for even baking. Lastly, avoid overcrowding the baking sheet. Space out the cookies to allow for spreading and airflow. To make your cookies more flavorful, try adding zest from citrus fruits. Lemon or orange zest adds a nice brightness. You can also use different types of chocolate, like dark or white chocolate. Adding a pinch of sea salt on top before baking can enhance sweetness. If you want crunch, consider adding more nuts or using toasted ones. Pro Tips Chill the Dough: Refrigerating the cookie dough for at least an hour helps the cookies hold their shape and develop a richer flavor. Use Quality Chocolate: Opt for high-quality chocolate chips for a more decadent taste. The better the chocolate, the tastier your cookies will be! Experiment with Flavors: Try adding different extracts like almond or hazelnut to the dough for a unique twist on the classic cookie flavor. Storage Tips: Store baked cookies in an airtight container at room temperature for up to a week, or freeze them for longer shelf life. {{image_2}} You can easily switch up the flavor of these cookies. Try adding different mix-ins to the dough. Here are some ideas: - Peanut Butter Chips: Replace chocolate chips with peanut butter chips for a nutty taste. - Dried Fruit: Add dried cranberries or raisins for a fruity twist. - Coconut Flakes: Stir in shredded coconut for a tropical vibe. - Spices: Mix in cinnamon or nutmeg for a warm, cozy flavor. These combinations keep things fun and exciting! You can change these cookies for special holidays too. For Halloween, use orange sprinkles and add pumpkin spice. For Christmas, add peppermint extract and red and green sprinkles. For Easter, try pastel-colored sprinkles and add some lemon zest. Each season brings a chance to get creative with your cookies! If you need gluten-free cookies, swap all-purpose flour for a gluten-free blend. Make sure it has xanthan gum for the right texture. For a vegan version, replace the egg with a flax egg (1 tablespoon flaxseed meal + 2.5 tablespoons water, mixed and let sit). Use vegan butter instead of regular butter. These options ensure everyone can enjoy these tasty treats! To keep your cookies fresh, store them in an airtight container. This helps to keep moisture in and air out. You can layer them with parchment paper to prevent sticking. If you want to keep them crispy, store them with a slice of bread. The bread absorbs extra moisture. Freezing cookie dough is a smart way to save time. To freeze, wrap each log tightly in plastic wrap. Place the wrapped logs in a freezer bag. They can last up to three months in the freezer. When you are ready to bake, just slice and bake from frozen. No need to thaw! Baked cookies stay fresh for about one week at room temperature. For longer storage, you can freeze them, too. Just make sure to wrap them well. Thaw them at room temperature before serving. This keeps them tasty and soft, just like fresh cookies! You can tell the cookies are done when the edges turn light golden brown. The centers might look soft, but they will set as they cool. Keep an eye on them, as baking times can vary. Check around the 8-minute mark. If they look firm, it's time to take them out. Yes, you can mix in any type of chocolate you like. Dark, milk, or white chocolate all work well. You can even use chocolate chunks or a mix of different kinds. This will add a unique flavor to your cookies. If you want to skip the egg, you can use a few options. Try a flaxseed meal mixed with water. Use 1 tablespoon of flaxseed meal with 3 tablespoons of water. Let it sit for a few minutes to thicken. Applesauce is another good choice. Use 1/4 cup of applesauce for one egg. To make cookies softer, try adding more butter or brown sugar. You can also bake them for a shorter time. For crunchier cookies, add a bit more flour or bake them longer. Keep testing until you find your perfect cookie texture. Yes, you can prepare the dough ahead of time. Wrap it well in plastic wrap and store it in the fridge for up to 3 days. You can also freeze it for up to 3 months. Just thaw in the fridge before slicing and baking. This makes it easy to bake fresh cookies anytime! In this article, we explored cookie-making from start to finish. We discussed key ingredients, optional add-ins, and helpful tips for substitutions. You learned step-by-step instructions for preparing, shaping, and baking cookies. We also shared tips to perfect your technique, avoid common mistakes, and enhance flavors. With variations for every season and dietary need, these cookies are truly versatile. Remember to store them properly to keep them fresh. Enjoy your baking journey, and make it your own!

Easy Slice and Bake Cookies Simple and Fun Recipe

For this pot pie, I love using a mix of fresh and frozen veggies. Here’s what you need: - 1 medium onion, diced - 2 cloves garlic, minced - 2 medium carrots, diced - 2 celery stalks, diced - 1 medium potato, peeled and cubed - 1 cup frozen peas - 1 cup butternut squash, diced These veggies bring a sweet and savory flavor. They also add nice colors to your dish, making it look appealing. To keep this pot pie creamy and tasty, I use some simple dairy alternatives and seasonings. Here’s what you need: - 1 cup vegetable broth - 1 cup unsweetened almond milk (or regular milk) - 1 tablespoon cornstarch dissolved in 2 tablespoons water - 1 teaspoon dried thyme - 1 teaspoon dried rosemary - Salt and pepper to taste The almond milk adds creaminess without dairy. Thyme and rosemary give an earthy taste that pairs well with the veggies. Choosing the right pastry makes your pot pie a winner. Here are your choices: - 1 sheet of puff pastry - 1 pie crust (store-bought or homemade) - 1 egg (for egg wash, optional) Puff pastry gives a light and flaky top. A pie crust can also work well if you prefer a more traditional style. The egg wash helps it turn golden brown and crisp. This combination of ingredients creates a warm and hearty dish that warms your heart and fills your belly. {{ingredient_image_1}} Start by heating the olive oil in a large skillet over medium heat. Add the diced onion and minced garlic. Sauté them for about 3 to 4 minutes until they are soft and smell great. Next, toss in the diced carrots, celery, and cubed potato. Cook these for about 5 to 7 minutes, stirring now and then. You want them to start softening but not mushy. Now, it’s time to add the fun stuff! Stir in the butternut squash and frozen peas. Sprinkle in the dried thyme and rosemary. Cook everything together for another 2 minutes. This step makes your filling taste fresh and fragrant. Pour in the vegetable broth and almond milk, bringing the mix to a gentle simmer. Once it starts to simmer, mix in the cornstarch dissolved in water. This will help thicken the filling. Keep cooking for a couple more minutes, and season with salt and pepper to taste. Once thickened, transfer the yummy filling to a greased pie dish. Now for the fun part! Take your puff pastry or pie crust and lay it over the filling. Trim the edges to fit the dish. Make some slits on top of the pastry for steam to escape while baking. This helps avoid a soggy crust, which we definitely don’t want! If you want to make your pot pie look beautiful, beat an egg and brush it over the pastry. This gives it a lovely golden color when baked. Preheat your oven to 400°F (200°C). Place the pot pie in your hot oven and bake for 25 to 30 minutes. Keep an eye on it, and look for a golden brown, puffed-up crust. After baking, take it out and let it cool for a few minutes. This helps the filling set a bit, making it easier to serve. Now, you can enjoy a warm, cozy slice of winter veggie pot pie! To make your pot pie shine, focus on the herbs. Dried thyme and rosemary add warmth. I suggest using fresh herbs if you have them. Fresh herbs can boost the taste even more. Saute the onion and garlic until soft. This step builds a nice base for flavor. Don’t rush it. A little patience goes a long way. You can also try adding a splash of soy sauce or balsamic vinegar for depth. A flaky crust makes all the difference. Start with cold ingredients. This includes your butter or oil. If you use puff pastry, keep it chilled until ready to bake. Handle the dough gently. Overworking it can make it tough. You want layers, not a dense crust. Use an egg wash for extra shine. Just beat an egg and brush it on before baking. This step makes the crust golden and appetizing. Taste your filling before adding it to the crust. The right mix of salt and pepper can elevate the dish. If it feels bland, add more herbs or spices. A pinch of nutmeg can add warmth, too. Remember, every vegetable has its own flavor. Adjust based on what you use. You can always add more broth or almond milk if it seems too thick. This will help keep your filling creamy and nice. Pro Tips Choose Seasonal Veggies: Using seasonal vegetables not only enhances the flavor but also ensures freshness and supports local produce. Make Ahead: Prepare the filling in advance and store it in the fridge. When you’re ready, just top with pastry and bake for a quick meal. Experiment with Herbs: Feel free to add other herbs like sage or parsley to customize the flavor profile of your pot pie. Golden Finish: For an extra crispy crust, let the egg wash sit for a few minutes before baking, ensuring a beautiful golden color. {{image_2}} You can easily make this pot pie vegan. Swap the milk for unsweetened almond milk or any plant milk you love. For a rich texture, use coconut cream. Instead of an egg wash, brush the crust with a bit of plant milk. This gives it a lovely shine without any eggs. Feel free to mix and match your favorite veggies. Instead of butternut squash, try sweet potatoes or parsnips. You can also add green beans, cauliflower, or even mushrooms. The key is to keep the total amount of vegetables the same. You create new flavors each time! To make a gluten-free pot pie, use a gluten-free pie crust. You can find options made from almond flour or rice flour. Another choice is to make a crust using mashed potatoes on top. This gives a unique twist and keeps it gluten-free. Just make sure to check that your broth and other ingredients are gluten-free as well. After enjoying your Winter Veggie Pot Pie, let it cool down first. Then, cover it tightly with plastic wrap or foil. You can also use an airtight container. This way, the pot pie stays fresh in the fridge for up to three days. If you want to keep it longer, freezing is a great option. To reheat, preheat your oven to 350°F (175°C). Place the pot pie in an oven-safe dish. Cover it with foil to keep the crust from burning. Heat for about 20-25 minutes, or until it's hot all the way through. You can also use a microwave, but the crust may not be as crispy. Heat it in short bursts of 1-2 minutes, checking often. If you want to freeze your pot pie, it’s best to do this before baking. Wrap the unbaked pie tightly in plastic wrap, then place it in a freezer bag. It can stay frozen for up to three months. When you're ready to bake, remove it from the freezer. Let it thaw in the fridge overnight before baking it as per the recipe instructions. This ensures a tasty meal whenever you want a cozy night in. Yes, you can. Use any veggies you enjoy. Zucchini, mushrooms, or bell peppers work great. Just cut them into small pieces. Make sure to adjust cooking time for softer veggies. Frozen veggies also work well and save time. To make it vegan, swap the milk for almond milk or any plant milk. Skip the egg wash or use a vegan egg. This keeps the crust golden. You can also add more plant-based protein like lentils or chickpeas for added nutrition. This pot pie pairs well with a fresh salad. A side of roasted veggies is also great. If you want something warm, serve it with soup. Try a simple tomato or carrot soup for a cozy meal. This blog post covered the key ingredients for a tasty Winter Veggie Pot Pie. We explored vegetables, dairy alternatives, and pastry options. I shared step-by-step instructions for filling, assembling, and baking the pie. You also learned tips for flavor, crust, and seasoning. Plus, we discussed variations, including vegan and gluten-free choices. In closing, cooking is fun and easy. You can adapt this recipe to your taste and needs. Enjoy your delicious pot pie and share it with others!

Winter Veggie Pot Pie Cozy and Comforting Delight

- 4 large russet potatoes, peeled and diced - 1 medium onion, finely chopped - 3 cloves garlic, minced - 4 cups chicken broth (or vegetable broth) - 1 cup heavy cream - 1 cup shredded cheddar cheese - 1/2 cup sour cream - 4 slices cooked crisp turkey bacon, chopped (optional) - 2 green onions, sliced (for garnish) - Salt and pepper to taste - 2 tablespoons olive oil Gathering these ingredients is the first step to making your warm and comforting potato soup. The russet potatoes give it a creamy texture. The onion and garlic add a savory flavor. Chicken broth makes the soup hearty, while heavy cream brings richness. Shredded cheddar cheese melts in to create a deliciously cheesy base. Sour cream adds a tangy kick, making each spoonful satisfying. If you like bacon, adding it will make the soup even better. Finally, green onions on top add a fresh crunch. When you have everything ready, you can start cooking. Each ingredient plays an important role, making this soup a favorite for many. {{ingredient_image_1}} 1. In a large pot, heat 2 tablespoons of olive oil over medium heat. 2. Add 1 medium onion, finely chopped. Sauté for about 5 minutes. The onion should turn translucent. 3. Next, add 3 cloves of minced garlic. Cook for another 1-2 minutes until you smell the garlic. 4. Stir in 4 large russet potatoes, peeled and diced. Mix well. 5. Pour in 4 cups of chicken broth. You can use vegetable broth for a vegetarian option. 1. Turn up the heat and bring the mixture to a boil. 2. Once boiling, reduce the heat and let it simmer for about 20-25 minutes. The potatoes should be tender. 3. After cooking, use an immersion blender to puree the soup. Blend it to your desired smoothness. 4. For a chunkier texture, blend only half of the pot and leave the rest. 1. Stir in 1 cup of heavy cream, 1 cup of shredded cheddar cheese, and 1/2 cup of sour cream. 2. Mix until the cheese melts and everything combines well. 3. Season with salt and pepper to taste. 4. If you want to add meat, include 4 slices of cooked crisp turkey bacon. Add it just before serving. 5. Serve hot, garnished with 2 sliced green onions and any reserved turkey bacon. For the best texture, blending is key. I love using an immersion blender. It gives a smooth finish with less mess. If you want some chunks, blend only half the soup. This gives a nice contrast in texture. You get creamy bites and hearty pieces. To boost flavor, try adding spices. A pinch of paprika or cayenne can add heat. You can also mix in fresh herbs like thyme or parsley. They add a fresh taste. For garnishes, sliced green onions work great. Crispy turkey bacon adds a nice crunch too. Use a large pot for cooking. A heavy-bottomed pot helps heat evenly. For blending, an immersion blender is best. It’s easy to use and clean. If you don’t have one, a regular blender works too. Just blend in small batches to avoid spills. Pro Tips Choose the Right Potatoes: For a creamy texture, russet potatoes work best due to their high starch content. Blend to Your Preference: Adjust the blending process based on your desired soup texture; blend completely for a smooth soup or partially for a chunkier version. Garnish for Flavor: Fresh green onions not only add color but also enhance the soup's flavor profile when sprinkled on top just before serving. Make It Ahead: This soup can be prepared in advance and stored in the refrigerator. Reheat gently, adding a splash of broth if it thickens too much. {{image_2}} You can easily make this soup fit your diet. For a vegetarian version, swap chicken broth with vegetable broth. This change keeps the flavor rich without meat. If you need dairy-free options, replace heavy cream with coconut milk. You can also use dairy-free cheese for a tasty twist. These adjustments make the soup just as comforting for everyone. To elevate your soup's taste, consider adding spices. Paprika adds warmth, while cayenne brings heat. You can also mix in vegetables like carrots or celery for extra nutrition and crunch. If you want protein, add shredded chicken or beans. These additions create layers of flavor and make each bowl exciting. Pair your potato soup with warm, crusty bread or a fresh salad. Bread soaks up the soup's goodness, while a salad adds a nice crunch. For serving, use bowls that showcase the soup's creamy texture. Garnish with green onions and reserved bacon for a pop of color and extra flavor. This simple touch makes the meal feel special. You can store Outback Steakhouse Potato Soup in the fridge for about 3 to 4 days. Use an airtight container to keep it fresh. When you are ready to enjoy it again, simply reheat it on the stove over low heat. Stir it often to avoid burning. You can also use a microwave, but be sure to cover the bowl to keep moisture in. To freeze your potato soup, let it cool completely first. Then, pour it into freezer-safe bags or containers. Make sure to leave some space at the top for expansion. When you want to eat it, take it out of the freezer and thaw it in the fridge overnight. You can also thaw it in the microwave on low power. Reheat in a pot on the stove, stirring often, until it's hot all the way through. The best containers for soup are those that seal tightly. Glass jars or plastic containers work well. Always label your containers with the date. This helps you know when to use them for the best taste. Keep your soup fresh for longer by marking each container clearly. To thicken potato soup, you can use a few methods. The easiest way is to blend part of the soup. This makes the soup creamy. You can also add more potatoes or use cornstarch mixed with water. Cook it in the soup until it gets thick. Yes, you can use other potatoes. Yukon Golds or red potatoes work well. They have a nice texture. Just remember that different potatoes may change the soup's taste a bit. To spice up the soup, add some cayenne pepper or crushed red pepper. You can also mix in hot sauce for a kick. Start with a little, then taste and add more if you want. Yes, this recipe can be gluten-free. Use vegetable broth instead of chicken broth. Make sure all other ingredients are gluten-free too. Always check labels on packaged items. Absolutely! This soup tastes great when made ahead. Make it, let it cool, and store in the fridge. Reheat it on the stove when you're ready to serve. The flavors will even get better! In this blog post, we explored how to make a creamy potato soup step by step. You learned the key ingredients and the cooking process, from sautéing onions and garlic to blending for the perfect texture. I also shared tips for flavor and variations, whether for dietary needs or taste preferences. Remember, this soup is versatile and easy to store. Try making it your own with different ingredients. Enjoy a warm bowl of comfort that fits your taste.

Outback Steakhouse Potato Soup Warm and Comforting Meal

PREV 1 2 3 4 … 86 NEXT
meal twig

explore

DessertsDinnerAppetizersDrinks

Our Policies

  • Cookie Policy
  • Copyright Policy
  • Disclaimer
  • GDPR Policy
  • Terms Of Use
Back to Top
  • About
  • Contact Us
  • Privacy Policy
© 2026 meal twig