FREE DINNER EBOOK! Get your copy!
  • Cookie Policy
  • GDPR Policy
  • Disclaimer
  • Terms Of Use
  • Visit my other site: Fun Cookie Recipes
meal twig
  • Home
  • Dinner
  • Desserts
  • Drinks
  • Appetizers
  • Contact
  • About
  • Privacy Policy
  • Home
  • Dinner
  • Desserts
  • Drinks
  • Appetizers
  • Contact
  • About
  • Privacy Policy
  • Cookie Policy
  • GDPR Policy
  • Disclaimer
  • Terms Of Use
Visit my other site: Fun Cookie Recipes

HOME / CATEGORIES /

Latest

To make Air Fryer Honey Garlic Shrimp, gather these items: - 1 pound large shrimp, peeled and deveined - 1/4 cup honey - 3 tablespoons soy sauce (low sodium preferred) - 3 cloves garlic, minced - 1 tablespoon fresh ginger, grated - 1 tablespoon olive oil - 1/2 teaspoon red pepper flakes (optional, for heat) - Salt and pepper to taste - 2 green onions, sliced (for garnish) - Sesame seeds (for garnish) Using high-quality shrimp makes a big difference. Look for fresh shrimp that are firm and odor-free. If you choose frozen shrimp, pick ones that are flash-frozen. This helps keep their texture intact. Use pure honey for the best flavor. Avoid blends that have added sugar or corn syrup. For soy sauce, low sodium is best to keep the dish balanced. Fresh garlic and ginger enhance the taste much more than dried versions. If you don't have shrimp, you can swap it for chicken or tofu. For honey, maple syrup works well as a vegan option. If soy sauce is not on hand, try tamari or coconut aminos for a gluten-free version. No fresh ginger? Ground ginger can be a good substitute, just use less. If you want to skip red pepper flakes, you can use sweet paprika for a milder flavor. To start, you need a mixing bowl. In it, whisk together these ingredients: - 1/4 cup honey - 3 tablespoons soy sauce - 3 cloves garlic, minced - 1 tablespoon fresh ginger, grated - 1 tablespoon olive oil - 1/2 teaspoon red pepper flakes (optional) - Salt and pepper to taste Mix well until smooth. This sauce is sweet and savory. It adds great flavor to the shrimp. Now, take 1 pound of large shrimp, peeled and deveined. Add the shrimp to the bowl. Toss gently to coat every shrimp with the marinade. Cover the bowl with plastic wrap. Place it in the fridge for 15 to 30 minutes. This step is important. It allows the shrimp to soak up all the flavors. While the shrimp marinates, preheat your air fryer to 400°F (200°C). This will take about 5 minutes. Once hot, arrange the marinated shrimp in a single layer in the air fryer basket. Avoid overcrowding the basket. If you have too many shrimp, cook them in batches. Air fry the shrimp for 6 to 8 minutes. Shake the basket halfway through to cook evenly. The shrimp should turn pink and opaque when done. After cooking, let the shrimp rest for a minute. You can drizzle any leftover marinade on top for extra flavor. Finally, garnish with sliced green onions and sesame seeds. Enjoy your tasty honey garlic shrimp! To get the best shrimp texture, start with large shrimp, about a pound. Peel and devein them for a clean bite. Marinate the shrimp for at least 15 minutes. This step makes them tender and flavorful. Avoid overcooking the shrimp. When they turn pink and opaque, they are done. Preheat your air fryer to 400°F (200°C) for five minutes. This helps the shrimp cook evenly. Arrange the shrimp in a single layer in the basket. If you crowd them, they won’t cook well. Shake the basket halfway through cooking. This ensures every shrimp gets nice and crispy. You can boost the taste with a few extra ingredients. Add red pepper flakes for heat if you like spice. You can also mix in lime juice for a zesty kick. Fresh herbs, like cilantro, give a nice touch too. For a crunch, sprinkle sesame seeds on top before serving. This adds flavor and looks great! {{image_2}} You can switch up the flavor by using different sauces. Try teriyaki sauce for a sweet twist. A garlic butter sauce adds richness and depth. Or use a spicy chili sauce for a kick. Each sauce brings a new taste to your dish. Adding vegetables makes this dish even better. Bell peppers, snap peas, or broccoli work great. Toss them in the marinade with the shrimp. The air fryer cooks them fast while keeping them crisp. You’ll enjoy a colorful and healthy meal. If you like heat, add more red pepper flakes. You can also use sriracha or hot sauce. Start small and taste as you go. If you prefer mild, leave out the spicy elements. Adjusting spice lets everyone enjoy this dish. To store leftover shrimp, let them cool first. Place them in an airtight container. You can keep them in the fridge for up to 2 days. Make sure to cover the shrimp well to keep them fresh. This will help prevent any strong odors from other foods. To reheat shrimp, use your air fryer. Set it to 350°F (175°C). Heat the shrimp for about 3-5 minutes. This will help them stay juicy and crisp. Check them often to avoid overcooking. You can also use a microwave, but the shrimp may lose some crispiness. If you want to freeze shrimp, place them in a freezer-safe bag. Remove as much air as possible before sealing. You can freeze shrimp for up to 3 months. When you’re ready to use them, thaw in the fridge overnight. This keeps them from becoming rubbery when cooked. Yes, you can use frozen shrimp. Just make sure to thaw them first. Place the shrimp in a bowl of cold water for about 15-20 minutes. Drain them well and pat dry before marinating. This helps the marinade stick better to the shrimp. Honey garlic shrimp pairs well with many sides. Here are some ideas: - Steamed rice - Quinoa - Stir-fried vegetables - A fresh green salad - Noodles These sides complement the sweet and savory flavors of the shrimp. The shrimp are done when they turn pink and opaque. This usually takes about 6-8 minutes in the air fryer. You can also slice one open to check. It should be firm and not translucent. Be careful not to overcook them, as they can become tough. This blog covered how to make honey garlic shrimp from start to finish. We explored essential ingredients and shared quality tips. You learned about marinating, air frying, and achieving the best shrimp texture. Remember, you can use substitutions for ingredients, tweak spice levels, and try different sauces. Store leftovers safely, and reheat them for a delicious meal. With these steps, you’ll enjoy flavorful shrimp time after time. Enjoy your cooking adventure!

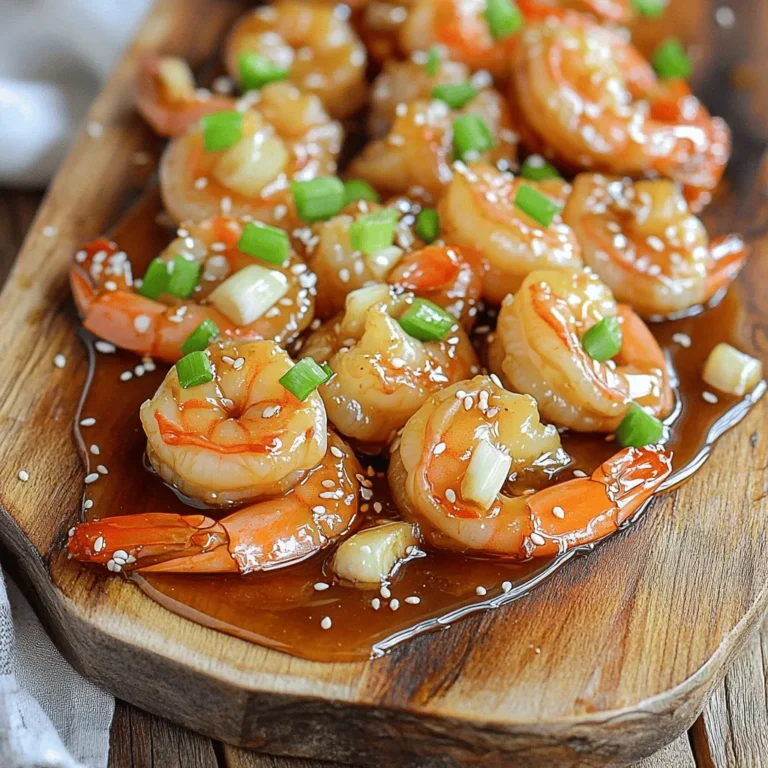
Air Fryer Honey Garlic Shrimp Quick and Flavorful Recipe

- Spaghetti squash - Olive oil - Garlic The first key ingredient is spaghetti squash. This squash is unique. It has a mild flavor and a stringy texture. When cooked, it forms strands that resemble spaghetti. This makes it a great base for our creamy sauce. Next, we need olive oil. It adds richness and helps to cook the garlic. Speaking of garlic, we need four cloves, minced. Garlic brings a wonderful aroma and flavor to the dish. - Heavy cream - Parmesan cheese For the creamy aspect, we use one cup of heavy cream. This gives the sauce its rich texture. We also need one cup of grated Parmesan cheese. Parmesan adds a salty, nutty flavor that pairs well with the garlic. - Salt - Black pepper - Italian seasoning - Fresh parsley Finally, we add seasonings. We need one teaspoon of salt and half a teaspoon of black pepper. These enhance the dish's overall taste. Italian seasoning adds a blend of herbs that complements the other flavors. We also use fresh parsley. A quarter cup of chopped parsley makes a lovely garnish and adds freshness. - Preheat your oven to 400°F (200°C). - Carefully slice the spaghetti squash in half lengthwise. - Scoop out the seeds using a spoon. - Brush the inside of each half with 1 tablespoon of olive oil. - Sprinkle with salt and pepper for flavor. - Place them cut-side down on a baking sheet. - Roast in the oven for 30-35 minutes. Cook until the flesh is tender. - While the squash roasts, heat the remaining olive oil in a skillet. - Add 4 cloves of minced garlic and sauté for 1-2 minutes. - Be careful not to burn the garlic. - Lower the heat and pour in 1 cup of heavy cream. - Stir to combine and bring to a gentle simmer. - Gradually whisk in 1 cup of grated Parmesan cheese. - Keep stirring until the sauce is smooth and creamy. - Add Italian seasoning, salt, and pepper to taste. - Once the squash is done, remove it from the oven. - Let it cool a bit, then use a fork to scrape the flesh. - This creates spaghetti-like strands. - Combine the strands with the creamy garlic Parmesan sauce. - Toss until well coated. - Serve immediately, garnished with fresh parsley. To get the sauce just right, focus on the texture. You want it creamy, not too thick. Start by adding the heavy cream to the garlic. Stir slowly to mix well. If the sauce feels too thick, add a splash of water or broth. This helps thin it out. For flavor enhancements, consider adding red pepper flakes. This gives the sauce a nice kick. Fresh herbs, like basil or thyme, can also elevate the taste. Try mixing in a little lemon juice for brightness. Cutting the squash can be tricky. Use a sharp knife and take your time. Slice it lengthwise to create two halves. Make sure to scoop out all the seeds. This step is key for even roasting. Roast the squash cut-side down on a baking sheet. This helps it cook more evenly. Check for doneness after 30 minutes. The flesh should be tender and easy to scrape into strands. Serve this dish warm for the best taste. You can pair it with grilled chicken or shrimp for added protein. A simple green salad goes well, too. For garnishing, sprinkle fresh parsley on top. This adds a pop of color and flavor. You can also add extra Parmesan for more richness. Enjoy your creamy garlic Parmesan spaghetti squash! {{image_2}} You can easily make this dish vegetarian. Instead of heavy cream, use coconut cream or cashew cream. Both options keep it rich and creamy without dairy. You can also try plain Greek yogurt for a tangy twist. For a flavor boost, mix in different cheeses like mozzarella or goat cheese. These add unique tastes to your dish. You can also try fresh herbs like basil or thyme for freshness. Adding vegetables, such as spinach or mushrooms, enhances both flavor and nutrition. Just sauté them with the garlic before adding the cream. Want to add protein? Chicken or shrimp are great choices. Cook chicken pieces in the skillet before adding garlic. For shrimp, add them just before the cream. They cook quickly and blend well with the sauce. This makes your meal heartier and satisfying. To store leftovers, let your spaghetti squash cool first. Place it in an airtight container. Keep it in the fridge for up to three days. This keeps the flavors fresh and safe to eat. If you plan to eat it soon, you can store it right in the sauce. When reheating, do it gently. Use a skillet over low heat. Add a splash of cream or broth to keep it creamy. Stir often to avoid burning. Heat until it’s warm, not hot. This helps to keep the texture nice and smooth. You can freeze spaghetti squash, but it’s best to freeze it without sauce. First, let it cool and scrape the strands into a container. Seal it tightly and freeze for up to a month. When you want to eat it, thaw it in the fridge overnight. Then, reheat it in a skillet with fresh sauce for the best flavor. You can tell when spaghetti squash is cooked by checking a few signs. First, look for a golden color on the skin. Then, poke the squash with a fork. If it goes in easily, it’s done. You can also scrape the flesh with a fork. If it separates into strands, it’s perfect. Yes, you can make this dish vegan by swapping some ingredients. Use coconut cream or cashew cream instead of heavy cream. For the cheese, try nutritional yeast or a vegan cheese blend. These alternatives keep the flavor rich and creamy without dairy. This dish pairs well with several sides. A simple green salad adds freshness. Garlic bread can give a nice crunch. For a protein boost, try grilled chicken or sautéed shrimp. These options balance the meal and make it heartier. This blog post covered how to make creamy garlic Parmesan spaghetti squash. We discussed the main ingredients, including olive oil and heavy cream. I shared step-by-step instructions to prepare, roast, and serve the dish. You can perfect the sauce with easy tips and variations, adding proteins or veggies. In summary, this dish is simple, delicious, and perfect for many diets. Enjoy experimenting with flavors and sharing leftovers. You’ll find it a rewarding dish to serve for any occasion.

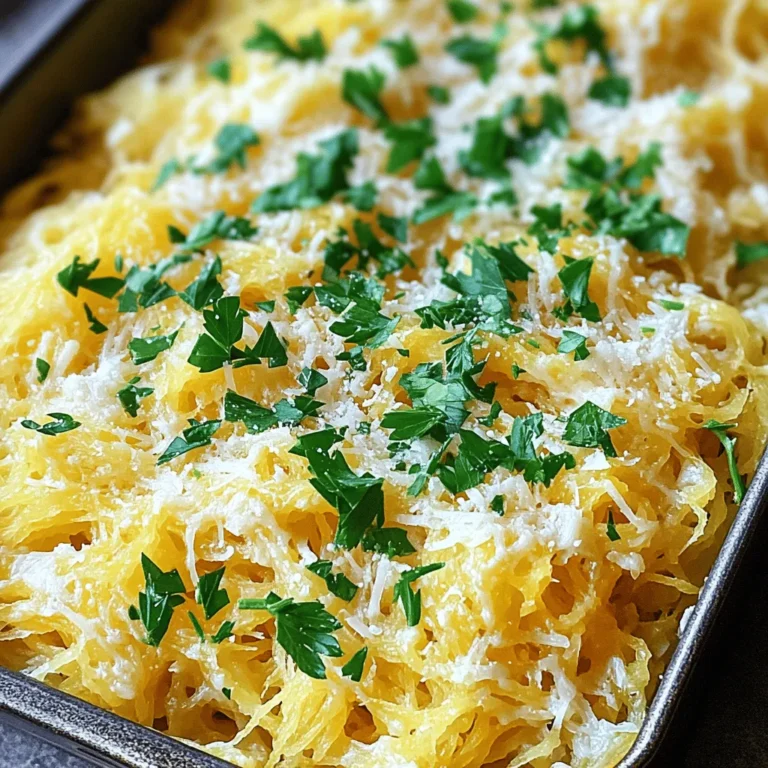
Creamy Garlic Parmesan Spaghetti Squash Delight

- 1 lb (450g) boneless chicken thighs, diced I prefer chicken thighs for their juicy texture. They hold up well and stay moist during cooking. - 1/2 cup cornstarch Cornstarch gives the chicken a nice, crispy coating. It helps achieve that takeout texture. - 1/4 cup all-purpose flour Mixing flour with cornstarch adds a bit of structure. It helps the coating stick to the chicken. - 1 teaspoon salt Salt brings out the flavor. It balances the dish and enhances the spices. - 1/2 teaspoon black pepper Black pepper adds a subtle heat. It pairs well with the other seasonings. - 1/2 teaspoon garlic powder Garlic powder gives depth to the flavor. It adds a savory note without being overpowering. - 1/2 teaspoon ginger powder Ginger powder adds warmth and a hint of spice. It complements the orange sauce nicely. - 1/4 cup vegetable oil (for frying) Use vegetable oil for frying. It has a high smoke point and works well for crispy chicken. - 1/2 cup fresh orange juice Fresh juice brightens the sauce. It gives a sweet and tangy flavor that is key to the dish. - Zest of 1 orange The zest adds intense orange flavor. It enhances the aroma and taste of the sauce. - 1/4 cup honey Honey adds sweetness and helps to balance the tartness. It gives a rich flavor to the sauce. - 2 tablespoons soy sauce (low sodium) Soy sauce brings umami to the dish. Use low sodium to keep the flavors balanced. - 1 tablespoon rice vinegar Rice vinegar adds a light tang. It brightens the sauce and enhances the fresh flavors. - 1 clove garlic, minced Minced garlic adds a fresh and sharp taste. It boosts the overall flavor of the sauce. - 1/2 teaspoon ginger, grated Fresh ginger gives a spicy kick. It works well with the orange and honey. - 1 teaspoon red chili flakes (adjust for spice preference) Chili flakes add heat. You can adjust the amount based on your spice level. - 1 teaspoon cornstarch mixed with 2 tablespoons water (for thickening) This mixture thickens the sauce. It gives the sauce a nice, syrupy texture that clings to the chicken. To start, I mix the cornstarch, flour, salt, black pepper, garlic powder, and ginger powder in a large bowl. This mix will coat the chicken and give it a nice crunch. Next, I dice the chicken thighs into bite-sized pieces. Toss the chicken in the flour mix until each piece is coated well. Be sure to shake off any extra flour. Now, it's time to fry. I heat the vegetable oil in a large pan over medium-high heat. Once the oil is hot, I add the chicken in a single layer. Fry the chicken for about 5 to 7 minutes. It's ready when it turns golden brown and is cooked through. If needed, I cook the chicken in batches to avoid overcrowding the pan. While the chicken fries, I prepare the orange sauce. In a saucepan, I combine fresh orange juice, orange zest, honey, soy sauce, rice vinegar, minced garlic, grated ginger, and red chili flakes. I bring this mix to a simmer over medium heat. The aroma fills the kitchen! Once it simmers, I stir in the cornstarch slurry. This slurry helps thicken the sauce. I cook it for another 1 to 2 minutes until it thickens nicely. After that, I remove the saucepan from the heat. When the chicken is done frying, I drain it on paper towels to remove extra oil. Then, I transfer the chicken into a large mixing bowl. I pour the orange sauce over the chicken and toss it gently. I want to make sure every piece is evenly coated in that sweet and tangy sauce. For serving, I like to place the chicken over steamed rice or with stir-fried vegetables. To make it look nice, I garnish with sesame seeds and chopped green onions. Adding some orange wedges on the side gives it a pop of color! To get crispy chicken, start with the right coating. Mix cornstarch and flour. This blend creates a nice crunch. Make sure you coat the chicken well. Shake off any extra flour mix. This step helps keep the chicken from getting soggy. When frying, use hot oil. Heat vegetable oil on medium-high heat. Add chicken in a single layer. Fry until golden brown, about 5-7 minutes. If your pan is too crowded, work in batches. This keeps the oil hot and crispy. To tweak the orange sauce, you can adjust the flavors. Add more honey for sweetness or soy sauce for saltiness. If you want a thicker sauce, add more cornstarch mixed with water. For spice, add red chili flakes. Start with a little, then taste. You can always add more if you like heat. Mix the sauce well before using, so all the flavors blend. This makes the dish more tasty and fun! {{image_2}} You can switch up the protein in this dish easily. - Using chicken breast vs. thighs: Chicken thighs add more flavor and moisture. They stay juicy when cooked. Chicken breast is leaner and can be used if you prefer. Just be careful not to overcook it. - Vegetarian or vegan substitutions: Try tofu or tempeh for a plant-based option. Press the tofu to remove water and cut it into cubes. Coat it just as you would with chicken. Cook it until golden brown for a tasty crunch. Don’t be afraid to mix things up with flavors! - Citrus alternatives: If you want a twist, use lemon or lime juice instead of orange juice. Each will give your dish a bright taste that’s refreshing. - Additional ingredients for a twist: Add vegetables like bell peppers or snap peas for extra crunch. You can also mix in some pineapple for a fruity touch. Try sesame oil for a nutty flavor or add a splash of sriracha for heat. To keep your orange chicken fresh, store it in the fridge. Place it in an airtight container. Make sure to cool the dish to room temperature first. This keeps it safe and tasty for later. Consume the leftovers within three days for the best flavor. When you reheat the chicken, use a microwave or a skillet. If using a microwave, heat it in short bursts. Stir between each burst to warm it evenly. If using a skillet, add a splash of water or broth. This helps keep the chicken moist. If you want to save orange chicken for later, freezing is a great option. First, let the chicken cool completely. Then, transfer it to a freezer-safe container. Make sure to label it with the date. It can last up to three months in the freezer. To thaw the chicken, move it to the fridge overnight. If you're in a hurry, you can use the microwave's defrost function. Once thawed, reheat using a skillet or microwave, just like with leftovers. Enjoy your meal anytime with these simple steps! Yes, you can make Orange Chicken ahead of time. Cook the chicken and sauce separately. Store them in airtight containers in the fridge. This meal stays fresh for up to three days. When you are ready to eat, reheat the chicken and sauce in a pan. This method keeps the chicken tasty and warm. Better Than Takeout Orange Chicken pairs well with several side dishes. Here are some top choices: - Steamed rice - Fried rice - Stir-fried vegetables - Noodles These sides will balance the sweet and tangy flavor of the chicken. Plus, they make your meal more filling and colorful. Yes, this recipe works great for meal planning. Portion the chicken and sauce into containers. Keep the rice or noodles separate to prevent sogginess. Store these meals in the fridge for up to three days. You can also freeze the chicken and sauce for up to a month. Just remember to thaw it overnight in the fridge before reheating. In this guide, we explored how to make delicious orange chicken. You learned about essential ingredients like chicken thighs, flour, and fresh spices. The step-by-step instructions will help you fry chicken and create a flavorful sauce. We also shared tips for perfect texture and variations for different diets. Storing leftovers properly ensures tasty meals later. Overall, this recipe is easy to follow and fun to make. Enjoy cooking and sharing this tasty dish!

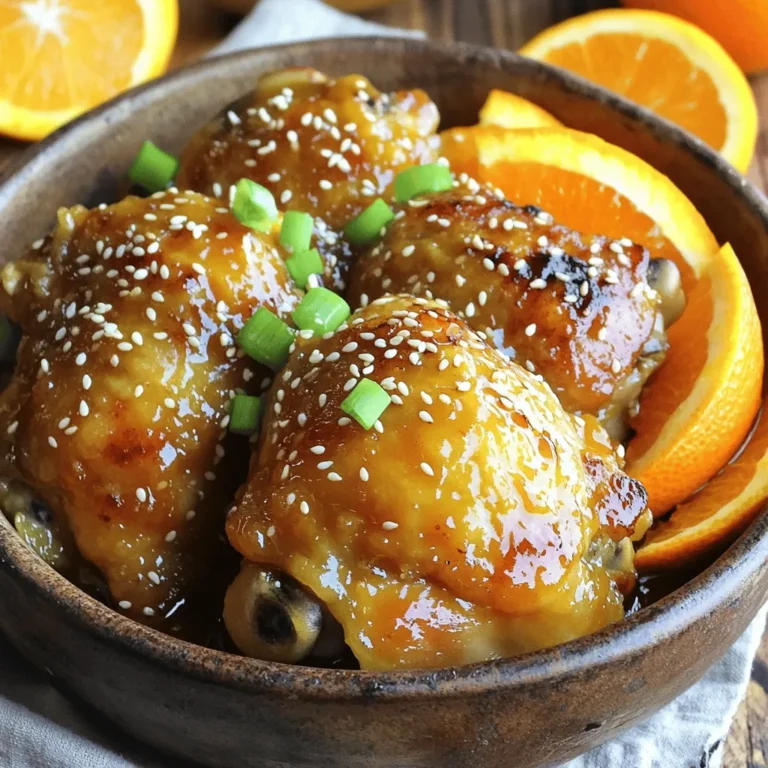
Better Than Takeout Orange Chicken Simple and Tasty

For this jam, you need 2 cups of fresh cranberries. Rinse them well to remove dirt. Fresh cranberries bring a tart flavor that balances the sweetness of the apples and sugar. You can find them in the store during fall and winter. Look for bright, firm berries for the best taste. You will also need 2 medium apples, peeled and diced. I prefer Granny Smith apples for their tartness. They add a nice bite to the jam. Next, use the zest and juice of 1 large orange. The zest adds a fragrant aroma while the juice gives a bright, citrusy flavor. Both apples and orange make the jam burst with flavor. You will want 1 cup of granulated sugar. Adjust it based on your taste. If you like less sweetness, you can use less sugar. Additionally, add 1/2 cup of water to help with cooking. For spices, use 1 teaspoon of cinnamon and 1/4 teaspoon of nutmeg. These spices warm up the flavor profile. Finally, add 1 tablespoon of lemon juice for a hint of tartness. This helps to brighten the jam and enhance the fruity notes. {{ingredient_image_1}} First, gather all your ingredients. You will need: - 2 cups fresh cranberries, rinsed - 2 medium apples, peeled and diced (preferably Granny Smith) - Zest and juice of 1 large orange - 1 cup granulated sugar (adjust if you prefer less sweetness) - 1/2 cup water - 1 teaspoon cinnamon - 1/4 teaspoon nutmeg - 1 tablespoon lemon juice Rinse the cranberries under cold water. Peel and dice the apples into small pieces. Zest the orange before juicing it. This prep makes the cooking process smooth. In a large pot, combine the cranberries, diced apples, orange zest, orange juice, and water. Bring this mix to medium heat. Stir occasionally to prevent sticking. Once the mixture boils, reduce the heat. Let it simmer for about 10 minutes. Watch as the cranberries burst and soften. Add the sugar, cinnamon, nutmeg, and lemon juice. Stir well until the sugar dissolves. Keep simmering for another 20-25 minutes. Stir frequently to avoid sticking. The jam will thicken as it cooks. To check if your jam is ready, take a teaspoon of it and place it on a plate. Let it cool for a minute. Run your finger through it. If it holds its shape, then it’s ready! If not, simmer it a bit longer. Once ready, remove the pot from heat. Let it cool slightly, then pour the jam into sterilized jars. Seal them tightly. Allow the jam to cool completely at room temperature before refrigerating. To adjust the sweetness of your jam, you can change the sugar amount. If you want less sweetness, reduce the sugar to 3/4 cup. Taste the mix before adding all the sugar. You can also add more lemon juice for a tangy kick. This balances the sweetness well. Sticking can ruin your jam. Stir often while it simmers, especially as it thickens. If you notice it starting to stick, lower the heat. Using a heavy-bottomed pot helps too. This type of pot spreads heat evenly, reducing the chance of sticking. Sterilizing jars is key for safe jam storage. Start by washing jars and lids in hot, soapy water. Rinse them well. Next, place them in a large pot of boiling water for 10 minutes. Let them dry upside down on a clean towel. This step keeps your jam safe and fresh for longer. Pro Tips Choose the Right Apples: For a balanced sweetness and tartness, opt for Granny Smith apples. Their firmness will help maintain texture in the jam. Adjusting Sweetness: Taste your jam as it cooks! You can adjust the sweetness by adding more sugar or a bit of honey, depending on your preference. Store in Sterilized Jars: Make sure your jars are properly sterilized to extend the shelf life of your jam. This prevents bacteria from spoiling your delicious creation. Experiment with Spices: Feel free to add other spices like ginger or allspice to customize the flavor of your jam. A little experimentation can lead to delightful surprises! {{image_2}} You can switch up the fruits in this jam. Try using pears or berries. Both will add new flavors. If you want a tropical twist, add mango or pineapple. Just keep the cranberries for tartness. Play with the ratios to find what you like best. Each mix will give you a unique jam. Nuts can add a nice crunch. Try adding chopped walnuts or almonds. Just a small amount will make a big difference. You can also experiment with spices. Cardamom or ginger can give the jam a warm flavor. Just remember, a little goes a long way. Start with a pinch. You can make this jam without sugar. Use natural sweeteners like honey or maple syrup. They add sweetness without the sugar. If you want it tart, skip sweeteners altogether. The fruit will shine through. Adjust the cooking time slightly, as it may thicken faster. To keep your cranberry apple orange jam fresh, start with clean jars. Fill them with hot jam, leaving some space at the top. Seal the jars tightly. Store them in a cool, dark place. A pantry or cupboard works great. Once opened, keep your jam in the fridge. Always use a clean spoon to scoop it out. This keeps the jam safe and tasty. When stored properly, your jam lasts about one year in the pantry. Once you open a jar, it stays good in the fridge for about three weeks. If you see mold or it smells funny, throw it away. Always check before you eat it. Trust your senses to keep you safe. Freezing is a smart way to keep your jam even longer. Make sure to use freezer-safe jars or containers. Leave some space at the top, as liquids expand when frozen. Label your jars with the date. Your jam can last for up to a year in the freezer. When you're ready to enjoy it, just thaw it in the fridge overnight. It will taste just as good! To make this jam less sweet, start by cutting the sugar. You can use 3/4 cup of sugar instead of 1 cup. This will keep the flavor but lower the sweetness. You can also add more citrus juice to balance the taste. Try adding more lemon juice or orange juice. Taste the jam as it cooks. Adjust the sugar to your liking while you cook. This way, you can create a jam that suits your taste buds. Yes, you can use frozen cranberries for this jam. Just make sure to rinse them well before adding them to the pot. Frozen cranberries may take a bit longer to cook. They might release more liquid than fresh ones. This can change the texture, but the taste will still be great. If you use frozen cranberries, keep an eye on the cooking time. Check the consistency often so you get the right thickness. Gifting homemade jam is fun and easy! First, pour the jam into clean, sterilized jars. Make sure they are warm to avoid cracking. Seal the jars tightly to keep the jam fresh. You can add a nice touch by tying a ribbon around the jar. A label with the jam name and date adds a personal touch. Pair the jam with fresh bread or scones for a perfect gift. It shows you care and makes a tasty treat for anyone! Cranberry apple orange jam is easy to make and full of flavor. We covered the ingredients needed, from fresh cranberries to spices. The cooking steps ensure your jam turns out perfectly thick and tasty. Use tips to adjust sweetness and prevent sticking. Explore fun variations for unique flavors and know the best ways to store your jam for long-lasting enjoyment. Homemade jam is a delight in every bite. You’ll impress friends and family with your tasty creations, sharing a piece of joy with every jar.

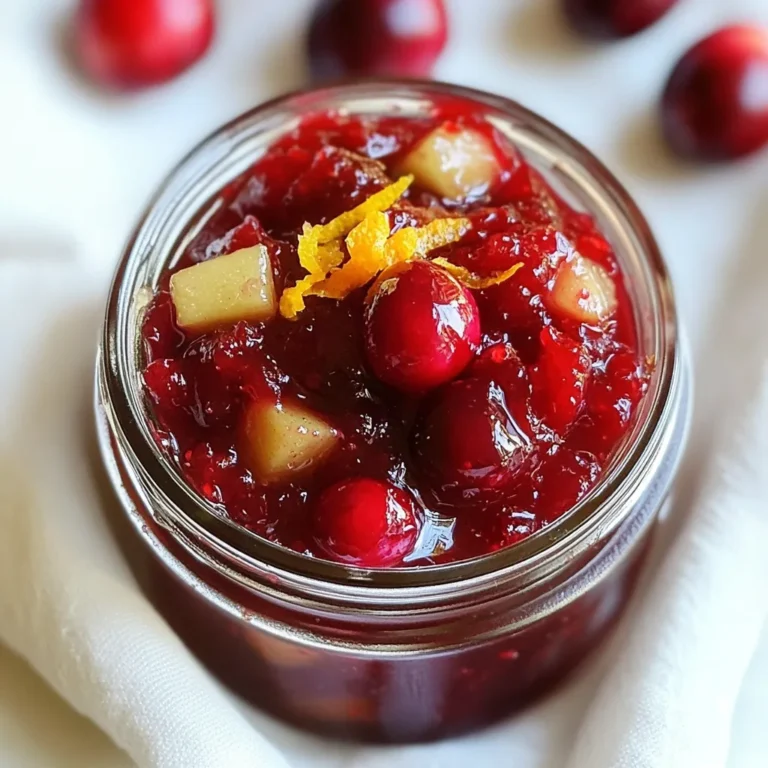
Cranberry Apple Orange Jam Easy Homemade Delight

- 1 medium butternut squash, peeled and diced - 1 pound Brussels sprouts, trimmed and halved - 1 cup fresh cranberries - 2 tablespoons olive oil - 1 tablespoon maple syrup - Salt and pepper to taste - 1/2 teaspoon ground cinnamon - 1/4 teaspoon nutmeg - 1/4 cup pecans, chopped (optional) - Fresh parsley for garnish - Large mixing bowl - Baking sheet - Oven When I make the Butternut Brussels Cranberry Medley, I use simple, fresh ingredients. The butternut squash gives a sweet base, while Brussels sprouts add a nice crunch. Fresh cranberries bring a tart bite that brightens the dish. I always use good-quality olive oil and pure maple syrup. They add depth and a hint of sweetness. Don't forget the spices! Cinnamon and nutmeg make this dish feel cozy and festive. If you want a little extra crunch, I recommend adding chopped pecans. They toast nicely in the oven and add a lovely texture. Fresh parsley is great for garnish. It adds color and a fresh taste to the dish. For tools, a large mixing bowl helps to combine all the ingredients. A baking sheet is perfect for roasting. And, of course, you need an oven to cook this delicious medley. These ingredients and tools create a vibrant holiday dish that everyone will love. {{ingredient_image_1}} - Preheat the oven to 400°F (200°C). - First, peel and dice the butternut squash. Cut it into small cubes for even cooking. Next, trim the Brussels sprouts and cut them in half. This helps them roast nicely. - In a large mixing bowl, combine the diced butternut squash, halved Brussels sprouts, and fresh cranberries. - Drizzle two tablespoons of olive oil and one tablespoon of maple syrup over the mix. - Add salt, pepper, 1/2 teaspoon of ground cinnamon, and 1/4 teaspoon of nutmeg. - Toss everything well until each piece is coated in the oil and seasonings. - Spread the mixture evenly on a large baking sheet. Keep it in a single layer for the best roasting. - Roast in the oven for 25-30 minutes. Stir the medley halfway through to help it cook evenly. - Look for the butternut squash to be tender and slightly caramelized. The Brussels sprouts should be browned and crispy. - If you choose to add pecans, sprinkle them on top during the last 5 minutes of roasting. This gives them a nice toast. - Once done, take the baking sheet out and let it cool for a few minutes before serving. Roasting is key to getting great flavor and texture. Always spread your veggies in a single layer. This helps them cook evenly. If they are too close, they will steam instead of roast. Stir the mixture halfway through roasting. This ensures everything cooks evenly and gets golden brown. You can boost the flavor with spices. Try adding a pinch of cayenne for heat or more cinnamon for warmth. If you want texture, toss in some chopped pecans just before the end of cooking. They will toast nicely and add a nice crunch. You can also add a sprinkle of feta cheese or goat cheese for a creamy touch. Presentation makes a big difference. After roasting, transfer your medley to a serving dish. Garnish with fresh parsley for a pop of color. This also adds a fresh taste. Serve it warm alongside your favorite protein. It looks great on the table and tastes even better! Pro Tips Choose the Right Squash: Make sure to select a butternut squash that feels heavy for its size and has smooth skin, which indicates freshness. Brussels Sprouts Prep: Trim the ends of the Brussels sprouts and remove any yellow or damaged leaves for the best flavor and presentation. Even Roasting: To ensure even cooking, spread the vegetables in a single layer on the baking sheet and avoid overcrowding. Serving Suggestion: This medley pairs beautifully with roasted meats or as a hearty vegetarian side; consider adding a sprinkle of feta cheese for extra flavor. {{image_2}} You can change the butternut squash. Sweet potatoes make a great swap. They add a sweet, creamy taste. If you want a different flavor, try dried cranberries. They give a nice chewy texture and sweetness. Just remember, use less sweetener if you do. You can cook this medley on the stovetop. Just sauté everything in a large pan. A slow cooker works too. Set it on low for about four hours. For a smoky flavor, grill the medley. Toss the veggies on a hot grill. You’ll get a nice char that adds depth. This dish shines during the holidays. You can add festive spices like cloves or ginger. For a twist, mix in other seasonal veggies. Try carrots, parsnips, or even kale. They all add color and flavor to your medley. To store leftovers, first let the medley cool down. Then, place it in an airtight container. This helps keep it fresh and safe. The best practice is to refrigerate within two hours of cooking. You can store it in the fridge for up to four days. After that, the flavors may change and the texture may not be as good. If you want to freeze the medley, follow these steps. First, let it cool completely. Next, transfer it to a freezer-safe container. Make sure to leave some space at the top for expansion. Properly stored, it can last in the freezer for up to three months. When it's time to eat, here’s how to reheat it. Thaw the medley in the fridge overnight. For reheating, place it in a baking dish and cover it with foil. Heat it in a preheated oven at 350°F (175°C) for about 20 minutes. This warms it through without drying it out. Enjoy your tasty medley again! I love pairing this medley with roasted chicken or turkey. The sweet and savory notes complement these proteins perfectly. You can also serve it alongside grilled salmon for a light option. For a meatless meal, try it with quinoa or a hearty grain salad. The flavors balance well with any of these choices. Yes, you can make this dish vegan! Simply replace the maple syrup with agave syrup. Use olive oil as it is already vegan. If you want a nutty flavor, add some sunflower seeds instead of pecans. This way, you keep the crunch while staying plant-based. Look for a few signs to know if it's ready. The butternut squash should feel soft when poked with a fork. The Brussels sprouts should be browned and slightly crispy on the edges. You’ll notice a sweet aroma as the cranberries start to burst. These signs indicate your medley is perfect! Yes, frozen cranberries can work, but fresh is best. If you use frozen, do not thaw them first. Just toss them in with the other ingredients. Frozen cranberries may not burst the same way, but they still add great flavor. Enjoy the ease of using frozen when fresh isn’t available! This roasted butternut squash and Brussels sprout medley is easy to make and full of flavor. You learned about key ingredients, step-by-step instructions, and helpful tips. Remember to use fresh ingredients to boost taste. Try different variations to match your seasons and preferences. Proper storage keeps leftovers tasty for later. Enjoy this dish as a delightful side or main course. It makes your table look inviting and delicious!

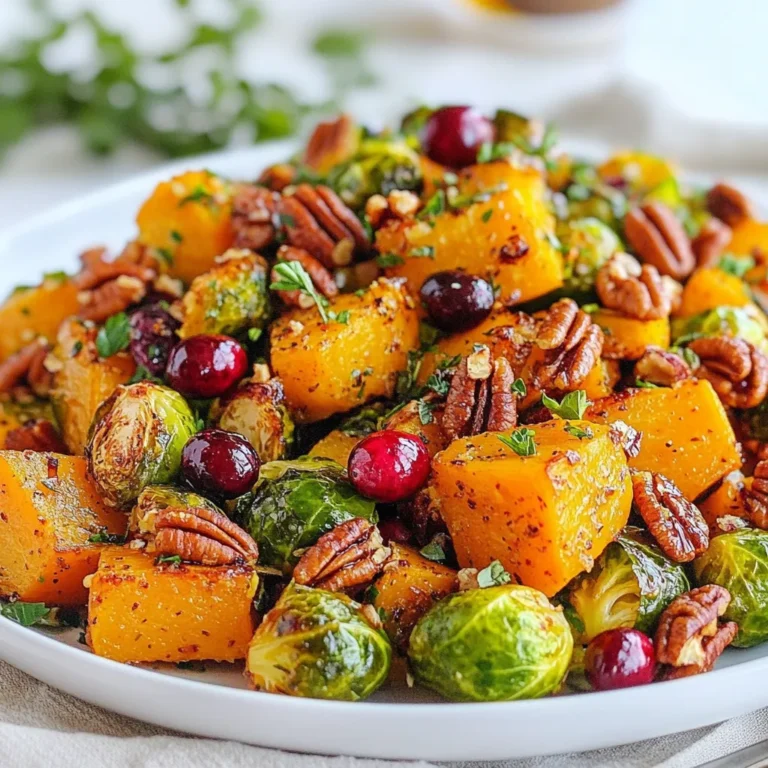
Butternut Brussels Cranberry Medley Vibrant Holiday Dish

- 1 ½ cups all-purpose flour - 1 cup granulated sugar - ½ cup unsweetened cocoa powder - 1 teaspoon baking powder - ½ teaspoon baking soda - ½ teaspoon salt - ½ cup unsalted butter, softened - 1 large egg - 1 teaspoon vanilla extract - 2 tablespoons red food coloring - ½ cup cream cheese, softened - ½ cup powdered sugar - 1 teaspoon vanilla extract - Additional sprinkles for garnish (optional) To make these Red Velvet Cupcake Cookies, we need a mix of dry and wet ingredients. The dry ingredients include flour, sugar, cocoa powder, baking powder, baking soda, and salt. Each plays a role in texture and flavor. Next, we have the wet ingredients. Softened butter, an egg, vanilla, and red food coloring bring the cookies to life. The red food coloring gives them that classic red velvet look. Finally, we create a delightful cream cheese filling. This filling combines softened cream cheese, powdered sugar, and vanilla. It adds a rich taste and creamy texture to the cookies. You can even add sprinkles for some fun color! With these ingredients, you will create a treat that is soft, flavorful, and visually stunning. - Preheat the oven to 350°F (175°C). - Line a baking sheet with parchment paper. - In a large bowl, whisk together: - 1 ½ cups all-purpose flour - 1 cup granulated sugar - ½ cup unsweetened cocoa powder - 1 teaspoon baking powder - ½ teaspoon baking soda - ½ teaspoon salt This mix gives the cookies their rich color and flavor. - In another bowl, beat ½ cup softened butter until creamy. - Add 1 large egg, 1 teaspoon vanilla extract, and 2 tablespoons red food coloring. - Mix until everything is well combined. The red food coloring makes these cookies pop! - Gradually mix the dry ingredients into the wet ingredients. - Keep mixing until a soft, cohesive dough forms. It should not be too sticky or dry. - Use a cookie scoop or tablespoon to drop rounded balls onto the baking sheet. - Leave space between each ball for spreading. - Bake cookies for 10-12 minutes. The edges should be set, but the centers can be soft. - Make the cream cheese filling by mixing: - ½ cup softened cream cheese - ½ cup powdered sugar - 1 teaspoon vanilla extract Beat until smooth. - Once cookies cool, spread a dollop of filling on one cookie. - Sandwich with another cookie, bottom side down. If you like, add some sprinkles for fun! To get the right dough, mix the flour, sugar, cocoa powder, baking powder, baking soda, and salt well. Make sure the butter is soft before mixing it with the egg, vanilla, and food coloring. This helps the dough be creamy and smooth. Aim for a soft dough that is not sticky. If it's too dry, add a bit of milk. If it's too wet, add a little flour. Bake the cookies at 350°F (175°C) for 10-12 minutes. The edges should be set while the center stays soft. Keep an eye on them to avoid overbaking. For fun decorations, you can use colorful sprinkles on the sides of the cream cheese filling. You can also try different frostings, like chocolate or vanilla. These small touches make your cookies look great. Think about using seasonal sprinkles for holidays. They add a festive flair to your treats. One common mistake is over-mixing the dough. This can lead to tough cookies. Mix until just combined for the best result. Another issue is baking too long. If cookies feel hard, they may be overdone. Watch for soft centers when you pull them from the oven. Finally, do not skip the cooling time. Letting them cool on the sheet for a bit helps keep them soft and chewy. {{image_2}} You can add spices to your red velvet cupcake cookies. Try mixing in cinnamon or nutmeg. These spices bring warmth and depth to the flavor. Just a pinch can change the taste. It makes your cookies special and unique. The cream cheese filling can be swapped for different flavors. You might use strawberry or lemon cream cheese. Chocolate ganache is another tasty option. Each filling adds a new twist to the cookie. It's fun to experiment with flavors and find your favorite. You can make these cookies gluten-free easily. Just use a gluten-free flour blend instead of all-purpose flour. For a vegan version, swap the egg with a flax egg or applesauce. Use vegan butter and cream cheese. These changes keep the flavor while meeting dietary needs. To keep your cookies fresh, place them in an airtight container. I recommend layering parchment paper between the cookies. This helps prevent them from sticking together. Store the container in a cool, dry place. Avoid the fridge; it can dry out the cookies. You can freeze these cookies for later. To freeze baked cookies, let them cool completely. Then, place them in a single layer on a baking sheet. Freeze until solid, about 1 hour. Next, transfer the cookies to a freezer bag. Squeeze out the air and seal it tight. For dough, scoop cookie balls onto a baking sheet. Freeze until firm, then place them in a bag. You can bake them straight from frozen. These cookies taste best within 3 days. If stored properly, they can last up to a week. However, the cream cheese filling may get soft over time. For the best flavor, eat them fresh. If you freeze them, they stay good for about 2-3 months. To enjoy them, let them thaw at room temperature. Red velvet cupcakes are soft, moist, and fluffy. They often have a cream cheese frosting. Red velvet cookies, on the other hand, are chewy and a bit denser. They have a cream cheese filling that gives them a nice surprise. Both share the same rich flavor but in different forms. Yes, you can make these cookies ahead of time. You can prepare the dough and freeze it. Just scoop the dough into balls and place them on a baking sheet. Freeze them until firm, then transfer to a bag. When you want fresh cookies, bake them straight from the freezer. Just add a minute to the baking time. If your dough is dry or crumbly, try adding a little more butter or egg. You can also add a teaspoon of milk to help it come together. Mix until the dough is soft but not sticky. This should fix the texture for better cookies. Yes, you can use gel food coloring. It provides a more vibrant color and needs less than liquid color. Just start with a small amount and mix until you reach the desired shade. This way, your cookies will stand out with a rich red hue. To boost the chocolate flavor, add an extra tablespoon of cocoa powder. You can also mix in chocolate chips for a delightful surprise. Use dark or semi-sweet chips for a richer taste. This will make your red velvet cookie experience even more delicious. You now have all the steps to make delicious red velvet cookies. We covered the key ingredients, mixing tips, and baking advice. Remember, small changes in the recipe can lead to big flavors. Experiment with extra spices or alternative fillings to find your favorite. Store them well to keep them fresh and tasty. Whether for a celebration or just a treat, these cookies are sure to please. Enjoy your baking journey and share these tasty delights with friends and family!

Red Velvet Cupcake Cookies Delightful and Easy Treat

For a rich and tasty slow cooker beef and lentil curry, gather these main ingredients: - 1.5 lbs boneless beef chuck, cut into 1-inch pieces - 1 cup dried green or brown lentils, rinsed - 1 large onion, finely chopped - 4 cloves garlic, minced - 1 tablespoon ginger, grated - 2 medium carrots, diced - 2 medium tomatoes, diced - 1 can (14 oz) coconut milk - 2 cups vegetable or beef broth Salt and pepper to taste Each ingredient adds its own layer of flavor. The beef gives a hearty base, while lentils add texture and nutrition. The onion, garlic, and ginger create a fragrant foundation. To make your curry pop, don’t forget these spices: - 2 tablespoons curry powder - 1 teaspoon ground cumin - 1 teaspoon turmeric - 1 teaspoon coriander - 1 tablespoon olive oil These spices bring warmth and depth. Curry powder gives a bold kick. Cumin adds earthiness, while turmeric gives a lovely color and health benefits. Coriander rounds out the flavors, making each bite exciting. To finish your dish and add freshness, consider these garnishes: - Fresh cilantro A sprinkle of cilantro on top brightens the dish. It adds color and a burst of flavor. You could also add a squeeze of lime if you like a tangy twist. Enjoy the layers of taste in every spoonful! First, heat olive oil in a skillet on medium heat. Add the chopped onion and sauté it for about five minutes. You want the onion to become soft and clear. Next, add minced garlic and grated ginger. Stir this mix for one more minute. This step fills your kitchen with a lovely aroma. Now, transfer the sautéed onion mix into your slow cooker. Add the diced beef, rinsed lentils, diced carrots, and tomatoes. Pour in the coconut milk and add the spices: curry powder, ground cumin, turmeric, and coriander. Finally, add the broth. Season it with salt and pepper. Stir well to mix everything together. Cover the slow cooker and set it to cook. You can choose low for 6 to 8 hours or high for 4 to 5 hours. The goal is to make the beef tender and cook the lentils well. When it's done, stir the curry. If you want a thicker curry, leave the lid off and cook on high for an extra 30 minutes. To get the best texture for your Slow Cooker Beef & Lentil Curry, choose the right beef cut. I recommend using boneless beef chuck. It becomes tender after hours in the slow cooker. Make sure to cut the beef into 1-inch pieces. This size helps it cook evenly. Rinsing the lentils is also key. It removes any dust or debris. Finally, if you want a thicker curry, leave the lid off for the last 30 minutes. It lets some liquid evaporate. You can easily adjust the spice level. If you prefer mild curry, use less curry powder and skip the heat. Add just a pinch of it at first. You can always add more later. For a spicy kick, try adding red chili flakes or cayenne pepper. Start with half a teaspoon and taste before adding more. This way, you can find the balance that suits you best. If you have a busy day, this curry is your friend. Prep it the night before. Chop the onions, garlic, and veggies, and store them in the fridge. You can even combine all other ingredients in the slow cooker. In the morning, just plug it in and set the timer. The aroma will greet you when you come home. It’s perfect for a family dinner after a long day. {{image_2}} You can easily make this dish vegetarian or vegan. Swap beef for hearty vegetables like mushrooms or eggplant. Use vegetable broth instead of beef broth. Lentils add protein and fiber, making this dish still filling and nutritious. You can also add chickpeas for extra texture and flavor. If you want a different protein, try chicken or turkey. Cut these into small pieces for even cooking. You may also use tofu for a plant-based option. Firm tofu works best, as it holds its shape well in the slow cooker. Adjust cooking times if you change the protein, as chicken cooks faster than beef. Feel free to get creative with spices. Add more curry powder for a bolder flavor. You can also try adding a pinch of cinnamon for warmth. For a kick, toss in some chopped chili peppers. If you like a sweeter touch, add a tablespoon of honey or maple syrup. Adjust these flavors to make the curry your own! After enjoying your meal, let the curry cool. Use airtight containers to store leftovers. Make sure to cover them well. You can keep the curry in the fridge for up to three days. This keeps it fresh and tasty for your next meal. To freeze your beef and lentil curry, use freezer-safe containers. Leave some space at the top. This allows for expansion as it freezes. Label the containers with dates to track freshness. The curry can last in the freezer for about three months. When you're ready to eat, just thaw it overnight in the fridge. When it’s time to reheat, you have options. You can use the stove or microwave. If using the stove, heat on low until warm. Stir it often to keep it from sticking. If using a microwave, use a safe container and cover it loosely. Heat in short bursts, stirring in between. This helps keep the flavors intact. Enjoy your delicious curry again! Yes, you can use different lentils. Green and brown lentils work best in this recipe. They hold their shape well during cooking. If you want a softer texture, you could try red lentils. However, red lentils cook faster and may break down more. Keep an eye on the cooking time if you choose them. To make this curry gluten-free, use gluten-free broth. Most vegetable and beef broths are gluten-free, but always check the label. The spices in this recipe are naturally gluten-free. So, you can enjoy this dish without worrying about gluten. This beef and lentil curry pairs well with rice or naan. You can serve it over basmati rice for a classic touch. Or, enjoy it with warm naan to soak up the sauce. A fresh salad or steamed veggies also make great sides. They add a nice crunch and balance to the meal. Slow cooker beef and lentil curry is simple and fun to make. We covered key ingredients, spices, and tips for the best results. You can adjust flavor and texture to suit your taste. Remember, this dish works well with many proteins and can fit different diets. Store leftovers properly to keep the taste fresh. Enjoying this meal can be easy, tasty, and rewarding. Dive into your cooking adventure with confidence!

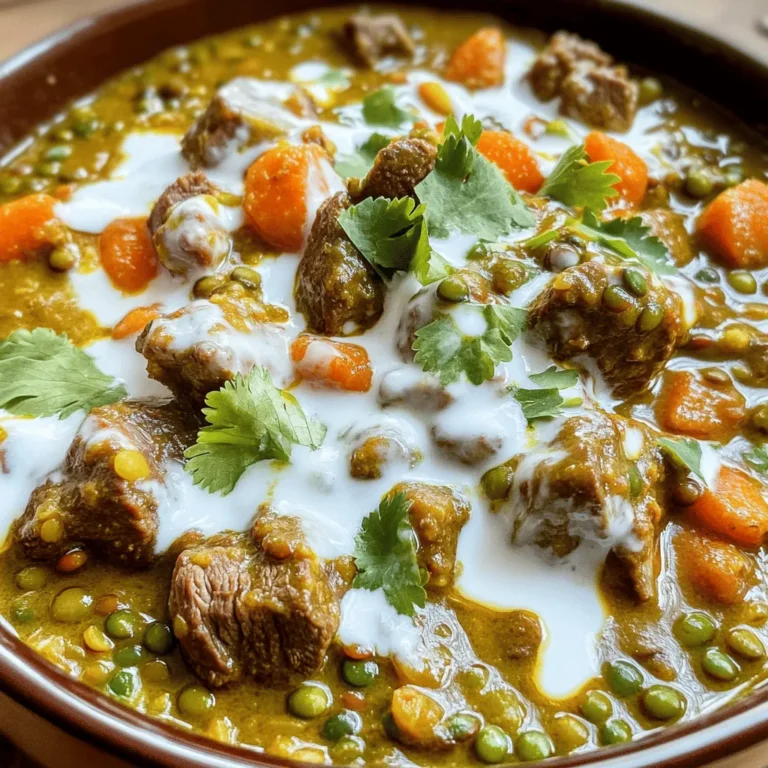
Slow Cooker Beef & Lentil Curry Flavorful Delight

- 1 package refrigerated cinnamon roll dough (8 rolls) - 1 medium apple, peeled and diced - 2 tablespoons brown sugar - 1/4 cup chopped walnuts - Icing from the cinnamon roll package - 1 teaspoon ground cinnamon - 1/2 teaspoon nutmeg - 1 tablespoon butter, melted Let's break down the ingredients for Air Fryer Cinnamon Roll Apple Bombs. You start with the refrigerated cinnamon roll dough. This dough gives you a soft and fluffy base. It’s easy to work with and saves time. Next, you need a medium apple. I like to peel and dice it for a sweet and juicy filling. The apple pairs well with the cinnamon and sugar. Brown sugar adds a rich sweetness. It melts and creates a gooey center. If you want, you can add chopped walnuts for crunch. They give a nice texture contrast. You’ll also want some seasonings. The ground cinnamon brings warmth and flavor. Nutmeg adds a hint of spice that makes these bombs even better. Lastly, melted butter helps create a crispy crust. It also adds flavor, making each bite delightful. First, take a bowl and mix the diced apple, brown sugar, ground cinnamon, nutmeg, and walnuts together. The apples add sweetness and crunch. The brown sugar gives depth, while the spices bring warmth and flavor. This mix will be the heart of your cinnamon roll apple bombs. Next, set your air fryer to 350°F (175°C). This step is key. Preheating helps the bombs cook evenly. Let it heat for about 5 minutes. This small step can make a big difference in the final result. Now, open the package of refrigerated cinnamon roll dough. Unroll each roll carefully on a lightly floured surface. You should create flat rectangles. Spoon a generous amount of the apple filling onto the center of each rectangle. Then, fold the dough over the filling and pinch the edges firmly to seal. Shape them into round balls. This step is fun and allows you to get creative! Place the apple bombs in the air fryer basket. Make sure they have space around them. This helps the hot air circulate properly. Cook them for about 10-12 minutes. Flip them halfway through to ensure they are golden brown all over. You will know they are done when they look crispy and smell amazing. After cooking, carefully remove the apple bombs from the air fryer. Let them cool for a few minutes. Then, drizzle the icing from the cinnamon roll package over the warm apple bombs. The icing adds a sweet finish that makes these treats irresistible. Enjoy them warm for the best experience! To keep your apple bombs from leaking, pinch the dough edges tightly. Start at one end and press the dough together. Use your fingers to create a strong seal. Make sure no filling escapes during cooking. A good seal helps keep all the yummy apple mix inside. Every air fryer cooks a bit differently. Check your model’s settings. If your air fryer runs hot, reduce the cooking time. For a crispier finish, increase the cooking time by a minute or two. Always flip the bombs halfway through for even cooking. This helps them brown nicely. Want to boost the taste? Try adding a pinch of ginger or allspice to the filling. You can also use a sprinkle of vanilla extract for extra richness. For a fun twist, top the warm bombs with caramel sauce or chopped nuts. These small changes can make a big difference in flavor. {{image_2}} You can swap the apple for other fruits. Pears add a nice, sweet touch. Peaches also work well and bring a juicy flavor. Just make sure to peel and dice them like the apples. This way, you keep the filling tender and tasty. To make this recipe nut-free, simply leave out the walnuts. You can also add more apple or a sprinkle of oats for texture. Oats provide a nice crunch without nuts. Check all other ingredients to ensure they are nut-free, especially the cinnamon roll dough. You can use other flavors of cinnamon rolls if you like. Try caramel rolls for a sweet twist. Pumpkin spice rolls add a fall flavor that is great too! Just follow the same steps to prepare them. Your apple bombs will still be a hit! To keep your apple bombs fresh, place them in an airtight container. This helps prevent drying out. Store the container in the fridge. They will stay good for about 3 days. If you want to enjoy them later, try to separate layers with parchment paper. This keeps them from sticking together. The air fryer is your best friend for reheating. Set it to 350°F (175°C) and place the apple bombs back inside. Heat them for about 3-5 minutes. This will warm them up and keep them crispy. Check often to avoid overcooking. Yes, you can freeze these treats! Wrap each bomb in plastic wrap or foil. Place them in a freezer bag. They will freeze well for about a month. When you want one, let it thaw in the fridge overnight. Reheat in the air fryer to bring back that fresh taste. Yes, you can make these ahead! Prepare the apple filling and roll the dough. Store them in the fridge for up to 24 hours. When you’re ready, just air fry them. This saves time and makes dessert quick and easy. If you don’t have an air fryer, you can bake these in a regular oven. Preheat your oven to 350°F (175°C). Place the apple bombs on a baking sheet. Bake for about 15-18 minutes until golden brown. Check for a golden brown color. If they look puffy and crispy, they are done. You can also insert a toothpick. If it comes out clean, they are ready to eat! Serve these bombs warm with ice cream or whipped cream. You can also add a sprinkle of powdered sugar on top for extra sweetness. They are perfect for dessert or a fun snack with friends! You can make delicious apple bombs with simple ingredients like cinnamon roll dough, apples, and sugar. Follow the easy steps to prepare, cook, and serve these treats. In closing, experiment with different fruits or flavors to keep things fresh. Storing them correctly helps maintain taste and texture. Enjoy every bite of this delightful dessert. Your kitchen is now ready for sweet fun!

Air Fryer Cinnamon Roll Apple Bombs Easy Dessert Delight

To make Minute Spicy Thai Peanut Noodles, gather these items: - 8 oz rice noodles - 1/4 cup creamy peanut butter - 2 tablespoons soy sauce - 1 tablespoon sriracha (adjust for spice) - 1 tablespoon lime juice - 1 tablespoon sesame oil - 2 garlic cloves, minced - 1/2 cucumber, julienned - 1 red bell pepper, sliced - 1 green onion, chopped - 1/4 cup chopped cilantro (for garnish) - Crushed peanuts (for garnish) Each serving of these noodles is not just tasty but also offers good nutrition. Here’s a rough idea of what you get per serving: - Calories: 300 - Protein: 10g - Carbs: 40g - Fats: 12g - Fiber: 3g These numbers can vary based on how you adjust the recipe. You can swap ingredients to fit your diet. When picking your ingredients, freshness matters. Here are some tips: - Rice Noodles: Look for ones that are firm and free of cracks. - Peanut Butter: Choose a brand with simple ingredients and no added sugar. - Vegetables: Select cucumbers and bell peppers that are firm and brightly colored. - Herbs: Fresh cilantro should smell strong and look vibrant. Avoid wilted leaves. Using fresh ingredients makes a big difference in taste and health. To start, boil a large pot of water. Once it boils, add 8 oz of rice noodles. Cook them according to the package instructions until they are al dente. This usually takes around 3 to 5 minutes. Drain the noodles and rinse them under cold water. This step stops the cooking and keeps the noodles from sticking together. Now, grab a mixing bowl. In this bowl, combine 1/4 cup of creamy peanut butter with 2 tablespoons of soy sauce. Add 1 tablespoon of sriracha for spice, but feel free to adjust it to your taste. Then, add 1 tablespoon of lime juice and 1 tablespoon of sesame oil. Finally, include 2 minced garlic cloves. Whisk everything together until it’s smooth. If your sauce feels too thick, you can add a tablespoon of warm water. This will help reach the right consistency. In a large mixing bowl, add your cooked noodles. Pour the peanut sauce over the noodles. Gently toss them to make sure every noodle gets coated. Next, mix in 1/2 a julienned cucumber and 1 sliced red bell pepper. Distribute the veggies evenly throughout the noodles. Finally, serve the dish on a platter or in bowls. Top with 1 chopped green onion, 1/4 cup of chopped cilantro, and a sprinkle of crushed peanuts for a nice crunch. Enjoy your meal! To make perfect rice noodles, start with a large pot of boiling water. Cook them until they are al dente. This means they should be firm but not hard. After cooking, drain the noodles and rinse them under cold water. This stops the cooking process and helps keep the noodles from sticking together. If you want to save time, you can use a microwave to heat the noodles. Just follow the package instructions for best results. If you love heat, add more sriracha to your sauce. Start with one tablespoon and taste. You can always add more, but it is hard to take spice out. If you find it too spicy, mix in a bit more peanut butter or lime juice. This will help balance the heat. You can also add a pinch of sugar to mellow the flavors. To elevate the flavor of your noodles, consider a few simple tricks. Adding fresh lime juice brightens the dish and adds a zesty kick. You can also mix in some toasted sesame seeds for a nutty flavor. If you want more crunch, try adding chopped carrots or snap peas. Fresh herbs like cilantro add a burst of flavor and color. Don't forget to top your noodles with crushed peanuts for extra texture and taste! {{image_2}} You can use different types of noodles for this recipe. Choose what you like! Here are some great options: - Whole wheat noodles: Healthier and adds a nutty flavor. - Soba noodles: These buckwheat noodles give a unique taste. - Zoodles: Spiralized zucchini is a fun, low-carb choice. Adding protein makes this dish more filling and tasty. Here are some ideas: - Grilled chicken: Perfect for added flavor. Slice it thin for easy mixing. - Shrimp: Cooked shrimp adds a nice touch. Toss them in with the noodles. - Tofu: For a vegetarian option, use firm tofu. Just sauté it until golden. This dish can easily fit a vegetarian or vegan diet. Here’s how: - Use tamari instead of soy sauce: This is a gluten-free option. - Swap peanut butter for almond butter: This gives a different flavor, but still creamy. - Add more veggies: Try snow peas, carrots, or bell peppers to boost nutrition. Feel free to mix and match these ideas to fit your tastes! To keep your Minute Spicy Thai Peanut Noodles fresh, place them in a sealed container. Make sure the noodles are cool before you store them. You can keep them in the fridge for up to three days. If you want to enjoy them later, store the sauce and noodles separately. This keeps everything fresh and tasty. When you are ready to eat, reheating is easy. You can use a microwave or a pan. If using the microwave, place the noodles in a bowl and cover it. Heat for about one to two minutes. Stir halfway through to warm evenly. If you prefer a pan, add a splash of water and heat on low. Stir until warm throughout. If you want to freeze your noodles, it is best to freeze the sauce and noodles separately. Place them in airtight containers. They can last up to two months in the freezer. When you are ready to eat, thaw them in the fridge overnight. Then, reheat as mentioned above. This will help you enjoy your spicy noodles later without losing flavor! If your sauce is too thick, you can fix it easily. Just add one tablespoon of warm water. Mix well until you reach your desired consistency. This keeps the sauce creamy without losing flavor. Remember, small changes can make a big difference. Absolutely! You can use any veggies you like. Try carrots, snap peas, or broccoli instead. Just chop them up small so they mix well with the noodles. Feel free to get creative with colors and textures. The more colorful, the more fun your dish will be! These noodles pair well with many sides. You can serve them with a fresh salad or spring rolls. They also go well with grilled chicken or shrimp for added protein. If you want a light meal, a bowl of soup is perfect too. Enjoy mixing and matching! This article covered the key ingredients for Spicy Thai Peanut Noodles, their nutrition, and tips on freshness. I shared detailed cooking steps for the noodles and sauce, plus ways to combine them. We discussed cooking techniques, spice adjustments, and flavor boosts for your dish. You can explore noodle and protein variations too. Lastly, I explained how to store leftovers and answered common questions. Enjoy making this dish that’s easy and full of flavor!

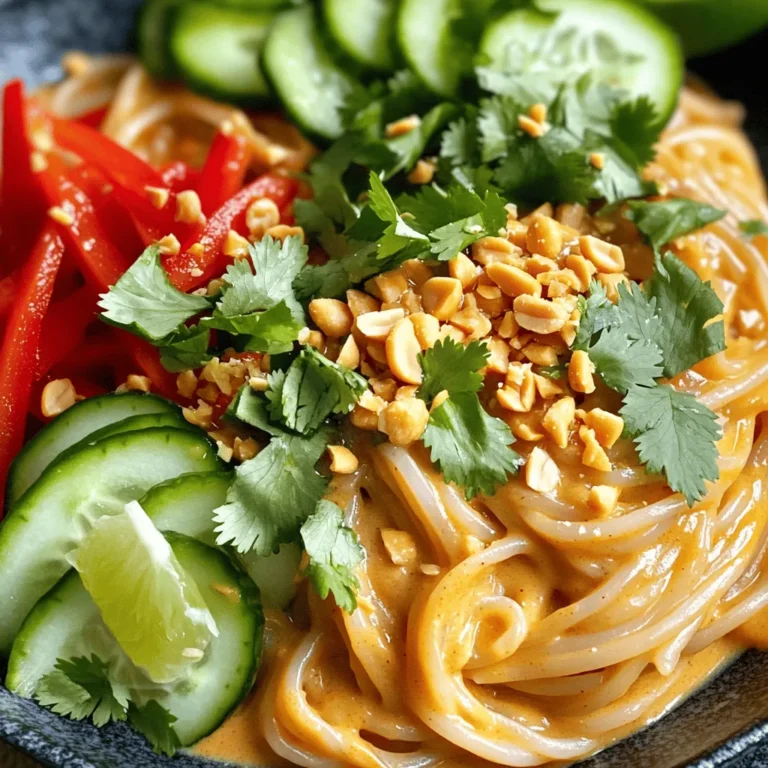
Minute Spicy Thai Peanut Noodles Easy and Quick Meal

- 4 medium sweet potatoes, peeled and cubed - 3 tablespoons olive oil - 2 teaspoons garlic powder - 1 teaspoon smoked paprika - 1 teaspoon dried thyme - 1 teaspoon dried rosemary - Salt and pepper to taste Sweet potatoes are the star here. They bring a sweet and earthy flavor. Olive oil adds richness and helps the spices stick. Garlic powder gives a savory kick. Smoked paprika adds a hint of smoke that makes everything better. Thyme and rosemary offer a nice herbal note. Don’t forget salt and pepper; they bring out all the flavors. - 2 tablespoons fresh parsley, chopped (for garnish) - Additional toppings Fresh parsley makes the dish pop with color. It also adds a fresh taste. You can use other toppings if you like. Crumbled feta or a sprinkle of chili flakes can add more fun. If you want, try adding nuts for crunch or a drizzle of balsamic glaze for sweetness. First, peel your sweet potatoes. Use a vegetable peeler for a smooth finish. After peeling, cut them into equal cubes. Aim for about one-inch pieces. This size ensures they cook evenly. Next, prep your baking sheet. Line it with parchment paper. This step makes cleanup easy and helps prevent sticking. Now, grab a large mixing bowl. Add the cubed sweet potatoes and pour in three tablespoons of olive oil. Toss them well. You want every piece coated in oil. Then, sprinkle in the garlic powder, smoked paprika, thyme, rosemary, salt, and pepper. Use two teaspoons of garlic powder and one teaspoon each of paprika and herbs. Toss the sweet potatoes again. Ensure they are fully coated with all the seasonings for the best flavor. Set your oven to 425°F (220°C). Preheating the oven is vital for even cooking. Spread the seasoned sweet potatoes on the lined baking sheet. Make sure they form a single layer. Roast them for 25 to 30 minutes. Flip them halfway through for even browning. When they are golden-brown and tender, they are ready. After roasting, take them out of the oven. Let them cool slightly before serving. This cooling time helps them firm up a bit. Enjoy your delicious herb-roasted sweet potatoes! When you pick sweet potatoes, look for medium-sized ones. Try to choose ones that feel heavy. A good sweet potato should have smooth skin with no bruises. If you see any dark spots, it's best to skip those. Fresh sweet potatoes should have a firm feel. They should not be soft or wrinkled. You want the sweet potatoes to be golden-brown and tender. This takes about 25 to 30 minutes at 425°F (220°C). To check if they’re done, poke a piece with a fork. If it goes in easily, they are ready. To avoid sticking, use parchment paper on your baking sheet. This helps with easy cleanup too! You can change the flavors to match your taste. If you like heat, add some chili flakes. For a sweeter touch, mix in a bit of brown sugar. You can also swap in herbs like oregano or basil. Try fresh herbs if you have them! They can add a bright flavor to your dish. {{image_2}} You can swap sweet potatoes with other root veggies. Try carrots, parsnips, or even butternut squash. Each brings a unique taste and texture. Combine different types for a colorful dish. Mixing sweet and savory roots can surprise your palate. Want to add some heat? Sprinkle chili flakes or cayenne pepper on your sweet potatoes. A little kick can make every bite exciting. You can also try different spice blends. Consider curry powder or za'atar for a new twist. Each spice brings its own flavor magic. Pair your herb-roasted sweet potatoes with tasty side dishes. A fresh salad or steamed broccoli works well. For the main course, try grilled chicken or fish. These pairings make a balanced and delicious meal. You can also serve them with a tasty dip, like yogurt sauce, for fun. After you enjoy your herb-roasted sweet potatoes, store leftovers in proper containers. Use airtight containers to keep them fresh. If you don’t have those, a good plastic wrap can work too. Place the sweet potatoes in the fridge after they cool down. They will stay good for about 3 to 5 days. Check for any signs of spoilage before eating. If they smell off or look bad, it’s best to toss them. To heat your sweet potatoes and keep them crispy, use an oven. Preheat it to 350°F (175°C). Spread the potatoes on a baking sheet, making sure they don’t touch. Bake them for 10 to 15 minutes. This will help them regain their crunch. Avoid using a microwave if you can. It can make them soggy and mushy. If you must use a microwave, heat them on a plate for just a short time. Check often to avoid overheating. You should roast sweet potatoes for 25 to 30 minutes. This timing ensures they cook well and get tender. You want them to be golden and soft. Flip them halfway through for even cooking. Yes, you can use other oils for roasting. Some good choices are avocado oil or canola oil. These oils work well and add nice flavor. Just make sure to use a high smoke point oil for best results. Herb-roasted sweet potatoes are quite healthy. They are loaded with vitamins and minerals. Sweet potatoes are high in fiber and antioxidants. The herbs and olive oil add flavor without many extra calories. Enjoying them can support a balanced diet. Herb-roasted sweet potatoes are simple and fun to make. We discussed key ingredients like sweet potatoes and olive oil, plus some tasty seasonings. I shared step-by-step instructions for prepping, mixing, and roasting. You now know tips for selecting perfect sweet potatoes and customizing flavors to your taste. In conclusion, this dish is versatile and easy to store. Don't hesitate to try new spices or serve it in different ways. Enjoy your cooking adventure!

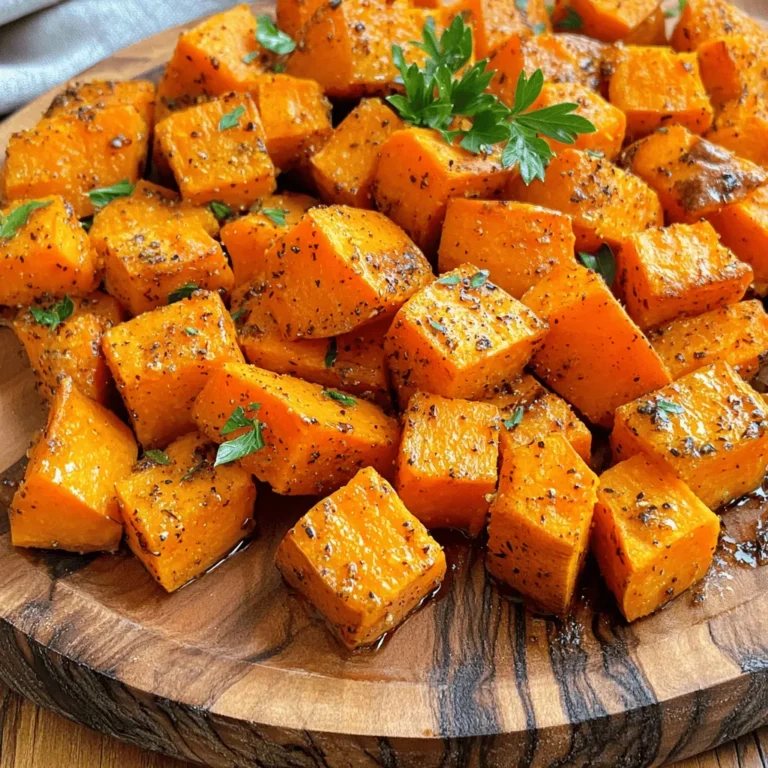
Herb Roasted Sweet Potatoes Flavorful and Easy Recipe

PREV 1 … 24 25 26 … 57 NEXT
meal twig

explore

DessertsDinnerAppetizersDrinks

Our Policies

  • Cookie Policy
  • Copyright Policy
  • Disclaimer
  • GDPR Policy
  • Terms Of Use
Back to Top
  • About
  • Contact Us
  • Privacy Policy
© 2025 meal twig