FREE DINNER EBOOK! Get your copy!
  • Cookie Policy
  • GDPR Policy
  • Disclaimer
  • Terms Of Use
  • Visit my other site: Fun Cookie Recipes
meal twig
  • Home
  • Dinner
  • Desserts
  • Drinks
  • Appetizers
  • Contact
  • About
  • Privacy Policy
  • Home
  • Dinner
  • Desserts
  • Drinks
  • Appetizers
  • Contact
  • About
  • Privacy Policy
  • Cookie Policy
  • GDPR Policy
  • Disclaimer
  • Terms Of Use
Visit my other site: Fun Cookie Recipes

HOME / CATEGORIES /

Latest

- 2 cups cooked chicken, shredded - 1 teaspoon chili powder - 1 teaspoon cumin - 1 teaspoon garlic powder - 1 teaspoon smoked paprika - Salt and pepper to taste - 8 small corn tortillas - 1 cup red cabbage, shredded - 1 avocado, diced - 1/2 cup fresh cilantro, chopped - 1/4 cup crumbled feta or cotija cheese - 1 lime, cut into wedges - 2 tablespoons olive oil To make tasty chicken street tacos, start with the right ingredients. You need cooked chicken. Shredded chicken works best. For flavor, use chili powder, cumin, garlic powder, and smoked paprika. These spices blend well and enhance the chicken. Next, grab fresh toppings. Red cabbage adds crunch. Avocado brings creaminess, and cilantro adds freshness. Cheese, like feta or cotija, gives a nice salty touch. Don’t forget lime wedges. They add a great zing when you squeeze them on the tacos. You can switch things up with different proteins. If you want, use beef or pork. There are also tasty vegetarian options, like beans or grilled veggies. For cheese, try different types. You can use Monterey Jack or pepper jack for a spicy kick. For spices, feel free to adjust. Add more chili powder or some hot sauce if you want heat. Explore your options! The best part of cooking is making each dish your own. {{ingredient_image_1}} To start, heat olive oil in a large skillet over medium heat. Add 2 cups of shredded chicken to the pan. Next, sprinkle in 1 teaspoon of chili powder, 1 teaspoon of cumin, 1 teaspoon of garlic powder, and 1 teaspoon of smoked paprika. Don't forget a pinch of salt and pepper to taste. Stir it all together well. You want the spices to coat the chicken evenly. Heat the chicken for about 5-7 minutes. This step brings out the great flavors in your chicken. For the tortillas, use a separate skillet. Lightly toast 8 small corn tortillas for about 30 seconds on each side. Look for them to be warm and soft, not crispy. Once toasted, wrap the tortillas in a clean kitchen towel. This keeps them warm and ready for your tacos. Warm tortillas make a big difference in taste. Now comes the fun part—assembling your tacos! Take one warm tortilla and place a generous scoop of the spiced chicken in the center. Next, layer on some shredded red cabbage for crunch. Then, add diced avocado for creaminess. Top it off with chopped cilantro and a sprinkle of crumbled feta or cotija cheese for extra flavor. Don’t forget to squeeze fresh lime juice over your tacos before serving. This adds a zesty touch that enhances all the flavors. Enjoy your tasty Chicken Street Tacos! To shred chicken well, use two forks. Pull the chicken apart gently. This method keeps the meat tender. You can also use your hands if they are clean. When seasoning, remember these dos and don'ts: - Do taste as you go. This will help you find the right balance. - Do use fresh spices. They add more flavor. - Don't over-season at first. You can always add more later. - Don't skip salt. It brings all the flavors together. Plating your tacos can make a big difference. Use a large plate for a colorful display. Arrange the tacos in a line or a circle. For garnishing: - Add lime wedges on the side for a bright touch. - Sprinkle extra cilantro on top for color. - A few slices of avocado can enhance the look and taste. If you need gluten-free options, use corn tortillas. They are perfect for street tacos. For dairy-free choices, skip the cheese or use a plant-based alternative. You can also customize flavors: - Add more chili powder for heat. - Mix in lime zest for a fresh kick. - Try different toppings like pickled onions or jalapeños to suit your taste. Pro Tips Use Leftover Chicken: This recipe is perfect for using up leftover rotisserie chicken, making it a quick and easy meal solution. Customize Your Toppings: Feel free to add other toppings like diced tomatoes, jalapeños, or sour cream to suit your taste. Make it Spicy: For an extra kick, add some hot sauce or diced chilies to the chicken mixture while cooking. Fresh Tortillas Matter: If possible, use freshly made corn tortillas for the best flavor and texture in your tacos. {{image_2}} You can switch up the protein in your chicken street tacos. Here are some tasty ideas: - Beef: Use ground beef or shredded beef. Just season it like chicken. - Pork: Carnitas or pulled pork work well. They add great flavor. - Shrimp: Sauté shrimp with the same spices for a seafood twist. - Plant-based options: Try jackfruit or tofu for a vegetarian choice. Season them to match the chicken flavors. Adding salsas and sauces can make your tacos pop. Here are some options: - Spicy salsa: Combine diced tomatoes, jalapeños, cilantro, and lime juice. This adds a kick! - Creamy sauce: Mix yogurt or sour cream with lime juice and garlic powder. It cools down the heat. Using seasonal ingredients can enhance your tacos. Here’s how: - Spring/Summer: Add fresh corn or diced tomatoes. They bring brightness. - Fall/Winter: Incorporate roasted peppers or sweet potatoes. They add warmth and comfort. - Pairings: Match your toppings to the season for the best taste. For example, use cilantro in spring and hearty greens in winter. To store leftover chicken tacos, let them cool first. Place the chicken in an airtight container. You can keep the tortillas separate to prevent sogginess. Store them in a plastic bag, or wrap them tightly in foil. This helps keep them fresh. For tortillas, you can also use parchment paper. Layer them with parchment in between. This method keeps them from sticking together. If you have extra toppings, like cabbage or avocado, store them in small containers. They stay fresh longer this way. When you reheat chicken tacos, use a skillet. Heat it over medium heat. Place the chicken in the skillet until hot. This keeps the chicken juicy and flavorful. For tortillas, avoid the microwave. Instead, warm them in the skillet for about 30 seconds on each side. This keeps them crisp and pliable. If you find them soggy, try toasting them slightly longer. This will help restore the right texture. Enjoy your tacos just as fresh as when you made them! You can use many other proteins in chicken street tacos. Here are some great options: - Beef: Shredded beef works well. Use flank steak or brisket. - Pork: Shredded pork is tasty. Pulled pork adds great flavor. - Turkey: Cooked turkey is a lean and healthy choice. - Shrimp: Cook shrimp quickly for a different taste. - Vegetarian options: Use black beans or grilled veggies for a meat-free meal. You can add heat in many ways. Here are my favorite tips: - Spices: Mix cayenne pepper or chipotle powder into the seasoning. - Hot Sauce: Drizzle your favorite hot sauce on top. - Jalapeños: Add sliced jalapeños for fresh heat. - Spicy Salsa: Serve with a spicy salsa on the side. - Pickled Peppers: Top tacos with pickled peppers for tang and spice. Yes, you can freeze chicken street tacos! Here’s how: - Cooked Chicken: Freeze just the chicken filling. Place it in an airtight bag. - Tortillas: You can freeze tortillas too. Wrap them in foil or plastic wrap. - Thawing: To eat, thaw in the fridge overnight. Heat the chicken on the stove and warm the tortillas. Chicken street tacos stay fresh for about 3 to 4 days in the fridge. Here are some tips: - Storage: Keep leftovers in an airtight container. - Check for freshness: Before eating, check for off smells or changes in texture. - Reheat: Warm them on the stove or microwave, but avoid overcooking. In this post, we explored how to make delicious Chicken Street Tacos. We covered essential ingredients, that perfect mix of spices, and fresh toppings. I shared step-by-step cooking instructions for the chicken and tortillas, plus tips for assembly. You also learned variations for proteins and flavors, along with storage advice. Enjoy experimenting with your tacos to fit your taste! The right ingredients make all the difference. With these tips, your Chicken Street Tacos can be a hit every time. Happy cooking!

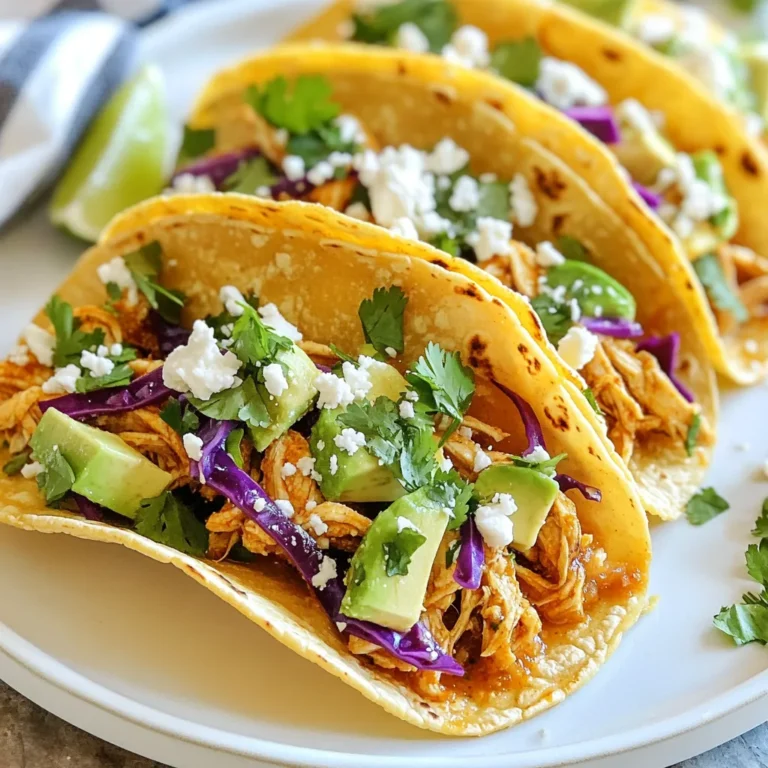
Chicken Street Tacos Simple and Flavorful Recipe

- 1 cup farro, rinsed - 2 ½ cups vegetable broth (or water) - 1 cup cherry tomatoes, halved - 1 cucumber, diced - ½ red onion, finely chopped - ½ cup Kalamata olives, pitted and sliced - 1 cup feta cheese, crumbled - ¼ cup fresh parsley, chopped - ¼ cup extra virgin olive oil - 2 tablespoons lemon juice - 1 teaspoon dried oregano - Salt and pepper to taste I love using fresh ingredients in my Mediterranean Farro Salad. Farro is the star here. This grain gives a nice, chewy texture. You can find it in most grocery stores. Next, I use vegetable broth or water to cook the farro. The broth adds flavor. For the veggies, I pick bright cherry tomatoes and crisp cucumbers. They add color and crunch. Red onion brings a bit of sharpness. Kalamata olives give a salty kick. Feta cheese adds creaminess and tang. I always crumble it for easy mixing. Fresh parsley adds a pop of green. I use extra virgin olive oil for a rich taste. Lemon juice brightens the salad. Dried oregano gives it a classic Mediterranean flavor. Don’t forget the salt and pepper! They balance everything out. With these ingredients, you create a wholesome and satisfying meal. {{ingredient_image_1}} To prepare farro, start by rinsing it under cold water. This removes any dust or debris. Next, combine 1 cup of farro with 2 ½ cups of vegetable broth in a medium saucepan. This broth adds flavor. Bring the mixture to a boil over medium heat. Once it boils, reduce the heat to low. Cover the pot and let it simmer for about 25 to 30 minutes. You want the farro to be tender but still chewy. If there is extra liquid, drain it and let the farro cool. In a large bowl, add your chopped vegetables: 1 cup of halved cherry tomatoes, 1 diced cucumber, and ½ finely chopped red onion. Also, add ½ cup of pitted and sliced Kalamata olives. For a creamy touch, include 1 cup of crumbled feta cheese. Mix these ingredients well. The colors should pop, and the smells will be amazing. For the dressing, gather ¼ cup of extra virgin olive oil, 2 tablespoons of lemon juice, and 1 teaspoon of dried oregano. In a small bowl, whisk these together until well combined. Add salt and pepper to taste. This dressing will bring all the flavors together. Once the farro has cooled, add it to the bowl with the vegetables and cheese. Pour the dressing over the mix and toss gently. Make sure everything is coated well. Taste the salad. If needed, adjust the seasoning with more salt or pepper. Just before serving, fold in ¼ cup of chopped fresh parsley. This adds a bright, fresh taste. Serve your salad in a big bowl or on individual plates, garnishing with extra parsley and olives. Enjoy! Yes, you can prepare Mediterranean Farro Salad in advance. This salad tastes even better the next day. The flavors blend nicely overnight. For best storage, keep the salad in an airtight container. Store it in the fridge. It will stay fresh for up to three days. If you add fresh herbs like parsley, do so just before serving. If you want an alternative for feta cheese, try goat cheese or a vegan option. Both offer great flavor. You can also mix in other vegetables. Bell peppers and zucchini work well. For more protein, consider adding chickpeas or beans. This salad pairs well with grilled meats. Serve it alongside chicken or fish for a full meal. You can also enjoy it as a light lunch. For leftovers, try serving them in a wrap or pita. You can also top it on greens for a quick salad. Pro Tips Use Fresh Ingredients: Opt for the freshest produce available to enhance the flavors of your salad. Fresh vegetables make a significant difference in taste and texture. Chill Before Serving: Allow the salad to chill in the refrigerator for at least 30 minutes before serving. This helps the flavors meld together beautifully. Customize Your Dressing: Feel free to experiment with additional herbs or spices in the dressing. Fresh mint or basil can add a delightful twist to the traditional Mediterranean flavors. Meal Prep Friendly: This salad keeps well in the fridge for a couple of days, making it a great option for meal prep. Just add the parsley right before serving for freshness. {{image_2}} You can add protein to your Mediterranean Farro Salad. Grilled chicken adds a nice touch. Just slice it up and mix it in. For a vegetarian option, try chickpeas. They are filling and tasty. Just rinse a can and toss them in. Tuna or shrimp also work well. Use canned tuna or sauté shrimp until pink. Both options boost flavor and protein. This makes your salad a complete meal. Seasonal vegetables can change your salad game. In spring, add fresh peas or asparagus. In summer, bell peppers and zucchini shine. Fall brings sweet roasted squash. Winter can include hearty roots like carrots or beets. Adjust flavors too. In summer, use fresh herbs like basil. In fall, try a bit of thyme. These small changes keep your salad exciting. You can switch up the dressing for variety. A balsamic vinaigrette gives a sweet twist. A yogurt-based dressing adds creaminess. Both can enhance the flavor of your salad. Homemade dressings are easy and fresh. Mix olive oil, vinegar, and herbs. Store-bought options work too for quick meals. Just read the label for quality ingredients. To keep leftovers fresh, store the Mediterranean Farro Salad in an airtight container. Make sure the salad is cool before sealing it. This way, you prevent moisture build-up that can make the salad soggy. The salad will last for about 3 to 5 days in the fridge. Can this salad be frozen? Yes, but with caution. The farro and some veggies freeze well, but the feta and fresh herbs may not. To freeze, place the salad in a freezer-safe container. Make sure to leave some space for expansion. When ready to eat, thaw it in the fridge overnight. For reheating, the best method is to warm it gently on the stove. Add a splash of vegetable broth or water to keep it moist. Stir it over low heat until warm. Avoid microwaving, as it can make the farro mushy. To maintain flavor and texture, serve it immediately after reheating. Farro is an ancient grain that belongs to the wheat family. It is chewy and has a nutty flavor. Farro is packed with nutrition. It is high in fiber, protein, and several vitamins. This grain can help keep you full and satisfied. You can use farro in salads, soups, or as a side dish. Yes, you can easily make this salad vegan. Replace feta cheese with vegan cheese or omit it. Use vegetable broth instead of water for cooking farro. For added flavor, add roasted nuts or seeds. You can also include more veggies like bell peppers or carrots. The Mediterranean Farro Salad can last about 3 to 5 days in the fridge. Store it in an airtight container. To keep it fresh, avoid adding the dressing until serving. If it starts to look soggy, add more fresh veggies before eating. You can serve Mediterranean Farro Salad warm, but it is best cold. Serve it at room temperature for a lovely taste. If you prefer it warm, just heat the farro before mixing it with veggies. This will change the texture, but it still tastes great. Mediterranean Farro Salad is a fresh and tasty dish. We explored its simple ingredients and easy steps, perfect for anyone. You learned how to cook farro, mix vegetables, and make a zesty dressing. I shared tips for storage, variations, and how to serve leftovers. Fresh ingredients make this salad fun to prepare and eat. Try adding your favorite proteins for extra flavor. Enjoy this salad as a main dish or as a side. It’s healthy, bright, and great for any meal!

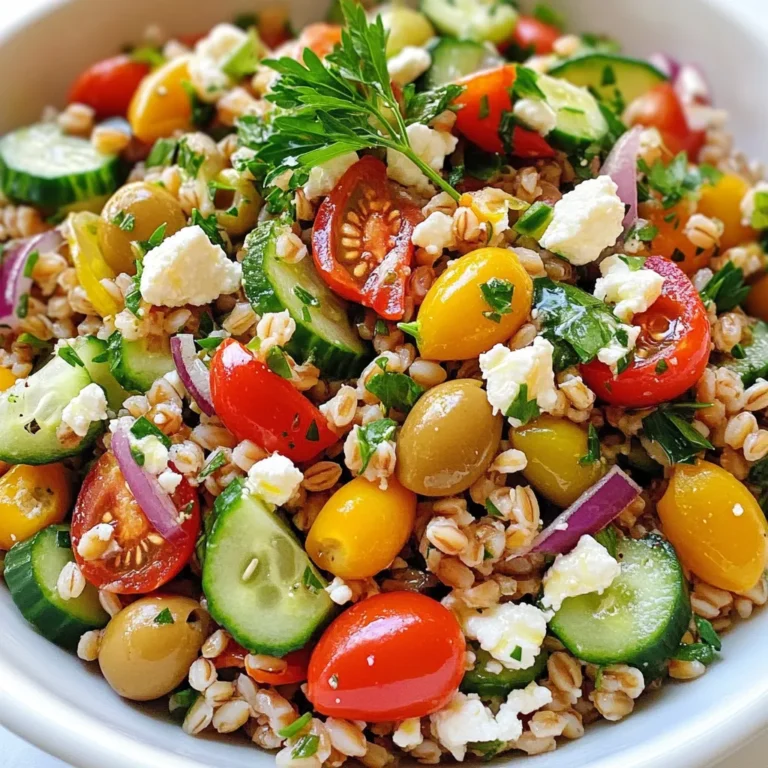
Mediterranean Farro Salad Wholesome and Satisfying Meal

- 1 lb (450g) boneless, skinless chicken thighs, diced - 1 tablespoon olive oil - 1 medium onion, diced - 2 garlic cloves, minced - 2 carrots, diced - 2 celery stalks, diced - 4 cups chicken broth - 1 cup heavy cream - 1 lb (450g) gnocchi - 1 teaspoon dried thyme - 1 teaspoon dried rosemary - Salt and pepper to taste - 1 cup frozen peas - Fresh parsley, chopped (for garnish) The main ingredients in this One Pot Gnocchi Chicken Pot Pie work together to create a hearty dish. The chicken thighs provide rich flavor and protein. Olive oil helps brown the chicken and adds a lovely taste. Onions, garlic, carrots, and celery form the base of the dish. These vegetables give a sweet and savory flavor, which enhances the overall taste. Chicken broth adds depth, while heavy cream makes the dish creamy and comforting. The gnocchi adds a unique twist. They soak up the flavors while cooking. This makes every bite delightful. For seasonings, dried thyme and rosemary add an earthy aroma. Salt and pepper balance the flavors. Frozen peas add a pop of color and sweetness. Finally, fresh parsley brightens the dish when sprinkled on top. Each ingredient plays a key role in making this recipe a crowd-pleaser. You can feel good knowing you are using wholesome ingredients in this one-pot wonder. {{ingredient_image_1}} First, heat one tablespoon of olive oil in a large pot over medium-high heat. Once the oil is hot, add one pound of diced chicken thighs. Season the chicken with salt and pepper. Cook the chicken for about 5-7 minutes, or until it is browned on all sides. This adds flavor and texture. Once done, remove the chicken from the pot and set it aside. In the same pot, add one medium diced onion, two minced garlic cloves, two diced carrots, and two diced celery stalks. Sauté these vegetables for about 5 minutes. You want them soft but not mushy. After that, stir in one teaspoon each of dried thyme and dried rosemary. Cook for another minute, letting the herbs release their lovely aroma. Now, it’s time to bring it all together. Add the browned chicken back into the pot. Pour in four cups of chicken broth and bring it to a gentle simmer. This should take just a few moments. Next, pour in one cup of heavy cream and stir well. Then, add one pound of gnocchi to the pot, stirring to combine. Let the mixture simmer for about 5-7 minutes. The gnocchi will float to the top when they are cooked. Finally, stir in one cup of frozen peas and cook for another 2 minutes. Taste the dish and adjust the seasoning as needed. You can add more salt, pepper, or herbs. Remove the pot from heat and let it sit for a few minutes. This helps the flavors meld together. Serve directly from the pot and garnish with chopped fresh parsley for a nice touch. - Ensuring chicken is fully cooked: Always check that your chicken thighs are cooked through. They should be white and not pink inside. Use a meat thermometer if you want a precise measure. The inside should reach 165°F (75°C). This step keeps the dish safe and tasty. - Techniques for perfect gnocchi texture: To get the best texture, cook the gnocchi until they float. This usually takes about 5 to 7 minutes. Floating gnocchi means they're done! Don't overcook them, or they might become mushy. Stir gently to keep them intact without breaking. - Adding more herbs or spices: Experiment with fresh herbs like basil or chives. They add a nice touch of flavor. You can also try a pinch of paprika for a warm, earthy taste. Just sprinkle them in while cooking for the best results. - Suggestions for a spicy twist: Want some heat? Add a dash of red pepper flakes or a bit of hot sauce. This will give your dish a kick that many will love. Just be careful not to add too much at first. You can always add more if needed. Pro Tips Perfectly Cooked Gnocchi: Make sure to add the gnocchi to the pot just before serving to prevent them from becoming too soft or mushy. Flavor Boost: For a richer flavor, consider adding a splash of white wine after sautéing the vegetables before adding the broth. Vegetable Variations: Feel free to swap in your favorite vegetables like green beans or potatoes for a personalized touch. Make It Ahead: This dish can be made ahead of time and stored in the fridge. Just reheat gently on the stove, adding a splash of broth to loosen it up. {{image_2}} You can change some ingredients for your taste. For protein, try chicken breasts or turkey. Both work well and stay juicy. You can also use cooked sausage for a tasty twist. For vegetables, fresh is often better. Use fresh carrots, peas, or green beans instead of frozen. Fresh veggies give a crunch and bright flavor. If you prefer, mix in some bell peppers or zucchini for color. Want to make it gluten-free? Choose gluten-free gnocchi. Many brands offer tasty options. You can also use cornstarch or rice flour to thicken the sauce. If you want a vegetarian meal, skip the chicken. Add more veggies like mushrooms and spinach. You can also use vegetable broth instead of chicken broth. This keeps the dish rich and hearty without meat. To keep your One Pot Gnocchi Chicken Pot Pie fresh, let it cool first. Once cooled, transfer it to an airtight container. Store it in the fridge for up to three days. Label the container with the date to track freshness. If you plan to keep it longer, consider freezing it instead. When you're ready to enjoy leftovers, the best method is to reheat on the stove. Pour the pot pie into a pan over medium heat. Stir often to ensure even heating. You can also add a splash of chicken broth or cream to keep it moist. Heat until bubbly and warm, about 5 to 10 minutes. If using a microwave, place it in a microwave-safe bowl. Heat in short bursts, stirring in between, to avoid hot spots. This dish takes a total of 30 minutes to prepare and cook. You need 15 minutes for prep and 15 minutes for cooking. It’s a quick meal that you can enjoy any day of the week! Yes, you can make this recipe in advance. Store it in an airtight container in the fridge for up to three days. To reheat, use a pot on the stove over low heat. Stir it gently to keep the gnocchi from sticking. You can also add a splash of broth or cream if it seems dry. Traditional gnocchi is not gluten-free, as it is made with wheat flour. However, many stores offer gluten-free gnocchi made from rice flour or potatoes. Always check the label to be sure. You can also make your own using gluten-free flour for a safe, tasty option! This recipe uses simple ingredients for a hearty One Pot Gnocchi Chicken Pot Pie. You learned how to brown chicken and sauté veggies for great flavor. We discussed tips for perfect gnocchi, spice options, and ingredient swaps. Remember, you can adapt this dish to fit your needs. Enjoy your cooking adventure and share your delicious results with others.

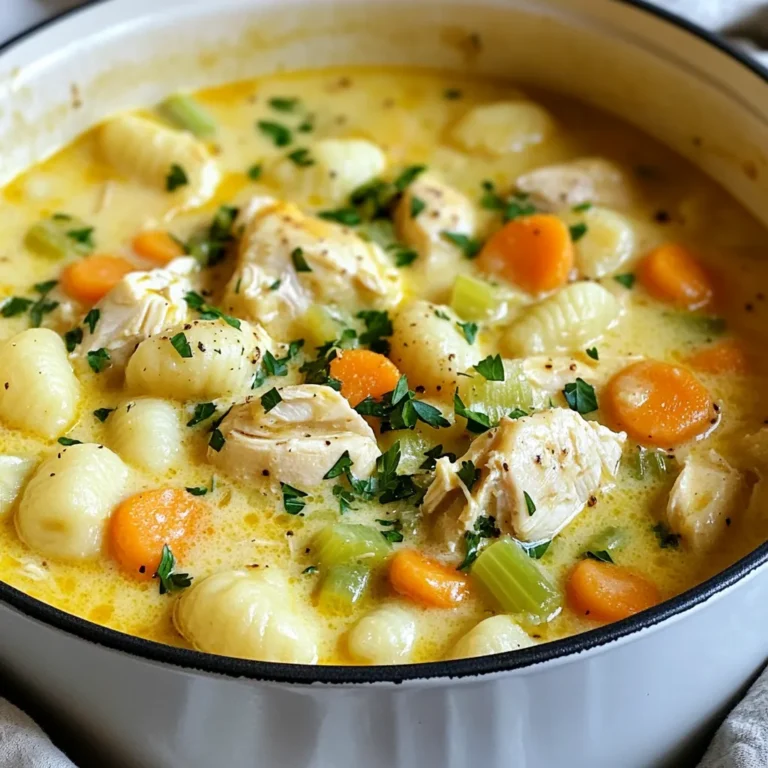
One Pot Gnocchi Chicken Pot Pie Delightful Recipe

To make the delightful chocolate chip cookie dough dip, you need simple ingredients. Here’s what you’ll need: - 1 cup all-purpose flour - 1 cup brown sugar, packed - ½ cup granulated sugar - 1 cup unsalted butter, softened - 2 teaspoons vanilla extract - 1 cup mini chocolate chips - 1 tablespoon milk (or more for desired consistency) - A pinch of salt Each ingredient plays a key role in creating the perfect dip. The all-purpose flour gives it a rich, dough-like texture. Brown sugar adds that warm, sweet flavor we love. Granulated sugar enhances the sweetness without being overpowering. Unsalted butter provides creaminess and a smooth mouthfeel. Vanilla extract brings depth with its warm notes. Mini chocolate chips are essential for those little bursts of chocolate in every bite. Finally, milk helps adjust the dip's creaminess. A pinch of salt balances all the flavors perfectly. With these ingredients, you’ll create a dip that tastes just like cookie dough. Enjoy! 1. Creaming butter and sugars: Start by taking softened butter and placing it in a mixing bowl. Add brown sugar and granulated sugar. Mix them together until the mixture becomes light and fluffy. This step helps to create a nice texture in your dip. 2. Incorporating vanilla extract: Next, pour in the vanilla extract. Mix again until it blends well with the butter and sugars. This adds a rich flavor that makes your dip taste amazing. 3. Adding the flour and salt: Gradually add the all-purpose flour and a pinch of salt to the bowl. Mix until just combined. Be careful not to overmix, as this can make your dip too dense. You want it to stay light and creamy. 1. Stirring in chocolate chips: Now, stir in the mini chocolate chips. Make sure to distribute them evenly throughout the dip. This adds sweetness and a delightful crunch. 2. Adjusting consistency with milk: If your dip feels too thick, add milk. Start with one tablespoon at a time, mixing in between. Keep adding until you reach your desired consistency. You want it to be scoopable but not runny. 1. Transferring to a serving bowl: Once mixed, transfer the cookie dough dip to a colorful serving bowl. This makes it look even more inviting. 2. Chilling time and tips for serving: For the best taste, chill the dip in the fridge for about 30 minutes. This helps it set slightly. When serving, you can top it with extra chocolate chips for a nice touch. Pair it with fun dippables like pretzel sticks, graham crackers, or apple slices for a fun treat! To make your dip just right, mix well. Start by creaming the butter and sugars until light. This step adds air and makes your dip fluffy. When adding flour and salt, mix slowly to avoid lumps. If your dip is too sweet, add a pinch of salt. This balances the taste. If it feels too thick, add milk, one tablespoon at a time. Mix until you reach your desired texture. Choose a colorful bowl to serve your dip. A bright bowl makes the dip look even better. For garnish, sprinkle mini chocolate chips on top. This adds a fun look and extra chocolate flavor. You can also add a few chocolate shavings or a drizzle of melted chocolate for flair. Pick dippables with different textures and flavors. Pretzel sticks add a nice crunch. Graham crackers are sweet and pair well. Apple slices give a fresh bite. You can even try vanilla wafers or marshmallows. All these options make your cookie dough dip even more fun to enjoy! {{image_2}} You can change the flavor of your dip easily. One fun choice is peanut butter chocolate chip cookie dough dip. Just swap some butter with peanut butter. This adds a rich, nutty taste. You still get the sweet chocolate goodness. If you need a nut-free option, try using alternative flours. Almond flour or oat flour works well. These flours give a different taste but still keep the dip creamy. Want to add more to your dip? You can mix in nuts or dried fruits. Chopped walnuts or pecans add crunch. Dried cranberries or raisins bring a sweet chewiness. These add fun flavors and textures. You can also experiment with different types of chocolate. Use dark chocolate chips for a richer taste. Or try white chocolate chips for a sweeter dip. Each type gives your dip a new twist. Make your dip festive for the holidays. Try a pumpkin spice version for fall. Just mix in some pumpkin puree and spices like cinnamon. It’s perfect for autumn gatherings. For winter holidays, use festive toppings. Add colorful sprinkles or mini marshmallows. These add a fun touch to your dip. You can match colors to the season for extra cheer. To keep your cookie dough dip fresh, start by placing it in an airtight container. You can store it in the fridge for up to five days. Just make sure it’s well sealed to avoid any odors from other foods. If you want to save it for longer, you can freeze it. To freeze, scoop the dip into a freezer-safe container and leave some space at the top. The dip will last for up to three months in the freezer. When you're ready to enjoy your frozen dip, take it out of the freezer. Let it sit in the fridge overnight to thaw. If you're in a hurry, you can leave it at room temperature for about an hour. After thawing, stir the dip gently to restore its creamy texture. If the dip feels too thick, add a splash of milk to bring it back to life. To keep your dip looking great, avoid browning by storing it properly. Use fresh ingredients and keep it chilled. Also, if you want to stop the chocolate chips from melting, add them right before serving. This way, they stay firm and look pretty on top of your dip. Enjoy this sweet treat while it’s fresh for the best taste! You can use several gluten-free alternatives for this dip. Almond flour works great. It gives a nice texture and flavor. Another option is oat flour. It adds a mild taste and blends well. Other possible substitutes include coconut flour. Keep in mind, you will need less of it. If you use coconut flour, add a little more milk to adjust the dip's texture. Chocolate Chip Cookie Dough Dip lasts about one week in the refrigerator. Store it in an airtight container for best results. To tell if the dip has gone bad, look for changes in smell or color. If it smells sour or looks off, toss it out. Always trust your senses! Yes, you can make this dip ahead of time! Prepare it up to a day in advance. Just store it in the fridge until you are ready to serve. For serving tips, let it sit out for about 10 minutes before serving. This helps the dip soften a bit. Serve it with fun dippables like pretzels or apple slices for a tasty treat! This blog post covered all you need for a delicious cookie dough dip. We explored the key ingredients, like flour and chocolate chips, and detailed simple steps to mix and serve. Tips and tricks helped you master the dip's sweetness and presentation. Variations let you try new flavors and add fun mix-ins. Finally, I shared storage info to keep your dip fresh. Enjoy making this treat yourself and sharing it with others!

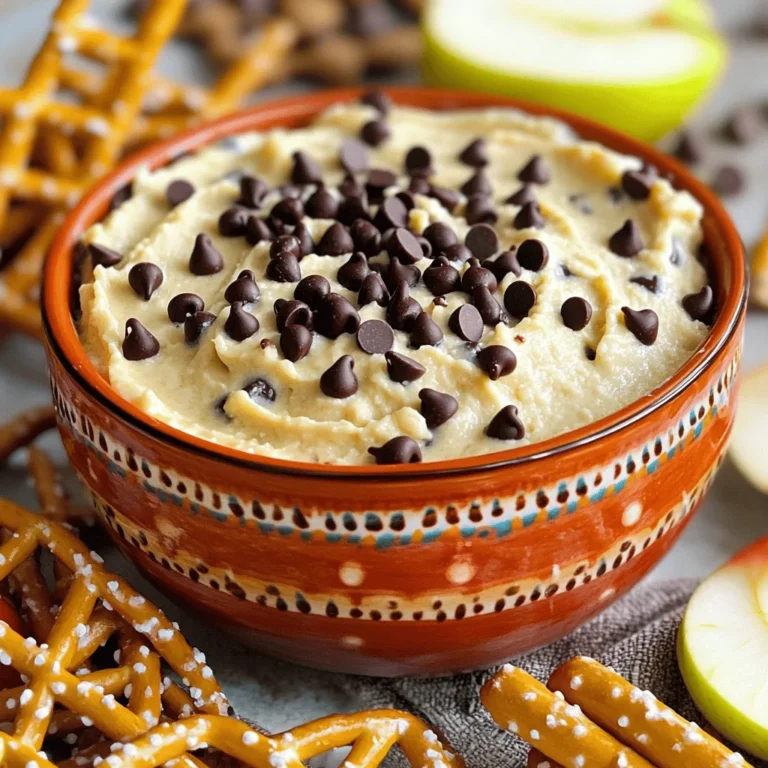
Chocolate Chip Cookie Dough Dip Delightful and Easy

To make these delightful muffins, gather these key ingredients: - 2 cups all-purpose flour - 1 cup granulated sugar - 1 tablespoon baking powder - 1 teaspoon baking soda - 1 teaspoon ground cinnamon (plus more for topping) - ½ teaspoon salt - 1 large egg - 1 cup whole milk - ½ cup unsalted butter, melted - 1 teaspoon vanilla extract - 2 medium apples, peeled, cored, and diced (about 2 cups) - ½ cup brown sugar (for topping) These ingredients work together to create a sweet and fluffy muffin. The apples add moisture and flavor, while the cinnamon gives a warm spice. You can add a few extra ingredients to personalize your muffins: - Chopped walnuts or pecans for crunch - Raisins or dried cranberries for extra sweetness - A handful of chocolate chips for a treat These add-ins make the muffins even more fun and tasty. Feel free to mix and match based on what you have at home. Sometimes you may not have all ingredients on hand. Here are some easy swaps: - Use whole wheat flour instead of all-purpose flour for more fiber. - Replace granulated sugar with brown sugar for a deeper flavor. - Substitute almond milk or oat milk for whole milk, if needed. - Use coconut oil instead of butter for a dairy-free option. These substitutes work well and can change the taste just a bit. Don’t be afraid to experiment! To start, gather your ingredients. You need: - 2 cups all-purpose flour - 1 cup granulated sugar - 1 tablespoon baking powder - 1 teaspoon baking soda - 1 teaspoon ground cinnamon - ½ teaspoon salt - 1 large egg - 1 cup whole milk - ½ cup unsalted butter, melted - 1 teaspoon vanilla extract - 2 medium apples, peeled, cored, and diced - ½ cup brown sugar First, preheat your oven to 350°F (175°C). Line a muffin tin with paper liners or grease it well. In a large bowl, whisk together the flour, sugar, baking powder, baking soda, cinnamon, and salt. This mix gives your muffins a great base. Next, in another bowl, beat the egg. Add the milk, melted butter, and vanilla extract. Mix until it's smooth. Pour this wet mix into the dry ingredients. Fold gently until just combined. Be careful! Overmixing makes muffins tough. Now, add in the diced apples. Fold them into the batter. This adds a sweet, juicy bite to each muffin. Scoop the muffin batter into the prepared muffin tin. Fill each cup about ¾ full. This gives them room to rise. In a small bowl, mix the brown sugar with a pinch of cinnamon. Sprinkle this mixture on top of each muffin. This will create a delicious crust. Bake your muffins for 18-22 minutes. Check them with a toothpick. If it comes out clean, they are done! After baking, let the muffins cool in the tin for about 5 minutes. Then, transfer them to a wire rack to cool completely. Serve the muffins warm on a rustic platter. Dust them lightly with powdered sugar. A sprinkle of fresh cinnamon adds a lovely aroma. Enjoy them as a sweet breakfast treat or a delightful snack! To keep your muffins light, mix gently. When you blend the wet and dry ingredients, stop as soon as no flour shows. Overmixing can make your muffins dense. It’s okay if you see a few lumps. They will bake out. For the best topping, mix brown sugar and a pinch of cinnamon. Use about half a cup of brown sugar for the right flavor. Sprinkle it on top of each muffin before baking. This creates a sweet crust that contrasts with the soft muffin. You can add different flavors to your muffins. Try mixing in chopped nuts, like walnuts or pecans, for crunch. You could also add a splash of maple syrup for extra sweetness. For a fun twist, mix in some raisins or dried cranberries too. These small changes can make your muffins unique and fun! {{image_2}} You can easily make these muffins gluten-free. Use a gluten-free flour blend instead of all-purpose flour. Look for blends that replace wheat flour one-to-one. This way, you still get a great rise and texture. Check that your baking powder is gluten-free as well. I often use a brand that guarantees no gluten. For a vegan version, swap the egg for a flax egg. Mix one tablespoon of ground flaxseed with three tablespoons of water. Let it sit for five minutes until it thickens. Use almond milk or oat milk in place of whole milk. Replace the melted butter with coconut oil or a plant-based butter. These swaps keep the muffins moist and yummy. Get creative with your muffins by adding other fruits and nuts. Chopped walnuts or pecans add a nice crunch. You can also mix in berries like blueberries or raspberries for a fun twist. Try using chopped peaches or pears for a different flavor profile. Just remember to keep the total fruit volume around two cups. This ensures your muffins stay fluffy and rise well. To keep your muffins fresh, store them in an airtight container. You can place them at room temperature for up to three days. If it's hot or humid, put them in the fridge. Just make sure to wrap them well so they do not dry out. You can freeze these muffins for up to three months. Let the muffins cool completely first. Wrap each one in plastic wrap, then place them in a freezer bag. This keeps them safe from freezer burn. When you're ready to eat, simply remove the wrap before reheating. To reheat, use your oven or microwave. For the oven, preheat it to 350°F (175°C). Heat the muffins for about 10 minutes. This helps restore their soft texture. If using the microwave, warm them for about 15-20 seconds. This makes them warm and fluffy. Enjoy your muffins just like they were fresh out of the oven! You can tell your muffins are done when they are golden brown. Insert a toothpick in the center. If it comes out clean, they are ready. The edges may pull away slightly from the pan. This shows they are cooked through. Yes, you can use many kinds of apples in this recipe. Crisp apples like Granny Smith or Honeycrisp work great. Sweet apples like Fuji can add a nice flavor too. Just make sure to peel and dice them well. You can prepare the batter ahead of time, but it is best to bake it right away. If you store it, the batter may lose its fluffiness. If you must, keep it in the fridge for a few hours. Stir it gently before baking to mix it up again. In this blog post, I covered key ingredients for making cinnamon sugar apple muffins. I shared essential steps, tips to avoid mistakes, and ideas for fun variations. You can store muffins easily and enjoy them later. Remember, using different apples can change the flavor. With practice, you'll bake perfect muffins every time. Trust your skills and enjoy the process. Happy baking!

Cinnamon Sugar Apple Muffins Tasty and Simple Recipe

To make this dish, you need fresh and flavorful items. Here is what you'll need: - 12 oz fettuccine or spaghetti - 1 lb large shrimp, peeled and deveined - 2 tablespoons olive oil - 3 cloves garlic, minced - 1 cup cherry tomatoes, halved - 3 cups fresh spinach - 1 cup heavy cream - 1 cup grated Parmesan cheese - 1 teaspoon Italian seasoning - Salt and pepper to taste - Fresh basil, for garnish These ingredients bring together a rich and creamy sauce that coats the pasta and shrimp. You can boost the taste with these fun add-ons: - Red pepper flakes for heat - Lemon zest for a fresh kick - Sun-dried tomatoes for extra depth - Capers for a briny touch Each of these options adds a unique twist to your dish. If you have specific dietary needs, here are some swaps: - Use zucchini noodles instead of pasta for a low-carb option. - Replace heavy cream with coconut milk for a dairy-free version. - Try nutritional yeast instead of Parmesan for a vegan alternative. These substitutions help you enjoy this dish while meeting your dietary goals. To start, bring a large pot of salted water to a boil. This is key for great pasta. Add 12 oz of fettuccine or spaghetti. Cook it according to the package instructions. Aim for al dente, which means firm but not hard. This usually takes about 8 to 10 minutes. Once done, drain the pasta. Save about 1 cup of the pasta water. This water helps later with the sauce. Next, grab a large skillet and heat 2 tablespoons of olive oil over medium heat. Once hot, add 1 lb of large shrimp, which should be peeled and deveined. Cook the shrimp for about 2 to 3 minutes on each side. They should turn pink and opaque. Season with salt and pepper to taste. After cooking, remove the shrimp from the skillet and set them aside. This step adds great flavor to your meal. Now, it’s time to make the sauce. In the same skillet, add 3 cloves of minced garlic. Sauté for about 30 seconds until fragrant. Then, add 1 cup of halved cherry tomatoes. Cook them for about 2 minutes, just until they soften. Next, stir in 3 cups of fresh spinach. Cook until it wilts, which should take about 1 to 2 minutes. Pour in 1 cup of heavy cream next. Stir in 1 cup of grated Parmesan cheese until it melts into a creamy sauce. Add 1 teaspoon of Italian seasoning. Adjust salt and pepper as needed. If the sauce seems too thick, add reserved pasta water a little at a time until you reach your desired texture. Finally, return the cooked shrimp to the skillet and add the pasta. Toss everything together until well mixed and heated through. Enjoy your meal! To get that perfect creamy texture, use heavy cream. It adds richness. Stir the cream slowly into the pan. This helps it blend well with the other ingredients. If the sauce is too thick, add reserved pasta water slowly. This will help thin it out without losing creaminess. Herbs and spices make your dish shine. Italian seasoning is a great base. But don’t stop there! Try adding fresh basil or oregano for more flavor. A pinch of red pepper flakes can add a nice kick. Taste as you go to find your perfect balance. Avoid overcooking the shrimp. It should be tender and pink, not rubbery. Don’t skip the pasta water; it helps the sauce stick. Also, watch the heat when adding cream. If it's too hot, the cream can separate. Lastly, remember to taste and adjust seasoning before serving! {{image_2}} You can swap pasta types to change the texture of your dish. Fettuccine gives a nice, flat surface that holds sauce well. Spaghetti works too, but you can try penne or rigatoni for a fun twist. These shapes catch sauce in their nooks and crannies. You might even enjoy using whole wheat or gluten-free pasta for a healthier choice. If you want a vegetarian version, skip the shrimp. Use mushrooms or zucchini instead. They add richness and a nice bite. You can sauté them just like the shrimp. For protein, try adding chickpeas or white beans. They blend well with the creamy sauce and make the dish filling. Don't forget to keep the garlic and spinach for flavor! You can add any veggies you love to this pasta. Bell peppers, broccoli, or asparagus bring great color and taste. Just sauté them with the garlic before adding the cream. You can also toss in some artichoke hearts or sun-dried tomatoes for a burst of flavor. This allows you to make this dish your own while keeping it delicious. To keep your leftover creamy Tuscan shrimp pasta fresh, place it in an airtight container. Make sure the pasta cools down first. This step helps prevent excess steam and moisture. You can store it in the fridge for up to three days. If you want to keep it longer, consider freezing it. Use a freezer-safe container, and it can last for up to three months. When it’s time to reheat, I suggest using the stovetop for the best results. Place your pasta in a skillet over low heat. Add a splash of water or a bit of cream to help revive the creamy sauce. Stir gently until warmed through. You can also use the microwave. Just cover the bowl with a damp paper towel to keep it moist. Heat in short bursts, stirring in between. If stored properly in the fridge, creamy Tuscan shrimp pasta lasts for three days. In the freezer, it can last for up to three months. However, I recommend eating it sooner than that for the best taste. The shrimp may not hold up as well after freezing. Always check for any off smells or changes in texture before eating leftovers. Yes, you can use frozen shrimp. Just make sure to thaw them first. Place the shrimp in a bowl of cold water for about 15-20 minutes. Once thawed, peel and devein them if needed. This will help them cook evenly and taste fresh. If you want a lighter option, use whole milk mixed with a bit of flour. For dairy-free choices, try coconut milk or cashew cream. Both will add creaminess to the sauce while changing the flavor slightly. Each option will keep your dish rich and delicious. To make this pasta gluten-free, swap regular pasta for gluten-free pasta. Many brands offer gluten-free options. Look for fettuccine or spaghetti made from rice, corn, or lentils. This way, you can enjoy the same creamy taste without gluten. In this post, we covered how to make creamy Tuscan shrimp pasta. We discussed the key ingredients, optional add-ons, and useful substitutions. I shared step-by-step instructions for cooking pasta, sautéing shrimp, and preparing the sauce. Don’t forget the tips to enhance texture and flavor. I also included ways to store leftovers and answered common questions. Now, you can enjoy a tasty meal that fits your needs and preferences. Happy cooking!

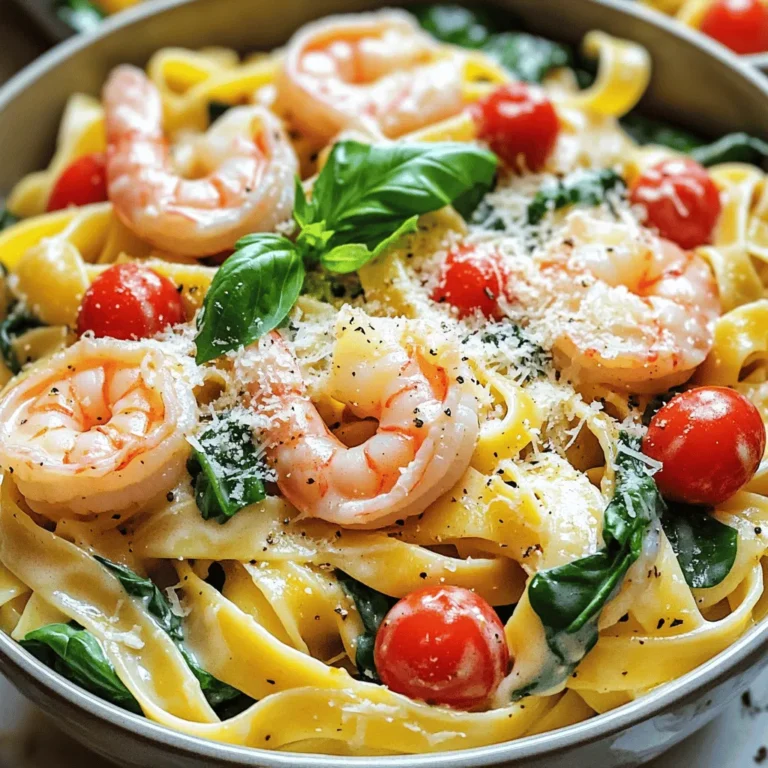
Creamy Tuscan Shrimp Pasta Flavorful Weeknight Meal

To make the brownies, you need: - 1 cup unsalted butter, melted - 1 1/2 cups granulated sugar - 1 cup brown sugar, packed - 4 large eggs - 1 teaspoon vanilla extract - 1 1/2 cups all-purpose flour - 1 cup unsweetened cocoa powder - 1/2 teaspoon baking powder - 1/4 teaspoon salt - 2 apples, peeled and diced (preferably Granny Smith) - 1 teaspoon cinnamon These ingredients create a rich and fudgy base for your brownies. The apples add a fresh twist. For the creamy layer, gather: - 8 oz cream cheese, softened - 1/3 cup powdered sugar - 1 egg - 1/2 teaspoon vanilla extract (for cheesecake layer) This creamy layer gives a smooth texture that pairs well with the brownie base. You can enhance your brownies with: - 1/2 cup caramel sauce (store-bought or homemade) - Chopped nuts (e.g., walnuts or pecans) for topping (optional) These toppings add extra flavor and crunch. You can also try different nuts or even chocolate chips for more variety. 1. Start by preheating your oven to 350°F (175°C). 2. Grease a 9x13 inch baking dish or use parchment paper. This helps with easy removal later. 3. In a large bowl, whisk together 1 cup of melted butter, 1 1/2 cups of granulated sugar, and 1 cup of brown sugar. Mix until everything is well combined. 4. Add 4 large eggs, one at a time. Make sure to mix well after each addition. Stir in 1 teaspoon of vanilla extract for extra flavor. 5. In another bowl, mix 1 1/2 cups of all-purpose flour, 1 cup of cocoa powder, 1/2 teaspoon of baking powder, and 1/4 teaspoon of salt. 6. Gradually add the dry mix to the wet mix. Stir until just combined. 7. Gently fold in 2 peeled and diced apples and 1 teaspoon of cinnamon. This adds a nice fruity touch to your brownies. 8. Spread about two-thirds of the brownie batter into your prepared baking dish. Make sure to create an even layer at the bottom. 9. In a new bowl, mix 8 oz of softened cream cheese, 1/3 cup of powdered sugar, 1 egg, and 1/2 teaspoon of vanilla extract. Blend until smooth and creamy. 10. Pour this cream cheese mixture over the brownie layer. Spread it evenly to cover the batter. 11. Drop spoonfuls of the remaining brownie batter on top of the cream cheese layer. Use a knife to swirl the layers together for a marbled effect. 12. Drizzle 1/2 cup of caramel sauce over the top. If you want, sprinkle with chopped nuts like walnuts or pecans. 13. Bake in the preheated oven for 30-35 minutes. The edges should be set, and a toothpick inserted in the center should come out with a few moist crumbs. 14. Allow the brownies to cool completely in the pan before slicing them into squares. 15. For a lovely presentation, serve on a decorative plate. Drizzle with more caramel sauce and sprinkle with cinnamon. 16. A scoop of vanilla ice cream on the side makes for a delightful finish. Enjoy this treat! To get the best brownie texture, follow a few key steps. Use unsalted butter to control the salt level. Melt it completely for a smooth mix. Mix the sugars well with the melted butter. Whisk in the eggs one at a time. This helps create a light and fluffy batter. Do not overmix the flour. Just combine until you see no dry bits. Gently fold in the apples and cinnamon to keep the chunks intact. Avoid adding too much flour; it makes brownies dry. Do not skip the baking powder; it helps the brownies rise. Be careful not to overbake, or you’ll lose that fudgy center. Check with a toothpick; it should come out with a few moist crumbs. Also, let the brownies cool completely before cutting. This helps them set and makes slicing easier. You can boost flavor in fun ways. Add a pinch of nutmeg for warmth. Mix in chocolate chips for extra chocolatey goodness. You can also use different apples, like Honeycrisp or Fuji, for a new taste. Try adding chopped nuts for crunch. A sprinkle of sea salt on top enhances the sweet caramel flavor. Explore other toppings like whipped cream or ice cream to make it special. {{image_2}} For this dessert, you can choose different apples. Granny Smith apples work well for their tartness. They balance the sweet caramel and cheesecake. Other great choices are Honeycrisp for sweetness or Fuji for a mellow flavor. Each type gives a unique twist to your brownies. Try mixing them for a complex taste! If you need gluten-free brownies, swap regular flour for a gluten-free blend. Make sure it has xanthan gum for texture. You can also use almond flour as a substitute. This will change the flavor slightly but will still be delicious. Just keep an eye on baking time, as it may differ. You can add chocolate chips for extra sweetness. Dark chocolate chips add richness to the brownies. A sprinkle of nutmeg or allspice can enhance the flavor, too. If you love nuts, add walnuts or pecans for crunch. Each choice helps you create a new version of this treat! You can store Caramel Apple Cheesecake Brownies easily. Allow them to cool fully in the pan. Once cooled, cut them into squares. Place them in an airtight container. They will stay fresh for up to four days at room temperature. If you want to keep them longer, consider refrigerating them. Just remember to let them sit at room temperature before serving. Freezing these brownies is a great option. Wrap each brownie square tightly in plastic wrap. Then, place them in a freezer-safe bag or container. They can last up to three months in the freezer. When you’re ready to enjoy them, remove the brownies from the freezer. Let them thaw in the fridge overnight or on the counter for a few hours. To reheat your brownies and keep them tasty, use the oven. Preheat it to 350°F (175°C). Place the brownies on a baking sheet. Heat them for about 10 minutes. This method keeps the texture nice and chewy. You can also use the microwave. Heat a brownie for about 15-20 seconds, but be careful not to overheat. Enjoy your warm brownies with a drizzle of caramel sauce for an extra treat! Yes, you can make these brownies ahead of time. They store well. Bake them a day before you plan to serve. Just cover them tightly. Keep them in the fridge for freshness. Allow them to come to room temperature before serving. They taste great even after a day or two. To lower the sugar in this recipe, you can reduce the granulated and brown sugars. Try using half the amount. You can also use sugar substitutes. Look for options like stevia or erythritol. Just keep in mind that this may change the texture. Experiment to find what you like best. Yes, you can substitute cream cheese. Use Greek yogurt for a lighter option. Silken tofu works well for a dairy-free choice. Both options provide a creamy texture, but the flavor may differ. Adjust the sugar if needed to balance the taste. These brownies pair well with many things. A scoop of vanilla ice cream complements the flavors nicely. You can also serve them with whipped cream. For a crunchy touch, add chopped nuts on top. A drizzle of extra caramel sauce adds sweetness and contrast. Enjoy experimenting with these pairings! You learned how to make caramel apple cheesecake brownies. We covered the key ingredients, from the brownie base to the cream cheese layer. I shared step-by-step instructions for preparing, baking, and serving. You also gained tips to perfect your brownies and avoid common mistakes. Variations let you customize flavors, while storage info ensures they stay fresh. Experiment and enjoy this treat! You'll find it's fun to make and share.

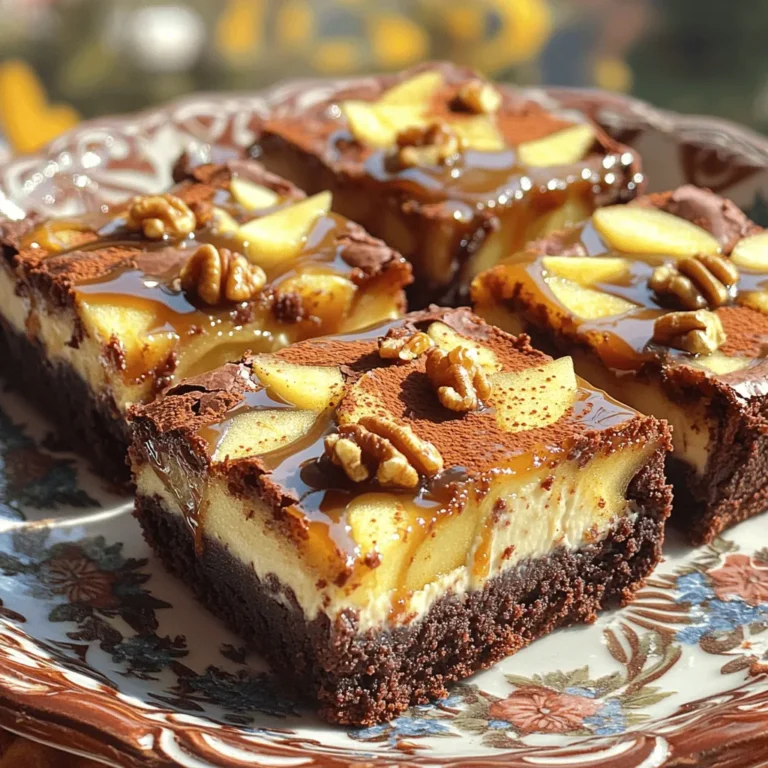
Caramel Apple Cheesecake Brownies Delightful Layered Treat

To make a delicious Pumpkin Pie Protein Smoothie, you will need the following ingredients: - 1 cup unsweetened almond milk - 1/2 cup canned pumpkin puree - 1 scoop vanilla protein powder - 1 teaspoon pumpkin pie spice - 1 banana, frozen - 1 tablespoon maple syrup (optional for sweetness) - 1 tablespoon chia seeds - A pinch of salt - Ice cubes (optional, for a thicker smoothie) These ingredients work together to create a creamy and flavorful smoothie. Almond milk keeps it light and dairy-free. Canned pumpkin adds a rich texture and is packed with nutrients. Vanilla protein powder boosts the smoothie with protein, making it a great post-workout drink. Pumpkin pie spice gives it that warm, cozy flavor we love in fall. A frozen banana adds natural sweetness and creaminess. You can adjust the sweetness by adding maple syrup if you like it sweeter. Chia seeds are a great source of fiber and healthy fats. Feel free to toss in some ice cubes if you want a thicker texture. Enjoy each sip of this tasty and nutritious smoothie! First, gather all your ingredients. You need: - 1 cup unsweetened almond milk - 1/2 cup canned pumpkin puree - 1 scoop vanilla protein powder - 1 teaspoon pumpkin pie spice - 1 frozen banana - 1 tablespoon maple syrup (optional) - 1 tablespoon chia seeds - A pinch of salt - Ice cubes (optional) Make sure to freeze the banana ahead of time if you want a cold, creamy smoothie. This step is key for a thick texture. Now, let’s blend! In your blender, add the almond milk, pumpkin puree, protein powder, and pumpkin pie spice. Blend on high until these mix well. Next, add the frozen banana, chia seeds, and a pinch of salt. If you like sweet smoothies, add maple syrup now. Blend again until it is smooth and creamy. You may need to scrape down the sides to mix everything evenly. To check the texture, pause and see if it’s thick enough. If you want it thicker, toss in a handful of ice cubes and blend again. Now, give your smoothie a taste. If it needs more sweetness, add a bit more maple syrup. Blend for a few more seconds to mix this in. Now you’re ready to pour and enjoy! For the best results, use a high-speed blender. These blenders break down ingredients well. If you have a regular blender, blend in stages. First, mix liquids and soft items. Then, add harder ingredients like frozen bananas or ice. To get a creamy texture, blend long enough to mix everything well. Scrape down the sides of the blender as needed. If your smoothie feels too thick, add a little more almond milk. To kick up the flavor, try adding a dash of nutmeg or cinnamon. Both spices pair well with pumpkin. You can also add a spoon of vanilla extract for extra sweetness. If you want a different sweetener, try honey or agave syrup. These options add a nice twist to your drink. Serve your smoothie in tall glasses to show off its beautiful color. For a fun touch, add whipped cream or a sprinkle of cinnamon on top. You can also use cute straws for a better sipping experience. Enjoy your smoothie right away for the best taste! {{image_2}} To make this smoothie vegan, swap the protein powder for plant-based protein. You can use pea or hemp protein. For sweetness, use agave syrup or date syrup instead of maple syrup. These swaps keep your smoothie tasty and plant-friendly. If you follow a keto diet, cut out the banana and maple syrup. Use a low-carb sweetener like erythritol or stevia. You can also replace almond milk with unsweetened coconut milk. These changes keep the carbs low while still being delicious. Want to boost the nutrition? Add a handful of spinach for extra vitamins. You can also stir in nut butters like almond or peanut. These additions make your smoothie creamier and more filling. Chia seeds are great too, adding fiber and omega-3s. To store leftover pumpkin pie protein smoothie, pour it into an airtight container. This helps keep it fresh in the fridge. Smoothies can stay good for up to 24 hours when refrigerated. If you want to keep it longer, freeze it in individual portions. Use freezer-safe containers or bags. Remember to leave some space at the top, as liquids expand when frozen. Smoothies are best enjoyed cold. If you prefer to warm it up, do so gently. Pour the smoothie into a pot and heat it on low. Stir often to avoid burning. You can also use a microwave, heating in short bursts. Check the temperature every 20 seconds to avoid overheating. Fresh smoothies last about one day in the fridge. If frozen, they can last for about one month. Just remember that the texture might change a bit after freezing. Always check the smell and look before consuming. If it looks off, it’s best to throw it away. A pumpkin pie protein smoothie tastes best fresh. If you have leftovers, store them in the fridge. Keep it in a sealed jar or bottle. It lasts about one day. After that, it may lose flavor and texture. For longer storage, freeze the smoothie. It can last for up to a month in the freezer. When you're ready to enjoy it, just thaw it in the fridge overnight. Yes, you can use fresh pumpkin! Fresh pumpkin offers great flavor and nutrition. To prepare it, first, you need to cook the pumpkin. Cut it in half and remove the seeds. Roast the halves in the oven at 400°F for about 45 minutes. Once it’s soft, scoop out the flesh and let it cool. Blend it until smooth. Use the same amount as the canned pumpkin in the recipe. Fresh pumpkin may have a lighter taste, so you might want to adjust the spices a little. This smoothie is perfect for meal prep! You can make it in advance to save time. Just blend all the ingredients and pour the mix into jars. Store the jars in the fridge for up to one day. If you want to keep it longer, freeze the jars. When you’re ready to drink, just thaw overnight. You can also blend the dry ingredients in advance. Then, add the wet ingredients and blend before serving. This way, you have a quick and tasty meal ready to go! This blog post shows you how to make a delicious pumpkin pie protein smoothie. We covered key ingredients, step-by-step blending, and tips for flavor and texture. You learned storage methods and how to adapt the recipe for different diets. Incorporating pumpkin into your smoothies boosts flavor and nutrition. Enjoy this tasty treat, and don’t hesitate to try your own twists. Happy blending!

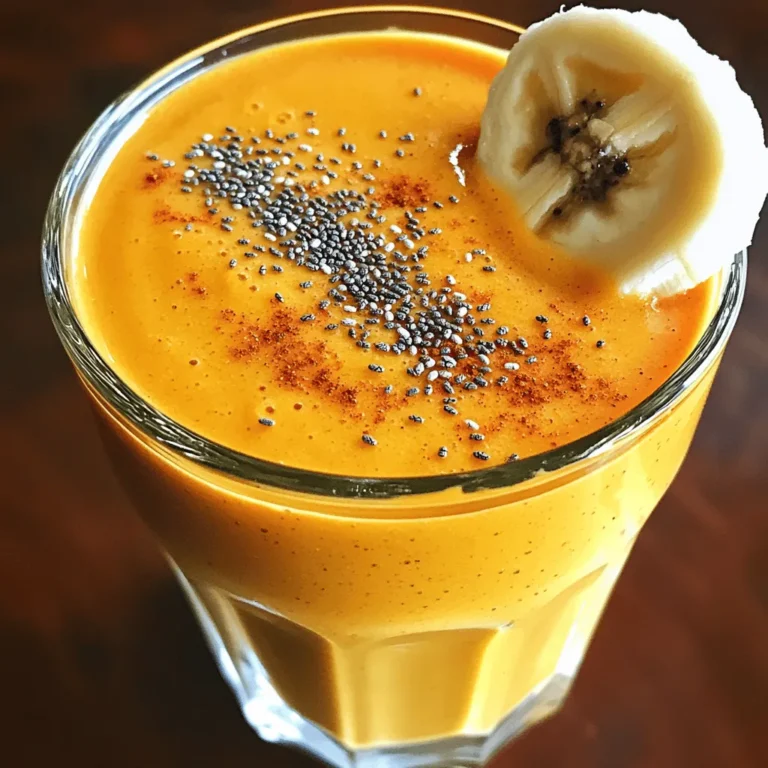
Pumpkin Pie Protein Smoothie Quick and Tasty Recipe

- 1 lb chicken tenderloins - 1 cup buttermilk - 1 cup all-purpose flour The main ingredients for Air Fryer Buffalo Chicken Tenders are simple yet effective. Chicken tenderloins offer a juicy and tender base. Buttermilk adds flavor and helps the coating stick. All-purpose flour creates that perfect crispy crust. - 1 teaspoon garlic powder - 1 teaspoon onion powder - 1 teaspoon smoked paprika - 1/2 teaspoon salt - 1/2 teaspoon black pepper Seasonings bring your chicken to life. Garlic powder gives a robust flavor. Onion powder adds sweetness, and smoked paprika lends a smoky touch. Salt and black pepper balance the overall taste perfectly. - 1/2 cup buffalo hot sauce - 2 tablespoons unsalted butter, melted - Optional: chopped green onions and celery sticks for garnish The buffalo sauce is key for that signature kick. You combine buffalo hot sauce with melted butter to create a rich, spicy blend. Green onions and celery are great for garnish, adding freshness and crunch. To start, you need to marinate the chicken tenders. First, in a large bowl, combine 1 cup of buttermilk with a pinch of salt and pepper. This mix will make the chicken tender and flavorful. Next, add the chicken tenderloins to the buttermilk. Cover the bowl and refrigerate for at least 30 minutes. If you have time, let it sit for up to 2 hours. This wait helps the chicken absorb all the great flavors. While the chicken marinates, let's prepare the breading. In a shallow dish, mix together 1 cup of all-purpose flour, 1 teaspoon of garlic powder, 1 teaspoon of onion powder, 1 teaspoon of smoked paprika, 1/2 teaspoon of salt, and 1/2 teaspoon of black pepper. This mix adds a nice flavor. Make sure to mix well. An even coating on the chicken is key. It helps the tenders cook evenly and get that perfect crunch. Next, preheat your air fryer to 400°F (200°C) for about 5 minutes. This step is important for crispy chicken. After preheating, remove the chicken from the buttermilk. Let the excess buttermilk drip off. Dredge each tender in the flour mixture. Make sure to coat all sides evenly. Now, place the coated chicken tenders in the air fryer basket in a single layer. You may need to cook in batches. Lightly spray the chicken with cooking oil to help it crisp up. Cook the chicken tenders for 10-12 minutes. Flip them halfway through for even cooking. They should be golden brown and cooked through, reaching an internal temperature of 165°F (75°C). To get those crispy tenders, I always use cooking oil spray. A light mist helps the breading crisp up. It makes a big difference! Also, cook in batches. If you crowd the basket, the tenders won’t fry well. Give each piece space to breathe. Marinate the chicken for at least 30 minutes. This time helps the meat soak up flavor. You can even go up to 2 hours for extra taste. Try adding spices to the buttermilk for more flavor. A splash of hot sauce or a squeeze of lemon juice can work wonders too. Always check the internal temperature. It should be 165°F (75°C) to ensure safety. Look for a golden brown color on the outside. The tenders should feel firm, not soft. That’s how you know they’re cooked perfectly! {{image_2}} To make your chicken tenders spicier, you can add extra hot sauce. Just mix more buffalo sauce with the melted butter. Taste it to see if it fits your spice level. You can also try different spice blends. A dash of cayenne pepper or chili powder can add a nice heat. If you love heat, this is a fun way to customize your dish. If you want a healthier meal, consider substituting almond flour for all-purpose flour. Almond flour gives a nice crunch and adds healthy fats. You can also use low-fat buttermilk. This swap keeps the dish creamy without the extra calories. Both changes keep the flavors but cut down on the calories. Pair your buffalo chicken tenders with tasty dips. Ranch dressing or blue cheese dressing makes a perfect match. You can also try celery sticks as a crunchy side. For a complete meal, serve these tenders with a side salad or sweet potato fries. These simple additions make your dish even better. To store leftovers, let the chicken tenders cool. Place them in an airtight container. This keeps them fresh for your next meal. You can also wrap them tightly in plastic wrap. Use a shallow dish for best results. Recommended storage containers include glass or BPA-free plastic. They seal well and help avoid odors. Label the container with the date. This way, you track how long they have been stored. You can freeze cooked tenders for a quick meal later. Let them cool completely before freezing. Place them in a freezer-safe bag or container. Remove as much air as possible to prevent freezer burn. For reheating, use the air fryer for best texture. Set it to 350°F (175°C) for about 8-10 minutes. This keeps them crispy. You can also use the oven, but check often to avoid drying them out. In the fridge, cooked tenders last about 3-4 days. If frozen, they can last up to 3 months. Always check for signs of spoilage. Look for an off smell, slimy texture, or discoloration. If you see any of these, it’s best to toss them out. Yes, you can use frozen chicken tenderloins. Just remember to thaw them first. To thaw, place the frozen chicken in the fridge overnight. If you're short on time, you can use the cold water method. Simply seal the chicken in a bag and submerge it in cold water for about an hour. Once thawed, marinate them like fresh ones. This helps keep them juicy. You can serve these tenders with many tasty sides. Here are some ideas: - Celery sticks: Crisp and fresh, they cool the spice. - Carrot sticks: Sweet and crunchy, they add a nice contrast. - French fries: Classic and loved by all, they pair well with the tenders. - Blue cheese dressing: Creamy and tangy, it complements the heat. - Ranch dressing: A favorite choice for dipping. Feel free to mix and match these sides for a full meal. To reduce the heat, use less buffalo sauce. You can also mix the buffalo sauce with some melted butter. This makes a milder sauce while keeping the flavor. Another option is to add honey or brown sugar to sweeten the sauce. This balances the heat and adds a nice touch. Adjust the heat to fit your taste! This blog covered how to make tasty Air Fryer Buffalo Chicken Tenders. We discussed the key ingredients like chicken, buttermilk, and spices. I provided step-by-step instructions for marinating, breading, and cooking. You learned tips for crispy tenders and variations to suit your taste. Lastly, I shared storage info to keep leftovers fresh. Enjoy making these tenders as a fun meal or snack. With practice, you'll perfect your method and impress everyone.

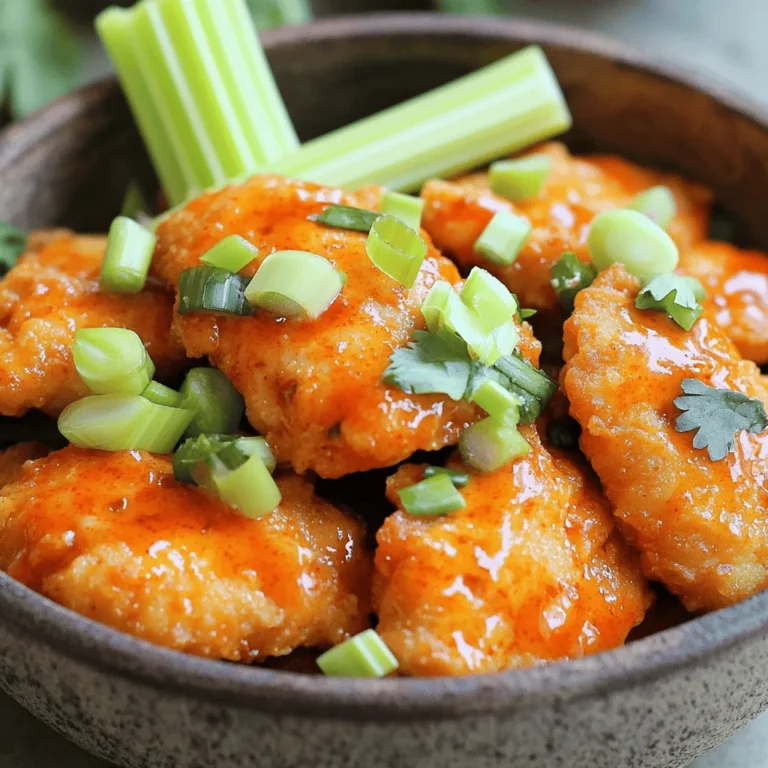
Air Fryer Buffalo Chicken Tenders Crispy and Easy Meal

- 2 pounds beef chuck, cut into 1-inch pieces - 1 medium onion, diced - 3 cloves garlic, minced - 8 ounces mushrooms, sliced For this dish, beef chuck is your best choice. It becomes tender and juicy when cooked low and slow. The onion and garlic add a rich base flavor. Sliced mushrooms bring in an earthy taste that pairs well with beef. - 1 tablespoon Worcestershire sauce - 2 teaspoons dried thyme - 1 teaspoon paprika - Salt and pepper to taste Worcestershire sauce adds a deep, savory flavor to the mix. Dried thyme and paprika give warmth and depth. Don’t forget to season with salt and pepper. These simple seasonings are key to a great beef stroganoff. - 2 tablespoons cornstarch mixed with 2 tablespoons water (for thickening) - 1 cup sour cream or Greek yogurt - Fresh parsley, chopped (for garnish) If you want a thicker sauce, use cornstarch and water. Adding sour cream or Greek yogurt makes the dish creamy. Finally, fresh parsley adds a nice touch of color and flavor when you serve it. - First, cut the beef chuck into 1-inch pieces. - In a large bowl, season the beef with salt, pepper, paprika, and thyme. Make sure to coat it well. - Now, take your slow cooker. Add the seasoned beef, diced onion, sliced mushrooms, and minced garlic together. - Pour in the beef broth and Worcestershire sauce. Stir everything until it's all mixed well. - Place the lid on the slow cooker and set it up. - Choose the low setting and cook for 7-8 hours. If you’re short on time, you can set it to high for 3-4 hours. - Check the beef for tenderness. It should be very soft when done. - About 30 minutes before serving, cook the egg noodles. Follow the package instructions for best results. - If you want a thicker sauce, mix the cornstarch with water. Stir this into the slow cooker. Let it cook for 10-15 minutes to thicken. - Finally, stir in the sour cream or Greek yogurt. Mix until everything is creamy. Adjust the seasoning with salt and pepper as needed. - Serve the beef stroganoff over the cooked egg noodles. Don’t forget to garnish with chopped fresh parsley. To get the right sauce consistency, start with enough liquid. The beef broth should cover the meat and veggies. If you want a thicker sauce, add the cornstarch mix toward the end. This helps it thicken nicely. Stir it well and let it cook for 10-15 minutes. For seasoning, always taste as you go. Adding salt and pepper in steps helps build flavor. The dried thyme and paprika give a warm taste. Don’t be shy to add more if you like! Use a slow cooker that holds at least 6 quarts. This size fits 2 pounds of beef and all the extras well. It lets the meat cook evenly and stay tender. For prep, have a sharp knife and a cutting board ready. A sturdy spoon helps in mixing your ingredients. You might also need measuring cups for accuracy. Serve your beef stroganoff over egg noodles. They soak up the sauce and add a nice texture. You can also try rice or mashed potatoes as a base. For garnish, sprinkle chopped parsley on top. It adds color and freshness. You can also serve with a side of steamed veggies for a complete meal. {{image_2}} You can switch up the meat in this recipe. Try chicken or pork instead of beef. For a vegetarian option, use mushrooms or lentils. This keeps the dish tasty and fun. If you need a dairy-free option, swap sour cream for coconut yogurt or cashew cream. These work well and still add creaminess to your stroganoff. Want to add more flavor? Toss in some vegetables like carrots or peas. They not only boost nutrition but also add color. You can also try herbs like rosemary or spices like cumin. Each change makes the dish unique. You can serve beef stroganoff over rice instead of noodles. This gives a different texture and flavor. Another fun idea is to serve it in a bread bowl. The bread soaks up the sauce and adds a delicious crunch. To keep your beef stroganoff fresh, use airtight containers. Glass or plastic containers work well. Make sure they seal tightly to avoid air. Store leftovers in the fridge within two hours of cooking. This helps prevent bacteria growth. You can freeze beef stroganoff for later use. First, let it cool completely. Then, place it in a freezer-safe container. Leave some space at the top for expansion. It will stay fresh for up to three months. To reheat, thaw it in the fridge overnight. Heat on low in a pot, stirring gently. You can also use a microwave. Add a splash of beef broth if it seems dry. Beef stroganoff lasts about three to four days in the fridge. If you freeze it, it can last three months. Always check for any off smells or changes in texture before eating. Safe storage is key to enjoying your meal later! You can use Greek yogurt or cream cheese as a sour cream substitute. Both options add creaminess and flavor. For a lighter choice, try plain yogurt. If you want a dairy-free option, use cashew cream or coconut cream. Each option gives a different taste, so choose what you like best. Yes, you can use frozen beef. Just remember to add extra cooking time. If you use frozen beef, place it directly in the slow cooker. Avoid thawing it first. It may take about 30 minutes longer to cook. Always check that the beef reaches a safe temperature. Slow cooker beef stroganoff pairs well with many sides. Here are some great options: - Egg noodles: Classic and comforting. - Rice: White or brown rice works well. - Mashed potatoes: A creamy, hearty choice. - Steamed vegetables: Broccoli or green beans add freshness. - Salad: A simple green salad for crunch. These sides will balance the rich flavors of the beef stroganoff. Enjoy your meal! This blog covered how to make slow cooker beef stroganoff. We explored key ingredients like beef chuck, mushrooms, and spices. I showed you how to prepare, cook, and add finishing touches for the dish. You learned helpful tips and best equipment for cooking. I also shared fun variations and storage tips. Slow cooker beef stroganoff is a tasty, easy meal. Enjoy trying different ingredients and serving ideas. Your cooking will shine!

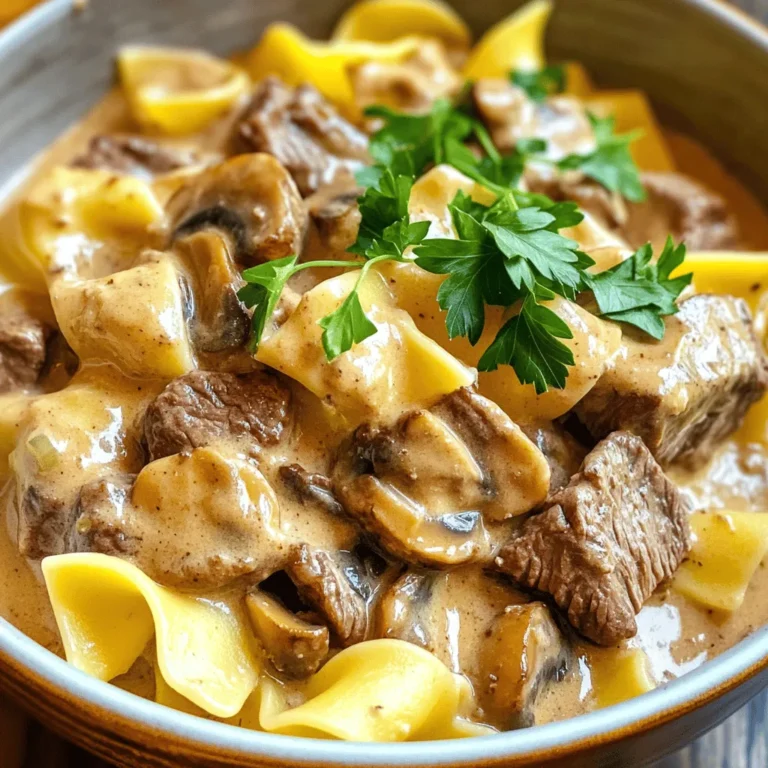
Savory Slow Cooker Beef Stroganoff Easy and Delicious

PREV 1 … 22 23 24 … 57 NEXT
meal twig

explore

DessertsDinnerAppetizersDrinks

Our Policies

  • Cookie Policy
  • Copyright Policy
  • Disclaimer
  • GDPR Policy
  • Terms Of Use
Back to Top
  • About
  • Contact Us
  • Privacy Policy
© 2025 meal twig