FREE DINNER EBOOK! Get your copy!
  • Cookie Policy
  • GDPR Policy
  • Disclaimer
  • Terms Of Use
  • Visit my other site: Fun Cookie Recipes
meal twig
  • Home
  • Dinner
  • Desserts
  • Drinks
  • Appetizers
  • Contact
  • About
  • Privacy Policy
  • Home
  • Dinner
  • Desserts
  • Drinks
  • Appetizers
  • Contact
  • About
  • Privacy Policy
  • Cookie Policy
  • GDPR Policy
  • Disclaimer
  • Terms Of Use
Visit my other site: Fun Cookie Recipes

HOME / CATEGORIES /

Latest

- 2 cups cooked jasmine rice - 1 pound shrimp, peeled and deveined - 3 tablespoons vegetable oil - 2 cloves garlic, minced - 1 small onion, diced - 1 bell pepper, diced - 1 cup frozen peas and carrots mix - 3 large eggs, beaten - 3 tablespoons soy sauce - 1 tablespoon sesame oil - Salt and pepper to taste - Optional: Sriracha for heat In this dish, using day-old jasmine rice makes a big difference. The rice dries out, which prevents it from getting mushy. Fresh rice can work, too, if you cool it first. Just spread it out on a baking sheet for about 30 minutes. You will need shrimp that is peeled and deveined. This saves time and helps the shrimp cook evenly. When you buy shrimp, look for ones that are firm and smell fresh. The vegetables add color and nutrition. Garlic gives a strong aroma, while onion adds sweetness. Bell pepper can be red or green, depending on your taste. The frozen peas and carrots mix is easy and adds a nice crunch. Eggs are key for richness. They bind the dish together and add protein. Soy sauce and sesame oil boost the flavor, making it savory and slightly nutty. Adjust the Sriracha if you like heat. Gather all these ingredients to create a meal that is better than takeout! - Prep the Rice: If you don’t have day-old rice, spread freshly cooked rice on a baking sheet. Let it cool for about 30 minutes. This helps it dry out. - Cook the Shrimp: Heat 1 tablespoon of vegetable oil in a large skillet over medium-high heat. Add the shrimp, seasoning with salt and pepper. Cook until they turn pink and opaque, about 2-3 minutes. Remove the shrimp and set them aside. - Sauté Garlic and Onion: In the same pan, add another tablespoon of oil. Toss in minced garlic and diced onion. Cook until the onion is translucent, about 2 minutes. - Adding Bell Pepper: Add the diced bell pepper. Cook for an additional 2-3 minutes until it softens and adds flavor. - Add Peas and Carrots: Stir in the frozen peas and carrots. Cook for about 2 minutes, just until they heat through. - Scramble Eggs: Push the vegetables to one side of the pan. On the empty side, add the last tablespoon of oil and pour in the beaten eggs. Scramble until fully cooked, then mix them with the vegetables. - Combine and Flavor: Add the cooked shrimp back to the pan along with the jasmine rice. Use a spatula to break up any clumps. Mix everything well. Drizzle soy sauce and sesame oil over the rice mixture. Stir and cook for another 3-4 minutes to meld the flavors. - Finish Up: Stir in chopped green onions. Taste and adjust seasoning with more salt, pepper, or Sriracha for heat if desired. To get that perfect fried rice texture, use day-old rice. Fresh rice is too moist and can clump together. If you don’t have day-old rice, spread freshly cooked rice on a baking sheet to cool. Leave it out for about 30 minutes. This helps dry it out. Cooking shrimp perfectly is key. Heat your skillet to medium-high. Add just enough oil to coat the pan. Season the shrimp with salt and pepper. Cook them for 2-3 minutes until they turn pink and opaque. Don’t overcook them; they should be tender and juicy. For flavor, use low-sodium soy sauce. It adds umami without too much salt. This keeps your dish balanced. You can also adjust the heat with Sriracha. Just drizzle some in when you mix in the soy sauce. Start with a little and taste as you go. For a beautiful presentation, serve your shrimp fried rice in large bowls. This makes it feel special. Top it with extra chopped green onions for color and crunch. You can also sprinkle sesame seeds on top. For a fresh touch, add lime wedges on the side. Squeeze them over the rice for a zesty kick. {{image_2}} You can easily change the shrimp to chicken or tofu. Each option gives a new taste. Adding vegetables makes it even better. Try broccoli or snap peas for crunch and color. These swaps keep the dish fresh and fun. Want to boost the flavor? Swap out soy sauce for oyster sauce. It adds a rich taste that many love. You can also try different oils, like peanut oil or even coconut oil. Each oil brings a unique twist to the dish. If you're gluten-free, use tamari instead of soy sauce. It tastes just as good. For a vegan version, skip the shrimp and eggs. Use tofu and add a bit more veggies. This way, everyone can enjoy shrimp fried rice! To keep shrimp fried rice fresh, store it in an airtight container. Place it in the fridge as soon as it cools down. This helps keep out moisture and air. It stays fresh for about 3 to 4 days. When reheating, use a skillet for the best texture. Heat a little oil in the pan and add the rice. Stir it often, so it warms evenly. You can also use the microwave. Add a splash of water to keep it moist. Cover the dish to trap steam. If you have extra fried rice, consider making a fried rice omelet. Just scramble some eggs, add the rice, and cook until golden. This gives you a tasty new dish! Yes, you can use frozen shrimp. Just thaw them first. Place shrimp in cold water for about 15 minutes. Pat them dry with a paper towel. This helps avoid excess water in your dish. Using frozen shrimp can save time. They are also easy to store and last longer. Just make sure they are peeled and deveined. You can enjoy the same great taste as fresh shrimp. To keep your fried rice from being mushy, use day-old rice. Freshly cooked rice holds moisture. This can lead to a soggy dish. If you must use fresh rice, cool it first. Spread it on a baking sheet for 30 minutes. Another tip is to avoid overcooking the rice. Use high heat when frying. Stir-fry quickly to keep the rice fluffy. Finally, don’t forget to break up clumps while cooking. Jasmine rice is the best choice for fried rice. It has a nice aroma and fluffy texture. This rice stays separate when cooked, which is perfect for stir-frying. If you don’t have jasmine rice, other options work too. Long-grain rice or basmati rice can be used. Both types will give you a good result. Just remember to cook the rice and let it cool before using it. This guide covers everything you need to know about shrimp fried rice. You learned about key ingredients, cooking steps, and helpful tips for the best texture. Customizations let you adapt the recipe to your taste. Plus, proper storage keeps leftovers fresh. Shrimp fried rice is simple, tasty, and can fit your diet. Enjoy making this easy dish at home! It will impress your friends and family while satisfying your cravings.

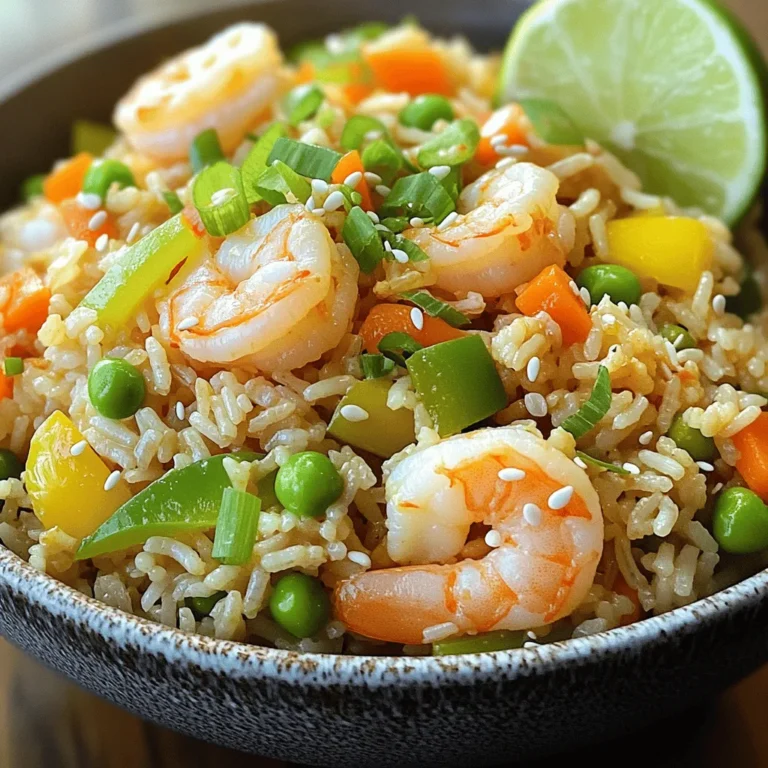
Shrimp Fried Rice Better Than Takeout Delight

- 1 cup graham cracker crumbs: These crumbs form the base of your cheesecake. They create a sweet, crunchy layer. - 2 tablespoons melted butter: This binds the crumbs together and adds richness. - 16 oz cream cheese, softened: Cream cheese gives the cheesecake its creamy texture. Make sure it’s at room temperature for easy mixing. - 1 cup powdered sugar: This sweetens the filling and helps it stay smooth. - 1 teaspoon vanilla extract: This adds a warm flavor that enhances the cheesecake. - 1 cup heavy cream: Whipping this cream makes the cheesecake light and fluffy. - 1/2 cup salted caramel sauce: This provides the sweet and salty flavor we love. You can use store-bought or homemade. - Flaky sea salt for garnish: This adds a finishing touch, balancing the sweetness. - Graham cracker crumbs: You can use crushed cookies like Oreos or digestive biscuits for a different flavor. - Cream cheese: Neufchâtel cheese works well for a lighter version. - Heavy cream: Look for coconut cream if you want a non-dairy option. - Salted caramel sauce: Try making your own with sugar, cream, and butter for a fresh taste. This simple list helps you gather all the elements for a delicious dessert. Each ingredient plays a key role in making these no-bake salted caramel cheesecake jars a delightful treat. First, gather your graham cracker crumbs and melted butter. In a mixing bowl, combine them well. You want the mixture to feel like wet sand. This texture helps the crust hold together. Next, take six small jars or cups. Divide the mixture evenly among them. Press it down gently with your fingers. This creates a firm layer at the bottom. Now, let’s focus on the filling. In a separate bowl, add the softened cream cheese. Beat it until it becomes smooth and creamy. This step is key for a good texture. Gradually add the powdered sugar while you mix. Then, stir in the vanilla extract for flavor. In another bowl, whip the heavy cream until you see soft peaks. This means it’s ready. Gently fold the whipped cream into the cream cheese mixture. Be careful not to deflate it. You want a light and airy filling. Time to put it all together! Start by spooning the cheesecake filling over the crust in each jar. Leave some space for caramel. Drizzle the salted caramel sauce on top of each jar. You want enough to enjoy the flavor without drowning the cheesecake. After assembling, cover the jars with lids or plastic wrap. Refrigerate them for at least 4 hours. Chilling is important. It helps the flavors develop and the cheesecake to set. Enjoy your delicious no-bake salted caramel cheesecake jars! To get a creamy cheesecake, be sure to beat the cream cheese well. Start with softened cream cheese. This makes mixing easier. Gradually add in powdered sugar. Mix until it is smooth. For the cream, whip it until you see soft peaks. This means the cream holds some shape but is not stiff. Gently fold the whipped cream into the cream cheese mixture. This keeps the cheesecake light and fluffy. To boost the caramel flavor, use more salted caramel sauce. You can add a little extra to the filling. This makes each bite rich and sweet. You can also try different extracts. Almond or hazelnut extracts add unique notes. Just a drop or two can change the flavor profile. When serving in jars, think about creative ways to show them off. Use clear jars so the layers show. This makes them look fancy. For garnishing, sprinkle flaky sea salt on top. This gives a nice crunch and enhances the flavor. You can also add a drizzle of caramel and some crust crumbs. This makes the jars even more appealing. {{image_2}} You can change up the flavor of your no-bake salted caramel cheesecake jars easily. Try a chocolate caramel cheesecake by adding cocoa powder to the cream cheese mix. This adds a rich and decadent twist. You can also use chocolate graham crackers for the crust. For something fruity, blend in puréed berries like strawberries or raspberries for a fresh touch. You can also fold in lemon zest to give it a bright flavor. If you need gluten-free options, swap graham crackers with gluten-free cookies or almond flour. For a vegan version, use dairy-free cream cheese and coconut cream instead of heavy cream. Replace powdered sugar with a powdered sugar substitute for a low-sugar option. These swaps can make this treat fit many diets without losing flavor. Incorporating seasonal fruits can make this dessert even more special. For summer, add fresh peaches or blueberries on top. In the fall, try a spiced pumpkin topping for a cozy vibe. Use festive toppings during holidays, like crushed peppermint or chocolate shavings. These variations keep the dessert exciting and fresh all year round. You can store these cheesecake jars in the fridge for up to five days. Make sure to cover them tightly with lids or plastic wrap. This keeps them fresh and tasty. If you want to save them longer, you can freeze them. To freeze, simply cover the jars with plastic wrap. Then, place them in an airtight container. They can last up to three months in the freezer. When you’re ready to enjoy your cheesecake after freezing, take it out and let it thaw in the fridge overnight. This helps maintain the smooth texture. If you want to serve them right away, let them sit at room temperature for about 30 minutes. Do not microwave them, as this can ruin the cheesecake texture. For the best experience, add a drizzle of salted caramel on top before serving. Enjoy the delightful flavors! Yes, you can! Try using Oreo cookies for a rich chocolate flavor. You can also use vanilla wafers or even shortbread cookies. Each type will add its own taste and texture. Simply crush them as you would with graham crackers. You may need to adjust the butter amount to keep the crust firm. The cheesecake needs at least 4 hours to chill. This helps it set well and allows the flavors to mix. If you can, chill it overnight for the best taste. The longer it chills, the creamier it feels. Absolutely! This cheesecake is perfect to make ahead. Just prepare the jars and store them in the fridge. They will stay fresh for about three days. This way, you can enjoy your event without cooking at the last minute. Start with the crust as the first layer. Press it down firmly in each jar. Then, spoon the cheesecake filling gently on top. For the caramel, drizzle it on last. Try to make each layer even for a nice look. You can alternate layers if you like for a fun twist! This blog post covered everything you need to make delicious cheesecake jars. We explored the main ingredients, preparation steps, tips for the perfect texture, and tasty variations. Remember to chill your jars for the best flavor. Don't hesitate to get creative with flavors or presentation. You can even store them for later. Now you have the tools to impress yourself and others with these sweet treats. Enjoy making your cheesecake jars!

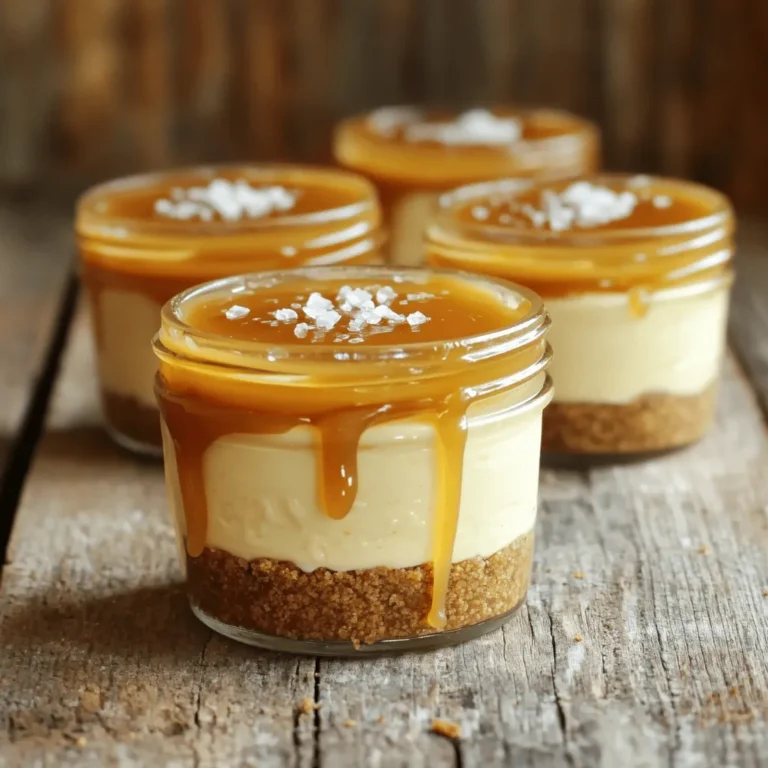
No-Bake Salted Caramel Cheesecake Jars Delight

To make these yummy pancakes, gather these main ingredients: - 1 cup rolled oats - 1 scoop vanilla protein powder - 1/2 cup canned pumpkin puree - 1 teaspoon baking powder - 1 teaspoon pumpkin pie spice - 1/2 teaspoon cinnamon - 2 eggs - 1/2 cup almond milk (or milk of choice) - Cooking spray or coconut oil for the pan These ingredients work together to create a fluffy and tasty pancake. The oats add fiber, while the protein powder boosts the nutrition. Feel free to mix in these optional ingredients to make the pancakes your own: - 1 tablespoon maple syrup (for added sweetness) - Chopped nuts (like pecans or walnuts) - A spoonful of yogurt (for creaminess) - Chocolate chips (for a fun twist) You can adjust the flavor and texture based on what you enjoy. These extras can make each pancake a special treat. Here’s why these ingredients are great for you: - Rolled oats: Full of fiber, they help you feel full and give energy. - Pumpkin puree: Packed with vitamins A and C, it supports your immune system. - Protein powder: This helps with muscle recovery and keeps you satisfied longer. - Almond milk: A low-calorie alternative to dairy, it is often rich in vitamins. Using these key ingredients not only makes the pancakes tasty but also keeps your breakfast healthy. You can enjoy a delicious meal that fuels your day. First, we need to make oat flour. Place 1 cup of rolled oats into a blender. Blend until the oats become a fine flour. This step is quick and easy. Next, add 1 scoop of vanilla protein powder, 1 teaspoon of baking powder, 1 teaspoon of pumpkin pie spice, and 1/2 teaspoon of cinnamon to the blender. Pulse the mixture a few times to blend the dry ingredients well. In a separate bowl, gather your wet ingredients. Whisk together 2 eggs, 1/2 cup of canned pumpkin puree, and 1/2 cup of almond milk. If you like, add 1 tablespoon of maple syrup for sweetness. Make sure the mixture is smooth, as this will help your pancakes be fluffy and tasty. Once mixed, pour this wet mixture into the blender with the dry ingredients. Blend everything until combined. Let the batter sit for a few minutes. This helps it thicken and gives you better pancakes. Now it’s time to cook! Heat a non-stick skillet over medium heat. Lightly grease it with cooking spray or coconut oil. Pour about 1/4 cup of batter onto the skillet for each pancake. Cook for 2 to 3 minutes until bubbles form on the surface. Flip the pancakes carefully and cook for another 2 to 3 minutes, or until they turn golden brown. Repeat this process with the remaining batter, adding more oil as needed. Enjoy your delicious pumpkin spice protein pancakes! To cook your pancakes well, start with a hot pan. Heat it on medium. Use a non-stick skillet or griddle. This helps prevent sticking and ensures easy flipping. Lightly grease the pan with cooking spray or coconut oil. This keeps the pancakes from burning. Pour the batter gently onto the skillet for even shapes. Fluffy pancakes are the best. To make them fluffy, let the batter rest for a few minutes. This helps it thicken. The baking powder activates, adding air. For extra fluff, separate the eggs. Whip the egg whites until they are stiff and fold them in gently. This adds even more air to the mix. If you have leftover pancakes, don’t worry! You can reheat them easily. The best way is in a toaster. Just pop them in until warm. You can also use the microwave. Heat them on low for about 15-20 seconds. Be careful not to overheat, or they can become tough. If you want to crisp them up, use a skillet over low heat. This gives them a nice texture again. {{image_2}} You can change the flavor of your pancakes easily. Try adding nutmeg for a warm kick. Cardamom brings a sweet, floral taste. For a fun twist, mix in some cocoa powder for chocolate pancakes. You can even add a splash of vanilla extract. Each spice adds its own charm, making breakfast fun. If you don't have protein powder, don’t worry! You can use ground nuts like almonds or walnuts. They add healthy fats and protein. Greek yogurt also works well. It makes the pancakes rich and creamy. You can replace protein powder with extra oats too. Just blend them into flour and keep the rest of the recipe the same. To make these pancakes paleo, swap the protein powder for almond flour. Use mashed banana in place of eggs for binding. This keeps it grain-free and light. For a vegan version, use flax eggs. Just mix one tablespoon of ground flaxseed with three tablespoons of water. Let it sit until it thickens. This way, everyone can enjoy these tasty pancakes! To keep your pumpkin spice protein pancakes fresh, store them in an airtight container. You can place a piece of parchment paper between each pancake. This helps prevent them from sticking together. Keep the container in the fridge. They will stay good for about 3 to 5 days. To freeze pancakes, let them cool completely first. Stack them with parchment paper between each one. Then, wrap the stack tightly in plastic wrap or foil. Place the wrapped pancakes in a freezer-safe bag. Remove as much air as possible before sealing. Frozen pancakes are best used within 2 to 3 months for the best flavor. To thaw your frozen pancakes, simply take out the number you need. Place them in the fridge overnight for a slow thaw. If you need them quickly, use the microwave. Heat them in 20-second bursts until warm. You can also reheat them in a skillet over low heat. This gives them a nice crisp outside. Enjoy your delicious pancakes anytime! Yes, you can make these pancakes gluten-free. Just use gluten-free rolled oats. Blend them into flour as you would with regular oats. This swap keeps the texture while ensuring everyone can enjoy them. If you want to skip protein powder, use ground nuts or seeds. Almond flour or hemp seeds work well. You can also try adding Greek yogurt for protein and creaminess. Adjust the liquid in the recipe to keep the batter smooth. To make pancakes without eggs, use a flaxseed or chia seed mixture. Mix one tablespoon of ground seeds with three tablespoons of water. Let it sit for a few minutes to thicken. This mix binds the ingredients just like eggs do. These Pumpkin Spice Protein Pancakes are simple and tasty. We covered key ingredients, like oats and protein powder, for nutrition. I shared steps to mix and cook them perfectly. You learned tips for fluffiness and reheating too. Experiment with spices or swap ingredients to fit your needs. Store leftovers properly or freeze them for later. Now, you can enjoy these pancakes anytime!

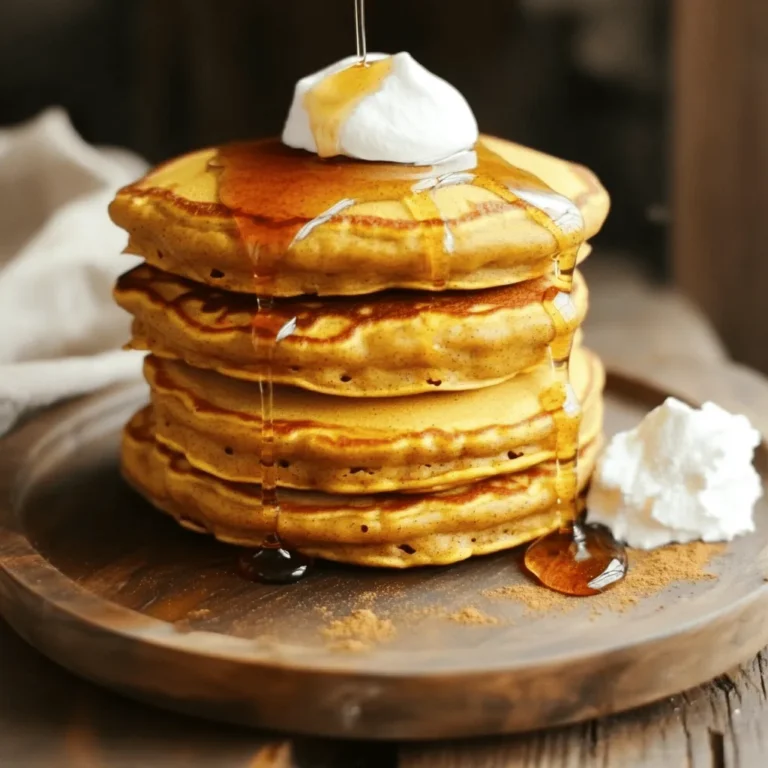
Pumpkin Spice Protein Pancakes Delightful Breakfast Treat

- 12 ounces cheese tortellini - 2 tablespoons olive oil - 1 medium onion, finely chopped - 3 cloves garlic, minced - 8 ounces mushrooms, sliced (cremini or button) - 5 cups fresh spinach, roughly chopped - 1 cup heavy cream - 1/2 cup grated Parmesan cheese - Salt and pepper to taste - 1/4 teaspoon nutmeg - Fresh basil, for garnish (optional) The right ingredients make all the difference in this creamy dish. First, you need cheese tortellini. It gives a rich flavor and nice texture. Next, we use olive oil. This helps sauté the veggies and adds healthy fat. Onions and garlic bring a savory base to the sauce. Mushrooms add earthiness. I prefer cremini mushrooms for their deeper taste, but button mushrooms work well too. Fresh spinach is key for color and nutrition. It wilts down and blends beautifully with the cream. Heavy cream creates that dreamy, silky sauce. Parmesan cheese adds umami depth and a bit of saltiness. Don't forget salt and pepper. They enhance all the flavors. Nutmeg gives a warm touch that makes the sauce special. Finally, fresh basil can brighten the dish if you choose to use it. With these ingredients, you set yourself up for a delightful cooking experience. To cook the tortellini to al dente, fill a large pot with water. Add a good amount of salt, then bring it to a boil. Once boiling, add 12 ounces of cheese tortellini. Cook according to the package instructions. Usually, this takes about 3 to 5 minutes. Stir gently to prevent sticking. The tortellini is ready when it is firm but tender. Drain the pasta and set it aside. In a large skillet, heat 2 tablespoons of olive oil over medium heat. Add 1 medium onion, finely chopped, and cook for about 3 to 4 minutes. The onion should turn translucent. Next, add 3 cloves of minced garlic and 8 ounces of sliced mushrooms. Stir and cook until the mushrooms soften and turn golden, about 5 to 7 minutes. Finally, toss in 5 cups of roughly chopped spinach. Cook until the spinach wilts, which takes about 2 to 3 minutes. Pour in 1 cup of heavy cream and bring it to a gentle simmer. Stir in 1/2 cup of grated Parmesan cheese, along with salt, pepper, and 1/4 teaspoon of nutmeg. Mix well until the cheese melts and the sauce becomes creamy. Add the cooked tortellini to the skillet and gently toss everything together. Cook for another 2 to 3 minutes until everything is heated through. Taste the dish and adjust the seasoning if needed. Serve warm, and feel free to garnish with fresh basil if you like. You can find many types of tortellini. Cheese tortellini is the most common. It has a rich flavor that pairs well with creamy sauces. You might also try spinach or mushroom-filled tortellini. These add more depth to your dish. If you want to be bold, try a meat-filled option. Each type brings its own taste. Choose what excites you the most! To make your dish pop, focus on seasoning. Start with salt and pepper. Taste as you go, and adjust as needed. Adding nutmeg gives a warm touch. It blends well with the cream and cheese. If you want more punch, try a splash of lemon juice. A hint of acidity balances the creaminess. Fresh herbs like basil or parsley can also brighten the dish. If you want a vegetarian version, swap out the cheese tortellini for a veggie option. Many brands offer spinach or mushroom tortellini without cheese. For a vegan dish, use coconut cream instead of heavy cream. Nutritional yeast can replace Parmesan cheese. It adds a cheesy flavor without dairy. You can also add more veggies like bell peppers or zucchini for texture and taste. {{image_2}} You can easily boost the nutrition of your creamy spinach mushroom tortellini by adding protein. Here are some tasty options: - Chicken: Grill or sauté some diced chicken breast. Add it to the creamy sauce for extra flavor and protein. - Shrimp: Sauté shrimp in olive oil until they turn pink. Toss them in with the tortellini for a seafood twist. - Tofu: For a vegetarian option, use firm tofu. Cube and sauté until golden. Mix it into the dish for a hearty bite. Each protein adds its unique taste, making the dish versatile. If you want to switch things up, try different veggies in your tortellini: - Kale: This adds a hearty texture. Use it instead of spinach for a nutrient boost. - Broccoli: Steamed broccoli florets can add crunch and color to your dish. - Zucchini: Sautéed zucchini provides a fresh taste and pairs well with the creamy sauce. Experimenting with veggies keeps the dish exciting and flavorful. For those avoiding gluten, there are great alternatives for tortellini: - Rice-Based Tortellini: Many brands offer gluten-free options made from rice flour. They cook similarly to regular tortellini. - Zucchini Noodles: Use a spiralizer to create zucchini noodles. They add a unique flavor and are low in carbs. - Chickpea Pasta: This type of pasta is high in protein and fiber. It works well in creamy dishes. These choices maintain the dish's integrity while catering to gluten-free diets. To store Creamy Spinach Mushroom Tortellini, let it cool first. Then, place it in an airtight container. You can keep it in the fridge for up to three days. When you want to eat it again, simply reheat it on the stove or in the microwave. Stir well to mix the sauce back in. If you want to save some for later, freezing works great! Portion the tortellini into freezer-safe bags. Remove as much air as possible before sealing. You can freeze it for up to three months. When you’re ready to enjoy, thaw it in the fridge overnight. Reheat it on low heat with a splash of cream to keep it creamy and delicious. Creamy Spinach Mushroom Tortellini stays fresh in the fridge for about three days. If you freeze it, it can last up to three months. Always check for off smells or changes in color before eating. If it looks or smells strange, it's best to toss it. Keeping track of these time frames helps ensure your meal stays tasty and safe. Yes, you can make this dish ahead of time. To do this, follow these steps: - Cook the tortellini as directed and let it cool. - Prepare the creamy sauce up to the step before adding tortellini. - Store the sauce and tortellini separately in airtight containers. - When ready to eat, heat the sauce on low and add the tortellini. Stir until warm. This method keeps the tortellini from becoming too soft. It also helps maintain the creamy texture of the sauce. Creamy Spinach Mushroom Tortellini pairs well with several sides. Here are some tasty options: - A simple green salad with a light vinaigrette. - Garlic bread for a crunchy side. - Roasted vegetables like asparagus or zucchini. - A side of sautéed greens to add more color and nutrition. These sides complement the rich flavors of the tortellini while adding balance to your meal. Yes, you can use frozen spinach and canned mushrooms. However, keep in mind some differences: - Frozen spinach is convenient. Just thaw and squeeze out excess water before cooking. It may have less flavor than fresh spinach. - Canned mushrooms save time but can be softer. Drain them well and add them to the dish later in the cooking process. Using these alternatives can change the texture and flavor slightly, but they still provide a delicious meal. This blog post has shared a simple and tasty recipe for Creamy Spinach Mushroom Tortellini. You learned about the key ingredients and step-by-step cooking instructions. The tips and variations can help you customize your dish. Don’t forget about storage options for leftovers and how to reheat them later. Overall, this meal is versatile and quick to make. Enjoy your cooking, and feel free to experiment with flavors! You can make this dish your own while enjoying its creamy goodness.

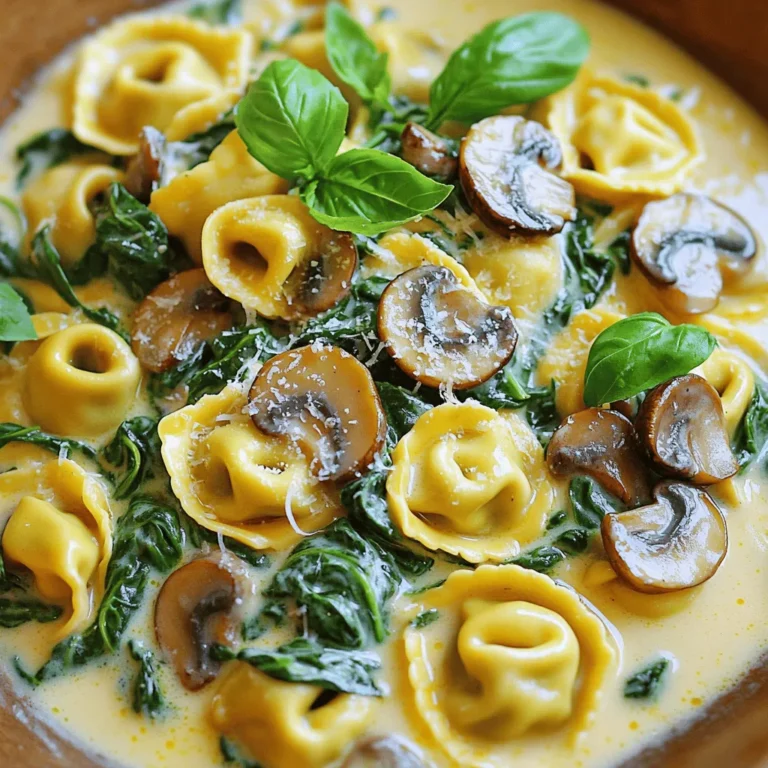
Creamy Spinach Mushroom Tortellini Delightful Dish

- 4 salmon fillets - 2 medium sweet potatoes, peeled and cubed - 1/4 cup pure maple syrup - 2 tablespoons Dijon mustard - 2 tablespoons olive oil - 1 teaspoon garlic powder - 1 teaspoon smoked paprika - Salt and pepper to taste - 1 tablespoon fresh rosemary, chopped (or 1 teaspoon dried) - 1 tablespoon fresh parsley, chopped (for garnish) Each serving of Maple Glazed Salmon and Sweet Potatoes has about: - Calories: 450 - Protein: 30g - Carbohydrates: 35g - Fat: 20g - Fiber: 5g - Sugars: 10g This dish offers a good balance of protein and healthy carbs. The salmon is rich in omega-3s, great for heart health. Sweet potatoes bring fiber and vitamins, making this meal nourishing. When choosing salmon, look for bright color and firm texture. Fresh salmon should smell like the ocean, not fishy. You can pick wild-caught for a more robust flavor or farmed for sustainability. For sweet potatoes, go for ones that are firm and smooth. Avoid any with soft spots or blemishes. A deep orange color inside means they are sweet and nutritious. These simple tips will help you pick the best ingredients for your dish. Enjoy the flavors that come from fresh, high-quality food! First, set your oven to 425°F (220°C). This high heat helps cook the salmon and sweet potatoes fast. While the oven heats up, grab a large sheet pan. Line it with parchment paper. This will make cleanup a breeze later. In a large bowl, mix the maple syrup, Dijon mustard, and olive oil. Add the garlic powder, smoked paprika, salt, and pepper. Stir until everything is well blended. This glaze will give your salmon a sweet and tangy flavor. Next, add the cubed sweet potatoes to the bowl with the glaze. Toss them until they are all coated. Spread the sweet potatoes out on one side of the sheet pan. Place the salmon fillets on the other side. Brush each fillet with any leftover glaze. Don’t forget to sprinkle fresh chopped rosemary on top for a nice touch. Now, it's time to bake! Place the pan in the oven for 20-25 minutes. You want the salmon to flake easily with a fork. The sweet potatoes should be tender and caramelized. When done, take the pan out and let it rest for a few minutes. Drizzle any extra glaze over the top before serving. Enjoy your delicious meal! To get the best salmon, choose fillets that are even in thickness. This helps them cook evenly. I recommend using skin-on salmon. The skin keeps the fish moist. Cook the salmon on a high heat. This gives you a nice crispy edge. Bake it until it flakes easily with a fork. This usually takes 20 to 25 minutes. Always let the salmon rest for a few minutes after cooking. This helps keep it juicy. For sweet potatoes, cube them evenly. This ensures they cook at the same rate. Toss them well in the glaze before baking. This gives them a nice coating. Spread them out in a single layer on the pan. Avoid crowding them, so they can caramelize. Bake them until they are tender and golden brown. This usually takes about 20 to 25 minutes. If they need more color, turn on the broiler for a minute or two. Just watch them closely to prevent burning. Store any leftovers in an airtight container. Place them in the fridge and use them within three days. To reheat, place the salmon and sweet potatoes in an oven-safe dish. Cover it with foil to keep moisture. Heat at 350°F (175°C) until warmed through. This helps maintain the flavors and texture. You can also enjoy the leftovers cold in a salad or wrap. {{image_2}} You can switch up the glaze for your salmon. Try honey or brown sugar. Both add a sweet touch. For a spicy kick, mix in some Sriracha. This gives a nice heat. You can also use soy sauce for a savory twist. Mixing maple syrup with soy sauce creates a great balance of sweet and salty. To make this meal even better, add more veggies. Broccoli or asparagus work well. They roast nicely and add color. Carrots or bell peppers are also great choices. Just toss them with the same glaze. This way, all your veggies share the same tasty flavor. You can use other fish instead of salmon. Try trout or halibut for a light taste. Both cook in a similar way. They pair well with the maple glaze too. Cod is another good option. Just keep an eye on the cooking time. Different fish may cook faster or slower than salmon. To store your maple glazed salmon and sweet potatoes, let them cool first. Place the leftovers in an airtight container. This keeps them fresh for up to three days. If you have extra glaze, store it in a small jar. It adds great flavor when reheating. You can freeze this dish too! Wrap the salmon and sweet potatoes tightly in plastic wrap. Then, place them in a freezer-safe bag. This helps prevent freezer burn. You can keep them frozen for up to three months. Just remember to label the bag with the date. To reheat, take the salmon and sweet potatoes out of the fridge or freezer. If frozen, let them thaw overnight in the fridge. Preheat your oven to 350°F (175°C). Place the food on a baking sheet. Cover it with foil to keep moisture in. Heat for about 15-20 minutes, or until warm. This method helps keep the salmon juicy and the sweet potatoes soft. Enjoy your tasty meal again! Yes, you can try honey or agave nectar. Both add sweetness but change the flavor. Honey brings a floral note, while agave is milder. If you switch, adjust the amount to taste. You can serve a fresh salad or steamed broccoli. These add color and crunch. Quinoa or rice works well too, for extra carbs. Lemon wedges brighten the dish, enhancing the flavor of the salmon. Check if the salmon flakes easily with a fork. It should be opaque and warm throughout. The internal temperature should reach 145°F (63°C). Use a meat thermometer for best results. You learned how to make maple glazed salmon and sweet potatoes. We covered key ingredients, nutrient facts, and tips for the best quality. I shared step-by-step ways to make this dish, including a tasty glaze and cooking details. We also talked about achieving perfect textures and storing leftovers. With variations like different glazes and fish, you can customize your meal. Remember, simple cooking can lead to great flavors. Enjoy your cooking journey with these ideas!

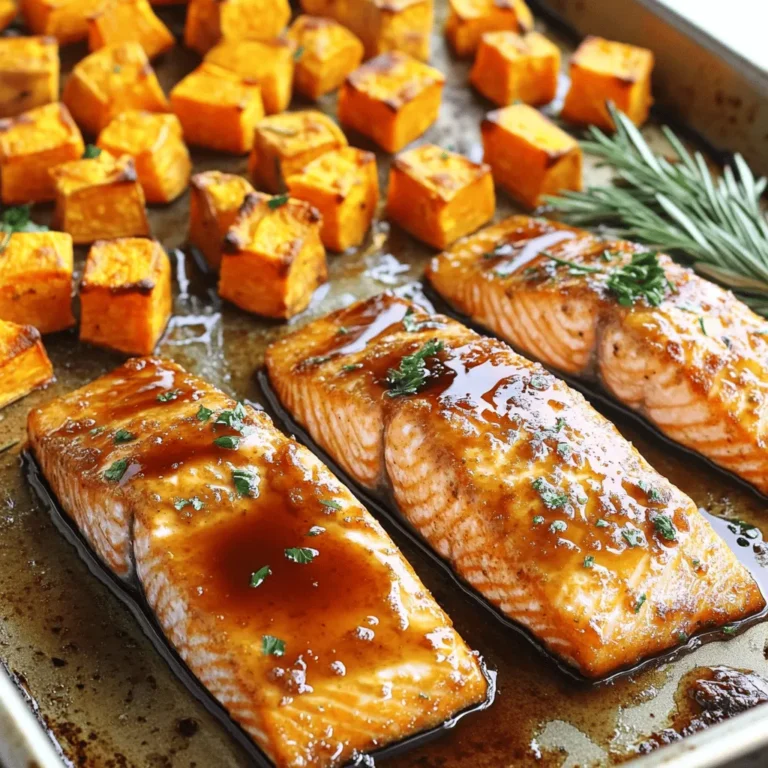
Maple Glazed Salmon & Sweet Potato Sheet Pan Delight

You need 1 pound of fresh asparagus. Look for bright green stalks. They should be firm and crisp. Trim the tough ends before cooking. This keeps the dish tasty and enjoyable. Use 4 cloves of garlic, minced. Garlic adds a rich, strong flavor. Mix it with 2 tablespoons of olive oil. The oil helps the garlic stick to the asparagus. It also adds a smooth taste when roasting. Add 1/4 cup of grated Parmesan cheese. This cheese gives a salty, nutty flavor. Season with salt and pepper to taste. These basic seasonings bring out the best flavors in the dish. You may add 1/4 teaspoon of red pepper flakes. This adds a bit of heat. Zest of 1 lemon gives a bright, fresh taste. Fresh parsley can be used as a garnish. It adds color and a fresh touch to the final dish. First, set your oven to 425°F (220°C). This temperature helps the asparagus roast perfectly. Preheating ensures that the cooking starts right away. Next, grab a large bowl. Add 1 pound of trimmed asparagus. Then, add 4 minced garlic cloves. Pour in 2 tablespoons of olive oil. If you like some heat, add 1/4 teaspoon of red pepper flakes. Season with salt and pepper to taste. Mix everything well. You want the asparagus to be fully coated in oil and spices. Now, spread the asparagus mixture evenly on a baking sheet. Use parchment paper to make cleanup easier. Place the sheet in the preheated oven. Roast for about 15 to 20 minutes. Stir the asparagus halfway through. This step helps it cook evenly. You want the asparagus to be tender with a slight crisp. Once the asparagus is done roasting, take the sheet out of the oven. Immediately sprinkle 1/4 cup of grated Parmesan cheese over the hot asparagus. This cheese melts and adds great flavor. Return the baking sheet to the oven for another 2 to 3 minutes. When the cheese is melted and bubbly, it's time to take it out. Zest one lemon over the top for a fresh taste. If you want, add some fresh parsley for color. Now your dish is ready to serve! When you buy asparagus, look for bright green stalks. They should be firm and straight. Avoid any that are limp or wilted. The tips should be tightly closed. If you can, buy asparagus that is in season for the best flavor. Store asparagus upright in a glass of water in the fridge. Cover the tops with a plastic bag. This helps keep it fresh for a few days. Roasting asparagus is simple but requires attention. Preheat your oven to 425°F (220°C). This high heat helps to caramelize the sugars in the asparagus. Toss the asparagus with garlic, olive oil, salt, and pepper. Spread it out on a baking sheet. Make sure they are in a single layer. This allows even cooking. Stir halfway through roasting for the best results. You want them tender, with a slight crunch. To make your dish pop, consider adding lemon zest. It brings a fresh taste that brightens the dish. Red pepper flakes add a bit of heat, if you like spice. You can also try adding different herbs like thyme or rosemary. If you want a richer flavor, use a mix of cheeses. Feta or goat cheese can work well. Get creative and enjoy exploring new flavors! {{image_2}} If you want to switch up the flavor, try different cheeses. Grated Pecorino Romano works well. It has a strong taste that pairs nicely with asparagus. Nutritional yeast is a great dairy-free option. It adds a cheesy flavor without using cheese. You could also use feta for a tangy twist. Just crumble it on top after roasting. Herbs can change the taste of your dish. Try fresh thyme or rosemary for a fragrant touch. Oregano adds a warm flavor that blends well with garlic. For a kick, add chili powder or smoked paprika. These spices can enhance the overall flavor profile. Fresh lemon thyme can also brighten the dish. Making this dish fit your diet is easy. If you're vegan, use olive oil and nutritional yeast. Skip the cheese, and you still have a tasty side. For gluten-free options, this recipe is already safe. Just ensure your olive oil is pure. You can also adjust the salt for low-sodium diets. This dish can fit many diets while still being delicious. After enjoying your roasted garlic Parmesan asparagus, store any leftovers right away. Let the asparagus cool to room temperature first. Then, place it in an airtight container. This keeps it fresh and tasty for a few days. You can keep it in the fridge for up to three days. If you plan to eat it later, avoid adding the Parmesan cheese until you reheat it. When it's time to enjoy your leftovers, reheating is key. The best method is to use the oven. Preheat it to 350°F (175°C). Place the asparagus on a baking sheet. Heat for about 10 minutes. This method helps keep the asparagus crispy. You can also use a microwave, but it may make the asparagus soggy. If you choose the microwave, heat it in short bursts. Check often to avoid overcooking. Freezing roasted asparagus is a great way to save it for later. First, let the asparagus cool completely. Then, spread it out on a baking sheet in a single layer. Freeze it for about an hour. This prevents it from sticking together. After that, transfer the asparagus to a freezer bag. Squeeze out as much air as possible. You can freeze it for up to three months. When you’re ready to eat it, thaw it in the fridge overnight before reheating. Asparagus is done when it is tender and slightly crispy. This usually takes about 15-20 minutes at 425°F. You should stir it halfway through to cook evenly. When you see the tips are a bit brown, it's ready. You can also poke a piece with a fork to check for tenderness. Yes, you can use frozen asparagus, but it may not be as crisp. Frozen asparagus tends to be softer after cooking. If you choose this option, reduce the roasting time a bit. You want it warmed through and not mushy. Roasted Garlic Parmesan Asparagus pairs well with many dishes. You can serve it with grilled chicken, steak, or fish. It also goes well with pasta or rice dishes. The flavor of the asparagus adds a nice touch to any meal. Yes, Roasted Garlic Parmesan Asparagus is a healthy side dish. Asparagus is low in calories and high in vitamins. It provides fiber, which is good for digestion. The olive oil and garlic add healthy fats and flavor without excess calories. Roasting asparagus is simple and rewarding. We covered its fresh ingredients, like garlic, oil, and Parmesan. You learned step-by-step how to perfect your roast. We also shared storage tips and variations to suit your taste. As you explore this dish, remember to have fun and try new flavors. Enjoy your culinary journey with roasted asparagus!

Roasted Garlic Parmesan Asparagus Tasty Side Dish

- 1 ½ cups all-purpose flour - 1 cup granulated sugar - ½ cup unsweetened cocoa powder - 1 ½ teaspoons baking powder - ½ teaspoon baking soda - ½ teaspoon salt - 2 large eggs - ½ cup whole milk - ½ cup vegetable oil - 2 teaspoons vanilla extract - 1 cup boiling water - 1 cup fresh strawberries, hulled and sliced - 1 cup heavy cream - 8 ounces semi-sweet chocolate, chopped - 2 tablespoons powdered sugar - Fresh strawberries for topping To make the best Chocolate Covered Strawberry Cake, you need the right mix of ingredients. The dry ingredients form the base of the cake. First, gather your flour, sugar, cocoa powder, baking powder, baking soda, and salt. Each plays a key role in taste and texture. Next, we have the wet ingredients. You will use eggs, milk, vegetable oil, and vanilla extract. These ingredients help bind everything and add moisture. Finally, we add some fun with additional ingredients. Boiling water brings out the rich cocoa flavor. Fresh strawberries are a must for that fruity touch. The heavy cream and semi-sweet chocolate come together to form a decadent ganache. Lastly, we finish with powdered sugar and more strawberries for a lovely topping. Having these ingredients ready makes the baking process smooth and enjoyable. 1. Preheat your oven to 350°F (175°C). Grease and flour a 9-inch cake pan. You can also use parchment paper. 2. In a large bowl, mix together: - 1 ½ cups all-purpose flour - 1 cup granulated sugar - ½ cup unsweetened cocoa powder - 1 ½ teaspoons baking powder - ½ teaspoon baking soda - ½ teaspoon salt 3. Next, add the wet ingredients. Include: - 2 large eggs - ½ cup whole milk - ½ cup vegetable oil - 2 teaspoons vanilla extract Beat this mixture on medium speed for 2 minutes until smooth. 4. Carefully stir in: - 1 cup boiling water This will make your batter thin, but that’s okay! 1. Now, pour the batter into your prepared pan. 2. Bake it for 30-35 minutes. Check doneness by inserting a toothpick in the center. If it comes out clean, your cake is done! 1. Let the cake cool in the pan for 10 minutes. Then, transfer it to a wire rack to cool completely. 2. Once cooled, slice the cake into two equal layers horizontally. Place the bottom layer on a serving plate. 3. Spread a layer of sliced strawberries over the bottom layer. Then, add a layer of chocolate ganache. 4. Place the second layer on top. Pour the remaining ganache over the cake, letting it drizzle down the sides. Use a spatula to smooth it out if needed. Now, you have a rich and decadent Chocolate Covered Strawberry Cake ready to impress! Measuring ingredients is key for a great cake. Use dry measuring cups for flour and sugar. For liquids, use a clear liquid measuring cup. This helps ensure your cake turns out just right. To keep your cake moist, do not overmix the batter. Mix just until combined. Also, using boiling water in the batter adds moisture. This step is crucial for a rich texture. To melt chocolate, use low heat. This helps avoid burning. Stir the chocolate slowly as it melts. You want it smooth and glossy. Once melted, let the ganache cool slightly. This helps it thicken. If it's too hot, it may run off the cake. A good consistency is thick but pourable. When garnishing with strawberries, cut them into thin slices. You can arrange them in a circle on top. This adds a pop of color and looks fancy. For whipped cream, use a chilled bowl and beaters. This helps the cream whip up nicely. Pipe it around the edges for a pretty finish. You can also spread it on top for a fluffy look. {{image_2}} You can boost the flavor of your Chocolate Covered Strawberry Cake in fun ways. Try adding different extracts. Almond or orange extract adds a unique twist. A hint of almond gives a sweet and nutty flavor. Orange extract brightens the cake with a citrus touch. You can also mix in nuts or other fruits. Chopped walnuts or pecans add crunch. Diced bananas or blueberries can give a fruity surprise. Experimenting with flavors lets you create a cake just for you. If you need gluten-free options, you can swap the flour. Use a gluten-free blend that measures cup for cup. This keeps the texture light and fluffy. You can also check labels to ensure no gluten sneaks in. For a vegan cake, replace eggs with flax eggs. Mix one tablespoon of ground flaxseed with three tablespoons of water. Let it sit until thick. Use plant-based milk and oil instead of dairy. This way, everyone can enjoy a slice of your cake. You can get creative with how you present your cake. A multi-layer cake looks stunning. Stack more layers for height, and add more strawberries and ganache between each layer. This makes each slice a showstopper. Miniature versions are also a hit. Bake the batter in cupcake liners for easy serving. These little treats are cute and perfect for parties. You can also decorate them just like the big cake. The choices are endless! To keep your Chocolate Covered Strawberry Cake fresh, let it cool completely. Wrap any leftovers tightly in plastic wrap. This keeps moisture in and prevents the cake from drying out. Use an airtight container for best results. Store it in the fridge for up to three days. If you want to save the cake for later, you can freeze it. Slice the cake into portions and wrap each piece in plastic wrap. Place the wrapped slices in a freezer bag or container. The cake can last for up to three months in the freezer. When you're ready to enjoy it, thaw it in the fridge overnight. Serve it cold or at room temperature for the best taste. Your cake stays fresh in the fridge for about three days. If frozen, it remains safe to eat for up to three months. Always check for signs of spoilage, like off smells or changes in texture, before serving. Enjoy your delicious cake while it’s at its best! Yes, you can make this cake ahead of time. Bake and cool the cake a day before. Store it in the fridge to keep it fresh. This allows the flavors to blend. Just add the ganache and strawberries before serving. I recommend using semi-sweet chocolate for the ganache. It gives a rich taste without being too sweet. You can also use dark chocolate if you prefer a stronger flavor. Just chop it finely for even melting. To prevent collapsing, measure your ingredients carefully. Make sure to bake the cake fully. A toothpick should come out clean when it’s done. Let the cake cool completely before slicing. This helps keep it stable. You can use frozen strawberries, but fresh is best. Frozen strawberries can add extra moisture. This might make your cake soggy. If using frozen, thaw and drain them well before adding to the cake. This cake pairs well with coffee or tea. You can also serve it with whipped cream or vanilla ice cream. Fresh mint leaves add a nice touch too. They bring out the flavors of the cake. You now have the tools to create a delicious Chocolate Covered Strawberry Cake. We covered all the key ingredients, steps for baking, and tips for perfecting the recipe. Remember to adjust for dietary needs and store your cake properly for the best taste. With a little practice, you can impress anyone with this treat. Enjoy experimenting with flavors and techniques to make it your own. Happy baking!

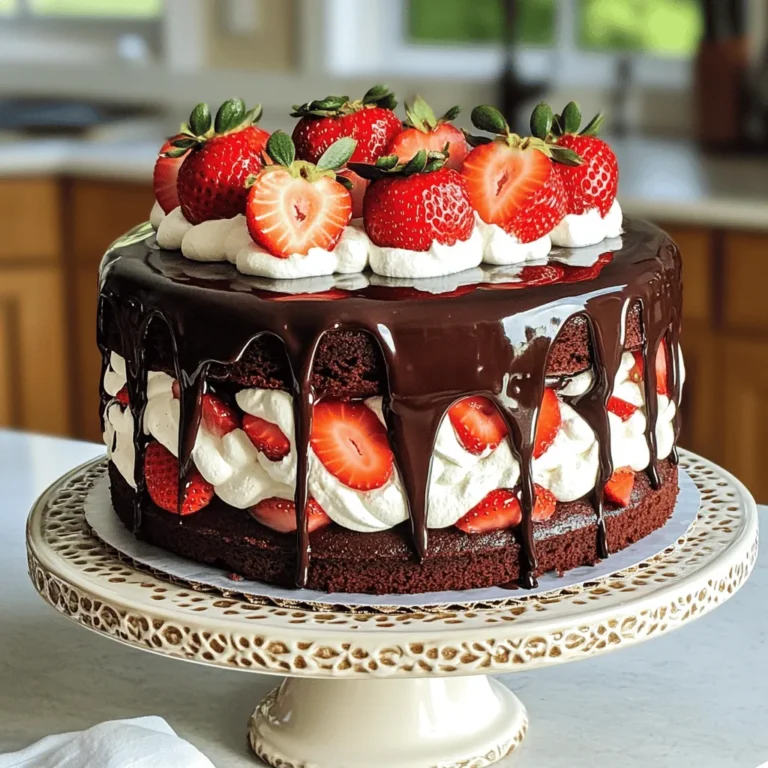
Chocolate Covered Strawberry Cake Rich and Decadent Treat

- 1 cup all-purpose flour - 1 cup almond flour - 1/2 cup granulated sugar - 1 tablespoon poppy seeds - 1 teaspoon baking powder - 1/2 teaspoon baking soda - 1/4 teaspoon salt - 2 large eggs - 1/2 cup buttermilk (or yogurt) - 1/4 cup vegetable oil - 1 teaspoon almond extract - 1 teaspoon vanilla extract - Slivered almonds for topping (optional) To make these muffins, gather your ingredients first. You will need both all-purpose and almond flour for a unique texture. The almond flour adds a subtle nutty flavor, while the all-purpose flour gives structure. You will also need sugar to sweeten the muffins. Poppy seeds add a lovely crunch and a bit of flair. Baking powder and baking soda help the muffins rise. Salt enhances the flavors and balances the sweetness. Next, you need two large eggs. They bind the ingredients and add moisture. For creaminess, use buttermilk or yogurt. This makes the muffins tender. Vegetable oil keeps them moist and fluffy. Finally, almond and vanilla extracts add a rich flavor. If you want a bit of extra crunch, you can top the muffins with slivered almonds. 1. Preheat the oven and prepare muffin tin: Start by setting your oven to 350°F (175°C). Line a muffin tin with paper liners or lightly grease it for easy removal. This step is key for getting a nice rise. 2. Mix dry ingredients in a bowl: In a medium bowl, combine 1 cup of all-purpose flour, 1 cup of almond flour, 1/2 cup of granulated sugar, 1 tablespoon of poppy seeds, 1 teaspoon of baking powder, 1/2 teaspoon of baking soda, and 1/4 teaspoon of salt. Stir them well to spread the flavors evenly. 3. Blend wet ingredients in a separate bowl: In a large bowl, whisk together 2 large eggs, 1/2 cup of buttermilk (or yogurt), 1/4 cup of vegetable oil, 1 teaspoon of almond extract, and 1 teaspoon of vanilla extract. Mix until it looks smooth and creamy. 4. Combine and mix ingredients carefully: Gradually add the dry mixture to the wet mixture. Stir gently until just combined. It's okay if there are a few lumps; overmixing can make the muffins tough. 5. Fill muffin cups and add toppings: Use a scoop to fill each muffin cup about two-thirds full. If you want a little crunch, sprinkle some slivered almonds on top of each muffin. 1. Bake muffins at the correct temperature: Place the muffin tin in the preheated oven. Bake for 18-22 minutes. Your kitchen will smell amazing as they bake! 2. Check for doneness with a toothpick: To see if they are ready, insert a toothpick into the center of a muffin. If it comes out clean, they are done. If not, give them a few more minutes. 3. Cooling instructions after baking: Once baked, let the muffins cool in the pan for about 5 minutes. Then, transfer them to a wire rack to cool completely. This helps keep them light and fluffy. Enjoy! - Avoid overmixing the batter. Mix just until the dry and wet ingredients come together. A few lumps are okay. This keeps the muffins fluffy and light. - Achieve the perfect texture with buttermilk. Buttermilk adds moisture and richness. It helps create a tender crumb. If you don’t have buttermilk, plain yogurt works just as well. - Optimal baking times and temperatures. Bake your muffins at 350°F (175°C). Check them at 18 minutes. The toothpick should come out clean when they are done. - Using too much flour. This can make your muffins heavy. Use the spoon and level method to measure flour. This gives you the right amount. - Not preheating the oven adequately. Always preheat your oven before baking. This helps muffins rise and bake evenly. - Baking too long or too short. Keep an eye on your muffins as they bake. If they bake too long, they can dry out. If too short, they may be raw in the center. {{image_2}} You can add fun twists to almond poppy seed muffins. Here are some ideas: - Adding lemon zest for a citrus twist: Grate the peel of one lemon into your batter. This adds brightness and a fresh taste. Lemon pairs well with almond flavor. - Incorporating chocolate chips: Stir in half a cup of chocolate chips. They add sweetness and richness. Dark chocolate works best for a nice balance. - Using different types of nuts: Swap out slivered almonds for chopped walnuts or pecans. This adds crunch and a new taste. Each nut brings its unique flavor to the muffins. You can make these muffins fit different diets. Here are some easy swaps: - Gluten-free almond poppy seed muffins: Replace all-purpose flour with a gluten-free blend. Make sure it has a good binding agent. This keeps your muffins moist and fluffy. - Vegan alternatives for eggs and dairy: Use flax eggs instead of regular eggs. Mix one tablespoon of flaxseed meal with three tablespoons of water. Let it sit for five minutes. For buttermilk, use almond milk with a teaspoon of vinegar. This will give you a great dairy-free option. To keep your almond poppy seed muffins fresh, store them at room temperature. Place the muffins in an airtight container. They can last for about three days this way. If you need to keep them for longer, freezing is a great option. Wrap each muffin in plastic wrap, then place them in a freezer-safe bag. This can keep them tasty for up to three months. Reheating muffins correctly makes a big difference in taste. The best way is to use the oven. Preheat your oven to 350°F (175°C). Place the muffins on a baking sheet. Heat them for about 10 minutes. This method keeps the muffins warm and soft. If you need a faster way, use the microwave. Place a muffin on a microwave-safe plate. Heat it for 10 to 15 seconds. This method is quick but may make the muffin a bit chewy. Enjoy your muffins warm! Can I use other types of flour? Yes, you can swap all-purpose flour with whole wheat flour. This change adds fiber and nutrients. Just note that whole wheat may make the muffins denser. You can also try gluten-free flour blends if needed. How can I make these muffins healthier? To make these muffins healthier, you can reduce the sugar. Try using only 1/3 cup instead of 1/2 cup. You can add mashed bananas or applesauce as a sweetener. Another option is to use Greek yogurt instead of buttermilk. What is the best way to serve almond poppy seed muffins? I love serving these muffins warm. You can enjoy them plain or with a bit of butter. They also pair well with jam or honey. For a special touch, add a sprinkle of powdered sugar on top. Why are my muffins sinking? Muffins sink when they have too much liquid or not enough flour. Check your measurements to ensure they are accurate. Overmixing can also cause sinking. Mix just until combined for the best rise. What can I do if my muffins are too dry? If your muffins are dry, they may need more fat or moisture. You can add a bit more buttermilk or yogurt next time. Also, try reducing the baking time. Check them a few minutes early to avoid overbaking. You now have all the tools to make almond poppy seed muffins. We covered the key ingredients, preparation steps, baking tips, flavor variations, and storage methods. Remember to avoid common mistakes for the best results. Don't hesitate to try new flavors or dietary options. Enjoy the warm muffins fresh from your oven. Baking can be fun and rewarding, as you learn along the way. So grab your ingredients and start your baking adventure today!

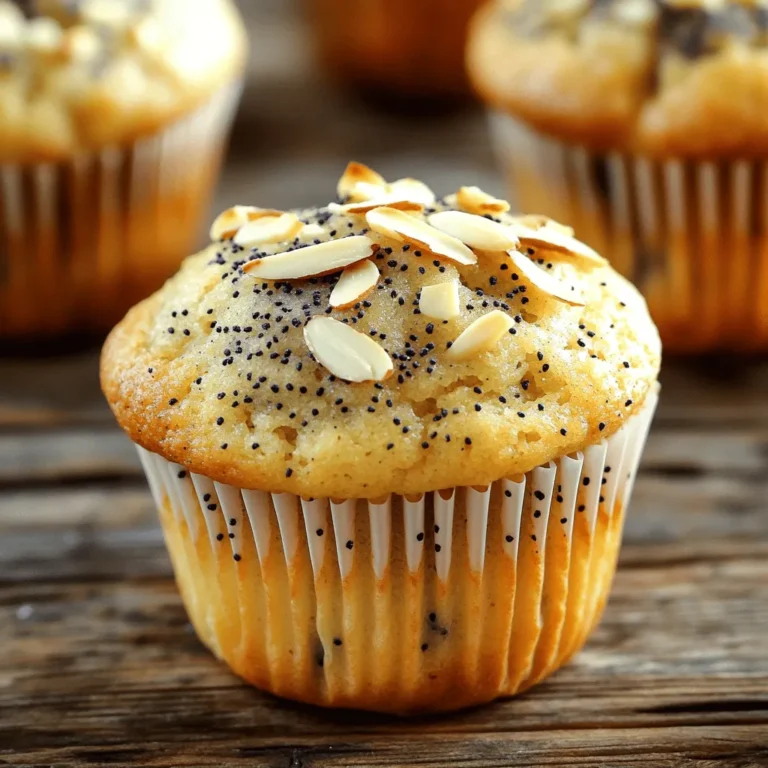
Almond Poppy Seed Muffins Delicious and Easy Recipe

- 1 lb (450g) ground beef - 1 cup brown lentils, rinsed - 1 large onion, finely chopped - 3 cloves garlic, minced - 1-inch piece ginger, grated - 2 medium tomatoes, chopped - 1 can (14 oz) coconut milk To make this hearty beef and lentil curry, you need key ingredients. The ground beef adds flavor and protein. Brown lentils bring texture and heartiness. Onions, garlic, and ginger form the base. They create a fragrant mix. Tomatoes add sweetness and acidity. Coconut milk makes the dish creamy. - 2 tablespoons curry powder - 1 teaspoon cumin seeds - 1 teaspoon turmeric powder - 1 teaspoon chili powder (adjust to taste) - Salt and pepper to taste Spices are the heart of this dish. Curry powder gives it warmth. Cumin seeds add depth and richness. Turmeric offers a lovely color. Chili powder can kick up the heat, so adjust it to your taste. Salt and pepper balance the flavors. - Fresh cilantro, chopped - Serving suggestions: basmati rice or naan bread Garnish is important for presentation. Fresh cilantro adds a burst of color and freshness. I suggest serving this curry with basmati rice or naan bread. They soak up the delicious sauce and round out the meal. 1. Start by heating the vegetable oil in a large pot. Use medium heat for this. 2. Add cumin seeds to the hot oil. Let them sizzle for about a minute. This makes the kitchen smell great. 3. Next, add the chopped onion. Sauté it until it turns golden brown, which takes about 5-6 minutes. Stir it often. 4. Now, add minced garlic and grated ginger. Cook them for 1-2 minutes until fragrant. 5. Mix in curry powder, turmeric powder, and chili powder. Toast the spices for about a minute. This boosts their flavor. 6. Add the ground beef to the pot. Cook until it’s browned, about 5-7 minutes. Break up the meat as you cook. 1. After the beef is browned, stir in the chopped tomatoes. Cook them for about 3-4 minutes. They should start breaking down. 2. Add the rinsed lentils to the pot. Then, pour in the coconut milk. Stir everything well to combine. 3. Season the mixture with salt and pepper to taste. This brings out the flavors. 1. Bring the mixture to a gentle boil, then reduce the heat to low. Cover the pot. 2. Let it simmer for about 25-30 minutes. This allows the lentils to cook through and become tender. 3. Stir occasionally. If the curry gets too thick, add a splash of water. 4. Once cooked, taste the dish. Adjust the seasoning if needed. If you like it spicier, add more chili powder. 5. Remove the pot from the heat and let it sit for 5 minutes before serving. This helps the flavors meld. To make your curry shine, start with the aromatics. Heat vegetable oil in your pot. Add cumin seeds and let them sizzle. This brings out their flavor. Next, toss in the chopped onion. Cook it until golden brown, which takes about 5-6 minutes. When the onions are ready, add minced garlic and grated ginger. Sauté these for just 1-2 minutes. This step builds a solid base for your curry. The key is not to rush. Let the flavors develop slowly. Now, for the ground beef, make sure to break it into small pieces. Brown it well, stirring for about 5-7 minutes. This adds a nice texture and flavor to your dish. You can boost your curry by adding vegetables. Carrots, bell peppers, or spinach work great. They add color and nutrition. Chop them up and stir them in with the tomatoes. If you want a different protein, consider chicken or turkey. Both can replace ground beef. Just cook them until fully done. This keeps the meal fresh and exciting. For spice lovers, chili powder is your friend. Start with 1 teaspoon and taste as you go. If you want it hotter, add more. Remember, different chili powders can have different heat levels. You can also adjust the curry powder and turmeric to suit your taste. Each spice brings its own flavor, so feel free to experiment! {{image_2}} You can make a tasty vegetarian version of beef and lentil curry. Swap the ground beef for plant-based protein like lentils, chickpeas, or tofu. This keeps the dish hearty and filling. Use the same spices and cooking methods. You will still enjoy a rich flavor. To boost the flavor, try adding more herbs or spices. Fresh herbs like basil or mint add a fresh touch. You can also mix in curry leaves, bay leaves, or even a dash of lemon juice. These small changes can make your curry unique and exciting. Different cultures have their own takes on curry. For instance, Indian curry often uses yogurt or cream. Thai curry might include lemongrass and lime leaves. You can play with these ideas to create your own version. Each twist adds a new layer of taste to your dish. To store leftovers, let the curry cool first. Use an airtight container to keep it fresh. Place the curry in the fridge if you plan to eat it within three days. This method helps keep the flavors strong and tasty. If you want to enjoy this hearty meal later, freezing is a great option. Use freezer-safe containers or bags. Make sure to leave some space at the top, as the curry will expand when frozen. Label the container with the date. It can last up to three months in the freezer. To reheat the curry, the best method is on the stove. Place it in a pot over low heat. Stir it often to avoid sticking. If it seems too thick, add a splash of water or broth. You can also use the microwave. Just cover the bowl with a lid or a damp paper towel. Heat in short bursts, stirring in between. This keeps the meal warm and flavorful. Can I use green lentils instead of brown? Yes, you can use green lentils. They have a firmer texture and may take a bit longer to cook. Just keep an eye on them. If you use them, check the lentils after 30 minutes of cooking to see if they are soft enough. How long does the dish take to cook? The dish takes about 45 minutes in total. Prep time is around 15 minutes, and cooking time is about 30 minutes. This gives you a warm and hearty meal in no time. What can I use instead of coconut milk? If you want to skip coconut milk, try using heavy cream or plain yogurt. This will change the taste slightly but still give a creamy texture. You can also use vegetable broth for a lighter option, but it won’t be as rich. Adjust the seasoning to match your choice. This blog post covered the key ingredients, steps, and tips for making a delicious beef and lentil curry. You learned about essential spices and optional garnishes, plus how to perfect your dish with smart variations. Remember, cooking is a fun way to explore flavors. Experiment with ingredients and make this curry your own! Store and reheat leftovers properly to enjoy later. I hope you feel excited to cook and share your curry creations. Enjoy every bite!

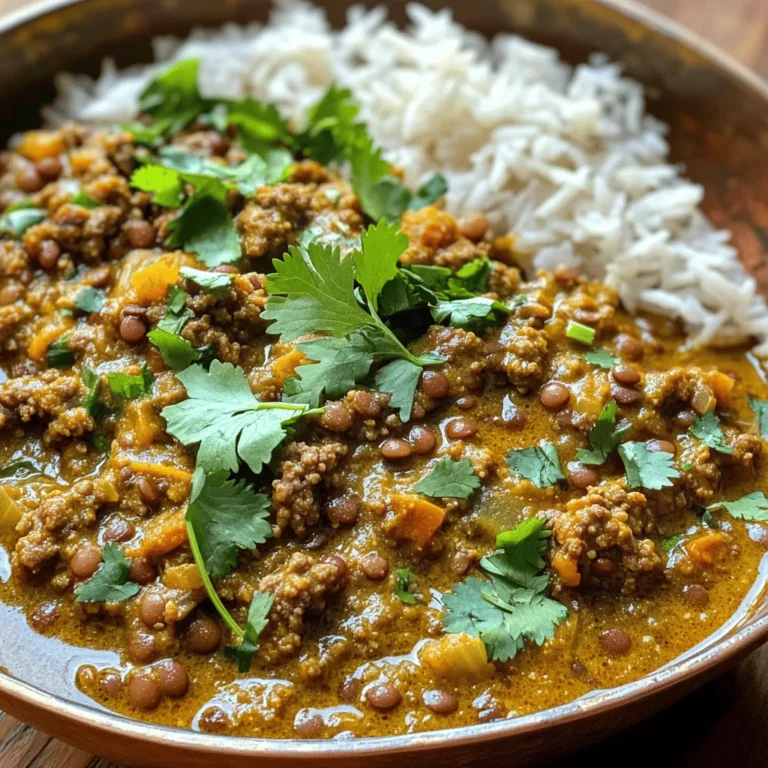
Hearty Beef and Lentil Curry Simple Comfort Meal

- 2 pounds chicken wings - 1/4 cup unsalted butter, melted - 4 cloves garlic, minced For this dish, chicken wings are the star. Choose fresh or frozen wings, but thaw them before cooking. The butter adds richness and helps the garlic flavor stick. Minced garlic gives a bold taste that makes these wings special. - 1/2 cup grated Parmesan cheese - 1 teaspoon dried oregano - 1 teaspoon dried parsley - 1/2 teaspoon salt - 1/4 teaspoon black pepper Parmesan cheese adds a savory kick to the wings. Oregano and parsley bring earthiness and freshness. Salt and pepper enhance the overall flavor. This blend makes each bite delicious and satisfying. - Fresh parsley, chopped Chopped fresh parsley adds a bright touch. It not only looks nice but also adds a hint of freshness. Use it to garnish your wings before serving for that perfect finishing touch. - Preheat the Oven: Set your oven to 425°F (220°C). This high heat helps make the wings crispy. - Prepare the Baking Sheet with Foil and Rack: Line a baking sheet with aluminum foil. Place a wire rack on top. This rack lets air flow around the wings, cooking them evenly. - Combine Butter and Garlic: In a large bowl, melt 1/4 cup of unsalted butter. Add 4 cloves of minced garlic to the butter. Stir well until they mix together. The smell will make you hungry! - Toss the Wings in Garlic Butter: Take 2 pounds of chicken wings and add them to the bowl. Toss the wings in the garlic butter until they are fully coated. Each wing should be shiny and flavorful. - Add Seasoning Mixture: In another bowl, mix 1/2 cup grated Parmesan cheese, 1 teaspoon dried oregano, 1 teaspoon dried parsley, 1/2 teaspoon salt, and 1/4 teaspoon black pepper. Sprinkle this mixture over the wings. Toss again to coat every wing with the tasty seasoning. - Arrange on the Rack: Place the coated wings in a single layer on the wire rack. This helps them crisp up during baking. - Baking and Monitoring: Put the baking sheet in the preheated oven. Bake for 30-35 minutes. Halfway through, turn the wings over. This ensures they cook evenly and get nice and crispy. - Use of Wire Rack: A wire rack helps wings cook evenly. It allows hot air to flow all around. This results in crisp skin. Place the wings on the rack above a baking sheet. This setup catches any drips. - Importance of Turning Halfway: Turning wings halfway through cooking is key. This action helps both sides crisp up. For best results, set a timer. This way, you won’t forget to flip them. - Allowing Wings to Marinate: Marinating wings adds depth to the flavor. After coating them, let them sit for 30 minutes. This allows the garlic and butter to soak in. You can even marinate overnight for a stronger taste. - Alternative Seasoning Options: If you want to switch it up, try other herbs. Rosemary or thyme can add a nice twist. You can also mix in some lemon zest for brightness. Experiment with spices to find your favorite blend. - Pair with Dips: Dips make your wings even more fun. Try ranch or blue cheese for a classic combo. You can also serve them with a spicy sriracha sauce for heat. - Perfect Side Dishes: Pair wings with simple sides. Celery sticks and carrot sticks offer a nice crunch. A light salad can also balance the meal. Consider serving with fries for a hearty option. {{image_2}} Want to add some heat? You can spice up your garlic Parmesan wings! Simply mix in hot sauce or chili flakes with the garlic butter. Start with a tablespoon of hot sauce for a mild kick. If you like it hot, add more. Chili flakes also work well. Just sprinkle them into the garlic butter. This gives your wings a nice punch! Looking to switch things up? You can use different cheeses! While Parmesan is classic, try Pecorino Romano for a stronger flavor. Grana Padano is another great option. It has a similar taste to Parmesan but is milder. You can also mix in other cheeses for added creaminess. Try mozzarella or fontina. Just shred or grate them and mix with the Parmesan. This will give your wings a unique twist! Want to try cooking wings in a different way? The air fryer is a great choice! Cook the wings at 400°F (200°C) for about 25-30 minutes. Shake the basket halfway through for even cooking. Grilling is another fun method. Preheat your grill to medium heat. Cook the wings for about 20-25 minutes. Flip them often to get that nice char. Both methods make tasty wings that everyone will love! After enjoying your garlic Parmesan chicken wings, store any leftovers in the fridge. Place the wings in an airtight container. This keeps them fresh for up to three days. Make sure to let them cool before sealing. This prevents moisture build-up and soggy wings. You can freeze both uncooked and cooked wings. To freeze uncooked wings, place them in a single layer on a baking sheet. Freeze until solid, then transfer to a freezer bag. For cooked wings, let them cool completely. Then, pack them in freezer bags or airtight containers. They will stay good for up to three months. To reheat, I recommend using the oven. Preheat it to 350°F (175°C). Place the wings on a wire rack over a baking sheet. This helps keep them crispy. Heat for about 10-15 minutes or until warmed through. You can also use an air fryer for a quick reheat, ensuring they stay crispy and delicious. To make chicken wings crispy, use a wire rack. This allows hot air to flow around the wings. Preheat your oven to 425°F (220°C). The high heat helps to render the fat and creates a crispy skin. Turning the wings halfway through cooking is key. This ensures even crispiness on all sides. Yes, you can prepare garlic Parmesan chicken wings in advance. Coat the wings in garlic butter and seasoning. Then, store them in the fridge for up to 24 hours. When ready to cook, simply place them on the baking sheet and bake. This is a great time-saver for parties or game days. Garlic Parmesan wings pair well with a variety of dips. Ranch dressing adds a creamy touch. Blue cheese dressing offers a bold flavor. A simple garlic aioli can enhance the garlic flavor. You can also try a spicy buffalo sauce for a kick. Each dip adds a unique twist to the wings. Cooking chicken wings in an air fryer takes about 25 to 30 minutes. Preheat your air fryer to 375°F (190°C). Arrange the wings in a single layer. Cook them until they are golden brown and crispy. Turn them halfway through cooking for the best results. You learned the key ingredients and steps to make garlic parmesan chicken wings. I shared tips for crispiness and enhancing flavors. You can even try variations or different cooking methods. Now, you can create tasty wings that impress everyone. Enjoy your cooking and have fun experimenting with flavors. Your perfect chicken wings await!

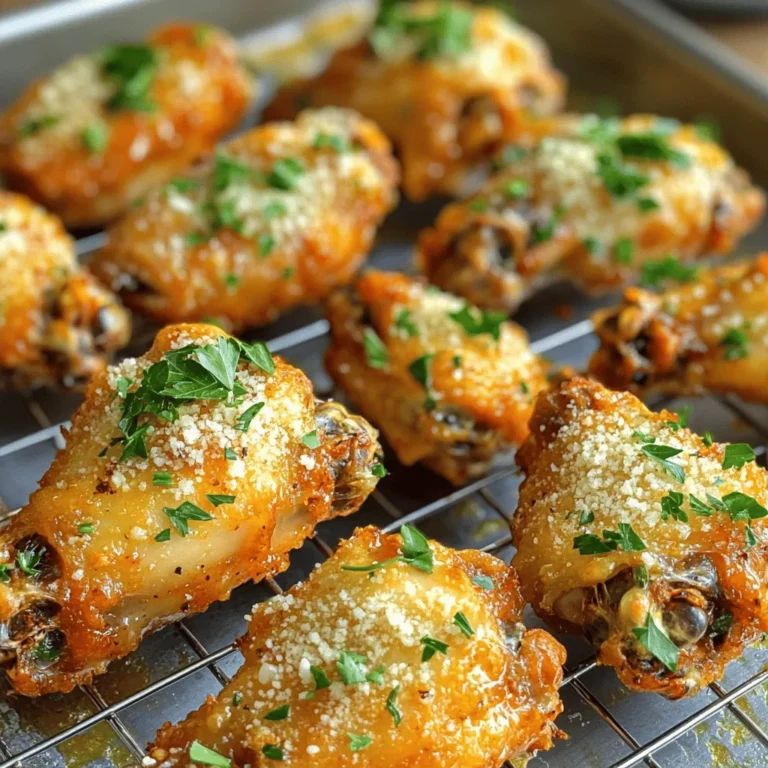
Garlic Parmesan Chicken Wings Irresistible Flavor Dish

PREV 1 … 20 21 22 … 57 NEXT
meal twig

explore

DessertsDinnerAppetizersDrinks

Our Policies

  • Cookie Policy
  • Copyright Policy
  • Disclaimer
  • GDPR Policy
  • Terms Of Use
Back to Top
  • About
  • Contact Us
  • Privacy Policy
© 2025 meal twig