FREE DINNER EBOOK! Get your copy!
  • Cookie Policy
  • GDPR Policy
  • Disclaimer
  • Terms Of Use
  • Visit my other site: Fun Cookie Recipes
meal twig
  • Home
  • Dinner
  • Desserts
  • Drinks
  • Appetizers
  • Contact
  • About
  • Privacy Policy
  • Home
  • Dinner
  • Desserts
  • Drinks
  • Appetizers
  • Contact
  • About
  • Privacy Policy
  • Cookie Policy
  • GDPR Policy
  • Disclaimer
  • Terms Of Use
Visit my other site: Fun Cookie Recipes

HOME / CATEGORIES /

Latest

For Peanut Butter Oat Energy Balls, you need a few simple ingredients. Here’s what you will gather: - 1 cup rolled oats - 1/2 cup creamy peanut butter - 1/4 cup honey (or maple syrup for a vegan option) - 1/4 cup ground flaxseed - 1/2 cup mini chocolate chips (or nuts/seeds of choice) - 1/4 teaspoon salt - 1 teaspoon vanilla extract - Optional: 1/2 teaspoon cinnamon These ingredients make a tasty and easy snack. The rolled oats give a nice base, while the peanut butter adds creaminess. You can switch honey for maple syrup if you want a vegan option. Ground flaxseed gives extra nutrition. Mini chocolate chips are fun, but you can use nuts or seeds too. A hint of salt and vanilla brings all the flavors together. If you love cinnamon, sprinkle some in for warmth. Each ingredient plays a role in making these energy balls both yummy and healthy. Making peanut butter oat energy balls is simple and quick. You will need about 10 minutes to prep and 30 minutes to chill. This snack is easy and fun to make! - Mixing dry ingredients Start with a large bowl. Add 1 cup of rolled oats, 1/4 cup of ground flaxseed, and 1/4 teaspoon of salt. If you like, add 1/2 teaspoon of cinnamon for extra flavor. Mix these dry items well. - Adding wet ingredients Next, add 1/2 cup of creamy peanut butter, 1/4 cup of honey (or maple syrup), and 1 teaspoon of vanilla extract to the dry mix. Use a spatula or your hands. Combine everything until it looks uniform and sticky. - Combining and refrigerating Now, fold in 1/2 cup of mini chocolate chips. You can also use nuts or seeds if you prefer. Once mixed, cover the bowl and place it in the fridge for about 30 minutes. Chilling makes it easier to work with. After the mixture is chilled, take it out. Use your hands to roll the mix into small balls, about 1 inch in size. You can make around 12 to 15 energy balls. Place them on a baking sheet lined with parchment paper. If you want, roll the balls in extra oats or coconut for a nice touch. Store these tasty snacks in an airtight container in the fridge or freeze them for later! To get your energy balls just right, you may want to adjust sweetness levels. If you like it sweeter, add more honey or maple syrup. If you prefer less sweetness, use less. Taste the mixture before rolling it into balls. This way, you can find the flavor that makes you smile. Storing and handling the mixture is also key. After mixing, chill the dough for 30 minutes. This helps it firm up and makes rolling easier. If the mixture feels too sticky, add a bit more oats or flaxseed. Get creative with flavor add-ins! You can mix in dried fruits like cranberries or raisins for a chewy twist. If you want a nutty flavor, add chopped nuts or seeds. You can also experiment with spices like cinnamon or nutmeg for extra warmth. For alternative coatings and textures, think outside the box. Roll your energy balls in extra oats or coconut flakes for a fun crunch. You can even coat them in crushed nuts for added flavor. Each option gives your energy balls a unique touch. {{image_2}} If you want a nut-free snack, try using seed butter. Sunflower seed butter works great! It has a similar creamy texture. You can also use pumpkin seed butter for a fun twist. Both options keep the energy balls tasty and safe for kids with nut allergies. For those who follow a vegan diet, you can make easy swaps. Instead of honey, use maple syrup. It adds sweetness and keeps the balls plant-based. You can also check that your chocolate chips are dairy-free. This way, everyone can enjoy these yummy snacks! Mixing in different flavors can make your energy balls unique. You can add dried fruits like cranberries or raisins for sweetness. Chopped nuts or seeds can add crunch. If you like spice, try adding cinnamon or nutmeg. Each mix-in gives a new taste adventure! Peanut Butter Oat Energy Balls pack a punch of nutrition. They offer a great mix of proteins, healthy fats, and carbs. This snack is not just tasty; it helps fuel your body. You can enjoy them before a workout or as a quick snack. They are simple to make and keep you full. - Calories per ball: Each ball has about 100 calories. This amount is perfect for a snack. - Protein, fat, and carb content: Each ball gives you around 3 grams of protein, 4 grams of fat, and 13 grams of carbs. These numbers can help you plan your meals well. - Energy-boosting properties: The oats and peanut butter provide energy. They help you feel strong and ready to take on your day. Flaxseed adds extra nutrition and can help with digestion. - Nutritional value of oats and flaxseed: Oats are great for heart health. They contain fiber that helps lower cholesterol. Flaxseed is high in omega-3 fatty acids, which are good for your heart and brain. These ingredients make your energy balls a smart choice! Peanut Butter Oat Energy Balls last up to two weeks in the fridge. Keep them in an airtight container to stay fresh. If you want to keep them longer, freeze them. They can last for up to three months in the freezer. Yes, you can freeze these energy balls. After rolling them, place them in a single layer on a baking sheet. Freeze until solid, then transfer them to a container or bag. This method helps keep them from sticking together. You can use almond butter, sunflower seed butter, or cashew butter as substitutes for peanut butter. Each option brings its own flavor and texture. If you have nut allergies, sunflower seed butter is a great choice. Yes, these energy balls are gluten-free if you use certified gluten-free oats. Always check the labels to ensure there is no cross-contamination. This way, you can enjoy them without worries. As a snack, one to two energy balls is a good amount. They are packed with nutrients and energy. You can adjust based on your activity level and hunger. We explored how to make tasty peanut butter oat energy balls. We started with the right ingredients, from oats to chocolate chips, and walked through each step. You can customize these balls to fit your taste and diet. Remember, you can adjust sweetness and add fun flavors. They offer great energy and nutrition. Enjoy making your own healthy snacks that boost energy and taste great!

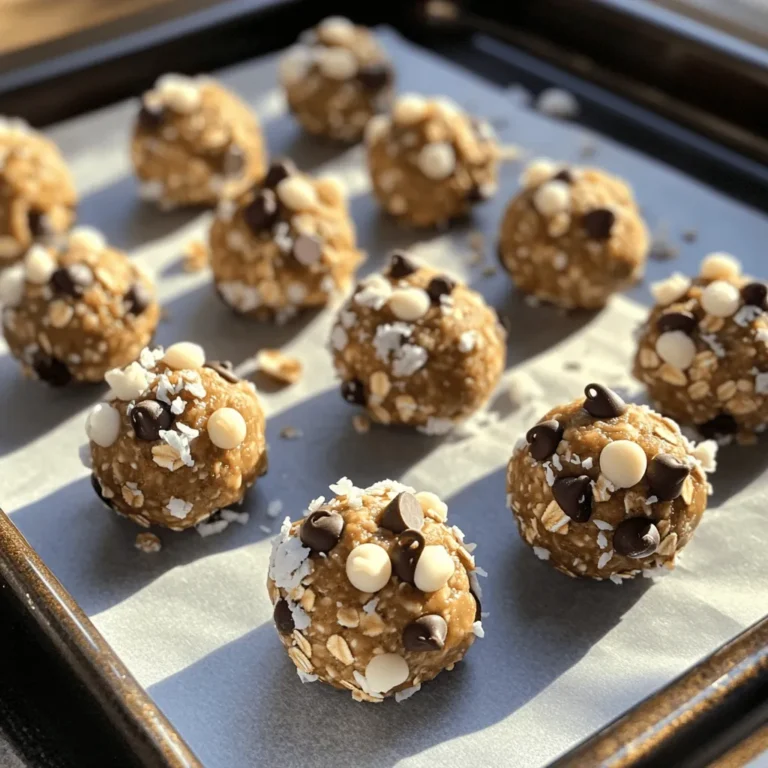
Peanut Butter Oat Energy Balls Tasty and Easy Snack

- 1 pound Italian sausage (mild or spicy) - 1 red bell pepper, sliced - 1 yellow bell pepper, sliced - 1 green bell pepper, sliced - 1 large red onion, sliced - 3 cloves garlic, minced - 1 teaspoon dried oregano - 1 teaspoon dried basil - Salt and black pepper to taste - Fresh basil leaves for garnish - 2 tablespoons olive oil - Use a large sheet pan for even cooking Gather these ingredients to create a delicious meal. The Italian sausage adds a rich flavor. The bell peppers and onion bring sweetness and color. Garlic enhances the taste, making it even better. The olive oil helps everything roast to perfection. Using fresh basil at the end adds a nice touch. Preheat your oven to 400°F (200°C). This step is key for even cooking. While your oven warms up, gather your veggies. In a large bowl, combine sliced bell peppers, red onion, and minced garlic. This mix adds color and flavor. Next, drizzle the veggies with 2 tablespoons of olive oil. Sprinkle in 1 teaspoon each of dried oregano and dried basil. Add salt and black pepper to taste. Toss everything together until the vegetables are well coated. This blend of spices makes each bite tasty. Now grab a large sheet pan. Spread the seasoned vegetables evenly across the pan. Make sure they have space to roast nicely. Then, arrange 1 pound of Italian sausages on top of the veggies. You can choose mild or spicy sausage based on your taste. This mix of sausage and veggies will create a delicious meal. Place the sheet pan in your preheated oven. Roast the dish for 25-30 minutes. During this time, the flavors will blend and the sausages will cook through. Halfway through, stir the veggies to ensure they cook evenly. Check for doneness by using a meat thermometer. The sausages should reach an internal temperature of 160°F. When everything is done, let it cool for a couple of minutes. Then, garnish with fresh basil leaves for a pop of color. Enjoy your meal warm and fresh from the pan! When choosing sausage, you can go for mild or spicy. Mild sausage gives a nice flavor without too much heat. Spicy sausage adds more kick for those who love heat. If you want lighter options, try chicken or turkey sausage. They still taste great and are lower in fat. To boost the taste, add more herbs or spices. Try red pepper flakes for heat or rosemary for a fresh twist. You can also add a splash of balsamic vinegar for tang. For caramelization, make sure the vegetables are not crowded on the pan. This way, they get that lovely golden color as they roast. Pair this dish with crusty bread to soak up the juices. A light salad with lemon vinaigrette complements the rich flavors. For a heartier meal, serve it with pasta or rice. When serving, use a large spoon to show off the colorful veggies and sausages. Garnish with fresh basil leaves for a pop of color and flavor. {{image_2}} You can make this dish your own by adding extra veggies. Zucchini and mushrooms work great. They cook well and add nice texture. You might also think about seasonal options. In summer, fresh corn or cherry tomatoes shine. In fall, try adding some squash. Each choice adds a unique flavor and color. Want to change the flavor? You can give it a Mediterranean twist. Adding feta cheese and olives gives it a nice salty kick. If you like spice, add some chopped chilies or hot sauce. This will turn up the heat and make the dish exciting. Your taste buds will thank you! If you're looking for vegetarian or vegan options, it’s easy! Swap the sausage for plant-based sausage or chickpeas. Both work well and keep the meal filling. For gluten-free, check your sausage’s label. Many brands offer gluten-free options. You can enjoy this dish no matter your diet. After cooking, let the Italian sausage and peppers cool for a few minutes. This helps prevent condensation in your storage containers. Next, transfer the dish into airtight containers. Glass or BPA-free plastic works best. These containers keep your food fresh and tasty. In the fridge, the dish lasts about 3 to 4 days. Make sure it is sealed tight. For longer storage, you can freeze it. Place the cooled dish in freezer-safe bags or containers. It can last for about 2 to 3 months in the freezer. When you’re ready to eat, thaw it overnight in the fridge. For reheating, the oven works best. Preheat it to 350°F (175°C). Place the dish in a baking dish and cover with foil. Heat for about 15 to 20 minutes. This keeps the sausage juicy and the peppers tender. You can also use the microwave for a quick reheat. Just be careful not to overcook it. Enjoying your leftovers should taste just as good as the first time! Yes, you can use frozen Italian sausage. Just remember to thaw it first. The best way is to leave it in the fridge overnight. If you're short on time, you can use the microwave to defrost it. Cook the sausage until it reaches an internal temperature of 160°F. This ensures it is safe to eat. To check if your sausages are done, use a meat thermometer. Insert it into the thickest part of the sausage. The reading should be 160°F. If you don’t have a thermometer, cut one sausage in half. The meat should be no longer pink inside. The juices should run clear. You can prepare this dish ahead of time. Assemble everything on the sheet pan and cover it. Store it in the fridge for up to 24 hours before cooking. When you're ready to cook, just pop it in the oven. You may need to add a few extra minutes to the cooking time. Many sides go well with this dish. Here are some ideas: - Crusty bread or rolls for soaking up the juices - A fresh green salad for a light touch - Roasted potatoes for a hearty side - Pasta tossed with olive oil and garlic for a filling option Feel free to mix and match to find your favorite pairings! This blog post covered how to make a tasty Italian sausage and peppers dish. You learned about the key ingredients, cooking steps, and ways to spice it up. We also explored options for variations and storage. Remember, you can always customize this meal to fit your taste. Enjoy experimenting with flavors and vegetables. Your kitchen will smell amazing, and the taste will impress everyone. Try this dish and share it with friends and family for a delightful experience!

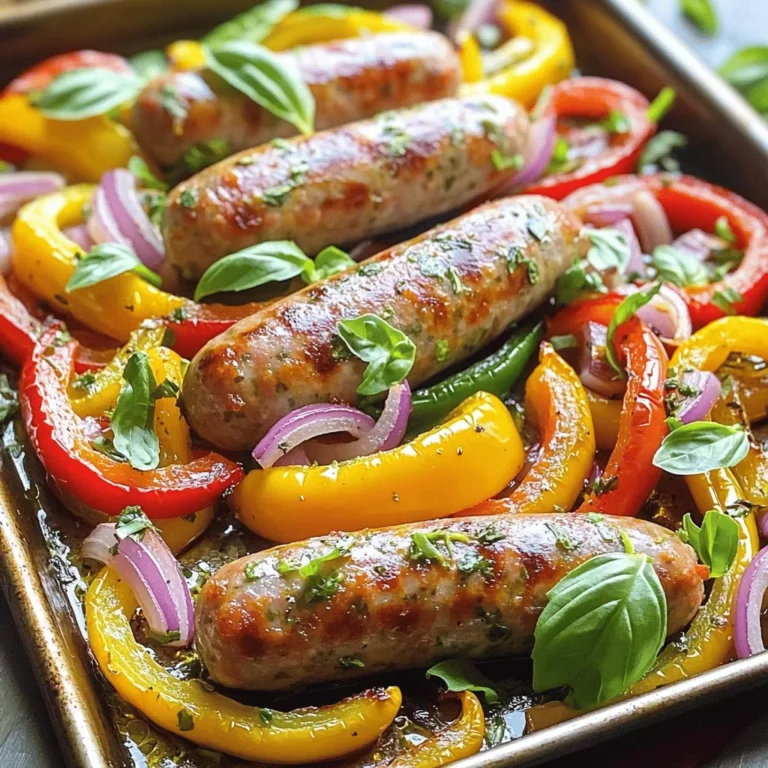
Italian Sausage and Peppers Sheet Pan Delight

- 4 boneless, skinless chicken breasts - 4 jalapeños, deseeded and diced - ½ cup cream cheese, softened - 1 cup shredded cheddar cheese - ½ cup breadcrumbs - 1 teaspoon garlic powder - 1 teaspoon onion powder - ½ teaspoon smoked paprika - Salt and pepper to taste - Olive oil spray If you want a twist, try these options: - Swap jalapeños for banana peppers for less heat. - Use goat cheese instead of cream cheese for a tangy flavor. - Replace cheddar with pepper jack for extra spice. - Gluten-free breadcrumbs work well for a gluten-free dish. I recommend these brands for the best taste: - For chicken, use organic or free-range options. - Philadelphia Cream Cheese is a classic choice for cream cheese. - Tillamook or Cabot are great for shredded cheddar cheese. - For breadcrumbs, look for Progresso or Ian's gluten-free options. These choices not only enhance flavor but also support quality cooking. Start by drying the chicken breasts with paper towels. This helps the chicken cook evenly. Place the chicken between two pieces of plastic wrap. Use a meat mallet or rolling pin to pound the chicken to an even thickness. Aim for about half an inch thick. This step ensures that your chicken cooks just right and stays juicy. In a mixing bowl, combine the softened cream cheese, shredded cheddar cheese, and diced jalapeños. Add garlic powder, onion powder, smoked paprika, salt, and pepper. Mix everything until well combined. This filling gives the chicken a creamy and spicy kick. Take one chicken breast and spoon a generous amount of the jalapeño filling onto one side. Fold the chicken over to enclose the filling. If it needs help staying closed, use toothpicks. Next, prepare a shallow dish with breadcrumbs. Lightly spray the stuffed chicken with olive oil. Then, coat the chicken evenly with breadcrumbs. This creates a crispy outer layer when cooked. Preheat your air fryer to 375°F (190°C). Once it's hot, place the stuffed and breaded chicken in the air fryer basket in a single layer. Cook for 18-20 minutes. Flip the chicken halfway through to ensure even cooking. The chicken is done when it reaches an internal temperature of 165°F (74°C). After cooking, let the chicken rest for 5 minutes. This allows the juices to settle. If you used toothpicks, remove them before slicing the chicken. Serve the chicken slices on a platter. You can add fresh cilantro or parsley for a pop of color. A drizzle of ranch dressing or a side of salsa makes it even tastier. For air frying jalapeno popper chicken, set your air fryer to 375°F (190°C). This heat cooks the chicken evenly and gives a great texture. Cook the chicken for 18-20 minutes. Always check the internal temperature. It should reach 165°F (74°C) for safe eating. When stuffing the chicken, do not overfill it. Use a generous spoonful of filling per breast. Fold the chicken over to seal in the mix. Secure it with toothpicks if needed. This keeps the filling from leaking out during cooking. Make sure to pound the chicken to an even thickness. This helps it cook uniformly. To get a crispy outside, spray the chicken with olive oil before coating it with breadcrumbs. This step is key for golden, crunchy skin. Use panko breadcrumbs for extra crunch. Flip the chicken halfway through cooking. This ensures both sides become crispy. {{image_2}} You can make a tasty vegetarian version of jalapeno popper chicken. Instead of chicken, use portobello mushrooms. They have a meaty texture. Remove the stems and gills, then stuff them with the jalapeno filling. Air fry them just like the chicken. This dish will keep the great flavors you love. Want more heat? Add extra diced jalapeños to the filling. You can also mix in some diced serrano peppers or even a splash of hot sauce. Adjust to your taste. If you prefer mild, use sweet bell peppers instead. This way, everyone can enjoy the dish. Cheese makes this dish special. You can switch cheddar with pepper jack for a spicy kick. Or try cream cheese mixed with feta for a tangy twist. Mozzarella gives a gooey texture, while goat cheese adds creaminess. Get creative and find your favorite blend! To store leftover Air Fryer Jalapeno Popper Chicken, let it cool first. Place the chicken in an airtight container. You can keep it in the fridge for up to three days. Make sure to seal it well to keep the flavors fresh. When you're ready to eat your leftovers, reheat them in the air fryer. Set the air fryer to 350°F (175°C). Heat the chicken for about 5 to 7 minutes. This will keep it crispy and warm throughout. You can also use an oven at 350°F, but the air fryer works best. If you want to freeze the chicken, wrap each piece tightly in plastic wrap. Then place them in a freezer-safe bag or container. You can freeze the chicken for up to three months. When you’re ready to enjoy it, thaw it in the fridge overnight before reheating. Yes, you can use frozen chicken, but thaw it first. This helps it cook evenly. Place frozen chicken in the fridge overnight or use the defrost setting on your microwave. After thawing, follow the same steps for stuffing and cooking. Check the internal temperature with a meat thermometer. The chicken should reach 165°F (74°C). This ensures it is safe to eat. If you don’t have a thermometer, cut into the thickest part. The meat should be white, and juices should run clear. Yes, you can prep the chicken ahead of time. Stuff and bread the chicken, then cover it. Keep it in the fridge for up to 24 hours. When ready to cook, simply air fry as directed. This makes meal prep easy! Serve this dish with a side of salad, rice, or veggies. You could also pair it with ranch dressing or salsa for dipping. Fresh cilantro or parsley can add color and flavor as a garnish. Enjoy your meal! This blog post explored the tasty process of making Air Fryer Jalapeno Popper Chicken. You learned about the key ingredients, steps for preparation, and tips to improve your dish. We also discussed variations and storage methods to keep your meal fresh. With practice, you can make this dish shine. Enjoy your air fryer skills and impress your family and friends with delicious flavors. Try different ingredients and make it your own. Your culinary journey starts with this recipe!

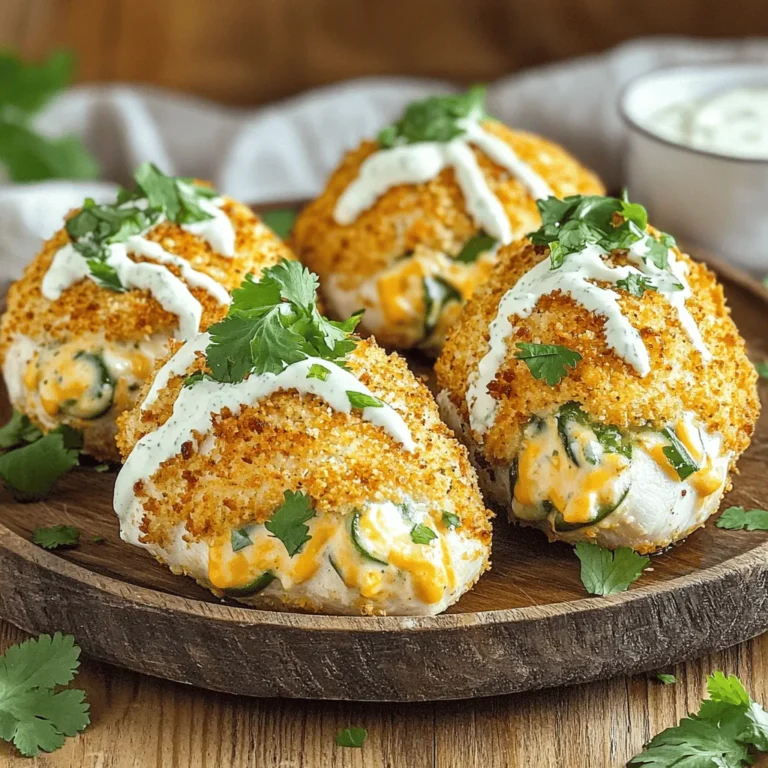
Air Fryer Jalapeno Popper Chicken Delicious and Easy

To make delicious pumpkin cheesecake bars, you will need specific ingredients for both the crust and the filling. Here’s what you need: - Pumpkin Cheesecake Bars Crust Ingredients: - 1 and ½ cups graham cracker crumbs - ½ cup unsalted butter, melted - ¼ cup granulated sugar - Pumpkin Cheesecake Filling Ingredients: - 2 (8 oz) packages cream cheese, softened - 1 cup pumpkin puree (canned or homemade) - ¾ cup brown sugar - ½ teaspoon vanilla extract - 2 large eggs - 1 teaspoon ground cinnamon - ½ teaspoon ground nutmeg - ¼ teaspoon ground cloves - ¼ teaspoon salt - Optional Ingredients for Serving: - Whipped cream (for topping) Each ingredient plays a key role in creating that rich, creamy texture and delightful flavor. The crust gives a nice crunch, while the filling brings the classic pumpkin taste. If you want a lovely touch, add whipped cream on top when serving. This makes each bite even more enjoyable! To start, grab a medium bowl. Combine 1 and ½ cups of graham cracker crumbs, ½ cup of melted butter, and ¼ cup of granulated sugar. Mix well until the crumbs look like wet sand. This will help your crust stick together. Next, press this mixture evenly into the bottom of a greased 9x13 inch baking pan. Use your fingers or the back of a spoon to get it nice and firm. Now, bake it in a preheated oven at 350°F (175°C) for 10 minutes. Once done, let it cool slightly before adding the filling. In a large bowl, beat 2 packages of softened cream cheese until it is smooth and creamy. This step is key for a velvety texture. Then, add 1 cup of pumpkin puree, ¾ cup of brown sugar, and ½ teaspoon of vanilla extract. Mix until well combined and smooth. Now, let’s add the eggs. Crack 2 large eggs into the bowl, mixing well after each one. This helps to incorporate air, making your cheesecake fluffy. Finally, add 1 teaspoon of ground cinnamon, ½ teaspoon of ground nutmeg, ¼ teaspoon of ground cloves, and ¼ teaspoon of salt. Mix until there are no lumps left. Now it’s time to pour that delicious filling over your pre-baked crust. Spread it evenly with a spatula. Bake the bars for 30-35 minutes. You want the edges to be set, and the center should have a slight jiggle. To check if they’re done, insert a toothpick into the center. It should come out mostly clean. Once baked, remove the pan from the oven. Let the bars cool at room temperature. After they cool, transfer them to the fridge. Chill for at least 2 hours or until completely set. Now, you are ready to slice and serve! To get that creamy texture, use room temperature ingredients. Cold cream cheese can make lumps. Let it sit out for about 30 minutes before mixing. This small step makes a big difference! To avoid cracks, bake at a lower temperature. If the oven is too hot, the bars can puff up and then sink. Bake them at 350°F (175°C) and check for a slight jiggle in the center when done. This means they are cooked just right. For toppings, whipped cream is a classic choice. You can also sprinkle some ground cinnamon or nutmeg on top. This adds a beautiful touch! Pair these bars with a warm drink. A spiced chai or a nice cup of coffee works well. If you want a dessert duo, serve with a scoop of vanilla ice cream. The cold ice cream balances the rich cheesecake perfectly. {{image_2}} You can easily add fun twists to your pumpkin cheesecake bars. One great idea is to mix in chocolate or caramel swirls. Just melt some chocolate or caramel and drizzle it on top of the cheesecake before baking. Use a knife to swirl it gently into the filling. This adds a rich flavor that pairs well with pumpkin. Another option is to play with different spices. While cinnamon, nutmeg, and cloves are classic, you can try adding ginger or allspice for a new taste. These spices can change the whole flavor profile of your bars. Experimenting with flavors keeps your dessert exciting! If you need gluten-free options, you can swap the graham cracker crumbs for gluten-free crumbs. Many stores sell these, or you can make your own from gluten-free cookies. This way, everyone can enjoy the bars without worry. For a vegan version, you can replace the cream cheese with a plant-based cream cheese. Look for brands that taste good and are easy to find. Also, use flax eggs instead of real eggs. To make one flax egg, mix one tablespoon of ground flaxseed with three tablespoons of water. Let it sit for a few minutes to thicken. These changes keep the delicious taste while meeting dietary needs. To keep your pumpkin cheesecake bars fresh, use airtight containers. Glass or plastic containers work well. Place parchment paper between layers to avoid sticking. For the best taste, store them in the fridge. They stay fresh for up to five days. You can also freeze them for longer storage. In the freezer, they last up to three months. Just make sure to wrap the bars tightly in plastic wrap before placing them in a freezer-safe container. To enjoy leftovers, take them out of the fridge. You can serve them cold or warm. If you want to warm them, use the oven. Preheat it to 350°F (175°C). Place the bars on a baking sheet and heat for about 10 minutes. You can also use the microwave. Heat them in 15-second bursts until warm. This keeps them soft and creamy. If you like, add whipped cream on top for extra flavor. You can serve pumpkin cheesecake bars in many fun ways. A dollop of whipped cream on top adds a nice touch. You might also sprinkle a bit of cinnamon or nutmeg for extra flavor. Serve the bars on a nice plate for a pretty look. Adding a few pecans or caramel drizzle can make them even better. Yes, you can freeze pumpkin cheesecake bars. First, let them cool completely. Then, cut them into squares. Wrap each square in plastic wrap. Place the wrapped bars in a freezer bag. They can stay frozen for up to three months. When you're ready to eat, take them out and thaw them in the fridge overnight. To check if the bars are done, look for a few signs. The edges should be set, while the center may still jiggle a bit. A toothpick inserted in the center should come out mostly clean. If it has some filling on it, that’s okay. Just bake for a few more minutes if needed. You now have a complete guide to making delicious pumpkin cheesecake bars. We covered the ingredients, steps, and tips for getting the best results. I shared fun ways to change up flavors and offered storage tips for leftovers. Keep these ideas in mind as you bake and enjoy this seasonal treat. With practice, you’ll master this recipe and impress everyone. Try it out, and let the flavors delight your taste buds!

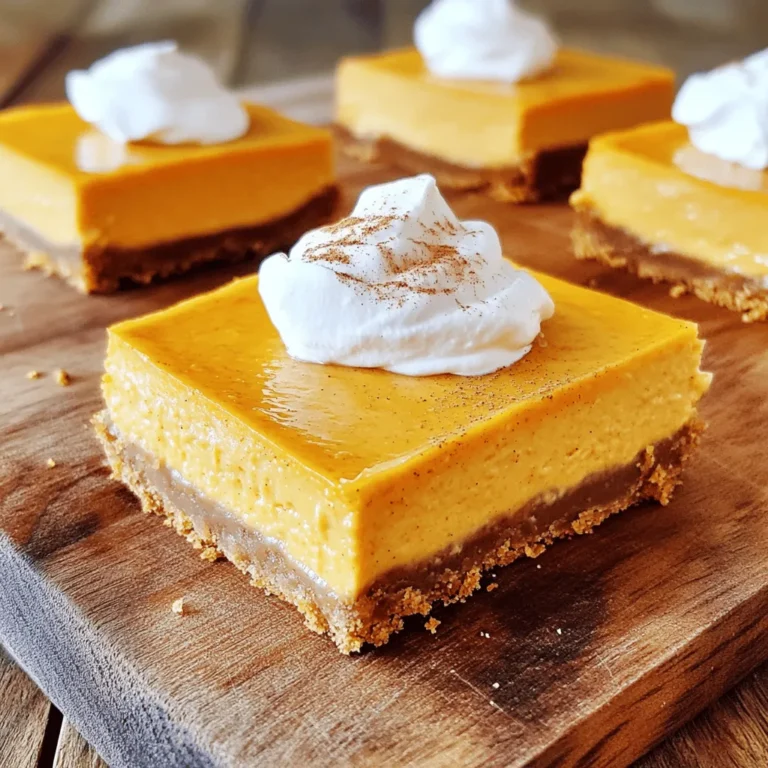
Pumpkin Cheesecake Bars Tasty Fall Dessert Recipe

- 1 lb (450g) boneless, skinless chicken thighs, diced - 3 tablespoons soy sauce - 2 tablespoons rice vinegar - 1 tablespoon cornstarch - 2 tablespoons vegetable oil - 3-4 dried red chilies (adjust for spice level) - 1/2 cup unsalted roasted peanuts - 1 red bell pepper, diced - 1 green bell pepper, diced - 3 green onions, chopped - 4 cloves garlic, minced - 1 tablespoon ginger, minced - 1 tablespoon sesame oil - 1 tablespoon hoisin sauce - Salt and pepper to taste - Fresh cilantro for garnish - Sesame seeds for added crunch - Sliced carrots for extra color - Baby corn for a fun texture - Use tofu instead of chicken for a vegetarian dish. - Swap soy sauce with tamari for a gluten-free version. - Replace rice vinegar with apple cider vinegar for a different taste. - Use cashews instead of peanuts for a nut-free option. To start, you need to marinate the chicken. In a medium bowl, combine: - 1 lb boneless, skinless chicken thighs, diced - 3 tablespoons soy sauce - 2 tablespoons rice vinegar - 1 tablespoon cornstarch Mix all these well and let it sit for at least 30 minutes. While the chicken marinates, prepare your vegetables. Dice: - 1 red bell pepper - 1 green bell pepper Chop: - 3 green onions Mince: - 4 cloves garlic - 1 tablespoon ginger Set aside your peanuts. You will need 1/2 cup unsalted roasted peanuts for the crunch. Now it’s time to cook! Heat 2 tablespoons of vegetable oil in a large skillet or wok over medium-high heat. Add the dried red chilies, around 3-4, and stir-fry them for about 1 minute. This makes them fragrant. Next, add the marinated chicken to the skillet. Stir-fry it for about 5-7 minutes. You want it browned and cooked through. After the chicken is ready, toss in the minced garlic and ginger. Stir for another minute until you smell the aroma. Now, add your diced red and green bell peppers. Cook them for 3-4 minutes until they soften. Finally, stir in the peanuts, 1 tablespoon sesame oil, and 1 tablespoon hoisin sauce. Season with salt and pepper to taste. Mix everything well, heating it through for a minute more. To finish, add the chopped green onions and stir for an extra minute. This adds a fresh touch. Serve the Kung Pao Chicken on a bed of steamed jasmine rice. For garnish, sprinkle extra green onions and sesame seeds on top. This makes your dish look great! Enjoy the tasty, colorful meal you've created. To get the best flavor in your Kung Pao Chicken, balance is key. You want sweet, savory, and spicy notes to shine. Start with soy sauce for saltiness. Then, use rice vinegar for a tangy kick. Add hoisin sauce for sweetness. The peanuts bring crunch and depth. Adjust these elements to suit your taste. Do you like it spicy? Start with 3-4 dried red chilies. For less heat, remove some chilies or use milder ones. You can also add a pinch of sugar to tone down the spice. Taste as you go to find your perfect mix. Using a wok gives the best results for stir-frying. Its shape lets heat circulate well. If you don’t have a wok, a large skillet works too. Ensure your pan is hot before adding the oil. This helps the chicken brown nicely. {{image_2}} You can switch up the protein in Kung Pao Chicken. Shrimp is a great choice. It cooks fast and adds a nice flavor. Tofu is perfect for a vegetarian option. It absorbs the sauce well. You can also use beef or pork for a different taste. Just make sure to slice them thin for even cooking. Adding more veggies makes the dish colorful and healthy. Broccoli works well with the sauce. You can also try snap peas for crunch. Carrots add sweetness and a nice pop of color. Mushrooms bring an earthy flavor, while zucchini adds a soft texture. Feel free to mix and match your favorites! Kung Pao Chicken varies across China. In Sichuan, it’s spicier and uses more peanuts. The heat comes from the dried chilies. In other regions, like Guangdong, the dish may be less spicy and sweeter. Some versions use more vegetables, making them lighter. Explore these styles to find your favorite! To store leftover Kung Pao Chicken, let it cool first. Place it in an airtight container. Make sure to use it within three days for the best taste. When reheating, add a splash of water or broth. This keeps the chicken moist and tasty. You can freeze Kung Pao Chicken if you want to save some for later. Use a freezer-safe container and store it for up to three months. To reheat, thaw it in the fridge overnight. Heat it on the stove over low heat. Stir often to keep it from drying out. Meal prepping Kung Pao Chicken is a great idea. You can marinate the chicken a day ahead. Chop the veggies and store them in the fridge. This makes cooking faster on busy nights. You can also make a larger batch and freeze half for later. Enjoy your easy weeknight meals! Kung Pao Chicken is a classic Chinese dish. It features diced chicken, peanuts, and vegetables. The dish has a rich flavor from soy sauce and spices. It is known for its combination of sweet, salty, and spicy tastes. This dish is popular not just in China but worldwide. It celebrates bold flavors and textures, making it a favorite for many. Yes, you can make Kung Pao Chicken ahead of time. To prepare it in advance, marinate the chicken and chop the vegetables. Store the marinated chicken and veggies in separate containers in the fridge. You can keep them for up to two days. When ready to cook, just stir-fry the chicken and veggies as per the recipe. This saves time and helps you enjoy a quick meal. To make Kung Pao Chicken gluten-free, swap regular soy sauce for tamari or coconut aminos. These options provide the same salty flavor without gluten. Use gluten-free hoisin sauce as well. Check the labels of all sauces and ingredients to ensure they are gluten-free. With these changes, you can enjoy this dish without worry. Kung Pao Chicken can be quite spicy, depending on the chilies used. Dried red chilies add heat, but you can control it. For less spice, use fewer chilies or remove the seeds. If you love heat, add more chilies or use fresh chili paste. Adjust the spice level to fit your taste. This way, everyone can enjoy this tasty dish! This blog post covered all you need for making Kung Pao Chicken. We explored core ingredients, optional enhancements, and handy substitutions. The step-by-step guide made cooking easy, along with tips for flavor and spice adjustments. You can even try different proteins and veggies for a unique twist. Remember the storage tips for leftovers and meal prep. With this knowledge, you can create a delicious dish that fits your needs. Enjoy making Kung Pao Chicken your way!

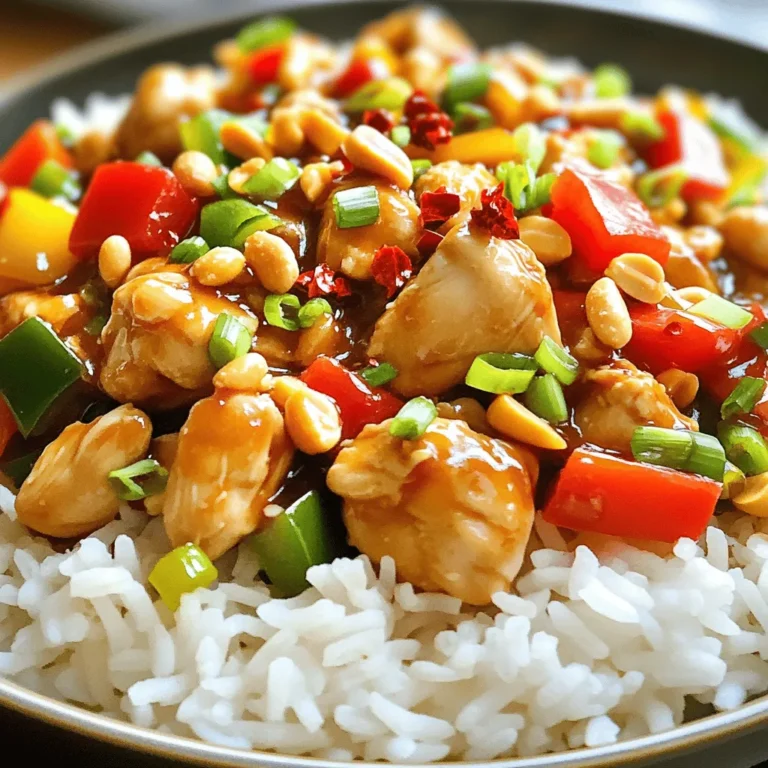
Kung Pao Chicken Flavorful Stir-Fry Delight

To make this delightful caramel apple coffee cake, you need some simple ingredients. Gather these items for a yummy treat: - 2 medium apples, peeled and diced - 1 cup brown sugar, packed - 1/2 cup granulated sugar - 1/2 cup unsalted butter, softened - 2 large eggs - 1 teaspoon vanilla extract - 2 cups all-purpose flour - 1 teaspoon baking powder - 1/2 teaspoon baking soda - 1/2 teaspoon salt - 1 teaspoon cinnamon - 1/2 cup sour cream - 1/2 cup caramel sauce (store-bought or homemade) - 1/2 cup chopped pecans or walnuts (optional) - Extra cinnamon sugar for topping These ingredients come together to make a moist, sweet cake with apple bits and caramel swirls. The apples add freshness, while the caramel brings a rich flavor. You can use any nuts you like, or skip them if you prefer. Each bite of this cake will make you smile! 1. Preheat your oven to 350°F (175°C). Grease a 9x13 inch baking dish or use parchment paper. 2. In a mixing bowl, cream together the softened butter, brown sugar, and granulated sugar. Mix until light and fluffy. 3. Add eggs, one at a time. Mix well after each addition. Stir in the vanilla extract until combined. 1. In a separate bowl, combine the flour, baking powder, baking soda, salt, and cinnamon. Whisk these dry ingredients together. 1. Gradually add the dry mixture to the wet mixture. Alternate adding them with the sour cream. Mix until just combined. 2. Gently fold in the diced apples and chopped nuts, if using. Make sure they are evenly mixed in the batter. 3. Pour half of the batter into the prepared baking dish. Smooth it out evenly. Drizzle half of the caramel sauce over the batter. 4. Pour the remaining batter on top. Finish by drizzling the rest of the caramel sauce. Use a knife or skewer to swirl the caramel into the batter. 5. Sprinkle a bit of extra cinnamon sugar on top for a sweet crunch. 6. Bake in the preheated oven for 40-45 minutes. Check doneness by inserting a toothpick into the center; it should come out clean. 7. Allow the cake to cool in the pan for about 10 minutes. Carefully transfer it to a wire rack to cool completely. - Always check for doneness using a toothpick. Insert it into the center. If it comes out clean, your cake is ready. This ensures a moist coffee cake. - Cool the cake properly to keep its texture. After baking, let it sit for 10 minutes. Then, move it to a wire rack to cool completely. This helps avoid sogginess. - Drizzle extra caramel sauce on top for a sweet touch. You can also add a scoop of ice cream. This makes each bite even more indulgent. - Pair this coffee cake with hot coffee or spiced cider. These drinks complement the flavors well and enhance the experience. - If you don’t have apples, try pears or peaches. They add a nice fruity flavor too. For nuts, you can use almonds or skip them altogether. - For gluten-free options, substitute regular flour with almond or oat flour. If you need a dairy-free cake, use coconut yogurt instead of sour cream. These swaps keep the cake delicious for everyone. {{image_2}} You can change the flavor of your caramel apple coffee cake easily. Try adding different spices like nutmeg for a warm twist. You can also mix in chocolate chips or raisins for added sweetness. Chocolate chips create a rich flavor, while raisins add chewiness. Both options make the cake even more fun! If you want a vegan version of this coffee cake, replace the eggs and butter. Use flax eggs made from ground flaxseed and water. Swap the butter for coconut oil or a vegan butter alternative. You can also use plant-based sour cream. For keto fans, you can adjust the sugars. Use a sugar substitute like erythritol or stevia. Almond flour can replace the all-purpose flour to keep carbs low. Enhance your coffee cake for fall or the holidays by adding spices like cloves or ginger. You can even use pumpkin puree for a festive flavor. In summer, adapt your recipe with fresh fruits. Try peaches or berries for a bright and juicy twist. Each season brings new flavors to your coffee cake! To store leftovers, let the cake cool completely. Cover it with plastic wrap or foil. You can also place it in an airtight container. Keep it at room temperature for up to three days. This keeps the cake moist and fresh. To freeze the coffee cake, wrap it tightly in plastic wrap. Then, place it in a freezer-safe bag. You can freeze it for up to three months. For the best texture, allow the cake to cool completely before freezing. Thawing tips: - Move the cake to the fridge the night before you want to eat it. - For a quicker thaw, leave it at room temperature for about an hour. This helps it regain its soft texture. To reheat slices, use the oven or microwave. For the oven: - Preheat it to 350°F (175°C). - Place slices on a baking sheet and warm for about 10 minutes. For the microwave: - Heat each slice for 15-20 seconds. - Check to avoid drying it out. These methods keep your caramel apple coffee cake tasty and moist! Can I use different types of apples? Yes, you can use many types of apples. Some great options are Granny Smith, Honeycrisp, or Fuji. Each type adds its unique taste and texture. Granny Smith gives a nice tartness, while Honeycrisp adds sweetness. Feel free to mix apples for more flavor! How do I ensure my coffee cake stays moist? To keep your cake moist, use sour cream in the batter. This ingredient adds extra moisture. Do not overmix the batter; mix just until combined. Also, do not bake too long. Check your cake a few minutes early to avoid dryness. What can I serve with caramel apple coffee cake? Caramel apple coffee cake pairs well with whipped cream or vanilla ice cream. You can also serve it with a cup of coffee or tea. Drizzling extra caramel sauce on top adds a fun touch. What to do if the cake sinks or is undercooked? If your cake sinks, it may be due to overmixing or not enough leavening. Ensure you mix just until combined. If it is undercooked, check your oven temperature. You may need to bake longer, but cover it with foil to prevent burning. How to avoid a soggy bottom in the cake? To prevent a soggy bottom, grease your pan well but do not overdo it. Use parchment paper to help. Make sure to bake the cake until a toothpick comes out clean. Also, cool it on a wire rack to let air circulate. Can I substitute sour cream with yogurt? Yes, you can use yogurt instead of sour cream. Choose plain yogurt for the best results. Greek yogurt works well too, but it may make the cake denser. What is the best type of caramel sauce for this recipe? Use a thick, rich caramel sauce for the best flavor. Store-bought sauces work great, but homemade adds a special touch. Choose one that is not too runny, as it can make the cake soggy. This blog post shared a simple recipe for caramel apple coffee cake. You learned about the key ingredients, step-by-step instructions, and helpful tips. Variations, storage info, and FAQs help you feel ready to bake. Remember, this cake is great for many occasions. You can always adjust ingredients or flavors to match your taste. Enjoy the process and the delicious results! Happy baking!

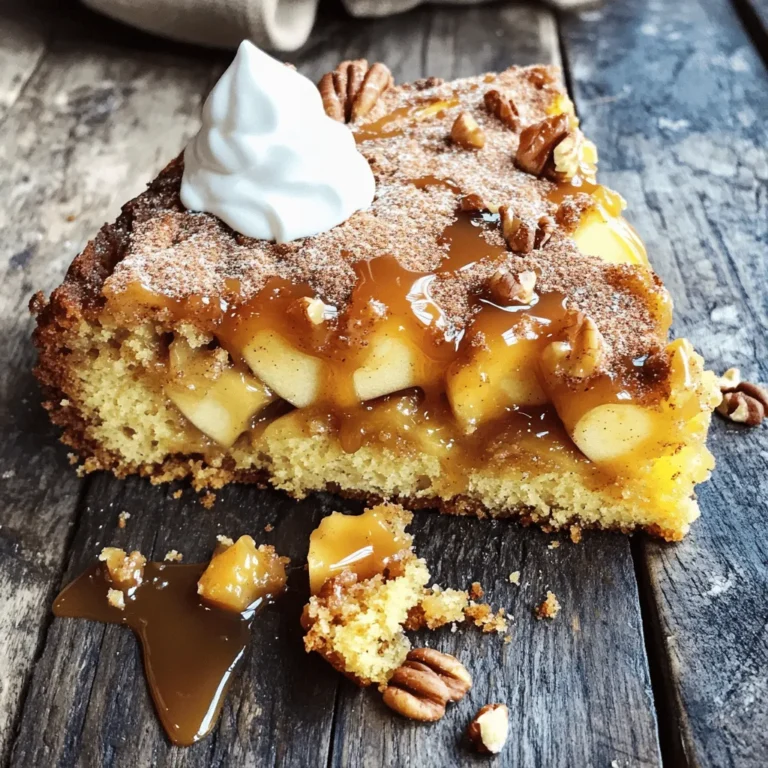
Irresistible Caramel Apple Coffee Cake Recipe Delight

- 9 lasagna noodles - 2 cups fresh spinach, chopped - 1 cup mushrooms, diced (button or cremini) - 1 cup ricotta cheese - 1 cup mozzarella cheese, shredded - 1/2 cup Parmesan cheese, grated - 1 egg, lightly beaten - 2 cloves garlic, minced - 1 teaspoon Italian seasoning - Salt and pepper to taste - 2 cups marinara sauce - Fresh basil for garnish (optional) Fresh spinach offers bright flavor and a nice texture. It wilts down perfectly when cooked. Frozen spinach is more convenient and often cheaper. It also has a long shelf life. If you choose frozen, make sure to thaw and drain it well. This helps avoid excess water in your dish. For this recipe, I prefer fresh spinach. It gives the roll ups a pop of color and taste. Cheese is key to a creamy filling. Ricotta gives a nice base and pairs well with spinach. Mozzarella adds gooeyness. You can use low-fat versions if you want to cut calories. For a twist, try goat cheese or feta. These options add tang and depth. A mix of cheeses can elevate the flavor of your roll ups. Just remember to balance flavors so one cheese does not overpower the others. First, boil a large pot of salted water. Place the lasagna noodles in the boiling water. Cook them for about 8 to 10 minutes until they are al dente. Drain the noodles and rinse them with cold water. This keeps them from sticking together. Lay them flat on a clean towel while you prepare the filling. In a large skillet, heat a drizzle of olive oil over medium heat. Add two cloves of minced garlic and sauté until you smell the garlic. Then, add one cup of diced mushrooms. Cook the mushrooms for about five minutes until they soften. Next, add two cups of fresh, chopped spinach to the skillet. Cook until the spinach wilts down. Season this mix with one teaspoon of Italian seasoning, salt, and pepper to taste. Grab your mixing bowl and combine one cup of ricotta cheese, half of the mozzarella cheese, and the lightly beaten egg. Stir in the sautéed spinach and mushroom mixture. Spread a thin layer of marinara sauce on the bottom of a 9x13 inch baking dish. Take a noodle and spread 2 to 3 tablespoons of the cheese and vegetable mix along the noodle. Roll the noodle from one end to the other and place it seam side down in the dish. Repeat this with the remaining noodles and filling. Once all the roll-ups are in the dish, pour the rest of the marinara sauce over them. Sprinkle the remaining mozzarella and half a cup of grated Parmesan cheese on top. Cover the dish with aluminum foil and bake it in a preheated oven at 375°F (190°C) for 25 minutes. After that, remove the foil and bake for another 10 to 15 minutes. Look for bubbly and golden cheese on top. Once done, let it cool for a few minutes before serving. To stop lasagna noodles from sticking, rinse them well. After boiling, cool them under cold water. This cools them down and stops cooking. You can also add a splash of olive oil to the water. This helps keep them separate. Handle the noodles gently when assembling. If they tear, don’t worry. You can patch them with extra filling. Choosing the right marinara sauce can boost your dish. Some top brands include Rao's, Classico, and Prego. Rao's offers a rich flavor with no added sugar. Classico has a nice balance of herbs. Prego is widely available and budget-friendly. If you like to cook, try making your own. Using fresh tomatoes and herbs can make a huge difference. Making this dish ahead saves time on busy nights. You can prepare the roll-ups a day early. Just assemble them and cover with foil. Store them in the fridge. When ready to bake, add a bit more sauce if needed. You can also freeze them. Just wrap each roll-up tightly. Defrost overnight in the fridge before baking. This keeps them fresh and tasty! {{image_2}} You can easily change up the filling in your spinach mushroom lasagna roll ups. Add extra veggies like bell peppers, zucchini, or even artichokes. Cook them just like the mushrooms and spinach. You can also mix in fresh herbs, such as parsley or thyme, for added flavor. If you want a meatier dish, try adding cooked ground beef or sausage to the filling. Just make sure it is well seasoned. You can also swap in different cheeses, like goat cheese or feta, for a unique twist. To make these roll ups vegan, use plant-based cheeses and egg replacements. You can use tofu or a mix of cashews blended with nutritional yeast for a creamy texture. Replace ricotta cheese with silken tofu mixed with lemon juice and spices. For the mozzarella, look for dairy-free options made from nuts or soy. Be sure to check labels for any hidden dairy. You can also use marinara sauce that does not contain added sugars or oils for a healthier option. If you need gluten-free options, look for gluten-free lasagna noodles. Many brands now offer great alternatives that taste just as good. You can also try using thin slices of zucchini or eggplant instead of noodles. When using vegetables, be sure to salt them first to remove excess moisture. This will help keep your roll ups from getting soggy. You can still enjoy all the great flavors while keeping your meal gluten-free. To keep your spinach mushroom lasagna roll ups fresh, let them cool first. Place them in an airtight container. They can stay in the fridge for up to three days. For best taste, try to eat them soon. When you're ready to enjoy your leftovers, preheat your oven to 350°F (175°C). Place the roll ups in a baking dish. If they seem dry, add a splash of marinara sauce on top. Cover with foil to prevent burning. Heat for about 20 minutes or until hot. You can also use the microwave. Simply heat them for 1-2 minutes, checking often. If you want to save some for later, freezing works great! Wrap each roll up in plastic wrap. Place them in a freezer-safe bag or container. They can stay frozen for up to three months. When you’re ready to eat, thaw them in the fridge overnight. Reheat as mentioned above for a quick meal. Yes, you can! Feel free to add other veggies. Zucchini, bell peppers, or carrots work well. Just chop them finely. Make sure to sauté them like you did with the mushrooms and spinach. This ensures they are soft and blend nicely with the cheese. Check the cheese on top. It should be bubbly and golden brown. You can also insert a knife into the center. If it feels hot and the filling is warm, they are ready. Baking them covered helps cook evenly. Uncovering for the last part gives a nice, crispy top. These roll ups pair well with a simple salad. A fresh green salad with a light vinaigrette is perfect. Garlic bread makes a great side too. You can also add some roasted vegetables for color and flavor. Enjoy your meal with a glass of red wine if you like! You learned how to make delicious lasagna roll ups using fresh and frozen ingredients. We covered various cheese options and shared tips for prepping the noodles and assembling the dish. I gave you tricks to prevent sticking and ideas for meal prep. Plus, you discovered fun variations for everyday diets. Now, you can enjoy homemade lasagna without the hassle. Get creative with your fillings and savor every bite. This dish is sure to please your family and friends!

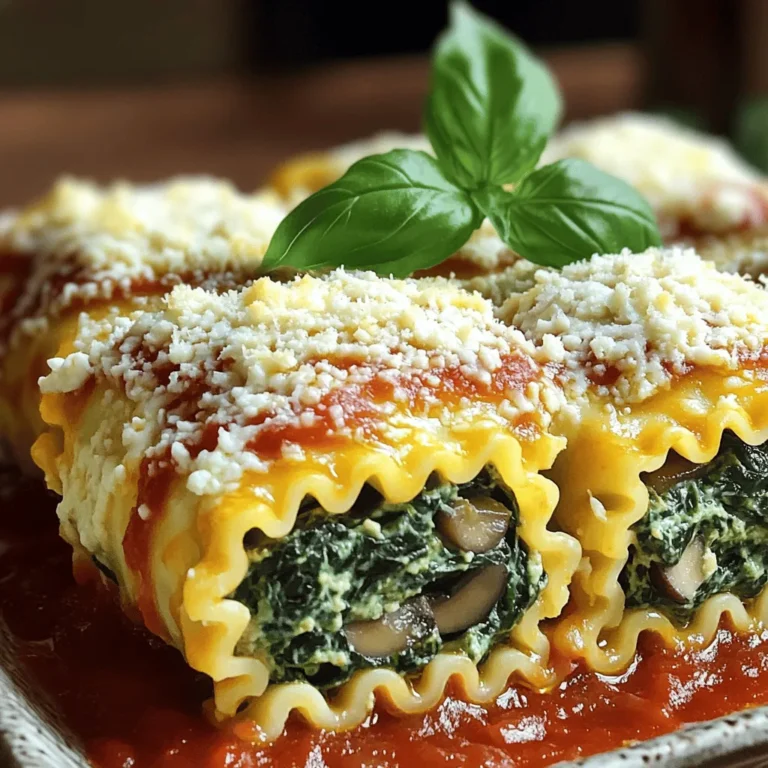
Spinach Mushroom Lasagna Roll Ups Simply Delicious Meal

- 1 cup unsalted butter - 1 cup packed brown sugar - 1/2 cup granulated sugar - 2 large eggs - 2 teaspoons vanilla extract - 2 1/2 cups all-purpose flour - 1 teaspoon baking soda - 1/2 teaspoon salt - 1 cup toffee bits - 1/2 cup semi-sweet chocolate chips (optional) You can swap unsalted butter for salted butter. Just cut back on the added salt. For sugar, you can use coconut sugar or maple sugar for a different taste. If you need gluten-free options for flour, use a 1:1 gluten-free blend. Using quality toffee bits makes a big difference. I recommend using Heath bits for their rich taste. If you want to add chocolate, semi-sweet chocolate chips work well. The type of butter you use also affects the flavor. Always choose good-quality butter for the best results. To make brown butter, melt the unsalted butter in a saucepan over medium heat. Stir it often. Keep cooking until it turns golden brown. This should take about 5 to 7 minutes. You’ll know it’s ready when it smells nutty and looks dark. Remove it from heat and let it cool for a few minutes. In a large bowl, mix the brown butter with brown sugar and granulated sugar. Use a whisk to blend them until smooth. Add the eggs one at a time. Then, pour in the vanilla extract. Mix until everything is combined well. Make sure the butter is not too hot; you don’t want to cook the eggs. In another bowl, whisk together the all-purpose flour, baking soda, and salt. Gradually add this mix to the wet ingredients. Stir gently until just combined. Be careful not to overmix, as this can make the cookies tough. Stop mixing as soon as you no longer see dry flour. Chilling the dough helps the cookies keep their shape. Cover the bowl with plastic wrap and put it in the fridge. Chill for at least 30 minutes. This step also helps improve the flavors. It gives the ingredients time to blend nicely. Preheat your oven to 350°F (175°C) and line a baking sheet with parchment paper. Scoop rounded balls of dough onto the sheet. Leave about 2 inches between each ball. Bake for 10 to 12 minutes. The edges should be lightly golden. The centers may look soft but will firm up while cooling. Let the cookies cool on the baking sheet for about 5 minutes. Then transfer them to a wire rack. This helps them cool fully. For serving, arrange them on a pretty plate. You can sprinkle a little sea salt on top for extra flavor. Enjoy with a glass of milk for the best treat! To achieve soft and chewy cookies, use more brown sugar than white sugar. Brown sugar adds moisture. For crunchier cookies, increase the granulated sugar. Chilling the dough is key. It helps the cookies hold their shape. Chill for at least 30 minutes. This also enhances flavor. Overbaking is a common error. To prevent it, watch the edges. They should be golden, while the center looks slightly underbaked. Remove cookies from the oven and let them finish cooking on the sheet. Measuring ingredients is crucial. Use a kitchen scale for accuracy. Incorrect amounts can change the texture. Always level off dry ingredients with a straight edge. Adding spices can elevate your cookies. A pinch of cinnamon or a dash of nutmeg works well. You can also try almond or peppermint extract for a unique twist. Mix-ins add fun flavors. Besides toffee bits, consider nuts or dried fruit. Chocolate variations like dark or white chocolate chips can create new tastes. Experiment and find your perfect mix! {{image_2}} You can change the chocolate in these cookies. Dark chocolate gives a rich taste. It adds a nice contrast to the sweet toffee. Semi-sweet chips work well too. They melt beautifully and balance the flavors. If you want something different, switch to white chocolate. It pairs nicely with toffee bits. The creamy sweetness of white chocolate makes the cookies extra special. You can mix and match these options based on your taste. You might want to add nuts or dried fruit for extra flavor. Chopped pecans or walnuts add crunch and richness. Dried cherries or cranberries bring a fruity twist. Both options will make your cookies unique. Consider trying different candy types as well. You can swap out toffee bits for butterscotch or peanut butter chips. Each choice changes the cookie's taste and texture. Be bold and experiment; you may find a new favorite! For holiday baking, you can add seasonal spices. A pinch of cinnamon or nutmeg can warm up the flavors. These spices work well with the butter and toffee. You can also use vanilla bean instead of extract for a richer taste. It's easy to adapt this recipe for festive occasions. Shape the cookies into holiday forms or sprinkle colored sugar on top. These small changes make your cookies stand out on any dessert table. Make your holiday baking fun and flavorful! To keep your brown butter toffee cookies fresh, use airtight containers. Glass jars or plastic containers work great. Line them with paper towels to absorb moisture. This helps keep your cookies from getting soft. Store them at room temperature away from sunlight. This way, they stay delicious for days. You can freeze the cookie dough for later use. First, scoop the dough into balls. Place them on a baking sheet and freeze until firm. Once frozen, transfer the balls to a zip-top bag. Press out as much air as you can. This way, you can bake fresh cookies anytime. When you are ready to bake, just take the dough from the freezer. Let it thaw in the fridge for a few hours. You can also bake the cookies straight from the freezer. Just add a couple of extra minutes to the baking time. Baked cookies last about a week at room temperature. They may last a bit longer if you store them properly. Keep an eye out for signs of spoilage. If they smell off or feel too hard, it’s best to toss them. Always trust your senses; if they don’t taste right, don’t eat them! Brown butter is made by cooking butter until it turns golden brown. You will see small brown bits forming at the bottom of the pan. This process creates a nutty, rich flavor. The browning adds depth to your cookies. It changes the taste from creamy to a warm, toasty flavor. This enhances the overall experience of eating the cookies. Yes, you can make these cookies ahead of time. Store the cookie dough in the fridge for up to three days. You can also freeze the dough for up to three months. Just scoop the dough into balls, wrap them well, and place them in a freezer-safe bag. When ready, bake them straight from the freezer. While you can use margarine, it will change the taste and texture. Margarine has a different fat content, which may make the cookies less rich. They might turn out softer and less flavorful. Butter gives the best taste and a nice crisp edge. To check if the cookies are done, look for lightly golden edges. The centers may look soft but will firm up as they cool. You can also gently touch the top. If it springs back, they are done. Take them out of the oven to cool on the baking sheet for five minutes. If your dough is too sticky, chill it for a bit. Place it in the fridge for around 20-30 minutes. This helps firm it up. If it’s still sticky, add a little more flour, one tablespoon at a time, until it reaches a good consistency. This blog post covered everything you need for perfect cookies. We explored ingredients, from great butter to tasty toffee. You learned how to brown butter and mix techniques for the best texture. Chilling the dough and baking tips helped ensure those cookies come out just right. I shared ways to boost flavor and avoid common mistakes. Remember, small changes can make a big difference. Enjoy creating your cookies, and don't hesitate to experiment with fun twists. Happy baking!

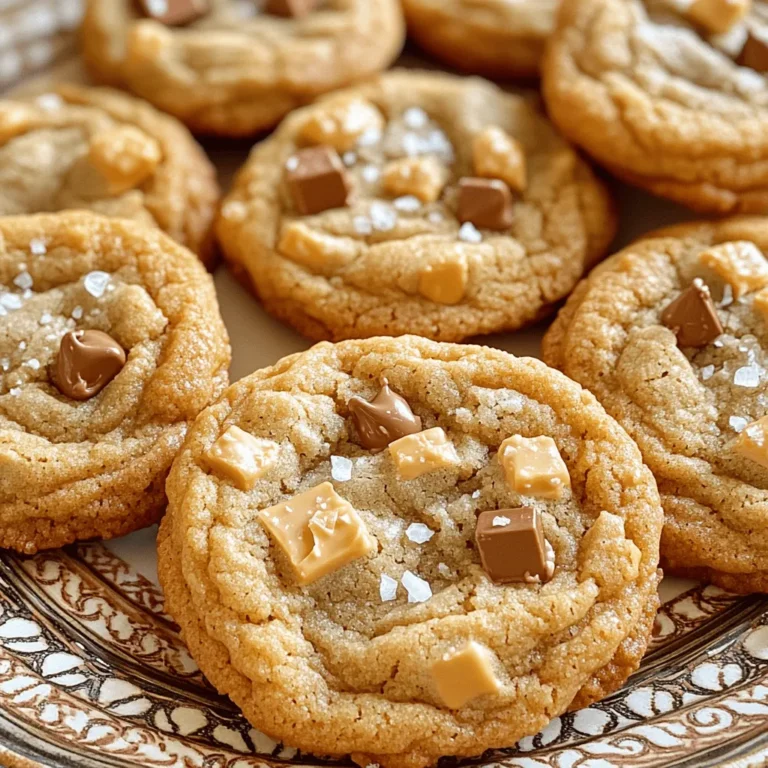
Brown Butter Toffee Cookies Irresistible Flavor Boost

- 16 oz (450g) baby bella mushrooms - 4 tablespoons unsalted butter - 4 cloves garlic - 1 tablespoon fresh parsley - 1 teaspoon dried thyme - Salt and pepper to taste - Lemon wedges for serving For these Air Fryer Garlic Butter Mushrooms, you need simple yet fresh ingredients. Baby bella mushrooms give a rich taste and firm texture. You will use four tablespoons of unsalted butter to create that delicious garlic butter base. The garlic adds a strong flavor that pairs perfectly with mushrooms. Fresh parsley gives a bright touch. For seasoning, dried thyme brings an earthy note. You can adjust salt and pepper to match your taste. Lemon wedges add a zesty finish that brightens the dish. This mix of ingredients makes your mushrooms flavorful and easy to prepare. First, let’s make the garlic butter. In a large bowl, mix together: - 4 tablespoons unsalted butter, melted - 4 cloves garlic, minced - 1 tablespoon fresh parsley, chopped - 1 teaspoon dried thyme - Salt and pepper to taste Stir this mix well until it combines into a smooth sauce. Now, move on to the mushrooms. Clean 16 oz (450g) of baby bella mushrooms. Rinse them under cold water and dry with a paper towel. Trim the stems, making them even. This helps them cook well. Next, preheat your air fryer. Set it to 375°F (190°C) and let it warm for about 3-5 minutes. This step makes sure the mushrooms cook evenly. Now, take your garlic butter-coated mushrooms. Place them in the air fryer basket in a single layer. Make sure they aren’t crowded. This helps them get crispy. Air fry the mushrooms for 10-12 minutes. Halfway through, shake the basket gently. This ensures every mushroom cooks well and gets that nice golden color. Once they are done, carefully take the mushrooms out. Toss them again in the remaining garlic butter sauce. This adds even more flavor. For serving, arrange the warm mushrooms on a platter. Serve with lemon wedges on the side. The lemon adds a bright, zesty finish to each bite. Enjoy! To get those golden brown mushrooms, watch the cooking time closely. You want to air fry them until they are tender and have a nice color. Typically, 10 to 12 minutes works well. Remember to shake the basket halfway through. This helps them cook evenly. Avoid overcrowding in the air fryer. If the mushrooms sit too close, they may steam instead of fry. Cook in batches if needed. This way, every mushroom gets that crispy texture you want. To make the dish more interesting, add extra herbs or spices. Fresh thyme or a sprinkle of red pepper flakes can bring a nice kick. Feel free to experiment with your favorite herbs. Adjusting garlic levels is simple. If you love garlic, add more cloves. If you want a milder flavor, use less. The great thing about this recipe is it’s easy to customize to your taste. Garnishing with fresh parsley makes the dish pop. Sprinkle some on top right before serving. It adds a nice splash of color and freshness. For creative serving options, try using lemon wedges on the side. The citrus brings a bright flavor that complements the garlic butter perfectly. Arrange the mushrooms on a nice platter for a lovely presentation. {{image_2}} You can switch up the type of mushrooms you use. Baby bella mushrooms are rich and flavorful. They add a nice depth to your dish. You can also use white button mushrooms. They are milder and will soak up the garlic butter well. If you want something meatier, try portobello mushrooms. They have a hearty texture and are great for grilling too. Get creative with your herbs! You can add rosemary or oregano for a new twist. These herbs bring fresh notes that brighten the dish. Want to make it richer? Add cheese! Goat cheese or Parmesan can give a nice creaminess. Just sprinkle some on top before serving for that extra burst of flavor. Need a vegan option? Use plant-based butter instead of regular butter. It works just as well and keeps the taste. If you are gluten-free, check your seasoning. Some mixes can have hidden gluten. Use fresh herbs and spices to keep it safe. This way, everyone can enjoy the dish! To store your leftover Air Fryer Garlic Butter Mushrooms, let them cool first. Place the cooled mushrooms in an airtight container. Make sure to seal it tightly to keep them fresh. You can keep them in the fridge for up to three days. I recommend using glass containers. They are safe and do not stain. You can see the mushrooms easily, too. To reheat, use your air fryer again. Set it to a low heat, about 350°F (175°C). This method helps keep the mushrooms crispy. Heat for about 5 minutes. Shake the basket halfway through to warm them evenly. Avoid using the microwave. It can make the mushrooms soggy. If you must use it, heat them for a very short time. This way, they will not lose their texture. You can use frozen mushrooms, but fresh ones taste better. Frozen mushrooms lose some texture. If you use them, thaw and drain them first. Pat them dry to avoid extra moisture. This will help them cook better in the air fryer. Check the mushrooms after 10 minutes. They should be tender and golden brown. If they seem soft and juicy, they are ready. If you want more color, air fry them for two more minutes. Just remember to shake the basket halfway through. Yes, you can! Use a skillet on medium heat. Melt the butter and add garlic. Then, add the mushrooms and cook until tender. This will take about 5 to 7 minutes. Stir often to keep the mushrooms from burning. These mushrooms pair well with many dishes. Serve them as a side with steak or chicken. They also taste great on pasta or rice. Try them in a salad for extra flavor. A squeeze of lemon brightens the dish, too! This recipe combines simple ingredients to create flavorful air fryer garlic butter mushrooms. You learned how to prepare, cook, and store them effectively. Remember, you can adjust flavors and use different mushroom types for variety. Experiment with herbs for added taste. Enjoy your dish fresh, and don't hesitate to share with friends and family. With these tips and tricks, you can make incredible mushrooms every time. Get ready to impress with your new cooking skills. Happy cooking!

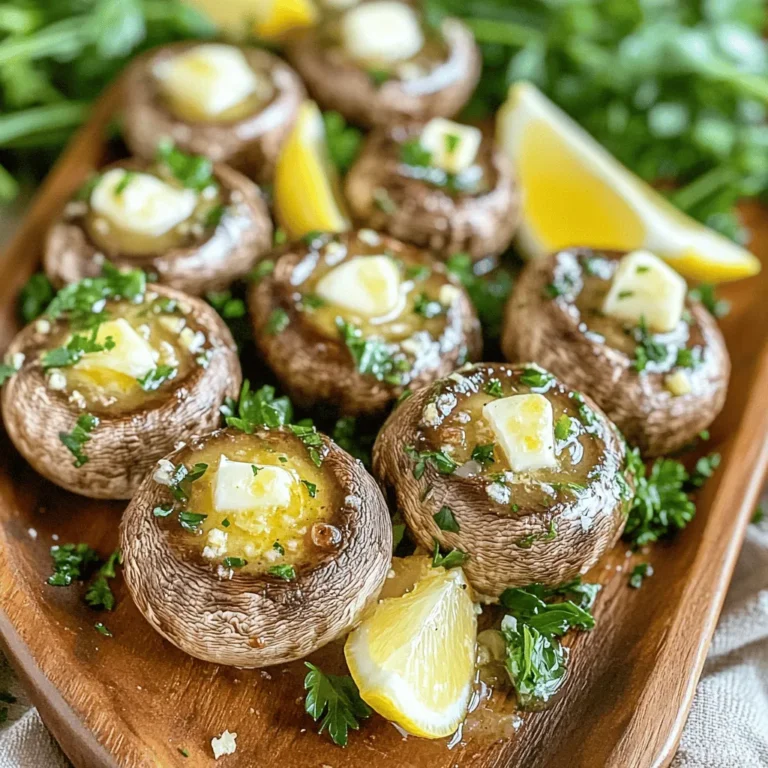
Air Fryer Garlic Butter Mushrooms Flavorful and Easy Dish

Chicken and Marinade Components - 4 boneless, skinless chicken breasts - 1/4 cup olive oil - 3 tablespoons lemon juice (freshly squeezed) - Zest of 1 lemon - 3 cloves garlic, minced - 1 tablespoon honey - 2 teaspoons dried oregano - 1 teaspoon dried thyme - Salt and pepper to taste These ingredients create a bright and zesty flavor in the chicken. The olive oil adds richness, while the lemon juice and zest provide a fresh tang. Honey balances the acidity and keeps the chicken moist. Garlic, oregano, and thyme give depth to the marinade. Quinoa and Vegetable Toppings - 2 cups cooked quinoa - 1 cup cherry tomatoes, halved - 1 cucumber, diced - 1 avocado, sliced Quinoa serves as a hearty base. It adds protein and fiber, making the meal filling. Cherry tomatoes bring sweetness and color, while cucumber adds crunch. Avocado gives a creamy texture that complements the grilled chicken perfectly. Garnishing Ingredients - Fresh parsley or cilantro for garnish Using fresh herbs uplifts the dish. They add a pop of color and a burst of flavor. Choose your favorite herb to make it your own. This combination of ingredients makes Lemon Herb Grilled Chicken Bowls a delightful meal. The flavors work together to create a satisfying and healthy dish. To start, grab a large bowl. You will whisk together the olive oil, lemon juice, lemon zest, minced garlic, honey, oregano, thyme, salt, and pepper. This mix becomes your flavor-packed marinade. Next, add the chicken breasts to the bowl. Make sure each piece is coated well. Cover the bowl and place it in the fridge for at least 30 minutes. If you have time, let it marinate for up to 2 hours. This extra time helps the flavors soak in. While the chicken marinates, prepare your grill. Preheat it to medium-high heat. This way, you get nice grill marks and a juicy chicken. Now it’s time to grill the chicken. Remove it from the marinade and toss the leftover marinade. Place the chicken on the grill. Cook each side for about 5-7 minutes. You want the chicken’s internal temperature to reach 165°F (75°C). To check for doneness, use a meat thermometer. If you don’t have one, cut into the thickest part of the chicken. It should be white and juicy inside, not pink. After grilling, let the chicken rest for 5 minutes. This helps keep it juicy. Slice the chicken into strips. Now, let’s build your bowl! Start with a base of cooked quinoa. Top it with the grilled chicken strips. Add cherry tomatoes, diced cucumber, and avocado slices. For a pop of color and flavor, garnish with fresh parsley or cilantro. You can also drizzle some extra olive oil or a squeeze of lemon over the top for added zest. Serve it all in vibrant bowls for a fun meal presentation. - Best Practices for Flavor Infusion: To get the best taste, mix the marinade well. Use a large bowl to whisk the olive oil, lemon juice, zest, garlic, honey, oregano, thyme, salt, and pepper. Make sure the chicken breasts are fully covered. This helps the flavors soak in deeply. - Recommended Marination Time: I suggest marinating the chicken for at least 30 minutes. For a stronger taste, you can marinate for up to 2 hours. Just keep it in the fridge during this time. - Avoiding Dry Chicken: To keep the chicken juicy, don’t overcook it. Grill on medium-high heat. Cook for about 5-7 minutes on each side. Use a meat thermometer to check for doneness. The chicken should reach 165°F (75°C). - Tools for a Perfect Grill: Use a good grill or grill pan. Tongs help flip the chicken easily. A meat thermometer is key for checking the right temperature. - Additional Pairings: Consider adding a simple salad or roasted veggies on the side. This adds color and nutrition to your meal. You can also include a light dressing to enhance flavors. - Making it a Complete Meal: Serve the chicken over quinoa and add the cherry tomatoes, cucumber, and avocado. This gives you a balanced meal full of protein, healthy fats, and carbs. Garnish with fresh parsley or cilantro for a nice touch. {{image_2}} Alternative Proteins You can swap chicken for other proteins. Try turkey, shrimp, or tofu. Each offers a unique taste. Turkey gives a lean option. Shrimp adds a seafood twist. Tofu is great for a plant-based meal. Just adjust the cooking time as needed. Gluten-Free Options Quinoa is naturally gluten-free, making this dish safe for gluten-free eaters. If you want more grains, use rice or millet. Both are gluten-free and cook well. Check labels on sauces and marinades to ensure they are gluten-free. Adding Heat with Spices Want some spice? Add red pepper flakes or cayenne pepper to your marinade. A pinch gives a nice kick. You can also use fresh jalapeños for a fresh heat. Mix in as much as you like to fit your taste. Fresh Herbs and Seasoning Ideas Fresh herbs can lift your dish. Try basil or dill for a twist. You can also mix thyme with rosemary for a robust flavor. These herbs add freshness and bright tastes to your bowl. Summer Vegetable Options In summer, fresh veggies shine. Add grilled zucchini or corn for a sweet crunch. Bell peppers also work well. They add color and flavor. Use what is in season for the best taste. Fall Enhancements In the fall, consider roasted butternut squash or Brussels sprouts. Their sweetness pairs well with the lemon herb chicken. You can also toss in some kale or spinach for extra greens. These toppings bring warmth and heartiness to your meal. How to Store Leftovers Store your Lemon Herb Grilled Chicken Bowls in airtight containers. This keeps them fresh and tasty. Make sure to let the bowls cool to room temperature before sealing. If you have extra chicken, store it separately from the veggies and quinoa. This helps maintain the best flavor and texture. Shelf Life of Ingredients When stored correctly, your grilled chicken will last up to four days in the fridge. The cooked quinoa can hold up for about five days. Fresh veggies like tomatoes and cucumbers should be consumed within three days for the best taste. Freezing Cooked Chicken If you want to save your grilled chicken for later, wrap it tightly in plastic wrap. Then place it in a freezer bag. This helps prevent freezer burn. You can freeze it for up to three months. When you’re ready, thaw it in the fridge overnight. Freezing Quinoa and Vegetables You can also freeze cooked quinoa. Just cool it first, then pack it in freezer bags. It’s best to use it within three months. For veggies, you can freeze diced cucumbers, but they may lose some crunch. Tomatoes and avocado don’t freeze well. Best Methods for Reheating To reheat your chicken, use the oven or stovetop. The oven works well at 350°F (175°C) for around 10-15 minutes. If you use the stovetop, heat it in a pan with a splash of olive oil. For quinoa, microwave it with a little water to keep it moist. Maintaining Flavor and Texture To keep your chicken juicy and flavorful, don’t overcook it again. Reheating gently helps maintain the texture. Adding a bit of fresh lemon juice or olive oil can boost the flavor too. Enjoy your delicious leftovers! You can use other grains or low-carb options in your bowls. - Brown rice - Farro - Barley - Couscous These grains add different textures and flavors. Each one cooks a bit differently, so check the package for timing. If you want to keep carbs low, try cauliflower rice or zucchini noodles. Both have a light taste and work well with the chicken and veggies. Marinating chicken makes it juicy and flavorful. I suggest marinating for at least 30 minutes. For even better taste, go for 2 hours. This time allows the flavors to soak in. If you marinate for too long, the chicken can become mushy. I recommend sticking to a maximum of 2 hours for best results. Yes! You can prep this meal in advance for easy meals later. Cook the chicken and quinoa ahead. Store them in airtight containers. Chop the veggies and keep them fresh in the fridge. You can enjoy this dish warm or cold. Warm it up in the microwave or eat it straight from the fridge. Both ways are tasty! You now have all the tools to make a tasty chicken bowl. We covered the key ingredients, how to prepare and grill the chicken, and how to build a beautiful bowl. Remember the tips for flavor and techniques to keep your chicken juicy. You can try fun variations or store leftovers with ease. Whether for a meal prep or a quick dinner, this recipe fits. Dive in and enjoy making your own delicious chicken bowl!

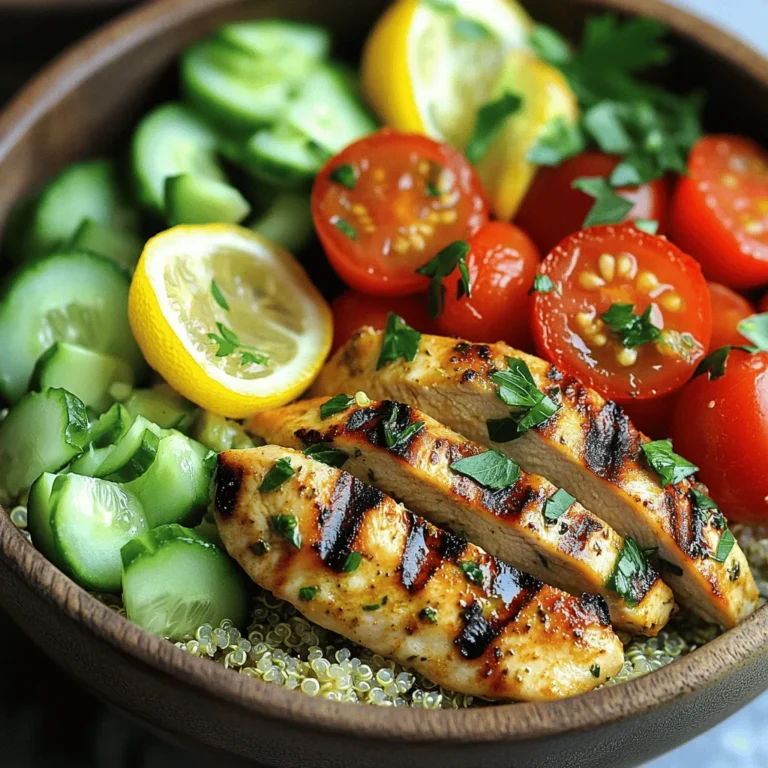
Lemon Herb Grilled Chicken Bowls Flavorful Meal Idea

PREV 1 … 19 20 21 … 57 NEXT
meal twig

explore

DessertsDinnerAppetizersDrinks

Our Policies

  • Cookie Policy
  • Copyright Policy
  • Disclaimer
  • GDPR Policy
  • Terms Of Use
Back to Top
  • About
  • Contact Us
  • Privacy Policy
© 2025 meal twig