FREE DINNER EBOOK! Get your copy!
  • Cookie Policy
  • GDPR Policy
  • Disclaimer
  • Terms Of Use
  • Visit my other site: Fun Cookie Recipes
meal twig
  • Home
  • Dinner
  • Desserts
  • Drinks
  • Appetizers
  • Contact
  • About
  • Privacy Policy
  • Home
  • Dinner
  • Desserts
  • Drinks
  • Appetizers
  • Contact
  • About
  • Privacy Policy
  • Cookie Policy
  • GDPR Policy
  • Disclaimer
  • Terms Of Use
Visit my other site: Fun Cookie Recipes

HOME / CATEGORIES /

Latest

For these Pumpkin Cream Cheese Muffins with Streusel, gather the following ingredients: Dry Ingredients: - 1 ½ cups all-purpose flour - 1 teaspoon baking powder - ½ teaspoon baking soda - ½ teaspoon salt - 1 teaspoon ground cinnamon - ½ teaspoon ground nutmeg Wet Ingredients: - ½ cup granulated sugar - ½ cup brown sugar, packed - ½ cup vegetable oil - 2 large eggs - 1 cup canned pumpkin puree - 1 teaspoon vanilla extract Cream Cheese Filling: - 1 package (8 oz) cream cheese, softened - ⅓ cup powdered sugar - ½ teaspoon vanilla extract (for cream cheese filling) Streusel Topping: - ½ cup rolled oats - ¼ cup cold butter, cubed - ¼ cup brown sugar (for streusel) - ½ teaspoon cinnamon (for streusel) By using these ingredients, you create a rich, spiced muffin with a creamy surprise. The mix of flavors will make each bite a treat. It’s exciting to think about how these simple ingredients come together. 1. Preheat your oven to 350°F (175°C). Line a muffin tin with paper liners to make cleanup easy. 2. In a large bowl, whisk together the dry ingredients. This includes 1 ½ cups of flour, 1 teaspoon of baking powder, ½ teaspoon of baking soda, ½ teaspoon of salt, 1 teaspoon of ground cinnamon, and ½ teaspoon of ground nutmeg. Mix well and set aside. 3. In another bowl, mix your wet ingredients. Combine ½ cup of granulated sugar, ½ cup of brown sugar, and ½ cup of vegetable oil until smooth. Then, add 2 large eggs, 1 cup of canned pumpkin puree, and 1 teaspoon of vanilla extract. Stir until everything is blended well. 1. Fold the dry mix into the wet mix. Add the dry ingredients slowly to the wet ingredients. Stir gently until just combined. Be careful not to overmix; this keeps them fluffy. 2. Prepare the cream cheese filling. In a small bowl, mix 1 package (8 oz) of softened cream cheese, ⅓ cup of powdered sugar, and ½ teaspoon of vanilla extract until smooth. Set this aside. 3. Make the streusel topping. Mix ½ cup of rolled oats, ¼ cup of cold cubed butter, ¼ cup of brown sugar, and ½ teaspoon of cinnamon in another bowl. Use your fingers or a fork to blend until it looks crumbly. 1. Fill each muffin liner. Start with about ⅓ of the pumpkin batter in each liner. Add a dollop of the cream cheese filling in the center, about 1 teaspoon per muffin. Then, top with more pumpkin batter until the liners are about ¾ full. 2. Sprinkle the streusel on top of each muffin generously. This will give a nice crunch and flavor. 3. Bake for 18-22 minutes. Check for doneness by inserting a toothpick into the center. It should come out clean. Let the muffins cool in the pan for 10 minutes before moving them to a wire rack. To keep your muffins fluffy, do not overmix the batter. Mix until the dry and wet ingredients just come together. This helps create air pockets for a light texture. Make sure your cream cheese filling is smooth. If it’s lumpy, your muffins won’t look nice. Mix the cream cheese with powdered sugar until creamy. This ensures a delicious filling. For a pretty presentation, serve your muffins on a rustic wooden board. Add a sprinkle of cinnamon on top. You can place a small pumpkin beside the muffins for a festive look. Pair these muffins with coffee or tea. The warm spices in the muffins work well with both. Enjoy them fresh for a delightful treat any time of day. To store leftover muffins properly, place them in an airtight container. Keep them in the fridge for up to five days. This keeps them fresh and tasty. You can also freeze muffins for future enjoyment. Wrap each muffin in plastic wrap and place them in a freezer bag. They will stay good for up to three months. Thaw them at room temperature before enjoying! {{image_2}} You can make these muffins even more delicious. Try adding chocolate chips or nuts. Chocolate adds a sweet touch. Nuts bring a nice crunch. You can mix in ½ cup of either. You can also change the spices. Instead of just cinnamon, try adding ginger or allspice. Ginger gives a warm kick. Allspice adds a unique flavor. Just replace half of the cinnamon with your choice. If you need a gluten-free option, use gluten-free flour. It works well in this recipe. You can find many blends in stores. Look for one that measures cup for cup like all-purpose flour. For a vegan version, swap the eggs with flax eggs. Mix 1 tablespoon of flaxseed meal with 2.5 tablespoons of water. Let it sit for a few minutes to thicken. Use a vegan cream cheese for the filling. Many brands offer great taste without dairy. These simple changes can help you enjoy these muffins no matter your diet! Can I use fresh pumpkin instead of canned? Yes, you can use fresh pumpkin. Just cook and puree it first. Make sure it’s smooth and not too watery. This will help keep your muffins moist and tasty. How do I know when the muffins are done baking? To check if the muffins are ready, insert a toothpick into the center. If it comes out clean, they are done. If there is batter on the toothpick, they need more time. What can I substitute for cream cheese? You can use Greek yogurt or ricotta cheese as a substitute. Both will give a creamy texture but may change the taste slightly. Choose the one that fits your diet best. How long do these muffins last in the fridge? These muffins can last about 5 days in the fridge. Store them in an airtight container to keep them fresh. You can also heat them in the microwave for a few seconds before serving. Can I reheat them after freezing? Yes, you can reheat muffins after freezing. Just thaw them in the fridge overnight, then heat in the oven at 350°F for about 10 minutes. This keeps them soft and warm. If you love pumpkin, try these other tasty ideas: - Pumpkin Spice Latte Muffins: A warm drink turned into a muffin. - Chocolate Chip Pumpkin Muffins: Sweet chocolate meets rich pumpkin. - Apple Cinnamon Muffins: A fruity twist with a hint of spice. These recipes will keep your kitchen smelling great and your taste buds happy! Baking pumpkin cream cheese muffins is easier with the right tools. Here are some must-haves: - Muffin tin: A good non-stick muffin tin is key. - Mixing bowls: Have one large and a few smaller ones. - Whisk: Perfect for blending dry and wet ingredients. - Rubber spatula: Use it for folding in ingredients gently. - Measuring cups and spoons: Accurate measurements are very important. Recommended brands include Pyrex for mixing bowls and USA Pan for muffin tins. These tools will make your baking easier and more fun! You now have the tools to make delicious pumpkin muffins. We covered the ingredients, preparation steps, and baking tips. Remember to avoid overmixing for fluffier muffins. Don’t forget to try fun variations or dietary swaps. Store any leftovers properly to enjoy later. With these tips, your muffins can impress anyone. Get ready to bake and enjoy the sweet smell of success! Happy baking!

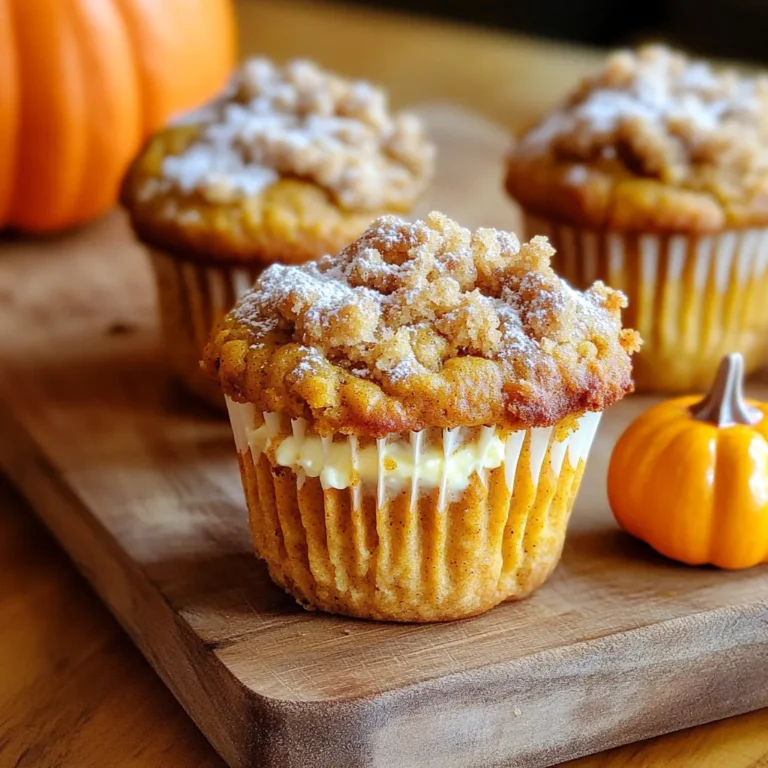
Pumpkin Cream Cheese Muffins with Streusel Delight

- 1 pound Italian chicken sausage, sliced - 2 cups Brussels sprouts, halved - 2 medium sweet potatoes, diced - 1 red onion, cut into wedges - 1 apple, cored and sliced You can find Italian chicken sausage in most grocery stores. It adds a savory kick to this dish. Brussels sprouts bring a nice crunch and balance the sweetness of the sweet potatoes and apple. Sweet potatoes give a creamy texture when roasted. Red onion adds a touch of sweetness when cooked. Lastly, apple slices add a hint of fall flavor. - 3 tablespoons olive oil - 1 teaspoon dried thyme - 1 teaspoon smoked paprika - Salt and pepper to taste Olive oil helps the sausage and veggies roast nicely. It creates a crisp texture and adds flavor. Dried thyme gives a warm, earthy taste. Smoked paprika adds a smoky depth. Salt and pepper enhance all the other flavors. These seasonings work together to make every bite tasty. - Fresh parsley, chopped Fresh parsley brings a pop of color and freshness. It also adds a nice flavor contrast. I like to sprinkle it on right before serving. This simple step makes your dish look and taste even better! 1. Preheat your oven to 425°F (220°C). This high heat helps cook the sausage and veggies evenly. 2. Line a large baking sheet with parchment paper. This makes cleaning up easy. 3. In a large mixing bowl, combine these ingredients: - 1 pound Italian chicken sausage, sliced - 2 cups Brussels sprouts, halved - 2 medium sweet potatoes, diced - 1 red onion, cut into wedges - 1 apple, cored and sliced - 4 cloves garlic, minced 4. Drizzle 3 tablespoons of olive oil over the mixture. Then, sprinkle in 1 teaspoon each of dried thyme and smoked paprika, plus salt and pepper to taste. 5. Toss everything together until well coated. This step adds flavor to each bite. 6. Spread the mixture in a single layer on your prepared baking sheet. This allows for even cooking. 7. Roast your dish in the preheated oven for 25-30 minutes. Stir halfway through to avoid sticking. The sausage should be cooked, and the veggies should be tender and caramelized. 8. Once finished, remove the sheet pan from the oven. 9. Garnish your dish with fresh chopped parsley before serving. This adds color and a fresh taste. Enjoy your delicious meal! To get the best results, follow a few easy steps. First, cut your veggies into similar sizes. This helps them cook evenly. When you spread the mixture on the baking sheet, make sure it’s in a single layer. This allows the heat to circulate well. Stir the mix halfway through cooking. This helps everything roast evenly and prevents sticking. Caramelization is key for great flavor. To achieve this, roast at a high temperature, around 425°F (220°C). The sugars in the veggies and sausage will brown nicely, giving depth to your dish. Keep an eye on them in the last few minutes. You want a golden, crispy finish. Want to boost the flavor? Try adding some fresh herbs like rosemary or oregano. You can also sprinkle in a bit of red pepper flakes for heat. If you like sweetness, drizzle a little honey on the veggies before roasting. If you don’t have smoked paprika, try regular paprika mixed with a dash of cumin. This gives a nice depth without losing that smoky flavor. You can also use chili powder for a different kick. Peel your sweet potatoes and Brussels sprouts ahead of time. You can store them in the fridge for a few days. This makes prep quick and easy. Using ready-made sausage is another great time-saver. Many brands offer pre-cooked sausage. Just slice and add it to your dish. This cuts down on cooking time and makes the meal even quicker. {{image_2}} For a healthier option, you can choose turkey or plant-based sausage. Turkey sausage has less fat but still packs flavor. Plant-based sausage works well for vegans. It gives a similar taste without using animal products. You can mix in other seasonal veggies. Consider using carrots, parsnips, or butternut squash. They all roast well and add sweetness. When it comes to apples, try Granny Smith for tartness or Honeycrisp for sweetness. Each type of apple changes the dish’s flavor. To switch up flavors, try different herbs like rosemary or oregano. These herbs add a unique twist. You can also add a splash of lemon juice or zest. The citrus brightens the dish and adds freshness. Experiment with spices too, like cumin or coriander, for a whole new taste. Store any leftovers in an airtight container. This helps keep them fresh. Place the container in the fridge. They stay good for up to three days. When you store, separate the sausage from the veggies. This keeps everything from getting mushy. To reheat, you can use an oven or a microwave. If you use the oven, set it to 350°F (175°C). Place the dish on a baking sheet. Heat for about 10 to 15 minutes. This helps keep the sausage crispy. If you use a microwave, cover the dish. Heat in short bursts. Stir each time to help the food heat evenly. To keep veggies from getting soggy, do not cover them tightly. This allows steam to escape. You want them to stay nice and crispy. You can freeze this meal for later use. After cooking, let it cool completely. Then, place it in a freezer-safe container. It can last up to three months in the freezer. When you're ready to eat, thaw it in the fridge overnight. For reheating, use the oven method. This helps maintain the texture. Avoid using a microwave for the entire dish. This can make the veggies mushy. Instead, heat the sausage and veggies separately if needed. Making this dish takes about 40 minutes. You spend 15 minutes prepping the food. Then, roast it for 25 to 30 minutes. This timing keeps the meal quick and easy. Yes, you can use different sausages. Try pork, turkey, or even plant-based sausage. Each type brings its own flavor to the dish. Just make sure to slice them to cook evenly. If you don't have Brussels sprouts, use broccoli or green beans. You can also add carrots or zucchini. These veggies roast well and add great taste. Feel free to mix and match for your favorite flavor. This dish is simple yet full of flavor. We discussed the key ingredients, like Italian chicken sausage, Brussels sprouts, and sweet potatoes. I shared step-by-step cooking instructions to guide you through. You learned useful tips for perfect roasting and how to add your twist. Remember, this meal is flexible for dietary needs and easy to store. You can enjoy it now and later. Cooking should be fun, so experiment with flavors and ingredients! Enjoy your delicious creation!

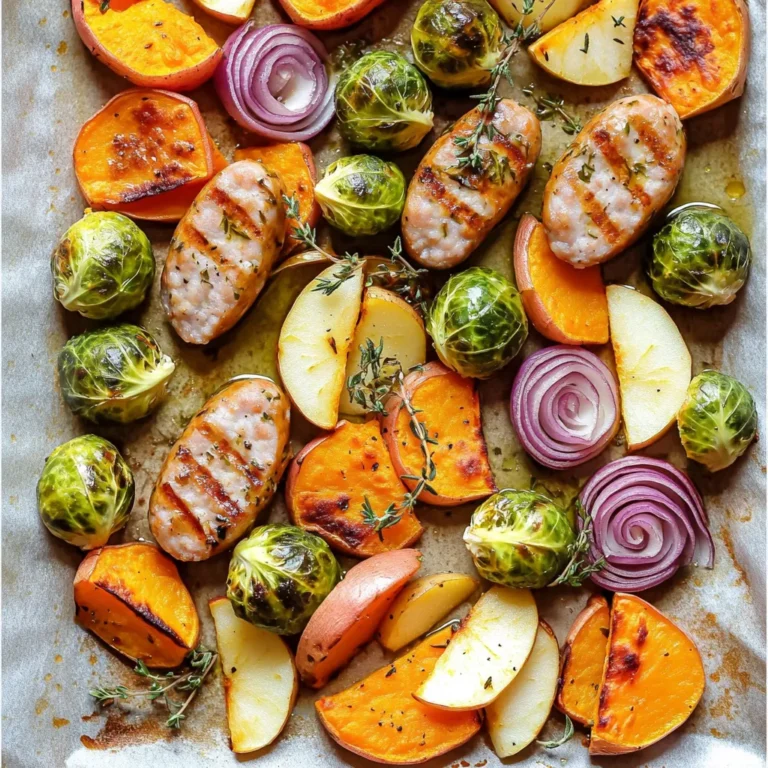
Sheet-Pan Roasted Sausage and Fall Veggies Delight

- 1 cup graham cracker crumbs - 1 cup crushed cornflakes - 1/4 cup sugar - 1/2 teaspoon cinnamon - 1/2 cup unsalted butter, melted - 8 oz cream cheese, softened - 1/2 cup powdered sugar - 1 teaspoon vanilla extract - 1 cup heavy whipping cream - 1 cup fresh strawberries, hulled and sliced - 1/4 cup strawberries, finely diced for crunch topping - Mint leaves for garnish These ingredients come together to create a fun dessert. The graham cracker crumbs and cornflakes make the taco shell crunchy. Cream cheese and heavy cream blend for a rich filling. Fresh strawberries add a sweet touch. You can swap some ingredients based on what you have at home. Use digestive biscuits instead of graham crackers. If you prefer, you can try using Rice Krispies instead of cornflakes. For a dairy-free option, consider using vegan cream cheese and coconut cream. Choose fresh strawberries that are bright and firm. They should smell sweet. When picking cream cheese, look for brands with simple ingredients for the best taste. For the whipped cream, use heavy cream with at least 36% fat. This ensures it whips up nicely. Always use unsalted butter to control the salt level in your dessert. {{ingredient_image_1}} To start, gather your ingredients. You will need graham cracker crumbs, crushed cornflakes, sugar, cinnamon, and melted butter. In a large bowl, mix the graham cracker crumbs, cornflakes, sugar, and cinnamon. Stir it well until combined. Then, pour in the melted butter and mix until it looks like wet sand. Next, preheat your oven to 350°F (175°C). You can shape the mixture into taco shells using a taco shell mold or an upside-down muffin tin. Press the mixture firmly into the mold to make it compact. Bake these shells on a tray for 10-12 minutes. They should turn golden brown. Once baked, let them cool completely. Now, let’s make the cheesecake filling. In a mixing bowl, take the softened cream cheese. Beat it until it is smooth and creamy. Gradually add in the powdered sugar and vanilla extract. Keep mixing until everything is well blended. In another bowl, whip the heavy cream until it forms stiff peaks. This means it holds its shape well. Gently fold this whipped cream into the cream cheese mixture. Do this carefully to keep it fluffy. It should look smooth and light. It’s time to put everything together! Carefully take the cooled taco shells out of the molds. Use a spoon to fill each shell with the cheesecake mixture. Be generous but avoid overfilling. Next, add sliced strawberries on top. You can also sprinkle some finely diced strawberries for a nice crunch. If you like, garnish with a mint leaf for a fresh touch. Once assembled, place the tacos in the fridge for at least 30 minutes. This helps the filling firm up before serving. To get a great taco shell, mix the graham cracker crumbs, crushed cornflakes, sugar, and cinnamon well. The melted butter helps bind everything together. When you press the mixture into the shell mold, make sure it is compact. This helps the shells hold their shape when baking. Bake them until golden brown, but watch closely. Overbaking can make them too hard. Let them cool completely before filling. Whipping cream is key to a light cheesecake filling. Start with cold heavy cream. Use a clean bowl and beaters to whip the cream. Whip it until stiff peaks form, but don't overbeat it. If you overbeat, it can become grainy. Fold the whipped cream gently into the cream cheese mixture. This keeps it light and fluffy. These cheesecake tacos look and taste amazing on a platter. You can drizzle honey or chocolate sauce on top for extra sweetness. Fresh mint leaves add a nice touch too. For drinks, serve them with a refreshing lemonade or sweet tea. You might also enjoy pairing them with vanilla ice cream for a special treat. Pro Tips Chill for Best Results: Allow the filled tacos to chill in the refrigerator for at least 30 minutes before serving. This helps the cheesecake filling firm up and makes them easier to eat. Use Fresh Ingredients: For the best flavor and texture, always use fresh strawberries and high-quality cream cheese. This will enhance the overall taste of your cheesecake tacos. Experiment with Flavors: Feel free to add other fruits like blueberries or raspberries, or even a splash of lemon juice to the filling for a zesty twist on the classic cheesecake flavor. Make Ahead: You can prepare the taco shells and cheesecake filling a day in advance. Assemble the tacos right before serving to keep the shells crunchy and the filling fresh. {{image_2}} You can change the cheesecake filling to fit your taste. Here are some ideas: - Chocolate: Add 1/4 cup of cocoa powder to the cream cheese mix. - Vanilla Bean: Use vanilla bean paste instead of vanilla extract. This gives more flavor. - Lemon: Mix in the zest of one lemon for a fresh taste. - Nutella: Swirl in some Nutella for a rich chocolate hazelnut flavor. Each option brings a new twist to the classic cheesecake. You can get creative with flavors! Toppings make your tacos more fun. Here are some tasty suggestions: - Berries: Use blueberries or raspberries for a colorful mix. - Crushed Cookies: Sprinkle crushed Oreos or graham crackers on top. - Nuts: Add chopped nuts like almonds or pecans for crunch. - Sauces: Drizzle with caramel or chocolate sauce for extra sweetness. Mix and match toppings to create your perfect taco! You can enjoy these tacos even with dietary needs. Here are some swaps: - Gluten-Free: Use gluten-free graham crackers or oats for the shells. - Dairy-Free Cream Cheese: Look for plant-based cream cheese for the filling. - Coconut Cream: Use coconut cream instead of heavy cream for a dairy-free whip. These options make it easy to enjoy Strawberry Crunch Cheesecake Tacos no matter your diet! To keep your unassembled strawberry crunch cheesecake tacos fresh, store them correctly. First, let the taco shells cool completely. Once cool, place them in an airtight container. You can stack them with parchment paper in between to prevent sticking. Keep the container in a cool, dry place. The shells can last up to three days this way. If you have leftover cheesecake filling, don't waste it! Store it in an airtight container. Place the container in the fridge. It will stay fresh for about three days. When you're ready to use it again, give it a quick stir. You may need to add a little cream to refresh the texture. Want to save some tacos for later? You can freeze them! First, store unassembled taco shells in a single layer on a tray. Freeze them for about an hour. Once frozen, transfer them to an airtight bag. Make sure to remove as much air as possible. You can freeze the shells for up to a month. Just remember, once you’re ready to eat them, let them thaw in the fridge before serving. You can keep these tacos in the fridge for up to three days. Make sure to store them in an airtight container. This helps keep the shells crispy and the filling fresh. Yes, you can use frozen strawberries. Just thaw them and drain any extra liquid. Fresh strawberries give a better taste, but frozen ones work in a pinch. If you don’t have a taco shell mold, use an upside-down muffin tin. Press the mixture into the cups to create taco shapes. This method works well and gives you the same fun shape. In this blog post, we covered how to make Strawberry Crunch Cheesecake Tacos. We explored key ingredients, substitutions, and tips for the best quality. The step-by-step instructions guide you from crunch shells to the cheesecake filling. Our tips give you the secrets to perfect texture and flavor. We also shared variations and storage advice. Now, you can create a fun, tasty treat with ease. Enjoy every bite and make them your own!

Strawberry Crunch Cheesecake Tacos Delightful Treat

Here is what you need for the Italian Ground Turkey Skillet: - 1 pound ground turkey - 1 tablespoon olive oil - 1 onion, diced - 2 cloves garlic, minced - 1 bell pepper, diced - 1 zucchini, diced - 1 can (14 oz) diced tomatoes - 2 teaspoons Italian seasoning - 1 teaspoon red pepper flakes (optional) - Salt and pepper to taste - 1 cup spinach or kale, chopped - 1/2 cup mozzarella cheese, shredded - Fresh basil for garnish These ingredients come together to create a tasty dish. Ground turkey is lean and packed with protein. The veggies add color and nutrients. I love using fresh herbs like basil to bring out the flavors. Each bite is a mix of savory, fresh, and a little spicy if you add the red pepper flakes. This meal is quick to make and perfect for busy nights. {{ingredient_image_1}} - Heat 1 tablespoon olive oil in a large skillet over medium heat. - Add 1 diced onion and sauté for about 3-4 minutes until soft. - Stir in 2 minced garlic cloves. Cook for 1 minute until fragrant. - Add 1 pound ground turkey. Break it apart with a spatula. Cook until browned for about 5-7 minutes. - Incorporate 1 diced bell pepper and 1 diced zucchini. Cook for 5 minutes until soft. - Pour in 1 can of diced tomatoes (with juices). Sprinkle in 2 teaspoons Italian seasoning and 1 teaspoon red pepper flakes if you want heat. Stir to mix. - Add 1 cup chopped spinach or kale. Stir until it wilts, about 2 minutes. - Season with salt and pepper to taste. - Reduce heat to low and sprinkle 1/2 cup shredded mozzarella cheese on top. - Cover the skillet and let it cook until the cheese melts and bubbles. - Remove from heat and garnish with fresh basil leaves before serving. - Importance of sautéing onions and garlic: Sautéing onions and garlic builds a strong base of flavor. It brings out their natural sweetness, making the dish taste richer. Cook them until soft and fragrant before adding other ingredients. - How to achieve the best flavor from herbs: Use fresh herbs like basil for the best taste. Add dried herbs early in cooking to release their oils. Fresh herbs should go in at the end for a bright flavor. This keeps their taste strong and vibrant. - Maintaining ground turkey texture: Avoid overcooking the ground turkey. Cook just until it turns brown and no longer pink. This keeps the turkey juicy and tender. Stir it gently to break it up while cooking to keep its texture light. - Pairing with crusty bread or quinoa: Serve this skillet with warm, crusty bread to soak up the sauce. Quinoa is another great option. It adds protein and a nice texture. Both options make the meal hearty and satisfying. - Presentation ideas for a rustic meal: Serve the skillet hot right from the pan. This looks inviting and casual. You can also plate it individually. Garnish with extra cheese and fresh basil for a lovely touch. This makes the meal feel special and homemade. Pro Tips Use Lean Turkey: Opt for lean ground turkey to keep the dish healthy while still providing plenty of flavor. Customize Your Veggies: Feel free to swap in other vegetables like mushrooms or carrots based on your preference or what you have on hand. Make It Ahead: This skillet meal can be made in advance and stored in the fridge for up to 3 days, making it a great meal prep option. Add More Cheese: If you love cheese, consider mixing in some parmesan or adding layers of cheese between the veggie layers for extra richness. {{image_2}} You can swap ground turkey for other meats. Ground chicken or beef works well. For a vegetarian option, try lentils or chickpeas. These choices keep the dish tasty and filling. You can also mix up the veggies. Add broccoli, carrots, or mushrooms for extra flavor and nutrition. Use seasonal vegetables for the best taste. Try bell peppers in different colors for a colorful dish. To boost the taste, add more spices. Try oregano, thyme, or even paprika. A dash of lemon juice adds brightness, too. If you like it spicy, increase the red pepper flakes. You can switch the cheese as well. Use feta for a tangy twist, or cheddar for a richer flavor. Mixing cheese types creates depth in taste. Don't be afraid to experiment! To keep your Italian ground turkey skillet fresh, place it in an airtight container. Store it in the fridge for up to four days. Make sure to cool it down before sealing the container. If you want to keep it longer, freezing is a great option. Use a freezer-safe container or bag. This way, it can last up to three months in the freezer. When it's time to eat leftovers, the best way to reheat is on the stove. Place the skillet over low heat. Stir often to keep everything warm and moist. You can also use a microwave. If you do, cover the dish to trap steam. This helps maintain moisture. Avoid reheating too long, as it can dry out the turkey or vegetables. Can I use a different type of meat? Yes, you can. Ground chicken or beef works well too. Just adjust cooking times slightly. How can I make this dish spicier? To add heat, use more red pepper flakes. You can also add chopped jalapeños or hot sauce. Is this recipe suitable for meal prep? Absolutely! This dish stores well. You can make it ahead and reheat for quick meals. General calorie count per serving Each serving has about 350 calories. This count may vary with added ingredients. Health benefits of key ingredients - Ground turkey: A lean protein source, low in fat. - Spinach: Rich in vitamins A, C, and K, plus iron. - Bell peppers: High in vitamin C, great for immunity. - Zucchini: Low in calories and high in fiber. This dish is not only tasty but also packed with nutrients to fuel your day! This recipe for ground turkey is simple and full of flavor. We covered each ingredient needed, from turkey to fresh basil, and outlined clear steps for preparation. I shared tips for cooking and serving, plus variations to keep things interesting. Storing leftovers safely ensures you enjoy this meal later, too. Remember, cooking can be fun and easy. With a few tweaks, you can make this dish your own and impress everyone at the table. Enjoy every bite and get creative in the kitchen!

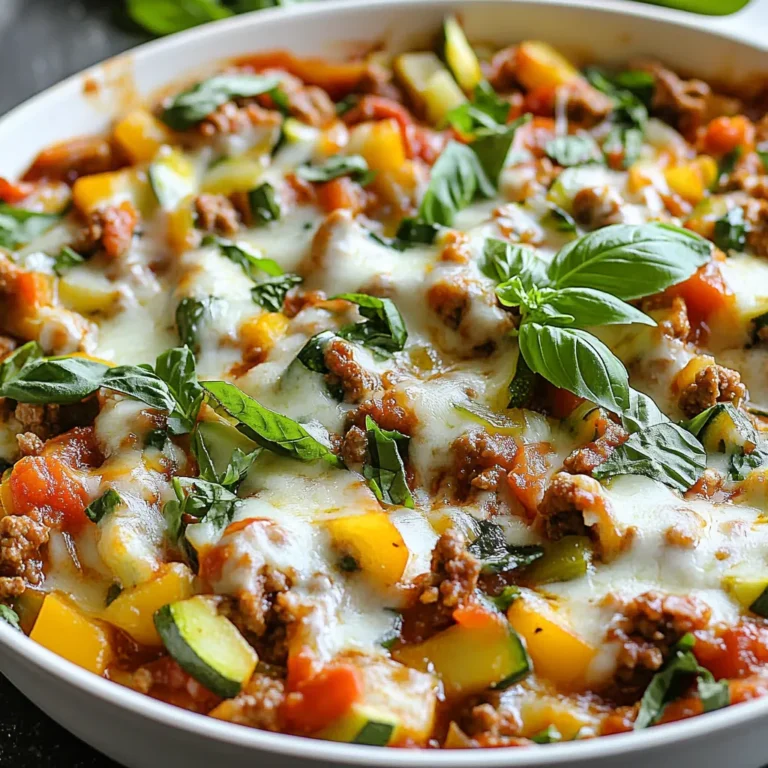
Italian Ground Turkey Skillet Tasty and Quick Meal

For the best buffalo chicken dip, you need key ingredients. Here’s what you will need: - 2 cups cooked shredded chicken - 1 cup cream cheese, softened - 1 cup shredded cheddar cheese - 1/2 cup ranch dressing - 1/2 cup buffalo sauce These ingredients create a creamy and spicy dip that everyone loves. The cream cheese adds richness. The shredded chicken gives it body. The ranch dressing cools the heat from the buffalo sauce. You can make the dip even better with a few optional items. Consider adding: - 1/4 cup blue cheese crumbles - 2 green onions, chopped (for garnish) Blue cheese adds a sharp flavor that pairs well with the buffalo sauce. Chopped green onions give a fresh taste and color to the dip. To serve the dip, I suggest using: - Tortilla chips - Celery sticks Tortilla chips add crunch and salt. Celery sticks bring a fresh crunch and help balance the dip's richness. You can also use carrots or crackers if you prefer. Enjoy your dip warm for the best flavor! {{ingredient_image_1}} Start by preheating your oven to 350°F (175°C). In a large mixing bowl, add the softened cream cheese, ranch dressing, and buffalo sauce. Use a fork or mixer to blend these until smooth. This base is key to a creamy dip. Next, fold in the cooked shredded chicken, shredded cheddar cheese, and blue cheese crumbles if you like that extra zing. Make sure everything mixes well. You want every bite to be full of flavor. Once your mixture is ready, transfer it to a baking dish. Spread the dip evenly to ensure it heats through. Place it in the preheated oven and bake for about 20 to 25 minutes. You’ll know it’s done when it bubbles and smells amazing. Remove the dip from the oven and let it cool for a few moments. This will help avoid burns when serving. Garnish your dip with chopped green onions for a fresh crunch. Serve it warm with tortilla chips or celery sticks. The crunch of the chips pairs perfectly with the creamy dip. This dish is a crowd-pleaser and makes any party fun. Enjoy sharing this tasty treat at your next gathering! When making buffalo chicken dip, some errors can ruin the dish. Here are key tips to avoid those mistakes: - Do not skip softening the cream cheese. If it’s cold, the dip won't mix well. - Mix all ingredients evenly. This helps each bite taste great. - Watch the baking time. Overbaking can dry out the dip. Check often. You can adjust the spice level to fit your taste. To make it spicier: - Add more buffalo sauce. Start with a tablespoon and taste. - Mix in diced jalapeños or hot sauce. This will give it a nice kick. For a milder dip: - Use less buffalo sauce. You can also add more cream cheese. - Try a mild ranch dressing. It balances the flavor without adding heat. Finding the right snacks to serve with your dip makes it even better. Here are my top picks: - Tortilla chips: These are classic. They add crunch and pair well with the dip. - Celery sticks: They provide a fresh and crunchy contrast. - Veggie sticks: Carrots and bell peppers add color and taste. - Crackers: They offer a different texture and flavor. Experiment with these options to find your favorite! Pro Tips Choose the Right Chicken: For the best flavor and texture, use rotisserie chicken. It's already seasoned and saves you time on cooking. Adjust the Heat: If you prefer a milder dip, reduce the amount of buffalo sauce or opt for a milder variety. You can also add more ranch dressing to balance the heat. Make it Ahead: Prepare the dip a day in advance and store it in the refrigerator. Just bake it when you're ready to serve for a stress-free appetizer. Experiment with Cheese: Feel free to mix in different cheeses like pepper jack for a spicy kick or mozzarella for a creamier texture. {{image_2}} If you want to change the cream cheese, consider Greek yogurt. It adds a tangy taste and keeps it creamy. You can also use sour cream. This option gives a rich flavor. Silken tofu is a great dairy-free choice. It blends well and keeps the dip smooth. Cheddar cheese is a classic choice, but you can mix it up! Try pepper jack for a spicy kick. Monterey Jack adds a nice creaminess. You can even use a blend of cheeses for more depth. Mozzarella gives a stretchy texture, which is fun. Want to add more flavor? Try adding diced jalapeños for heat. You can include garlic powder or onion powder for extra taste. Hot sauce intensifies the buffalo flavor. A splash of lime juice brightens the dip. Fresh herbs like cilantro or parsley can add a fresh touch, too. After your party, you might have some dip left. First, let it cool to room temperature. Then, transfer the dip to an airtight container. This helps keep it fresh. Store it in the fridge for up to four days. Always make sure it is sealed well to avoid any strange smells. Freezing your dip is easy and smart. To freeze, place the cooled dip in a freezer-safe container. Leave some space at the top, as it may expand when frozen. You can freeze it for up to three months. Label the container with the date. This way, you can enjoy it later! To reheat, start by taking the dip out of the fridge or freezer. If frozen, let it thaw in the fridge overnight. For reheating, place it in an oven-safe dish. Heat it at 350°F (175°C) for about 20 minutes. Stir it halfway through to warm evenly. You can also use a microwave. Heat in short bursts, stirring in between, until hot. Enjoy it warm with your favorite chips or veggies! Yes, you can make Buffalo Chicken Dip ahead of time. Prepare the dip and store it in the fridge. Cover it well to keep it fresh. You can bake it later when you need it. Just remember to let it sit at room temp for a bit before baking. Buffalo Chicken Dip pairs well with many tasty options. Here are some ideas: - Tortilla chips - Celery sticks - Carrot sticks - Pita bread - Crackers These sides add crunch and freshness to each bite. You can mix and match to please your guests. Buffalo Chicken Dip lasts about 3 to 4 days in the fridge. Make sure to store it in an airtight container. If it smells off or looks strange, it's best to toss it. Enjoy it while it’s fresh for the best taste! Buffalo chicken dip is a tasty, fun dish that many love. We explored key ingredients, useful tips, and easy steps for making it. You learned about variations and storage options too. By following these insights, you can whip up a tasty dip every time. Experiment with flavors and enjoy this crowd-pleaser at your next gathering!

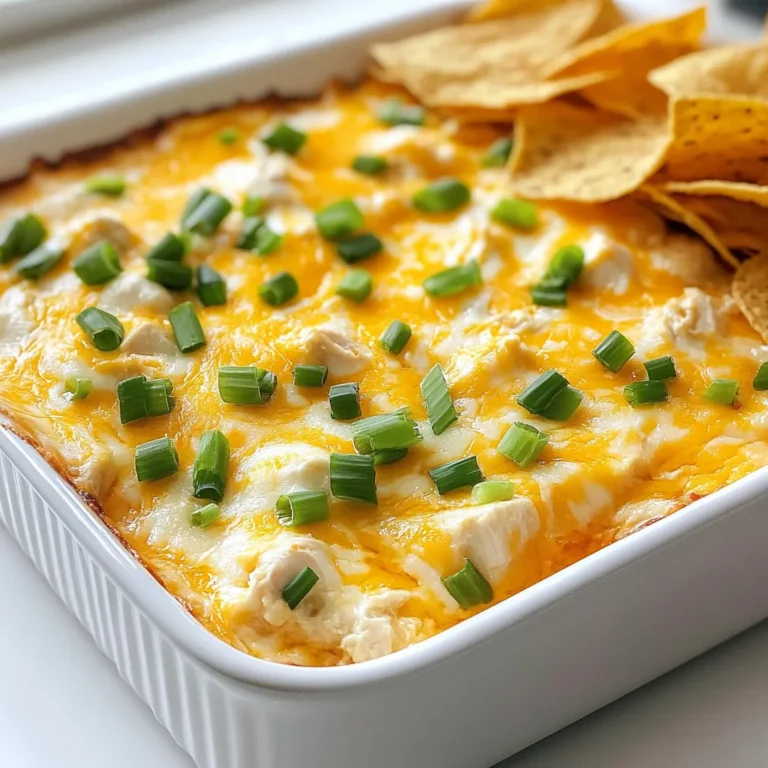
Ultimate Buffalo Chicken Dip Flavorful Party Must-Have

- 1 pound boneless, skinless chicken breasts - 1 medium onion, diced - 3 cloves garlic, minced - 3 cups chicken broth - 1 cup heavy cream - 1 teaspoon dried thyme - 1 teaspoon dried oregano - 1 bay leaf - Salt and pepper to taste In this creamy chicken gnocchi soup, the chicken breasts bring protein and flavor. The diced onion and garlic add a savory base. Chicken broth creates a rich, comforting soup. Heavy cream gives it that extra creamy texture, making each bite feel indulgent. Dried thyme and oregano enhance the taste, while salt and pepper balance everything. - 1 medium carrot, diced - 1 cup celery, diced - 2 cups fresh spinach The diced carrots and celery add crunch and sweetness. Fresh spinach brings color and nutrients, making the soup feel light and fresh. These veggies also help create a well-rounded flavor profile. Together, they enrich the soup with texture and depth. - Grated Parmesan cheese Grated Parmesan cheese is a delightful topping. It adds a salty kick and creaminess. You can sprinkle it on top before serving for a nice finish. If you want a little extra flavor, this is a perfect choice! Start by gathering your slow cooker. Add 2 tablespoons of olive oil to the bottom. Next, chop one medium onion and three cloves of garlic. Add the diced onion and minced garlic to the slow cooker. Then, dice one medium carrot and one cup of celery. Toss these into the mix and stir well. Now, take 1 pound of boneless, skinless chicken breasts. Place them on top of the vegetables in the slow cooker. Pour in 3 cups of chicken broth to cover the chicken and veggies. It's time to add some flavor. Sprinkle in 1 teaspoon of dried thyme and 1 teaspoon of dried oregano. Toss in one bay leaf and add salt and pepper to taste. Stir gently to mix the herbs and seasonings throughout the broth. Cover your slow cooker. If you set it on low, let it cook for 6 to 7 hours. If you choose high, 3 to 4 hours will do. The chicken will turn tender and fully cooked. Once your cooking time is up, it’s time to shred the chicken. Remove the chicken breasts from the slow cooker and use two forks to shred them. After shredding, return the chicken to the pot. Next, mix in 1 cup of heavy cream, 1 pound of potato gnocchi, and 2 cups of fresh spinach. Stir to combine, then cover the slow cooker again. Cook on high for another 30 minutes. This will help the gnocchi cook through and get tender. Before serving, taste and adjust the seasoning if needed. Remove the bay leaf and serve hot. For an extra treat, top with grated Parmesan cheese if you like. Enjoy your creamy chicken gnocchi soup! To get that creamy feel, you can swap heavy cream for half-and-half or coconut milk. Both options work great. If your soup seems too thin, you can thicken it with cornstarch. Just mix one tablespoon of cornstarch with two tablespoons of cold water. Stir that mix into the soup and let it cook for a few more minutes. This helps the soup become thicker and richer. Seasoning makes all the difference in taste. To boost flavor, try adding a splash of lemon juice or a pinch of red pepper flakes. Fresh herbs like basil or parsley can also elevate your soup. Add them just before serving for the best flavor. They bring a bright, fresh taste that makes every spoonful delightful. Cooking times may change based on your slow cooker size. If you have a smaller slow cooker, it may take longer to cook the chicken and gnocchi. Always check the doneness of the chicken. It should be easy to shred and register at least 165°F. For the gnocchi, they are done when they float to the top and feel soft. This ensures you have a perfectly cooked soup every time! {{image_2}} You can change the protein in this soup. Try turkey instead of chicken for a lighter meal. Tofu works well if you want a vegetarian dish. For veggies, swap spinach for kale or add mushrooms for extra flavor. These changes keep the soup fresh and fun! Want to spice things up? Add cayenne for heat or smoked paprika for a smoky taste. For an Italian twist, toss in diced tomatoes. These additions make the soup burst with flavor and will impress your family and friends. If you need a gluten-free option, look for gluten-free gnocchi. Many brands offer great choices that fit your needs. For a dairy-free version, use coconut cream instead of heavy cream. This keeps the soup creamy without dairy while adding a unique taste. For the best taste, store any leftover soup in an airtight container. Make sure it cools first. Place it in the fridge. This soup stays fresh for about 3 to 4 days. Always check for signs of spoilage before eating. To freeze the soup, let it cool completely. Then, scoop it into freezer-safe bags or containers. Remove excess air to prevent freezer burn. Label the bags with the date. The soup can stay frozen for up to 3 months. When you’re ready to eat, thaw it overnight in the fridge. For quick thawing, place the bag in cold water. Reheat the soup on the stove or in the microwave. Stir well to ensure even heating. Transform leftovers into a new meal! Add more fresh spinach for extra flavor. You can also mix in some cooked noodles or rice. This adds texture and makes it filling. When you reheat, do so gently. Use low heat and stir often. This keeps the creamy texture intact. Serve with a sprinkle of grated Parmesan on top for a tasty finish. Yes, you can use frozen chicken. Just add it directly to the slow cooker. The cooking time will stay the same. Make sure to check that the chicken is cooked through before serving. It should reach an internal temperature of 165°F. Cooking from frozen may add about 30 minutes to the overall cooking time on low. You can store the soup in the fridge for up to three days. Make sure to keep it in a sealed container. If you want to store it longer, place it in the freezer. In the freezer, it lasts up to three months. When you're ready to eat, just thaw it in the fridge overnight. Yes, you can make this soup on the stove. Start by sautéing the vegetables in a pot. Add the chicken and broth next. Bring it to a boil, then reduce to a simmer. Cook for about 20-30 minutes until the chicken is done. Shred it, then stir in the cream, gnocchi, and spinach. Cook for another 5-10 minutes until the gnocchi are tender. This recipe for slow cooker chicken soup is easy and flexible. We started by discussing key ingredients, like chicken, veggies, and cream. Then, we covered step-by-step instructions to ensure great taste. I shared tips for getting that creamy texture and enhancing flavors. You can even change ingredients for different diets. In the end, this soup is perfect for any meal. It’s simple to make and packed with flavors. Enjoy experimenting with the recipe to fit your taste!

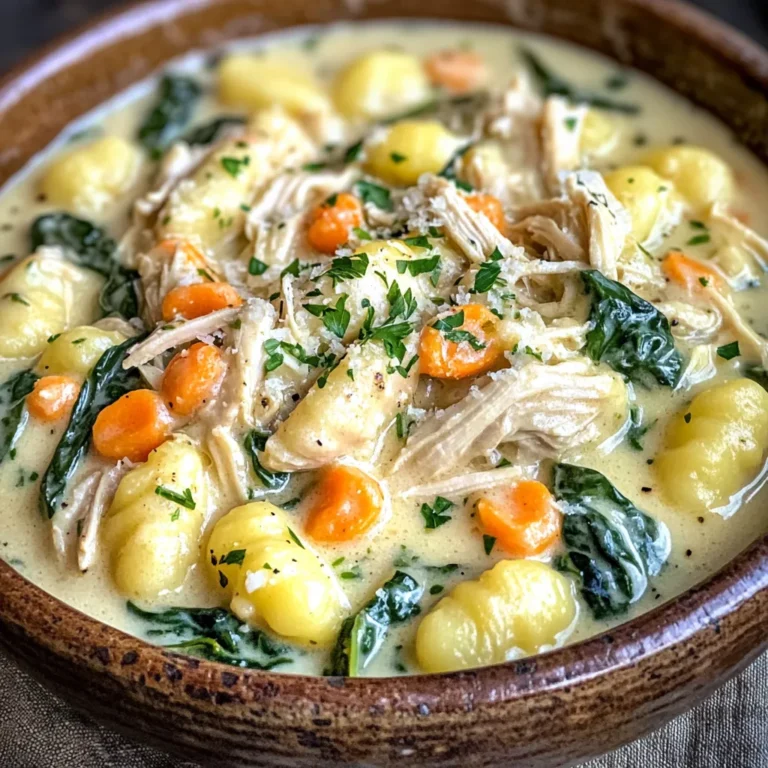
Slow Cooker Creamy Chicken Gnocchi Soup Delight

- 1 pound large shrimp, peeled and deveined - 1 red bell pepper, sliced - 1 yellow bell pepper, sliced - 1 red onion, sliced - 3 cloves garlic, minced - 3 tablespoons honey The main ingredients create a colorful and tasty dish. The large shrimp are the star. They soak up all the sweet and savory flavors. The bell peppers and onions add crunch and sweetness. They also make the meal look bright and fun. The minced garlic gives a punch of flavor. Honey adds a lovely sweetness that balances the dish. - 2 tablespoons lime juice - 1 tablespoon olive oil - 1 teaspoon smoked paprika - 1 teaspoon ground cumin - 1/2 teaspoon chili powder - Salt and pepper to taste The seasoning and marinade are key. Lime juice brightens the flavors. Olive oil helps everything blend. Smoked paprika adds a warm, smoky taste. Cumin gives a hint of earthiness. Chili powder adds a bit of heat. Salt and pepper round it all out. Mix these ingredients well with the shrimp for a tasty kick. - Flour or corn tortillas, for serving - Fresh cilantro, for garnish (optional) - Lime wedges, for serving (optional) When it's time to serve, warm up some tortillas. You can choose flour or corn, depending on what you like. The shrimp and veggies go inside the tortillas. Add fresh cilantro for a pop of flavor. Lime wedges on the side add a zesty touch. This meal is fun to eat and perfect for sharing. Start by preheating your oven to 400°F (200°C). This step is crucial. A good oven temperature ensures that your shrimp and veggies cook evenly. An accurate temperature helps to create that perfect texture you want in your fajitas. For the marinade, mix 3 cloves of minced garlic, 3 tablespoons of honey, and 2 tablespoons of lime juice in a bowl. Add 1 tablespoon of olive oil, 1 teaspoon of smoked paprika, and 1 teaspoon of ground cumin. Don’t forget 1/2 teaspoon of chili powder, plus salt and pepper to taste. Toss in 1 pound of shrimp and coat them well. Let this sit for 15 minutes. This short time allows the shrimp to soak up all the yummy flavors. While the shrimp marinates, it’s time for the veggies. Slice 1 red bell pepper, 1 yellow bell pepper, and 1 red onion. Place them on a large sheet pan. Drizzle with olive oil and sprinkle with salt and pepper. Toss everything to coat evenly. This step makes sure your veggies get nice and tender while the shrimp cooks. After marinating, spread the shrimp over the veggies on the sheet pan. Make sure they are evenly distributed. This helps with even cooking. Then, place the sheet pan in the oven. Bake for 15 to 20 minutes. Stir halfway through for the best results. You want the shrimp to be pink and the veggies tender. Once done, take the pan out of the oven and let it cool slightly. Serve the shrimp and veggies in warm tortillas. For extra flavor, add fresh cilantro and lime wedges on the side. This makes your fajitas look great and taste even better! To keep shrimp juicy, avoid overcooking. Shrimp cook fast. They turn pink and curl when done. Bake them for 15-20 minutes. Check them halfway through. If they feel firm, they are ready. Add spices for a flavor boost. Try cayenne for heat. Cumin adds warmth. You can also add fresh lime zest for brightness. If you like it sweet, add more honey. Mixing in fresh herbs, like cilantro, gives a fresh taste. Cleanup can be easy. Line your sheet pan with foil for less mess. Soak your utensils right after use. This makes washing them easier. If you want to cook faster, try grilling or using a stovetop skillet. Both methods can give great results. {{image_2}} You can make a tasty veggie-only version of these fajitas. Just swap the shrimp for your favorite vegetables. Great choices include: - Zucchini - Mushrooms - Broccoli - Carrots Slice the veggies and coat them in the same marinade. Bake them until tender. This version is full of flavor and is perfect for a meat-free meal. If you want to try other proteins, chicken and tofu work great. For chicken: - Use 1 pound of boneless, skinless chicken breast, sliced thin. - Marinate just like the shrimp. For tofu: - Use firm tofu, pressed and cubed. - Marinate as you would for shrimp. Both options cook well and soak up the honey garlic flavor nicely. Want to change the heat? Adjust the spice level easily. To make it milder, cut back on the chili powder. You can also use sweet paprika instead. If you like more heat, add: - Extra chili powder - A pinch of cayenne pepper - Sliced jalapeños These adjustments let you customize your fajitas to suit your taste. After you enjoy your Sheet-Pan Honey Garlic Shrimp Fajitas, store any leftovers in the fridge. Use an airtight container to keep them fresh. If you want to save them longer, freeze the leftovers. Place them in freezer-safe bags, removing as much air as possible. To reheat, use the oven for the best results. Preheat it to 350°F (175°C). Spread the shrimp and veggies on a baking sheet. Heat for about 10 minutes until warm. You can also use a microwave. Cover the dish to keep moisture. Heat in short bursts, stirring in between, to avoid drying out the shrimp. In the fridge, your leftovers last about three days. If you freeze them, they stay good for up to three months. Always check for any strange smell or texture before eating. Your safety is key! Yes, you can use frozen shrimp. Just remember to thaw them first. To thaw, place the shrimp in a bowl of cold water for about 15-20 minutes. Change the water if it gets warm. Once thawed, pat them dry with a paper towel. This step helps the shrimp absorb the marinade better. Cook the shrimp the same way as fresh shrimp. They will taste just as good! You can serve shrimp fajitas with many tasty sides. Here are some ideas: - Mexican rice - Refried beans - Guacamole - Salsa - Corn on the cob - Fresh salad These sides add color and flavor to your meal. They also complement the shrimp and veggies well. Yes, you can prepare this recipe ahead of time! For meal prep, you can marinate the shrimp and slice the veggies the night before. Store them in separate containers in the fridge. When ready to cook, just spread them on the pan and bake. This method saves time and makes dinner easier. Leftovers can be stored in the fridge for up to three days. Just reheat them on the stove or in the microwave. This way, you can enjoy your delicious shrimp fajitas again! You learned how to make tasty shrimp fajitas using fresh ingredients and simple steps. Start with large shrimp, colorful veggies, and a zesty marinade. Bake for easy cleanup and serve with warm tortillas and garnishes. You can adjust spice and flavors to fit your taste. Remember, store any leftovers well, and you’ll enjoy them later. With these tips, you can create a flavorful dish that is sure to please. Dive in and enjoy your creative cooking!

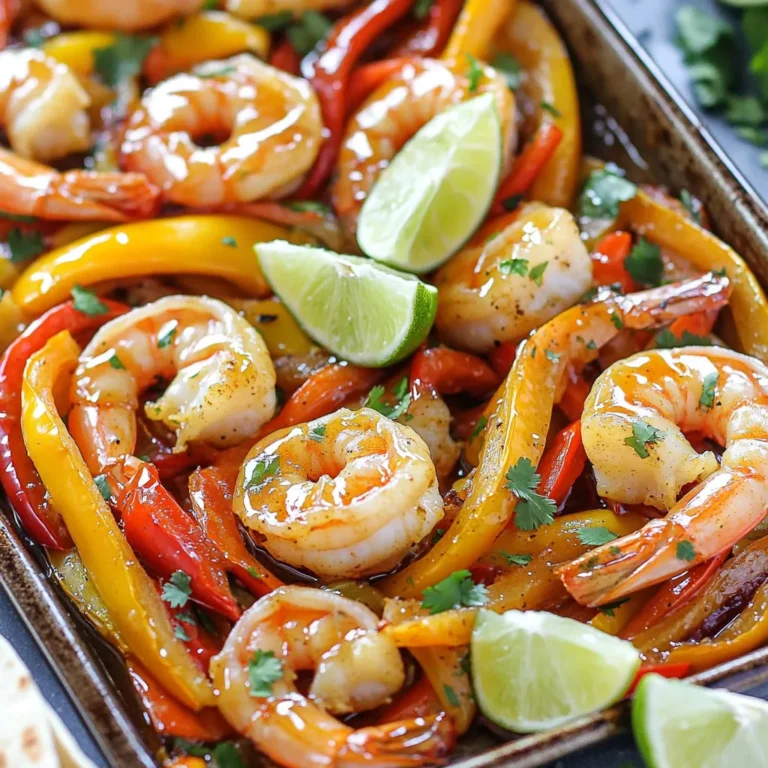
Sheet-Pan Honey Garlic Shrimp Fajitas Quick Dinner

- 2 packs of instant ramen noodles - 1/2 cup creamy peanut butter - 2 tablespoons soy sauce - 1 tablespoon sriracha - 1 tablespoon honey or maple syrup - 1 tablespoon sesame oil - 1 teaspoon rice vinegar - 1/2 cup shredded carrots - 1/2 cup snap peas, trimmed - 3 green onions, chopped You need just a few simple items to make this tasty dish. Start with instant ramen noodles. These noodles cook fast and are easy to find. Next, grab creamy peanut butter. It gives the sauce a rich and smooth texture. Soy sauce adds saltiness. It brings out the flavors in the dish. For heat, you’ll want sriracha. This sauce can be adjusted. More sriracha means more spice! Optional ingredients add a twist. Honey or maple syrup sweetens the sauce a bit. Sesame oil gives a nutty flavor. Rice vinegar adds a nice tang. You can pick and choose what you like. Fresh add-ins make the dish colorful. Shredded carrots add crunch and sweetness. Snap peas give a fresh taste. Chopped green onions add a burst of flavor. These ingredients work together. They create a quick meal that is also fun to make! To prepare the instant ramen noodles, boil water in a pot. Add the noodles and cook for about 3-4 minutes. Stir them gently to avoid clumping. When they are tender, drain the noodles and set them aside. For perfect noodle texture, do not overcook them. This keeps them firm and chewy. In a medium bowl, whisk together the creamy peanut butter, soy sauce, sriracha, sesame oil, honey, rice vinegar, and water. Mix until smooth and well combined. If the sauce is too thick, add more water to get the right consistency. You want it creamy but pourable to coat the noodles perfectly. In a large mixing bowl, combine the cooked ramen noodles, shredded carrots, and snap peas. Pour the peanut sauce over the noodles and veggies. Toss everything together until well coated with sauce. For garnish, serve in bowls topped with chopped green onions, crushed peanuts, and fresh cilantro. This adds color and extra flavor to your dish. To make your Minute Spicy Thai Peanut Ramen just right, adjust the spice level with sriracha. Start with one tablespoon. If you like it spicier, add more. You can also balance the heat with honey or maple syrup. This sweetness will enhance the flavors. Consider adding more ingredients for extra taste. Shredded carrots and snap peas add crunch. You can toss in vegetables like bell peppers or broccoli. This will make your dish more colorful and nutritious. Preparing ingredients in advance can save time. Chop your veggies the night before. You can even mix the peanut sauce ahead. Just store it in the fridge. Cooking in bulk is a smart move. Make a larger batch of ramen on the weekend. Store in the fridge. This way, you can have quick meals ready for busy days. Pair your ramen with sides or beverages. A light salad or spring rolls go well. For drinks, try iced tea or coconut water. These will complement the meal nicely. For a great presentation, serve in deep bowls. Top with green onions, crushed peanuts, and cilantro. This makes your dish look bright and inviting. Enjoy your creation! {{image_2}} You can add protein to Minute Spicy Thai Peanut Ramen easily. Chicken works great. Just cook it until it’s done, then slice it up. You can also use tofu. For a vegan option, choose firm tofu. Press it to remove extra water. Then, dice it and sauté until golden. Both options add flavor and nutrition. This dish is all about flavor. You can try different sauces if you want. For a zing, add lime juice or tamari. You can also mix in extra veggies. Try bell peppers, broccoli, or baby corn. Top with sesame seeds or chili flakes for an extra kick. Get creative and find what you like best! If you need gluten-free options, use rice noodles instead of ramen. They cook quickly and taste great. For nut-free adaptations, substitute the peanut butter with sunflower seed butter. This keeps the creaminess without nuts. Always check labels to ensure everything fits your diet. Enjoy your meal without worry! To keep your ramen fresh, store it in an airtight container. Place it in the fridge. Make sure to separate the noodles from the sauce if possible. This helps keep the noodles from getting soggy. For reheating, use a microwave or a stovetop. If using a microwave, heat in short bursts. Stir between each burst to ensure even heating. Yes, you can freeze peanut ramen! First, cool the ramen completely before packing it. Use freezer-safe containers or bags. When ready to eat, thaw the ramen in the fridge overnight. For reheating, warm it on the stove with a splash of water. This keeps the noodles moist and tasty. Cooked ramen lasts about 3 to 4 days in the fridge. Look for signs of spoilage. If the noodles smell off or change color, it’s best to toss them. Always trust your senses. If it looks or smells bad, don’t eat it. Can I use other types of noodles? Yes, you can use other noodles. Rice noodles or whole wheat noodles work well. Just adjust cooking time as needed. If you use fresh noodles, cooking time may be shorter. How to make the sauce spicier? To make the sauce spicier, add more sriracha. You can also mix in chili flakes or fresh sliced chili peppers. Start with a little, then taste it. Adjust until it’s just right for you. Is this recipe suitable for meal prep? Yes, this recipe is great for meal prep. You can cook noodles and sauce in advance. Store them separately in containers. Just mix them before eating to keep things fresh. What common mistakes to avoid? One common mistake is overcooking the noodles. Follow the package instructions closely. Also, be careful not to skip the rinsing. Rinsing helps keep noodles from clumping together. How to store fresh vegetables used in the recipe? Store fresh vegetables in the fridge. Keep them in a sealed bag or container. This keeps them crunchy and fresh. Use them within a few days for the best taste. Caloric content of the recipe This recipe has about 600 calories per serving. The calorie count can vary based on the peanut butter and noodles you choose. Health benefits of ingredients used Peanut butter adds protein and healthy fats. Carrots give you vitamins and fiber. Snap peas add crunch and more vitamins. This meal is tasty and nutritious! This blog post explored a tasty peanut ramen dish. It covered key ingredients like noodles, peanut butter, and soy sauce. I shared tips for cooking noodles and making peanut sauce. You can also customize the recipe with various proteins and add-ins. Meal prep options make this dish quick and easy. Remember, ramen is versatile and fun. Try different flavors and ingredients to suit your taste. Enjoy creating your own delicious variations!

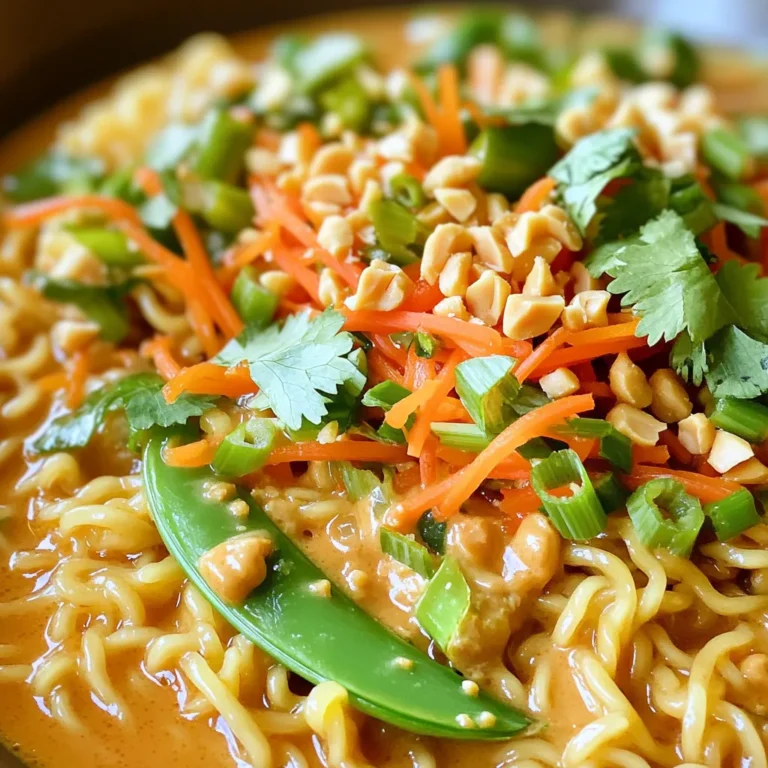
Minute Spicy Thai Peanut Ramen Quick and Easy Meal

To make pumpkin spice snickerdoodle cookies, start with these key items: - 1 cup unsalted butter, softened - 1 cup granulated sugar - 1/2 cup brown sugar, packed - 1 cup pumpkin puree - 1 large egg - 1 teaspoon vanilla extract - 2 3/4 cups all-purpose flour - 2 teaspoons cream of tartar - 1 teaspoon baking soda - 1/2 teaspoon salt These ingredients create a soft and chewy cookie, rich in pumpkin flavor. The butter adds creaminess while the sugars give sweetness. Pumpkin puree provides moisture and a lovely fall taste. Spices are key in making these cookies special. You will need: - 1 teaspoon pumpkin pie spice (for the dough) - 1 tablespoon pumpkin pie spice (for rolling) - 1/4 cup granulated sugar (for rolling) Pumpkin pie spice adds warmth and depth. Rolling the dough balls in this mix gives each cookie a sweet, spiced crust. The sugar balances the flavors and adds a nice crunch. Feel free to get creative! Here are some fun add-ins: - Chocolate chips - Chopped nuts, like pecans or walnuts - Dried cranberries These add-ins can change the flavor and texture. Chocolate chips give a sweet surprise. Nuts add crunch, while cranberries bring a tart note. Adjust the mix-ins to match your taste for a fun twist! Start by preheating your oven to 350°F (175°C). This step is key for even baking. Next, line a baking sheet with parchment paper. This will keep your cookies from sticking. It also makes cleanup easy later on. In a large bowl, cream together the softened butter, granulated sugar, and brown sugar. Mix until it looks light and fluffy. This should take about two to three minutes. Then, add in the pumpkin puree, egg, and vanilla extract. Stir until everything is well blended. In another bowl, whisk together the flour, cream of tartar, baking soda, pumpkin pie spice, and salt. This helps mix the dry ingredients evenly. Gradually add this dry mix to the wet ingredients, stirring just until combined. Be careful not to over-mix, or your cookies could turn out tough. Now it's time to prepare the spiced sugar. In a small bowl, mix the 1/4 cup of granulated sugar with 1 tablespoon of pumpkin pie spice. This will add a nice flavor to your cookies. Using a cookie scoop or tablespoon, portion out the dough. Roll each piece into a ball, about 1.5 inches in diameter. Then, roll each ball in the spiced sugar until it is well coated. Place the dough balls on the baking sheet, leaving space between each one. They will spread while baking. Bake in your preheated oven for 10 to 12 minutes. Look for golden edges. The centers might look a bit underbaked, but they will firm up as they cool. After baking, let the cookies sit on the baking sheet for about 5 minutes. Then, transfer them to a wire rack to cool completely. Enjoy the warm, cozy scent filling your kitchen! To get the best texture, start with softened butter. Cream it well with both sugars. This step makes your cookies light and fluffy. When mixing dry ingredients, be gentle. Over-mixing can lead to a tough cookie. I suggest using a cookie scoop for even sizes. This helps them bake evenly and look nice. One common mistake is skipping the chilling step. If your dough is too warm, the cookies spread too much. Always leave space on the baking sheet. Cookies need room to grow. Don't worry if they look a bit underbaked. They will firm up as they cool. Lastly, avoid using too much flour. Measuring accurately is key for the right dough consistency. Use high-quality pumpkin puree for a richer taste. Fresh pumpkin can work, but it may alter the texture. Don’t skip the pumpkin pie spice; it gives that signature fall flavor. Rolling the cookies in spiced sugar adds an extra kick. If you want more flavor, try adding chopped nuts or chocolate chips. These can give your cookies a fun twist. {{image_2}} You can easily make these cookies gluten-free. Use a gluten-free all-purpose flour blend. This blend replaces regular flour cup for cup. Just be sure it contains xanthan gum or add 1/2 teaspoon. This helps bind the dough. The cookies will still be soft and tasty! If you want dairy-free cookies, swap the butter for a vegan butter. Many brands work well in baking. You can also use coconut oil. Just make sure it's softened. For milk, use almond, soy, or oat milk instead. These swaps keep the cookies moist and delicious. You can get creative with flavors! Try adding chocolate chips to the dough. White chocolate chips or butterscotch chips also work well. For a nutty twist, mix in chopped pecans or walnuts. If you love caramel, add small caramel bits. These changes will give your cookies a fun spin! To keep your pumpkin spice snickerdoodle cookies fresh, store them in an airtight container. Line the bottom of the container with parchment paper. This helps absorb moisture and keeps the cookies crisp. Place a layer of cookies in the container, adding parchment between layers. Store at room temperature for up to one week. For longer freshness, keep them in the fridge. They will last for about two weeks in the fridge. Freezing cookies is simple and a great way to save them for later. First, let the cookies cool completely after baking. Then, place them in a single layer on a baking sheet. Freeze them for about one hour. Once frozen, transfer the cookies to a freezer-safe bag or container. Remove as much air as possible before sealing. These cookies can stay frozen for up to three months. When ready to enjoy, thaw them in the fridge or at room temperature. To bring back the warmth of your cookies, preheat the oven to 350°F (175°C). Place the cookies on a baking sheet and heat for about 5-7 minutes. This step makes them soft and fresh again. If you prefer, you can use a microwave. Heat each cookie for about 15-20 seconds. This method is quick but may make the cookies a bit chewy. Enjoy your delightful pumpkin spice snickerdoodle cookies! Pumpkin spice snickerdoodle cookies stay fresh for about one week. Store them in an airtight container at room temperature. If you want them to last longer, store them in the fridge. They stay good for up to two weeks there. You can also freeze them for up to three months. Just make sure to wrap them well. This keeps them soft and tasty. You can use fresh pumpkin, but it takes more work. First, cook the pumpkin until it is soft. Then, scoop out the flesh and mash it. Make sure to remove all the water. Too much water will make your cookies soggy. If you use fresh pumpkin, you need about one and a half cups. This will replace the one cup of pumpkin puree in the recipe. If you don't have cream of tartar, you can use baking powder. Use one and a half teaspoons of baking powder instead of two teaspoons of cream of tartar. Another option is to use lemon juice or white vinegar. Use one teaspoon of either for each teaspoon of cream of tartar. These substitutes help keep your cookies soft and puffy. In this blog post, I covered all you need to know about pumpkin spice snickerdoodle cookies. We explored key ingredients, shared step-by-step instructions, and highlighted tips for perfect results. You learned about tasty variations and how to properly store your cookies. To sum up, baking these cookies is fun and rewarding. With practice, you can create your own delicious twist. Enjoy trying different flavors, and remember to keep experimenting!

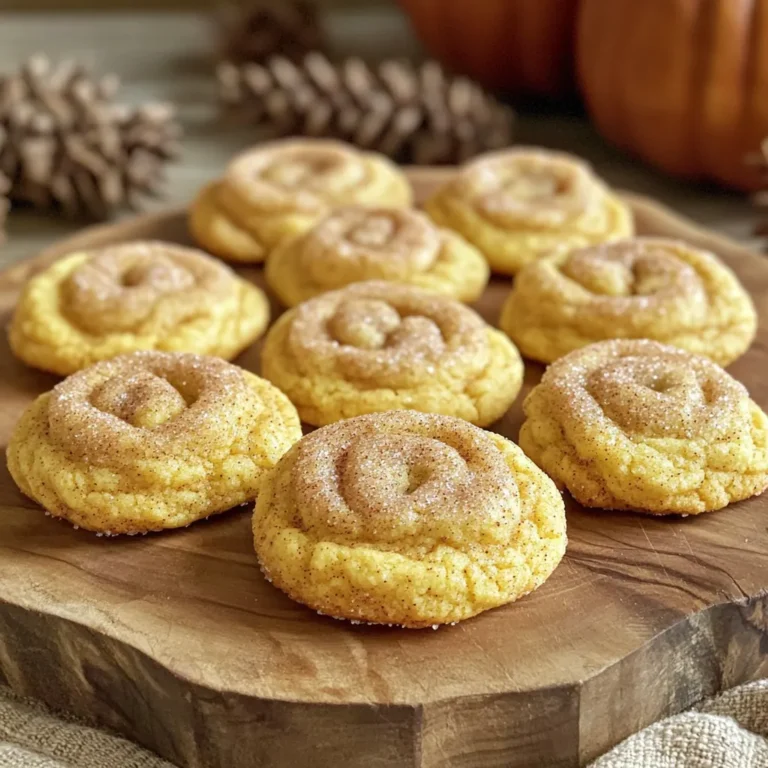
Pumpkin Spice Snickerdoodle Cookies Easy Fall Treat

Cooking One-Pot Creamy Mushroom Spinach Pasta is easy when you have the right ingredients. Here’s what you will need: - Pasta options: 12 ounces of fettuccine or spaghetti - Vegetables: 1 medium onion, finely chopped; 3 cloves garlic, minced; 8 ounces cremini mushrooms, sliced; 4 cups fresh spinach, roughly chopped - Liquids: 3 cups vegetable broth; 1 cup heavy cream or coconut cream for a dairy-free option - Seasonings: 1 teaspoon Italian seasoning; salt and pepper to taste - Garnishes: Grated Parmesan cheese for serving (omit for dairy-free); fresh parsley, chopped for garnish These ingredients create a rich, creamy dish packed with flavor. You can mix and match based on what you have on hand. The mushrooms add earthiness, while the spinach brings in freshness. The cream sauce ties everything together, making each bite delightful. Enjoy the process of gathering these ingredients, and let’s get cooking! Start by heating 2 tablespoons of olive oil in a large pot over medium heat. Once the oil is warm, add 1 medium onion, finely chopped. Sauté the onion for about 5 minutes until it turns soft and clear. This step builds a strong flavor base. Next, stir in 3 cloves of minced garlic and 8 ounces of sliced cremini mushrooms. Cook these for about 5 to 7 minutes. You want the mushrooms to become golden and tender. This mix of onion, garlic, and mushrooms adds a rich taste to your pasta. Now it's time to combine the main ingredients. Add 12 ounces of your choice of pasta, 3 cups of vegetable broth, and 1 cup of heavy cream or coconut cream to the pot. Don't forget to sprinkle in 1 teaspoon of Italian seasoning, along with salt and pepper to taste. Stir everything well to make sure the pasta is coated. Bring the pot to a boil. After it starts bubbling, reduce the heat to a simmer. Cover the pot and let it cook for about 10 to 12 minutes. Stir occasionally. You want the pasta to be al dente and most of the liquid to be absorbed. Once the pasta is cooked, fold in 4 cups of roughly chopped spinach. Stir until the spinach wilts, which should take about 2 minutes. Take a moment to taste your dish. Adjust the seasonings if needed. If the pasta seems too thick, add a splash of vegetable broth or cream for your desired consistency. Serve your pasta hot. Top it with grated Parmesan cheese, if you like. Garnish with fresh chopped parsley for a pop of color and flavor. Enjoy your delightful meal! - Ensuring pasta is al dente: Cook the pasta until it is firm but not hard. This keeps it from becoming mushy. Use the package time as a guide, but test a minute early. Taste a piece; it should have a slight bite. - Adjusting the creaminess of the sauce: If you want a richer sauce, add more heavy cream. For a lighter version, use less cream or swap it for coconut cream. Stir in small amounts until you hit your desired creaminess. - Prepping ingredients in advance: Chop your onions, garlic, and mushrooms before you start cooking. This saves time and keeps things moving smoothly. You can also wash and chop the spinach ahead of time. - Utilizing kitchen gadgets for efficiency: Use a food processor to chop veggies quickly. A measuring cup helps pour liquids accurately. If you have a pressure cooker, you can cook pasta faster and keep it all in one pot. - Selecting fresh produce: Look for firm mushrooms and bright green spinach. Fresh ingredients give the best flavor. A good onion should feel heavy for its size and have a smooth skin. - Alternatives for dairy-free options: Use coconut cream instead of heavy cream for a dairy-free dish. Nutritional yeast can add a cheesy flavor without dairy. You can also skip cheese entirely and still enjoy this meal. {{image_2}} You can switch pasta types or shapes in this dish. Fettuccine and spaghetti are great, but you might try penne or bowtie. These shapes will hold the sauce, too. If you want to change the veggies, consider using kale or Swiss chard. You can also add bell peppers or zucchini. These options bring new flavors and colors to your meal. For added protein, consider chicken or shrimp. Cook them in the pot before adding the onions for rich flavor. Chopped grilled chicken blends nicely, while shrimp cooks quickly. You can use different herbs or spices to boost taste. Fresh basil or thyme adds freshness. Try a pinch of red pepper flakes for heat. These small changes can make your dish even more special. To keep your One-Pot Creamy Mushroom Spinach Pasta fresh, follow these tips: - Cool the Pasta: Let the pasta cool down before storing. This helps avoid sogginess. - Use Airtight Containers: Transfer the pasta to airtight containers. Glass or BPA-free plastic works well. - Refrigeration: Store the containers in the fridge. It stays good for up to three days. Reheating pasta can be tricky. Here are some methods for the best results: - Stovetop Method: Place the pasta in a pan. Add a splash of broth or cream. Heat on low, stirring often. This keeps it creamy. - Microwave Method: Put the pasta in a microwave-safe bowl. Add a little liquid. Cover with a damp paper towel. Heat in short bursts, stirring in between. - Add Liquid: If the pasta seems dry, add a bit of broth or cream while reheating. - Avoid Overheating: Heat slowly to prevent the sauce from separating. This keeps your dish rich and smooth. To make One-Pot Creamy Mushroom Spinach Pasta gluten-free, use gluten-free pasta. Many brands sell delicious gluten-free options. Look for pasta made from rice or chickpeas. Cook it just like regular pasta. Adjust cooking time as needed to avoid mushiness. Yes, you can use coconut cream or cashew cream instead of heavy cream. Both options create a rich and creamy sauce. They add a slight sweetness that pairs well with the mushrooms. Just swap the cream in equal parts for a dairy-free dish. This pasta pairs well with a simple side salad. A fresh green salad with lemon vinaigrette works great. Garlic bread is another good choice for dipping. If you like crunch, add toasted pine nuts or walnuts on top for extra texture. You learned how to make a delicious One-Pot Creamy Mushroom Spinach Pasta. We covered key ingredients, easy steps, and helpful tips. Remember to choose fresh veggies, cook the pasta just right, and store leftovers properly. Mix it up with your favorite proteins or spices to make it your own. This dish is simple, tasty, and perfect for any occasion. Enjoy your cooking journey and impress your friends with this amazing recipe!

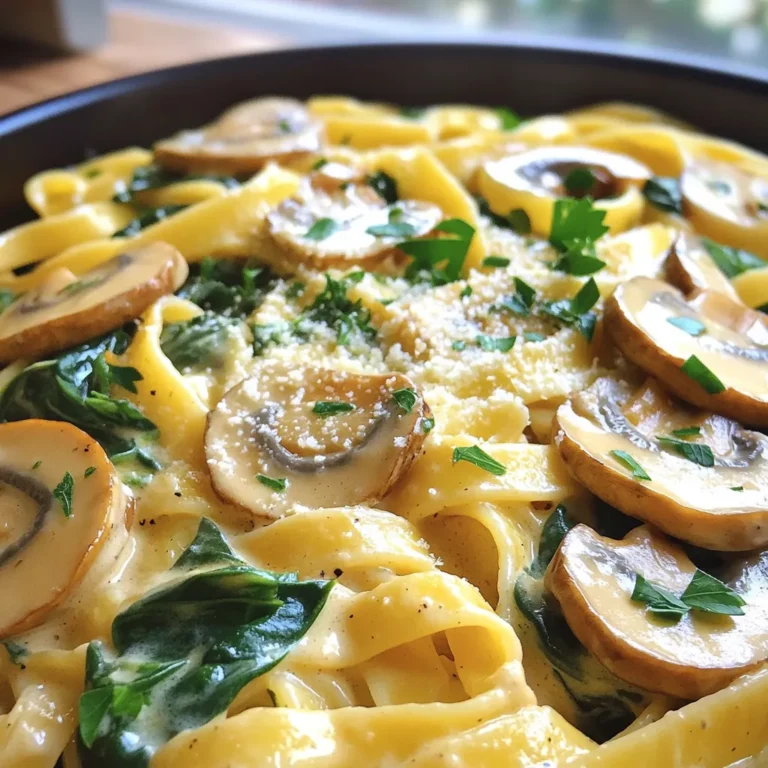
One-Pot Creamy Mushroom Spinach Pasta Delight

PREV 1 … 16 17 18 … 57 NEXT
meal twig

explore

DessertsDinnerAppetizersDrinks

Our Policies

  • Cookie Policy
  • Copyright Policy
  • Disclaimer
  • GDPR Policy
  • Terms Of Use
Back to Top
  • About
  • Contact Us
  • Privacy Policy
© 2025 meal twig