FREE DINNER EBOOK! Get your copy!
  • Cookie Policy
  • GDPR Policy
  • Disclaimer
  • Terms Of Use
  • Visit my other site: Fun Cookie Recipes
meal twig
  • Home
  • Dinner
  • Desserts
  • Drinks
  • Appetizers
  • Contact
  • About
  • Privacy Policy
  • Home
  • Dinner
  • Desserts
  • Drinks
  • Appetizers
  • Contact
  • About
  • Privacy Policy
  • Cookie Policy
  • GDPR Policy
  • Disclaimer
  • Terms Of Use
Visit my other site: Fun Cookie Recipes

HOME / CATEGORIES /

Latest

- 1 lb chicken thighs, boneless and skinless - 1 tablespoon olive oil - 1 medium onion, diced - 2 carrots, diced - 2 celery stalks, diced - 3 cloves garlic, minced - 4 cups chicken broth - 1 teaspoon dried thyme - 1 teaspoon paprika - Salt and pepper to taste - 1 cup frozen peas For this dish, I love using chicken thighs. They stay tender and juicy. The olive oil helps brown the chicken, adding flavor. Diced onion, carrots, and celery create a sweet base. Garlic adds a nice kick, while chicken broth keeps it moist. Thyme and paprika give depth, and a pinch of salt and pepper balances it all. A cup of frozen peas at the end adds color and sweetness. - 2 cups all-purpose flour - 1 tablespoon baking powder - 1/2 teaspoon salt - 3/4 cup milk - 1/4 cup butter, melted For the dumplings, I use all-purpose flour to get that nice texture. Baking powder makes them fluffy. A bit of salt adds flavor. Mixing in milk and melted butter creates a rich dough. You can add herbs or spices if you like. They can really amp up the taste of your dumplings. - Heat 1 tablespoon of olive oil in your cast-iron skillet over medium heat. - Add 1 pound of diced chicken thighs. Season with salt and pepper. - Cook the chicken for about 5-7 minutes. Brown it well on all sides. - Remove the chicken and set it aside. This step adds great flavor. - In the same skillet, add 1 medium diced onion, 2 diced carrots, and 2 diced celery stalks. - Sauté for 5-6 minutes until the veggies are soft. - Add 3 cloves of minced garlic next. Cook for one more minute. This keeps the garlic from burning. - Pour in 4 cups of chicken broth. Stir in the cooked chicken. - Add 1 teaspoon of dried thyme, 1 teaspoon of paprika, and 1 cup of frozen peas. - Bring this mixture to a gentle simmer. A proper simmer helps blend the flavors well. - In a mixing bowl, combine 2 cups of all-purpose flour, 1 tablespoon of baking powder, and 1/2 teaspoon of salt. - Stir in 3/4 cup of milk and 1/4 cup of melted butter. Mix until just combined. - Be careful not to overmix the batter. Overmixing can make the dumplings tough. - Drop spoonfuls of the dumpling batter into the simmering chicken mixture. - Cover the skillet with a lid. Cook for 12-15 minutes. - Check if the dumplings puff up and are no longer doughy. This means they are ready. Using fresh herbs makes a big difference in flavor. I love adding chopped parsley or thyme right before serving. Fresh herbs brighten the dish and add a nice touch. If you want more depth, try adding a dash of lemon juice or zest. It will lift all the flavors while adding a hint of freshness. For seasoning adjustments, taste as you go. If the dish seems flat, add more salt or pepper. You can also boost flavors with a pinch of paprika or garlic powder. These small changes can elevate your chicken and dumplings. Using a cast-iron skillet is key for this recipe. Preheat your skillet with olive oil until it shimmers. This helps brown the chicken evenly. Make sure to avoid overcrowding the pan. Cook in batches if needed. This prevents steaming and ensures a nice sear. To avoid sticking, don’t rush the browning. Let the chicken sit without moving it too soon. Once it releases easily, it’s ready to flip. After cooking, don’t forget to scrape the bottom. This gets all those tasty bits into your sauce. Serving straight from the skillet makes it feel rustic and inviting. It’s a great way to share a meal with family or friends. Use a large spoon to serve generous portions right from the pan. For garnishing, sprinkle fresh parsley on top. This adds a pop of color and freshness. You can also add a few whole thyme sprigs for a nice touch. Enjoy this cozy dish straight from your skillet! {{image_2}} You can easily switch up the main ingredients in this recipe. If you want to use chicken breasts instead of thighs, that works well. Turkey is another great alternative. For veggies, consider using bell peppers or green beans. They add nice color and crunch. As for spices, try rosemary or oregano to change the flavor profile. To lower calories, you can use skinless chicken or reduce the butter in the dumplings. For a cholesterol-friendly twist, swap in low-fat milk. If you need gluten-free dumplings, use a gluten-free flour blend. This keeps the meal light but still tasty. You can make this dish unique by adding local flavors. For example, toss in some jalapeños for spice or use coconut milk for a tropical vibe. You can also explore different dumpling styles. Try making them with cornmeal for a Southern touch or using potato for a heartier bite. Each variation brings its own charm to the dish. To keep your chicken and dumplings fresh, follow these tips: - Cool Down: Let the dish cool to room temperature before storing. - Use Airtight Containers: Store leftovers in airtight containers. This keeps moisture in and avoids freezer burn. - Timeframe: Consume within 3 to 4 days for best taste. Reheating properly helps maintain the dish's flavor and texture. Here’s how: - Stovetop Method: Heat on low. Stir gently and add a splash of broth or water. This keeps the dumplings fluffy. - Microwave Method: Cover with a damp paper towel. Heat in short bursts, stirring in between to ensure even warmth. If you want to save some for later, freezing is a great option. Here’s how: - Freezing: Store in freezer-safe containers. Leave some space for expansion. - Thawing: Move to the fridge overnight before reheating. - Reheating Frozen: Warm in a pot on low heat. Add a bit of broth to keep dumplings moist. You can use chicken breasts or turkey. Both options work well in this dish. Chicken breasts will be leaner, while turkey can add a nice flavor. Ensure you adjust cooking times as needed. Yes, you can make simple dumplings from scratch. Mix flour, baking powder, and salt in a bowl. Then, add milk and melted butter. Stir until just combined. Avoid overmixing to keep them light. Check for doneness by looking for a puffed-up shape. The dumplings should feel firm and not doughy inside. You can also insert a toothpick; it should come out clean. You can prep parts ahead of time. Cook the chicken and veggies, then store them in the fridge. Make the dumpling batter fresh to keep them fluffy. Reheat and cook when ready to serve. Using a cast-iron skillet is not required, but it has benefits. It heats evenly and retains heat well. This helps cook the chicken and dumplings evenly. Plus, it gives a nice rustic look when serving. This blog post covers how to make delicious chicken and dumplings. We started with the main ingredients, then moved onto step-by-step instructions for preparing everything. You learned tips for enhancing flavors and cooking techniques. Variations allow you to customize the dish to fit your needs. We also discussed storing and reheating leftovers. By following these easy steps, you can create a warm, satisfying meal. Enjoy crafting your own version of this comfort food classic!

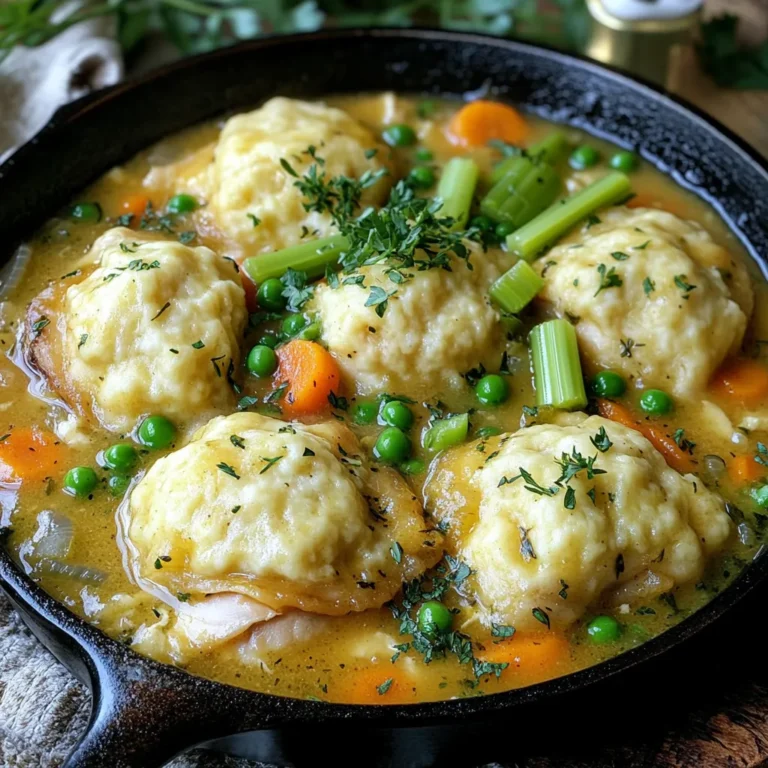
Chicken and Dumplings Cast-Iron Skillet Delight

To make Air Fryer Parmesan Asparagus Fries, start with fresh asparagus. You need about 1 pound. Look for firm, bright green spears. They should snap easily when bent. Trim the tough ends off to prepare them for cooking. Next, gather your seasonings. You will need: - 1 teaspoon garlic powder - 1 teaspoon onion powder - 1/2 teaspoon salt - 1/4 teaspoon black pepper These seasonings add great flavor. Garlic powder gives a nice kick, while onion powder adds depth. Salt and pepper enhance the taste of the asparagus. For the crunchy coating, collect these items: - 1/2 cup grated Parmesan cheese - 1/2 cup breadcrumbs (preferably panko) - 2 large eggs The eggs help the coating stick to the asparagus. Panko breadcrumbs create a lovely crunch. Parmesan cheese adds a savory, cheesy flavor that pairs well with the asparagus. Start with 1 pound of fresh asparagus. Trim the tough ends off. Make sure each spear is about the same size for even cooking. Rinse the spears under cold water to clean them well. Pat them dry with a towel. This step is key for crispy fries. In a shallow bowl, whisk 2 large eggs until they are smooth. This will help the coating stick. In another bowl, mix together 1/2 cup of grated Parmesan cheese, 1/2 cup of breadcrumbs (panko is the best choice), 1 teaspoon of garlic powder, 1 teaspoon of onion powder, 1/2 teaspoon of salt, and 1/4 teaspoon of black pepper. Stir these ingredients well. This mix gives the fries a tasty crunch. Preheat your air fryer to 400°F (200°C) for about 5 minutes. Take each asparagus spear and dip it into the beaten eggs. Make sure it is fully coated. Then, roll the spear in the Parmesan-breadcrumb mix. Press lightly to help it stick. Place the coated asparagus fries in the air fryer basket in a single layer. Lightly spray them with cooking spray or olive oil. Air fry for 8-10 minutes. Flip them halfway through to ensure even cooking. They should be golden brown and crispy when done. Remove and serve hot, maybe with a tasty dip like marinara or aioli! To get your asparagus fries just right, follow these tips. First, use fresh asparagus. Trim the ends to keep them tender. Next, prepare your coatings in shallow bowls. This makes dipping easy. Dip each spear in the egg first. Make sure it gets fully coated. Then, roll it in the Parmesan-breadcrumb mix. Press gently to help it stick. This is key for a good crunch. For the best crunch, don’t crowd the air fryer basket. Place the asparagus fries in a single layer. If they touch, they don’t crisp as well. Lightly spray them with cooking spray before cooking. This adds extra crunch. Flip them halfway through cooking to ensure even browning. Aim for a golden color. This means they are perfectly crispy. Dipping sauces can take your fries to the next level. Marinara sauce is a classic choice. It adds a nice tang. Aioli is another great option. It has a creamy texture and rich flavor. You can even try ranch dressing for a fun twist. These sauces will make your asparagus fries even more delicious! {{image_2}} You can switch up the cheese. Try using mozzarella or cheddar for a different taste. Both melt well and add a nice stretch. Another option is to use nutritional yeast for a dairy-free choice. It gives a cheesy flavor without the cheese. You can experiment with different cheeses to find your favorite. Want to spice things up? Add more seasonings! You can use paprika for a smoky kick. Try cayenne pepper if you like heat. Fresh herbs, like parsley or basil, can brighten the dish. Mix in lemon zest for a fresh, zesty taste. Experiment with flavors to make this dish your own! If you need a gluten-free version, swap the breadcrumbs. Use gluten-free breadcrumbs made from rice or oats. You can also crush gluten-free crackers. Almond flour is a great choice too; it adds a nutty flavor. This way, everyone can enjoy crispy asparagus fries! To store leftovers, let the asparagus fries cool down. Place them in an airtight container. They can stay fresh in the fridge for up to three days. If you want to keep them longer, freezing is an option. Reheat the asparagus fries in the air fryer. Set the temperature to 350°F (175°C). Heat them for about 5-7 minutes. This method helps keep them crispy. You can also use an oven if you don’t have an air fryer. If you want to freeze the asparagus fries, do it before cooking. After coating, lay them on a baking sheet. Make sure they don’t touch each other. Freeze them for about 1-2 hours. Once frozen, transfer them to a freezer bag. They can last up to two months. When ready to cook, air fry them straight from the freezer. Just add a couple of extra minutes to the cooking time. Yes, you can use frozen asparagus, but it may not be as crisp. Frozen asparagus often has more water. This can make your fries soggy. If you use frozen asparagus, thaw it first and pat it dry. This step helps remove excess moisture. You will know the fries are done when they turn golden brown. They should be crispy to the touch. Check them around 8 minutes into cooking. Flip the fries halfway to ensure even cooking. If you want them crispier, air fry for an extra minute or two. You can add a variety of seasonings to change the flavor. Try adding smoked paprika for a smoky taste. Italian seasoning gives a herbaceous twist. You can also add cayenne pepper for heat. Experiment with your favorites to make it your own! You learned about fresh asparagus and key seasonings to elevate your dish. I shared step-by-step instructions for prepping, coating, and air frying. Tips helped you achieve crispiness, and I discussed tasty dipping sauces. Variations included cheese alternatives and gluten-free options, plus storage and reheating tips. Enjoy your air-fried asparagus as a healthy snack or side. Experiment with flavors to make it your own. You have all the tools to create a dish that's both simple and delicious. Happy cooking!

Air Fryer Parmesan Asparagus Fries Crunchy Delight

- 12 oz penne pasta - 2 cups cooked chicken, shredded - 1 cup cream cheese, softened - 1 cup shredded cheddar cheese - ½ cup ranch dressing - 1 cup chicken broth - 1 cup frozen broccoli florets (thawed) - 1 teaspoon garlic powder - 1 teaspoon onion powder - Salt and pepper to taste - ½ cup crispy fried onions - Fresh parsley, chopped (for garnish) For my Crack Chicken Penne Bake, I use simple ingredients that pack a punch. First, I start with 12 ounces of penne pasta. This pasta shape holds onto the creamy sauce well. Next, I add 2 cups of cooked chicken. I love using shredded chicken for its tender texture. Cream cheese is a must in this dish. One cup of softened cream cheese makes the sauce rich and smooth. I also mix in 1 cup of shredded cheddar cheese for that cheesy goodness. To bring it all together, I include ½ cup of ranch dressing. It adds a nice zip to the flavor. One cup of chicken broth keeps everything moist and delicious. Don’t forget 1 cup of thawed broccoli florets. They add color and nutrition. For seasoning, I use 1 teaspoon of garlic powder and 1 teaspoon of onion powder. A pinch of salt and pepper balances the taste perfectly. Finally, I top it with ½ cup of crispy fried onions. They give a nice crunch. I also sprinkle fresh parsley on top as a bright garnish. This simple mix of ingredients makes a tasty meal everyone will love! {{ingredient_image_1}} - Preheat the oven to 350°F (175°C). - Gather a large baking dish. This dish will hold all the goodness. - Cook 12 oz of penne pasta until al dente and drain it well. - In a large bowl, mix 2 cups of shredded chicken, 1 cup of softened cream cheese, ½ cup of ranch dressing, and seasonings like 1 teaspoon each of garlic and onion powder. Add salt and pepper to taste. Blend until smooth. - Stir in the cooked pasta and 1 cup of thawed broccoli florets. Make sure everything is well coated with the creamy mix. - Pour the mixture into your baking dish. Spread it out evenly. - Top with 1 cup of shredded cheddar cheese and ½ cup of crispy fried onions for that extra crunch. - Bake the dish for 25-30 minutes. You want it to be golden and bubbly. - Once done, cool it briefly before slicing. Enjoy the delicious layers! - Ensure chicken is cooked and shredded properly. I like to use rotisserie chicken for ease. - Cook pasta al dente for the best texture. This means it should be firm when bitten. - Pair with a side salad for a complete meal. A fresh green salad adds crunch and balance. - Offer breadsticks or garlic bread on the side. They are great for dipping into the creamy sauce. - Garnish with chopped parsley for color. This makes the dish look fresh and appealing. - Use colorful serving dishes. Bright colors enhance the meal and make it more inviting. Pro Tips Use Rotisserie Chicken: For a quicker prep time, pick up a rotisserie chicken from the grocery store and shred it for this dish. Customize Your Cheese: Feel free to mix and match different types of cheese like mozzarella or pepper jack for a unique flavor twist. Add More Veggies: You can include other vegetables like bell peppers or spinach to make this bake even healthier and colorful. Make Ahead: Prepare the dish a day in advance and store it in the refrigerator. Just bake it when you're ready to serve! {{image_2}} You can easily change the cheese in this dish. Try using mozzarella or gouda for a new taste. Each cheese brings its own unique flavor. You can also swap ranch dressing with blue cheese or Italian dressing. This can give the dish a different twist that many will enjoy. Want to make it more colorful? Add in some vegetables! Bell peppers and spinach work well in this bake. They add color and nutrition. If you like a bit of crunch, toss in some cooked bacon. It adds a smoky flavor and makes it even tastier. If you're looking for a gluten-free option, use gluten-free pasta. This simple swap keeps the dish friendly for everyone. For those who need a dairy-free version, try dairy-free cream cheese. It blends well and keeps the dish creamy without the dairy. To keep your Crack Chicken Penne Bake fresh, store it in an airtight container. It will stay good in the fridge for up to three days. When you're ready to eat, reheat it in the oven or microwave until hot. This way, you can enjoy that creamy goodness again! You can freeze either unbaked or baked portions of this dish for later. Just wrap it tightly in foil or use freezer-safe containers. This makes it easy to pull out a meal on busy days. Make sure to label the containers with the date, so you know when to use them. When reheating, do it gently in the oven. This keeps the texture nice and creamy. If the dish seems dry, add a splash of chicken broth. This little trick brings back its moisture and flavor. Enjoy your meal as if it was freshly made! Crack Chicken Penne Bake is a hearty and creamy dish. It combines pasta, chicken, and cheese. The main ingredients are: - 12 oz penne pasta - 2 cups cooked chicken, shredded - 1 cup cream cheese, softened - 1 cup shredded cheddar cheese - ½ cup ranch dressing - 1 cup chicken broth - 1 cup frozen broccoli florets (thawed) - 1 teaspoon garlic powder - 1 teaspoon onion powder - Salt and pepper to taste - ½ cup crispy fried onions (for topping) - Fresh parsley, chopped (for garnish) This dish is rich in flavor and easy to make. You mix everything together and bake it. The result is a cheesy, comforting meal that your family will love. Yes, you can make Crack Chicken Penne Bake ahead of time. Prepare the dish up to the baking step. Cover it tightly and keep it in the fridge. You can bake it later when you are ready to eat. Just remember to bake it a bit longer if it is cold from the fridge. This makes meal prep easy, especially on busy nights. Crack Chicken Penne Bake lasts up to three days in the fridge. Store it in an airtight container. Always check for any signs of spoilage before eating. If you want it to last longer, consider freezing it. In this post, we covered how to make Crack Chicken Penne Bake, a simple and tasty dish. You learned about the main ingredients, steps to cook, and tips for serving. This meal is easy to customize with different cheeses or veggies. Store leftovers well and enjoy them later. Remember, cooking should be fun and relaxing. With this recipe, you have a reliable meal option that will please everyone at the table. Get creative and make it your own! Enjoy your cooking adventure!

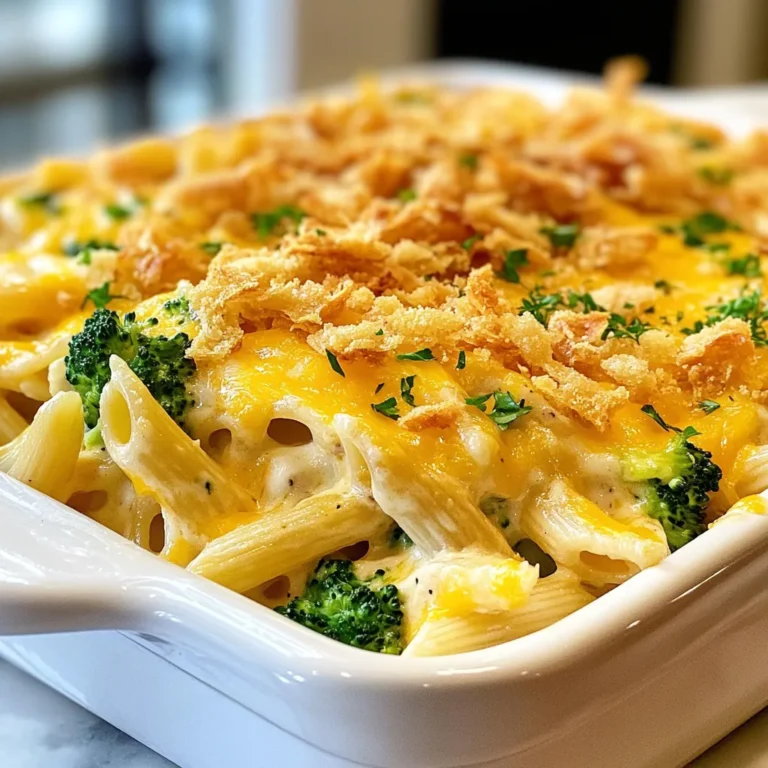
Crack Chicken Penne Bake Simple and Tasty Meal

- 2 cups uncooked elbow macaroni - 2 cups butternut squash, peeled and diced - 4 cups vegetable broth - 1 cup shredded sharp cheddar cheese - 1 cup shredded mozzarella cheese - 1/2 cup cream cheese, softened - 1 teaspoon garlic powder - 1 teaspoon onion powder - 1/2 teaspoon smoked paprika - Salt and pepper to taste - Fresh parsley, chopped For this Slow Cooker Butternut Squash Mac and Cheese, I focus on the balance of flavors. The main ingredients blend well. The macaroni adds a nice texture. The butternut squash gives the dish a slight sweetness. I love using vegetable broth instead of water. It adds depth to the dish. The sharp cheddar and mozzarella bring the creaminess you crave. Cream cheese melts in perfectly, making everything rich. Next, the spices elevate the flavor. Garlic powder gives it warmth. Onion powder adds a savory note. Smoked paprika brings a hint of smokiness. Adjust the salt and pepper to suit your taste. Don't forget the garnish! Fresh parsley brightens the dish and adds color. You can easily change the dish by swapping cheeses or adding herbs. This recipe is simple yet full of great taste. - Dicing butternut squash: Start by peeling the squash. Use a sharp knife to cut it into small cubes. Aim for about half-inch pieces. This size cooks well and blends nicely in the dish. - Measuring uncooked macaroni: Measure out two cups of elbow macaroni. This pasta shape holds the cheese sauce and adds great texture. - Adding ingredients to the slow cooker: Place the diced butternut squash and uncooked macaroni in the slow cooker. Pour in four cups of vegetable broth, making sure the pasta and squash are fully covered. Add one teaspoon each of garlic powder and onion powder, along with half a teaspoon of smoked paprika. Season with salt and pepper. - Cooking time and settings: Cover the slow cooker and set it to low heat. Cook for about two to three hours. Check for tenderness. The pasta should be soft, and the squash should be cooked through. - Adding cheese and adjusting consistency: Once cooked, stir in one cup of shredded sharp cheddar cheese, one cup of shredded mozzarella cheese, and half a cup of softened cream cheese. Mix until all the cheese is melted and creamy. If the mix is too thick, add a splash of vegetable broth to thin it out. - Tasting and adjusting seasoning: Taste the mac and cheese. Adjust the seasoning with more salt or pepper if needed. Serve warm, topped with fresh parsley for a pop of color. Enjoy your creamy, cheesy delight! - Make sure the pasta is fully submerged in the broth. This helps it cook evenly. - For melting cheese, add it when the pasta is done. Stir gently for a creamy texture. - If you can’t find butternut squash, try pumpkin or sweet potato. Both add great flavor. - For a vegan version, use cashew cheese or almond cheese instead of dairy cheese. - Serve with a simple green salad to balance the meal. - Garlic bread or crusty rolls pair well and add a nice crunch. {{image_2}} You can make this dish lighter. Start by cutting down the cheese. This lowers calories without losing taste. You can also add more veggies. Spinach, broccoli, or peas blend well. They add nutrition and color. Want to boost flavor? Try adding fresh herbs like thyme or basil. A pinch of cayenne pepper can give a kick. If you want protein, add cooked chicken or turkey. These make the dish heartier and more filling. Change it up for the seasons! In fall, add nutmeg or sage. These spices pair well with butternut squash. For spring, consider fresh asparagus or peas. They bring a bright twist to this cozy dish. Store your leftovers in airtight containers. Glass or plastic containers work great. Make sure they seal well to keep moisture in. Your mac and cheese will stay fresh in the fridge for up to three days. To reheat without losing texture, use the stove. Heat it in a saucepan on low. Stir often to warm it evenly. If you use the microwave, heat it in short bursts. Stir after each burst to avoid hot spots. To freeze, place cooled mac and cheese in freezer-safe bags. Squeeze out as much air as you can. It will last up to three months in the freezer. When you are ready to eat, thaw it overnight in the fridge. Reheat it on the stove, adding a splash of broth if needed. Yes, you can use frozen butternut squash. It saves time and effort. Just make sure to thaw it before adding it to the slow cooker. This helps it cook evenly with the pasta. Frozen squash may add a little extra moisture, so keep an eye on the broth level. This dish lasts about 3 to 5 days in the fridge. Store it in an airtight container. Make sure it cools down before sealing it. If you want to keep it longer, consider freezing it. Yes, you can make this recipe on the stove. Boil the pasta and squash in vegetable broth. Once tender, stir in the cheeses and spices. Cook on low heat until everything is creamy. This method takes less time than the slow cooker. If the mac and cheese is too thick, add a splash of vegetable broth. Stir well to combine. You can also add a little milk or cream to achieve your desired creaminess. Adjust it slowly to avoid making it too runny. This recipe is not gluten-free because of the elbow macaroni. However, you can use gluten-free pasta as a substitute. Check the package to ensure it cooks similarly. This way, you can enjoy the dish without gluten. This blog post outlined a tasty recipe for mac and cheese with butternut squash. We covered ingredients, cooking steps, and tips for a perfect dish. You can easily customize it to suit your taste or diet. Don't forget to try the variations and serving suggestions for a fun spin. Remember, leftovers can be stored well for later meals. Enjoy your cooking adventure and share it with friends!

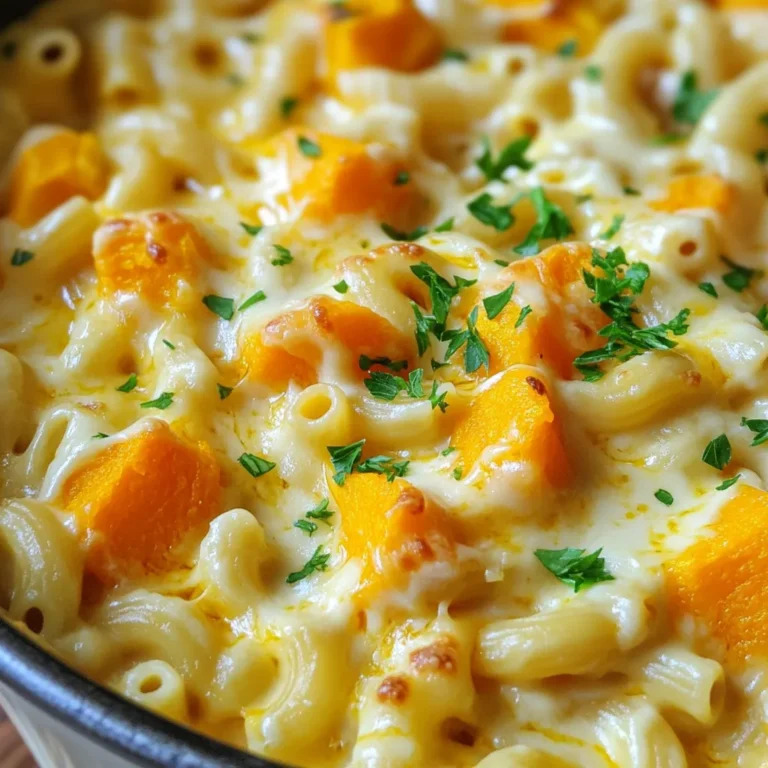
Slow Cooker Butternut Squash Mac and Cheese Delight

- 2 pounds chicken wings - 2 tablespoons olive oil - 4 cloves garlic, minced - 1 teaspoon garlic powder - 1 teaspoon onion powder - 1 teaspoon smoked paprika - ½ teaspoon black pepper - 1 teaspoon salt - ½ cup grated Parmesan cheese - 2 tablespoons chopped fresh parsley (for garnish) I love using fresh ingredients for this recipe. Start with 2 pounds of chicken wings. They are the star of the show! I like to use bone-in wings for the best flavor. Next, grab 2 tablespoons of olive oil. This helps the seasonings stick and adds flavor. Now, let’s get garlicky! You will need 4 cloves of minced garlic. Fresh garlic gives a nice kick to the wings. We also need some spices. Add 1 teaspoon of garlic powder. It boosts the garlic flavor. Then, mix in 1 teaspoon of onion powder for depth. Want some warmth? Add 1 teaspoon of smoked paprika. It gives a great smoky taste. For seasoning, include ½ teaspoon of black pepper and 1 teaspoon of salt. They balance the flavors. Finally, don’t forget the cheese! Use ½ cup of grated Parmesan cheese. This makes the wings extra tasty. For a fresh touch, use 2 tablespoons of chopped parsley to garnish. It adds color and freshness. Gather these ingredients, and you’re ready to make crispy garlic Parmesan wings that are sure to impress! Start by preheating your air fryer to 400°F (200°C). This takes about 5 minutes. Preheating helps the wings cook evenly and get crispy. In a large bowl, mix 2 pounds of chicken wings with 2 tablespoons of olive oil. Add 4 cloves of minced garlic, 1 teaspoon of garlic powder, 1 teaspoon of onion powder, 1 teaspoon of smoked paprika, ½ teaspoon of black pepper, and 1 teaspoon of salt. Toss everything together well. Make sure every wing is coated with the seasoning. This mix gives the wings great flavor. Place the seasoned wings in the air fryer basket in a single layer. Be careful not to overcrowd them. Depending on your air fryer size, you may need to cook them in batches. Cook the wings for 25-30 minutes. Flip them halfway through for even cooking. You want them golden brown and crispy. Once the wings are done, take them out of the air fryer and put them in a large bowl. While they are still hot, sprinkle ½ cup of grated Parmesan cheese over them. Toss the wings to coat. The heat will melt the cheese just a bit, making a tasty cheesy crust. Finally, add 2 tablespoons of chopped fresh parsley on top for a pop of color. Serve the wings hot and enjoy! To get crispy wings, follow these steps: - Start with dry chicken wings. Pat them with paper towels. - Use olive oil to coat the wings. This helps them crisp up. - Do not overcrowd the air fryer basket. Space allows hot air to flow. - Flip the wings halfway through cooking. This ensures even cooking. - Cook until they are golden brown. Aim for about 25-30 minutes. Avoid these common mistakes for the best results: - Don’t skip the preheating step. It helps wings cook evenly. - Avoid too much oil. A little goes a long way. - Don’t crowd the basket. Wings need space to crisp up. - Forgetting to flip can lead to uneven cooking. Always remember to turn them! Pair your crispy wings with tasty sides: - Serve with celery sticks and ranch dressing. They balance the flavors. - Try a fresh salad to add crunch. A simple green salad works well. - Pair with your favorite dipping sauces. BBQ or honey mustard are great choices. - Consider beer or soda for drinks. They complement the wings perfectly. {{image_2}} You can easily add heat to your wings. To make spicy garlic parmesan wings, use hot sauce. Mix your favorite hot sauce with the olive oil and garlic. Toss the wings in this spicy mix before cooking. Adjust the spice level to your liking. You can also sprinkle crushed red pepper flakes on top after cooking for extra kick. For a fresh twist, try lemon garlic parmesan wings. Add lemon juice and zest to the olive oil mix. This gives the wings a bright flavor. Use about two tablespoons of fresh lemon juice. Toss in some lemon zest for extra zing. The tangy flavor pairs well with the garlic and parmesan. Bring in fresh herbs for an herb-infused variation. Add chopped fresh herbs like rosemary, thyme, or oregano to the olive oil mix. Use about one tablespoon of each herb. This will give your wings a fragrant and earthy taste. Toss the wings well to ensure an even coat. You can choose any mix of herbs you enjoy. After enjoying your crispy garlic Parmesan wings, store any leftovers in an airtight container. This helps keep them fresh. Place the wings in the fridge within two hours of cooking. They will stay good for about three to four days. Make sure they cool down before sealing the container. This avoids extra moisture that can make them soggy. If you want to save wings for later, freezing is a great option. First, let the wings cool completely. Then, arrange them in a single layer on a baking sheet. Freeze them for about an hour until solid. After that, transfer the wings to a freezer-safe bag. Remove as much air as you can before sealing the bag. Frozen wings can last up to three months. To enjoy leftover wings again, reheating is key. The best way is to use your air fryer. Preheat it to 375°F (190°C). Place the wings in a single layer in the basket. Heat for about 8-10 minutes, flipping halfway through. This keeps them crispy. You can also reheat in the oven. Set your oven to 350°F (175°C) and bake for about 15 minutes. Whichever method you choose, enjoy! Cooking wings in an air fryer takes about 25 to 30 minutes. Set the fryer to 400°F (200°C). Flip the wings halfway through. This helps them cook evenly. You will want them crispy and golden brown. Yes, you can use frozen chicken wings. Just add extra cooking time. Cook them for about 35 to 40 minutes. Make sure to check if they are cooked through. Thawing the wings first can also help. Garlic parmesan wings pair well with many sides. You can serve them with celery sticks and ranch dressing. French fries or a fresh salad also make great choices. Consider serving them with a tangy dipping sauce for extra flavor. To know if chicken wings are done, check their internal temperature. It should reach 165°F (75°C). You can use a meat thermometer to check. The wings should also be crispy and golden brown on the outside. You now know how to make delicious garlic Parmesan chicken wings. We covered key ingredients, step-by-step cooking, and helpful tips. You can explore spicy or lemon variations to keep things fresh. Proper storage ensures you enjoy leftovers later. With these methods, you can impress friends and family. Enjoy your crispy wings at your next meal!

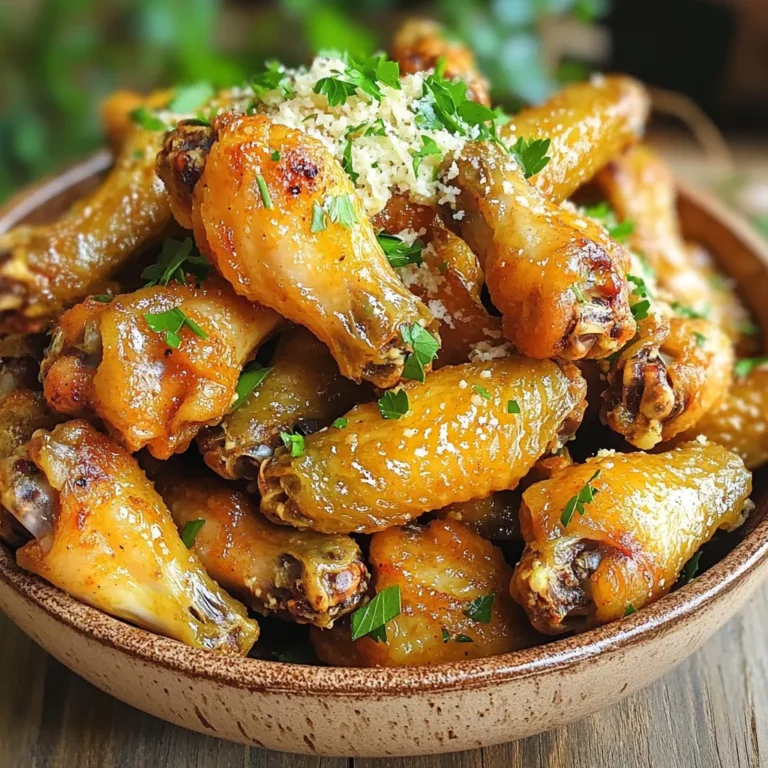
Air Fryer Crispy Garlic Parmesan Wings Delight

To make Cinnamon Brown Sugar Roasted Almonds, you will need: - 2 cups raw almonds - 1/2 cup brown sugar - 1 teaspoon ground cinnamon - 1/4 teaspoon salt - 1/4 cup water - 1 tablespoon vanilla extract - Cooking spray or parchment paper for lining If you don’t have brown sugar, you can use white sugar. For a different flavor, try honey or maple syrup instead of water. You can also use other nuts if you prefer. Almonds are great, but pecans or walnuts work well too. If you need a nut-free option, try sunflower seeds. Each serving of these roasted almonds is packed with flavor and nutrition. Here’s what you get in one serving (about 1/4 cup): - Calories: 200 - Protein: 6 grams - Fat: 15 grams - Carbohydrates: 18 grams - Fiber: 3 grams - Sugars: 7 grams These almonds make a tasty snack that is both sweet and healthy. Enjoy them on their own or add them to your favorite dishes! First, gather your ingredients. You need: - 2 cups raw almonds - 1/2 cup brown sugar - 1 teaspoon ground cinnamon - 1/4 teaspoon salt - 1/4 cup water - 1 tablespoon vanilla extract - Cooking spray or parchment paper Preheat your oven to 325°F (163°C). Line a baking sheet with parchment paper or spray it with cooking spray. This step keeps the almonds from sticking. In a medium saucepan, mix the brown sugar, ground cinnamon, salt, water, and vanilla extract. Set the heat to medium. Stir the mix until the sugar dissolves, about 3-4 minutes. The syrup will feel smooth and smell sweet. This coating is what makes the almonds so tasty! Now, add the raw almonds to the saucepan. Stir well to coat each almond in the syrup. Spread the almonds evenly on the baking sheet in a single layer. This helps them roast evenly. Roast them in the oven for about 15-20 minutes. Stir halfway through to make sure they cook evenly. You’ll know they’re ready when they turn golden brown and smell amazing. After roasting, take the baking sheet out of the oven. Let the almonds cool completely; they will harden as they cool. If you see any clusters, break them apart. Store your delicious snack in an airtight container at room temperature. Enjoy! Roasting almonds is simple and fun. Start with raw almonds for the best taste. Always preheat your oven to 325°F (163°C). This makes sure the almonds roast evenly. Use parchment paper to line the baking sheet. It helps prevent sticking and makes cleanup easy. Stir the almonds halfway through roasting. This helps them brown all over. To coat the almonds well, stir them in the warm syrup for a few minutes. Make sure all almonds get covered. If the syrup cools too fast, it won’t stick well. If needed, warm the syrup again. Spread the coated almonds in a single layer on the baking sheet. This way, they roast evenly and become crispy. One common mistake is not stirring the almonds while roasting. This can cause some to burn while others stay raw. Also, avoid using too much syrup. If the almonds are too sticky, they won’t crisp up. Lastly, don’t skip the cooling step. Let them cool completely to harden for the best crunch. {{image_2}} You can change the flavor of these roasted almonds easily. Instead of cinnamon, use nutmeg or ginger for a new taste. You can also try cocoa powder for a chocolate twist. For a spicy kick, add cayenne pepper or chili powder. Each option gives a unique flavor and keeps things fun. Feel free to mix in other nuts or seeds. Walnuts, pecans, or pistachios work well with the cinnamon brown sugar taste. Try adding pumpkin seeds or sunflower seeds for some crunch and nutrition. Just make sure to adjust roasting time if you add larger nuts. You can change the amount of sugar in this recipe. If you want less sweetness, cut the sugar by a third. You can also use maple syrup or honey instead of brown sugar for a different flavor. This gives you control over the sweetness while keeping the taste delicious. To keep your cinnamon brown sugar roasted almonds fresh, place them in an airtight container. Glass jars or plastic containers work well. Make sure the lid seals tightly. Store them in a cool, dry place, like a pantry or cupboard. This helps maintain their crunch and flavor. Avoid storing them in warm or humid areas, as this can lead to spoilage. When stored properly, your roasted almonds can last for about two weeks. After this, they may start to lose their flavor and crunch. Signs of spoilage include a stale smell, soft texture, or mold. If you notice any of these signs, it’s best to toss them out. Always trust your senses! If your almonds lose their crunch, don’t worry! You can easily re-crisp them. Spread the almonds on a baking sheet in a single layer. Preheat your oven to 350°F (175°C). Roast them for about 5-10 minutes, stirring halfway through. Keep an eye on them to avoid burning. Once they cool, they will be crispy again! Yes, you can use different nuts. Pecans, cashews, or walnuts work well. Just keep the same steps in mind. Change the cooking time if needed. Each nut has a unique flavor. Make sure to coat them well with the cinnamon-sugar mix. This recipe is already vegan! It uses brown sugar and vanilla extract, which are plant-based. You don't need to change anything to keep it vegan. Enjoy the sweet and warm flavors without worry! To make almonds crunchier, roast them longer. Check them every few minutes to avoid burning. Spread them in a single layer to allow hot air to circulate. Let them cool completely, as they will crisp up more as they cool. This guide took you through the simple steps to make delicious roasted almonds. We covered the needed ingredients, how to prep them, and the right techniques for roasting. You learned tips for great flavor variations, storage advice, and answered common questions. Remember, roasting almonds isn’t just tasty; it’s fun too. Explore flavors and get creative. Enjoy tasty snacks that please everyone!

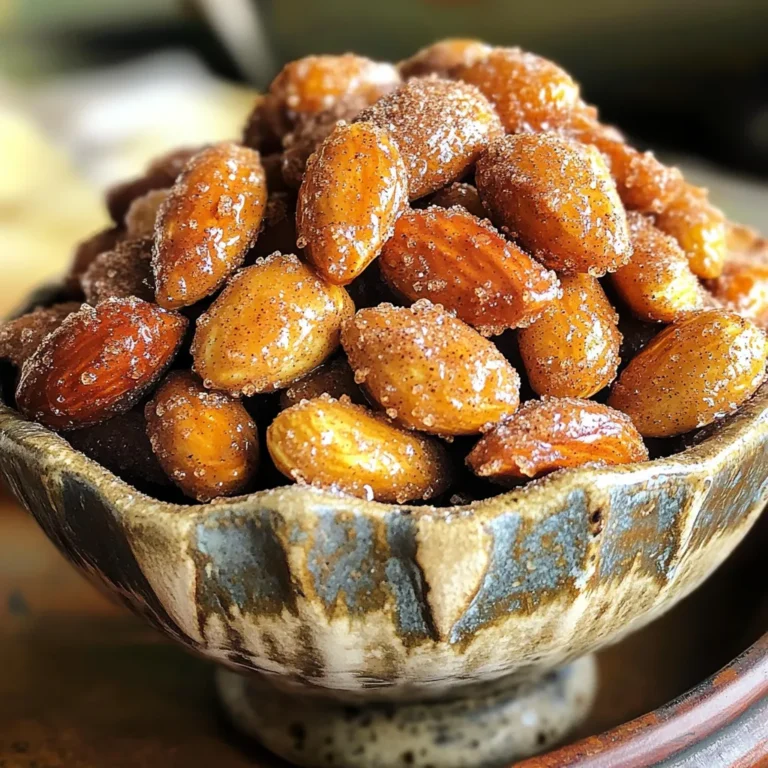
Cinnamon Brown Sugar Roasted Almonds Irresistible Snack

- 1 cup crushed graham crackers - 1/2 cup powdered sugar - 4 tablespoons unsalted butter, melted - 16 oz cream cheese, softened - 1 cup heavy whipping cream - 1 teaspoon vanilla extract - 1/2 cup caramel sauce (plus extra for drizzling) - Sea salt for garnish - Additional caramel for drizzling For this no-bake caramel cheesecake, we focus on simple ingredients. The dry ingredients include crushed graham crackers and powdered sugar. The graham crackers form a sweet crust, while the powdered sugar adds extra sweetness to the cheesecake filling. The wet ingredients are where the magic happens. Unsalted butter binds the graham cracker crust. Cream cheese gives the cheesecake its rich texture. Heavy whipping cream is vital for a light, fluffy filling. Vanilla extract adds warmth and depth. Finally, caramel sauce brings a sweet, gooey touch that makes every bite delightful. You can add sea salt on top for a fun flavor twist. A drizzle of extra caramel enhances the look and taste. These ingredients work together to create layers of flavor and texture. Each jar becomes a little piece of dessert heaven. Start by mixing together the crushed graham crackers and melted butter in a medium bowl. You want this mix to feel like wet sand. Once it's ready, scoop about 2 tablespoons into each jar. Press down gently to form an even layer. This crust gives your cheesecake a great base. Next, grab a large bowl and beat the softened cream cheese with an electric mixer until it's smooth. This step is key for a creamy texture. Slowly add the powdered sugar and vanilla extract. Keep mixing until everything combines well and is creamy. In a separate bowl, whip the heavy cream until stiff peaks form. This means the cream should hold its shape when you lift the beaters. Now, gently fold the whipped cream into the cream cheese mixture. Be careful here; you don't want to deflate the whipped cream. It's time to layer your jars! Start by adding the cheesecake mixture on top of the graham cracker crust. Fill each jar about halfway. Then, drizzle some caramel sauce over this layer. Add another layer of the remaining graham cracker mix next. Finally, top each jar with the rest of the cheesecake mixture and smooth it out. Cover each jar with a lid or plastic wrap and place them in the fridge. Let them chill for at least 4 hours, or overnight if you can wait. This time helps the flavors meld together. When you’re ready to serve, drizzle a bit more caramel sauce on top. Optionally, sprinkle some sea salt for a touch of flavor contrast. Enjoy your delightful no-bake caramel cheesecake jars! - Use room temperature cream cheese: This helps mix the cream cheese smoothly. Cold cream cheese can cause lumps. - Ensure whipped cream is folded gently: This keeps the mixture light and fluffy. A heavy hand can deflate the cream. - Overmixing the cream cheese: This can make your cheesecake too dense. Mix just until smooth. - Skipping the chilling process: Chilling allows the flavors to meld. Don't rush this step, as it makes a big difference in taste. - Pair with fresh fruit: Berries or sliced bananas add a fresh burst. Their sweetness complements the cheesecake nicely. - Serve with a side of whipped cream: A dollop of whipped cream makes it extra special. It adds creaminess and looks great on the plate. {{image_2}} You can switch up the flavor of your no-bake caramel cheesecake jars. Here are two fun ideas: - Chocolate caramel cheesecake: Just add cocoa powder to the cream cheese mix. This gives the cheesecake a rich chocolate taste. You can also use chocolate graham crackers for the crust. - Pumpkin spice version: Mix in pumpkin puree and pumpkin spice. This adds a fall flavor that many love. It’s perfect for a seasonal treat. You can make this dessert work for your needs by swapping some ingredients: - Gluten-free graham crackers: Look for gluten-free options at your store. They work just as well for the crust. - Dairy-free cream cheese alternatives: Use cashew or almond cream cheese. These options keep the same creamy texture without dairy. How you present your cheesecake jars can make them even more special: - Use mason jars for a rustic look: They add charm and are easy to find. Plus, they are perfect for layering. - Layer with fresh berries on top: Berries not only add color but also give a fresh taste. You can use strawberries, blueberries, or raspberries for a pop of flavor. You can store your no-bake caramel cheesecake jars in the fridge for up to five days. Make sure to cover them tightly with lids or plastic wrap. This keeps them fresh and tasty. Yes, you can freeze no-bake cheesecake jars! However, it's best to freeze them before adding the caramel sauce on top. This will help maintain their texture. Wrap each jar in plastic wrap, then place them in an airtight container. They can last for up to three months in the freezer. To prevent sogginess in layers, keep the graham cracker crust separate until you are ready to serve. You can also add a thin layer of chocolate or white chocolate on top of the crust before adding the cheesecake. This layer acts as a barrier and helps keep the crust crisp. I love serving these jars in a fun way. Here are some ideas: - Use clear jars to show off the layers. - Add a drizzle of caramel on top. - Sprinkle a pinch of sea salt for a nice contrast. - Serve with a small spoon for easy eating. - Pair them with fresh fruit for extra flavor. These simple touches make your jars look stunning and taste even better! Yes! If you want a change, consider these options: - Use crushed Oreos for a chocolatey twist. - Try crushed almonds or walnuts for a nutty flavor. - Consider using a cookie like shortbread for a rich taste. - Gluten-free options, like almond flour, work great too. Feel free to mix and match until you find your favorite! The cheesecake needs time to chill. Here’s what you need to know: - Chill the jars for at least 4 hours. - Overnight works best for full flavor and texture. - Warmer kitchens may need longer chilling times. This wait allows the layers to meld and the cheesecake to firm up. Enjoy the patience; it's worth it! This blog post guides you on making no-bake caramel cheesecake jars. You learned about key ingredients and how to blend them. The step-by-step instructions help you create a tasty crust and filling. I shared tips to avoid common mistakes, suggested fun variations, and explained storage. No-bake desserts are easy, fun, and rewarding. You can impress friends with your delicious treat. Enjoy making these jars and get creative with your flavors!

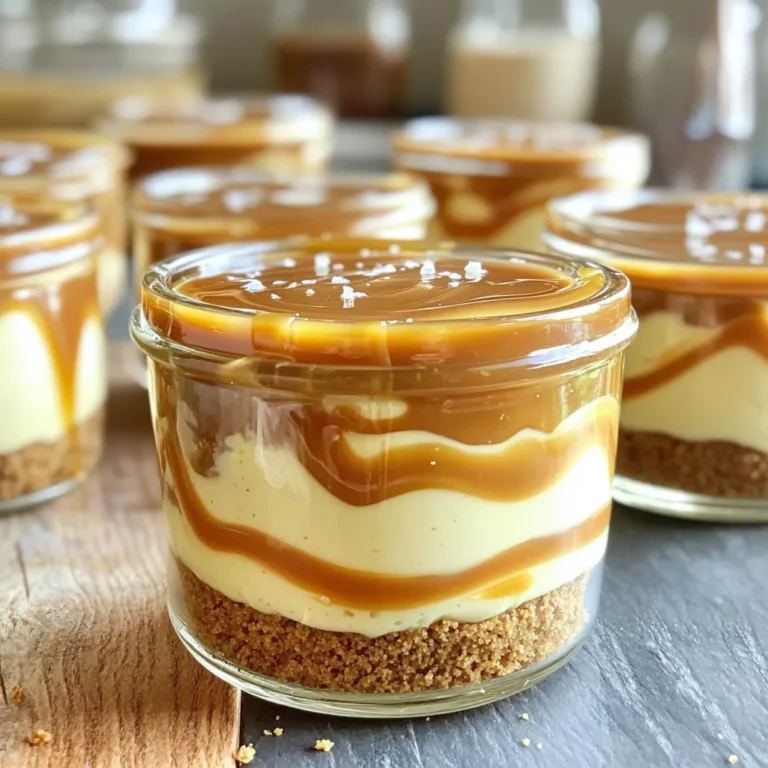
No-Bake Caramel Cheesecake Jars Delightful Treats

To make One-Pot Chicken Parmesan Pasta, gather these ingredients: - 2 boneless, skinless chicken breasts, diced - 2 tablespoons olive oil - 3 cloves garlic, minced - 1 teaspoon Italian seasoning - 1/2 teaspoon red pepper flakes (optional) - 4 cups low-sodium chicken broth - 8 ounces penne pasta - 1 can (15 ounces) crushed tomatoes - 1 cup shredded mozzarella cheese - 1/2 cup grated Parmesan cheese - Fresh basil leaves for garnish - Salt and pepper to taste For the best taste, I recommend using high-quality ingredients: - Chicken: Look for organic, free-range chicken for better flavor. - Olive Oil: Use extra virgin olive oil for a rich taste. - Pasta: Barilla or De Cecco brands work well for penne. - Cheese: Freshly grated Parmesan and mozzarella melt better than pre-shredded versions. - Broth: Swanson or Pacific Foods make great low-sodium chicken broth. You can swap some ingredients if needed: - Chicken: Use turkey or tofu for a different protein. - Pasta: Any short pasta, like rigatoni or farfalle, fits well. - Cheese: Try provolone or gouda if you want a twist. - Broth: Vegetable broth is a good option for a lighter dish. - Tomatoes: Diced tomatoes can replace crushed ones if that’s what you have. These easy swaps help you enjoy this dish even if you run low on some items. To make One-Pot Chicken Parmesan Pasta, start with a large pot. Heat 2 tablespoons of olive oil over medium heat. Add 2 diced chicken breasts and season them with salt, pepper, and 1 teaspoon of Italian seasoning. If you like heat, add 1/2 teaspoon of red pepper flakes. Cook the chicken for 5 to 7 minutes until it's golden and cooked through. Next, add 3 minced garlic cloves and sauté for 1 minute. This will give your dish a nice aroma. Now, pour in 4 cups of low-sodium chicken broth and bring it to a simmer. Stir in 8 ounces of penne pasta and 1 can (15 ounces) of crushed tomatoes. Cover the pot and let it cook for 12 to 15 minutes. Stir it occasionally to prevent sticking. When the pasta is al dente, remove the pot from heat. Add 1 cup of shredded mozzarella cheese and 1/2 cup of grated Parmesan cheese. Stir until they melt and blend in nicely. Let the dish sit for a few minutes to thicken. To ensure your chicken turns out great, cut it into small, even pieces. This helps it cook evenly. Always season the chicken well. Salt and pepper are key to enhancing its natural flavor. Don't rush the browning process; let it take its time. This adds a nice texture and depth of flavor. Use a meat thermometer if you want to be sure the chicken is fully cooked. It should reach 165°F. For perfect pasta, use penne pasta as it holds sauce well. Stir the pasta often while it cooks. This keeps it from clumping together. Make sure to follow the cooking time on the package, but start checking for doneness a minute or two early. You want it to be firm, or al dente. If you overcook it, the pasta will become mushy. If needed, save a bit of pasta water to adjust the sauce later. This will help keep your dish creamy and delicious. To boost flavor, add fresh herbs like basil and parsley. You can also try using fresh garlic instead of minced. A splash of lemon juice will brighten the dish too. If you like heat, add more red pepper flakes. For a richer taste, use homemade chicken broth. Mixing in a bit of white wine before adding the broth can add depth. One big mistake is overcooking the chicken. It should be juicy, not dry. Stirring the pasta too much can break it. Let it sit for a moment before stirring. Also, don’t skip the cheese. It makes the dish creamy and rich. Lastly, avoid cooking the pasta too long. It should be al dente for the best texture. To make your dish pop, serve it in a shallow bowl. Sprinkle extra grated Parmesan on top. Add fresh basil leaves for color. A drizzle of olive oil can also enhance the look. For a fun twist, use colorful pasta. This adds visual interest to the meal. Serve with a side salad for a complete dinner. {{image_2}} You can make this dish vegetarian by swapping the chicken for vegetables. Use diced zucchini, bell peppers, or mushrooms. Sauté them in olive oil until tender. You can also add chickpeas for protein. This keeps the meal hearty and satisfying without meat. Penne works great, but you can try other pasta shapes. Fusilli, farfalle, or rigatoni are tasty alternatives. Just remember to adjust the cooking time. Thin pasta may cook faster, while thicker pasta may need more time. Make sure to stir it occasionally for even cooking. If you want to use different proteins, try shrimp or turkey. Shrimp cooks quickly and adds a nice flavor. Turkey is a lean option that pairs well with the sauce. You can also use cooked sausage for a richer taste. Just make sure to adjust cooking times based on the protein you choose. To keep your One-Pot Chicken Parmesan Pasta fresh, cool it down first. Use an airtight container to store it in the fridge. It will stay good for about 3-4 days. Always label the container with the date to keep track. If you have a lot left, consider dividing it into smaller portions for easy meals later. When you are ready to eat the leftovers, take them out of the fridge. You can reheat in the microwave or on the stove. If using the microwave, heat for 1-2 minutes, stirring halfway. On the stove, add a splash of chicken broth to prevent sticking and heat over low until warm. Make sure it is hot all the way through before serving. If you want to save some for later, freezing is a great option. Let the pasta cool completely before freezing. Place it in a freezer-safe container or bag. Try to remove as much air as possible to avoid freezer burn. This dish can last in the freezer for up to 2 months. When ready to enjoy, thaw it in the fridge overnight before reheating. Yes, you can use different cheeses. If you want a sharper flavor, try using aged cheddar or provolone. You can also mix cheeses for a unique taste. Just remember that mozzarella gives that classic stretch. Parmesan adds a nice salty touch. Feel free to experiment based on your taste. To make this dish gluten-free, switch the penne pasta for gluten-free pasta. Many brands offer great options that cook well. Also, check the chicken broth label to ensure it is gluten-free. This way, you can enjoy the same rich flavors while avoiding gluten. Using crushed tomatoes adds depth to the sauce. They break down and blend well with the pasta. If you don’t have crushed tomatoes, you can use diced tomatoes instead. Just chop them smaller. This keeps the sauce thick and flavorful, so you won’t lose that great taste! This blog post covered essential ingredients and tips for great cooking. We explored ingredient lists, cooking steps, and tricks to boost flavor. You learned key variations, storage methods, and common questions answered. Cooking is fun and rewarding. With practice, you can create meals that impress. Use these tips to enjoy your time in the kitchen and make tasty dishes every time. Happy cooking!

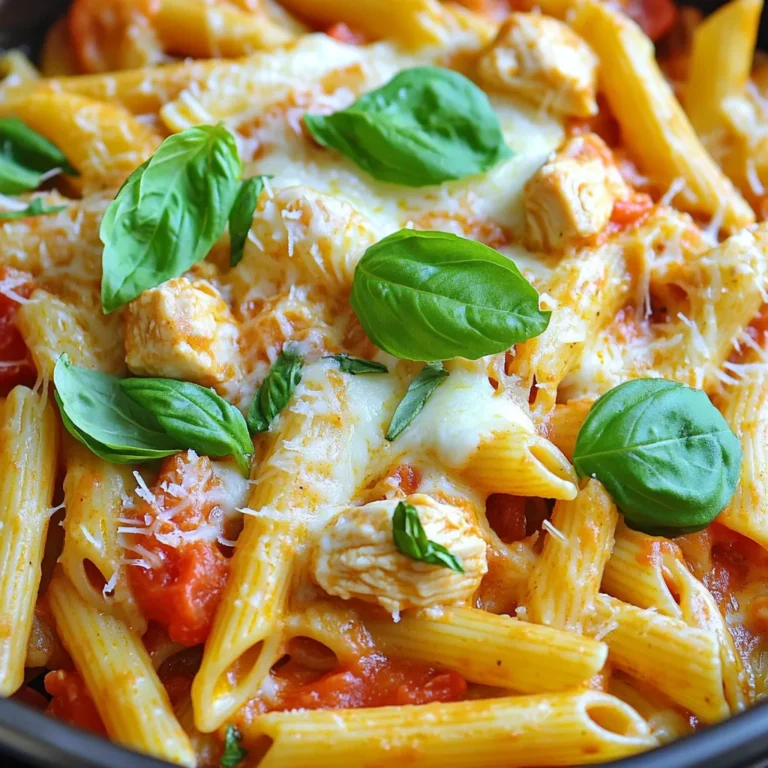
One-Pot Chicken Parmesan Pasta Easy and Tasty Meal

- 1 cup pumpkin puree (canned or homemade) - 1/2 cup vegetable oil - 1 cup granulated sugar - 1/2 cup brown sugar, packed - 3 large eggs - 1 teaspoon vanilla extract - 2 cups all-purpose flour - 1 teaspoon baking soda - 1/2 teaspoon baking powder - 1 teaspoon ground cinnamon - 1/2 teaspoon ground nutmeg - 1/4 teaspoon ground ginger - 1/4 teaspoon salt - 1 cup semi-sweet chocolate chunks (or chips) - Optional: 1/2 cup chopped nuts (walnuts or pecans) Using the right ingredients makes all the difference in your chocolate chunk pumpkin bread. Start with pumpkin puree. It gives the bread moisture and flavor. You can use canned or homemade puree. Both work well. Next, add vegetable oil. It keeps the bread soft. Granulated sugar and brown sugar bring sweetness. They also help create a nice crust. You will need three eggs. They bind the ingredients together. Don’t forget vanilla extract. It adds a rich flavor. For the dry mix, use all-purpose flour. This helps the bread rise. Baking soda and baking powder are your leavening agents. They give the bread its fluffy texture. Spices elevate your bread's taste. Use ground cinnamon, nutmeg, and ginger. These spices create a warm, cozy flavor. Finally, add chocolate chunks. They melt into gooey goodness. If you like, toss in some nuts for added crunch. Walnuts and pecans work great. With these ingredients, you are ready to bake a delicious loaf that feels like a treat from a bakery! 1. Preheat the oven and prepare the loaf pan: Set your oven to 350°F (175°C). Grease and flour a 9x5-inch loaf pan. You can also use parchment paper for easy removal later. 2. Mix wet ingredients: In a large bowl, combine 1 cup of pumpkin puree, 1/2 cup of vegetable oil, 1 cup of granulated sugar, 1/2 cup of brown sugar, 3 large eggs, and 1 teaspoon of vanilla extract. Whisk them together until smooth. 3. Combine dry ingredients: In another bowl, sift 2 cups of all-purpose flour, 1 teaspoon of baking soda, 1/2 teaspoon of baking powder, 1 teaspoon of ground cinnamon, 1/2 teaspoon of ground nutmeg, 1/4 teaspoon of ground ginger, and 1/4 teaspoon of salt. Mix until well combined. 4. Blend wet and dry mixtures: Gradually add the dry mixture to the wet mixture. Stir gently until just combined. It’s fine if there are a few flour streaks; do not overmix. 5. Fold in chocolate chunks and nuts: Add 1 cup of semi-sweet chocolate chunks to the batter. If you like, fold in 1/2 cup of chopped nuts, such as walnuts or pecans, until evenly mixed. 6. Pour batter and bake: Pour the batter into your prepared loaf pan. Smooth the top with a spatula. Bake for 55-65 minutes. To check for doneness, insert a toothpick into the center. It should come out clean or with a few crumbs. 7. Cooling process for the bread: Once baked, remove the bread from the oven. Let it cool in the pan for about 10 minutes. Then, transfer it to a wire rack to cool completely before slicing. This bread is perfect for sharing and will fill your home with a warm, inviting aroma! Why is measuring ingredients important? Measuring your ingredients helps ensure the right balance. If you use too much flour, your bread can be dry. Too little sugar makes it less sweet. Always use a scale or measuring cups for accuracy. How do you achieve the perfect texture? To get a moist bread, mix your wet and dry ingredients gently. Overmixing leads to tough bread. A few flour streaks are okay. Letting the batter sit for a few minutes can also help. What are the best ways to serve the bread? Serve this bread warm or at room temperature. Slice it thick and spread some butter on top. You can also dust it with powdered sugar for a sweet touch. What drinks pair well with pumpkin bread? Coffee is a great match for this bread. A hot cup of tea works well, too. For a fall vibe, try apple cider or a spiced latte. How can you present this bread elegantly? Presentation can elevate your dish. Place the sliced bread on a nice platter. Add some fresh herbs or seasonal fruits for color. What toppings can make it special? A light dusting of powdered sugar adds sweetness. You can also sprinkle chopped nuts on top for crunch. Chocolate drizzle can make it look even more tempting. {{image_2}} You can change up the flavors in your pumpkin bread. Adding spices like cloves or allspice gives it a warm kick. These spices blend well with pumpkin and chocolate. You can also try different types of chocolate. Using dark chocolate will add a rich taste, while milk chocolate gives a sweet touch. This way, you can find the flavor you love most. If you need a gluten-free option, use gluten-free flour instead of regular flour. Many brands offer blends that work well in baking. For a vegan version, replace the eggs with flaxseed meal or applesauce. Use plant-based oil and chocolate to keep it dairy-free. These swaps keep the bread tasty while meeting your dietary needs. You can swap sugars for healthier alternatives. Try using coconut sugar or maple syrup instead of granulated sugar. This change can make the bread a bit more nutritious. If you have nut allergies, you can skip the nuts or use seeds like sunflower seeds instead. These swaps help everyone enjoy the bread without worry. To keep your pumpkin bread fresh, store it in an airtight container. This helps keep moisture locked in. Place the bread at room temperature for best results. Avoid storing it in the fridge, as this can dry it out. If you want to keep it extra soft, wrap it in plastic wrap. This method works well for up to three days. If you want to save your pumpkin bread for later, freezing is a great option. Wrap the bread tightly in foil or plastic wrap before placing it in a freezer bag. This prevents freezer burn. To thaw, simply place it in the fridge overnight. You can also warm it in the microwave for a few seconds. Enjoy it warm for a cozy taste! At room temperature, the bread lasts about three days. Look for signs of spoilage like a dry texture or mold. If it smells off or has a weird color, it’s best to toss it. Always check before eating leftovers. Proper storage keeps your bakery-style chocolate chunk pumpkin bread delightful and delicious! Can I use fresh pumpkin instead of canned? Yes, you can use fresh pumpkin. Just cook and puree it first. Make sure it is not too watery. Fresh pumpkin gives a nice flavor and texture. How do I know when the bread is done baking? Check for doneness with a toothpick. Insert it into the center of the bread. It should come out clean or with a few crumbs. If the toothpick is wet, bake for a few more minutes. Can I substitute oil for applesauce? Yes, you can swap oil for applesauce. This change makes the bread healthier. It may also make the bread a bit denser. Why did my bread not rise properly? Your bread may not rise due to old baking soda or baking powder. Make sure they are fresh. Also, do not overmix the batter. That can lead to a dense loaf. What should I do if my bread is too dry? If the bread is too dry, try adding a little milk or water. You can also add more chocolate chunks or nuts. These will help add moisture and flavor. What drinks pair well with pumpkin bread? Pumpkin bread goes well with coffee or tea. A warm cup of chai or spiced cider works great too. Milk or almond milk is another delicious option. How to make pumpkin bread into a dessert? You can turn pumpkin bread into a dessert by adding whipped cream or ice cream. Serve it warm with a drizzle of chocolate sauce. A sprinkle of cinnamon or nuts on top adds a nice touch. You learned how to make delicious pumpkin bread from scratch. We've covered key ingredients, clear steps to follow, and helpful tips for the best results. You now know fun variations and how to store your bread too. Remember, the right ingredients and methods can make all the difference. Enjoy sharing this tasty treat with friends or family. Happy baking!

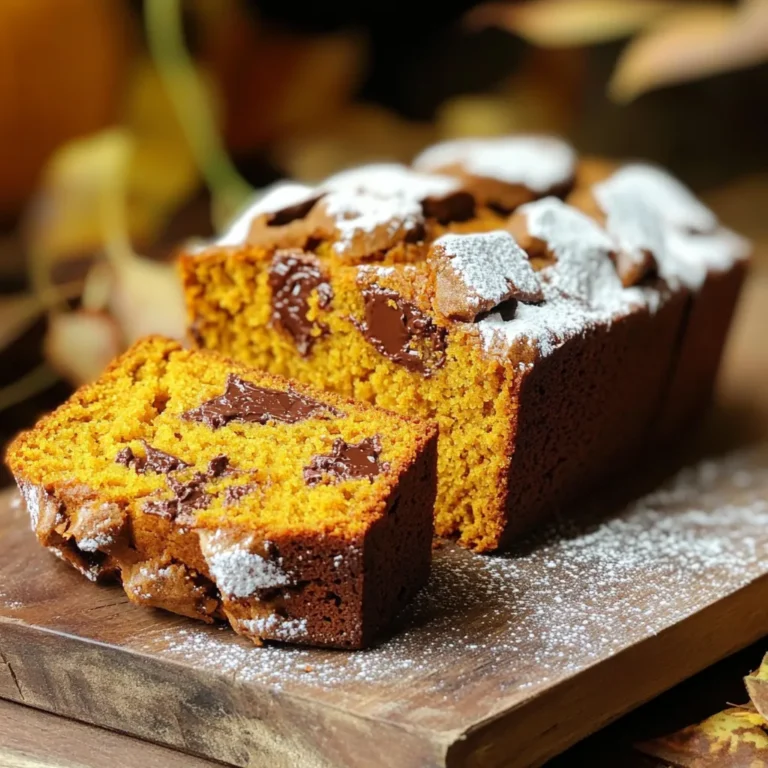
Bakery-Style Chocolate Chunk Pumpkin Bread Delight

Fresh apple cider is key to this drink. It gives the cocktail its sweet and tart base. I like to use local cider for the best flavor. Look for cider that has no added sugar or preservatives. You need about 2 cups of fresh apple cider for four servings. This cider brings warmth and comfort, perfect for fall. To make this drink pop, we add a few flavorings. I use 1 tablespoon of fresh ginger, grated, for a spicy kick. Ginger adds warmth that pairs well with the cider. Next, I add 1 tablespoon of honey for sweetness. Adjust this to your taste. Then, I sprinkle in 1 teaspoon of cinnamon and 1 teaspoon of nutmeg. These spices remind you of cozy fall days. They blend well with the apple cider and bourbon. Garnishes make your drink look great. I love to use fresh mint leaves. You’ll need 4 leaves for the drink and more for garnish. The mint adds a fresh aroma that makes every sip refreshing. For the glass, fill it with ice cubes to chill the drink. Lastly, add apple slices on top for a beautiful finish. This simple touch makes the drink even more appealing. Start by grabbing a mixing pitcher. Add 2 cups of fresh apple cider. Next, add 1 tablespoon of grated fresh ginger. Then, mix in 1 tablespoon of honey. Stir well until the honey dissolves. Now, sprinkle in 1 teaspoon of cinnamon and 1 teaspoon of nutmeg. These spices will add warmth to the drink. Stir again to ensure everything blends well. Now, let’s add some fresh mint. Take 4 mint leaves and drop them into the mixture. Use a muddler or the back of a spoon to press down gently on the leaves. This helps release the minty flavor. Be careful not to tear the leaves too much. You want a nice mint flavor, not mush. It’s time to put the drink together. Fill your glasses with ice cubes. Pour the apple cider mixture over the ice, filling each glass about three-quarters full. Now, top off each drink with sparkling water for that fizzy touch. Finally, stir each glass gently to mix the flavors. For a lovely garnish, add apple slices and a mint leaf on top. Enjoy your refreshing Apple Cider Bourbon Smash! You can change the sweetness to fit your taste. Start with one tablespoon of honey. Taste the mix after stirring. If you want it sweeter, add more honey, one teaspoon at a time. This way, you control the sweetness. Remember, the apple cider itself is sweet. So, taste as you go! Pick a fresh apple cider for the best flavor. Look for cider without added sugar or preservatives. A good cider tastes crisp and fruity. If you can, try local options. They often taste better and support nearby farms. When you find the right cider, your drink will shine. Garnishes make drinks look fun. Use fresh apple slices for a pop of color. They also add a nice touch of flavor. Add a mint leaf on top for freshness. You can even freeze mint leaves in ice cubes for a twist. This way, your drink stays cold and looks cool! {{image_2}} You can enjoy a tasty Apple Cider Bourbon Smash without alcohol. Just skip the bourbon and add more apple cider. This drink still tastes great! Here’s how: - Use 3 cups of fresh apple cider. - Add 1 cup of sparkling water for fizz. - Mix in ginger, honey, cinnamon, and nutmeg as usual. - Muddle the mint and pour over ice. This version is perfect for kids or anyone avoiding alcohol. Want to spice up your drink? You can easily add different flavors. Here are some ideas: - Cloves: Add a pinch of ground cloves for warmth. - Allspice: Mix in a little allspice for a unique taste. - Cardamom: A dash of cardamom can give a nice twist. Feel free to experiment with spice amounts. Each spice gives a different vibe to your cocktail. You can make this drink fruitier too! Adding fruits can change the flavor and look. Here are some fun ideas: - Citrus Fruits: Try adding orange or lemon slices. - Berries: Toss in some fresh raspberries or blueberries for color. - Pineapple: A few pineapple chunks can add a tropical touch. Just remember to adjust the sweetness if you add more fruit. Enjoy your fruity Apple Cider Bourbon Smash! If you have leftover apple cider mix, store it in a sealed container. Keep it in the fridge. It stays fresh for up to three days. Make sure to stir it before serving again. The flavors meld together nicely. You can enjoy it chilled or over ice. Use fresh ingredients for the best taste. Store fresh apple cider in the fridge. Keep grated ginger in a cool, dry place. Mint leaves should stay in a damp paper towel. Place them in a plastic bag for extra freshness. If you cut apple slices, use them right away. They brown quickly, but a squeeze of lemon juice helps. Fresh apple cider lasts about a week in the fridge. Once opened, use it within five days. Grated ginger keeps for about a week. Mint leaves can last about one week too. Honey and spices, like cinnamon and nutmeg, last much longer. Keep them in a cool, dark place for the best flavor. Yes, you can switch the bourbon for other spirits. Rye whiskey adds a spicy kick. Vodka gives a clean taste, while spiced rum brings warmth. Each choice will change the drink's flavor, so feel free to experiment. To make more Apple Cider Bourbon Smash, simply multiply the ingredients. For a batch of eight drinks, use: - 4 cups fresh apple cider - 2 cups sparkling water - 2 tablespoons fresh ginger, grated - 2 tablespoons honey (or to taste) - 2 teaspoons cinnamon - 2 teaspoons nutmeg - 8 fresh mint leaves Mix everything in a large pitcher. Serve over ice in individual glasses. Top with sparkling water, and garnish as usual. This drink fits many fall events. Serve it at harvest parties, Thanksgiving, or Halloween gatherings. It also works well for cozy nights by the fire. Enjoy it during game day or when friends drop by. The fresh flavors delight everyone, making it a go-to choice. This blog post covered how to make an Apple Cider Bourbon Smash. We discussed key ingredients like fresh apple cider and flavorings. You learned step-by-step instructions, from mixing to garnishing. Tips on sweetness and storage helped ensure your drink stays fresh. Finally, we explored variations, including alcohol-free options. Experiment with your drink, and have fun personalizing it! Enjoy making this refreshing treat for your next gathering or special occasion.

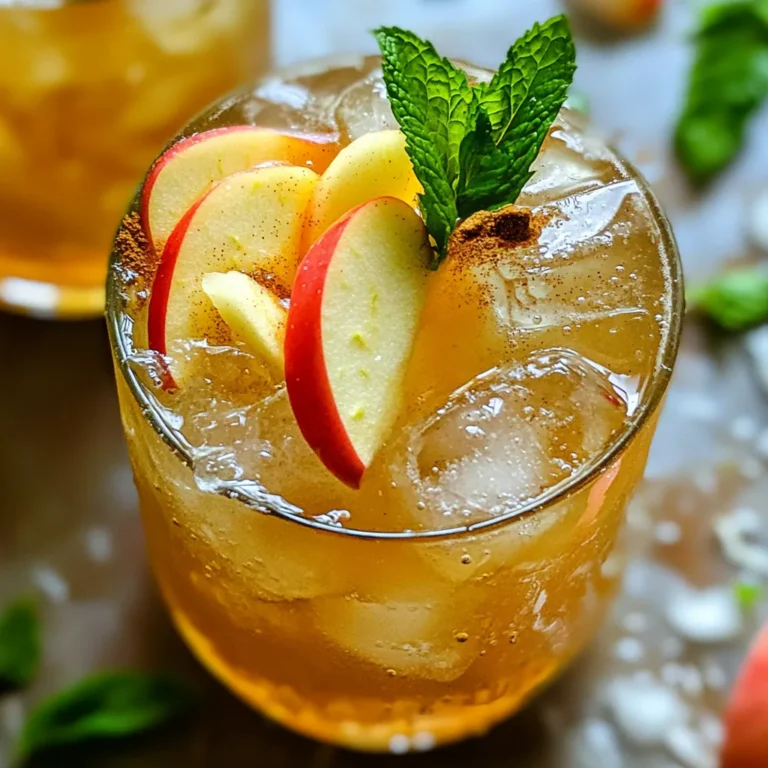
Apple Cider Bourbon Smash Refreshing Fall Cocktail

PREV 1 … 15 16 17 … 57 NEXT
meal twig

explore

DessertsDinnerAppetizersDrinks

Our Policies

  • Cookie Policy
  • Copyright Policy
  • Disclaimer
  • GDPR Policy
  • Terms Of Use
Back to Top
  • About
  • Contact Us
  • Privacy Policy
© 2025 meal twig