FREE DINNER EBOOK! Get your copy!
  • Cookie Policy
  • GDPR Policy
  • Disclaimer
  • Terms Of Use
  • Visit my other site: Fun Cookie Recipes
meal twig
  • Home
  • Dinner
  • Desserts
  • Drinks
  • Appetizers
  • Contact
  • About
  • Privacy Policy
  • Home
  • Dinner
  • Desserts
  • Drinks
  • Appetizers
  • Contact
  • About
  • Privacy Policy
  • Cookie Policy
  • GDPR Policy
  • Disclaimer
  • Terms Of Use
Visit my other site: Fun Cookie Recipes

HOME / CATEGORIES /

Latest

To make peanut butter chocolate chip muffins, gather these items: - 1 cup all-purpose flour - 1/2 cup whole wheat flour - 1/2 teaspoon baking soda - 1/2 teaspoon baking powder - 1/4 teaspoon salt - 1/2 cup creamy peanut butter - 1/2 cup brown sugar, packed - 1/4 cup granulated sugar - 2 large eggs - 1 teaspoon vanilla extract - 1/2 cup milk (dairy or non-dairy) - 1/2 cup chocolate chips - 1/4 cup chopped walnuts (optional) You can play with the recipe. Here are some ideas: - Use almond butter instead of peanut butter for a nutty twist. - Swap chocolate chips for dark chocolate or white chocolate chips. - Add dried fruits like raisins or cranberries for extra sweetness. - Replace walnuts with pecans or leave them out if you prefer. Quality ingredients make a big difference. Here are my tips: - Choose fresh flour and check the expiration date. - Use natural peanut butter with no added sugar or oils. - Select high-quality chocolate chips for rich flavor. - If using eggs, make sure they are at room temperature for better mixing. These choices can elevate your muffins and make them even more delightful. Enjoy creating your tasty treats! Start by preheating your oven to 350°F (175°C). This ensures even baking. Next, line a muffin tin with paper liners or lightly grease it. This helps the muffins come out easily. In a medium bowl, whisk together the all-purpose flour, whole wheat flour, baking soda, baking powder, and salt. Make sure they mix well. Set this bowl aside for later. In a large mixing bowl, combine the creamy peanut butter, brown sugar, and granulated sugar. Use an electric mixer on medium speed. Beat until the mixture is smooth and creamy. This should take about 1-2 minutes. Next, add the eggs one at a time. Mix well after each egg. Then, add the vanilla extract and mix until combined. Now, it’s time to combine the wet and dry mixtures. Gradually add the dry flour mix to the wet ingredients, alternating with the milk. Start and end with the flour. Mix until just combined. Don’t overmix, or the muffins will be tough. Now, gently fold in the chocolate chips. If you like, add in the chopped walnuts. Use a spatula to make sure everything is evenly mixed. Divide the muffin batter evenly among the cups. Fill each cup about 3/4 full. Place the muffin tin in the preheated oven. Bake for 18-20 minutes. To test doneness, insert a toothpick into the center of a muffin. If it comes out clean, the muffins are ready. Once baked, remove the muffins from the oven. Let them cool in the tin for 5 minutes. After that, transfer them to a wire rack to cool completely. Enjoy your tasty treats warm! When making peanut butter chocolate chip muffins, some common mistakes can ruin your bake. - Overmixing the batter: This makes muffins tough. Mix just until combined. - Not measuring ingredients: Use a scale or measuring cups for accuracy. - Skipping the rest time: Letting the batter rest helps the muffins rise better. The right texture is key for great muffins. Here are my tips to get it just right: - Use room temperature ingredients: Eggs and milk blend better at this temp. - Alternate wet and dry ingredients: This keeps the muffins fluffy and moist. - Fill muffin cups correctly: Fill each cup about 3/4 full to allow for rising. You can easily adapt this recipe to fit different dietary needs. Here are some ideas: - Gluten-free: Substitute with a gluten-free flour blend. - Dairy-free: Use almond milk or coconut milk instead of regular milk. - Nut-free: Replace peanut butter with sun butter or soy nut butter. Experimenting with these tips can help you make the perfect muffins for everyone! {{image_2}} You can add banana for a fun twist. Use one ripe banana, mashed. This adds sweetness and moisture. Simply mix the banana with the wet ingredients before adding flour. The banana flavor pairs great with chocolate and peanut butter. You will love the yummy results! If you want a nut-free option, swap out peanut butter for sun butter or soy nut butter. These choices work well and keep the texture smooth. Just remember to check for allergies. This way, everyone can enjoy these muffins without worry. Feel free to get creative with mix-ins! You can add dried fruits like cranberries or raisins. Seeds like chia or sunflower seeds also work well. Just fold them in with the chocolate chips before baking. These additions add flavor and nutrition. They make your muffins even more fun and tasty! To keep your muffins fresh, store them in an airtight container. This helps prevent drying out. You can place parchment paper between layers to avoid sticking. Keep them at room temperature for up to three days. For longer storage, consider the freezer. Freezing muffins is simple and effective. First, let the muffins cool completely. Wrap each muffin in plastic wrap. Place the wrapped muffins in a freezer bag. Label the bag with the date. You can freeze them for up to three months. This way, you always have a tasty treat on hand. When you're ready to enjoy your muffins, reheating brings back their warmth. You can use the microwave for a quick fix. Heat for about 15-20 seconds. For a crispier texture, use the oven. Preheat to 350°F (175°C) and heat for 5-10 minutes. This helps restore that fresh-baked goodness. Yes, you can easily make these muffins vegan. Substitute eggs with flax eggs. Mix one tablespoon of ground flaxseed with three tablespoons of water. Let it sit for five minutes to thicken. Use non-dairy milk instead of regular milk. Choose a plant-based yogurt to replace the creamy peanut butter. This keeps the flavor rich while being vegan. To make gluten-free muffins, swap the all-purpose flour and whole wheat flour with gluten-free flour. Look for a blend that works well for baking. Make sure it contains xanthan gum for better texture. You can also use almond flour or oat flour as alternatives. Just keep in mind that the texture may vary slightly. These muffins taste great warm and fresh. Serve them with a drizzle of melted chocolate for a treat. You can also add a sprinkle of sea salt on top to enhance the flavors. Pair them with a glass of milk or a hot cup of coffee. They are perfect for breakfast or as a snack. Enjoy them any time you crave something sweet! In this post, we explored how to make delicious Peanut Butter Chocolate Chip Muffins. We covered ingredients, preparation tips, and common mistakes to avoid. You learned about variations and storage tips to keep your muffins fresh. Remember, using quality ingredients makes a big difference. Try different mix-ins for new flavors. Baking is fun, so enjoy the process! With these guidelines, you can create tasty muffins that everyone will love. Happy baking!

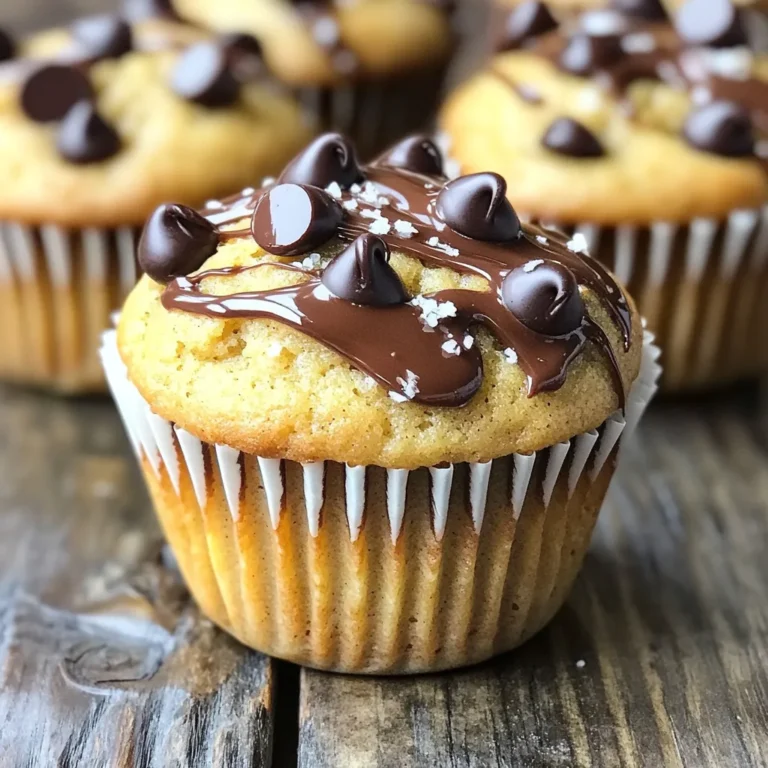
Peanut Butter Chocolate Chip Muffins Tasty Treats

To make Brown Butter Pumpkin Blondies, you will need the following simple ingredients: - 1 cup unsalted butter (2 sticks), browned - 1 cup packed brown sugar - 1/2 cup granulated sugar - 1 teaspoon vanilla extract - 1 cup pumpkin puree (canned or homemade) - 2 large eggs - 2 cups all-purpose flour - 1 teaspoon baking powder - 1 teaspoon baking soda - 1 teaspoon ground cinnamon - 1/2 teaspoon ground nutmeg - 1/4 teaspoon salt - Optional add-ins: 1/2 cup white chocolate chips, 1/2 cup chopped pecans or walnuts Each item plays a key role in creating soft, moist blondies. The browned butter gives a rich, nutty flavor that makes these treats special. The brown sugar adds depth and moisture, while the pumpkin brings a lovely fall essence. If you want to mix things up, you can include white chocolate chips or nuts for extra texture. These options make the blondies even more delightful. Gather these ingredients, and you’re ready to start your baking adventure! - Preheat the oven to 350°F (175°C). - Grease a 9x13 inch baking dish or line it with parchment paper. - Melt the butter over medium heat until it gets foamy. - Cook it until it turns golden brown and smells nutty. - Combine the browned butter, brown sugar, and granulated sugar until smooth. - Add vanilla extract and pumpkin puree, then mix in the eggs. - In a separate bowl, combine the dry ingredients. Slowly fold them into the wet mixture. - Pour the batter into the prepared dish and spread it evenly. - Bake for 25-30 minutes or until a toothpick comes out clean. - Let them cool in the pan before moving to a wire rack. To make your blondies perfect, start with the butter. Brown it well to get that nutty flavor. The butter should be deep golden brown. This step adds richness and depth to your blondies. Next, mix the batter gently. Overmixing makes the blondies tough. Stir just enough to combine the ingredients. You want a soft, tender treat that melts in your mouth. For a pretty finish, cut the blondies into nice squares. Dust them with powdered sugar for a sweet touch. This adds a beautiful look and extra sweetness. If you want to indulge, serve the blondies warm. A scoop of vanilla ice cream on top makes them irresistible. The warm blondies and cold ice cream create a perfect contrast. To spice things up, try adding other flavors. A pinch of ginger or cloves can give your blondies a new twist. You can also mix in white chocolate chips for sweetness. Chopped nuts like pecans or walnuts add a nice crunch. These extras make your blondies even more delicious and fun! {{image_2}} To make these blondies gluten-free, simply swap the all-purpose flour with a gluten-free blend. This change keeps the texture moist and tasty. Many gluten-free blends work well, so choose one you like. For a vegan twist, use vegan butter instead of regular butter. Replace the eggs with flax eggs. Mix one tablespoon of ground flaxseed with three tablespoons of water. Let it sit until it thickens. Also, pick dairy-free chocolate chips for a sweet touch. You can add cranberries or pecans for a festive flavor. Both add a nice crunch, perfect for fall. Another fun idea is to mix in orange zest. This adds a bright, citrusy note that pairs well with pumpkin. To keep your brown butter pumpkin blondies fresh, store them in an airtight container. They will stay good at room temperature for up to 3 days. If you want them to last longer, place them in the fridge. They will stay fresh for up to a week this way. If you want to save some blondies for later, freeze them. Wrap each blondie tightly in plastic wrap, then in foil. They will keep well in the freezer for up to 3 months. When you want to enjoy them, just thaw them at room temperature before serving. This way, you can have a delicious treat anytime! Yes, but the recipe may need adjustments for sweetness and spices. Pumpkin pie filling has added sugar and spices. If you use it, cut back on the sugar in the recipe. Taste the batter before baking to get it just right. Insert a toothpick in the center; it should come out clean or with a few crumbs. If the toothpick has wet batter, bake a little longer. Keep an eye on the edges; they should look firm and slightly golden. Use flax eggs or applesauce as a substitute for binding. For one flax egg, mix one tablespoon of ground flaxseed with three tablespoons of water. Let it sit until it thickens. Use 1/4 cup of applesauce for each egg if you prefer that option. Definitely! Consider caramel, nuts, or chocolate drizzle for extra flavor. You can sprinkle nuts on top before baking. Drizzling caramel or melted chocolate after baking makes the blondies even more special. Get creative and enjoy! This blog covered how to make delicious pumpkin blondies. You learned about the key ingredients, step-by-step instructions, and useful tips. Perfect texture comes from browning the butter and careful mixing. You can also try gluten-free or vegan versions, or add fun flavors. Store them easily to enjoy later. Baking these treats will bring warmth to any gathering. Enjoy making and sharing them with friends and family. Happy baking!

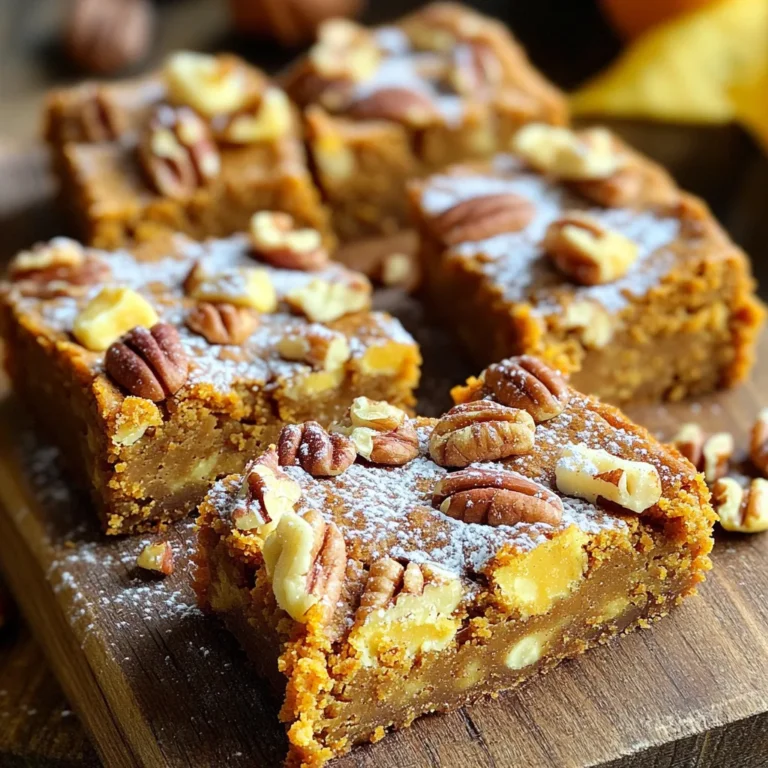
Brown Butter Pumpkin Blondies Delightful Fall Treat

To make tasty Sweet Chili Chicken Bowls, you will need: - 2 boneless, skinless chicken breasts, diced - 1 cup cooked jasmine rice - 1 bell pepper (red or yellow), sliced - 1 cup broccoli florets - 1 carrot, thinly sliced These ingredients form the base of our dish. The chicken provides protein, while the veggies add color and crunch. The right sauces and seasonings make this dish shine. Gather these: - 2 tablespoons sweet chili sauce - 1 tablespoon soy sauce - 1 tablespoon sesame oil - 1 teaspoon fresh ginger, grated - 2 cloves garlic, minced - Pinch of salt and pepper Sweet chili sauce gives a touch of sweetness. Soy sauce adds depth. Sesame oil brings a nutty flavor, while ginger and garlic give it a nice kick. Garnishes can elevate your dish. Here are some great options: - Green onions, chopped for garnish - Sesame seeds for sprinkling These add a fresh taste and a bit of crunch. A wedge of lime on the side also adds a zesty twist! Start by heating sesame oil in a large skillet over medium heat. Add minced garlic and grated ginger. Sauté these for about one minute until it smells great. Next, add the diced chicken. Sprinkle a pinch of salt and pepper on top. Cook the chicken for five to seven minutes. Stir it often to help it brown evenly and cook through. Once the chicken is ready, toss in the sliced bell pepper, broccoli florets, and thinly sliced carrot. Sauté these veggies for three to five minutes. You want them to be tender but still crisp. This keeps them colorful and full of flavor. Now it's time to mix in the sauces! Pour the sweet chili sauce and soy sauce over the chicken and veggies. Toss everything together so that each piece gets coated. Cook for another two minutes. This allows the sauce to thicken just a bit. To serve, scoop some cooked jasmine rice into each bowl. Top it with the sweet chili chicken and veggie mix. Finish with chopped green onions and sesame seeds for a nice crunch. Enjoy your meal! To cook chicken just right, start with diced chicken breasts. Heat sesame oil in a skillet over medium heat. Add minced garlic and grated ginger for flavor. Sauté for one minute. Then, add the chicken. Season with salt and pepper. Cook for about 5-7 minutes. Stir often until the chicken turns golden brown and is fully cooked. This method keeps the chicken juicy and tender. For great texture, add vegetables at the right time. After the chicken is cooked, toss in sliced bell pepper, broccoli, and carrots. Sauté them for 3-5 minutes. You want them to be tender but still crisp. This keeps the veggies vibrant and fresh. Cooking them too long makes them mushy. Remember, bright colors mean more flavor and nutrients! Presentation is key for any dish. Start with a base of jasmine rice in each bowl. Top it with the sweet chili chicken and veggies. For a pop of color, garnish with chopped green onions and sesame seeds. You can even add a lime wedge on the side. This adds a zesty kick and looks great. Arrange everything neatly to make your bowl appealing. Enjoy the compliments! {{image_2}} You can switch the chicken for other proteins. Tofu is a great choice for a plant-based meal. Use firm tofu and press it to remove excess water. Cut it into cubes and sauté it just like the chicken. Shrimp is another tasty option. Cook shrimp for about 3-4 minutes until they turn pink. Both give a unique twist to your sweet chili bowls. To make this dish vegetarian, simply remove the chicken. You can add more veggies like zucchini or snap peas. For a vegan version, use tofu or tempeh instead of chicken. Make sure the sweet chili sauce you choose is vegan friendly. This way, everyone can enjoy a delicious bowl. If you like heat, add some crushed red pepper flakes or sriracha. This will give your dish a spicy kick. For a sweeter version, mix in some pineapple chunks. The sweetness of the pineapple pairs well with the chili sauce. You can also try adding a splash of lime juice for a zesty flavor. Each twist makes your sweet chili chicken bowls exciting and fun! To keep your sweet chili chicken bowls fresh, store them in airtight containers. This helps keep moisture in and odors out. Make sure the dish cools down before sealing. You can keep it in the fridge for up to three days. When it's time to enjoy your leftovers, reheat them gently. You can use a microwave or a stovetop. If using a microwave, heat in short bursts. Stir often to warm it evenly. On the stovetop, use low heat and add a splash of water to keep it moist. You can freeze sweet chili chicken bowls for later use. Divide the dish into portions and place them in freezer-safe bags. Squeeze out any air before sealing. They will stay good for about three months. When you're ready to eat, thaw in the fridge overnight before reheating. Yes, you can use other types of rice. Brown rice, for example, adds more fiber. Quinoa is another great option that boosts protein. Just make sure to cook it before adding it to the bowls. Each type of rice may change the flavor a bit, but it will still taste great! You can swap vegetables easily in this recipe. Snow peas add crunch and sweetness. Zucchini is another good choice, and it cooks quickly. You can even use frozen vegetables if you're short on time. Just remember to adjust cooking time as needed. This recipe can be made gluten-free. Use gluten-free soy sauce instead of regular soy sauce. Sweet chili sauce can also be gluten-free, but check the label first. Jasmine rice is naturally gluten-free, making this a safe option for those avoiding gluten. Sweet chili chicken bowls offer tasty flavors and easy steps for everyone. We explored the main ingredients, cooking methods, and tips to elevate your dish. You can also customize it with different proteins or vegetables. Store leftovers wisely and enjoy them later. Overall, sweet chili chicken bowls are fun to make and share. Try your hand at this recipe, and impress your family with your skills!

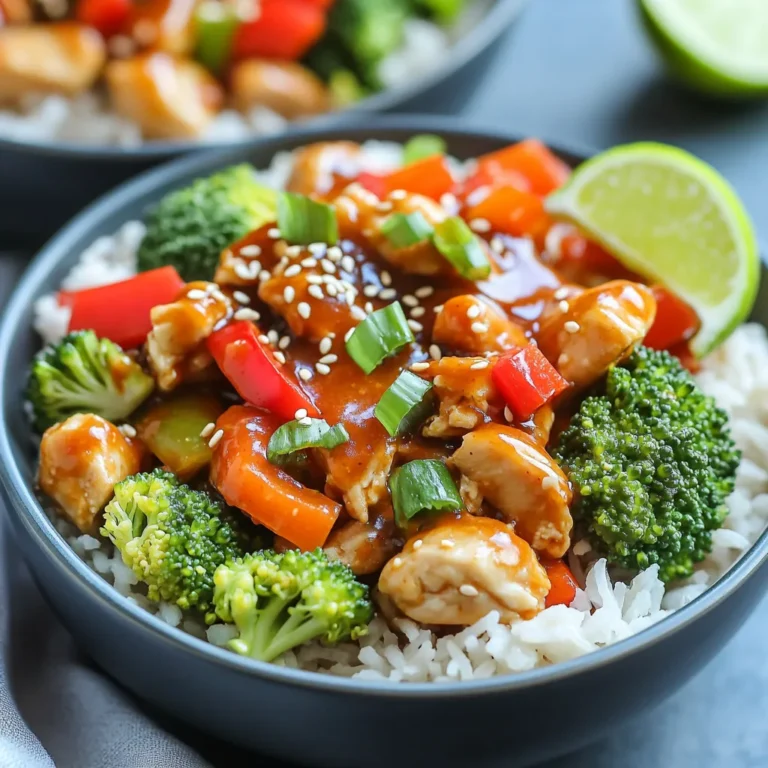
Sweet Chili Chicken Bowls Flavorful and Easy Recipe

- 1 pound beef chuck roast, cut into 1-inch cubes - 1 cup pearl barley, rinsed - 4 cups low-sodium beef broth - 2 cups water - 1 medium onion, chopped - 3 carrots, diced - 2 celery stalks, diced - 3 cloves garlic, minced - 1 teaspoon dried thyme - 1 teaspoon dried rosemary - 2 bay leaves - Salt and pepper to taste - 2 tablespoons olive oil - 1 cup frozen peas (optional) - Chopped fresh parsley for garnish When you make this soup, gather your ingredients first. Start with the beef chuck roast. This cut gives a rich flavor. Next, rinse the pearl barley. It adds a nice texture. The low-sodium beef broth and water help create a tasty base. For vegetables, you'll need onion, carrots, celery, and garlic. These add depth and sweetness. The seasonings include dried thyme, dried rosemary, and bay leaves. They give the soup great aroma. Don't forget salt and pepper for flavor! If you like, you can add frozen peas. They add color and sweetness. Fresh parsley makes a lovely garnish. Having all these items ready makes cooking smooth and easy. Enjoy the process! - Searing the beef: First, heat 2 tablespoons of olive oil in a large skillet over medium-high heat. Add 1 pound of beef chuck roast cut into 1-inch cubes. Sear the beef until it is browned on all sides, about 5-7 minutes. This step boosts the flavor. - Transferring ingredients to slow cooker: Next, transfer the browned beef into your slow cooker. Add the chopped vegetables: 1 medium onion, 3 diced carrots, and 2 diced celery stalks. Also, include 3 minced garlic cloves for a rich taste. - Adding liquids and seasonings: Now, stir in 1 cup of rinsed pearl barley. Pour in 4 cups of low-sodium beef broth and 2 cups of water. Add 1 teaspoon each of dried thyme and rosemary, plus 2 bay leaves. Season with salt and pepper to taste. - Setting slow cooker temperature and time: Cover the slow cooker and cook on low for 6-8 hours or on high for 3-4 hours. This slow cooking makes the beef tender and the barley soft. - Stirring in optional ingredients before serving: About 30 minutes before you serve, if you want, stir in 1 cup of frozen peas. This adds color and a touch of sweetness to your soup. - Final adjustments and serving: Before serving, remove the bay leaves. Taste the soup and adjust the seasoning if needed. Ladle the soup into bowls and garnish with chopped fresh parsley for a fresh finish. How to sear beef properly To sear beef well, heat olive oil in a skillet. Add beef cubes in one layer. Let them cook without moving for a few minutes. This browning adds deep flavor. Flip and brown all sides for about 5-7 minutes. Importance of herb selection Choosing fresh herbs is key to a tasty soup. Dried thyme and rosemary work well in slow cooking. They release their flavors over time. If you use fresh herbs, add them later in the cooking process to keep their taste bright. Adjusting seasoning to taste Always taste the soup before serving. Add salt and pepper as needed. Each ingredient can change the flavor. Adjusting seasoning helps create a balanced dish that suits your taste. Optimal settings for cooking times Set your slow cooker on low for 6-8 hours. If you're short on time, use the high setting for 3-4 hours. The low heat gives the beef time to get tender while the flavors meld. How to avoid overcooking To prevent overcooking, stick to the times above. Check your soup near the end of cooking. If the beef is tender, it’s ready. Overcooking can make the meat tough and the barley mushy. Using the right slow cooker size Use a slow cooker that holds at least 6 quarts. This size works well for this recipe. If your cooker is too small, the soup may overflow. A larger cooker allows for even cooking and better flavor. {{image_2}} You can switch up the veggies in this soup. Try adding: - Sweet potatoes for a hint of sweetness. - Green beans for extra crunch. - Mushrooms for an earthy flavor. For meat, consider these options: - Beef brisket for a different cut. - Ground beef for a quicker cook time. - Chicken thighs if you prefer poultry. If you want grains other than barley, use: - Quinoa for a gluten-free option. - Brown rice for a hearty feel. - Farro for added texture. In winter, you can try these soups: - Creamy potato soup for a rich taste. - Spicy chili for a warm kick. - Butternut squash soup for a sweet, smooth flavor. When summer hits, add fresh herbs like: - Basil for a bright, aromatic touch. - Cilantro for a fresh, zesty flavor. - Dill for a unique twist. These changes let you enjoy the soup all year round! After you enjoy your hearty slow cooker beef barley soup, store any leftovers. First, let the soup cool down to room temperature. Then, pour it into airtight containers. Label the containers with the date to help you remember when you made it. - Refrigerating leftovers: The soup stays fresh in the fridge for 3-4 days. Just make sure the lid is on tight to keep out air and moisture. - Freezing soup for later use: If you want to keep it longer, freeze the soup. It lasts up to 3 months in the freezer. Use freezer-safe containers or bags to prevent freezer burn. When it’s time to enjoy your soup again, follow these tips for reheating. - Best methods for reheating without losing flavor: The best way to reheat the soup is on the stove. Pour it into a pot and heat on medium. Stir occasionally until it’s hot. You can also use a microwave. Heat in short intervals, stirring in between. - How to thicken soup if it thins out: If the soup is too thin after reheating, don’t worry! Mix a bit of cornstarch with cold water, then stir it into the soup. Heat for a few more minutes until it thickens up. Enjoy every spoonful! Slow Cooker Beef Barley Soup lasts about 3 to 4 days in the fridge. To keep it fresh, store it in an airtight container. Make sure to let the soup cool down before sealing it. This helps to prevent bacteria growth and keeps it tasty. Yes, you can use quick-cooking barley. Just remember to adjust the cooking time. Quick-cooking barley needs less time to cook than pearl barley. You can add it in the last 30 minutes of cooking to avoid mushiness. This way, you still get that nice texture in your soup. Absolutely! You can make this soup in a regular pot. Just use medium heat to bring it to a boil. Then, lower the heat and let it simmer for about 1.5 to 2 hours. Keep an eye on the beef to ensure it stays tender. Stir occasionally, and enjoy the rich flavors as they combine. This blog post covered how to make a tasty Slow Cooker Beef Barley Soup. We went over the key ingredients, the step-by-step cooking process, and some helpful tips. Remember, searing the beef boosts flavor, and using fresh herbs makes a big difference. You can also swap ingredients to make it your own. Finally, storing and reheating your soup properly keeps it delicious. Enjoy making this comfort food, and feel free to experiment with your own twists!

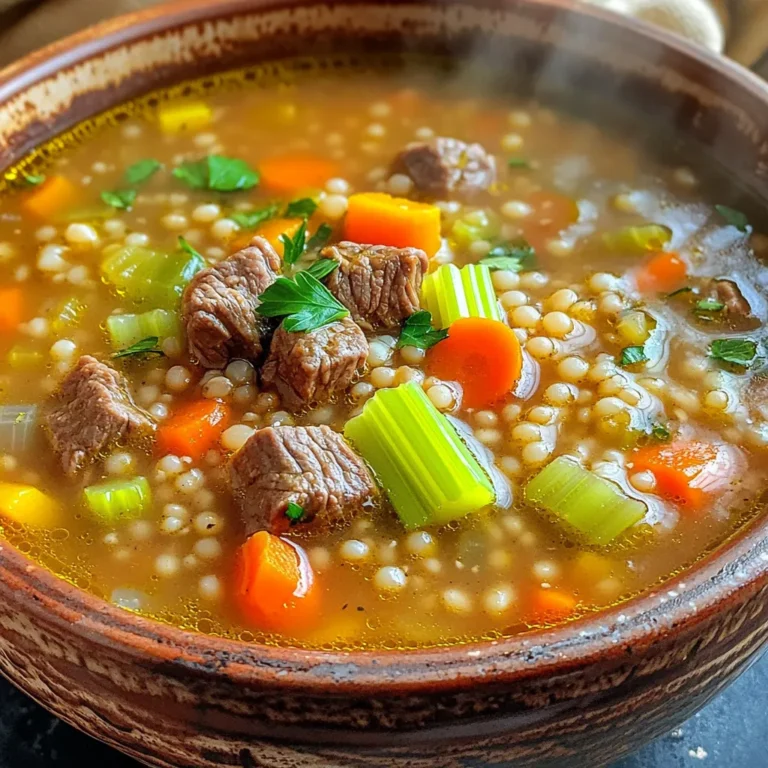
Savory Slow Cooker Beef Barley Soup Recipe Today

To make these delicious potato wedges, gather the following essential ingredients: - 4 medium russet potatoes - 3 tablespoons olive oil - 4 cloves garlic, minced - 1 teaspoon garlic powder - 1 teaspoon onion powder - 1 teaspoon Italian seasoning - ½ cup freshly grated Parmesan cheese - Salt and pepper to taste These ingredients work together to create a crispy and flavorful snack. The right seasonings make these wedges stand out. I like to use: - Garlic powder for extra garlic flavor. - Onion powder adds depth. - Italian seasoning gives a nice herbal touch. Feel free to adjust the amounts to match your taste. For a fresh finish, consider these optional garnishes: - Fresh parsley, chopped - A sprinkle of extra Parmesan cheese Garnishing adds color and a burst of flavor, making your wedges look and taste amazing. First, wash the potatoes well. Scrub off any dirt. You want clean potatoes for the best taste. Next, cut each potato into wedges. Aim for about eight wedges per potato. Keep the skin on for more crunch and flavor. After cutting, soak the wedges in cold water for about 30 minutes. This step removes extra starch. The soaking makes your wedges crispier when cooked. Once the wedges have soaked, drain them and dry them with paper towels. This helps the seasoning stick better. In a large bowl, mix together the olive oil, minced garlic, garlic powder, onion powder, Italian seasoning, salt, and pepper. This blend packs great flavor. Add the dried potato wedges and toss them well. Make sure every wedge gets a nice coating of that tasty mixture. Now it's time to cook! Preheat your air fryer to 400°F (200°C) for about 5 minutes. Once preheated, place the seasoned potato wedges in the basket. Make sure they sit in a single layer. If you have a small air fryer, you might need to cook in batches. Air fry the wedges for 15 to 20 minutes. Shake the basket halfway through to ensure even cooking. When the wedges turn golden and crispy, sprinkle them with the grated Parmesan cheese. Cook for an extra 2 to 3 minutes. This melts the cheese and gives it a lovely golden color. Finally, remove the wedges from the air fryer. Garnish with freshly chopped parsley for a pop of color. Enjoy your crispy garlic Parmesan potato wedges hot! When cutting potatoes, make sure to start with clean ones. Scrub them well to remove dirt. Use a sharp knife for better control. Cut each potato into eight wedges. Keep the skin on for texture and flavor. This method gives you thick, hearty wedges that stay firm when cooked. To get crispy wedges, soak them first. Place the cut wedges in cold water for 30 minutes. This step removes excess starch, which helps them crisp up. After soaking, dry them well with paper towels. Any moisture left can lead to soggy potatoes. Toss them in olive oil for a nice coating. For great flavor, mix your spices well. Use minced garlic, garlic powder, onion powder, and Italian seasoning. Ensure every wedge gets a good coating. Salt and pepper balance the flavors. Don’t be shy with the Parmesan cheese. Sprinkle it on after frying for a rich, cheesy finish. Mix it into the seasoning for a stronger flavor. {{image_2}} Want a kick in your dish? Try spicy garlic parmesan wedges. Add some heat with red pepper flakes. Mix them with the garlic and spices. This will give your wedges a nice kick. I love to serve these with ranch dressing. The coolness of the ranch balances the heat. For a heartier option, go for cheesy loaded potato wedges. After air frying, top the wedges with melted cheese, crispy bacon bits, and green onions. Cheese adds a wonderful creaminess. Bacon gives a nice crunch and flavor. These loaded wedges are perfect for game day or a movie night. If you prefer fresh flavors, try herb and garlic potato wedges. Use fresh herbs like rosemary or thyme. Chop them finely and mix with the garlic. This will give a bright taste to your wedges. They pair well with a garlic aioli or a fresh dip. To store leftover potato wedges, let them cool completely. Place them in an airtight container. You can keep them in the fridge for up to three days. Be sure to separate layers with parchment paper to avoid sticking. This keeps them fresh and ready for your next snack. When you want to enjoy your leftover wedges, preheat your air fryer to 375°F (190°C). Place the wedges in the basket in a single layer. Heat them for about 5-7 minutes. This will bring back their crunch. Check them halfway through and shake the basket to get even heat. You can freeze the potato wedges if you have extra. First, let them cool completely. Place them in a single layer on a baking sheet. Freeze them for about one hour. Once frozen, transfer them to a freezer bag. They will last for up to three months. When ready to eat, cook them straight from the freezer in the air fryer. Just add a few extra minutes to the cooking time. Yes, you can use other types of potatoes. Yukon Golds work well. They have a creamy texture. Red potatoes are also a good choice. They hold their shape nicely. You might need to adjust cooking times. Just keep an eye on them as they cook. To make these wedges vegan, skip the Parmesan cheese. You can use nutritional yeast instead. It gives a cheesy flavor without dairy. You can also try vegan cheese. Just sprinkle it on before the last few minutes of cooking. This way, you still get that cheesy touch. Many sauces go great with these wedges. Here are some tasty options: - Ketchup - Ranch dressing - Garlic aioli - Sriracha mayo - Barbecue sauce Each sauce adds a different flavor. Try out a few to find your favorite! This blog post covered garlic Parmesan potato wedges, from ingredients to storage. We explored essential spices and delicious garnishes to enhance flavor. I shared step-by-step instructions for easy preparation in an air fryer. You learned tips for cutting, cooking, and achieving crispiness. Variations like spicy and cheesy options add fun twists. Finally, I explained how to store and reheat your wedges. Enjoy experimenting with these recipes and make them your own!

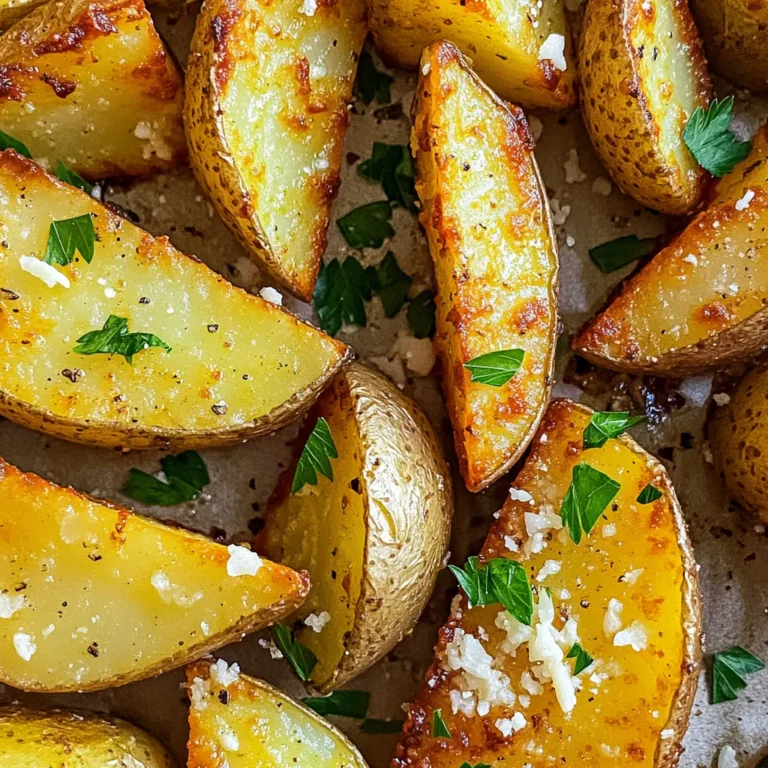
Air Fryer Garlic Parmesan Potato Wedges Crunchy Delight

For Grilled Chicken Broccoli Bowls with Garlic Sauce, you need simple ingredients. These create a tasty and healthy meal. - 2 boneless, skinless chicken breasts - 2 cups broccoli florets - 1 cup cooked quinoa or brown rice - 1 tablespoon olive oil - 3 cloves garlic, minced - 2 tablespoons soy sauce (or tamari for gluten-free) - 1 tablespoon honey or maple syrup - 1 tablespoon fresh ginger, grated - Salt and pepper to taste - Sesame seeds for garnish - Fresh cilantro for garnish (optional) These ingredients come together to make a colorful and nutritious bowl. The chicken is juicy, while the broccoli stays crisp and bright. The quinoa or rice adds a nice base. You can adjust the marinade to suit your taste. Adding sesame seeds and cilantro gives a fresh touch. {{ingredient_image_1}} Start by seasoning the chicken breasts with salt and pepper. This simple step boosts flavor. In a bowl, mix minced garlic, soy sauce, honey, and grated ginger. This mix is your marinade. Coat the chicken in this marinade. Let it sit for at least 20 minutes. If you have more time, refrigerate it for up to 2 hours. This will deepen the flavor. Preheat your grill to medium-high heat. This helps get nice grill marks. Cook the marinated chicken for about 6-8 minutes on each side. Check the internal temperature with a meat thermometer. It should reach 165°F (75°C). Once done, let the chicken rest for a few minutes before slicing. Resting keeps it juicy. While the chicken grills, get a pot of water boiling. Place a steamer basket over it. Add the broccoli florets to the basket. Steam them for about 4-5 minutes. You want them bright green and slightly crisp. This keeps the nutrients and adds crunch. If you haven't cooked the quinoa or brown rice yet, follow the package instructions. This usually takes about 15 minutes for quinoa and 20-30 minutes for brown rice. Make sure it's fluffy and ready to absorb flavors. Grab your bowls. Start with a layer of quinoa or rice at the bottom. Next, add the steamed broccoli. Finally, top it with sliced grilled chicken. Make sure to layer it nicely. A good presentation makes the meal more inviting. For the garlic sauce, you can use the leftover marinade if you didn't cook it. If you prefer, mix fresh minced garlic with soy sauce and olive oil. Drizzle this sauce over each bowl just before serving. This adds a burst of flavor to every bite. - Recommended Spices and Sauces: Try adding cayenne pepper for heat. Smoked paprika gives a nice smoky flavor. If you want something savory, consider adding a splash of sesame oil. It adds depth to the dish. - Additions for More Texture: Crunchy toppings make a big difference. Add chopped nuts like almonds or cashews. You can also sprinkle sunflower seeds for a nice crunch. For a burst of flavor, toss in roasted red peppers. - Avoiding Overcooking Chicken and Broccoli: Chicken should be juicy, not dry. Use a meat thermometer to check for 165°F. For broccoli, steam just until bright green. This keeps it crunchy and colorful. - Best Practices for Meal Prep: Cook your chicken and broccoli ahead. Store them in separate containers. This keeps flavors fresh. You can assemble your bowls quickly during the week. - Pairing with Other Sides: Serve with a light salad for freshness. A side of roasted sweet potatoes adds sweetness. You can also try a tangy coleslaw for crunch. - Ideal Beverage Pairings: A cold sparkling water with lemon is refreshing. For a wine option, a light Chardonnay pairs well. If you prefer tea, iced green tea complements the flavors nicely. Pro Tips Marinade Time: For the best flavor, let the chicken marinate for at least 1 hour, or overnight if possible. Chicken Thickness: Ensure the chicken breasts are of even thickness to promote even cooking on the grill. Broccoli Cooking: Don't oversteam the broccoli; it should be vibrant green and slightly crunchy for the best texture. Serving Suggestions: Add a squeeze of fresh lemon juice over the finished bowls for a bright flavor boost. {{image_2}} Using Tofu or Tempeh Tofu and tempeh make great substitutes for chicken. They soak up flavors well and add a nice texture. Use firm tofu for a meatier bite. Press it to remove excess water, then marinate just like the chicken. Tempeh has a nutty taste. Slice it thinly, then grill or sauté it for a delicious option. Substitutes for Chicken If you prefer not to use chicken, try pork or shrimp. Both cook quickly and pair well with garlic sauce. For a plant-based option, chickpeas are a good choice. They add protein and a hearty bite to your bowl. Adding Colorful Veggies Adding colorful veggies makes your bowl fun and healthy. Consider bell peppers, carrots, or snap peas. These veggies not only add color but also crunch. You can grill, steam, or toss them in with broccoli for added flavor. Seasonal Vegetable Recommendations Seasonal veggies can elevate your dish. In spring, add asparagus or peas. In summer, zucchini and cherry tomatoes shine. Fall brings sweet potatoes or squash. Winter is great for Brussels sprouts or kale. Use what is fresh for the best taste. Alternative Sauces for Different Flavors You can tweak the sauce for your taste. Try adding peanut butter for a nutty twist. Sriracha adds heat, while lime juice gives a bright zing. Experiment with different sauces to keep your bowls exciting. Making it Spicy or Sweet Want a spicy kick? Add red pepper flakes or chili paste to the sauce. For a sweeter touch, increase the honey or use maple syrup. Adjust these elements to match your mood or meal theme. For storing leftovers, use airtight containers. Glass or BPA-free plastic works best. They keep food fresh longer. Place the chicken and broccoli bowls in the fridge. They will last about 3 to 4 days. To reheat your bowls, use the microwave or oven. The microwave is quick but can make food soggy. To avoid this, heat in short bursts. Check often to ensure even warming. If using an oven, cover with foil. Heat at 350°F (175°C) for about 15 minutes. You can freeze the grilled chicken broccoli bowls. First, let them cool completely. Then, place them in freezer-safe containers. They can last up to 3 months. When you're ready to eat, thaw in the fridge overnight. Reheat in the microwave or oven as mentioned above. Yes, you can make this recipe ahead of time. Meal prep is a great way to save time during busy weeks. You can marinate the chicken and store it in the fridge for up to two hours or overnight for more flavor. Cook the quinoa or rice in advance and keep it in the fridge. Steam the broccoli just before serving to keep it fresh and bright. If you want to swap quinoa, try brown rice or couscous. Both options work well as a base. You can also use farro or barley for a different texture. Each grain has its own taste, so choose one that you enjoy. To check if your chicken is done, use a meat thermometer. The safe internal temperature for chicken is 165°F (75°C). Insert the thermometer into the thickest part of the breast. If you don’t have a thermometer, cut into the chicken. The meat should be white and juices should run clear. You can use frozen broccoli, but it cooks differently. Frozen broccoli may need a bit longer to steam. It’s best to thaw it before cooking to ensure even cooking. If you steam it straight from the freezer, check for tenderness often. The goal is to keep it bright green and crisp. In this blog post, we explored a tasty recipe featuring chicken, broccoli, and quinoa or rice. You learned how to prepare and grill the chicken, cook the broccoli, and assemble your meal for a great look. We also shared tips for flavor, cooking techniques, and meal storage. These steps make cooking and meal prep simple. Enjoy crafting your own bowls with variations. Happy cooking!

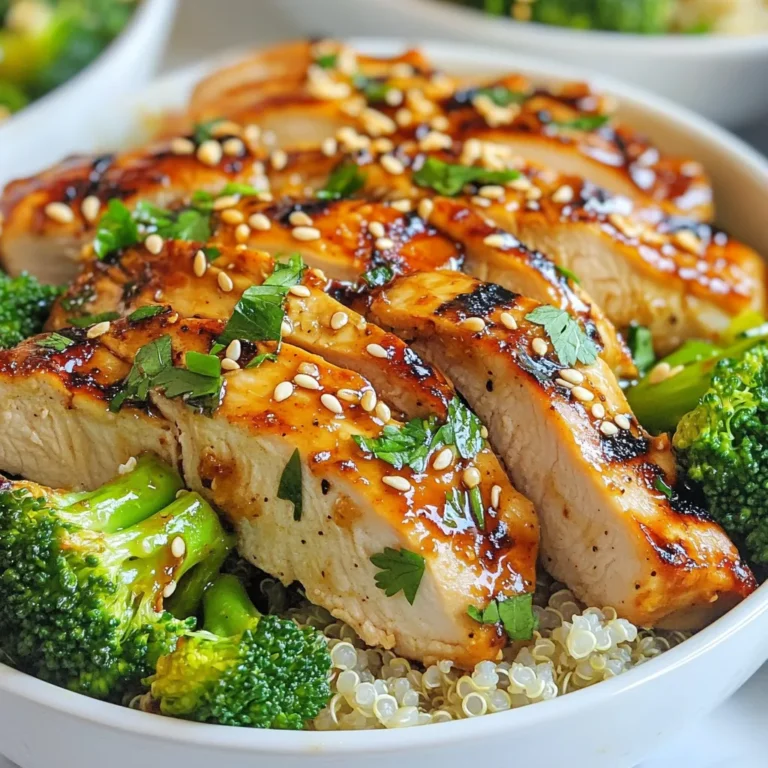
Grilled Chicken Broccoli Bowls with Garlic Sauce Delight

- 1 cup creamy peanut butter - 1/2 cup honey or maple syrup - 1 cup rolled oats - 1/2 cup vanilla protein powder (or almond flour) - 1/4 cup dark chocolate chips (dairy-free if preferred) - 1/2 teaspoon vanilla extract - Pinch of salt To make no bake peanut butter bars, gather your ingredients. Start with creamy peanut butter, which gives the bars their rich taste. You can use honey or maple syrup for sweetness. Rolled oats add texture and fiber. I often use vanilla protein powder, but almond flour works too. Dark chocolate chips add a touch of indulgence. A splash of vanilla extract and a pinch of salt enhance the flavors. Each ingredient plays a key role. The peanut butter binds everything together. The sweetener balances the taste. Oats provide a hearty base. Protein powder boosts nutrition, making these bars a great snack. Chocolate chips bring joy in every bite. Vanilla and salt elevate the overall flavor. When you have everything ready, you can mix and create these tasty bars quickly. Enjoy the process, and get ready for a delicious treat! {{ingredient_image_1}} Mixing the Peanut Butter and Sweetener First, grab a medium bowl. Add 1 cup of creamy peanut butter. Pour in 1/2 cup of honey or maple syrup. Stir them well. You want a smooth mix with no lumps. Adding Flavor Enhancements Next, add 1/2 teaspoon of vanilla extract. Toss in a pinch of salt. Mix again until everything is combined. These flavors make the bars taste great! Combining Dry Ingredients with Peanut Butter Mixture Now, slowly add 1 cup of rolled oats and 1/2 cup of vanilla protein powder or almond flour. Stir until you have a sticky dough. Make sure no dry bits remain. Preparing the Baking Dish Line an 8x8 inch square baking dish with parchment paper. Leave some paper hanging over the sides. This helps when you remove the bars later. Pressing and Smoothing the Mixture Take the peanut butter mixture and pour it into the dish. Use a spatula to spread it out evenly. Press down firmly to fill the corners. Smooth the top for a nice finish. Refrigeration Time Place the dish in the fridge for at least 1 hour. This helps the bars set up. After they are firm, lift the parchment paper out. Cut the bars into squares or rectangles. Enjoy your tasty no-bake peanut butter bars! Importance of Mixing Well Mixing the peanut butter and honey is key. You want a smooth blend. If you skip this step, the bars might be dry. Take your time and blend until it looks creamy. This helps the bars hold together. How to Achieve the Right Consistency To get the right texture, add oats and protein powder slowly. Mix until everything sticks together. If it feels too dry, add a bit more honey or maple syrup. If too wet, add more oats or protein powder. You want a sticky dough that you can press into the dish. Substituting Honey with Maple Syrup You can swap honey for maple syrup. This change gives a nice flavor twist. Maple syrup is a great vegan option too. Use the same amount as honey for best results. Using Different Protein Powders or Flours Feel free to use different protein powders or flours. Almond flour adds a nutty taste. You can also try pea protein for a dairy-free choice. Use what you like or have on hand! This flexibility makes the bars your own. Pro Tips Use Natural Nut Butter: Opt for natural peanut butter without added sugars or oils for a healthier bar. Sweetness Adjustment: Adjust the sweetness by using less honey or maple syrup according to your taste preference. Protein Powder Variations: Feel free to experiment with different protein powders, like chocolate or plant-based options, for varied flavors. Storage Tips: For longer shelf life, freeze the bars and separate layers with parchment paper to prevent sticking. {{image_2}} You can make your no bake peanut butter bars even better with add-ins. Here are some great options: - Nuts and Seeds Options: Try adding chopped almonds, walnuts, or sunflower seeds. These add crunch and healthy fats. You can mix in about 1/2 cup of your favorite nuts or seeds for extra flavor and texture. - Dried Fruits to Consider: Dried fruits like raisins, cranberries, or apricots can add sweetness. Chop them up and mix in about 1/3 cup. This gives the bars a chewy texture and more nutrients. Chocolate can change the taste of your bars. Here are some choices: - Using Milk Chocolate vs. Dark Chocolate: If you love sweeter bars, use milk chocolate chips. They make the bars taste sweeter. Dark chocolate adds a rich flavor and is less sweet. You can choose based on your taste. - Carob Chips for a Dairy-Free Variation: For a dairy-free option, try carob chips. They taste similar but are not chocolate. Carob is also naturally sweet and has less fat. You can use the same amount as chocolate chips in the recipe. These variations help you customize your bars to fit your taste and health goals. Enjoy experimenting! To keep your no-bake peanut butter bars fresh, store them in the refrigerator. Place the bars in an airtight container. This helps prevent them from drying out. You can also wrap them in plastic wrap for extra protection. If you want to store them longer, freezing is a great option. Cut the bars into squares first. Then, wrap each piece tightly in plastic wrap. Place the wrapped bars in a freezer-safe bag. This keeps them fresh for several months. In the refrigerator, these bars last about a week. Make sure to check for any signs of spoilage, like a change in smell or texture. If you freeze the bars, they can last for up to three months. To enjoy them, just take out a few pieces and let them thaw in the fridge overnight. This way, you always have a tasty treat ready to go! Yes, you can use crunchy peanut butter. It adds extra texture and flavor. The bars will still hold together well. Just mix it like creamy peanut butter. Enjoy the added crunch in each bite! To make these bars vegan, you need to substitute honey with maple syrup. This keeps the sweet taste while staying plant-based. Also, check that your chocolate chips are dairy-free. These simple swaps make a tasty vegan treat! Each bar has about 150 calories. It includes 6g of protein, 8g of fat, and 15g of carbs. This makes it a good snack option. The bars are rich in protein and healthy fats. They provide lasting energy without refined sugars. You now have all the tools to make delicious no-bake peanut butter bars. We covered the key ingredients, easy steps, and useful tips to ensure great texture. You can also customize the bars in many ways to suit your taste. Store them well for a tasty snack anytime. Enjoy making your own treats at home! Now go get your ingredients and start baking.

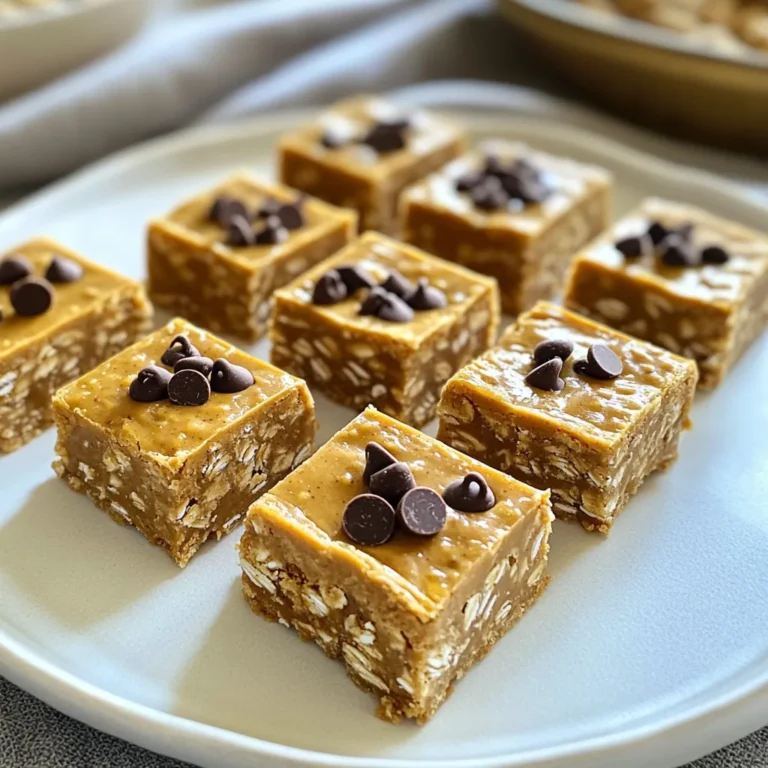
No Bake Peanut Butter Bars Easy and Healthy Recipe

- 8 oz dark chocolate, chopped - 8 oz white chocolate, chopped - 1/2 teaspoon peppermint extract - 1/4 cup crushed peppermint candies or candy canes - Sea salt flakes for garnish - Parchment paper for lining the tray You need a few simple ingredients for this no-bake chocolate peppermint bark. Start with dark and white chocolate. I find that using good-quality chocolate makes a big difference in taste. You can easily chop the chocolate into small pieces for melting. Next, get peppermint extract. It adds a fresh minty flavor that pairs perfectly with chocolate. The crushed peppermint candies or candy canes add a nice crunch. I always love the colorful pop they give to the bark. Don't forget the sea salt flakes. A sprinkle on top makes the treat even better. Finally, grab some parchment paper. This will help you lift the bark from the tray once it's set. - Additional peppermint candies - Chocolate drizzle If you want to make your bark even more fun, consider adding extra peppermint candies on top. A drizzle of chocolate can also make it look fancy. These garnishes add not just flair, but also flavor! First, grab your baking tray. Line it with parchment paper. This paper helps the bark come out easily. Make sure to cover the entire tray well. It will save you time later. To melt the dark chocolate, use a microwave-safe bowl. Heat it in 30-second bursts. Stir it after each round. This helps it melt evenly. Be careful not to burn it. For the white chocolate, follow the same method. Use another bowl. Heat it in 30-second intervals too. Stir until it’s nice and smooth. Now, take the melted dark chocolate. Pour it onto the lined tray. Spread it out with a spatula. Aim for a thin, even layer. Chill it in the fridge for 15 minutes to set. Once the dark chocolate sets, pour the melted white chocolate over it. Use your spatula to spread it gently. Try to cover the dark chocolate completely. Next, sprinkle the crushed peppermint candies on top. Do this while the chocolate is still warm. Press them down lightly so they stick well. For extra flavor, add a few flakes of sea salt on top. Return the tray to the refrigerator. Let it set for at least 30 minutes. Check if it’s hard by gently pressing the surface. If it feels firm, it’s ready. When it’s set, lift the bark out using the parchment paper. Break it into pieces as you like. Enjoy this delightful treat! To get a smooth texture, melt your chocolate gently. Use a microwave-safe bowl. Heat the dark chocolate in 30-second bursts. Stir it after each burst. This helps it melt evenly. If you see lumps, keep stirring. Avoid overheating. Chocolate can seize if it gets too hot. If it gets thick or grainy, you cannot fix it. Always check the temperature. You want it just melted, not boiling. Crushing the peppermint candies needs care. Place them in a zip-top bag and use a rolling pin. This helps you crush them evenly. Large pieces won’t stick well to the chocolate. If you want a twist, try other toppings. You can use crushed nuts or dried fruits. They add flavor and texture. Just make sure they complement the chocolate. For flavor, consider other extracts. Vanilla or almond extracts work nicely. Add them to the melted white chocolate. This can change the taste and keep things fun. You can also add nuts or dried fruits. Chopped walnuts or cranberries add crunch. They also bring a new flavor. Just make sure to mix them in well before it sets. {{image_2}} You can change the chocolate types in this recipe. For a milk chocolate version, simply swap the dark chocolate for milk chocolate. This makes the bark sweeter and creamier. If you prefer vegan options, use dairy-free chocolate instead. Many brands offer great vegan chocolate that melts well. This way, everyone can enjoy the treat! You can add more flavors to your bark. One option is to mix in a few drops of vanilla extract. This gives a warm, rich touch. You can also switch up the toppings. Instead of just crushed peppermint, try adding mini chocolate chips or chopped nuts. Each adds a new taste and texture to your bark. Get creative for different seasons! For Christmas, keep the peppermint and add festive sprinkles. You can even use red and green colors to make it pop. For Halloween, mix in orange candy or use spooky-shaped sprinkles. Each season brings a new chance to enjoy this delightful treat! To keep your no-bake chocolate peppermint bark fresh, use an airtight container. A glass or plastic container with a tight lid works best. This helps prevent moisture from ruining the texture. Store it in a cool, dry place away from heat. Avoid direct sunlight, as it can melt the chocolate. Your peppermint bark can last up to two weeks when stored properly. Look for signs of spoilage like white streaks or an off smell. These are signs that the chocolate may have gone bad. If it looks good and smells fine, it’s likely safe to eat. Enjoy your sweet treat while it’s fresh and tasty! Yes, you can! If you want a change, try these options: - Crushed Oreo cookies for a chocolatey twist - Chopped nuts like almonds or pecans for crunch - Dried fruit, such as cranberries or cherries for a fruity flavor - Toffee bits for a sweet, buttery taste These choices will give your bark a new spin while still being fun and tasty! Yes, you can make it ahead of time! Here’s how: - After breaking the bark into pieces, store it in an airtight container. - Keep it in a cool, dry place. - If you want to keep it fresh longer, you can refrigerate it. This way, you’ll have a delightful treat ready for any occasion! Seizing can happen if chocolate gets too hot. Here are some tips: - Always melt chocolate in short bursts, like 30 seconds. - Stir it between each heating to keep the heat even. - Avoid water getting into the chocolate, as this can cause it to seize. If your chocolate does seize, you can try adding a small amount of coconut oil. This may help bring it back! In this blog post, we explored how to make delicious peppermint bark. We covered required ingredients like dark chocolate, white chocolate, and peppermint extract. You learned the step-by-step process, tips for a smooth texture, and optional variations. Peppermint bark is a fun, easy treat for any occasion. Experiment with flavors and toppings to make it your own. Enjoy making and sharing this festive snack!

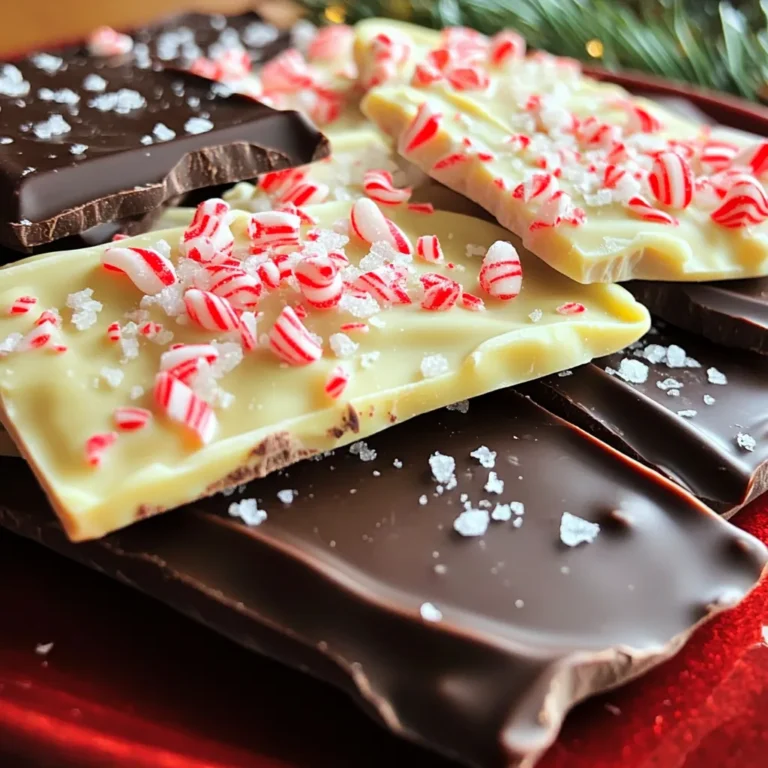
No-Bake Chocolate Peppermint Bark Delightful Treat

- 4 chicken thighs, boneless, skinless - 1 tablespoon olive oil - 2 teaspoons smoked paprika - 1 teaspoon garlic powder - 1 teaspoon dried oregano - Salt and pepper to taste - 1 red bell pepper, sliced - 1 zucchini, sliced - 1 red onion, sliced - 1 cup cherry tomatoes, halved - 1 can (15 oz) chickpeas, drained and rinsed - 1 lemon, zested and juiced - 1 cup cooked quinoa or couscous - Fresh parsley, chopped for garnish - Tzatziki sauce - Quinoa or couscous - Fresh parsley Choosing the right vegetables: Pick fresh, vibrant veggies. They add flavor and color. Bell peppers, zucchini, and cherry tomatoes work well. Feel free to swap in other favorites like asparagus or carrots. Substitutions for chicken thighs: If you prefer, use chicken breasts instead. They cook faster but may dry out. You can also try tofu or chickpeas for a plant-based option. - Preheating the oven: Start by preheating your oven to 400°F (200°C). This step is key for even cooking. Line a large baking sheet with parchment paper to make cleanup easy. - Preparing the chicken: In a mixing bowl, combine 1 tablespoon of olive oil, 2 teaspoons of smoked paprika, 1 teaspoon of garlic powder, 1 teaspoon of dried oregano, and salt and pepper to taste. Add 4 boneless, skinless chicken thighs to the bowl. Toss the chicken well so it gets coated in the spice mix. - Arranging the vegetables: Place the seasoned chicken on one side of the baking sheet. On the other side, spread out your sliced red bell pepper, zucchini, red onion, and halved cherry tomatoes. Add 1 can of drained and rinsed chickpeas to the vegetables. Drizzle olive oil over them, and add salt and pepper as needed. Finally, zest and juice 1 lemon, drizzling half of the juice over the veggies. - Roasting time and temperature: Roast everything in your preheated oven for about 25-30 minutes. The chicken should reach an internal temperature of 165°F. The vegetables will turn tender and flavorful. - Checking for doneness: After roasting, check the chicken with a meat thermometer. If it reads 165°F, it is safe to eat. If not, return it to the oven for a few more minutes. - Layering in bowls: Once cooked, let everything cool for a few minutes. In each bowl, layer 1 cup of cooked quinoa or couscous. Top it with the roasted chicken thighs and vegetables. This makes for a colorful and hearty meal. - Optional garnishes: Drizzle the remaining lemon juice over each bowl. For a fresh touch, sprinkle chopped parsley on top. If you like, serve it with tzatziki sauce on the side for extra flavor. To keep your chicken juicy, use bone-in thighs when possible. The bones add flavor and moisture. If you stick with boneless thighs, marinate them in olive oil and spices for at least 30 minutes. This helps lock in moisture. For perfect roasted vegetables, cut them into similar sizes. This ensures even cooking. Use a high oven temperature, like 400°F, to get a nice caramelization. Spread them out in a single layer on the pan so they roast instead of steam. Prep your ingredients in advance. Chop your veggies and season the chicken the night before. This makes cooking time quicker and easier. You can also cook your quinoa or couscous ahead of time. Store it in the fridge until you are ready to serve. Using pre-cooked quinoa or couscous saves even more time. Just heat it up when your chicken and veggies are almost done. This way, everything is ready at the same time. Consider adding more spices for a flavor boost. Cumin or coriander can add warmth. A pinch of red pepper flakes gives a nice kick. Don't hesitate to experiment with your favorite spices! Fresh herbs make a big difference. Try adding basil, mint, or dill for a fresh taste. You can mix herbs into the chicken or sprinkle them over the finished dish. This adds a pop of color and flavor. {{image_2}} You can swap chicken thighs for chicken breasts. Chicken breasts cook faster and are leaner. They still taste great with the same spices. If you want a vegetarian option, try tofu or chickpeas. Tofu soaks up flavors well. Chickpeas add protein and fiber. Both options keep the dish hearty and filling. Feel free to mix up the veggies. Use seasonal vegetables for freshness. Try asparagus in spring or squash in fall. You can add bright colors too. Use purple cabbage or orange carrots. More colors mean more fun and flavor on your plate. You can serve this meal in different ways. Try wraps instead of bowls. Use a large tortilla to hold the chicken and veggies. It’s a fun way to eat! Another option is a sheet-pan salad. Just toss mixed greens with the roasted veggies and chicken. Top it with your favorite dressing for a fresh twist. To keep your leftovers fresh, place them in airtight containers. Glass containers work well and do not stain. Use smaller containers for single servings. Label them with the date to track freshness. Store them in the fridge for up to four days. When reheating, use the oven for best results. Preheat to 350°F (175°C). Place the chicken and veggies on a baking sheet. Heat for about 15-20 minutes or until warmed through. You can also use the microwave. Cover the bowl with a lid or plate to keep moisture in. This helps avoid dry food and keeps flavors intact. To freeze, let the chicken and vegetables cool completely. Place them in freezer-safe bags or containers. Remove as much air as possible to prevent freezer burn. Label with the date. For best taste, eat within three months. To thaw, place in the fridge overnight. Reheat as mentioned above for even cooking. It takes about 25-30 minutes to cook chicken thighs in the oven at 400°F (200°C). Always check the internal temperature. It should reach 165°F for safe eating. Use a meat thermometer for best results. This ensures your chicken is juicy and safe to eat. Yes, you can make this recipe ahead of time. Cook the chicken and veggies, and store them separately. Keep them in airtight containers in the fridge. They stay fresh for up to three days. When you are ready to eat, just reheat them in the oven or microwave. This saves time on busy days. This recipe is quite healthy. It uses lean chicken thighs and lots of colorful veggies. The chickpeas add protein and fiber. Olive oil provides healthy fats. Quinoa or couscous boosts the nutritional value with whole grains. Plus, you can control the salt and spices to suit your needs. Overall, it makes a balanced meal packed with flavors and nutrients. This blog post covered the key ingredients and steps for a delicious roasted chicken dish. You learned about main and optional ingredients, cooking tips, and serving ideas. Each tip aims to make cooking enjoyable and easy. Remember, you can customize the recipe to suit your taste. Don't hesitate to experiment with vegetables and protein choices. With the right preparation and storage, you can enjoy this meal again. Happy cooking and enjoy sharing this dish with friends and family!

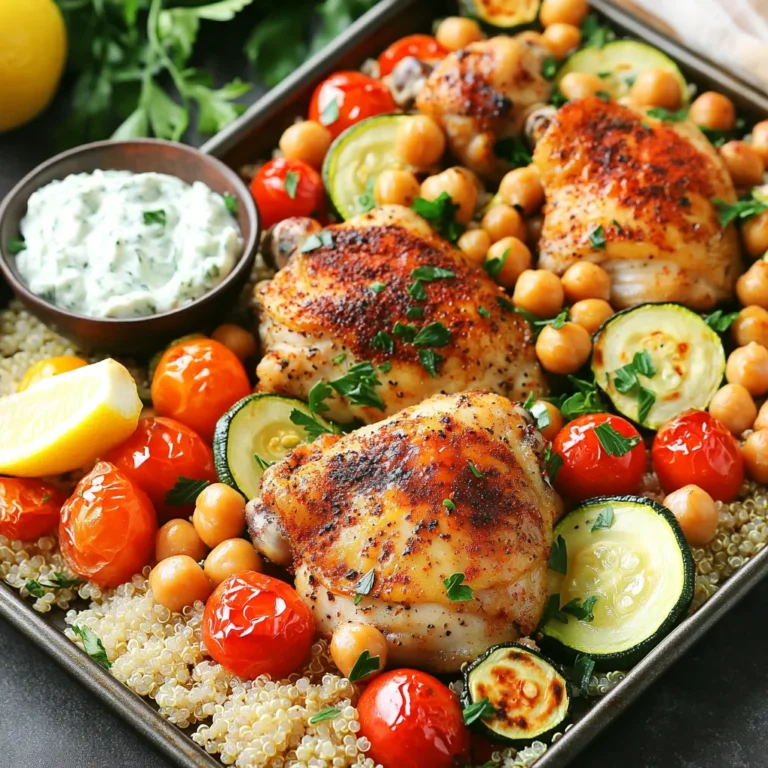
Sheet-Pan Mediterranean Chicken Bowls Flavorful Feast

To make a One-Pan Creamy Cajun Shrimp Rice Skillet, gather these key ingredients: - 1 pound large shrimp, peeled and deveined - 1 cup uncooked long-grain rice - 3 cups chicken or vegetable broth - 1 tablespoon Cajun seasoning - 1 medium onion, chopped - 2 cloves garlic, minced - 1 bell pepper (red or green), diced - 1 cup heavy cream - 1 tablespoon olive oil - 1 cup frozen peas - 1 teaspoon smoked paprika - Salt and pepper to taste - Fresh parsley for garnish Each ingredient plays a role in creating a rich and creamy flavor. The shrimp add protein and a nice texture. The rice serves as a great base, soaking up all the flavors. Cajun seasoning gives that warm, spicy kick. The cream makes it all smooth and delicious. Fresh parsley adds a pop of color and a hint of freshness. When picking shrimp, look for ones that are fresh and firm. For the rice, long-grain works best here as it cooks evenly. Don’t forget the broth; it’s key for flavor. Use either chicken or vegetable broth based on your preference. Feel free to customize your ingredients. You can swap out the bell pepper for your favorite veggie or adjust the Cajun seasoning for more or less heat. Enjoy the cooking process and get ready for a tasty meal! - Sauté onion and bell pepper Heat olive oil in a large skillet over medium heat. Add the chopped onion and diced bell pepper. Cook them for about five minutes until they soften. This step builds a great base for your dish. - Cook garlic and add shrimp Stir in minced garlic and cook for one more minute. The garlic adds a lovely aroma. Next, add the shrimp to the skillet. Sprinkle with Cajun seasoning and smoked paprika. Cook until the shrimp turn pink, which takes about three to four minutes. Remove the shrimp and set them aside. - Toast rice in skillet In the same skillet, add uncooked rice. Toast it for about two minutes. Stir often to prevent burning. This step gives the rice a delicious nutty flavor. - Combine broth and cook rice Pour in chicken or vegetable broth. Bring it to a boil. Lower the heat, cover, and let it simmer for about fifteen minutes. The rice should absorb the liquid and become tender. - Stir in cream and peas Once the rice is cooked, stir in the heavy cream and frozen peas. Mix well to combine. The cream adds richness and makes the dish creamy. - Return shrimp and season Return the cooked shrimp to the skillet. Gently fold it into the creamy rice mixture. Season with salt and pepper to taste. Let it cook together for an extra two to three minutes to heat through. Enjoy your One-Pan Creamy Cajun Shrimp Rice Skillet, a dish full of flavor! - Ensuring shrimp don't overcook Cook the shrimp until they turn pink. This takes about 3-4 minutes. Remove them when they are just done. Overcooking makes them tough. - Best type of rice for this dish Use long-grain rice. It cooks well and stays fluffy. Jasmine or basmati rice also works great in this recipe. - Adjusting spice levels Start with one tablespoon of Cajun seasoning. Taste it as you cook. If you want more heat, add more. - Adding lemon zest or juice A splash of lemon juice brightens the dish. Zest adds a fresh flavor too. Add it right before serving for the best taste. - Incorporating additional vegetables Try adding diced zucchini or spinach. These veggies add color and nutrients. You can mix them in when you add the peas. - Using different types of seafood Feel free to swap shrimp for chicken or scallops. You can also use a mix of seafood. Just adjust cooking time as needed. {{image_2}} You can swap shrimp for other proteins. Chicken works well in this dish. Tofu also makes a great plant-based option. For a gluten-free choice, use rice that fits your needs. Look for brands that say "gluten-free" clearly on the package. If you want a dairy-free dish, replace heavy cream with coconut milk. It adds a rich flavor while keeping it light. Try different brands of Cajun seasoning to find your favorite. Each brand has a unique taste and kick. You can also make your own Cajun spice blend. Mix paprika, cayenne, garlic powder, onion powder, and oregano. Adjust the spices to your liking. This homemade blend gives you full control over the flavor. To keep your One-Pan Creamy Cajun Shrimp Rice Skillet fresh, use airtight food storage containers. Glass containers work well, but plastic ones are fine too. Make sure to let the dish cool before sealing. Store in the fridge for up to three days. For longer storage, consider freezing. Place portions in freezer-safe bags or containers, removing as much air as possible. You can keep it frozen for up to three months. For the best reheating results, use a skillet or microwave. If you choose the skillet, add a splash of broth or water. This helps keep the rice moist. Heat over low to medium heat, stirring often. If using a microwave, cover your dish loosely with a lid or paper towel. Heat in short bursts, stirring in between. This helps the heat spread evenly. To prevent the rice from drying out, add a few drops of water before reheating. This will keep your dish creamy and delicious. Yes, you can make this dish ahead of time. Cook the shrimp and rice as directed. Let them cool before storing in a container. You can keep it in the fridge for up to three days. When ready to eat, reheat it on the stove or in the microwave. Add a splash of broth or cream to keep it creamy. Shrimp are fully cooked when they turn pink and opaque. They should also curl into a C shape. This usually takes about 3-4 minutes in the skillet. Be careful not to overcook them, as they can become rubbery. It's best to remove them from the skillet as soon as they are done. Serve the dish warm, right from the skillet. Garnish with fresh parsley for a pop of color. You can add a wedge of lemon on the side for extra flavor. Pair it with a simple salad or crusty bread to soak up the creamy sauce. Enjoy the bold flavors with family or friends! This blog covered how to make a delicious One-Pan Creamy Cajun Shrimp Rice Skillet. We explored key ingredients, step-by-step cooking, and tips to enhance flavor. Remember, adjusting spices and exploring variations can make this dish your own. Don’t forget to store leftovers properly and reheat wisely. Enjoy the ease of this one-pan meal, and let its flavors bring joy to your table. Cooking can be fun and simple!

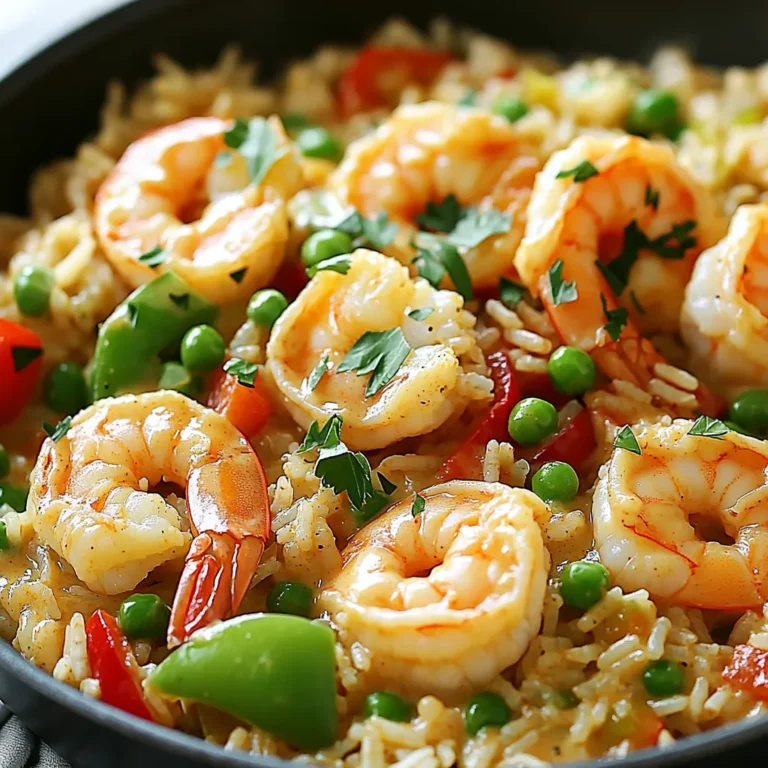
One-Pan Creamy Cajun Shrimp Rice Skillet Delight

PREV 1 … 12 13 14 … 57 NEXT
meal twig

explore

DessertsDinnerAppetizersDrinks

Our Policies

  • Cookie Policy
  • Copyright Policy
  • Disclaimer
  • GDPR Policy
  • Terms Of Use
Back to Top
  • About
  • Contact Us
  • Privacy Policy
© 2025 meal twig