FREE DINNER EBOOK! Get your copy!
  • Cookie Policy
  • GDPR Policy
  • Disclaimer
  • Terms Of Use
  • Visit my other site: Fun Cookie Recipes
meal twig
  • Home
  • Dinner
  • Desserts
  • Drinks
  • Appetizers
  • Contact
  • About
  • Privacy Policy
  • Home
  • Dinner
  • Desserts
  • Drinks
  • Appetizers
  • Contact
  • About
  • Privacy Policy
  • Cookie Policy
  • GDPR Policy
  • Disclaimer
  • Terms Of Use
Visit my other site: Fun Cookie Recipes

HOME / CATEGORIES /

Latest

To make these sweet rolls, gather these main ingredients: - 3 ½ cups all-purpose flour - 1 packet (2 ¼ teaspoons) instant yeast - ½ cup whole milk, warmed - ¼ cup granulated sugar - ¼ cup brown sugar, packed - 1 large egg - ½ teaspoon salt - ¼ cup unsalted butter, melted - 2 tablespoons ground cinnamon - ½ cup brown sugar, packed (for filling) These ingredients create a soft, sweet dough that rises beautifully. The brown sugar and cinnamon combo makes the filling rich and warm. You can add these optional ingredients for extra taste: - ½ cup chopped pecans or walnuts Nuts give a nice crunch and boost the flavor of the rolls. Feel free to skip them if you prefer a nut-free treat. For easy cooking, have these tools ready: - Large mixing bowl - Whisk - Rolling pin - Baking dish - Plastic wrap - Oven These tools help you mix, roll, and bake with ease. Each step becomes simple with the right equipment. Enjoy your cooking! To start, grab a large mixing bowl. Combine 2 cups of all-purpose flour, instant yeast, granulated sugar, and salt. Whisk these dry ingredients until they blend well. In another bowl, mix ½ cup of warmed whole milk, ¼ cup of melted unsalted butter, and 1 large egg. Pour this wet mix into your dry ingredients. Gradually add more flour, about ½ cup at a time, until you see a soft dough form. You might need more or less flour based on the weather. Knead the dough on a floured surface for 5 to 7 minutes until it's smooth and stretchy. Place the dough in a greased bowl, cover it with a damp cloth, and let it rise in a warm spot for about 1 hour. It should double in size. Now it’s time to make the filling. Take the risen dough and punch it down gently. Roll it out on a floured surface into a rectangle, about 16 by 12 inches. Spread softened butter over the dough's surface. Next, sprinkle ½ cup of packed brown sugar and 2 tablespoons of ground cinnamon evenly across it. If you like nuts, toss in ½ cup of chopped pecans or walnuts. This adds a nice crunch and flavor. Start at one long side of the rectangle. Carefully roll the dough into a log shape. Pinch the seam to seal it well. Use a sharp knife to cut the log into 12 equal pieces. Place each roll in a greased baking dish, making sure to leave space between them. Cover the dish with plastic wrap and let the rolls rise for another 30 minutes. This second rise will help them become fluffy. Preheat your oven to 350°F (175°C). Bake the rolls for 20 to 25 minutes until they turn golden brown. While they bake, prepare the cream cheese frosting. Mix softened cream cheese and powdered sugar in a bowl until it’s smooth. Once the rolls are done, let them cool slightly. Then drizzle the cream cheese frosting over the top. Enjoy the sweet smell and warm taste of your brown sugar cinnamon rolls! To get the best dough, use the right flour amount. Start with 2 cups and then add more if needed. You want the dough to feel soft but not sticky. Knead it for 5-7 minutes until it’s smooth. This step builds gluten, which gives the rolls a nice rise. Place the rolls with space in between. This helps them bake evenly. Keep the pan covered while they rise. It keeps warmth in and helps the rolls grow. Watch them closely in the oven. They should be golden brown when done, about 20-25 minutes. For a tasty cream cheese frosting, mix softened cream cheese with powdered sugar. Add a splash of vanilla for extra flavor. If you like it sweeter, add more sugar. Drizzle it on the rolls while they are still warm. This makes the frosting melt into the rolls, creating a delicious topping. {{image_2}} If you want to keep your rolls nut-free, just skip the nuts. The filling will still taste great with just brown sugar and cinnamon. You won’t lose any flavor. This simple change makes these rolls safe for those with nut allergies. Cream cheese frosting is a classic choice, but you can try other options. A simple glaze made from powdered sugar and milk adds a nice touch. Mix one cup of powdered sugar with two tablespoons of milk for a sweet drizzle. You might also enjoy a vanilla or maple frosting for a unique twist. You can boost flavor by adding fruits or chocolate. Try mixing in some chopped apples or berries into the filling. This adds moisture and sweetness. For chocolate lovers, sprinkle mini chocolate chips into the filling for a rich taste. Both options will make your cinnamon rolls even more delightful! To keep your brown sugar cinnamon rolls fresh, wrap them tightly in plastic wrap or foil. This helps prevent them from drying out. Store them at room temperature for up to two days. If you want to keep them longer, put them in the fridge. They will stay fresh for about a week in the fridge. Ensure they are sealed well to avoid absorbing odors from other foods. When reheating leftover rolls, preheat your oven to 350°F (175°C). Place the rolls on a baking sheet and cover with foil. Heat them for about 10-15 minutes. This keeps them soft and warm. If you’re in a hurry, you can use the microwave. Just heat each roll for about 15-20 seconds. Be careful not to overheat them, as this can make them tough. To freeze your rolls, let them cool completely first. Wrap each roll in plastic wrap, then place them in a freezer bag. They can be frozen for up to three months. When you want to enjoy them, remove the rolls from the freezer. Let them thaw in the fridge overnight. You can reheat them in the oven afterward. This method keeps their taste and texture intact. Yes, you can use whole wheat flour. Whole wheat flour gives a nutty flavor. It can make the rolls denser. I suggest mixing it with all-purpose flour for a lighter texture. Start with half and half. This way, you get the taste and texture you want. If your dough doesn’t rise, check your yeast. It may be old or inactive. Make sure your milk is warm, not hot. Hot milk can kill the yeast. Another tip is to place the dough in a warm spot. You can turn the oven on for a minute, then turn it off. Let the dough rise there. You can make these rolls ahead of time. Prepare the dough and filling. Roll them up and cut them. Place the rolls in the pan, then cover and refrigerate. When you are ready to bake, let them sit at room temperature for about 30 minutes. Then, bake as usual. Store leftover cream cheese frosting in an airtight container. Keep it in the fridge for up to one week. You can also freeze the frosting. Just make sure to thaw it in the fridge before use. Mix it well before spreading it on your rolls. Yes, you can use granulated sugar instead of brown sugar. Your rolls will be less rich and not as sweet. Brown sugar adds moisture and a hint of caramel flavor. If you want, you can add a bit of molasses to granulated sugar to mimic that flavor. Brown sugar cinnamon rolls are simple to make and oh-so-delicious. You now know the key ingredients, step-by-step instructions, and tips for perfect rolls. Explore variations to suit your taste. Don't forget how to store and reheat them for later. Each bite is worth the effort, and you have the tools to impress. Enjoy the process and share these tasty treats with others!

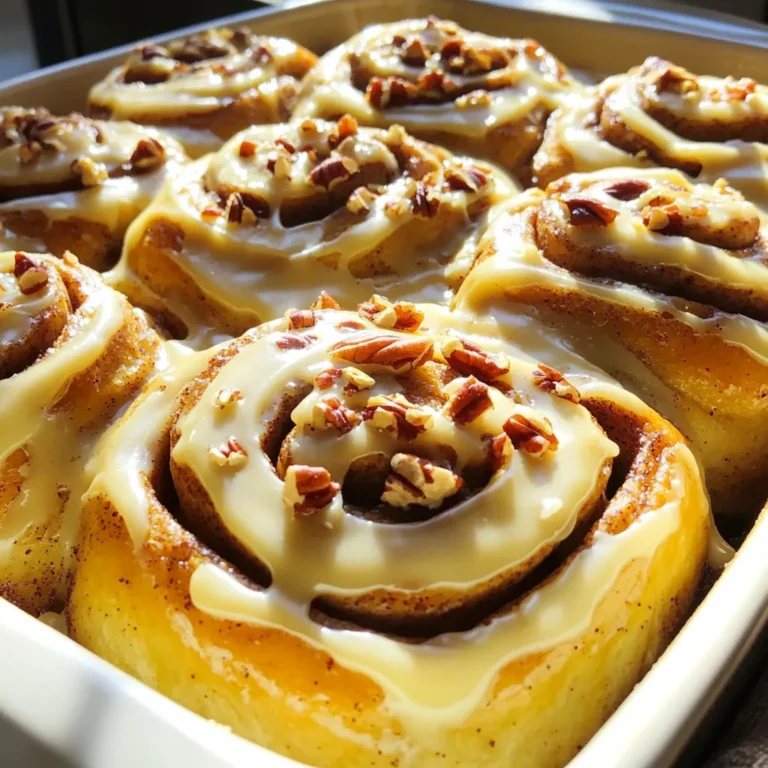
Brown Sugar Cinnamon Rolls Irresistible Recipe Guide

For a tasty Slow Cooker Chili Mac, you need some key ingredients: - 1 pound ground beef or turkey - 1 medium onion, diced - 2 cloves garlic, minced - 1 can (15 ounces) kidney beans, drained and rinsed - 1 can (15 ounces) black beans, drained and rinsed - 1 can (28 ounces) diced tomatoes (with juices) - 2 cups beef broth - 2 cups elbow macaroni - 2 tablespoons chili powder - 1 tablespoon cumin - 1 teaspoon smoked paprika - 1 teaspoon oregano - Salt and pepper to taste - 1 cup shredded cheddar cheese (for topping) - Fresh cilantro or parsley for garnish (optional) These ingredients work together to create a rich and hearty dish. The ground meat gives it protein, while beans add fiber. Tomatoes and broth provide moisture and flavor. You can add extra ingredients to boost the taste: - Bell peppers for sweetness - Jalapeños for heat - Corn for sweetness and texture - A splash of lime juice for brightness These options let you customize your chili mac. Feel free to mix and match based on what you like! If you have dietary needs, here are some swaps: - Use ground chicken or plant-based meat for a lighter option. - Replace beef broth with vegetable broth for a vegetarian dish. - Use gluten-free pasta if you need a gluten-free meal. These substitutions keep the dish tasty while meeting your needs. Enjoy making a chili mac that fits your lifestyle! First, I take a skillet and set it over medium heat. I add one pound of ground beef or turkey. I cook the meat until it turns brown and is fully cooked. This usually takes about 5 to 7 minutes. Next, I drain any extra fat from the skillet. Then, I add a medium onion, diced, and two cloves of minced garlic to the meat. I stir and cook this mixture until the onion is soft and clear, which takes about 3 to 4 minutes. This step brings out great flavors. Now, I carefully transfer the meat mixture into the slow cooker. I open two cans: one with 15 ounces of kidney beans and another with 15 ounces of black beans. I drain and rinse both beans before adding them to the cooker. Next, I add a 28-ounce can of diced tomatoes, including the juices. Then, I pour in 2 cups of beef broth. To spice things up, I mix in 2 tablespoons of chili powder, 1 tablespoon of cumin, 1 teaspoon of smoked paprika, and 1 teaspoon of oregano. I also add salt and pepper to taste. I stir everything well to combine. I cover the slow cooker and set it to cook. For best results, I choose low heat for 6 to 8 hours or high heat for 3 to 4 hours. About 30 minutes before the cooking ends, I stir in 2 cups of elbow macaroni. If the chili looks too thick, I add more broth or water until it’s just right. When the pasta is cooked, I serve the chili mac hot, topped with shredded cheddar cheese. For a fresh touch, I might add cilantro or parsley as a garnish. To get the right texture for your chili mac, add pasta at the end. This keeps the pasta from getting mushy. I usually stir in the elbow macaroni about 30 minutes before serving. If it seems too thick, add more broth or water. This way, you control how creamy or chunky your dish turns out. Toppings make your chili mac more fun and tasty! Shredded cheddar cheese is a must. It melts beautifully on top. You can also use fresh cilantro or parsley for a pop of color. A dollop of sour cream adds creaminess and balances the spice. Try crushed tortilla chips for crunch and extra flavor. One common mistake is not browning the meat first. This step adds deep flavor to your chili mac. Also, be careful with spices. Too much chili powder can overwhelm the dish. Lastly, avoid overcooking the pasta. It should be tender but not mushy. Following these tips will ensure a delicious meal every time. {{image_2}} You can make a tasty vegetarian chili mac. Start by using plant-based ground meat. You can also use lentils instead of beans. For a vegan twist, skip the cheese or use a dairy-free option. Adding more veggies like bell peppers or zucchini boosts the flavor and nutrition. If you want your chili mac spicy, add chopped jalapeños or red pepper flakes. You can also use hot chili powder instead of regular. For a milder dish, use sweet paprika and skip the heat. Adjust the spices to your taste for the best experience. There are many fun add-ins for chili mac. Try corn for a sweet crunch. You can also add diced bell peppers for color and flavor. For a creamy touch, stir in sour cream before serving. Fresh herbs like cilantro or parsley add a nice finish too. After enjoying your chili mac, let it cool down. Use an airtight container to store leftovers. Make sure to divide the chili mac into smaller portions. This way, it will cool faster and stay fresh longer. When you want to eat your leftovers, you can reheat them easily. Place the chili mac in a pot on the stove. Heat it over low to medium heat. Stir often to avoid sticking. You can also use the microwave. Place it in a microwave-safe bowl, cover it loosely, and heat in short bursts. Stir in between to ensure even heating. Freezing is a smart way to save chili mac for later. First, let it cool completely. Then, pour it into a freezer-safe container. Leave some space at the top for expansion. You can freeze it for up to three months. When you're ready to eat it, thaw it in the fridge overnight before reheating. Yes, you can make Slow Cooker Chili Mac ahead of time. Prepare the dish a day before serving. Store it in the fridge overnight. When it's time to eat, simply reheat it in the slow cooker or on the stove. This gives the flavors a chance to blend even more. To thicken your Slow Cooker Chili Mac, you have a few options. You can add a cornstarch slurry. Mix one tablespoon of cornstarch with two tablespoons of cold water, then stir it in. Another way is to let it cook longer with the lid off. This allows excess liquid to evaporate, making the dish thicker. Slow Cooker Chili Mac is great on its own, but you can add sides too. Try serving it with crusty bread for dipping. A fresh salad can balance the meal nicely. You could also add toppings like sour cream, avocado, or extra cheese for more flavor. We’ve explored the main ingredients for a tasty slow cooker chili mac. You can customize it with optional ingredients and make smart substitutions for your diet. I shared step-by-step instructions for clear cooking. Tips helped you avoid common mistakes, and variations let you make unique versions. Remember, leftovers can be stored and reheated easily. Enjoy this hearty meal with friends or family. Slow cooker chili mac is simple, fun, and super delicious. You’re ready to make a great dish!

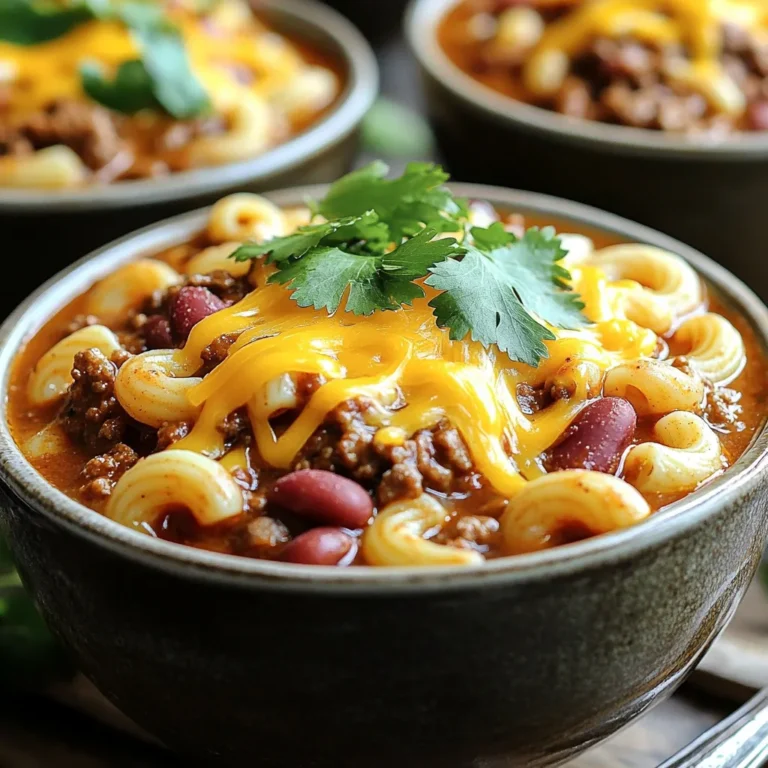
Savory Slow Cooker Chili Mac Hearty Comfort Meal

- 12 ounces semi-sweet chocolate chips - 12 ounces white chocolate chips - 1 teaspoon peppermint extract - 1/2 cup crushed candy canes (plus extra for garnish) - Pinch of sea salt For this no-bake peppermint bark, you need just a few simple ingredients. First, you will use semi-sweet chocolate chips. They give a rich, deep flavor. Next, grab some white chocolate chips. These will add creaminess and sweetness. Add peppermint extract for that festive kick. The crushed candy canes bring a nice crunch and holiday feel. Don’t forget the pinch of sea salt. It helps balance the sweetness and enhances all the flavors. Make sure to have extra crushed candy canes on hand. You will want to sprinkle them on top for a pretty finish. This treat is not just easy to make but also fun to share. - Line an 8x8-inch baking dish with parchment paper. - In a bowl, melt 12 ounces of semi-sweet chocolate chips. - Stir in a pinch of sea salt. Spread the mixture in the dish. - Chill the semi-sweet layer in the fridge for about 10-15 minutes. - Melt 12 ounces of white chocolate chips in the microwave. - Stir in 1 teaspoon of peppermint extract once melted. - Spread the white chocolate over the semi-sweet layer. - Sprinkle 1/2 cup of crushed candy canes on top. Press them gently into the chocolate. - Chill the dish again until set, about 30-45 minutes. - Use the parchment to lift the bark out. Cut into squares or break into pieces. To melt chocolate well, use microwave-safe bowls. Heat in 30-second intervals. Stir after each time. This helps keep the chocolate smooth. If it looks lumpy, keep stirring. The heat will help it melt evenly. Chilling is key for good texture. After you pour the semi-sweet layer, chill it for 10-15 minutes. This helps it harden before the next layer. Aim for a thickness of about a half-inch for each layer. This way, each bite has a nice balance of flavors. To make the bark look special, arrange pieces on a fun platter. You can sprinkle more crushed candy canes around the bark for color. Try using different shapes when cutting the bark. Fun shapes make it more festive and appealing! {{image_2}} You can change up the flavor of your peppermint bark. Adding nuts can give it a nice crunch. Try using chopped almonds or walnuts. Dried fruits also work well. Dried cherries or cranberries can add a fruity twist. You can also mix in different types of chocolate. Dark chocolate gives a rich taste. Milk chocolate creates a sweeter bark. You can even try a mix of chocolates for a unique flavor. For those on a vegan diet, you can use vegan chocolate. Look for brands that offer dairy-free options. They melt just as well and taste great. If you need gluten-free options, this recipe is already safe. Just make sure the chocolate you use has no gluten. Always check the labels to be sure. You can modify this treat for different holidays. For Halloween, use orange and black sprinkles. For Easter, try pastel colors. Using seasonal sprinkles or toppings can make it festive. Red and green for Christmas add a nice touch. You can also use themed candies or chocolate shapes to fit the season. Store your peppermint bark in an airtight container. This keeps it fresh and tasty. You can use plastic wrap, foil, or a sealed jar. Keep your bark away from heat and moisture. The ideal storage temperature is between 60°F and 75°F. Peppermint bark stays fresh for about two weeks at room temperature. To maximize its life, always check for signs of melting or moisture. If it looks good, it should taste great! You can also extend freshness by storing it in the fridge, where it lasts up to a month. Yes, you can freeze peppermint bark! To do this, wrap it tightly in plastic wrap or foil. Place it in a freezer-safe container. When ready to enjoy, take it out and let it thaw in the fridge for a few hours. This helps maintain its texture and taste. Yes, you can use chocolate melts. They melt easily and give a nice shine. Just follow the same melting steps as with chocolate chips. To use dark chocolate, simply swap the semi-sweet chips for dark chocolate chips. Melt them like before. The peppermint flavor will still shine through. If your chocolate seizes, add a small amount of vegetable oil or shortening. Stir until smooth. This can help bring it back to a usable state. Peppermint bark takes about 30 to 45 minutes to set in the fridge. Make sure it is completely firm before cutting. Yes, you can use other extracts. Try vanilla or almond for a fun twist. Just use the same amount as the peppermint extract. Making peppermint bark is fun and simple. You'll need chocolate chips, peppermint extract, and crushed candy canes. Follow the steps to melt, layer, and chill your ingredients for a tasty treat. Remember the tips for perfect texture and display. Feel free to customize with nuts or dried fruits. Store it well to enjoy later, and use my answers for any questions. Try out these ideas and enjoy your homemade peppermint bark!

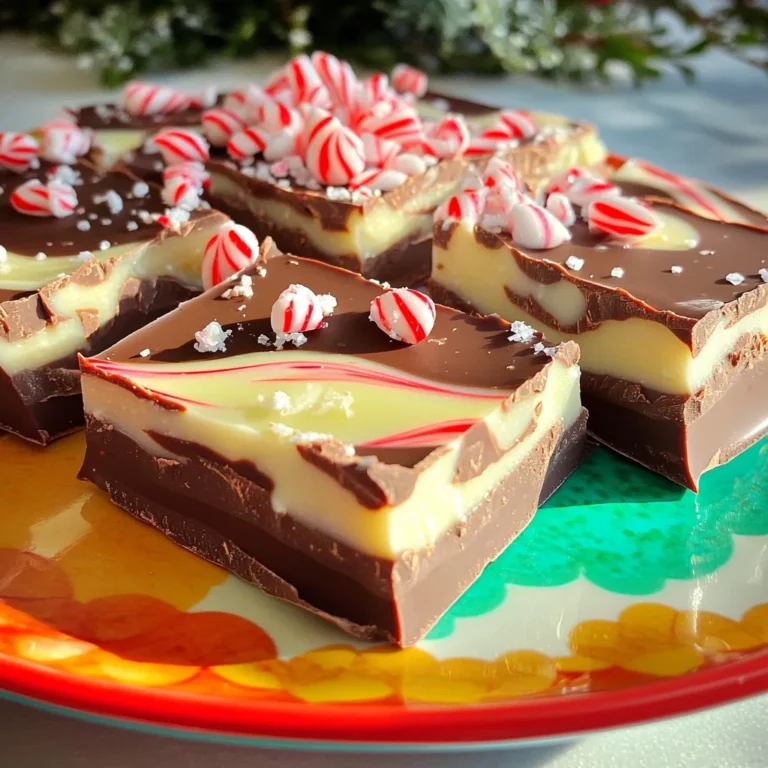
No-Bake Peppermint Bark Festive Holiday Treat

- 4 boneless, skinless chicken thighs - 1 cup jasmine rice - 2 cups chicken broth - 1 bell pepper (red or green), diced - 1 medium onion, diced - 3 cloves garlic, minced - 1 tablespoon Cajun seasoning - 1 teaspoon smoked paprika - 1 teaspoon dried thyme - Salt and pepper to taste - 2 tablespoons olive oil - 1 cup frozen peas - Fresh parsley, chopped (for garnish) I love using these ingredients for my Cajun Chicken & Rice Sheet Pan. First, the chicken thighs are juicy and packed with flavor. They soak up all the spices well. Jasmine rice is my choice because it cooks fluffy and fragrant. The chicken broth adds depth to the rice, making it tasty. Next, the veggies bring color and crunch. Bell peppers and onions add sweetness, while garlic gives a nice kick. Cajun seasoning is key to that bold flavor. Smoked paprika and thyme enhance the dish even more. I always keep salt and pepper handy to adjust the taste. Don't forget the olive oil! It helps the chicken brown and keeps the veggies from drying out. Frozen peas add a pop of green and sweetness at the end. Finally, fresh parsley is perfect for a bright finish. It makes the dish look and taste fresh. - Preheating the oven: Start by setting your oven to 400°F (200°C). This step ensures your chicken cooks evenly. - Seasoning the chicken: In a large bowl, mix your chicken thighs with Cajun seasoning, smoked paprika, and dried thyme. Add salt and pepper to taste. Drizzle with one tablespoon of olive oil and mix well. Make sure every piece is coated with the spices. - Spreading the rice: Take a large sheet pan and spread one cup of jasmine rice evenly across the bottom. This will serve as a bed for the chicken and veggies. - Arranging chicken and vegetables: Place the seasoned chicken thighs on top of the rice. Scatter diced bell pepper, onion, and minced garlic around the chicken. This adds flavor and color to the dish. - Adding chicken broth: Pour two cups of chicken broth over the rice. This liquid helps the rice cook and adds rich flavor to the dish. - Covering the sheet pan with foil: Use aluminum foil to cover the sheet pan tightly. This keeps steam in, which helps cook the chicken and rice. - Timing and checking doneness: Bake in the oven for 30 minutes. After that, carefully remove the foil. Stir in one cup of frozen peas and return it to the oven uncovered for an additional 15-20 minutes. Check if the chicken is cooked through and the rice is tender. - Fluffing the rice before serving: Once cooked, take the pan out of the oven and let it rest for five minutes. Use a fork to fluff the rice, mixing in the peas and veggies for a colorful and tasty dish. - Choose four boneless, skinless chicken thighs. They stay juicy and cook well. - Marinate the chicken for at least 30 minutes. This time helps the flavors mix. - I recommend brands like Tony Chachere’s or Zatarain’s for Cajun seasoning. They add great taste. - You can add garlic powder or onion powder for extra depth. A little goes a long way. - Covering the pan with foil keeps moisture in. This makes the rice fluffy and the chicken tender. - Let the dish rest for five minutes after cooking. This step allows the flavors to settle. {{image_2}} You can easily switch the chicken for other meats. Try pork or shrimp for a twist. If you prefer plant-based meals, tofu or tempeh works well. Just season them like you would the chicken. For a lighter option, fish like salmon or tilapia can also shine in this dish. While jasmine rice is tasty, you can use other kinds. Brown rice gives a nutty flavor and is healthier. You may also try wild rice for a unique texture. For a grain-free meal, use quinoa instead. Cauliflower rice is a great low-carb choice and absorbs flavors well. Seasonal vegetables can add freshness to your dish. Think about adding zucchini, squash, or asparagus. They cook well and provide color. If you have leftovers, toss them in! This recipe is perfect for using up extra veggies you have in your fridge. Just chop and mix them in with the rice and chicken. To keep your Cajun chicken and rice fresh, place it in a cool spot. Use airtight containers to seal in flavor. Glass or plastic containers with tight lids work best. Make sure to cool the dish to room temperature before storing. This helps avoid condensation, which can make your food soggy. You can easily reheat the chicken and rice. Use the microwave for quick results. Place the meal in a microwave-safe dish and cover it. Heat for one to two minutes, checking to see if it is hot. You can also reheat it on the stove. Add a splash of chicken broth to keep it moist. Stir often to ensure even heating. If you want to save some for later, freezing is a great choice. Let the dish cool completely before you freeze it. Portion it into small containers or freezer bags. This makes it easy to reheat later. When ready to eat, thaw it overnight in the fridge. For a quicker option, you can use the microwave on defrost mode. Yes, you can use brown rice. However, you need to adjust the cooking time and liquid. Brown rice takes longer to cook than jasmine rice. Use about 2 ½ cups of chicken broth for 1 cup of brown rice. Bake the dish for 50 to 60 minutes instead of 30. Check the rice for doneness before serving. Leftovers will last about 3 to 4 days in the fridge. Store them in an airtight container. Always check for any off smells or signs of spoilage before eating. Reheat thoroughly to ensure safety. Yes! You can prep this dish a day ahead. Season the chicken and combine it with the rice and broth. Cover and store it in the fridge until you’re ready to cook. This saves time and makes dinner a breeze! Just remember to bake it the next day. This blog post covered making a delicious sheet pan chicken and rice dish. You learned about the key ingredients, step-by-step instructions, and tips for the best results. Variations let you adapt the recipe to your tastes. Plus, the storage and reheating section ensures you make the most of your leftovers. This dish is not just easy; it caters to various diets and preferences. Now, you can create a tasty meal that satisfies everyone. Explore this recipe and enjoy every bite!

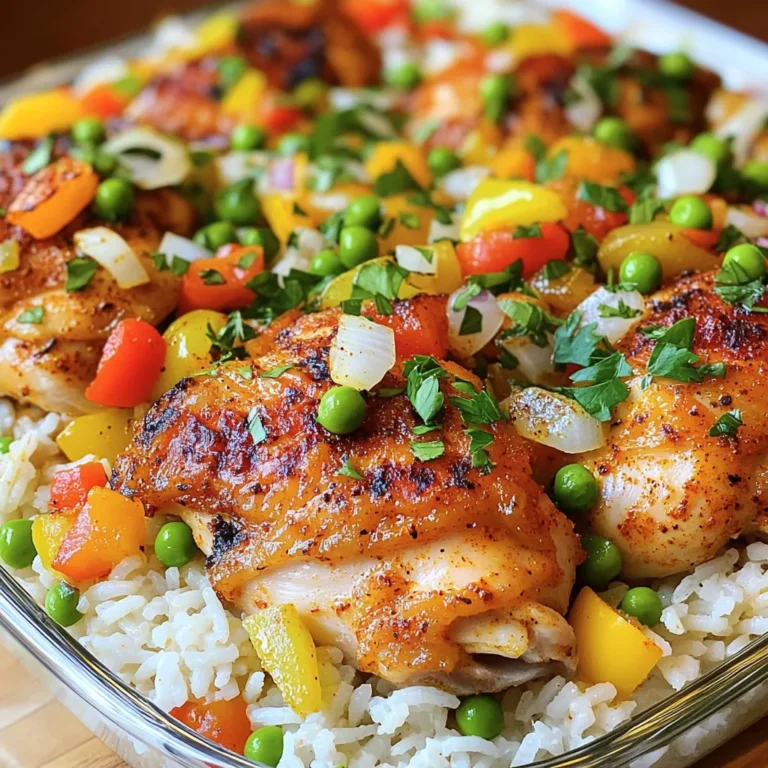
Cajun Chicken & Rice Sheet Pan Delightful Meal

- 10 fresh jalapeños, halved and seeded - 1 cup cream cheese, softened - 1/2 cup shredded cheddar cheese - 1/4 cup shredded mozzarella cheese - 2 tablespoons green onion, finely chopped - 1/2 cup breadcrumbs (optional, for topping) You need fresh jalapeños for the best flavor. Halving and seeding them makes them less spicy. I like to mix cream cheese, cheddar, and mozzarella for a rich taste. The green onion adds a nice crunch and fresh flavor. If you want a crispy texture, breadcrumbs on top work great. - 1 teaspoon garlic powder - 1/2 teaspoon smoked paprika - Salt and pepper to taste Garlic powder gives a strong flavor. Smoked paprika adds a hint of smokiness. Don't forget salt and pepper to taste. These spices make each bite burst with flavor. - Air fryer - Mixing bowl - Spoon for filling You need an air fryer to cook these poppers quickly and evenly. A mixing bowl helps you combine the cheese mix easily. A spoon is perfect for filling each jalapeño half. Keep these tools handy for a smooth cooking process. Preheat your air fryer to 375°F (190°C). This should take about 5 minutes. Preheating helps to cook the jalapeños evenly and gives them a nice crunch. Next, take 10 fresh jalapeños. Cut each one in half lengthwise. Use a spoon to scoop out the seeds and membranes. This step reduces the heat, making them milder and easier to eat. In a mixing bowl, combine the following ingredients: - 1 cup cream cheese, softened - 1/2 cup shredded cheddar cheese - 1/4 cup shredded mozzarella cheese - 2 tablespoons green onion, finely chopped - 1 teaspoon garlic powder - 1/2 teaspoon smoked paprika - Salt and pepper to taste Mix everything until it is smooth and well-blended. You want a creamy filling that will stick well to the jalapeños. Now it's time to fill the jalapeños. Take a spoon and pack the cheese mixture into each half. Make sure to fill them generously. You want each bite to be loaded with cheesy goodness. Place the stuffed jalapeños in the air fryer basket. Keep them in a single layer so they cook evenly. Cook for about 10-12 minutes. The cheese should be bubbly, and the jalapeños should feel tender. Check them a bit early to avoid overcooking. Enjoy the crispy, flavorful treat that is sure to impress! To get that crunchy texture, use breadcrumbs. They add a nice bite. You can mix them with a bit of olive oil spray. This helps them brown perfectly in the air fryer. Lightly spray the poppers before cooking. This small step makes a big difference in crispiness. Garnish your jalapeño poppers with chopped green onions. They add color and flavor. A drizzle of sour cream also works well. It gives a creamy touch. You can serve them with salsa or guacamole for extra fun. These dips enhance the overall taste and make for a great party snack. One big mistake is overcrowding the air fryer. Keep the jalapeños in a single layer. This allows hot air to circulate. When they are too close, they won’t cook evenly. If you have many poppers, fry them in batches. This way, each popper gets the crispy texture you want. {{image_2}} You can mix up the cheeses in your jalapeño poppers. While cream cheese and cheddar are classic choices, try different kinds. Here are some ideas: - Goat cheese: It adds a tangy flavor. - Pepper jack: This brings a spicy kick. - Feta cheese: It gives a nice crumbly texture. Feel free to blend these cheeses with mozzarella for a creamy filling. You can experiment until you find your perfect match. Want your poppers milder? Simply remove all the seeds and membranes. This cuts down on the heat. You can also: - Add more cream cheese to balance the spice. - Use sweet peppers instead of jalapeños. If you like it hot, keep the seeds in. Try adding diced jalapeños or hot sauce to the cheese mix. Adjust the spice to make it just right for you. You can easily make jalapeño poppers for different diets. For a vegetarian option, just skip the meat and stick to the cheese mix. If you want a vegan version, try these swaps: - Use vegan cream cheese instead of regular cream cheese. - Replace dairy cheese with nut-based cheese or vegan cheese shreds. - Use flax eggs or silken tofu to help bind the filling. These swaps let everyone enjoy a tasty popper! To keep your leftover jalapeño poppers fresh, place them in an airtight container. Make sure they cool down first. Store the container in the fridge. They will stay fresh for up to three days. You can also wrap them tightly in plastic wrap or foil. This extra layer helps keep them from drying out. To reheat your jalapeño poppers, use the air fryer for best results. Preheat the air fryer to 350°F (175°C). Place the poppers in the basket without overcrowding. Heat for about 5 to 7 minutes. This keeps them crispy and warm. You can also use an oven. Set it to 350°F (175°C) and bake for 10 to 15 minutes. If you want to freeze jalapeño poppers, follow these steps: 1. Let the poppers cool completely. 2. Place them on a baking sheet in a single layer. 3. Freeze them for about 1 to 2 hours until solid. 4. Once frozen, transfer them to a freezer-safe bag. 5. Label the bag with the date and contents. They will last for about three months in the freezer. When you want to eat them, cook straight from frozen. Just add a few extra minutes to the cooking time in the air fryer. Yes, you can prepare your jalapeño poppers ahead of time. You can stuff the jalapeños and keep them in the fridge for up to 24 hours. This makes meal prep easy and quick. Just remember to spray them with olive oil before air frying. This way, they will turn out crispy and delicious. Your jalapeño poppers are done when the cheese is bubbly and the jalapeños are tender. The air fryer should cook them for about 10-12 minutes at 375°F. Keep an eye on them, as all air fryers can cook a bit differently. If you see golden-brown tops, they are likely ready. Yes, you can use frozen jalapeños. However, thaw them first and pat them dry. This helps remove excess moisture. This way, your poppers will stay crispy. Frozen jalapeños may also be a bit softer, so adjust your cooking time if needed. Many sauces pair well with jalapeño poppers. Some great options include: - Sour cream - Ranch dressing - Guacamole - Salsa - BBQ sauce Feel free to experiment and find your favorite dipping sauce! To make delicious jalapeño poppers, you need fresh jalapeños, a creamy cheese mix, and spices. We covered step-by-step instructions for preparing, filling, and air frying them. Remember to avoid overcrowding the air fryer for the best crispiness. Don’t forget the fun variations and tips to store any leftovers. With these simple ideas, you can impress anyone with tasty poppers. Enjoy experimenting with flavors and serving them at your next gathering! Your new recipe is sure to be a hit.

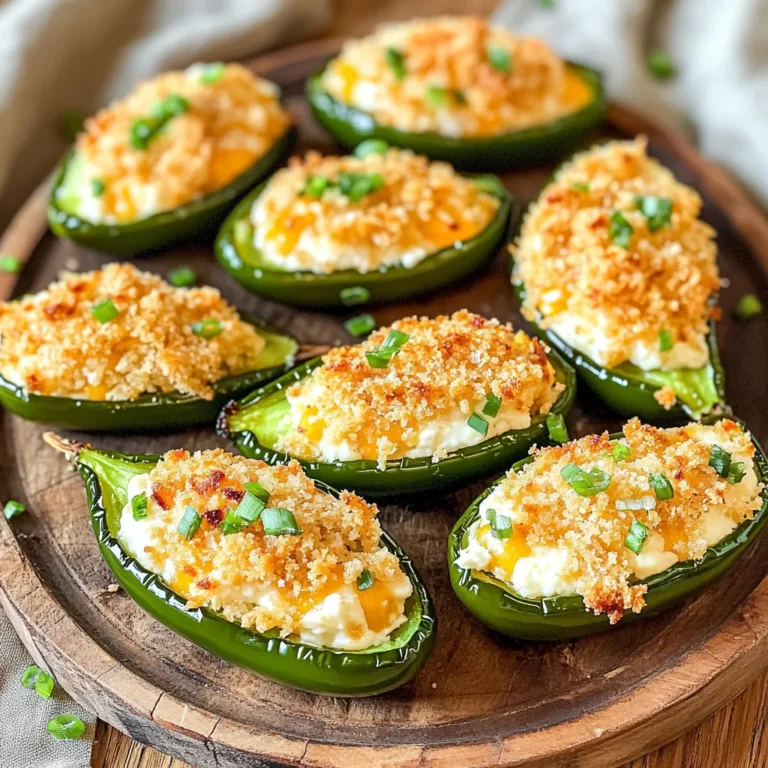
Air Fryer Jalapeño Poppers Crispy and Flavorful Treat

- 1 pound fresh green beans, trimmed - 4 tablespoons unsalted butter - 4 cloves garlic, minced - 1 teaspoon lemon zest - 1 tablespoon lemon juice - Salt and pepper to taste - 2 tablespoons toasted almonds, chopped (for garnish) - A pinch of red pepper flakes (optional) Fresh green beans are the star of this dish. Choose bright, firm beans for the best flavor. The unsalted butter adds richness, while minced garlic gives a robust taste. Lemon zest and juice brighten the dish, making it lively and fresh. Don’t forget to season with salt and pepper for balance. Toasted almonds add crunch and a nutty flavor, which enhances the overall dish. If you like some heat, a pinch of red pepper flakes works well. This simple list of ingredients combines to create a delightful side that pairs well with many meals. - Bring salted water to a boil. - Add trimmed green beans and blanch for 3-4 minutes. - Transfer to an ice bath to halt cooking. First, get a large pot and fill it with water. Add a generous pinch of salt. Turn the heat on high and wait for it to boil. Once the water is bubbling, add your fresh green beans. You will want to watch them closely. Blanching means cooking them just enough. In about 3 to 4 minutes, they should turn bright green and feel a bit tender. Now, prepare an ice bath in a large bowl with cold water and ice. As soon as the beans are done, move them to the ice bath. This stops the cooking and keeps them crisp. Let them chill for about 5 minutes, then drain and set aside. - Melt butter in a skillet over medium heat. - Sauté minced garlic until fragrant. Next, grab a large skillet and place it on medium heat. Add the unsalted butter and let it melt. You want it to become bubbly but not brown. Once the butter melts, toss in the minced garlic. Stir it around for about 1-2 minutes. You will know it’s ready when it smells great and turns slightly golden. Be careful; burnt garlic has a bitter taste. - Toss blanched beans in garlic butter. - Sauté to meld flavors. Now it’s time to add the blanched green beans to the skillet. Gently toss them in the garlic butter. Make sure every bean gets a nice coat of that tasty butter. Sauté for about 3-5 minutes. This helps all the flavors blend together. You want the beans to heat through but not overcook. - Stir in lemon zest and juice. - Season with salt, pepper, and red pepper flakes (if using). For a bright twist, add the lemon zest and juice at this stage. Stir well to combine. This adds a fresh zing that makes the dish pop. Next, sprinkle in some salt and pepper. If you like a bit of heat, add a pinch of red pepper flakes. Stir it all together for about a minute. - Transfer green beans to a serving dish. - Garnish with chopped toasted almonds. Finally, scoop the garlic butter green beans into a serving dish. To make it look extra special, sprinkle chopped toasted almonds on top. This adds a nice crunch and a bit of flavor. Your garlic butter green beans are now ready to impress! To make great garlic butter, avoid burning the garlic. Burnt garlic turns bitter. Cook it just until it smells good and turns light golden. You can adjust the garlic amount based on your taste. If you love garlic, add more. If you prefer a milder flavor, use less. When picking green beans, fresh is best, but frozen works too. Fresh green beans should be bright green and firm. Look for beans without blemishes or wrinkles. If you choose frozen beans, ensure they are not icy or clumped together. This shows they are fresh and not thawed multiple times. To make your green beans even better, try adding spices or herbs. A bit of garlic powder or a sprinkle of thyme can boost flavor. For crunch, consider adding crushed walnuts or sunflower seeds. These add texture and flavor, making your dish even more enjoyable. {{image_2}} You can easily make a vegan version of garlic butter green beans. Just replace the butter with olive oil or vegan butter. This keeps it rich and tasty without any animal products. Use the same amount of oil or vegan butter as the recipe calls for. The garlic will still shine through, giving you that same delicious flavor. If you like some heat, try making spicy garlic butter green beans. Add extra red pepper flakes or a dash of chili powder to the garlic butter. Start with a pinch and taste as you go. This will give your green beans a nice kick. It’s a fun twist that adds depth to the dish. For a fresh take, you can turn these green beans into a salad. After cooking, let them cool. Toss the beans with a vinaigrette dressing. This makes a light and zesty dish, perfect for warm days. You can add other veggies or nuts to enhance the salad. The contrast of warm beans and cool dressing is delightful! To keep your leftover garlic butter green beans fresh, store them in airtight containers. This helps maintain their flavor and crispness. Place them in the fridge right after they cool down. They will stay good for about 3 to 5 days. If you want to freeze blanched green beans, follow these tips. First, cool them completely after blanching. Then, place them in freezer-safe bags or containers. Squeeze out as much air as possible before sealing. This helps prevent freezer burn. Blanched green beans can stay fresh for up to 6 months in the freezer. To reheat your green beans without losing taste or texture, use a skillet. Heat a small amount of butter over medium heat. Add the green beans and stir for a few minutes until warm. You can also microwave them, but be careful not to overcook. A minute or two on medium power is often enough. This way, you can enjoy your garlic butter green beans just like when they were fresh! You can tell green beans are done when they are bright green and tender. They should have a slight crunch. Overcooking makes them mushy and dull in color. Yes, you can use frozen green beans. They save time and are easy to find. Just blanch them for a few minutes as you would with fresh beans. Adjust cooking time as needed since they may cook faster. Garlic butter green beans pair well with many dishes. Here are some ideas: - Grilled chicken or steak - Baked fish - Roasted pork - Quinoa or rice - Mashed potatoes These options create a delicious and balanced meal. Enjoy your cooking! This blog post covered a simple, tasty way to cook green beans. We started with fresh ingredients and shared easy steps from blanching to sautéing. I shared tips on picking the best beans and balancing flavors. You learned variations, like vegan options and how to store leftovers. In the end, this dish brings great taste and nutrition to your table. Enjoy your meal and have fun customizing it!

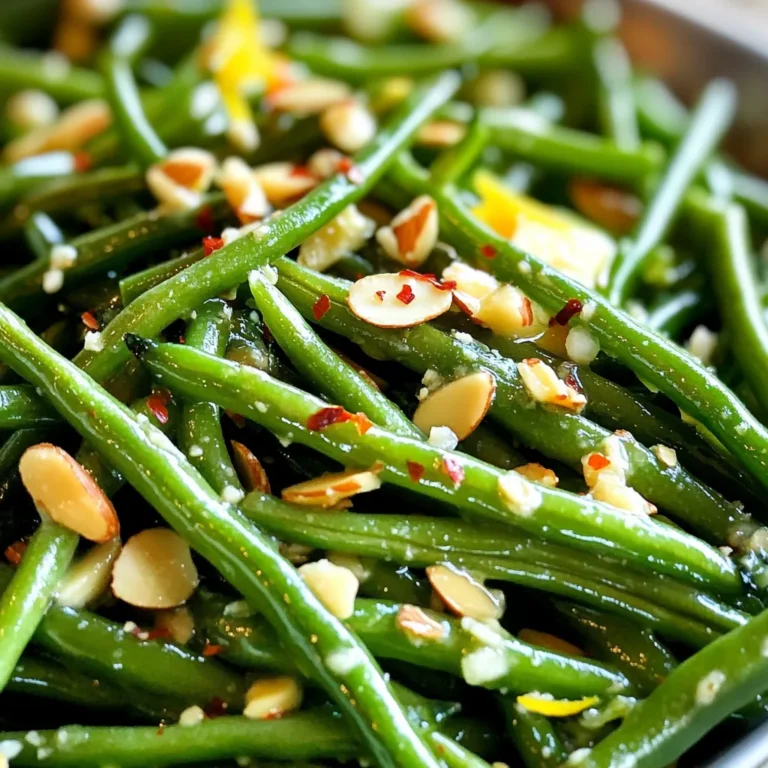
Garlic Butter Green Beans Flavorful and Easy Recipe

- 1 cup canned pumpkin puree - 1 frozen banana - 1/2 cup almond milk (or milk of choice) - 1/2 cup Greek yogurt (or dairy-free alternative) Pumpkin puree gives this smoothie its rich flavor. The frozen banana adds creaminess and sweetness. Almond milk keeps it light, while Greek yogurt packs in protein. - 1 tablespoon maple syrup (adjust for sweetness) - 1 teaspoon ground cinnamon - 1/2 teaspoon nutmeg - 1/4 teaspoon ginger powder - Pinch of salt Maple syrup sweetens your bowl, but you can adjust it to your taste. Cinnamon, nutmeg, and ginger bring warmth and spice, making it taste like fall. A pinch of salt enhances all the flavors. - Granola - Chopped pecans - Coconut flakes - Drizzle of honey Toppings add crunch and flavor. Granola is great for texture, while chopped pecans give a nutty taste. Coconut flakes add a tropical twist. A drizzle of honey makes it even sweeter. You can mix and match toppings based on your mood. To start, gather your ingredients. You need: - 1 cup canned pumpkin puree - 1 frozen banana - 1/2 cup almond milk (or milk of choice) - 1/2 cup Greek yogurt (or a dairy-free alternative) - 1 tablespoon maple syrup - 1 teaspoon ground cinnamon - 1/2 teaspoon nutmeg - 1/4 teaspoon ginger powder - Pinch of salt Now, combine these ingredients in a blender. Make sure everything is well measured. Blend on high until it looks smooth and creamy. If it is too thick, add more almond milk. Blend again until you reach your desired consistency. Once your base is ready, pour the smooth mixture into a bowl. This is where you can get creative! Arrange your toppings for a beautiful look. You can use granola, chopped pecans, and coconut flakes. If you like, drizzle some honey on top. This adds a nice touch and sweet flavor. This smoothie bowl is best served right away. Enjoy it fresh for the best taste. If you want to mix it up, try different toppings. You can add fruits, seeds, or nuts. Have fun with your creations! To get the best texture for your Pumpkin Pie Smoothie Bowl, always use a frozen banana. It makes the smoothie creamy and thick. If the mix is too thick, add more almond milk. Start with a little, then blend and check. This way, you can control the thickness. You can customize the spice levels to fit your taste. If you love cinnamon, add a bit more. Want some heat? A pinch of cayenne pepper can do wonders. You can also add protein or superfood supplements. Chia seeds or protein powder blend well and boost nutrition. Creating a pretty smoothie bowl makes it more fun to eat. Pour the smoothie into a bowl and arrange toppings neatly. Use granola, chopped pecans, or coconut flakes. Drizzle honey for a sweet finish. Seasonal toppings, like pomegranate seeds in winter or fresh berries in summer, add color and flavor. {{image_2}} If you want a dairy-free Pumpkin Pie Smoothie Bowl, you can easily swap out the Greek yogurt. Instead, use a dairy-free yogurt. Coconut yogurt is creamy and adds a nice flavor. For the milk, almond milk works well, but you can also try oat or soy milk. These options keep the bowl rich and tasty without dairy. To make your smoothie bowl even more exciting, try adding chocolate. A tablespoon of cocoa powder gives a nice twist. You can also mix in other fruits. Apples and pears go great with pumpkin. Just chop them up and blend them with the other ingredients. These additions make the bowl fun and fruity. You can change your smoothie bowl to fit the season. In the fall, add toppings like caramel or whipped cream for a holiday treat. For winter, you might want to add a sprinkle of peppermint. Each season can inspire new toppings. You can also tweak the spices to match the time of year. For example, add more cinnamon in the fall or a hint of cardamom in the winter. These small changes make your smoothie bowl feel fresh and special all year round. The Pumpkin Pie Smoothie Bowl lasts about 2 days in the fridge. To keep it fresh, store the bowl in an airtight container. If you add toppings, store them separately. This keeps everything crispy and fresh. You can freeze the smoothie base for later use. Pour the mixture into freezer-safe containers. Leave some space at the top, as it will expand when frozen. To serve later, thaw it overnight in the fridge. Blend again to get a creamy texture. Prep your ingredients ahead of time to save time. You can mix the smoothie base and store it in the fridge for up to 2 days. For single servings, pour the mixture into small containers. This makes it easy to grab a quick meal on busy days. Yes, you can use fresh pumpkin! Fresh pumpkin can taste different than canned. Canned pumpkin is smooth and sweet. Fresh pumpkin may need cooking and blending to get that texture. It also has a milder flavor, so you might want to add more spice to match the taste of canned pumpkin. If you lack some spices, you can use pumpkin pie spice. This blend has cinnamon, nutmeg, and ginger, which works great in this smoothie bowl. Just use about two teaspoons of pumpkin pie spice in place of the separate spices. It simplifies the process and still keeps the flavor. Making this smoothie bowl vegan is easy! Use a plant-based yogurt instead of Greek yogurt. Almond milk is a great choice, but any nut or oat milk works. Replace honey with maple syrup or agave nectar for sweetness. This way, you keep all the yummy flavors while making it vegan-friendly! This blog post covers how to make a delicious pumpkin smoothie bowl. You start with simple ingredients, blend them, and top your bowl as you like. I shared tips for the best texture, flavor boosts, and pretty presentations. You can adapt recipes to fit your needs and store your smoothie for later. Remember, you can get creative with flavors, striving to make a tasty dish that fits your taste. Enjoy your blending adventure, and make each bowl your own!

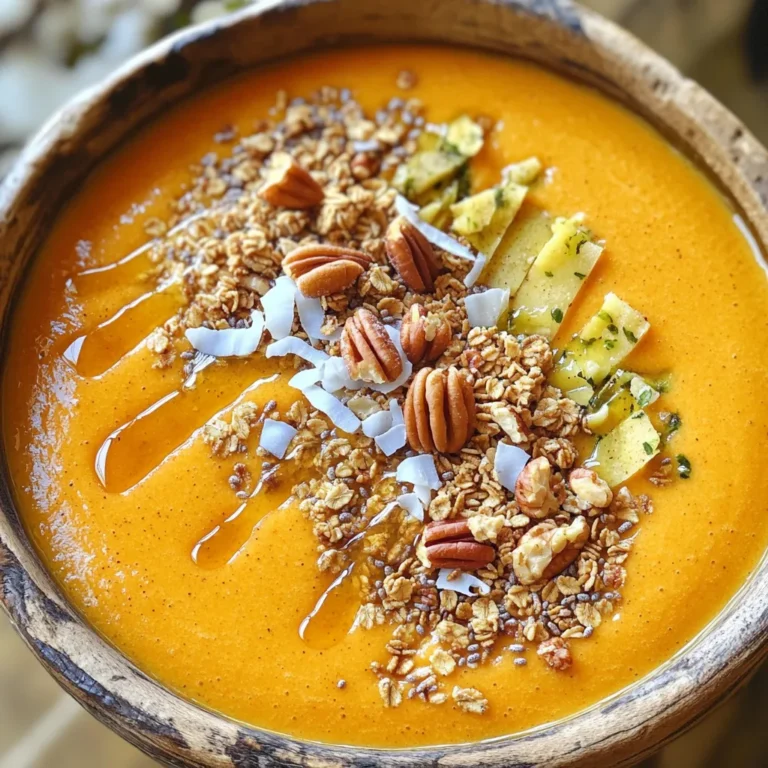
Pumpkin Pie Smoothie Bowl Energizing and Delicious Treat

To make Cowboy Casserole, you need fresh and tasty ingredients. Gather the following items for a hearty meal: - 1 lb ground beef - 1 can (15 oz) black beans, drained and rinsed - 1 cup corn kernels (fresh or frozen) - 1 can (10 oz) diced tomatoes with green chilies - 1 cup shredded cheddar cheese - 1 cup diced bell peppers (red and yellow for color) - 1 small onion, finely chopped - 2 cloves garlic, minced - 1 teaspoon chili powder - ½ teaspoon cumin - 1 teaspoon smoked paprika - 1 package (1 lb) frozen tater tots - Olive oil for sautéing - Salt and pepper to taste This mix of ingredients makes the casserole rich and full of flavor. The ground beef provides protein, while black beans add fiber. The vibrant bell peppers give a sweet crunch. Diced tomatoes with green chilies add a spicy kick. The cheddar cheese melts nicely, bringing everything together. Tater tots on top create a crispy finish. For the spices, chili powder, cumin, and smoked paprika give a warm, smoky taste. Olive oil helps sauté the veggies, making them soft and sweet. Don’t forget to add salt and pepper to boost the flavors. Now that you have your ingredients ready, you can move on to the fun part—cooking! Enjoy the process of bringing these flavors together for a dish that everyone will love. {{ingredient_image_1}} Start by chopping your vegetables. Dice one onion and two bell peppers. Choose colors like red and yellow for a bright look. Next, rinse and drain a can of black beans. This step helps remove extra sodium. Finally, preheat your oven to 375°F (190°C). This ensures your casserole cooks evenly. In a large skillet, heat a drizzle of olive oil over medium heat. Add the chopped onion and bell peppers. Sauté them for about 4-5 minutes until they become soft. Then, add two cloves of minced garlic. Cook it for one more minute until you smell the garlic. Next, stir in one pound of ground beef. Break it apart with a spatula as it cooks. Brown the beef for about 5-7 minutes. If there is excess fat, drain it off. Now, add the black beans, one cup of corn, and one can of diced tomatoes with green chilies to the skillet. Mix in one teaspoon of chili powder, half a teaspoon of cumin, and one teaspoon of smoked paprika. Add salt and pepper to taste. Stir everything together until well combined. Transfer the beef mixture into a greased 9x13 inch baking dish. Spread it out evenly. Now, sprinkle one cup of shredded cheddar cheese on top of the beef mixture. Next, layer frozen tater tots over the cheese. Arrange them neatly for a nice look. Bake the casserole in your preheated oven for about 30-35 minutes. The tater tots should turn golden brown and crispy. After baking, let it cool for a few minutes before serving. To ensure perfect browning of beef, use a hot skillet. This helps the beef cook fast. Break the beef apart with a spatula as it cooks. Drain any extra fat after browning. This keeps your casserole lighter. To avoid a soggy casserole, layer ingredients carefully. Make sure the tater tots sit on top. They should be frozen for the best crisp. Avoid adding too much liquid when mixing in the beans and tomatoes. This keeps the bottom from becoming mushy. For garnishing ideas, use freshly chopped cilantro or green onions. These add a nice pop of color. You can also sprinkle more cheese on top right before serving. This makes it look even more delicious. When serving, present the casserole directly from the baking dish. This gives a rustic feel. Pair it with sour cream or guacamole on the side. This adds creaminess and flavor to each bite. Pro Tips Choose Lean Meat: Opt for lean ground beef to reduce excess grease in the casserole, making it healthier without sacrificing flavor. Customize Your Veggies: Feel free to add or substitute any of your favorite vegetables, such as zucchini or mushrooms, to enhance the nutritional value and flavor profile. Layering Cheese: For an extra cheesy experience, mix some of the cheddar cheese into the beef mixture before topping with tater tots. Make It Spicy: If you enjoy heat, consider adding diced jalapeños or a dash of hot sauce to the beef mixture for an extra kick. {{image_2}} You can swap the ground beef for other meats. Try ground turkey or chicken. These options are leaner and cook well. If you want a meatless dish, use lentils or quinoa. They add protein and texture. You can also use canned chickpeas if you prefer. They work great in casseroles too. Boost the flavor with spices. Add a pinch of cayenne for heat. You can also toss in some extra veggies. Try zucchini, carrots, or even spinach. They add nutrients and color to the dish. For cheese, cheddar is delicious, but feel free to mix it up. Monterey Jack or pepper jack add creaminess and a kick. You can even try a blend of different cheeses for a tasty twist. To keep your Cowboy Casserole fresh, cool it down first. Then, transfer it to an airtight container. Store it in the fridge for up to three days. Ensure you cover it well to prevent drying out. If you want to keep it longer, freezing works well. Portion the casserole into smaller containers. This way, you can thaw only what you need. It will stay good in the freezer for up to three months. When ready to eat, thaw it in the fridge overnight before reheating. Reheating Cowboy Casserole can be easy and tasty. The best way is to use the oven. Preheat your oven to 350°F (175°C). Place the casserole in an oven-safe dish and cover it with foil. Bake for about 20-25 minutes until it’s hot. You can also use the microwave for quick reheating. Place a portion on a microwave-safe plate. Cover it with a paper towel to keep moisture in. Heat it for 1-2 minutes, checking often. Stir it halfway through to ensure even heating. Either way, you will enjoy your flavorful meal again! What is Cowboy Casserole? Cowboy Casserole is a hearty dish. It combines ground beef, beans, and corn. You top it with cheese and tater tots. This meal is great for families. It's filling, tasty, and easy to make. Can I make this recipe ahead of time? Yes, you can prepare this dish in advance. Cook the beef and veggies, then layer them in a dish. Cover it and store it in the fridge. Just bake it when you're ready. It saves time on busy nights. What to serve with Cowboy Casserole? This casserole pairs well with simple sides. Try a fresh salad or garlic bread. You can also serve it with sour cream or guacamole. These add creaminess and flavor. Can I use fresh corn instead of frozen? Yes, fresh corn works great in this recipe. Just cook it until tender before adding. It adds a nice crunch and sweetness. Use about one cup of fresh corn kernels. What can I use instead of tater tots? If you want a swap for tater tots, try mashed potatoes. Spread them on top for a creamy finish. You can also use tortilla chips for a different crunch. Each option gives the casserole a fun twist. The Cowboy Casserole combines ground beef, beans, and veggies for a hearty meal. You learned how to prep ingredients, cook, and assemble the dish easily. I shared tips for great flavor and texture. Remember to store leftovers properly for future enjoyment. Explore variations to make it your own. This dish is not just filling; it’s fun to make! Enjoy it with family and friends. Keep experimenting and create your own favorite versions of this comforting casserole.

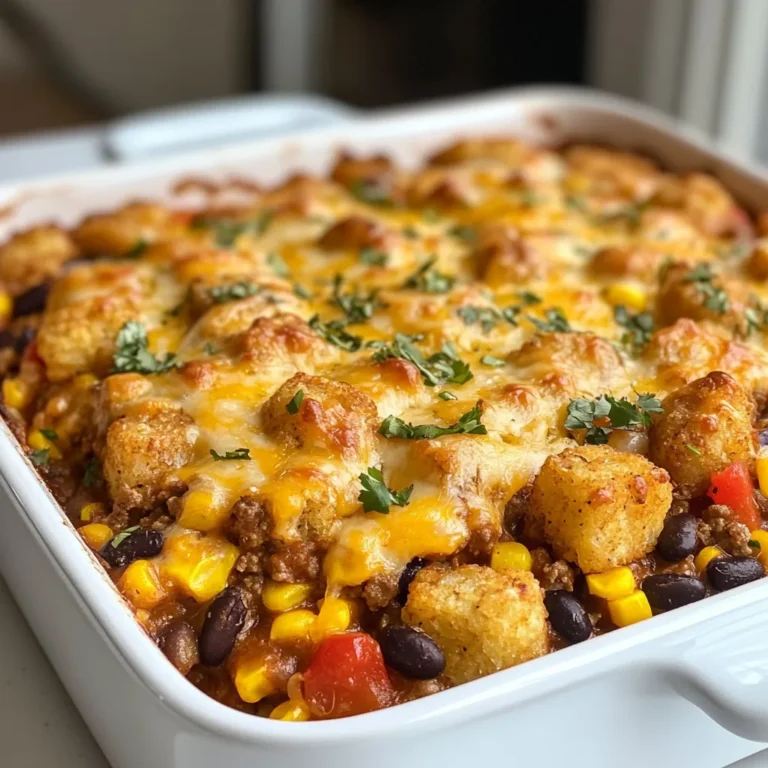
Cowboy Casserole Hearty Family Meal for Everyone

- 1 lb boneless, skinless chicken thighs, cut into bite-sized pieces - ½ lb smoked sausage, sliced (andouille preferred) - 1 large onion, chopped - 1 green bell pepper, chopped - 2 celery stalks, chopped - 3 cloves garlic, minced - 2 tablespoons Cajun seasoning and 1 teaspoon thyme - 1 can (14.5 oz) diced tomatoes, undrained - 4 cups chicken broth - 2 tablespoons olive oil, salt, and pepper to taste - 1 cup green onions, sliced - Fresh parsley, chopped Cajun Chicken and Sausage Jambalaya is a dish full of bold flavors. It starts with juicy chicken thighs and smoky sausage, bringing great texture. The holy trinity of Cajun cooking—onions, bell peppers, and celery—adds depth to the dish. For seasonings, I use Cajun seasoning and thyme for warmth and aroma. Diced tomatoes give a nice tart touch. Chicken broth brings everything together, ensuring the rice cooks perfectly. Garnish your jambalaya with green onions for a fresh crunch and parsley for color. These finishing touches make your dish pop and look beautiful. {{ingredient_image_1}} 1. Start by heating 2 tablespoons of olive oil in a large pot over medium heat. 2. Add 1 pound of boneless, skinless chicken thighs and ½ pound of sliced smoked sausage. 3. Sauté the meat until it gets a nice brown crust, about 5 to 7 minutes. Remove the meat and set it aside. 4. In the same pot, add 1 large chopped onion, 1 chopped green bell pepper, and 2 chopped celery stalks. 5. Cook these veggies, known as the holy trinity, for about 5 minutes. They should soften nicely. 6. Add 3 minced garlic cloves and cook for another minute. This will fill your kitchen with amazing aromas. 1. Stir in 2 tablespoons of Cajun seasoning, 1 teaspoon of thyme, and 1 bay leaf. Cook for 1 minute to let the spices bloom. 2. Next, add 1 can of diced tomatoes (14.5 oz, undrained) and stir well. Cook for about 3 minutes. This helps the flavors mix. 3. Pour in 4 cups of chicken broth and bring it all to a gentle boil. 4. Add 1 ½ cups of long-grain rice into the pot. Then, return the browned chicken and sausage back in. Stir it all together. 1. Lower the heat to a simmer and cover the pot. Let it cook for 20 to 25 minutes. Do not lift the lid, as the steam helps cook the rice. 2. When the time is up, carefully take out the bay leaf. Fluff the jambalaya with a fork to separate the rice. 3. Season with salt and pepper to taste. Your dish is now ready to serve. Garnish with sliced green onions and chopped parsley for a fresh touch. Browning the meats is key. This step brings out rich flavors. Cook the chicken and sausage until they get a golden crust. This caramelization adds depth to the dish. After browning, remove them from the pot. This lets the veggies cook in the flavorful drippings. Allowing flavors to meld is vital. Once all ingredients are in the pot, let them simmer. This step helps the rice absorb all the delicious juices. The longer they cook together, the better the taste. Avoid lifting the lid while cooking. Lifting the lid lets the steam escape. This steam is essential for cooking the rice evenly. Keep the pot covered to ensure perfect results. Trust the process; the rice will cook beautifully. Fluffing the rice is an important step. After cooking, use a fork to fluff the jambalaya. This helps separate the grains and prevents clumping. Fluffed rice makes for a better presentation. Pair your jambalaya with side dishes. A simple green salad complements the rich flavors well. Cornbread or crusty bread is also a great choice. These sides help balance the meal. Consider alternative garnishes for a fresh touch. Sliced green onions add color and crunch. Fresh parsley brings brightness and flavor. Experiment with different garnishes to find your favorite. Pro Tips Brown the Meat: Ensure the chicken and sausage are browned well; this adds depth of flavor to your jambalaya. Use Quality Sausage: For the best results, use high-quality andouille sausage; it enhances the dish's authenticity. Don't Lift the Lid: Keep the lid on while the jambalaya simmers; this traps steam and ensures the rice cooks evenly. Custom Spice Level: Adjust the Cajun seasoning to your taste; feel free to add more for extra heat or less for milder flavor. {{image_2}} You can switch up the proteins in jambalaya. Shrimp works great, adding a nice touch. If you prefer a vegetarian dish, use beans or tofu instead. These options keep the meal tasty and fun. For vegetables, you can try carrots or okra. Carrots add a sweet crunch, while okra brings a unique texture. Both choices offer new flavors and colors to your dish. Want more heat? Increase the Cajun seasoning. Just add a bit more than the recipe calls for. This simple change will turn up the spice level. You can also add hot sauce or fresh pepper to the mix. Just a little goes a long way. This makes it easy to control the heat in your jambalaya. If you're gluten-free, use rice and check your sausage. Many brands offer gluten-free options. This keeps your jambalaya safe for everyone. For low-carb or keto-friendly meals, swap rice for cauliflower rice. This keeps the dish light and healthy. You can still enjoy the rich flavors without the carbs. To store leftovers, let the jambalaya cool first. Once cool, place it in an airtight container. Make sure to seal it well to keep out air. Using glass or plastic containers works best. These containers help keep the dish fresh and tasty. To freeze jambalaya, first cool it completely. Then, transfer it to a freezer-safe container. Leave some space at the top for expansion. Label the container with the date. When ready to eat, take it out and thaw it in the fridge overnight. Reheat it on the stove or in the microwave. Stir it well to heat evenly. In the fridge, jambalaya lasts about three to four days. In the freezer, it stays good for up to three months. Check for signs of spoilage before eating. If it has an off smell or strange color, throw it away. Always trust your senses to keep meals safe. Jambalaya comes from Louisiana, blending Spanish, French, and West African flavors. It started in the 18th century. The dish uses local ingredients like rice, meat, and spices. It shows the rich culture of the region. People often make it during festivals or family gatherings. Jambalaya is a symbol of unity in Louisiana’s diverse communities. Yes, you can make Jambalaya ahead of time. Prepare it and let it cool. Then, store it in an airtight container. Refrigerate it for up to three days. You can also freeze it for longer storage. To reheat, warm it on the stove or in the microwave. Add a splash of broth if it seems dry. To reduce the heat in Jambalaya, use less Cajun seasoning. You can also remove spicy sausage and replace it with a mild one. Adding more rice can help balance the spices. Another option is to include more diced tomatoes. This will dilute the heat and add flavor. Jambalaya pairs well with several sides. Try serving it with cornbread or a green salad. You can also have coleslaw for a crunchy contrast. For drinks, sweet tea or a light beer works great. These sides enhance the meal and make it even more enjoyable. You learned how to create a delicious Cajun Chicken and Sausage Jambalaya. By using key ingredients like chicken, sausage, and the holy trinity of vegetables, you can build strong flavors. Simmering the dish brings everything together beautifully. Remember to adjust spice levels and try different proteins or veggies. Store leftovers properly for future meals. This meal is versatile and packed with rich history. Enjoy making your own jambalaya and impress your family with this delightful dish!

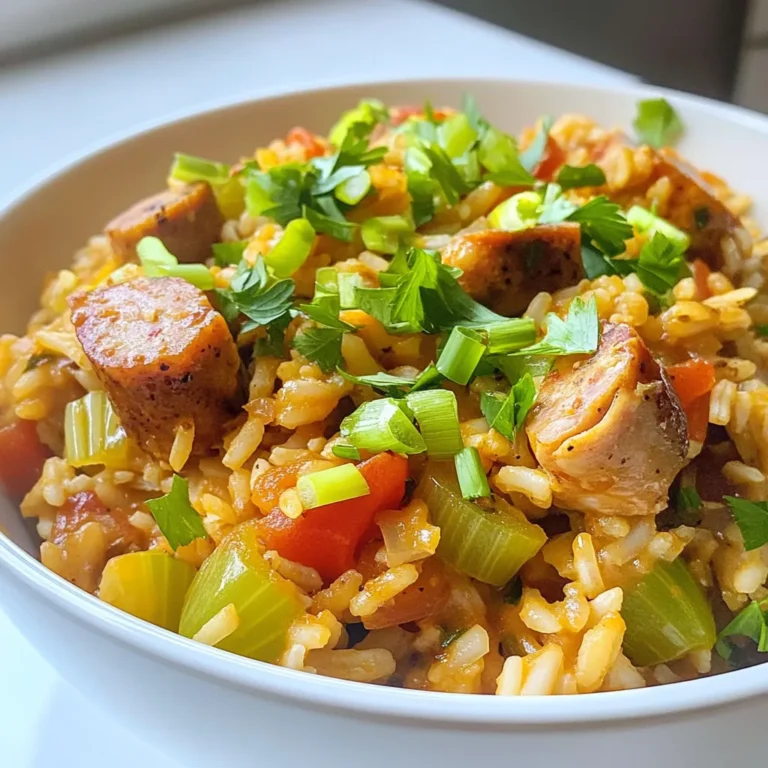
Cajun Chicken and Sausage Jambalaya Flavorful Feast

- 4 boneless, skinless chicken thighs - 1 red bell pepper, sliced - 1 yellow bell pepper, sliced - 1 zucchini, sliced - 1 red onion, cut into wedges - 2 tablespoons olive oil - 1 teaspoon garlic powder - 1 teaspoon smoked paprika - 1 teaspoon dried oregano - Salt and pepper to taste - Fresh parsley, chopped Air fryer chicken and veggies bring joy to dinner. First, we need chicken thighs. They are juicy and cook well in the air fryer. Choose fresh, boneless, skinless thighs for the best taste. Next, let’s add colorful veggies. I love using red and yellow bell peppers for sweetness. Zucchini adds a nice crunch, and red onion gives depth to the flavor. Together, they create a beautiful plate. For flavor, we use olive oil. It helps the spices stick to the chicken and veggies. Garlic powder adds a nice kick. Smoked paprika gives a warm, smoky flavor. Dried oregano brings an Italian touch. Don’t forget salt and pepper to enhance all the tastes. Finally, we garnish with fresh parsley. It adds a pop of color and freshness. This simple herb brightens the whole dish. Enjoy these delicious flavors in every bite! {{ingredient_image_1}} To start, take 4 boneless, skinless chicken thighs. Place them in a large bowl. Add 2 tablespoons of olive oil. Next, sprinkle in 1 teaspoon of garlic powder, 1 teaspoon of smoked paprika, and 1 teaspoon of dried oregano. Season with salt and pepper to taste. Mix well so that the chicken is fully coated. Let it marinate for at least 15 minutes. This step helps the chicken soak up all those great flavors. While the chicken marinates, let’s prep the veggies. Grab a second bowl and toss in 1 sliced red bell pepper, 1 sliced yellow bell pepper, 1 sliced zucchini, and wedges of 1 red onion. Drizzle a little olive oil over the veggies and add salt and pepper. Mix them well to coat all the pieces evenly. This adds flavor and makes them delicious when cooked. Now, it’s time to cook! Preheat your air fryer to 400°F (200°C). This usually takes about 5 minutes. Once it’s hot, place the marinated chicken thighs in the basket. Spread them out in a single layer. Cook the chicken for 10 minutes. After this time, carefully open the air fryer and add the seasoned veggies around the chicken. Cook everything for another 10-12 minutes. Shake the basket halfway through. This helps everything cook evenly. To know if your meal is done, check the chicken’s internal temperature. It should reach 165°F (75°C) to be safe to eat. The veggies should be tender and have a slight char. This means they are perfectly cooked and ready to enjoy. For the best flavor, marinate the chicken for at least 15 minutes. This helps the spices soak in. You can also marinate it longer, up to two hours, if you have time. Just keep it in the fridge. This extra time allows the chicken to get even more tasty. To ensure even cooking in the air fryer, place the chicken in a single layer. Avoid stacking. This allows hot air to flow around the chicken and veggies. Shake the basket halfway through cooking for best results. This helps everything cook evenly and get that nice crispy texture. To make your dish look appealing, serve the chicken and veggies on a large platter. Drizzle a bit of extra olive oil on top. Add a sprinkle of fresh parsley for color. This adds a nice touch and makes the dish look gourmet. You can also arrange the veggies in a colorful pattern to catch the eye. Pro Tips Marination Matters: Allowing the chicken to marinate for at least 15 minutes enhances the flavor profile. For even better results, marinate it for a few hours or overnight in the refrigerator. Veggie Variety: Feel free to mix and match your vegetables based on what's in season or what you have on hand. Broccoli, asparagus, or carrots can add even more color and nutrients. Don’t Overcrowd: When cooking, make sure not to overcrowd the air fryer basket. This allows for even cooking and helps achieve that perfect crispiness. Check Temperature: Always use a meat thermometer to ensure the chicken reaches an internal temperature of 165°F (75°C) for safety and the best texture. {{image_2}} You can switch up the protein in this dish. Chicken thighs are great, but chicken breast works too. If you prefer something plant-based, tofu is an excellent option. Just press the tofu to remove extra water. Cut it into cubes and marinate like the chicken. It absorbs flavors well and cooks nicely in the air fryer. Feel free to use different vegetables based on what's in season. Broccoli, carrots, and asparagus all make great additions. If you like greens, try adding snap peas or green beans. The air fryer brings out the natural sweetness of vegetables. Mixing colors adds fun to your plate and boosts nutrients. Experiment with spices and marinades. Try a zesty lemon herb mix with lemon juice, thyme, and rosemary. If you enjoy heat, add some chili powder or cayenne pepper. A honey mustard glaze can give your chicken a sweet twist. The best part? You can adjust flavors based on your mood or what you have on hand. To store leftovers, let the chicken and veggies cool down first. Place them in an airtight container. This helps keep them fresh. You can store them in the fridge for up to three days. If you want to enjoy them later, make sure to seal the container tightly. If you want to freeze portions, let the dish cool completely. Divide it into smaller, freezer-safe containers. You can use freezer bags too. Remove as much air as possible before sealing. This prevents freezer burn. The chicken and veggies can last up to three months in the freezer. Remember to label the containers with the date. To reheat air fryer chicken and veggies, use the air fryer for best results. Set it to 350°F (175°C) and heat for about 5-8 minutes. This method keeps the chicken crispy. You can also use a microwave if you're in a hurry. Just heat it on medium power for 2-3 minutes. Make sure everything is hot before serving. Cooking chicken thighs in an air fryer usually takes about 20 minutes. Start by cooking the chicken for 10 minutes at 400°F (200°C). After this, carefully add veggies and cook for another 10 to 12 minutes. Always check that the chicken reaches an internal temperature of 165°F (75°C) before serving. This step ensures the chicken is safe to eat and juicy. Yes, you can cook frozen chicken thighs in the air fryer. Place the frozen thighs in the basket. Cook them for about 25 to 30 minutes at 400°F (200°C). Flip halfway through. Make sure to check the internal temperature. It should reach 165°F (75°C) for safety. Air fryer chicken and veggies go well with many sides. Here are some ideas: - Rice: White, brown, or wild rice adds a nice base. - Quinoa: This nutty grain is a healthy option. - Salad: A fresh green salad can add crunch. - Couscous: This fluffy grain soaks up flavors nicely. - Bread: Garlic bread or crusty rolls can be a great addition. These sides enhance the main dish and create a complete meal. Enjoy! In this post, I covered everything you need for air fryer chicken and veggies. We discussed the main ingredients, useful tips, and step-by-step instructions for an easy meal. I shared various protein and vegetable options for flexibility and storage advice to keep leftovers fresh. Cooking can be fun and simple. With these insights, you can enjoy delicious meals every time. Experiment and make this dish your own, as it can fit any taste or preference. Happy cooking!

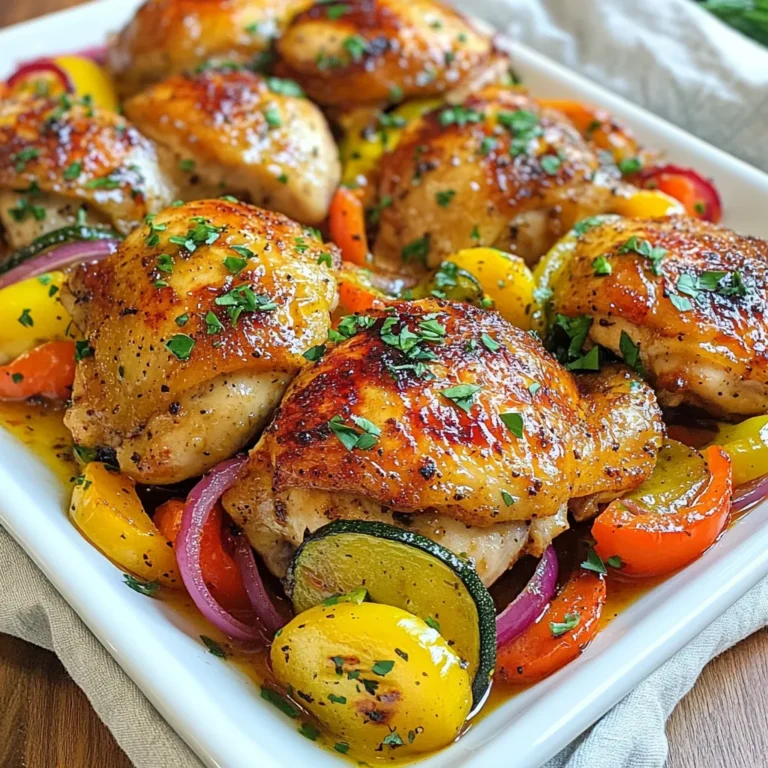
Air Fryer Chicken and Veggies Flavorful Dinner Dish

PREV 1 … 10 11 12 … 57 NEXT
meal twig

explore

DessertsDinnerAppetizersDrinks

Our Policies

  • Cookie Policy
  • Copyright Policy
  • Disclaimer
  • GDPR Policy
  • Terms Of Use
Back to Top
  • About
  • Contact Us
  • Privacy Policy
© 2025 meal twig