WANT TO SAVE THIS RECIPE?
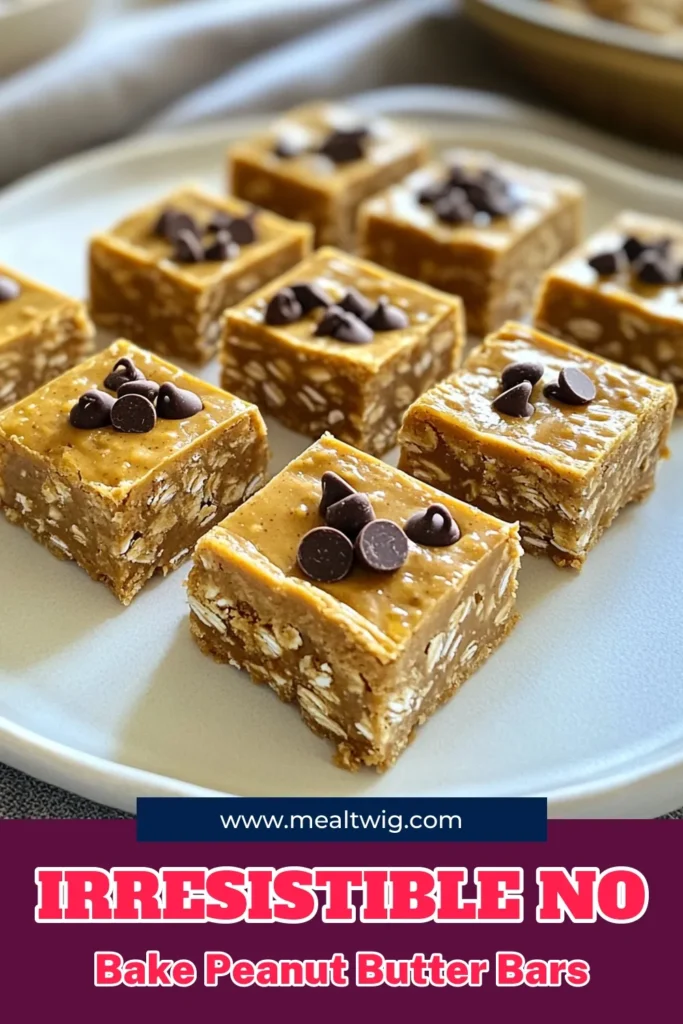
Craving a quick snack that’s both easy and healthy? I’ve got just the treat for you: No Bake Peanut Butter Bars! With just a handful of wholesome ingredients, you can whip up a delicious snack in no time. Perfect for busy days or a post-workout boost, these bars are simple to make and loaded with flavor. Let’s dive into this easy recipe that will satisfy your sweet tooth without the guilt!

Why I Love This Recipe
- Easy to Make: This recipe requires no baking, making it a quick and simple treat to whip up anytime.
- Nutritious Ingredients: Packed with protein from peanut butter and protein powder, these bars are a guilt-free snack.
- Customizable: You can easily substitute ingredients like honey for maple syrup, or add nuts and seeds for extra crunch.
- Great for Meal Prep: These bars can be made in advance and stored in the fridge or freezer, making them perfect for busy days.
Ingredients
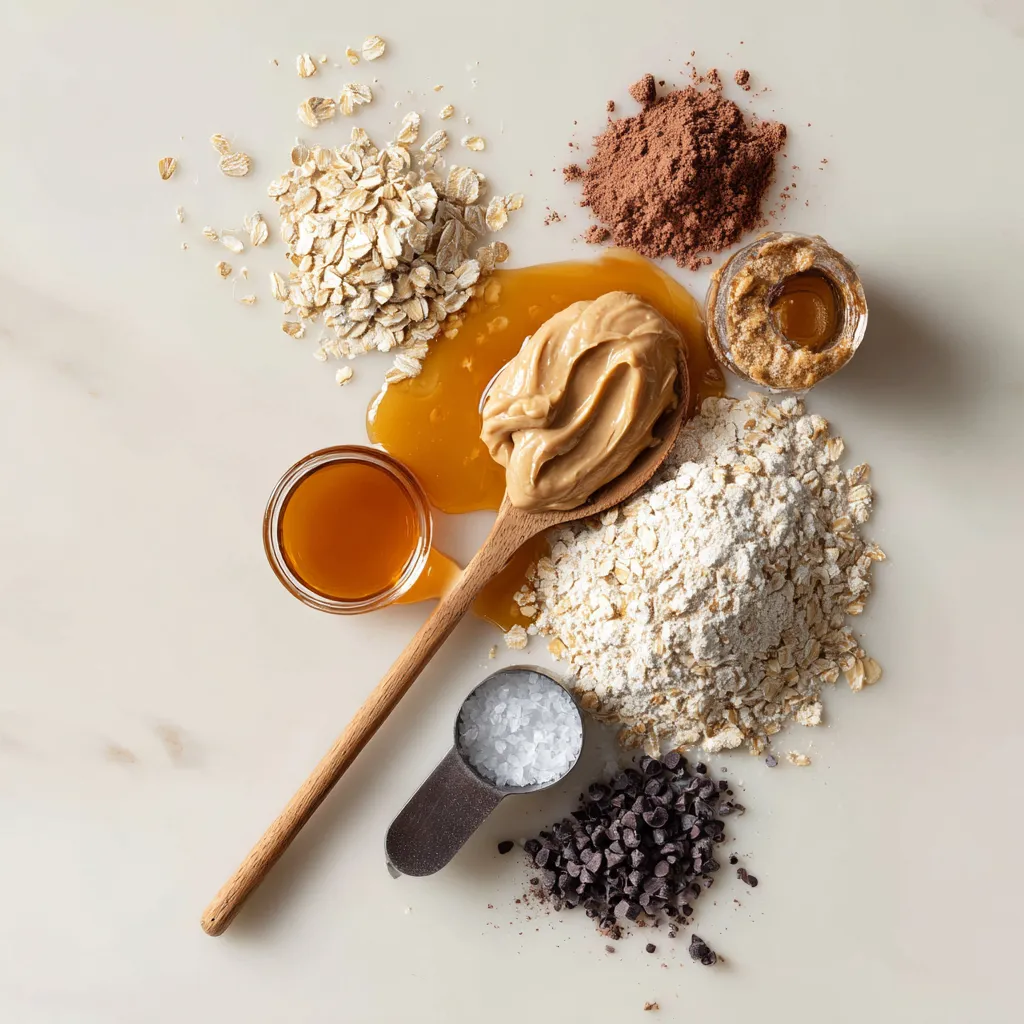
List of Ingredients
– 1 cup creamy peanut butter
– 1/2 cup honey or maple syrup
– 1 cup rolled oats
– 1/2 cup vanilla protein powder (or almond flour)
– 1/4 cup dark chocolate chips (dairy-free if preferred)
– 1/2 teaspoon vanilla extract
– Pinch of salt
To make no bake peanut butter bars, gather your ingredients. Start with creamy peanut butter, which gives the bars their rich taste. You can use honey or maple syrup for sweetness. Rolled oats add texture and fiber. I often use vanilla protein powder, but almond flour works too. Dark chocolate chips add a touch of indulgence. A splash of vanilla extract and a pinch of salt enhance the flavors.
Each ingredient plays a key role. The peanut butter binds everything together. The sweetener balances the taste. Oats provide a hearty base. Protein powder boosts nutrition, making these bars a great snack. Chocolate chips bring joy in every bite. Vanilla and salt elevate the overall flavor.
When you have everything ready, you can mix and create these tasty bars quickly. Enjoy the process, and get ready for a delicious treat!
Step-by-Step Instructions
Preparation Steps
Mixing the Peanut Butter and Sweetener
First, grab a medium bowl. Add 1 cup of creamy peanut butter. Pour in 1/2 cup of honey or maple syrup. Stir them well. You want a smooth mix with no lumps.
Adding Flavor Enhancements
Next, add 1/2 teaspoon of vanilla extract. Toss in a pinch of salt. Mix again until everything is combined. These flavors make the bars taste great!
Combining Dry Ingredients with Peanut Butter Mixture
Now, slowly add 1 cup of rolled oats and 1/2 cup of vanilla protein powder or almond flour. Stir until you have a sticky dough. Make sure no dry bits remain.
Preparing the Baking Dish
Line an 8×8 inch square baking dish with parchment paper. Leave some paper hanging over the sides. This helps when you remove the bars later.
Pressing and Smoothing the Mixture
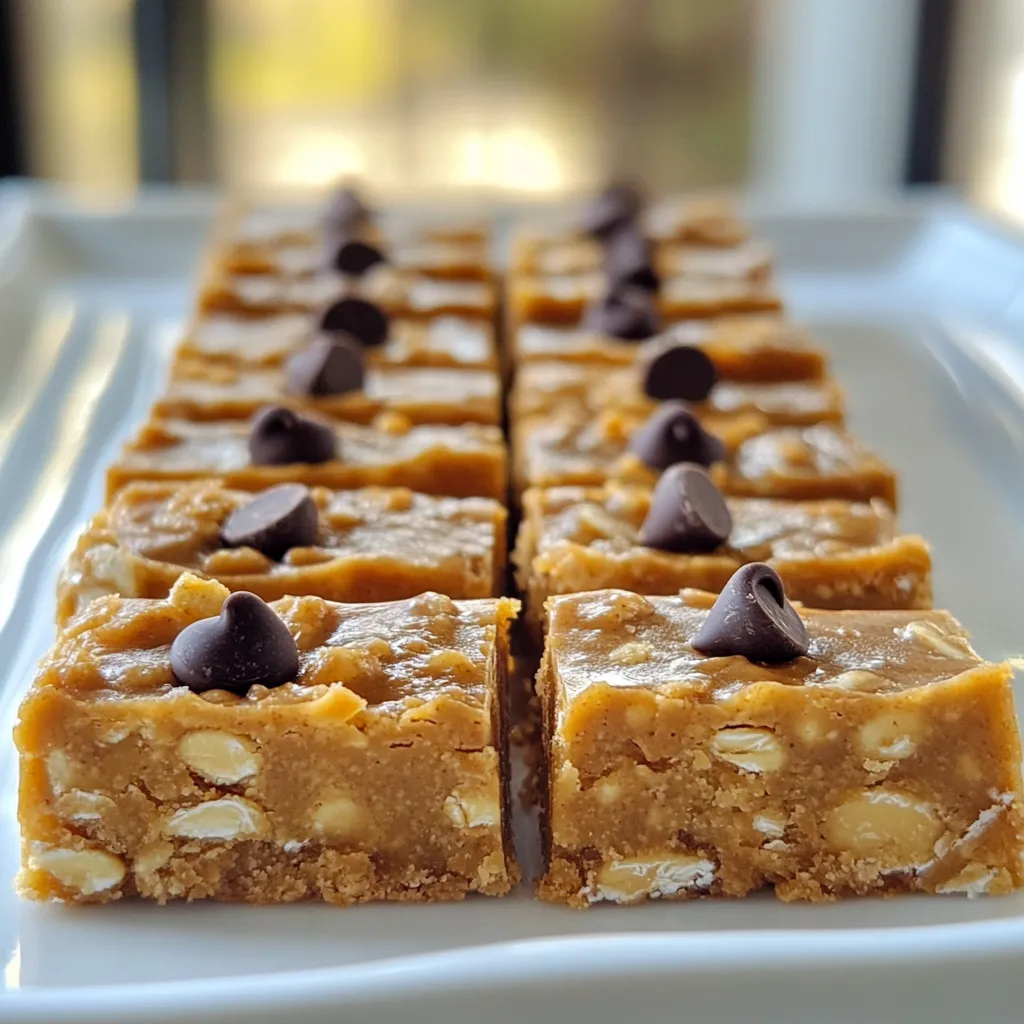
Take the peanut butter mixture and pour it into the dish. Use a spatula to spread it out evenly. Press down firmly to fill the corners. Smooth the top for a nice finish.
Refrigeration Time
Place the dish in the fridge for at least 1 hour. This helps the bars set up. After they are firm, lift the parchment paper out. Cut the bars into squares or rectangles. Enjoy your tasty no-bake peanut butter bars!
Tips & Tricks
Best Practices for Texture
Importance of Mixing Well
Mixing the peanut butter and honey is key. You want a smooth blend. If you skip this step, the bars might be dry. Take your time and blend until it looks creamy. This helps the bars hold together.
How to Achieve the Right Consistency
To get the right texture, add oats and protein powder slowly. Mix until everything sticks together. If it feels too dry, add a bit more honey or maple syrup. If too wet, add more oats or protein powder. You want a sticky dough that you can press into the dish.
Customization Suggestions
Substituting Honey with Maple Syrup
You can swap honey for maple syrup. This change gives a nice flavor twist. Maple syrup is a great vegan option too. Use the same amount as honey for best results.
Using Different Protein Powders or Flours
Feel free to use different protein powders or flours. Almond flour adds a nutty taste. You can also try pea protein for a dairy-free choice. Use what you like or have on hand! This flexibility makes the bars your own.
Pro Tips
- Use Natural Nut Butter: Opt for natural peanut butter without added sugars or oils for a healthier bar.
- Sweetness Adjustment: Adjust the sweetness by using less honey or maple syrup according to your taste preference.
- Protein Powder Variations: Feel free to experiment with different protein powders, like chocolate or plant-based options, for varied flavors.
- Storage Tips: For longer shelf life, freeze the bars and separate layers with parchment paper to prevent sticking.
Variations
Healthy Add-ins
You can make your no bake peanut butter bars even better with add-ins. Here are some great options:
– Nuts and Seeds Options: Try adding chopped almonds, walnuts, or sunflower seeds. These add crunch and healthy fats. You can mix in about 1/2 cup of your favorite nuts or seeds for extra flavor and texture.
– Dried Fruits to Consider: Dried fruits like raisins, cranberries, or apricots can add sweetness. Chop them up and mix in about 1/3 cup. This gives the bars a chewy texture and more nutrients.
Chocolate Alternatives
Chocolate can change the taste of your bars. Here are some choices:
– Using Milk Chocolate vs. Dark Chocolate: If you love sweeter bars, use milk chocolate chips. They make the bars taste sweeter. Dark chocolate adds a rich flavor and is less sweet. You can choose based on your taste.
– Carob Chips for a Dairy-Free Variation: For a dairy-free option, try carob chips. They taste similar but are not chocolate. Carob is also naturally sweet and has less fat. You can use the same amount as chocolate chips in the recipe.
These variations help you customize your bars to fit your taste and health goals. Enjoy experimenting!
Storage Info
Optimal Storage Conditions
To keep your no-bake peanut butter bars fresh, store them in the refrigerator. Place the bars in an airtight container. This helps prevent them from drying out. You can also wrap them in plastic wrap for extra protection.
If you want to store them longer, freezing is a great option. Cut the bars into squares first. Then, wrap each piece tightly in plastic wrap. Place the wrapped bars in a freezer-safe bag. This keeps them fresh for several months.
Shelf Life of Bars
In the refrigerator, these bars last about a week. Make sure to check for any signs of spoilage, like a change in smell or texture.
If you freeze the bars, they can last for up to three months. To enjoy them, just take out a few pieces and let them thaw in the fridge overnight. This way, you always have a tasty treat ready to go!
FAQs
Can I use crunchy peanut butter instead of creamy?
Yes, you can use crunchy peanut butter. It adds extra texture and flavor. The bars will still hold together well. Just mix it like creamy peanut butter. Enjoy the added crunch in each bite!
How can I make these bars vegan?
To make these bars vegan, you need to substitute honey with maple syrup. This keeps the sweet taste while staying plant-based. Also, check that your chocolate chips are dairy-free. These simple swaps make a tasty vegan treat!
What is the nutritional information for No Bake Peanut Butter Bars?
Each bar has about 150 calories. It includes 6g of protein, 8g of fat, and 15g of carbs. This makes it a good snack option. The bars are rich in protein and healthy fats. They provide lasting energy without refined sugars.
You now have all the tools to make delicious no-bake peanut butter bars. We covered the key ingredients, easy steps, and useful tips to ensure great texture. You can also customize the bars in many ways to suit your taste. Store them well for a tasty snack anytime. Enjoy making your own treats at home! Now go get your ingredients and start bakin
No Bake Peanut Butter Bars
Enjoy these delicious, no-bake peanut butter bars as a quick snack or a protein-rich treat!
Prep Time 15 minutes mins
Total Time 1 hour hr 15 minutes mins
Course Dessert
Cuisine American
Servings 12
Calories 150 kcal
- 1 cup creamy peanut butter
- 1/2 cup honey or maple syrup
- 1 cup rolled oats
- 1/2 cup vanilla protein powder or almond flour
- 1/4 cup dark chocolate chips
- 1/2 teaspoon vanilla extract
- 1 pinch salt
In a medium-sized mixing bowl, combine the creamy peanut butter and honey (or maple syrup) until well blended.
Add the vanilla extract and pinch of salt to the mixture; stir until completely combined.
Gradually mix in the rolled oats and protein powder (or almond flour) until everything is evenly distributed and forms a sticky dough.
Fold in the dark chocolate chips into the mixture.
Line an 8x8 inch square baking dish with parchment paper, leaving some overhang for easy removal.
Press the peanut butter mixture into the prepared baking dish, spreading it evenly to fill the corners. Use a spatula to smooth the top.
Refrigerate the bars for at least 1 hour or until firm.
Once set, lift the parchment paper out of the dish and cut the bars into squares or rectangles.
Store in an airtight container in the fridge for up to a week or freeze for longer storage.
Store in an airtight container in the fridge for up to a week or freeze for longer storage.
Keyword no bake, peanut butter, protein bars, snack
WANT TO SAVE THIS RECIPE?