Flavorful White Bean Chicken Chili Easy to Make

WANT TO SAVE THIS RECIPE?

Are you craving a warm, hearty dish that’s easy to make? My Flavorful White Bean Chicken Chili is just what you need! This simple recipe combines tender chicken, creamy white beans, and spices for a meal full of delight. Whether you’re cooking for family or friends, everyone will love the rich flavors. Let’s dive into my easy, step-by-step guide to making this delicious chili. You’ll be amazed at how quickly you can whip it up!

To make this dish, you need some key ingredients: - 1 lb boneless, skinless chicken breasts, diced - 2 cans (15 oz each) white beans (cannellini or navy), drained and rinsed - 1 medium onion, finely chopped - 3 cloves garlic, minced - 1 green bell pepper, diced - 2 cups low-sodium chicken broth - 1 cup coconut milk - 1 tablespoon olive oil - 1 tablespoon ground cumin - 1 teaspoon chili powder - 1/2 teaspoon smoked paprika - Salt and pepper, to taste These ingredients blend together to create a smooth and tasty chili. The chicken provides protein, while the white beans add fiber and heartiness. Coconut milk makes the chili creamy and rich. Garnishes add fun and flavor: - Fresh cilantro, for garnish - Sliced jalapeños, for serving (optional) - Lime wedges, for serving These toppings enhance the dish. Cilantro gives a fresh taste, while lime adds a zesty kick. If you like heat, jalapeños bring that extra spice. You can swap some ingredients if needed: - Use chicken thighs instead of breasts for a juicier bite. - Try vegetable broth instead of chicken broth for a vegetarian version. - Coconut milk can be replaced with heavy cream for a different texture. These substitutions still keep the dish tasty. Feel free to adapt the recipe to fit your pantry or dietary needs. {{ingredient_image_1}} Start by gathering your ingredients. You need chicken, beans, onion, garlic, and bell pepper. Heat one tablespoon of olive oil in a large pot over medium heat. Add the chopped onion and green bell pepper. Sauté them for about five minutes, until they soften. This step builds a strong base for your chili. Stir in three minced garlic cloves, one tablespoon of ground cumin, one teaspoon of chili powder, and half a teaspoon of smoked paprika. Cook these spices for one to two minutes. This will bring out their flavors. Next, add one pound of diced chicken breast to the pot. Cook it for five to seven minutes. Stir the chicken often to ensure it cooks evenly. You want to see no pink in the chicken. Once it’s cooked, pour in two cups of low-sodium chicken broth. Increase the heat to bring the mixture to a boil. After it boils, reduce the heat to low. Let it simmer for ten to fifteen minutes. This helps the flavors blend well. Now, it’s time to add the beans and coconut milk. Stir in two cans of drained and rinsed white beans. Then, add one cup of coconut milk for creaminess. Mix everything well and let it simmer for another ten minutes. This final simmer melds all the flavors together. Season the chili with salt and pepper to taste. If you want more heat, add sliced jalapeños. Remove the pot from heat and let it rest for a few minutes. This makes serving easier. To get a creamy texture in your chili, coconut milk is key. I use one cup of coconut milk. It adds a rich, velvety feel. If you want it creamier, you can add a bit more. Blend some of the white beans ahead of time. This helps thicken the chili without adding extra fat. Just mash half a can of beans before adding them into the pot. It works wonders. Spiciness is all about your taste. If you like it mild, skip the jalapeños. For a medium kick, add one or two sliced jalapeños when cooking. For more heat, use a pinch of cayenne pepper. You can also add a few dashes of hot sauce at the end. Always taste before serving to ensure it meets your heat preference. Using an electric pressure cooker can save time. After sautéing your veggies and chicken, add all the ingredients at once. Seal the lid and cook on high for about 10 minutes. Make sure to let the steam release naturally for best results. This method keeps the chili moist and flavorful while speeding up the cooking process. Pro Tips Cook the Chicken Thoroughly: Ensure the chicken is cooked all the way through to avoid any food safety issues. It should reach an internal temperature of 165°F (75°C). Adjust the Spice Level: If you prefer a milder chili, leave out the jalapeños or use mild chili powder. For extra heat, consider adding some chopped serrano peppers. Use Fresh Herbs: Garnishing with fresh cilantro at the end enhances the flavor and adds a pop of color. You can also try adding a sprinkle of fresh lime juice for brightness. Make it Ahead: This chili tastes even better the next day! Make a big batch and store leftovers in the fridge for up to 3 days or freeze for later use. {{image_2}} You can make this chili vegetarian. Swap the chicken for tofu or tempeh. Both options absorb flavors well. Use vegetable broth instead of chicken broth. This keeps the taste rich and hearty. Add a splash of lemon juice for brightness. You can still enjoy the creamy texture with coconut milk. Feel free to add more veggies. Zucchini, carrots, or corn work great in this chili. Chop them into small pieces to cook evenly. Add them at the same time as the chicken. This way, they soften and enhance the dish. You can also use frozen veggies for ease. Just toss them in the pot and let them heat through. Want more heat? You have options! Add sliced jalapeños during cooking. You can also sprinkle in red pepper flakes. For a milder version, use less chili powder. Adjusting the spice lets you personalize each bowl. Your guests will love the ability to choose their heat level. To store your white bean chicken chili, let it cool first. Once cool, transfer it to an airtight container. Make sure to seal it well. This helps keep the chili fresh and tasty. Store it in the fridge if you plan to eat it within a few days. Chili can last in the fridge for about 3 to 4 days. When you’re ready to enjoy your chili again, reheat it on the stove. Pour the chili into a pot over medium heat. Stir it often to warm it evenly. You can also use the microwave. Place the chili in a microwave-safe bowl and cover it. Heat in short bursts, stirring in between until hot. Check the temperature before serving to ensure it’s safe to eat. If you have extra chili, freezing is a great option. Use freezer-safe containers or resealable bags. Make sure to leave some space for expansion. Label the bags with the date for your reference. Chili can stay fresh in the freezer for up to 3 months. When you want to eat it, thaw it overnight in the fridge. Then, reheat it on the stove or in the microwave as noted above. Enjoy your warm chili anytime! Yes, you can use canned chicken. Drain the liquid from the can first. Canned chicken saves time and still tastes great. Just add it in with the beans and coconut milk. This makes your chili quick and easy. White Bean Chicken Chili lasts about 3 to 4 days in the fridge. Store it in a sealed container for best results. Make sure it cools before putting it away. To enjoy it longer, freeze it. Freezing keeps it fresh for up to 3 months. You can serve it with cornbread or tortilla chips for a delightful crunch. Lime wedges add a zesty kick. Fresh cilantro brings a fresh taste. If you like heat, try sliced jalapeños on top. This makes every bowl even better! This blog post covered how to make tasty White Bean Chicken Chili. You learned the main ingredients, optional garnishes, and how to swap items. I shared steps for prepping, cooking, and finishing your chili. You also received tips for creaminess, spice, and cooking times. In the end, experiment with variations to find what you love. Store extras well, and enjoy every bowl. Cooking can bring joy and warmth to your table.

Why I Love This Recipe

  1. Comforting Flavors: This creamy chili is packed with warm spices and a smooth texture, making it a perfect dish for cozy nights.
  2. Easy to Prepare:
  3. Healthy Ingredients: Loaded with protein from chicken and fiber from white beans, this chili is a nutritious choice for the whole family.
  4. Customizable: You can easily adjust the spice level and add toppings like jalapeños or avocado to suit your personal taste.

Ingredients

Main Ingredients for White Bean Chicken Chili

To make this dish, you need some key ingredients:

– 1 lb boneless, skinless chicken breasts, diced

– 2 cans (15 oz each) white beans (cannellini or navy), drained and rinsed

– 1 medium onion, finely chopped

– 3 cloves garlic, minced

– 1 green bell pepper, diced

– 2 cups low-sodium chicken broth

– 1 cup coconut milk

– 1 tablespoon olive oil

– 1 tablespoon ground cumin

– 1 teaspoon chili powder

– 1/2 teaspoon smoked paprika

– Salt and pepper, to taste

These ingredients blend together to create a smooth and tasty chili. The chicken provides protein, while the white beans add fiber and heartiness. Coconut milk makes the chili creamy and rich.

Optional Garnishes

Garnishes add fun and flavor:

– Fresh cilantro, for garnish

– Sliced jalapeños, for serving (optional)

– Lime wedges, for serving

These toppings enhance the dish. Cilantro gives a fresh taste, while lime adds a zesty kick. If you like heat, jalapeños bring that extra spice.

Ingredient Substitutions

You can swap some ingredients if needed:

– Use chicken thighs instead of breasts for a juicier bite.

– Try vegetable broth instead of chicken broth for a vegetarian version.

– Coconut milk can be replaced with heavy cream for a different texture.

These substitutions still keep the dish tasty. Feel free to adapt the recipe to fit your pantry or dietary needs.

Step-by-Step Instructions

Preparation of the Base

Start by gathering your ingredients. You need chicken, beans, onion, garlic, and bell pepper. Heat one tablespoon of olive oil in a large pot over medium heat. Add the chopped onion and green bell pepper. Sauté them for about five minutes, until they soften. This step builds a strong base for your chili. Stir in three minced garlic cloves, one tablespoon of ground cumin, one teaspoon of chili powder, and half a teaspoon of smoked paprika. Cook these spices for one to two minutes. This will bring out their flavors.

Cooking the Chicken and Building Flavor

Next, add one pound of diced chicken breast to the pot. Cook it for five to seven minutes. Stir the chicken often to ensure it cooks evenly. You want to see no pink in the chicken. Once it’s cooked, pour in two cups of low-sodium chicken broth. Increase the heat to bring the mixture to a boil. After it boils, reduce the heat to low. Let it simmer for ten to fifteen minutes. This helps the flavors blend well.

Finalizing the Chili

Now, it’s time to add the beans and coconut milk. Stir in two cans of drained and rinsed white beans. Then, add one cup of coconut milk for creaminess. Mix everything well and let it simmer for another ten minutes. This final simmer melds all the flavors together. Season the chili with salt and pepper to taste. If you want more heat, add sliced jalapeños. Remove the pot from heat and let it rest for a few minutes. This makes serving easier.

Tips & Tricks

How to Achieve a Creamy Texture

To get a creamy texture in your chili, coconut milk is key. I use one cup of coconut milk. It adds a rich, velvety feel. If you want it creamier, you can add a bit more. Blend some of the white beans ahead of time. This helps thicken the chili without adding extra fat. Just mash half a can of beans before adding them into the pot. It works wonders.

Adjusting Spiciness Levels

Spiciness is all about your taste. If you like it mild, skip the jalapeños. For a medium kick, add one or two sliced jalapeños when cooking. For more heat, use a pinch of cayenne pepper. You can also add a few dashes of hot sauce at the end. Always taste before serving to ensure it meets your heat preference.

Cooking Time Adjustments for Electric Pressure Cookers

Using an electric pressure cooker can save time. After sautéing your veggies and chicken, add all the ingredients at once. Seal the lid and cook on high for about 10 minutes. Make sure to let the steam release naturally for best results. This method keeps the chili moist and flavorful while speeding up the cooking process.

Pro Tips

  1. Cook the Chicken Thoroughly: Ensure the chicken is cooked all the way through to avoid any food safety issues. It should reach an internal temperature of 165°F (75°C).
  2. Adjust the Spice Level: If you prefer a milder chili, leave out the jalapeños or use mild chili powder. For extra heat, consider adding some chopped serrano peppers.
  3. Use Fresh Herbs: Garnishing with fresh cilantro at the end enhances the flavor and adds a pop of color. You can also try adding a sprinkle of fresh lime juice for brightness.
  4. Make it Ahead: This chili tastes even better the next day! Make a big batch and store leftovers in the fridge for up to 3 days or freeze for later use.

Variations

Vegetarian Adaptation

You can make this chili vegetarian. Swap the chicken for tofu or tempeh. Both options absorb flavors well. Use vegetable broth instead of chicken broth. This keeps the taste rich and hearty. Add a splash of lemon juice for brightness. You can still enjoy the creamy texture with coconut milk.

Adding More Vegetables

Feel free to add more veggies. Zucchini, carrots, or corn work great in this chili. Chop them into small pieces to cook evenly. Add them at the same time as the chicken. This way, they soften and enhance the dish. You can also use frozen veggies for ease. Just toss them in the pot and let them heat through.

Spice Level Variations

Want more heat? You have options! Add sliced jalapeños during cooking. You can also sprinkle in red pepper flakes. For a milder version, use less chili powder. Adjusting the spice lets you personalize each bowl. Your guests will love the ability to choose their heat level.

Storage Info

Proper Storage Techniques

To store your white bean chicken chili, let it cool first. Once cool, transfer it to an airtight container. Make sure to seal it well. This helps keep the chili fresh and tasty. Store it in the fridge if you plan to eat it within a few days. Chili can last in the fridge for about 3 to 4 days.

Reheating Instructions

When you’re ready to enjoy your chili again, reheat it on the stove. Pour the chili into a pot over medium heat. Stir it often to warm it evenly. You can also use the microwave. Place the chili in a microwave-safe bowl and cover it. Heat in short bursts, stirring in between until hot. Check the temperature before serving to ensure it’s safe to eat.

Freezing Tips for Leftovers

If you have extra chili, freezing is a great option. Use freezer-safe containers or resealable bags. Make sure to leave some space for expansion. Label the bags with the date for your reference. Chili can stay fresh in the freezer for up to 3 months. When you want to eat it, thaw it overnight in the fridge. Then, reheat it on the stove or in the microwave as noted above. Enjoy your warm chili anytime!

FAQs

Can I use canned chicken in this recipe?

Yes, you can use canned chicken. Drain the liquid from the can first. Canned chicken saves time and still tastes great. Just add it in with the beans and coconut milk. This makes your chili quick and easy.

How long does White Bean Chicken Chili last in the fridge?

White Bean Chicken Chili lasts about 3 to 4 days in the fridge. Store it in a sealed container for best results. Make sure it cools before putting it away. To enjoy it longer, freeze it. Freezing keeps it fresh for up to 3 months.

What to serve with White Bean Chicken Chili?

You can serve it with cornbread or tortilla chips for a delightful crunch. Lime wedges add a zesty kick. Fresh cilantro brings a fresh taste. If you like heat, try sliced jalapeños on top. This makes every bowl even better!

This blog post covered how to make tasty White Bean Chicken Chili. You learned the main ingredients, optional garnishes, and how to swap items. I shared steps for prepping, cooking, and finishing your chili. You also received tips for creaminess, spice, and cooking times.

In the end, experiment with variations to find what you love. Store extras well, and enjoy every bowl. Cooking can bring joy and warmth to your tabl

To make this dish, you need some key ingredients: - 1 lb boneless, skinless chicken breasts, diced - 2 cans (15 oz each) white beans (cannellini or navy), drained and rinsed - 1 medium onion, finely chopped - 3 cloves garlic, minced - 1 green bell pepper, diced - 2 cups low-sodium chicken broth - 1 cup coconut milk - 1 tablespoon olive oil - 1 tablespoon ground cumin - 1 teaspoon chili powder - 1/2 teaspoon smoked paprika - Salt and pepper, to taste These ingredients blend together to create a smooth and tasty chili. The chicken provides protein, while the white beans add fiber and heartiness. Coconut milk makes the chili creamy and rich. Garnishes add fun and flavor: - Fresh cilantro, for garnish - Sliced jalapeños, for serving (optional) - Lime wedges, for serving These toppings enhance the dish. Cilantro gives a fresh taste, while lime adds a zesty kick. If you like heat, jalapeños bring that extra spice. You can swap some ingredients if needed: - Use chicken thighs instead of breasts for a juicier bite. - Try vegetable broth instead of chicken broth for a vegetarian version. - Coconut milk can be replaced with heavy cream for a different texture. These substitutions still keep the dish tasty. Feel free to adapt the recipe to fit your pantry or dietary needs. {{ingredient_image_1}} Start by gathering your ingredients. You need chicken, beans, onion, garlic, and bell pepper. Heat one tablespoon of olive oil in a large pot over medium heat. Add the chopped onion and green bell pepper. Sauté them for about five minutes, until they soften. This step builds a strong base for your chili. Stir in three minced garlic cloves, one tablespoon of ground cumin, one teaspoon of chili powder, and half a teaspoon of smoked paprika. Cook these spices for one to two minutes. This will bring out their flavors. Next, add one pound of diced chicken breast to the pot. Cook it for five to seven minutes. Stir the chicken often to ensure it cooks evenly. You want to see no pink in the chicken. Once it’s cooked, pour in two cups of low-sodium chicken broth. Increase the heat to bring the mixture to a boil. After it boils, reduce the heat to low. Let it simmer for ten to fifteen minutes. This helps the flavors blend well. Now, it’s time to add the beans and coconut milk. Stir in two cans of drained and rinsed white beans. Then, add one cup of coconut milk for creaminess. Mix everything well and let it simmer for another ten minutes. This final simmer melds all the flavors together. Season the chili with salt and pepper to taste. If you want more heat, add sliced jalapeños. Remove the pot from heat and let it rest for a few minutes. This makes serving easier. To get a creamy texture in your chili, coconut milk is key. I use one cup of coconut milk. It adds a rich, velvety feel. If you want it creamier, you can add a bit more. Blend some of the white beans ahead of time. This helps thicken the chili without adding extra fat. Just mash half a can of beans before adding them into the pot. It works wonders. Spiciness is all about your taste. If you like it mild, skip the jalapeños. For a medium kick, add one or two sliced jalapeños when cooking. For more heat, use a pinch of cayenne pepper. You can also add a few dashes of hot sauce at the end. Always taste before serving to ensure it meets your heat preference. Using an electric pressure cooker can save time. After sautéing your veggies and chicken, add all the ingredients at once. Seal the lid and cook on high for about 10 minutes. Make sure to let the steam release naturally for best results. This method keeps the chili moist and flavorful while speeding up the cooking process. Pro Tips Cook the Chicken Thoroughly: Ensure the chicken is cooked all the way through to avoid any food safety issues. It should reach an internal temperature of 165°F (75°C). Adjust the Spice Level: If you prefer a milder chili, leave out the jalapeños or use mild chili powder. For extra heat, consider adding some chopped serrano peppers. Use Fresh Herbs: Garnishing with fresh cilantro at the end enhances the flavor and adds a pop of color. You can also try adding a sprinkle of fresh lime juice for brightness. Make it Ahead: This chili tastes even better the next day! Make a big batch and store leftovers in the fridge for up to 3 days or freeze for later use. {{image_2}} You can make this chili vegetarian. Swap the chicken for tofu or tempeh. Both options absorb flavors well. Use vegetable broth instead of chicken broth. This keeps the taste rich and hearty. Add a splash of lemon juice for brightness. You can still enjoy the creamy texture with coconut milk. Feel free to add more veggies. Zucchini, carrots, or corn work great in this chili. Chop them into small pieces to cook evenly. Add them at the same time as the chicken. This way, they soften and enhance the dish. You can also use frozen veggies for ease. Just toss them in the pot and let them heat through. Want more heat? You have options! Add sliced jalapeños during cooking. You can also sprinkle in red pepper flakes. For a milder version, use less chili powder. Adjusting the spice lets you personalize each bowl. Your guests will love the ability to choose their heat level. To store your white bean chicken chili, let it cool first. Once cool, transfer it to an airtight container. Make sure to seal it well. This helps keep the chili fresh and tasty. Store it in the fridge if you plan to eat it within a few days. Chili can last in the fridge for about 3 to 4 days. When you’re ready to enjoy your chili again, reheat it on the stove. Pour the chili into a pot over medium heat. Stir it often to warm it evenly. You can also use the microwave. Place the chili in a microwave-safe bowl and cover it. Heat in short bursts, stirring in between until hot. Check the temperature before serving to ensure it’s safe to eat. If you have extra chili, freezing is a great option. Use freezer-safe containers or resealable bags. Make sure to leave some space for expansion. Label the bags with the date for your reference. Chili can stay fresh in the freezer for up to 3 months. When you want to eat it, thaw it overnight in the fridge. Then, reheat it on the stove or in the microwave as noted above. Enjoy your warm chili anytime! Yes, you can use canned chicken. Drain the liquid from the can first. Canned chicken saves time and still tastes great. Just add it in with the beans and coconut milk. This makes your chili quick and easy. White Bean Chicken Chili lasts about 3 to 4 days in the fridge. Store it in a sealed container for best results. Make sure it cools before putting it away. To enjoy it longer, freeze it. Freezing keeps it fresh for up to 3 months. You can serve it with cornbread or tortilla chips for a delightful crunch. Lime wedges add a zesty kick. Fresh cilantro brings a fresh taste. If you like heat, try sliced jalapeños on top. This makes every bowl even better! This blog post covered how to make tasty White Bean Chicken Chili. You learned the main ingredients, optional garnishes, and how to swap items. I shared steps for prepping, cooking, and finishing your chili. You also received tips for creaminess, spice, and cooking times. In the end, experiment with variations to find what you love. Store extras well, and enjoy every bowl. Cooking can bring joy and warmth to your table.

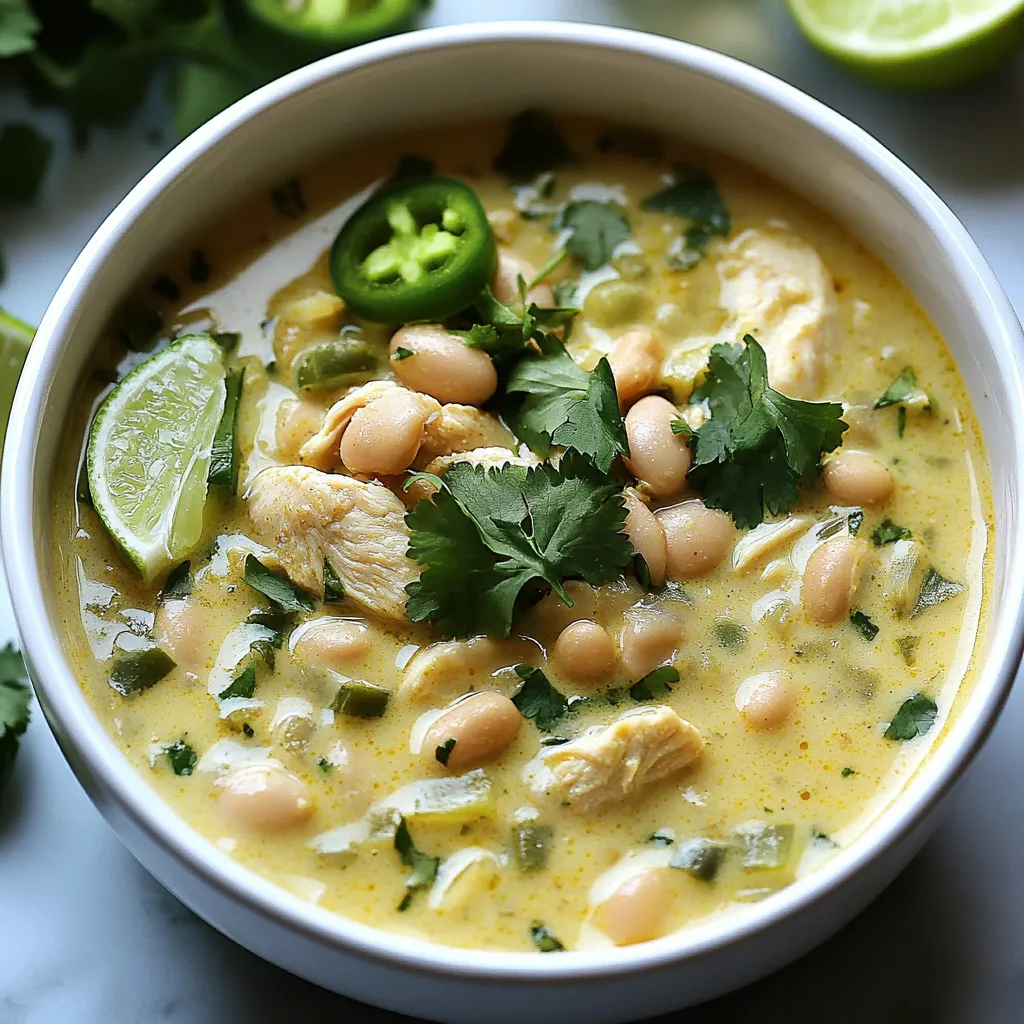
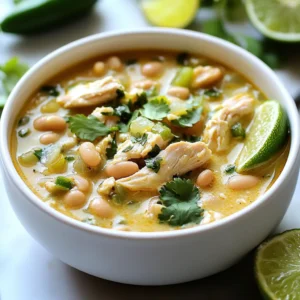
Creamy White Bean Chicken Chili

A hearty and creamy chili made with white beans, chicken, and spices, perfect for a comforting meal.
Prep Time 15 minutes
Cook Time 35 minutes
Total Time 50 minutes
Course Main Course
Cuisine American
Servings 4
Calories 350 kcal

Ingredients
  

  • 1 lb boneless, skinless chicken breasts, diced
  • 2 cans white beans (cannellini or navy), drained and rinsed
  • 1 medium onion, finely chopped
  • 3 cloves garlic, minced
  • 1 green bell pepper diced
  • 2 cups low-sodium chicken broth
  • 1 cup coconut milk
  • 1 tablespoon olive oil
  • 1 tablespoon ground cumin
  • 1 teaspoon chili powder
  • 1/2 teaspoon smoked paprika
  • to taste salt and pepper
  • for garnish fresh cilantro
  • for serving sliced jalapeños (optional)
  • for serving lime wedges

Instructions
 

  • In a large pot, heat the olive oil over medium heat. Add the chopped onion and bell pepper, sautéing for about 5 minutes until softened.
  • Stir in the minced garlic, cumin, chili powder, and smoked paprika, cooking for an additional 1-2 minutes until fragrant.
  • Add the diced chicken to the pot and cook for 5-7 minutes, stirring occasionally, until the chicken is no longer pink.
  • Pour in the chicken broth and bring the mixture to a boil. Reduce the heat to low and let it simmer for 10-15 minutes.
  • Next, stir in the drained white beans and coconut milk, mixing well to combine. Let the chili simmer for another 10 minutes to meld the flavors.
  • Season with salt and pepper to taste. If you prefer a spicier chili, add sliced jalapeños.
  • Remove from heat and let it rest for a few minutes before serving.

Notes

Serve with cornbread or tortilla chips for a complete meal.
Keyword chicken, chili, comfort food, creamy, white beans

WANT TO SAVE THIS RECIPE?